Wie Sie vielleicht wissen, wurde der WordPress-Editor kürzlich aktualisiert, wodurch sich die Art und Weise, wie wir Inhalte mit dieser beliebten Website-Builder-Software erstellen, verändert hat.
Der Name des neuen WordPress-Editors lautet GutenbergDie neue Version von Gutenberg hat nicht nur die vertraute Benutzeroberfläche erneuert, sondern auch einige neue und aufregende Funktionen für den Prozess der Inhaltserstellung hinzugefügt. Ein Beispiel dafür sind die Gutenberg-Blöcke.
Dabei handelt es sich um Inhaltsblöcke oder Module, die in Ihre Beiträge und Seiten eingefügt werden können und Ihnen mehr Kontrolle über die Erstellung von Inhalten geben. Einige Beispiele für diese Blöcke sind Absatz-, Galerie-, Tabellen- und Spaltenblöcke, um nur einige zu nennen.
Seit dem Upgrade des WordPress-Editors und der Implementierung von Gutenberg haben einige WordPress-Plugins damit begonnen, ihre eigenen Blöcke zu erstellen, auf die über die neue Version des Editors zugegriffen und die in Ihren Inhalt eingefügt werden können. MemberPress ist ein solches Plugin, und in diesem Leitfaden stellen wir Ihnen die vier MemberPress-Blöcke für Gutenberg vor und zeigen Ihnen, wie Sie sie auf Ihrer Mitgliederseite verwenden können.
Fangen wir an...
Die Gutenberg MemberPress-Blöcke
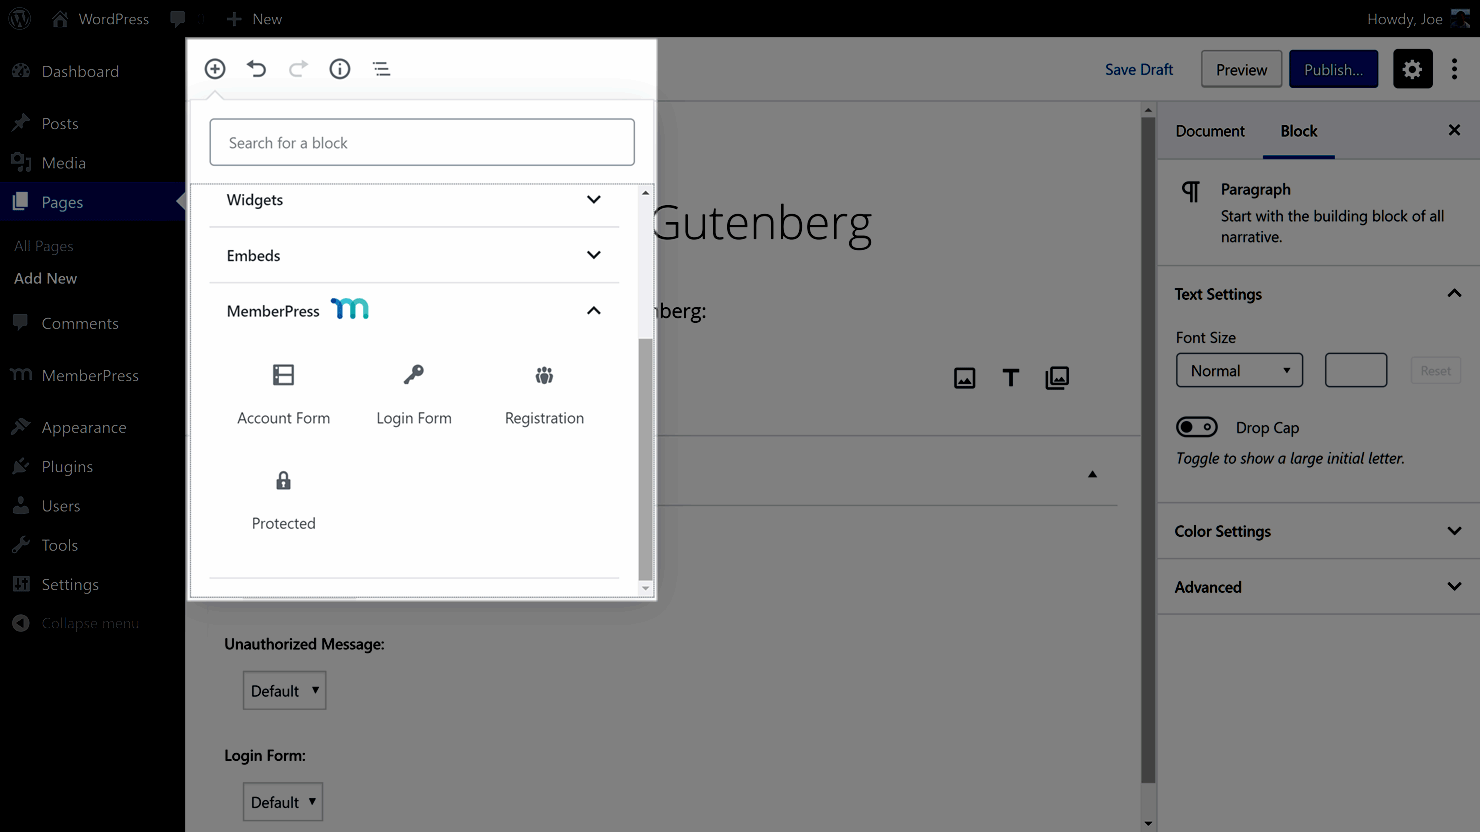
Wie bereits erwähnt, erhalten MemberPress-Benutzer seit der Veröffentlichung des neuen WordPress-Editors Zugang zu einer Auswahl an speziell entwickelten Gutenberg-Blöcken. Dank der Funktionsweise von Gutenberg können Sie diese Blöcke per Drag-and-Drop in Ihre Beiträge und Seiten ziehen und deren Funktionsweise anpassen. Wenn Ihre Inhalte dann veröffentlicht werden, sehen Ihre Besucher eine Reihe von Elementen auf Ihrer Website, je nachdem, welche Blöcke Sie verwendet haben, und ob der Besucher ein Mitglied ist und welchen Mitgliedsplan er abonniert hat.
In diesem Sinne finden Sie hier einen Überblick über die MemberPress Gutenberg-Blöcke und wie Sie sie auf Ihrer WordPress-Mitgliedschaftsseite verwenden können.
Anmeldeformular-Block
Wie der Name schon sagt, fügt dieser Block ein Anmeldeformular in Ihren Beitrag oder Ihre Seite ein. Ihre Mitglieder können dann dieses Formular verwenden, um sich bei ihren Konten auf Ihrer Mitgliederseite anzumelden und auf den eingeschränkten Inhalt und die anderen Komponenten Ihres Mitgliederbereichs zuzugreifen.
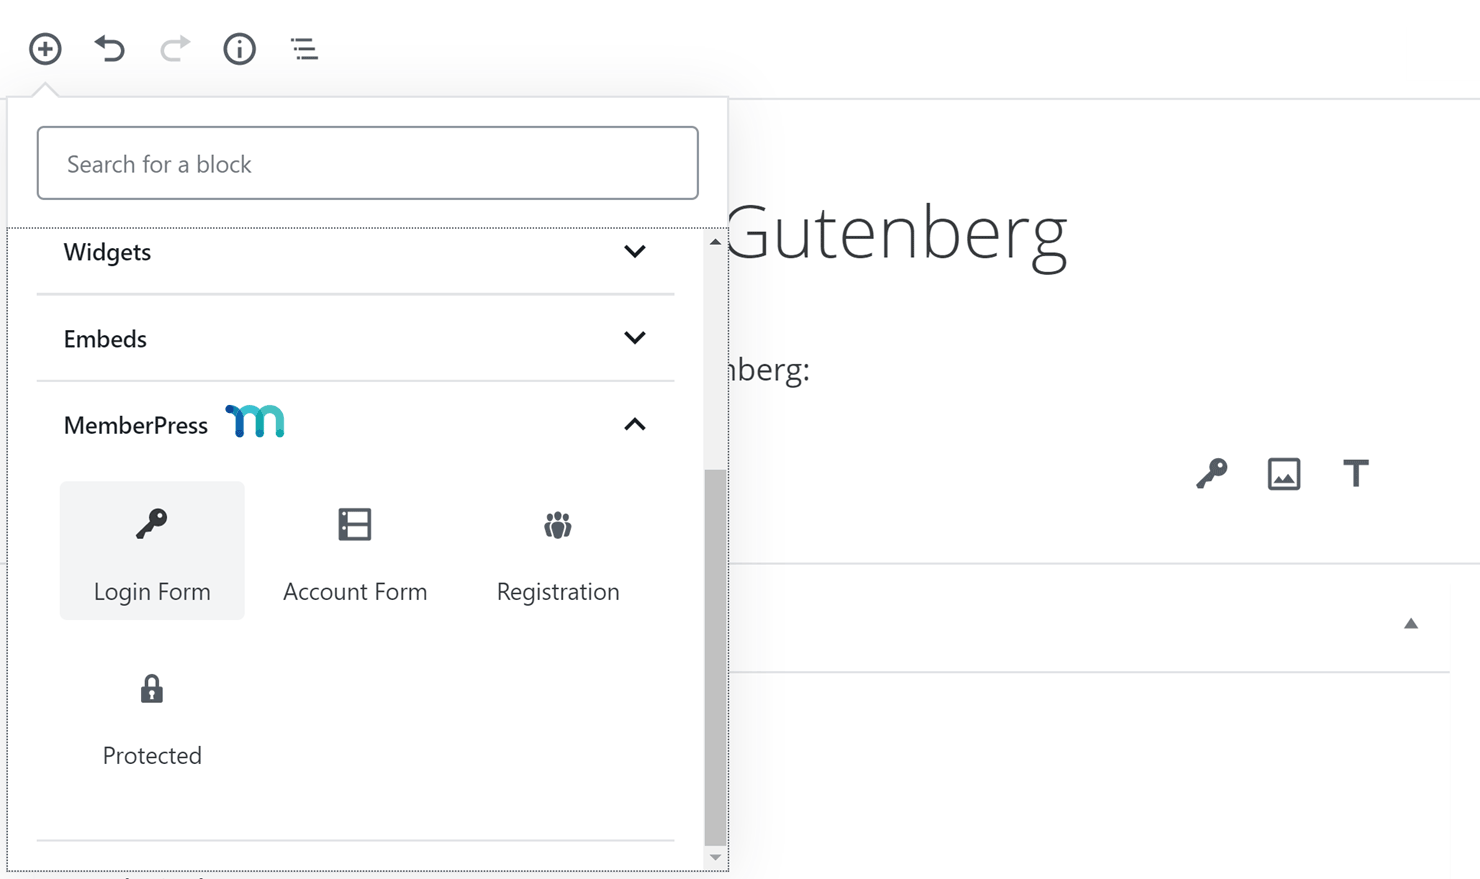
Sobald Sie den Block über das Menü "Block hinzufügen" in Ihren Beitrag oder Ihre Seite eingefügt haben, wird das Formular angezeigt, wenn Sie den Beitrag oder die Seite veröffentlichen.
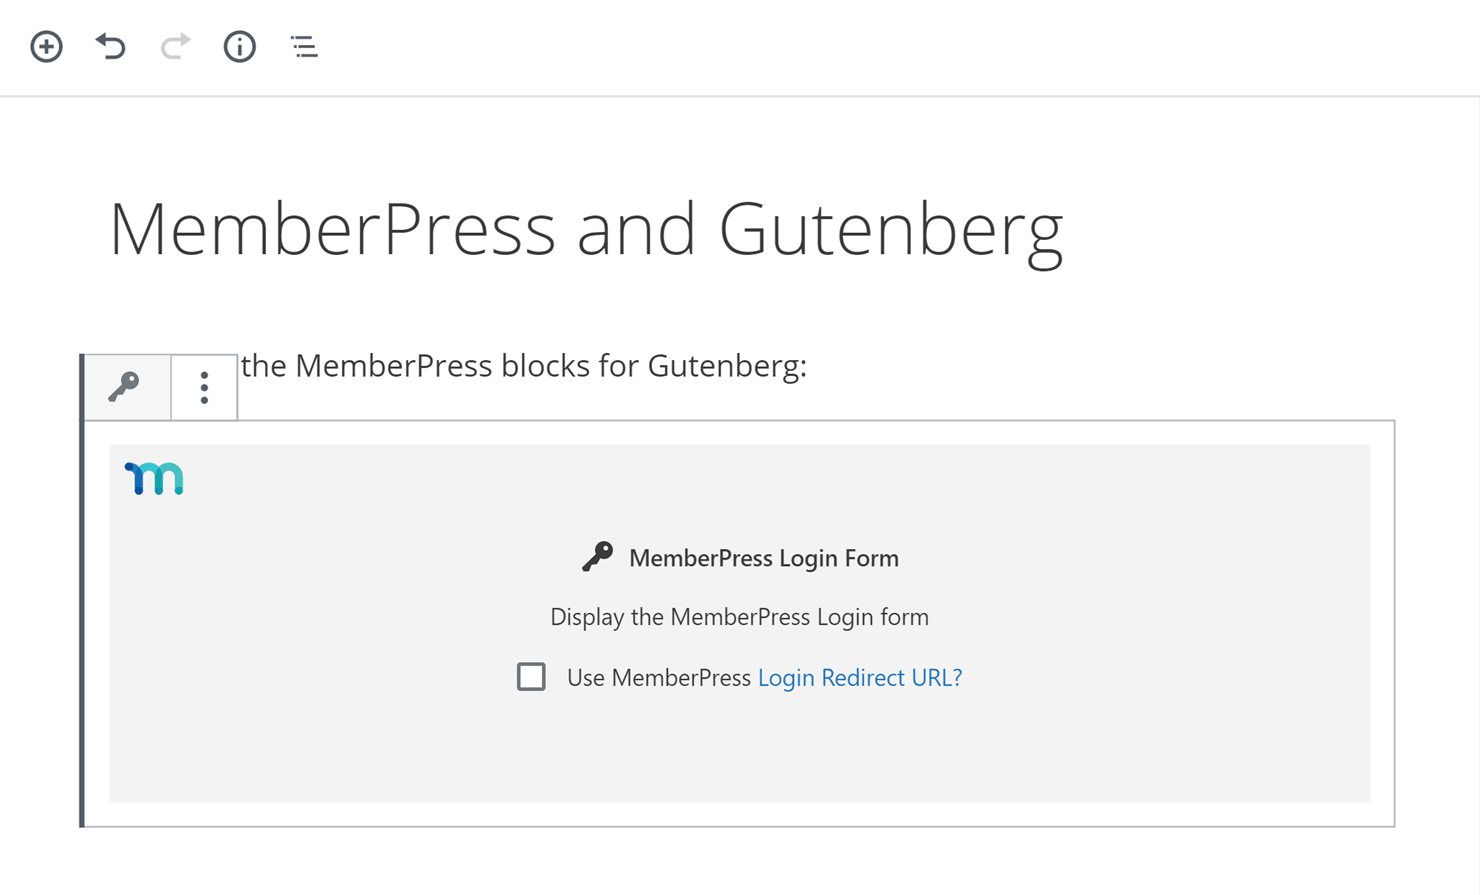
Es gibt eine Einstellung oder Option für den Anmeldeformularblock, mit der Sie festlegen können, welche Seite auf Ihrer Website angezeigt wird, sobald sich ein Mitglied angemeldet hat.
Wenn Sie von dieser Einstellung Gebrauch machen möchten, klicken Sie einfach auf den Textlink Login Redirect URL. Scrollen Sie auf der angezeigten Seite nach unten zum Abschnitt Login & Logout. Geben Sie dann die URL der Seite ein, die angezeigt werden soll, nachdem sich der Benutzer angemeldet hat. In diesem Beispiel wird die Seite für das Mitgliedskonto angezeigt. Klicken Sie auf die Schaltfläche Optionen aktualisieren, sobald Sie eine Seiten-URL eingegeben haben.

Kehren Sie nun zu dem Beitrag oder der Seite zurück, in den/die Sie den Anmeldeformularblock eingefügt haben, und überprüfen Sie die Box neben dem Text MemberPress Login Redirect URL verwenden. Wenn Sie die Seite veröffentlichen oder in der Vorschau anzeigen, können Sie das Formular sehen, das der Block in den Inhalt eingefügt hat.
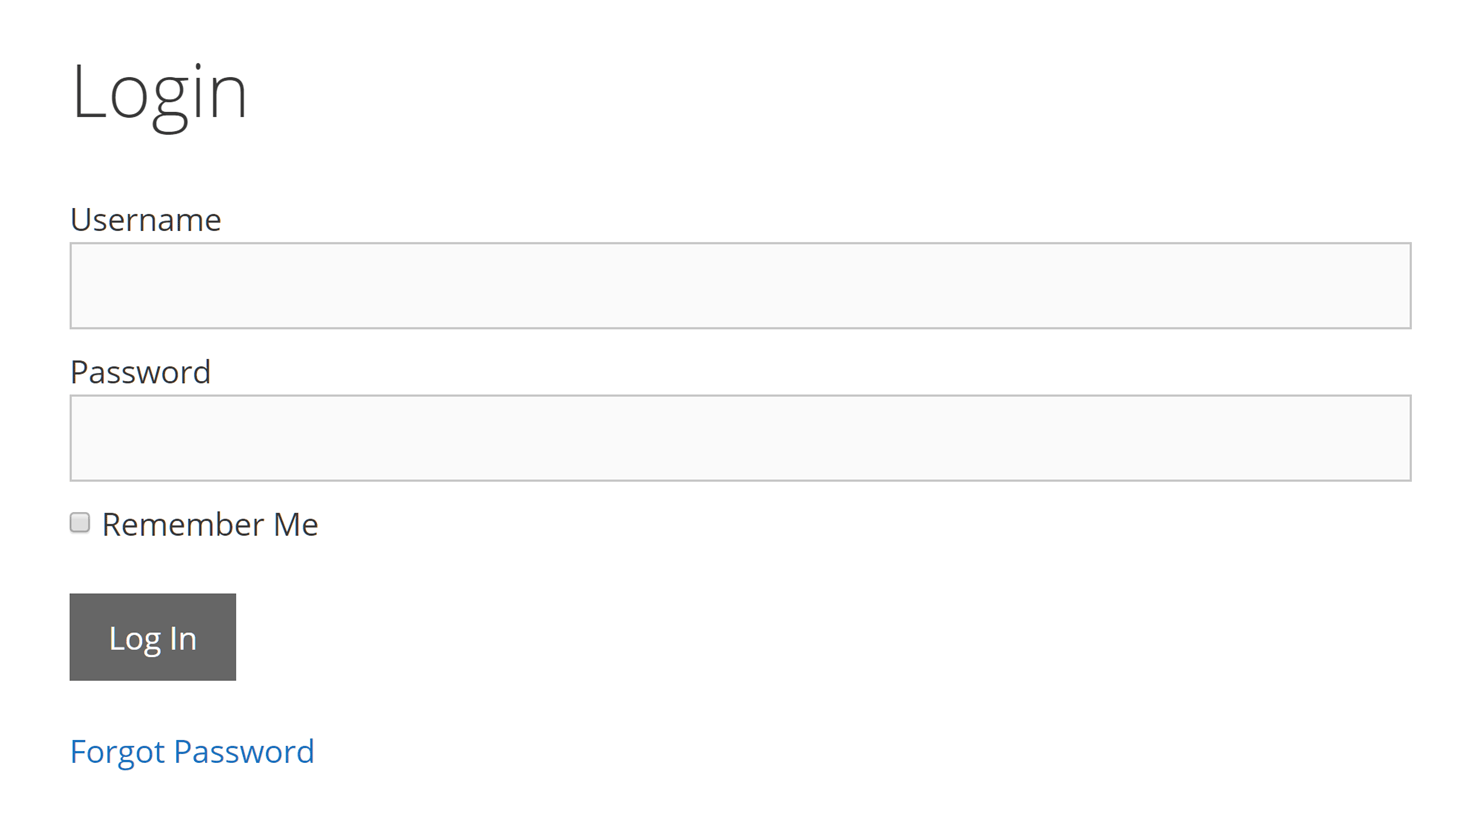
Sobald sich der Benutzer anmeldet, wird er zu der URL weitergeleitet, die Sie beim Einrichten des Formularblocks angegeben haben.
Anmeldeformular Block
Wenn ein Besucher Ihrer Website noch kein Mitglied ist, kann er sich über das Formular, das dieser Block Ihren Beiträgen und Seiten hinzufügt, anmelden und registrieren. Um diesen Block zu verwenden, erstellen Sie eine neue Seite auf Ihrer Website oder öffnen Sie eine bestehende Seite und fügen Sie den Block einfach über das Menü Block hinzufügen in die Seite ein.
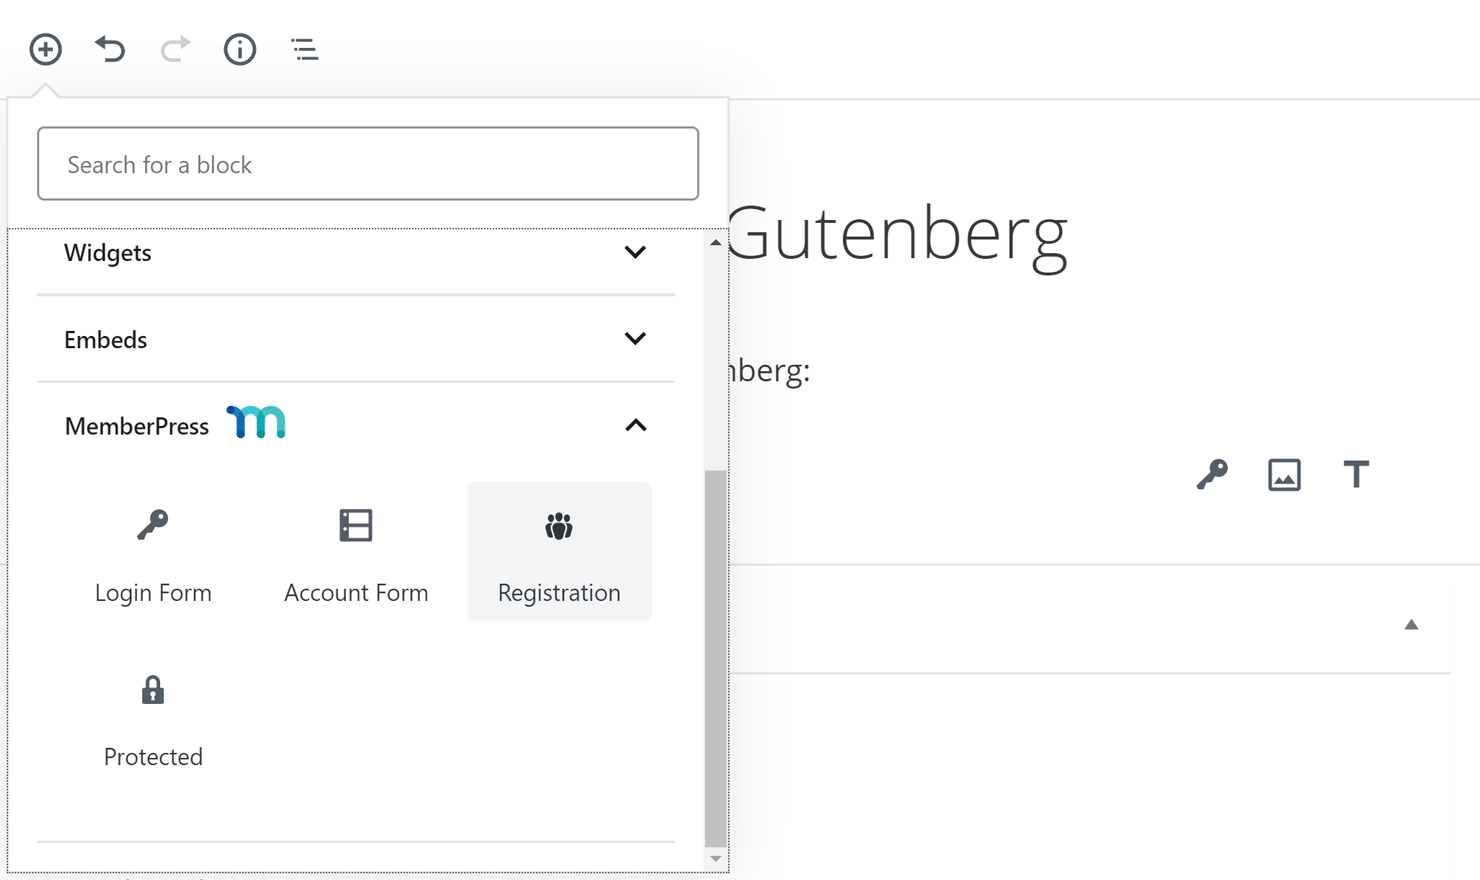
Sobald Sie den Registrierungsblock hinzugefügt haben, können Sie auswählen, welches Registrierungsformular angezeigt werden soll. Da jede Mitgliedschaft auf Ihrer Website ihr eigenes Anmeldeformular hat, können Sie diesen Block verwenden, um das Formular des jeweiligen Mitgliedschaftsplans anzuzeigen.
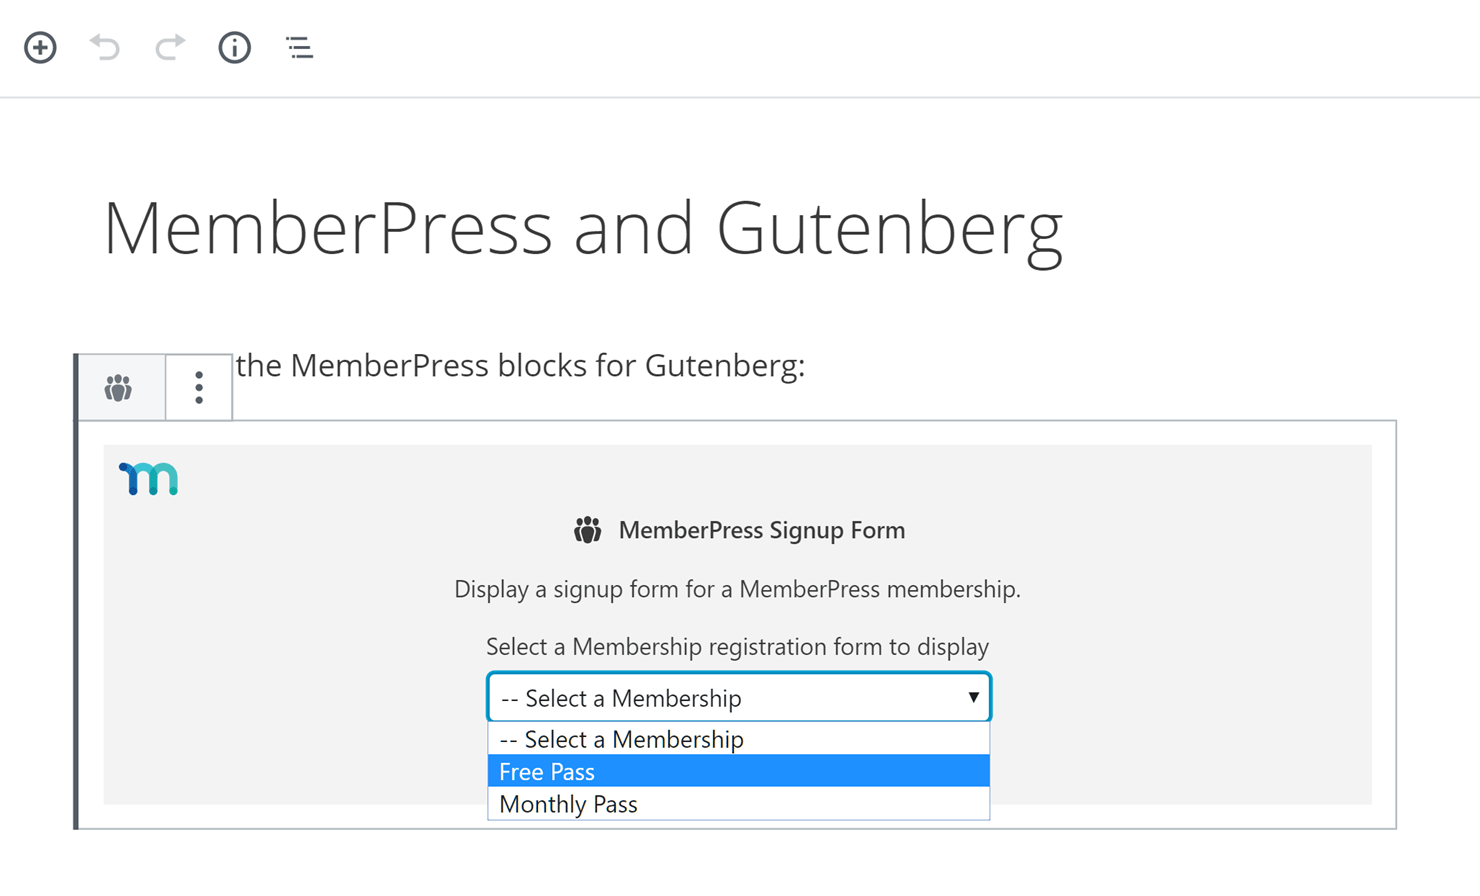
Wenn Sie die Seite veröffentlichen oder in der Vorschau anzeigen, werden Sie sehen, dass das von Ihnen gewählte Anmeldeformular angezeigt wird und Ihre Besucher die Möglichkeit haben, sich zu registrieren und Mitglied zu werden.
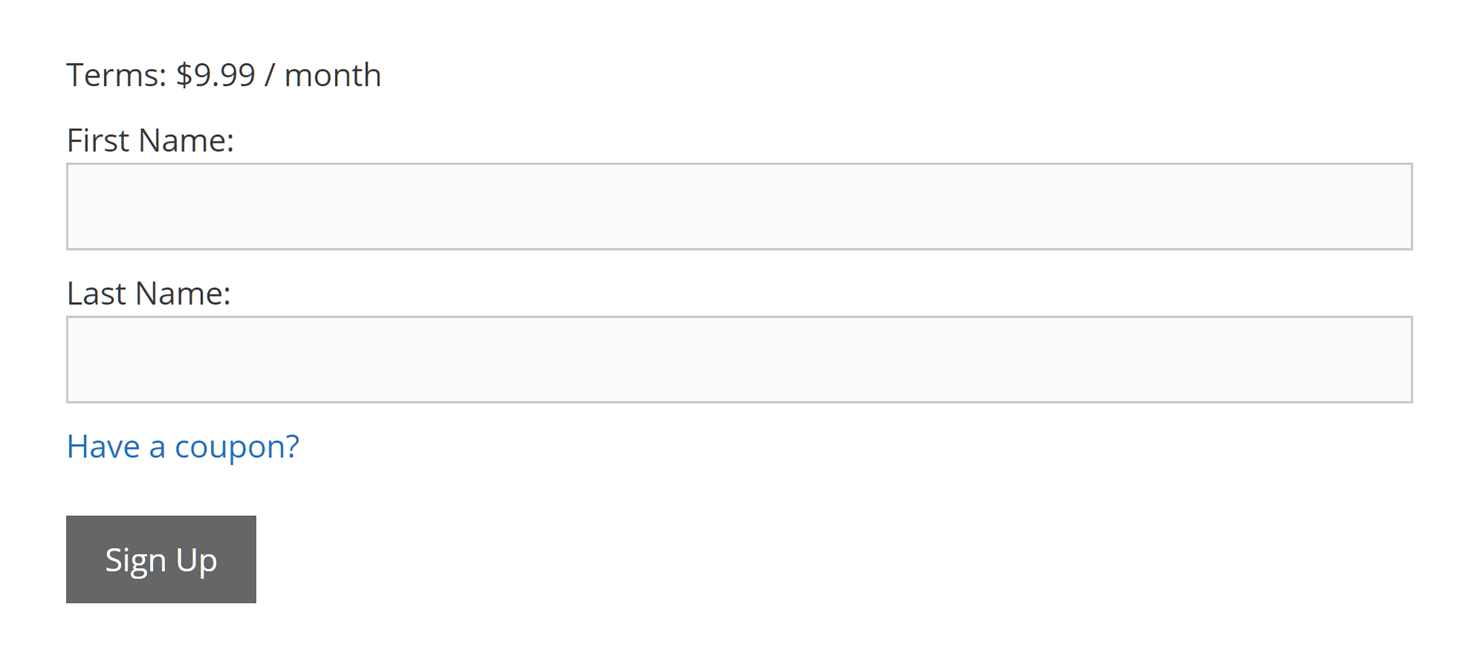
Konto Formularblock
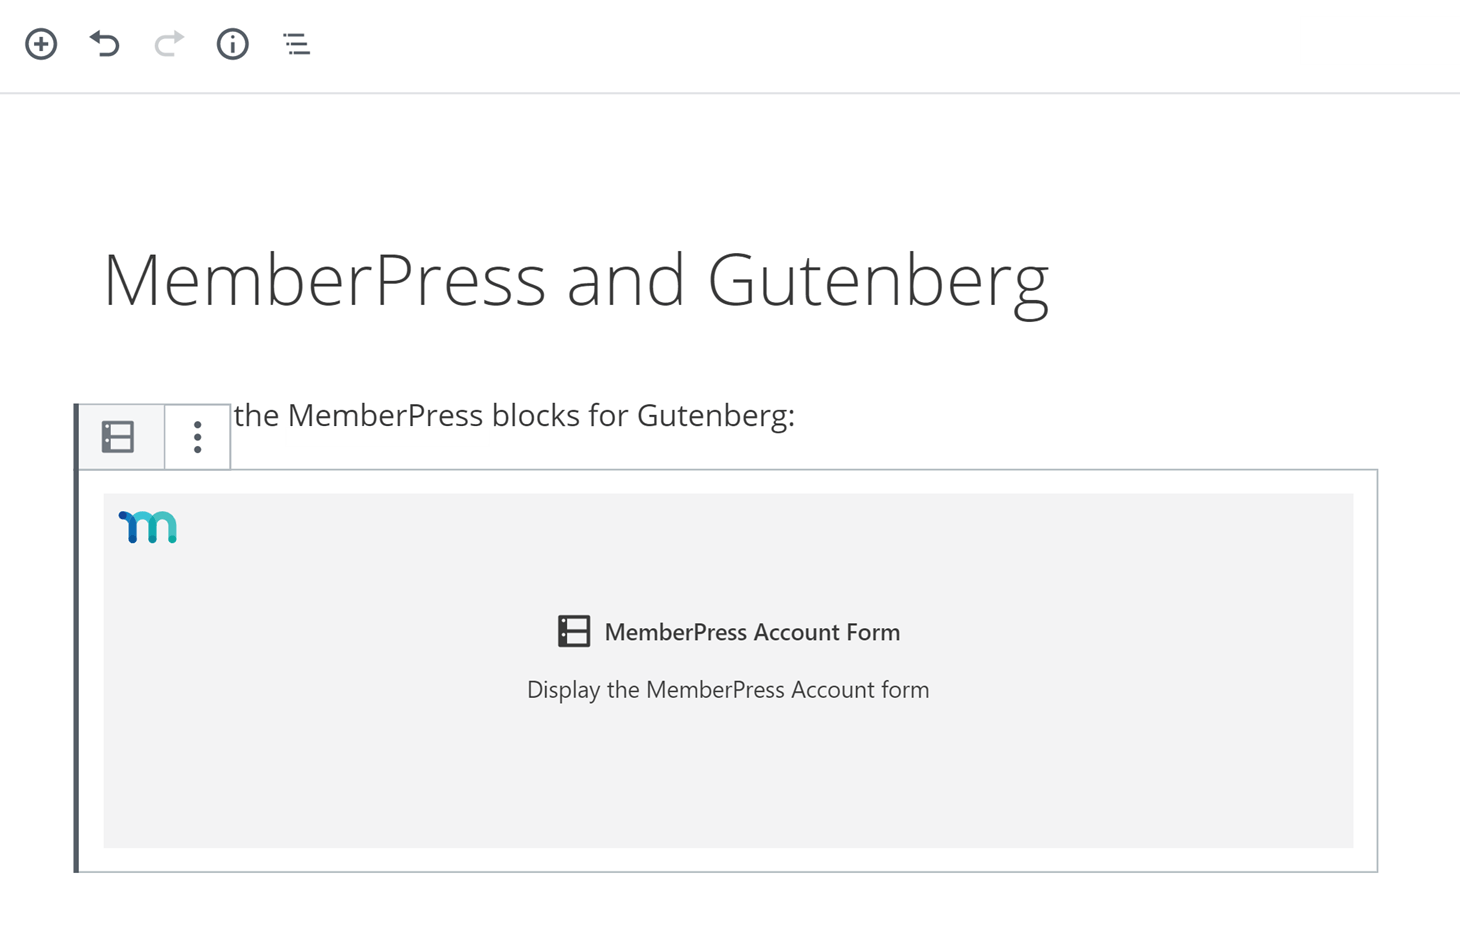
Wenn Sie die Details eines Mitgliederkontos in einem Beitrag oder auf einer Seite Ihrer Website anzeigen möchten, ist dies mit dem Kontoblock möglich.
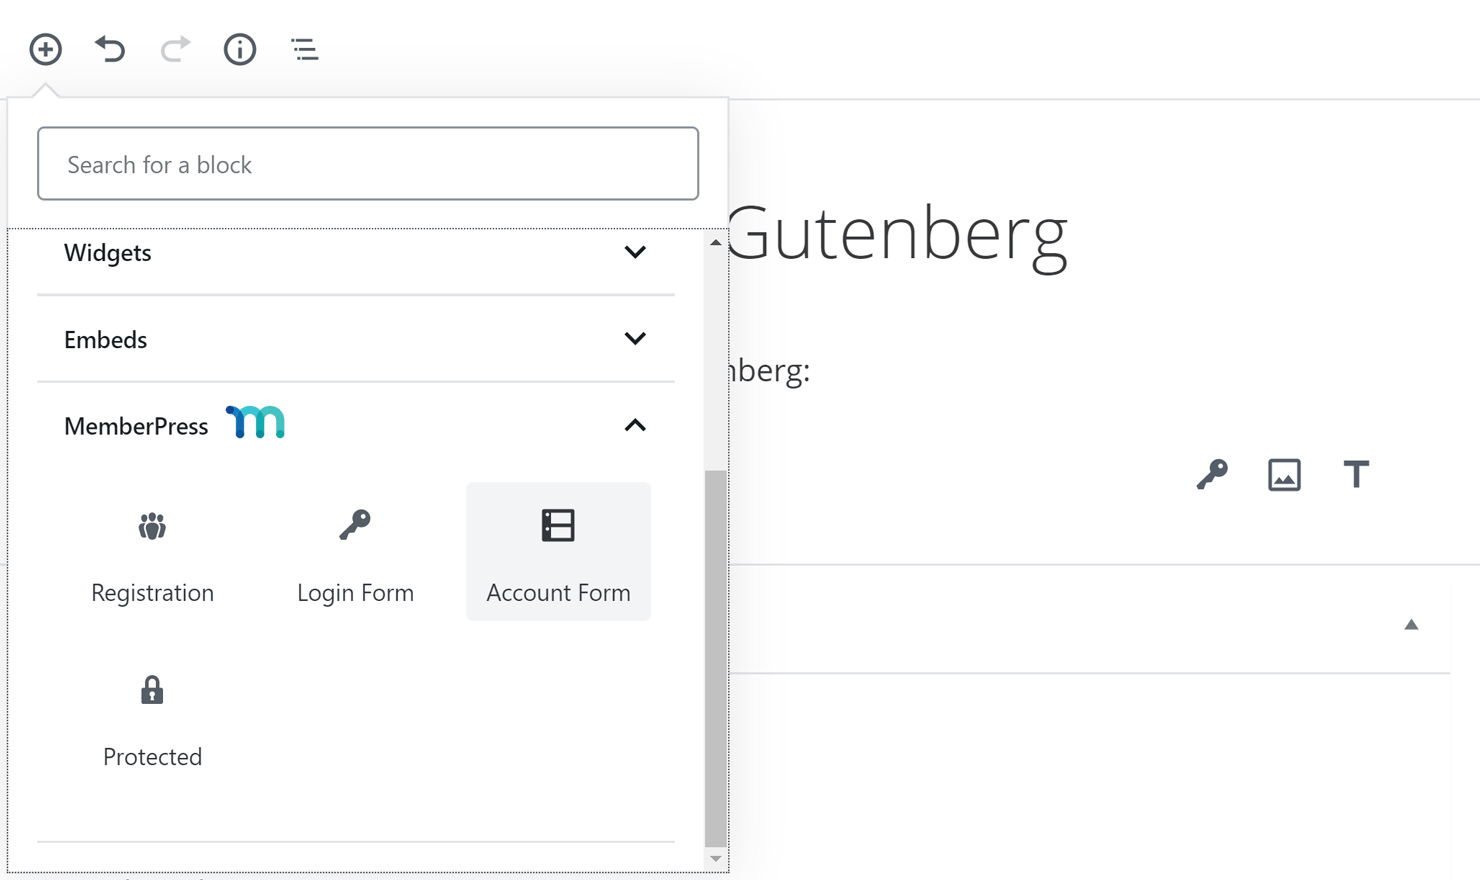
Fügen Sie den Kontoblock einfach in einen Beitrag oder eine Seite ein, und wenn ein eingeloggtes Mitglied diese Seite besucht, kann es seine Kontodaten sehen.
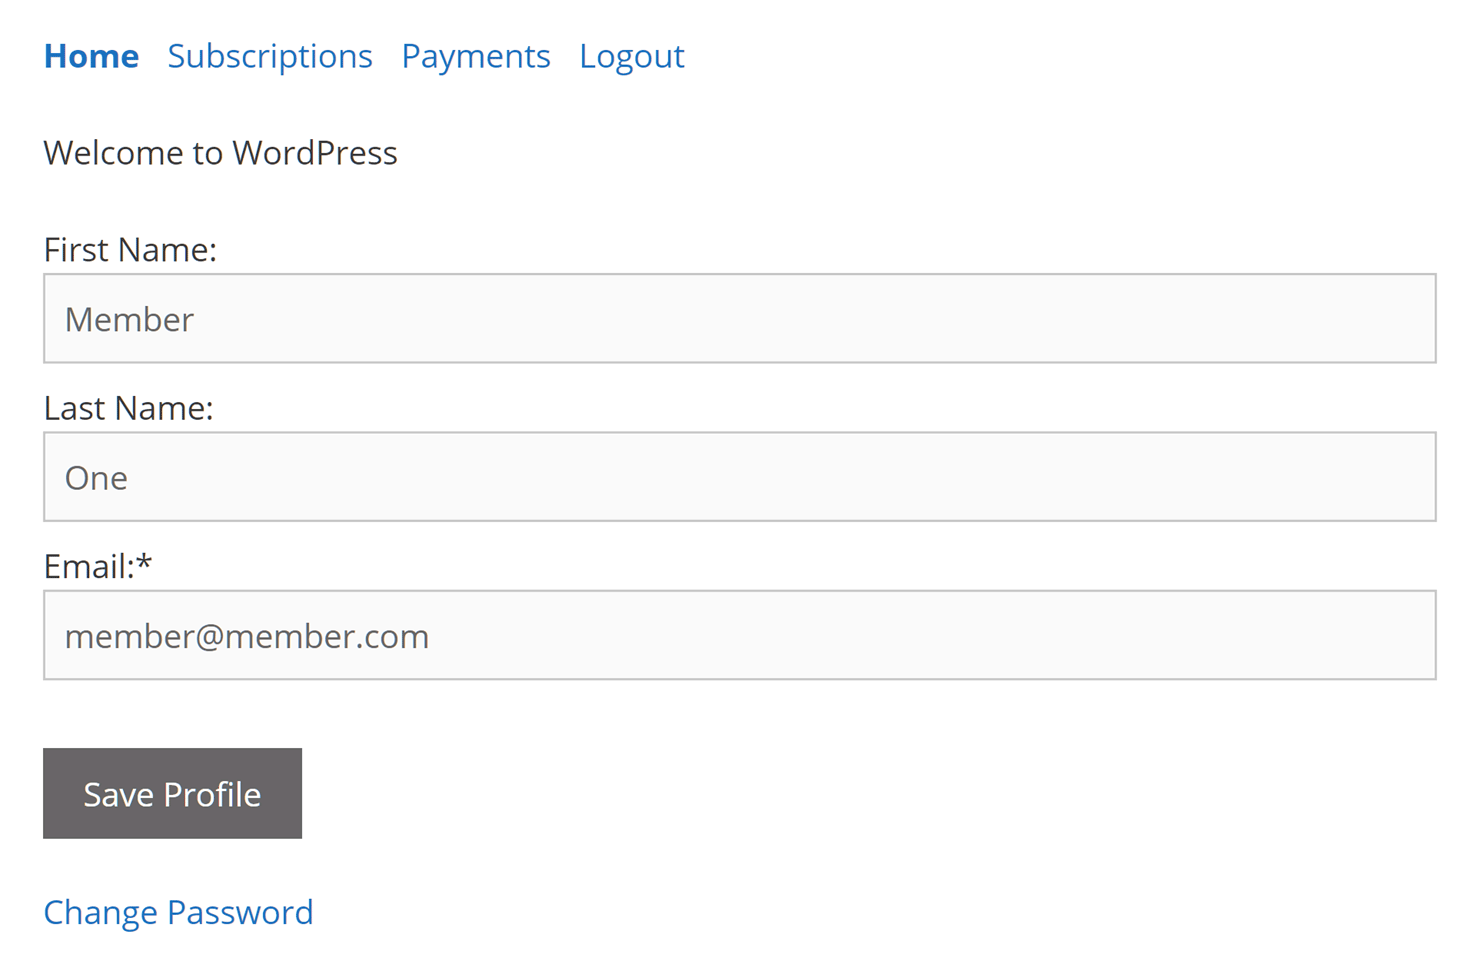
Auf ihrer Kontoseite können die Mitglieder ihre Abonnement- und Zahlungsdaten einsehen und sehen, welche anderen Daten über sie gespeichert sind.
Geschützter Inhalt Block
Schließlich haben wir noch den Block für geschützte Inhalte. Dies ist der bisher leistungsstärkste Block, zumindest was die Flexibilität und die Verwendungsmöglichkeiten angeht.
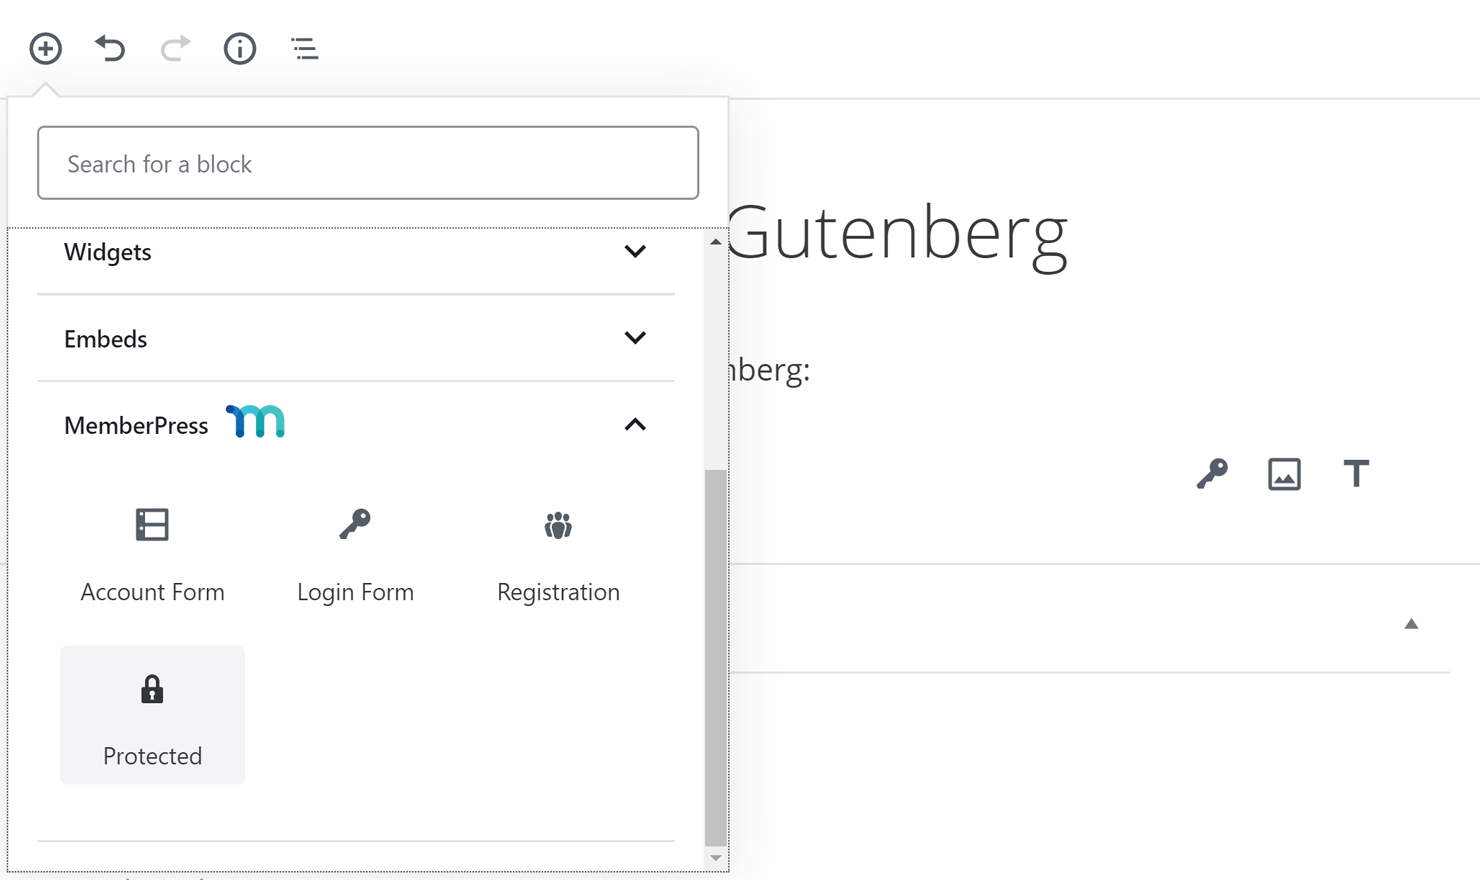
Nach dem Hinzufügen des geschützten Blocks zu einem Beitrag oder einer Seite sind alle anderen Blöcke, die der Seite unterhalb des geschützten Blocks hinzugefügt werden, für Mitglieder, die nicht über die richtige Zugriffsstufe verfügen, nicht verfügbar, einschließlich Besuchern, die nicht bei Ihrer Website angemeldet sind.
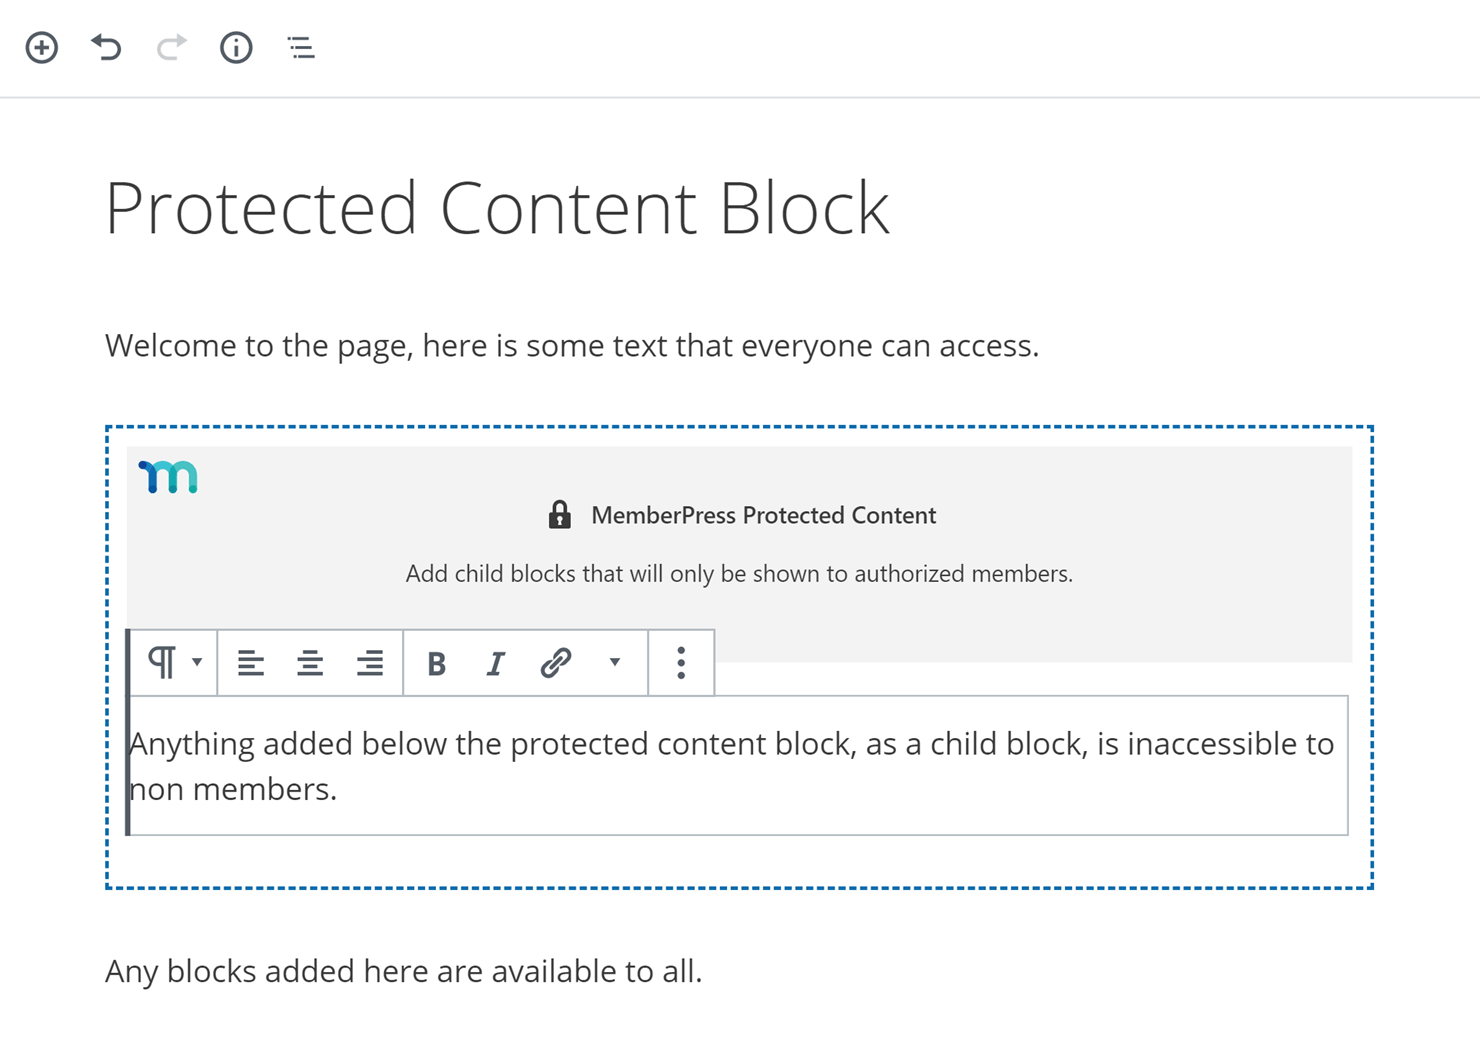
Bevor Sie den Beitrag oder die Seite veröffentlichen, müssen Sie festlegen, welche Mitglieder auf den Inhalt des geschützten Blocks zugreifen können.
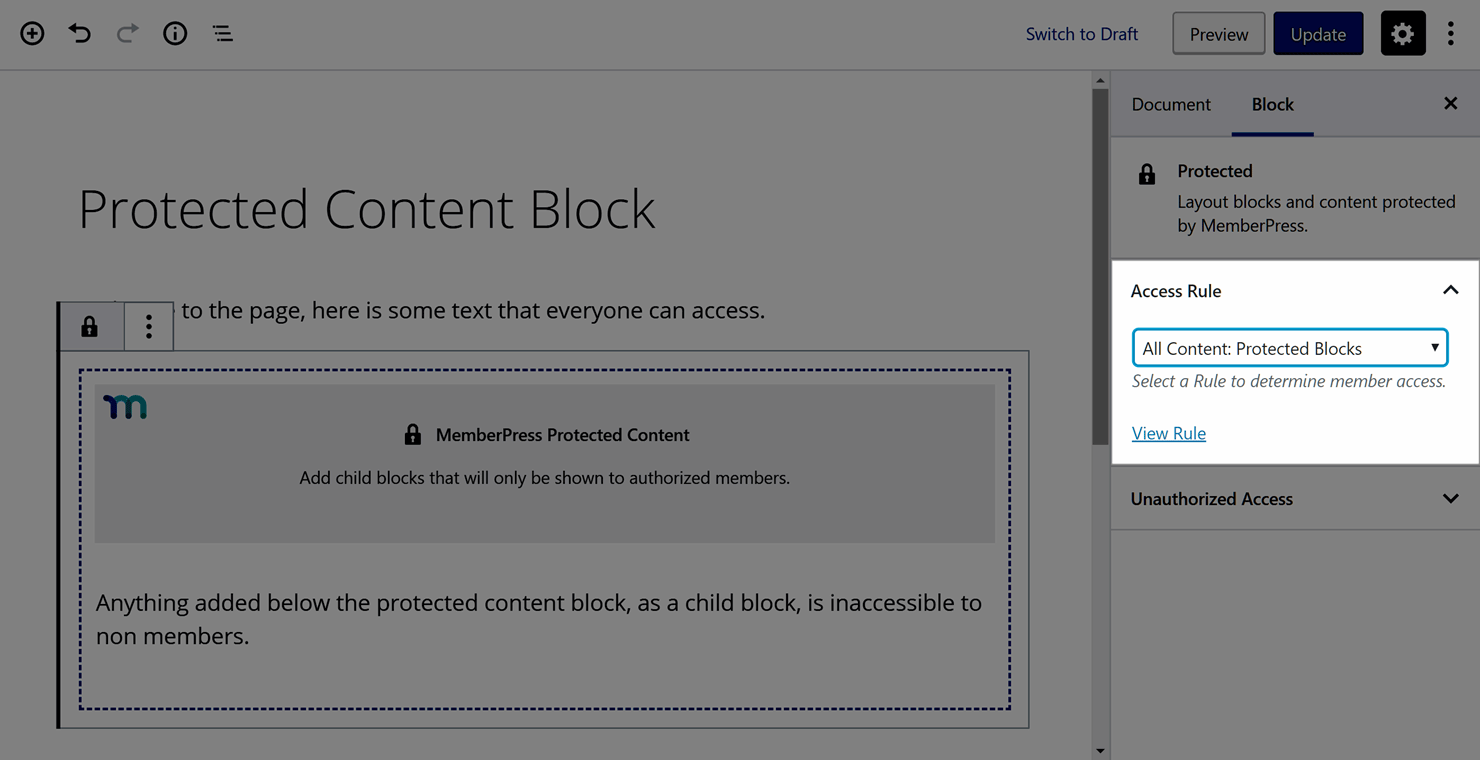
Klicken Sie dazu auf den geschützten Block und suchen Sie dann auf der rechten Seite des Editors nach dem Bereich Zugriffsregeln. Hier können Sie eine Ihrer bestehenden Regeln auswählen, die festlegen, wer auf welche Inhalte Ihrer Website zugreifen darf. Um einen Teil eines Beitrags oder einer Seite zu schützen, sollten Sie den Typ Teilregel verwenden.
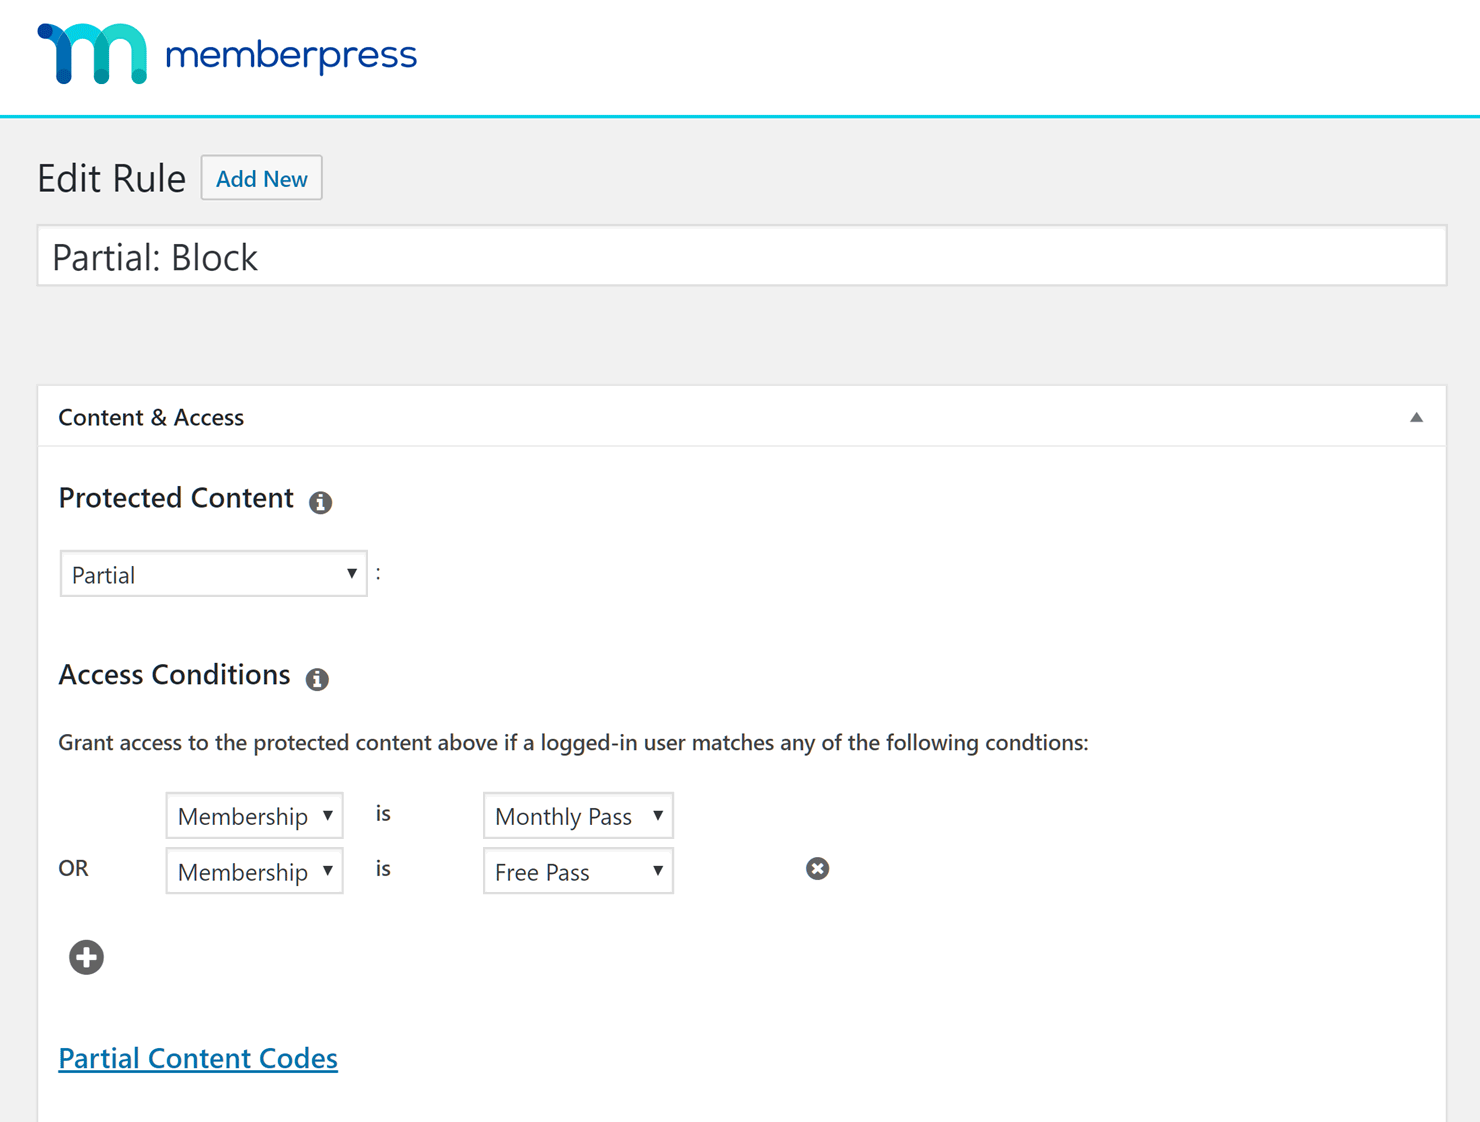
Wenn Sie noch keine Regeln erstellt haben, erfahren Sie, wie Sie dies tun können unter die entsprechende Seite der MemberPress-Online-Dokumentation. Sobald Sie eine geeignete Regel erstellt haben, können Sie diese aus dem Dropdown-Menü "Zugriffsregel" auswählen.
Wenn nun ein Nichtmitglied oder ein Mitglied ohne die richtige Zugriffsstufe diese Seite besucht, sieht es den Inhalt des geschützten Blocks nicht. Standardmäßig wird nichts angezeigt, wenn dies der Fall ist. Sie können jedoch eine benutzerdefinierte Meldung anzeigen lassen, die erklärt, warum der geschützte Inhalt nicht angezeigt werden kann, sowie ein optionales Anmeldeformular.
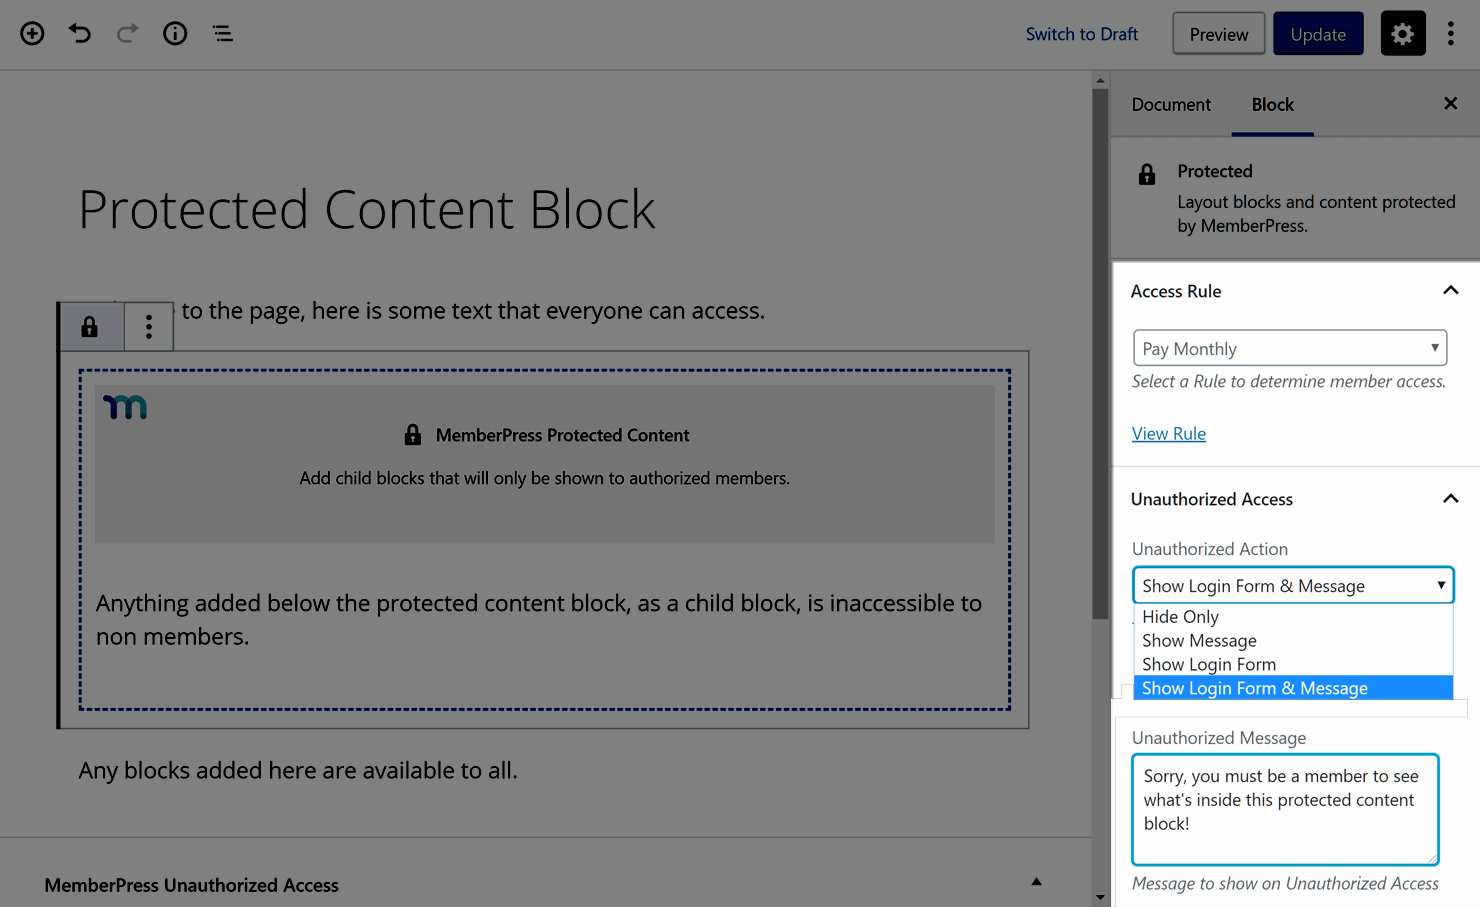
Je nachdem, wie Sie diese Einstellungen konfigurieren, kann ein Besucher nichts oder eine Kombination aus der benutzerdefinierten Nachricht und dem Anmeldeformular sehen.
Für einen besseren visuellen Überblick über diese MemberPress Gutenberg-Blöcke, dieses YouTube-Video bietet einen guten Überblick über das Hinzufügen dieser Elemente zu Ihrer Website.
Abschließende Überlegungen
Mit dem Upgrade des WordPress-Editors haben sich viele Änderungen bei der Erstellung von Inhalten ergeben.
Gutenberg-Blöcke sind ein interessantes Konzept, und da immer mehr Plugins von Drittanbietern die Vorteile dieser Blöcke nutzen, sollten sie wirklich dazu beitragen, Ihren Arbeitsablauf zu beschleunigen und viele spannende kreative Möglichkeiten für Ihre WordPress-Beiträge und -Seiten zu eröffnen.
Wir hoffen, dass dieser Leitfaden zur Zusammenarbeit von Gutenberg und MemberPress sowie die aktuelle Auswahl an MemberPress-Blöcken für Gutenberg Ihnen helfen wird, bei der Erstellung und Verwaltung Ihrer Mitgliederseite effizienter zu arbeiten.
Wenn Sie Fragen zu Gutenberg und MemberPress haben, können Sie unten einen Kommentar hinterlassen.


Einen Kommentar hinzufügen