MemberPress-Konto- und Registrierungsformulare haben eine Reihe von Standardfeldern. Unter MemberPress-Einstellungen können Sie einige Standard-MemberPress-Felder aktivieren und deaktivieren und Ihre eigenen Felder hinzufügen.
In diesem Dokument wird erläutert, wie Sie MemberPress-Felder verwalten und benutzerdefinierte Felder für Registrierungs- und Kontoformulare erstellen können.
Verwaltung der MemberPress-Felder
MemberPress-Feldoptionen sind verfügbar unter Dashboard > MemberPress > Einstellungen > Registerkarte Felder. Hier finden Sie mehrere Optionen zur Verwaltung von Standardfeldern.
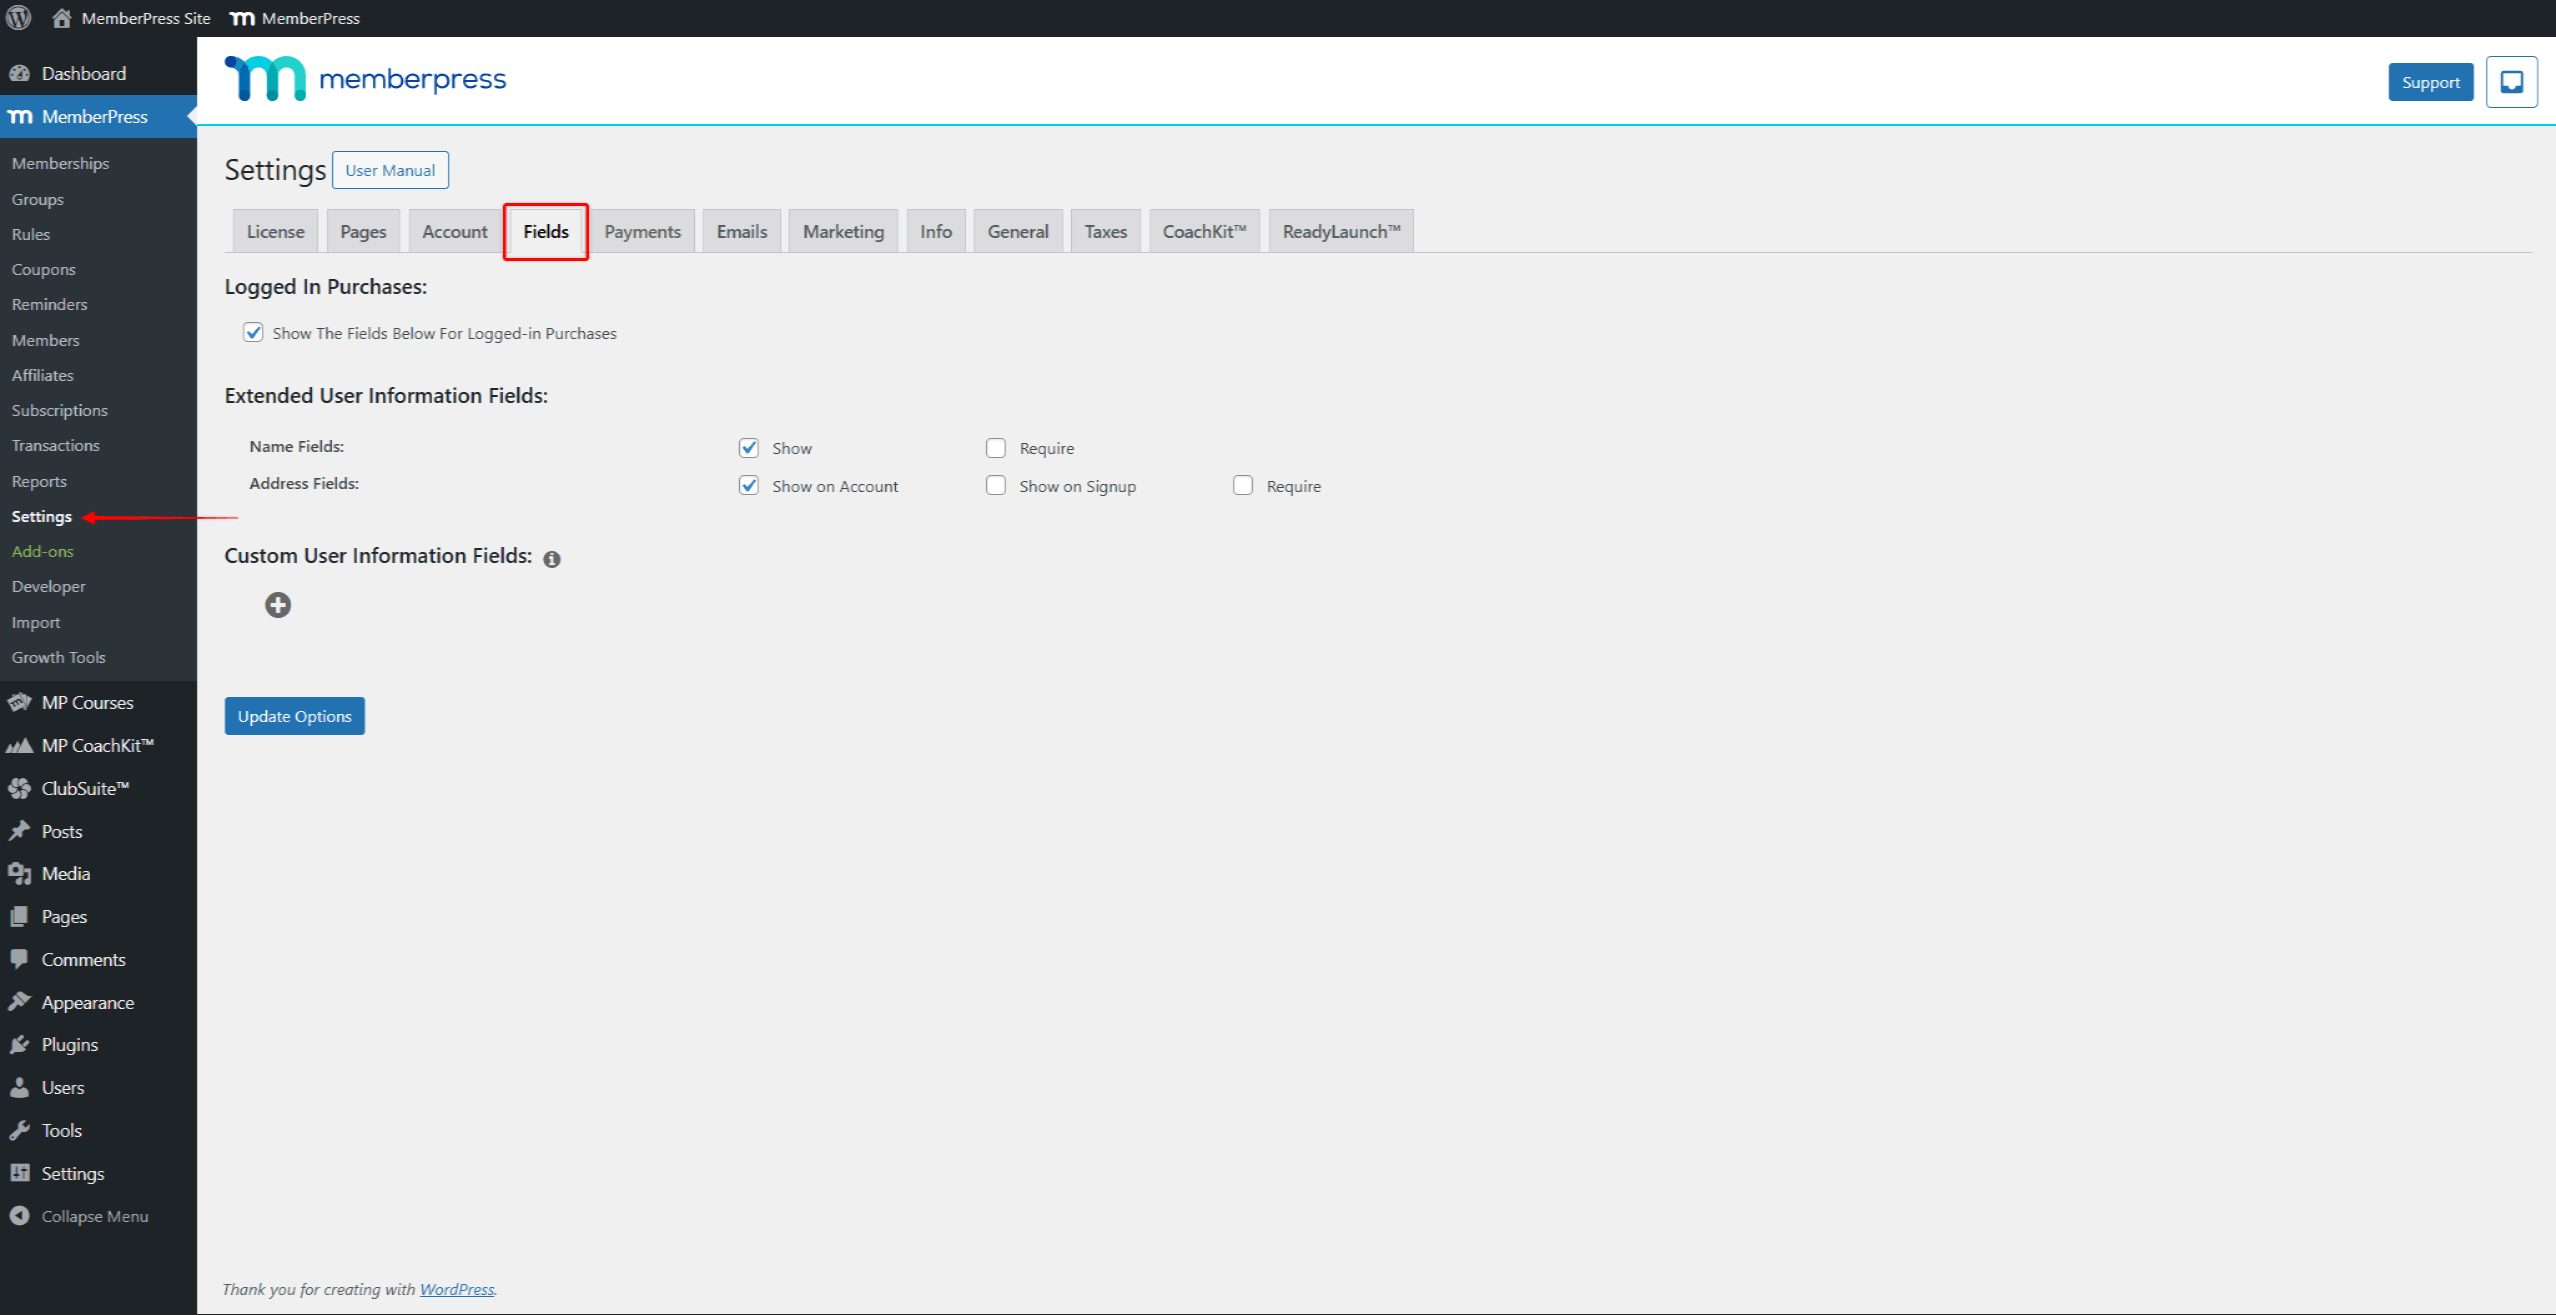
Die erste Option, die Sie überprüfen können, ist, ob die Feldeinstellungen auf Einkäufe von bestehenden Benutzern angewendet werden sollen. Deaktivierung der Die untenstehenden Felder für angemeldete Einkäufe anzeigen werden nur die Feldeinstellungen übernommen für neue Benutzer.
Als nächstes können Sie wählen, ob Sie die Felder Name und Adresse auf den Seiten und Formularen Konto und Registrierung.
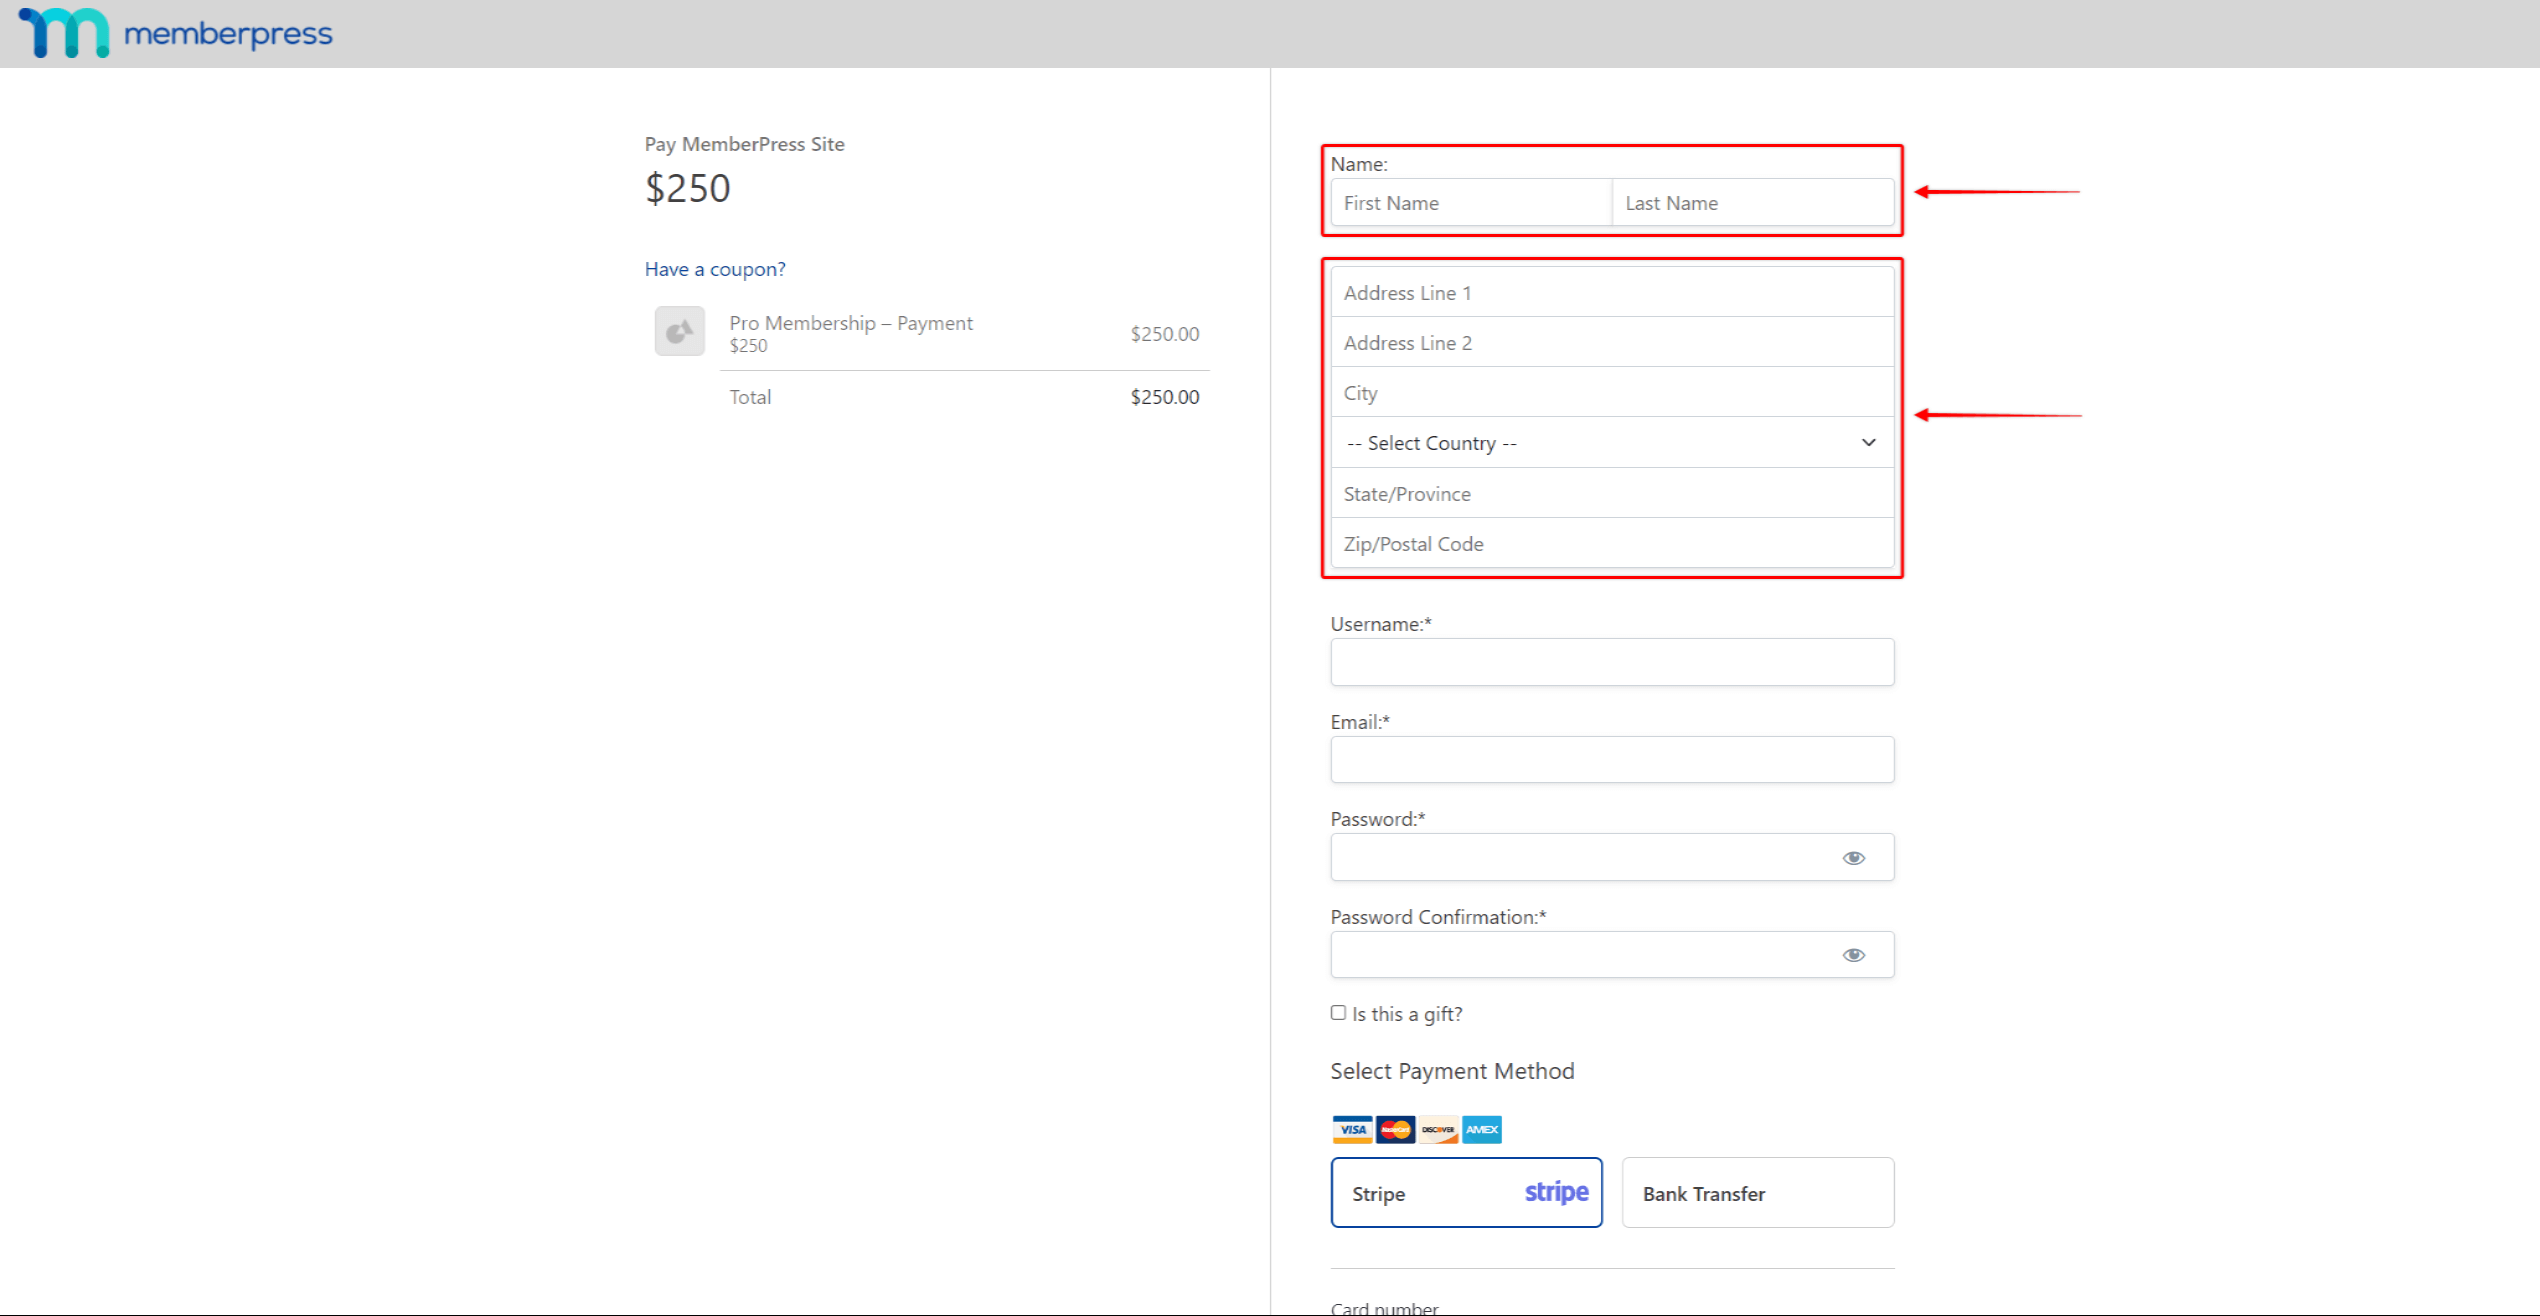
Hier können Sie auch festlegen, ob die Felder Name und Adresse erforderlich sind. Das Aktivieren der Erforderlich verhindert, dass die Benutzer Registrierungsformulare übermitteln, wenn sie diese nicht ausfüllen.
Name Felder
Die Name Felder fügt die Vorname und Nachname Felder sowohl für das Benutzerkonto als auch für die Registrierung.
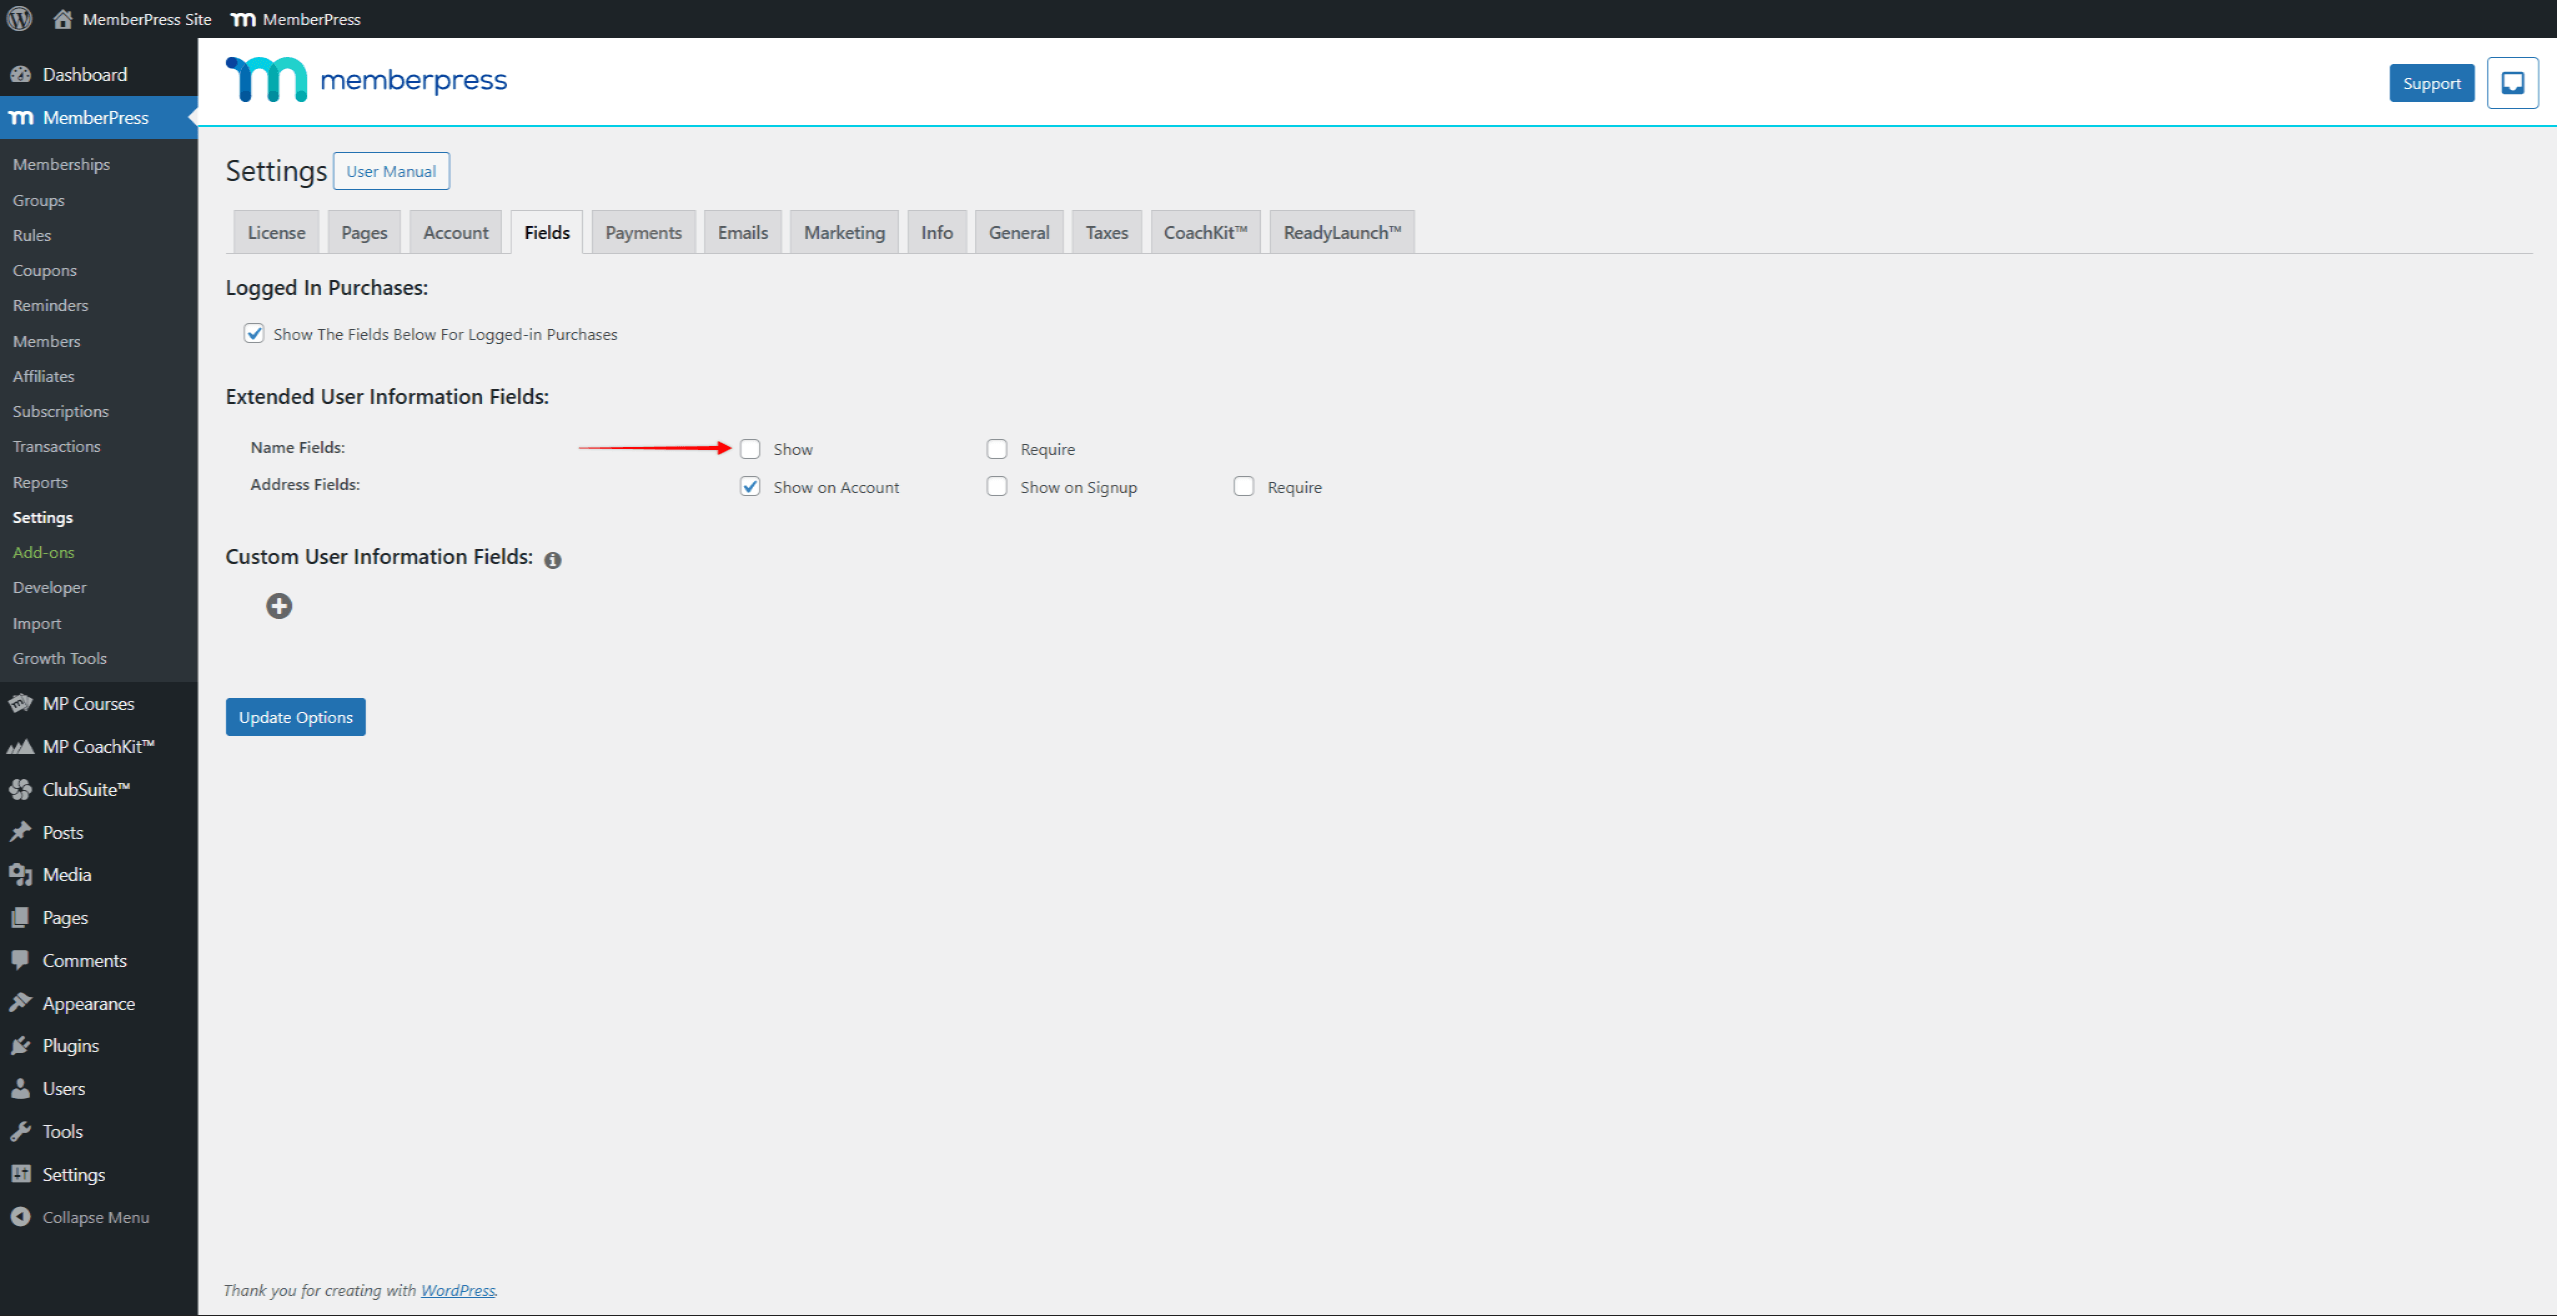
Die Die Option Anzeigen ist standardmäßig aktiviert für die Namensfelder. Zum Verstecken diese Felder sowohl auf den Konto- als auch auf den Registrierungsseiten und -formularen, die Option Anzeigen deaktivieren.
Adressfelder
Ter Adressfelder fügt die Adresse, den Ort, das Land und die Postleitzahl hinzu.tate/Provinz und Postleitzahl. Sie können wählen Adressfelder nur auf Ihrer Kontoseite oder auf beiden Seiten hinzufügen die Seiten Konto und Registrierung.
Standardmäßig, die Im Konto anzeigen Option für Adressfelder aktiviert ist, während Bei Anmeldung anzeigen ist deaktiviert. Das macht sie sichtbar auf der Seite Konto und versteckt bei der Registrierung. Auf diese Weise können sich die Nutzer schneller registrieren und müssen beim Kauf von Abonnements weniger Felder ausfüllen. Sie können dann ihre Adressdaten auf ihrer Kontoseite eingeben.
An Adressfelder auf Ihren Registrierungsseiten aktivierenfolgen Sie diesen Schritten:
- Navigieren Sie zu Dashboard > MemberPress > Einstellungen > Registerkarte Felder.
- Blättern Sie zu Adressfelder und aktivieren Sie die Option Bei Anmeldung anzeigen Kontrollkästchen.
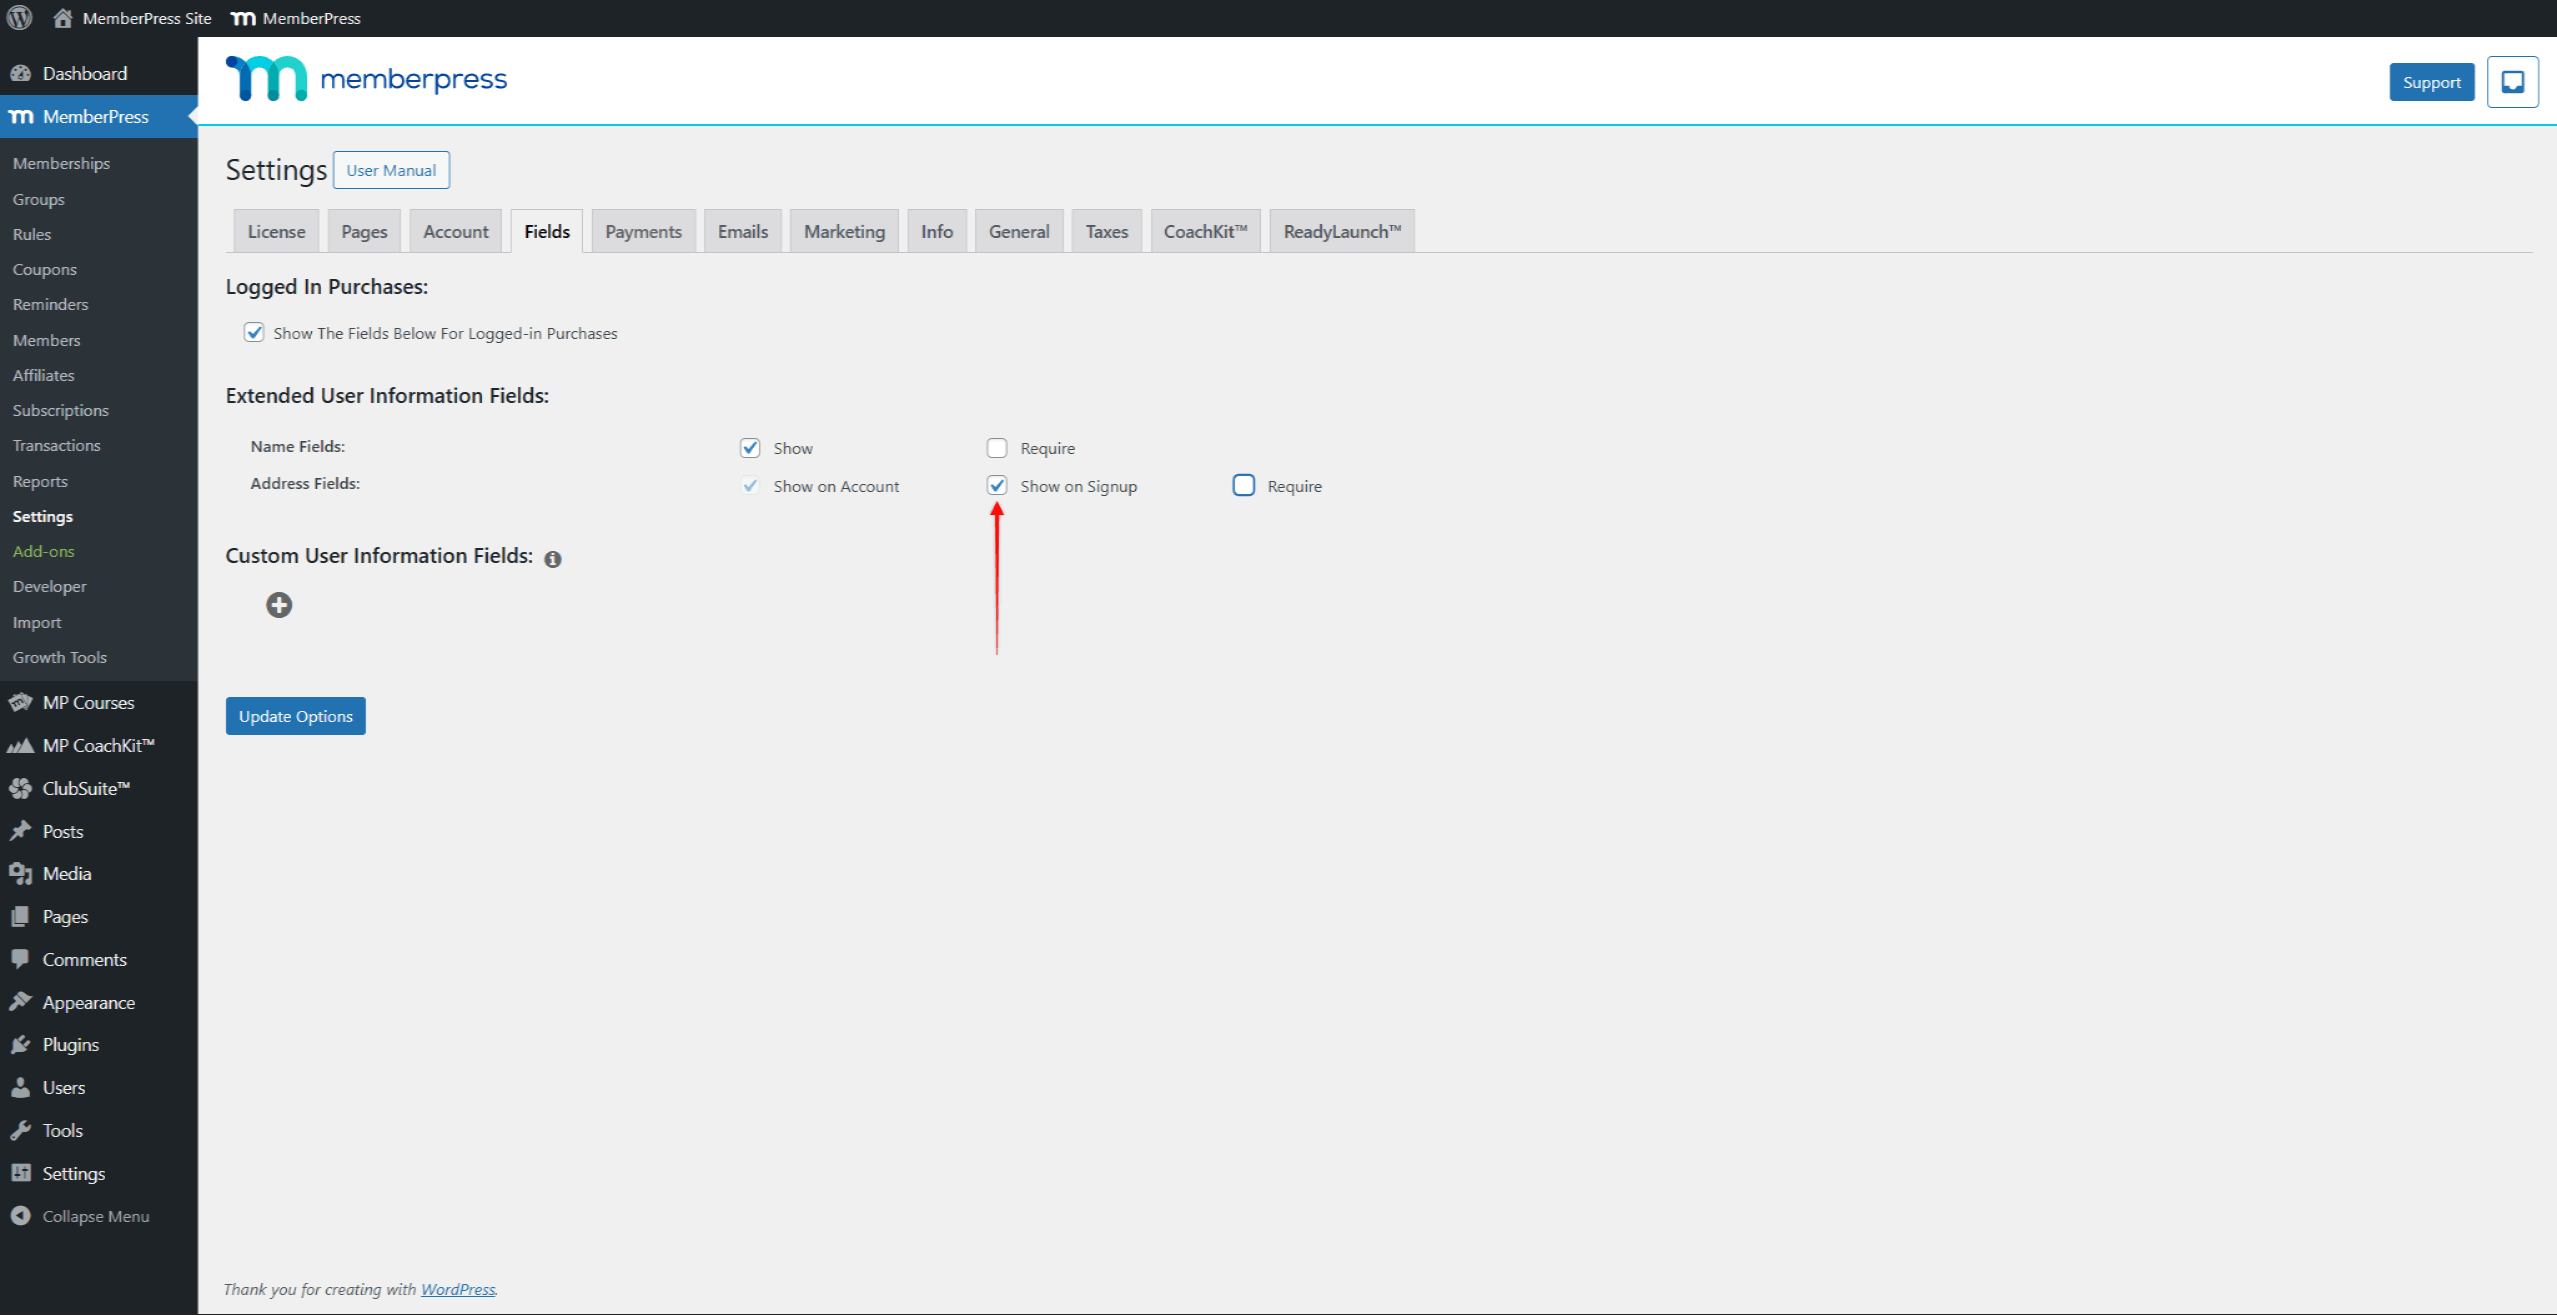
- Klicken Sie auf die Optionen aktualisieren um die Änderungen zu übernehmen.
Darüber hinaus können Sie Adressfelder vollständig ausblenden, indem Sie die Markierung der beiden Felder Im Konto anzeigen und Bei Anmeldung anzeigen Optionen.
Benutzerdefinierte Felder erstellen
Auf der Felder Seite können Sie im Abschnitt Benutzerdefinierte Felder für Benutzerinformationen Ihre eigenen Felder hinzufügen:
- Klicken Sie auf das + Symbol um ein neues benutzerdefiniertes Feld hinzuzufügen. Dadurch wird das Feldformular geöffnet.
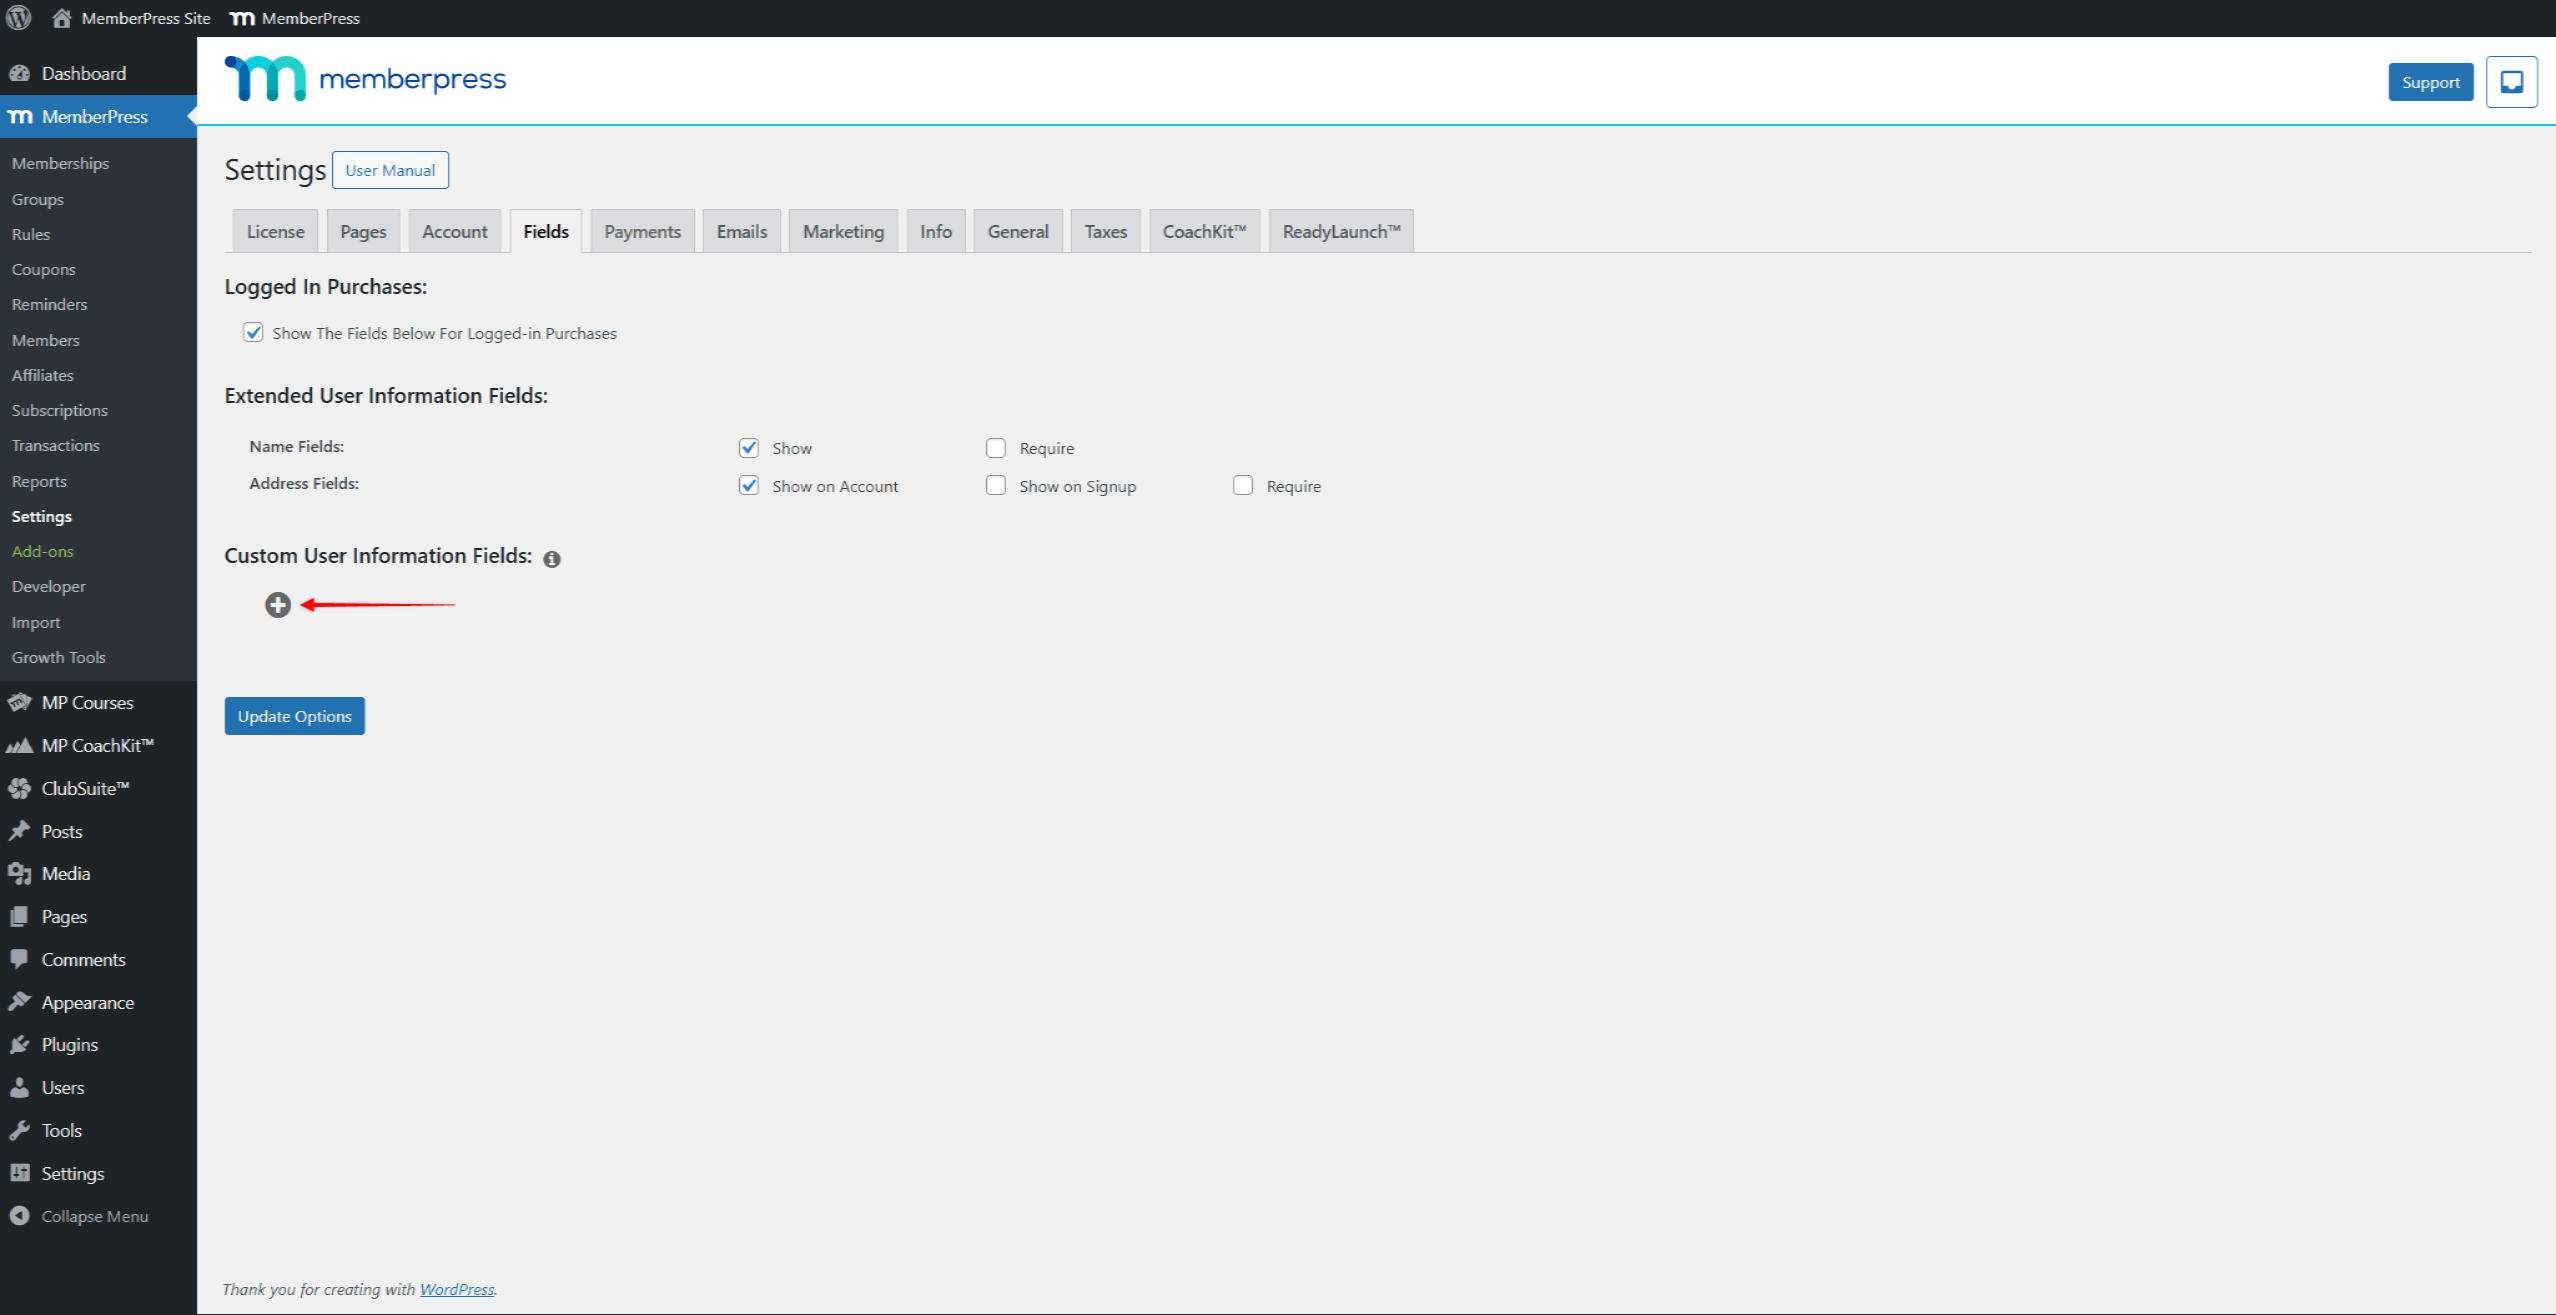
- Beginnen Sie damit, Ihr Feld zu benennen. Diese Name wird als Bezeichnung für dieses Feld in Ihren Formularen.
- Als nächstes müssen Sie die Typ des Feldes. Je nach gewähltem Typ werden zusätzliche Optionen angezeigt, die für diesen Typ spezifisch sind.
- Die Standardwert(e) Feld sollte den Wert enthalten, der als Standard geladen werden soll.
- Wie bei den Adressfeldern können Sie angeben, wo Ihr benutzerdefiniertes Feld angezeigt werden soll. Das Aktivieren des Bei Anmeldung anzeigen wird Ihr benutzerdefiniertes Feld auf Registrierungsformularen angezeigt. Außerdem wird durch die Auswahl der Option Im Konto anzeigen wird das Feld auf dem Kontoformular angezeigt.
- Die Auswahl der Erforderlich verhindert die Registrierung des Benutzers, wenn dieses benutzerdefinierte Feld nicht ausgefüllt ist.
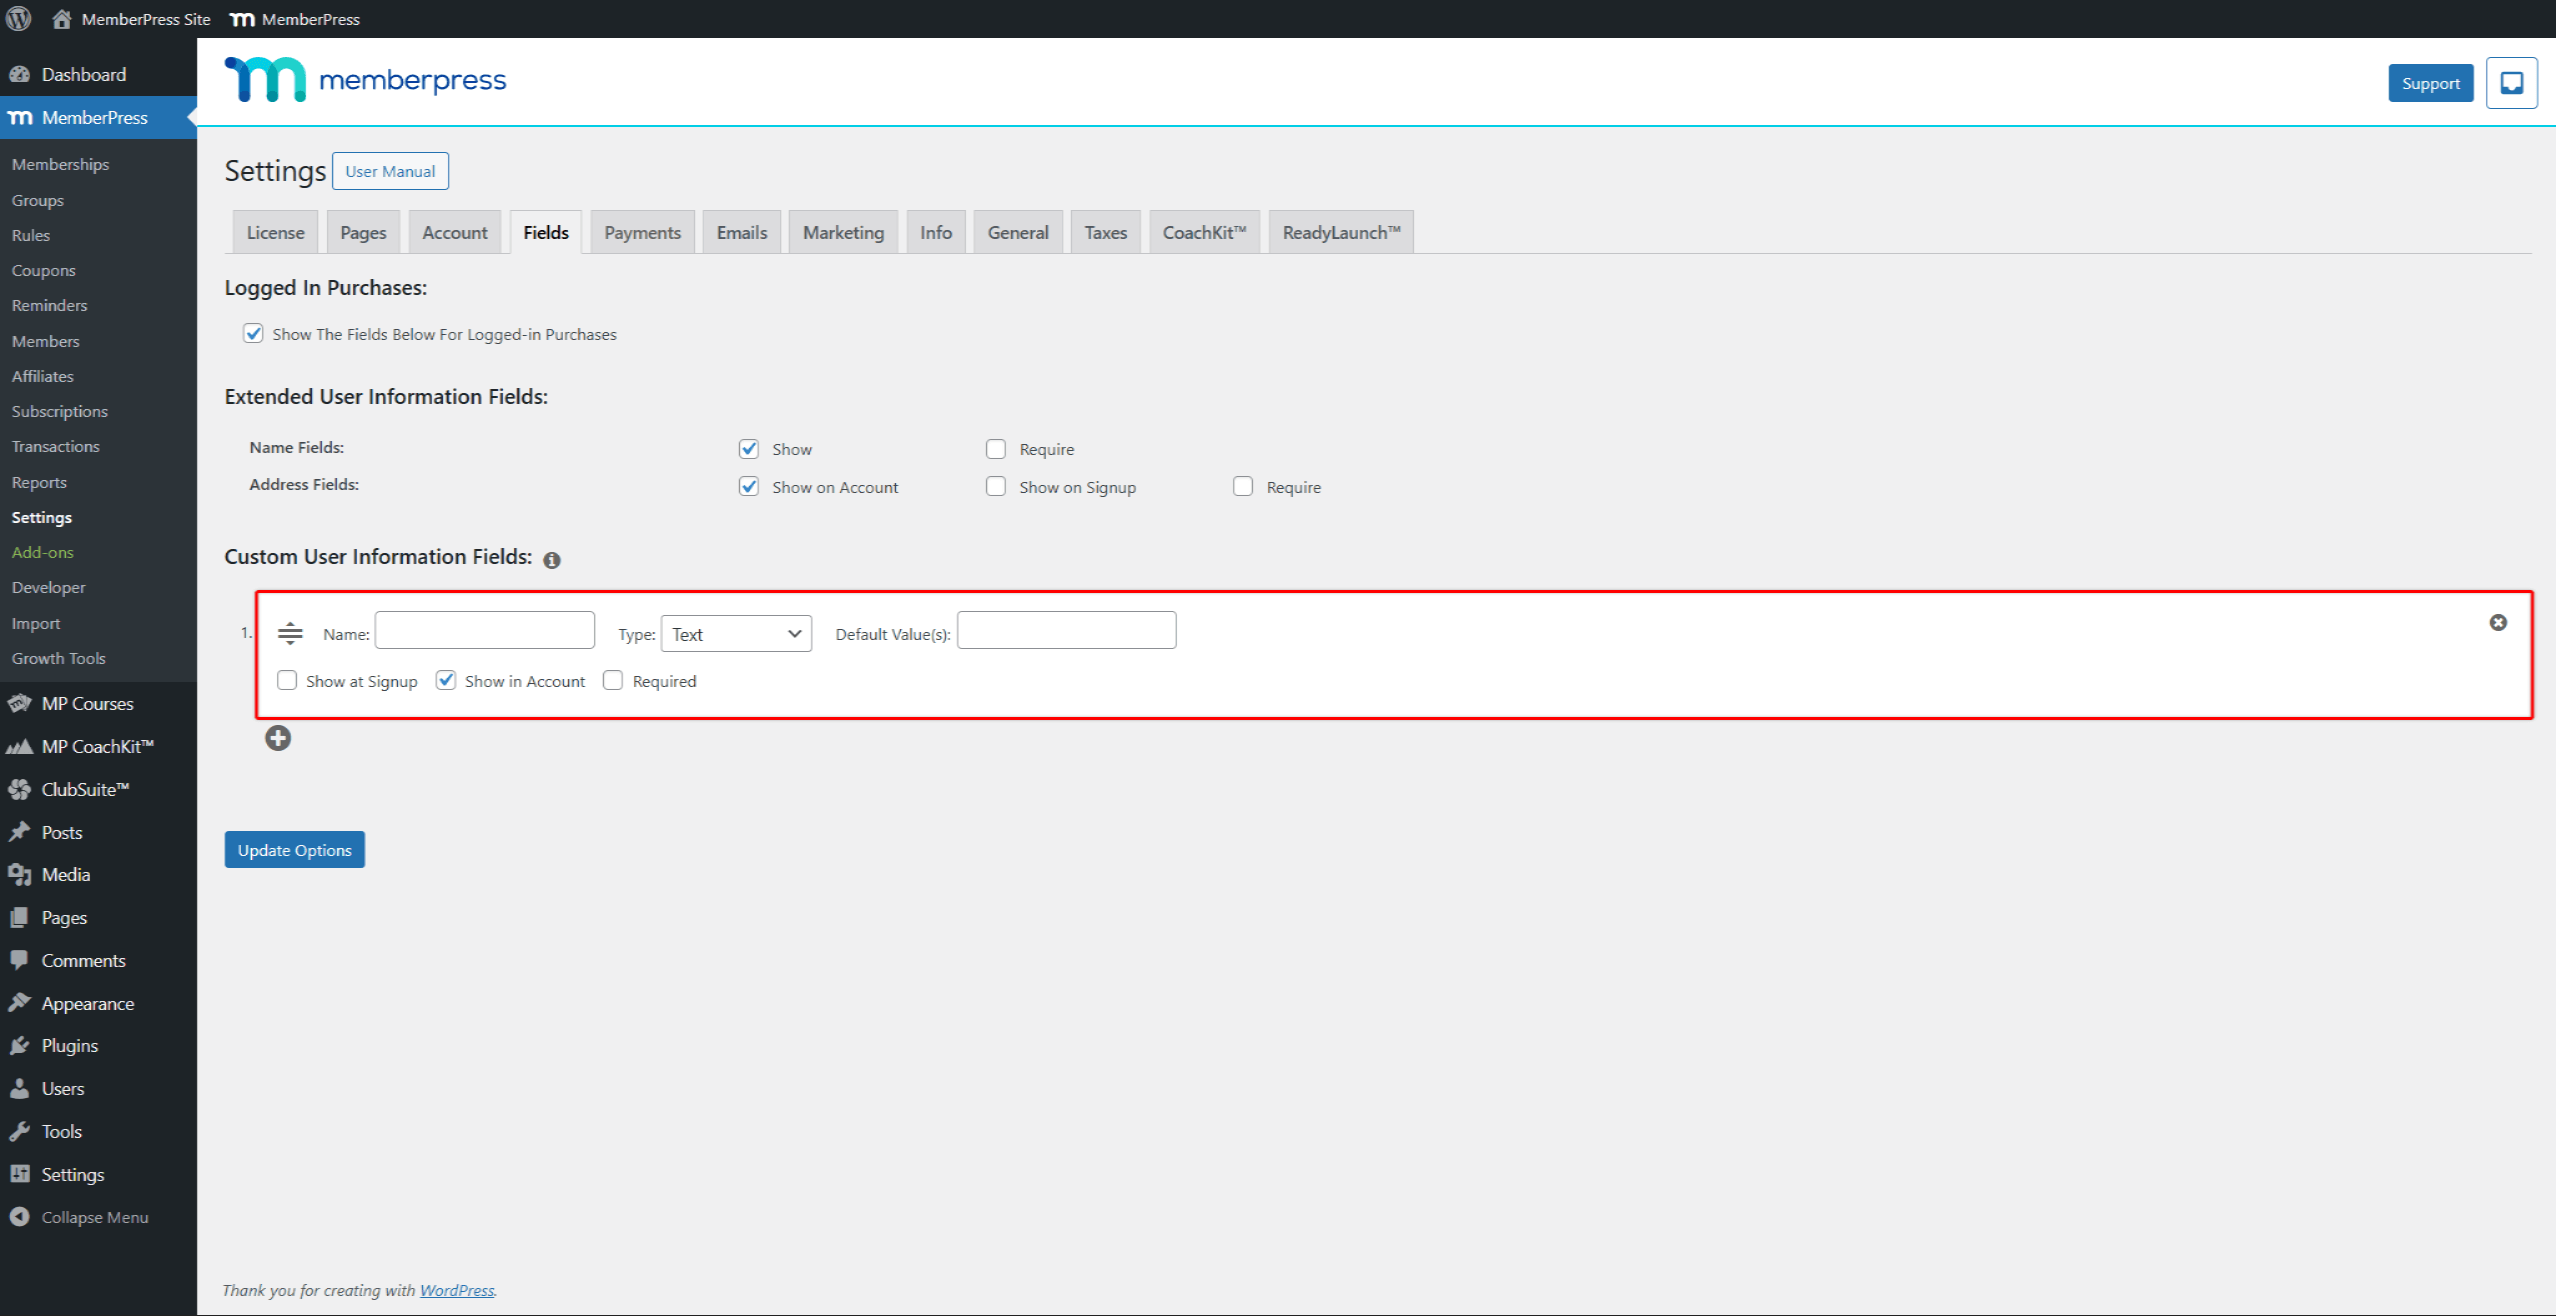
- Klicken Sie auf die Optionen aktualisieren um das Feld zu speichern.
Sie können unbegrenzt viele benutzerdefinierte MemberPress-Felder erstellen, die Ihre Mitglieder ausfüllen können.
Außerdem können Sie in den Einstellungen der Mitgliedschaften bestimmte Felder ein- oder ausblenden. Standardmäßig werden alle benutzerdefinierten Felder, die auf Bei Anmeldung anzeigen wwird auf den Anmeldeformularen für alle Mitgliedschaften angezeigt.
So können Sie nur die Felder anzeigen, die Sie auf den Anmeldeformularen für jede Mitgliedschaft benötigen.
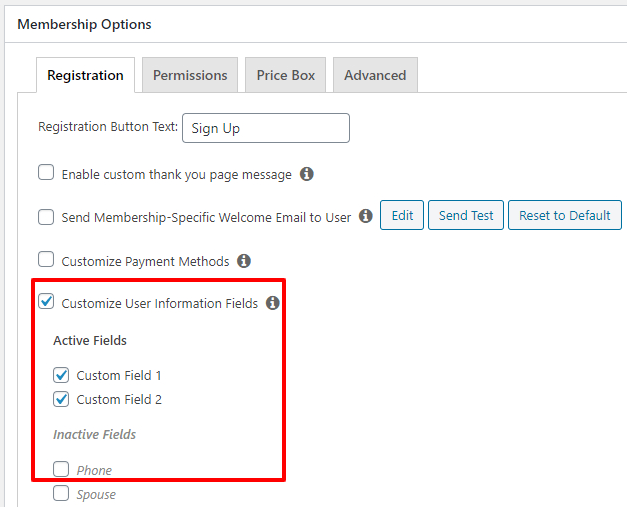
Benutzerdefinierte Felder, die auf Im Konto anzeigen will be visible in users' accounts only after they register for a membership.
Erstellen einer leeren Standardoption für ein benutzerdefiniertes Dropdown-Feld
Um eine "leere" Option hinzuzufügen, fügen Sie Folgendes als erste Option hinzu:
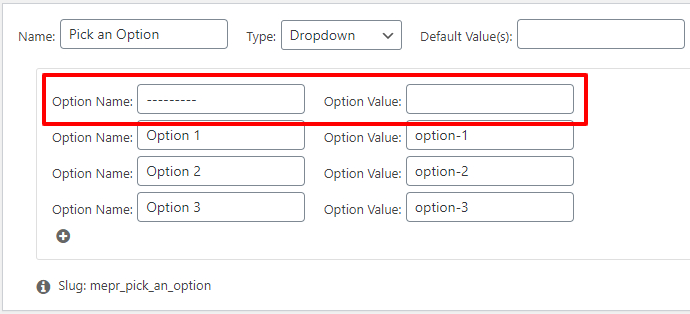
Wenn Ihre Benutzer eine Option nicht auswählen können, lässt MemberPress sie das Formular nicht abschicken und zeigt diesen Fehler an:

Erstellen einer anklickbaren Checkbox-Option
Um ein anklickbares benutzerdefiniertes Feld zu erstellen, können Sie bei der Erstellung des Feldes einfach ein paar einfache HTML-Elemente an den Feldnamen anhängen. Hier ist ein Beispiel:
<a href='https://www.yoursite.com/special-policies' target='_blank'>Bitte stimmen Sie unseren besonderen Richtlinien zu</a>

Diese wird auf der Registrierungsseite wie folgt angezeigt:

Aktivieren mehrerer "angekreuzter" Optionen für benutzerdefinierte Felder mit Mehrfachauswahl und Kontrollkästchen
MemberPress ermöglicht Ihnen die Eingabe einer Standardoption, die für benutzerdefinierte Feldtypen mit Mehrfachauswahl und Kontrollkästchen ausgewählt oder angekreuzt werden soll, indem Sie die
Standardwert(e) Option für das Feld und geben Sie den Optionswert wie hier gezeigt ein:

Um mehr als eine Option zu markieren, trennen Sie einfach die
Option Werts, die in der Standardwert(e) wie hier gezeigt (kommagetrennt, ohne Leerzeichen zwischen den Einträgen):

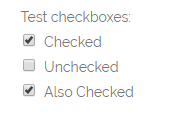
So würde dies auf Ihrer Registrierungsseite aussehen:
