Cuando los usuarios se registran en MemberPress, WordPress crea automáticamente una cuenta de usuario para cada uno de ellos. Para proteger su sitio web de registros de spam, puede añadir verificaciones de usuario.
Este documento explica cómo utilizar el plugin gratuito de verificación de usuarios con MemberPress para proteger su sitio web.
Configuración del plugin de verificación de usuarios
Para empezar, debe instalar el plugin gratuito de verificación de usuarios. Puede instalarlo como cualquier otro plugin de WordPress en Panel> Plugins > Añadir Plugins.
Una vez instalado, siga los pasos que se indican a continuación para configurar el plugin para que funcione con MemberPress.
Página de verificación
- Vaya a Panel de control > Páginas > Añadir páginay cree una nueva página que se utilizará para la verificación del usuario. Nombra la página como corresponda (por ejemplo, Verificar cuenta).
- Mientras editas esta nueva página, en el área de contenido de la nueva página, añade este shortcode:
[user_verification_check]Configuración de correo electrónico y spam
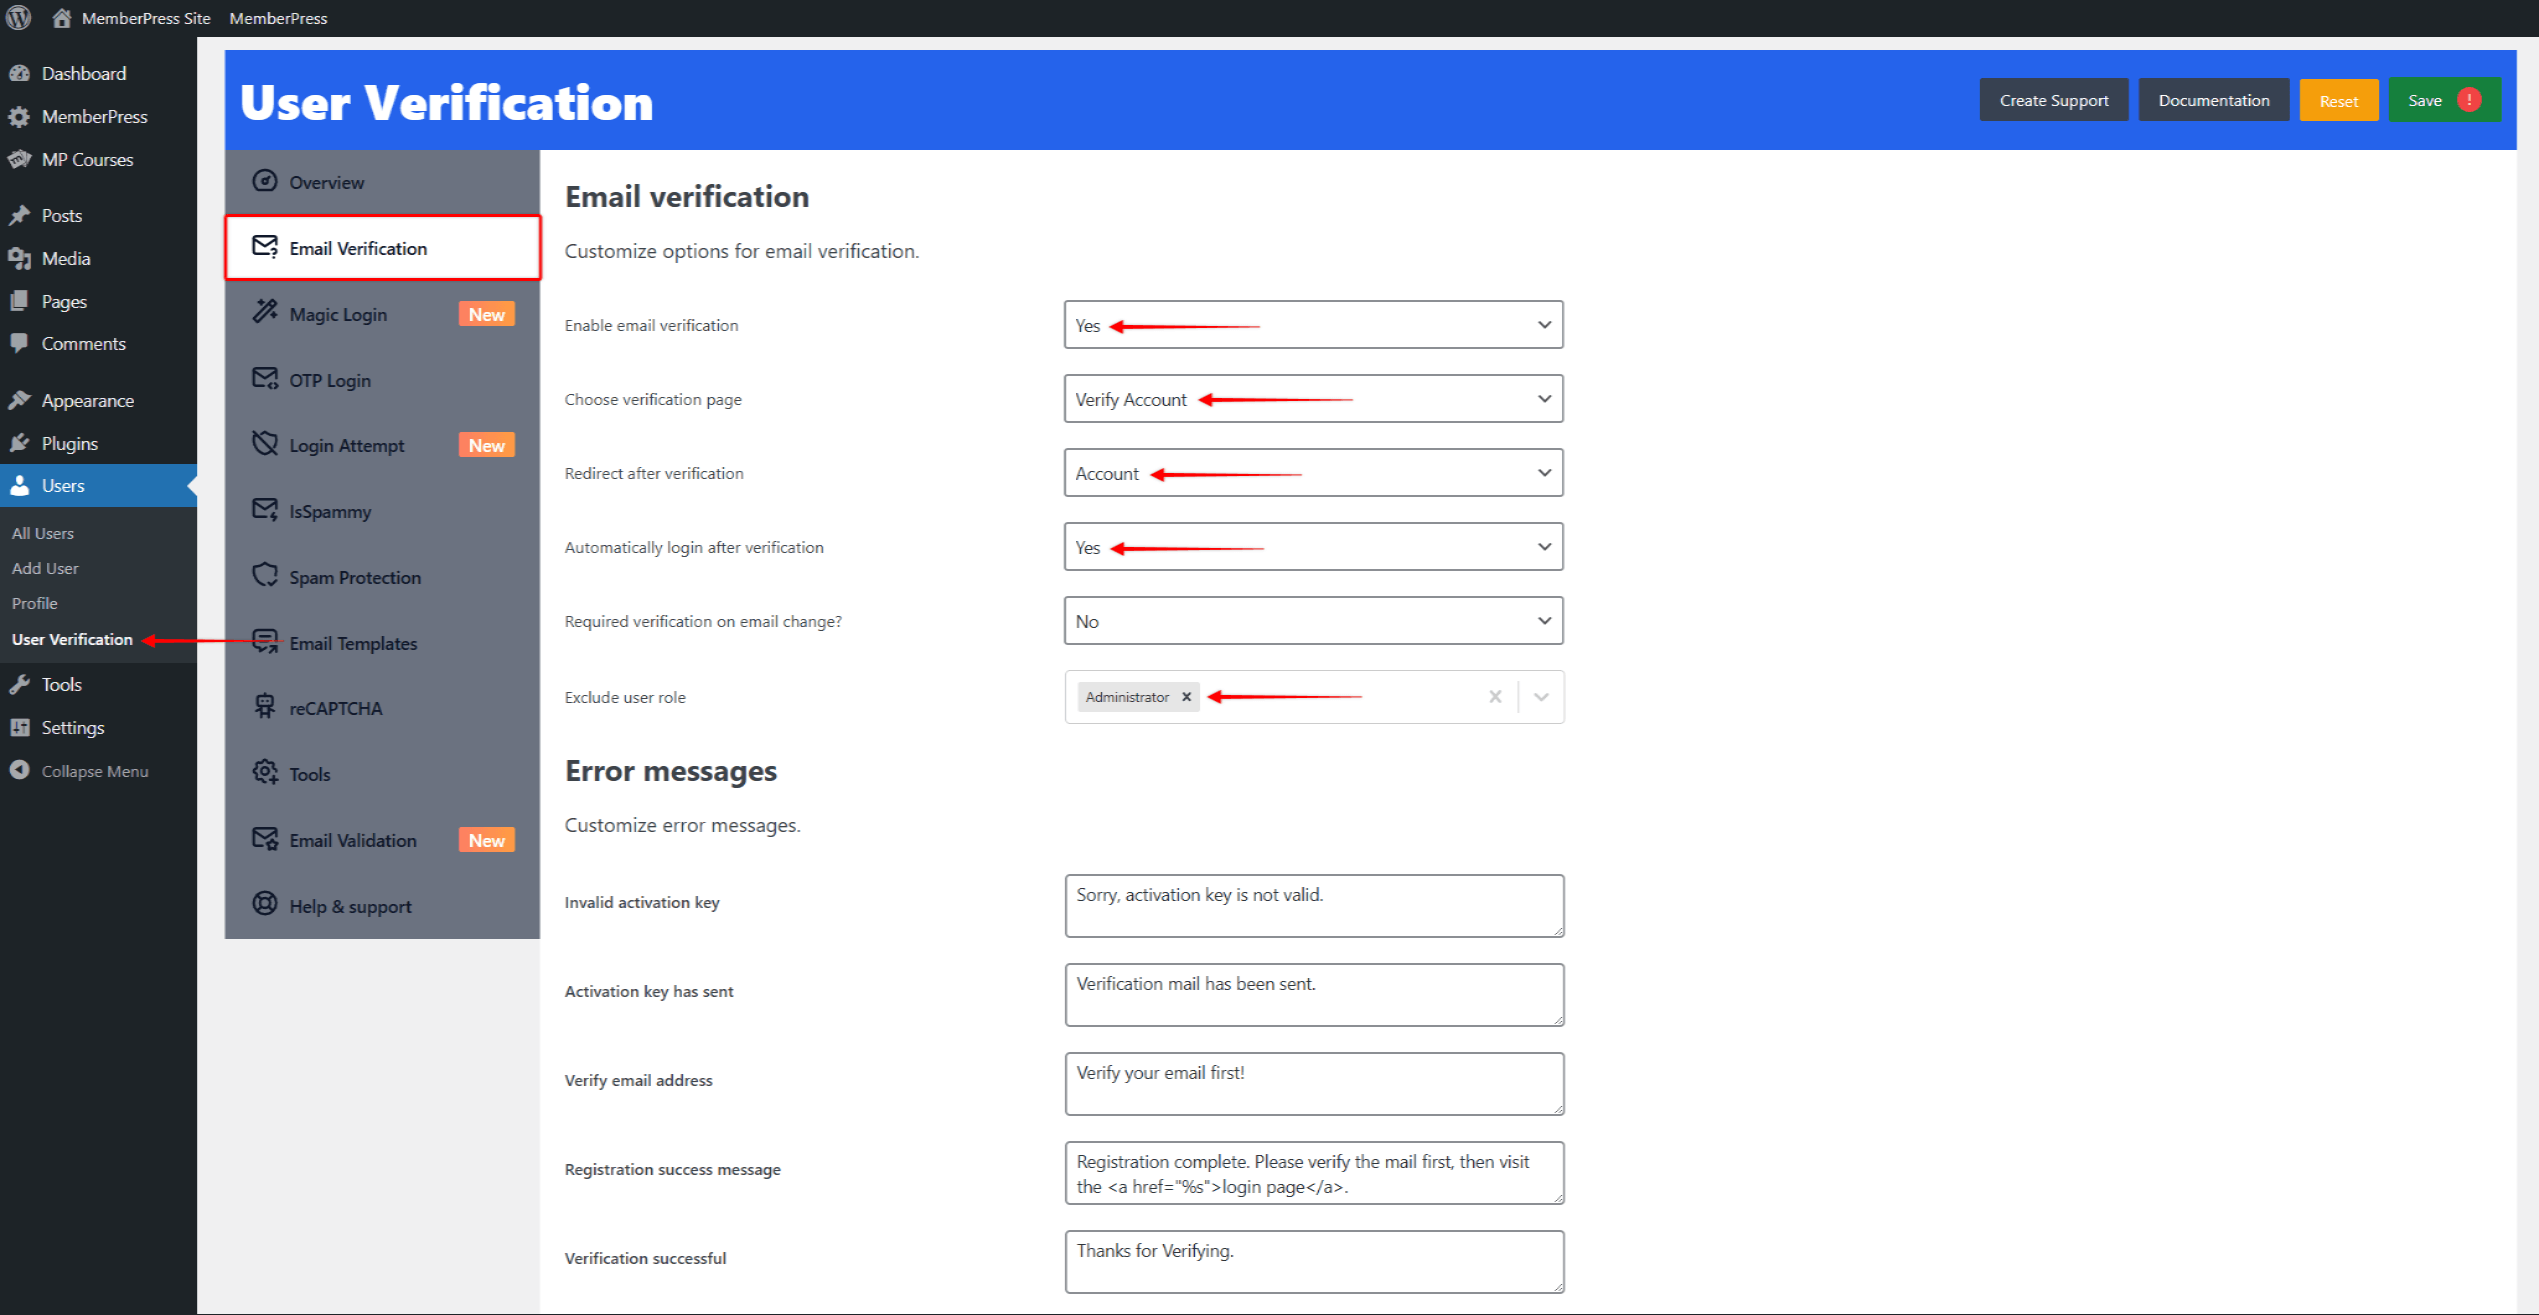
- A continuación, debe configurar los ajustes del plugin de verificación de usuarios. Vaya a Panel de control > Usuarios > Verificación de usuarios > Verificación de correo electrónico y aplica lo siguiente:
- Activar la verificación del correo electrónicofijado en Sí;
- Elija la página de verificación: seleccionar la página que creó para la verificación del usuario;
- Redirección tras la verificación: ajustado a los usuarios Página de la cuenta MemberPress;
- Inicio de sesión automático tras la verificaciónfijado en Sí;
- Excluir rol de usuario: seleccione el Administrador y cualquier otra función que desee excluir del proceso de verificación en su sitio web.

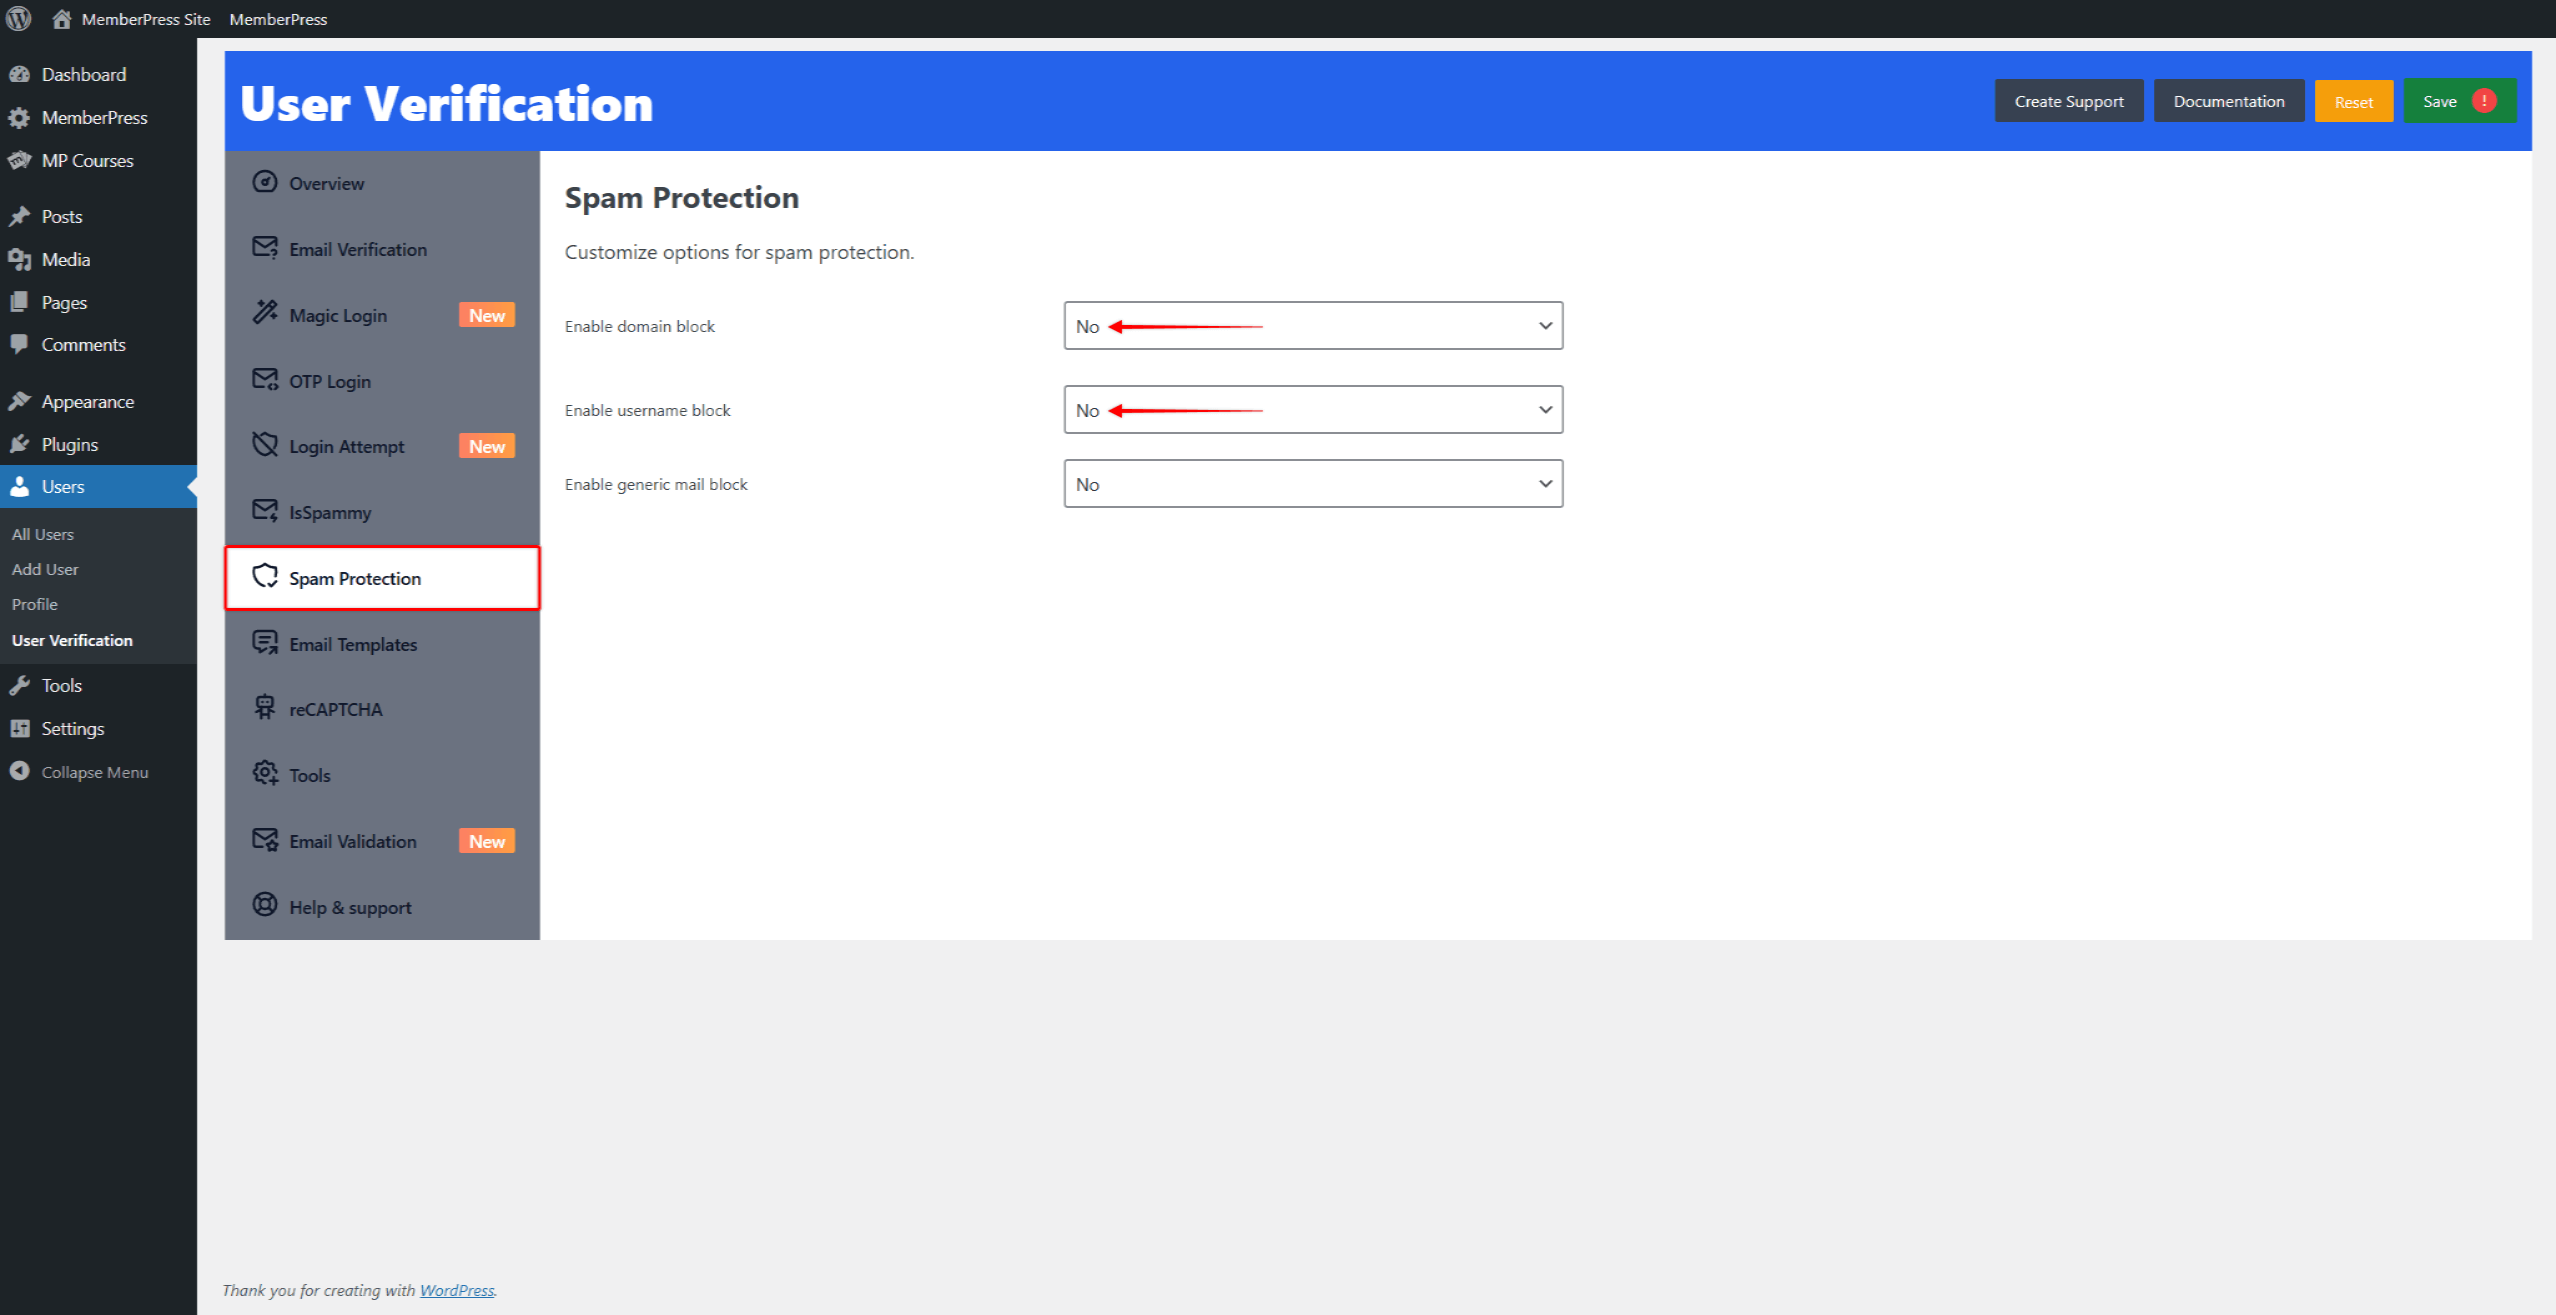
- Navegue también a Panel de control > Usuarios > Verificación de usuarios > Verificación de spam y asegúrese de que estas opciones están configuradas correctamente:
- Activar bloqueo de dominiofijado en No;
- Activar el bloqueo de nombres de usuariofijado en No.

Plantillas de correo electrónico Contenido
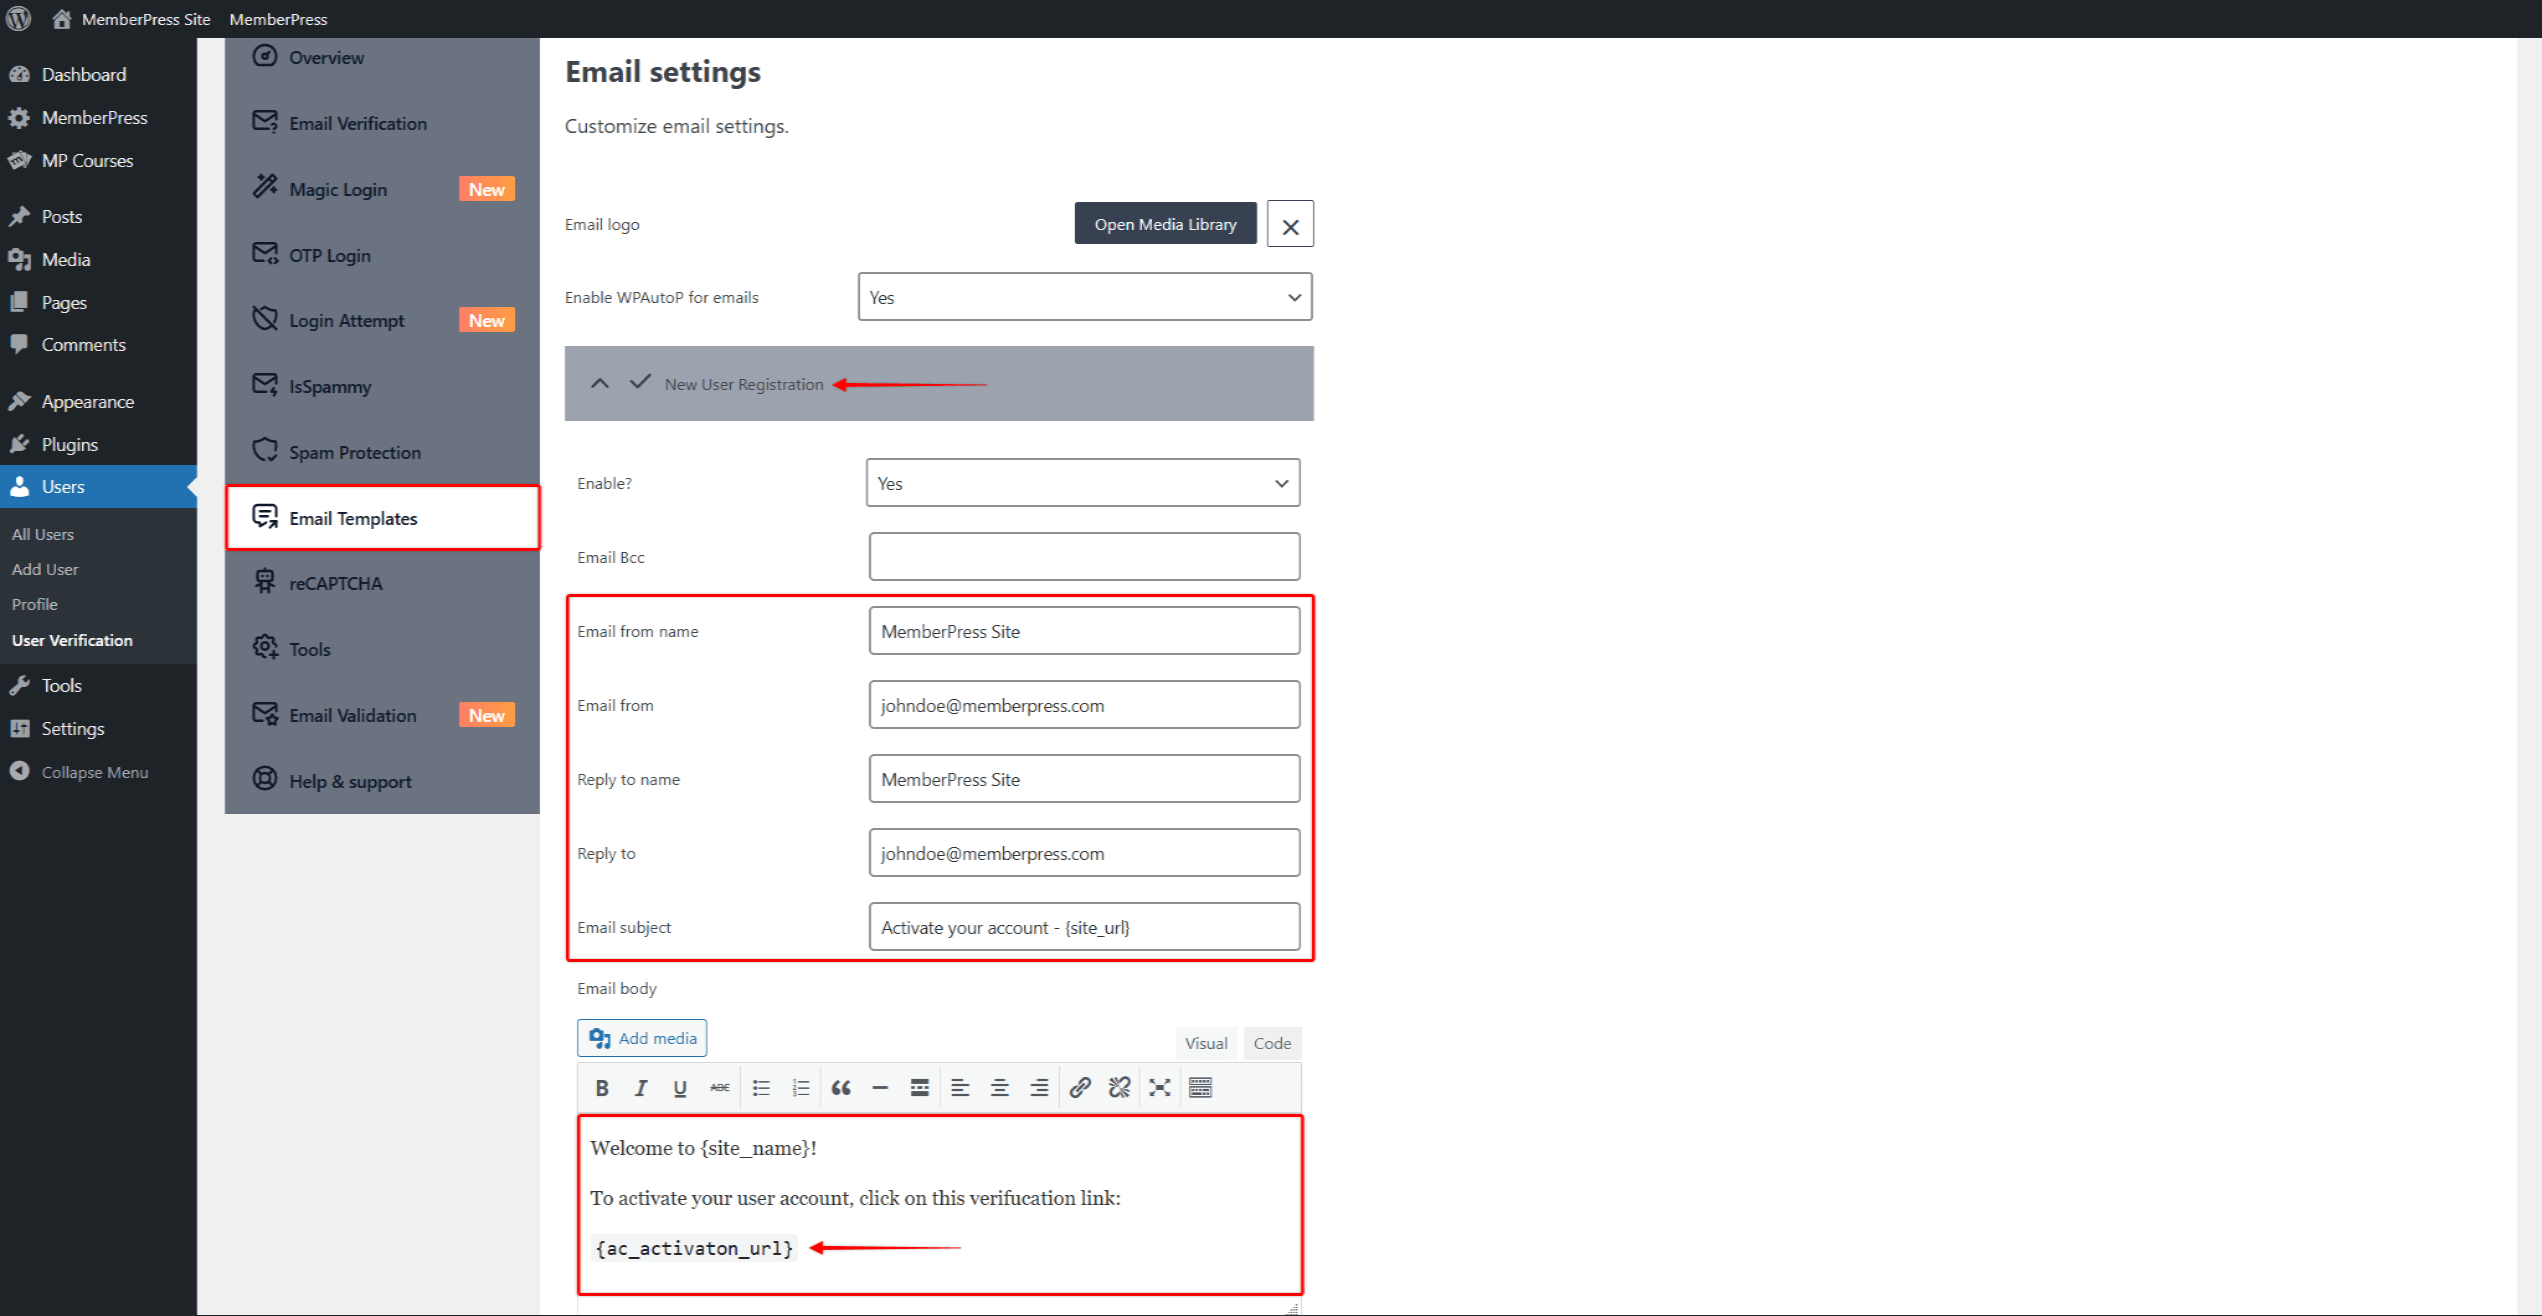
- Por último, debe añadir contenido y configurar sus plantillas de correo electrónico. Vaya a Panel de control > Usuarios > Verificación de usuarios > Plantillas de correo electrónico y haga clic en Registro de nuevos usuarios para ampliarla. Añada o edite los siguientes datos:
- Correo electrónico del nombre: se utilizará como nombre de remitente;
- Correo electrónico de: se utilizará como correo electrónico del remitente;
- Responder al nombre: se utilizará como respuesta al nombre;
- Responder a: se utilizará como respuesta al correo electrónico;
- Asunto del correo electrónico: el asunto del correo electrónico de registro de nuevo usuario;
- Correo electrónico: el contenido de su correo electrónico e incluya el
{ac_activaton_url}(enlace de verificación) en el cuerpo del correo electrónico.

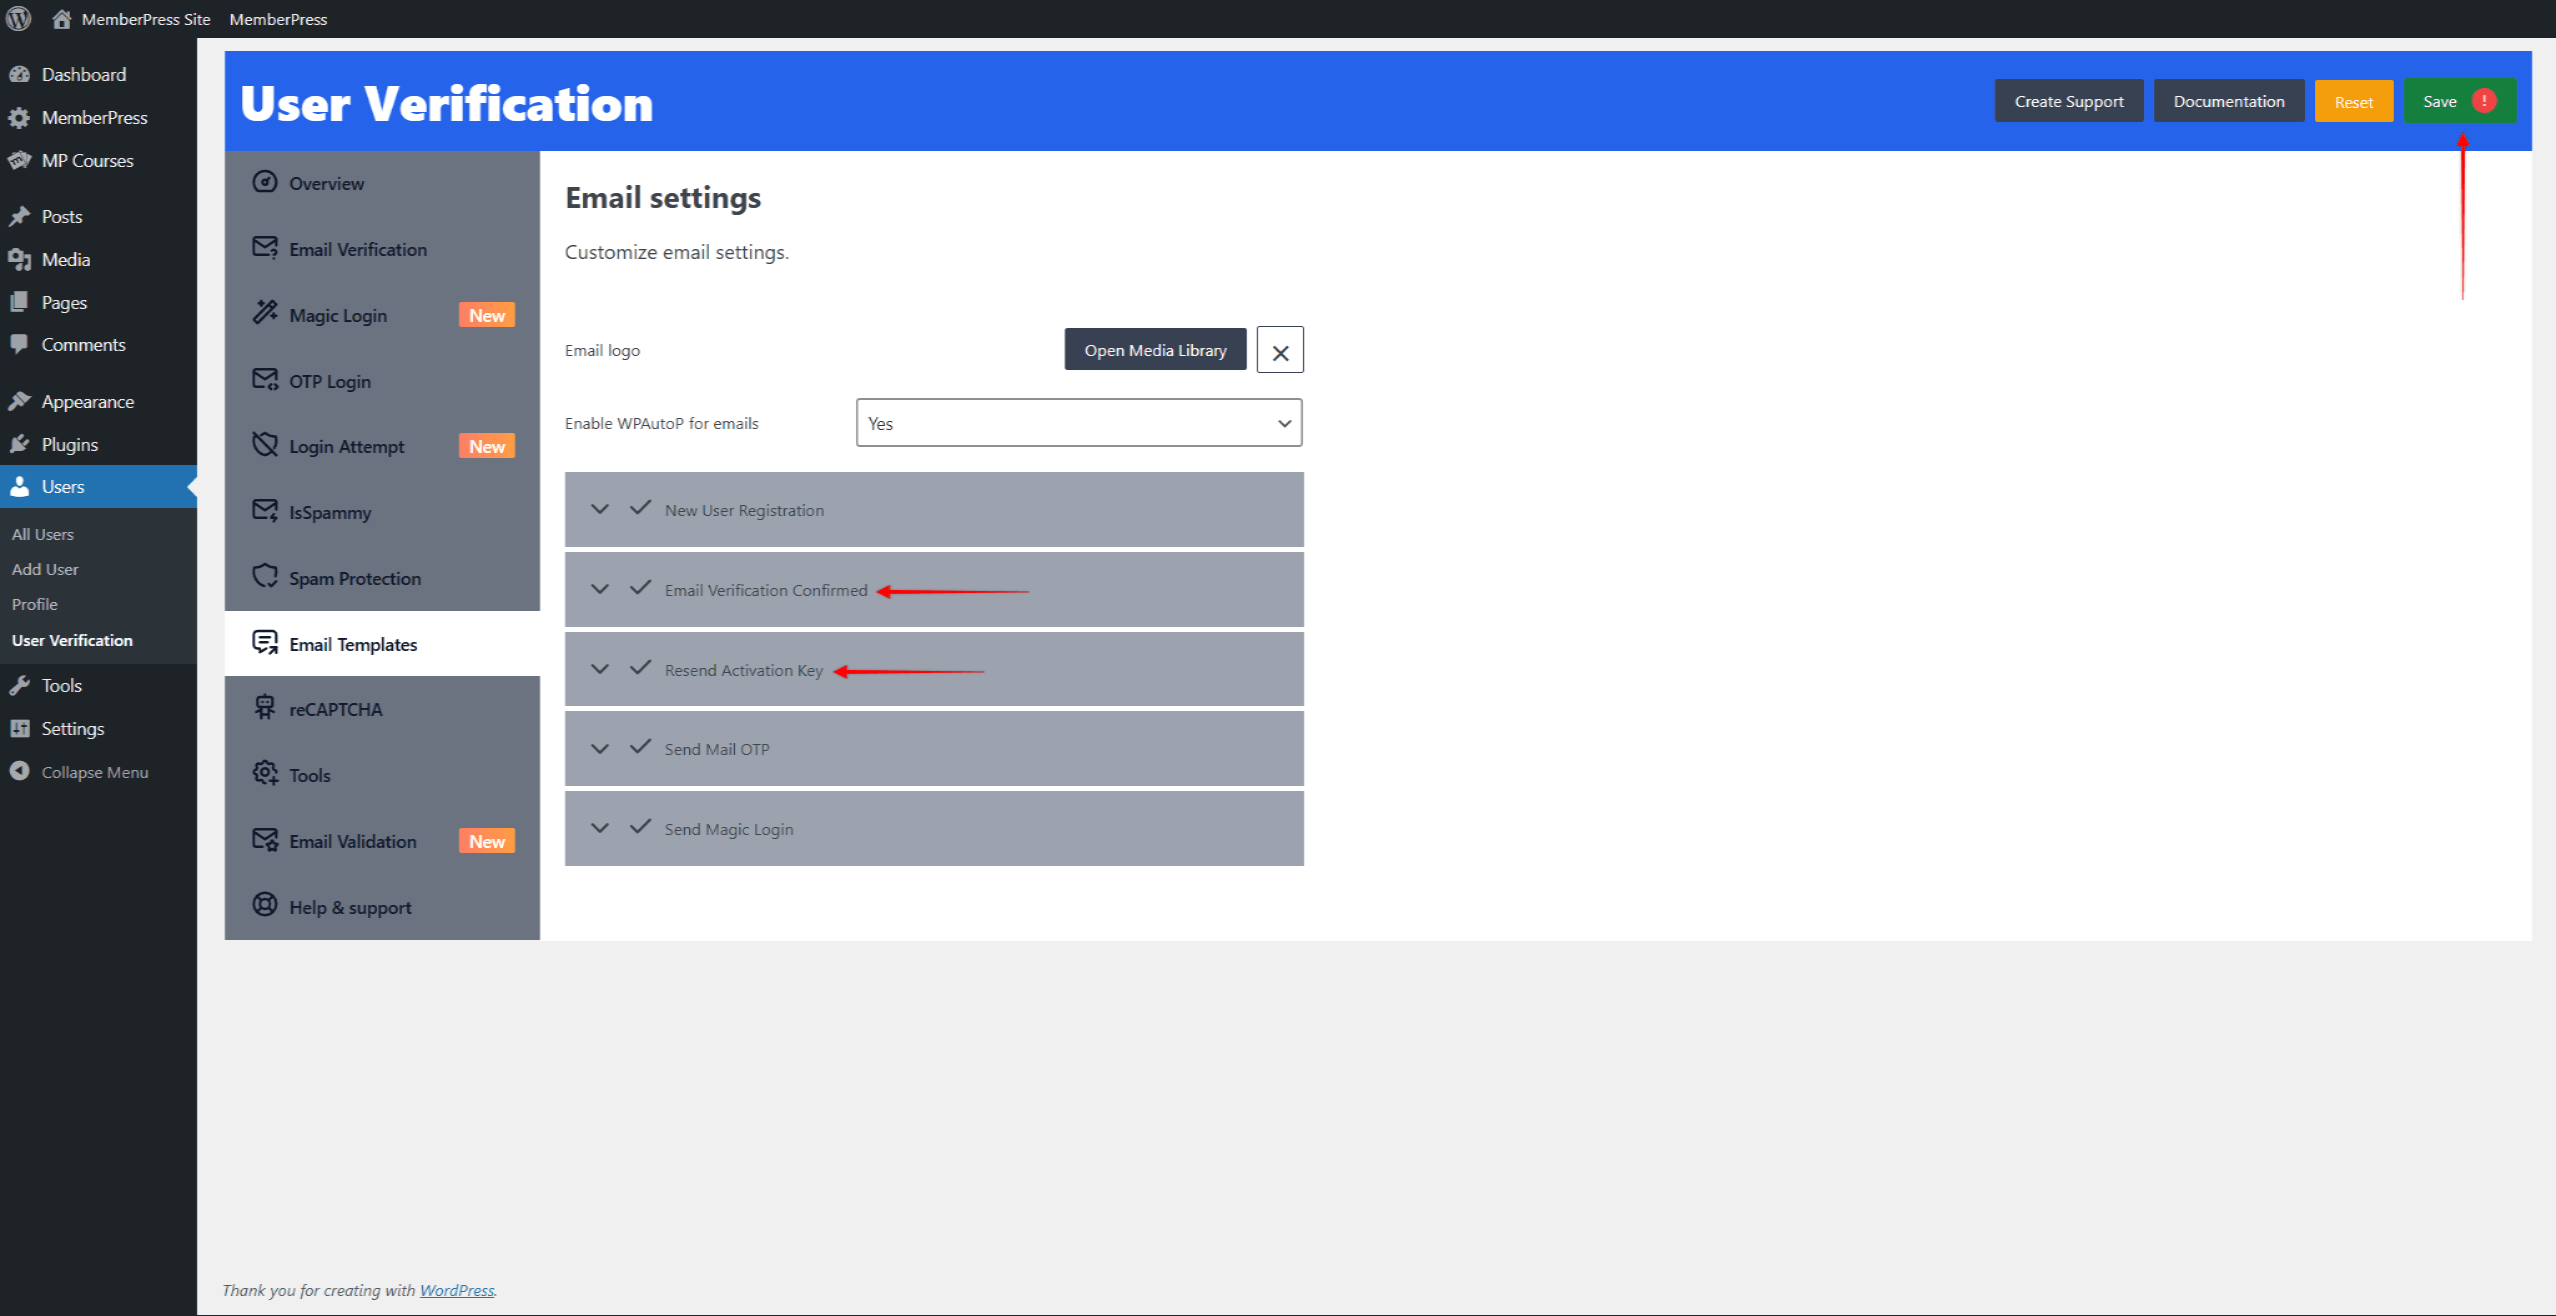
- Aplique estos ajustes a Verificación de correo electrónico confirmada y Reenviar clave de activación plantillas.

- Haga clic en el botón Guardar en la esquina superior derecha para aplicar los ajustes.
Verificación de usuarios
Como resultado, sus miembros no podrán iniciar sesión en su sitio web antes de verificar sus cuentas.
Al registrarse, los usuarios recibirán un correo electrónico con el enlace de verificación.
Tendrán que hacer clic en ese enlace para verificar su cuenta, tras lo cual podrán iniciar sesión normalmente.


