Les formulaires de compte et d'enregistrement de MemberPress comportent un ensemble de champs par défaut. Dans les paramètres de MemberPress, vous pouvez activer et désactiver certains champs par défaut de MemberPress et ajouter vos propres champs.
Ce document explique comment gérer les champs MemberPress et créer des champs personnalisés pour les formulaires d'inscription et de compte.
Gestion des champs MemberPress
Les options de terrain MemberPress sont disponibles à l'adresse suivante Tableau de bord > MemberPress > Paramètres > Onglet Champs. Vous y trouverez plusieurs options de gestion des champs par défaut.
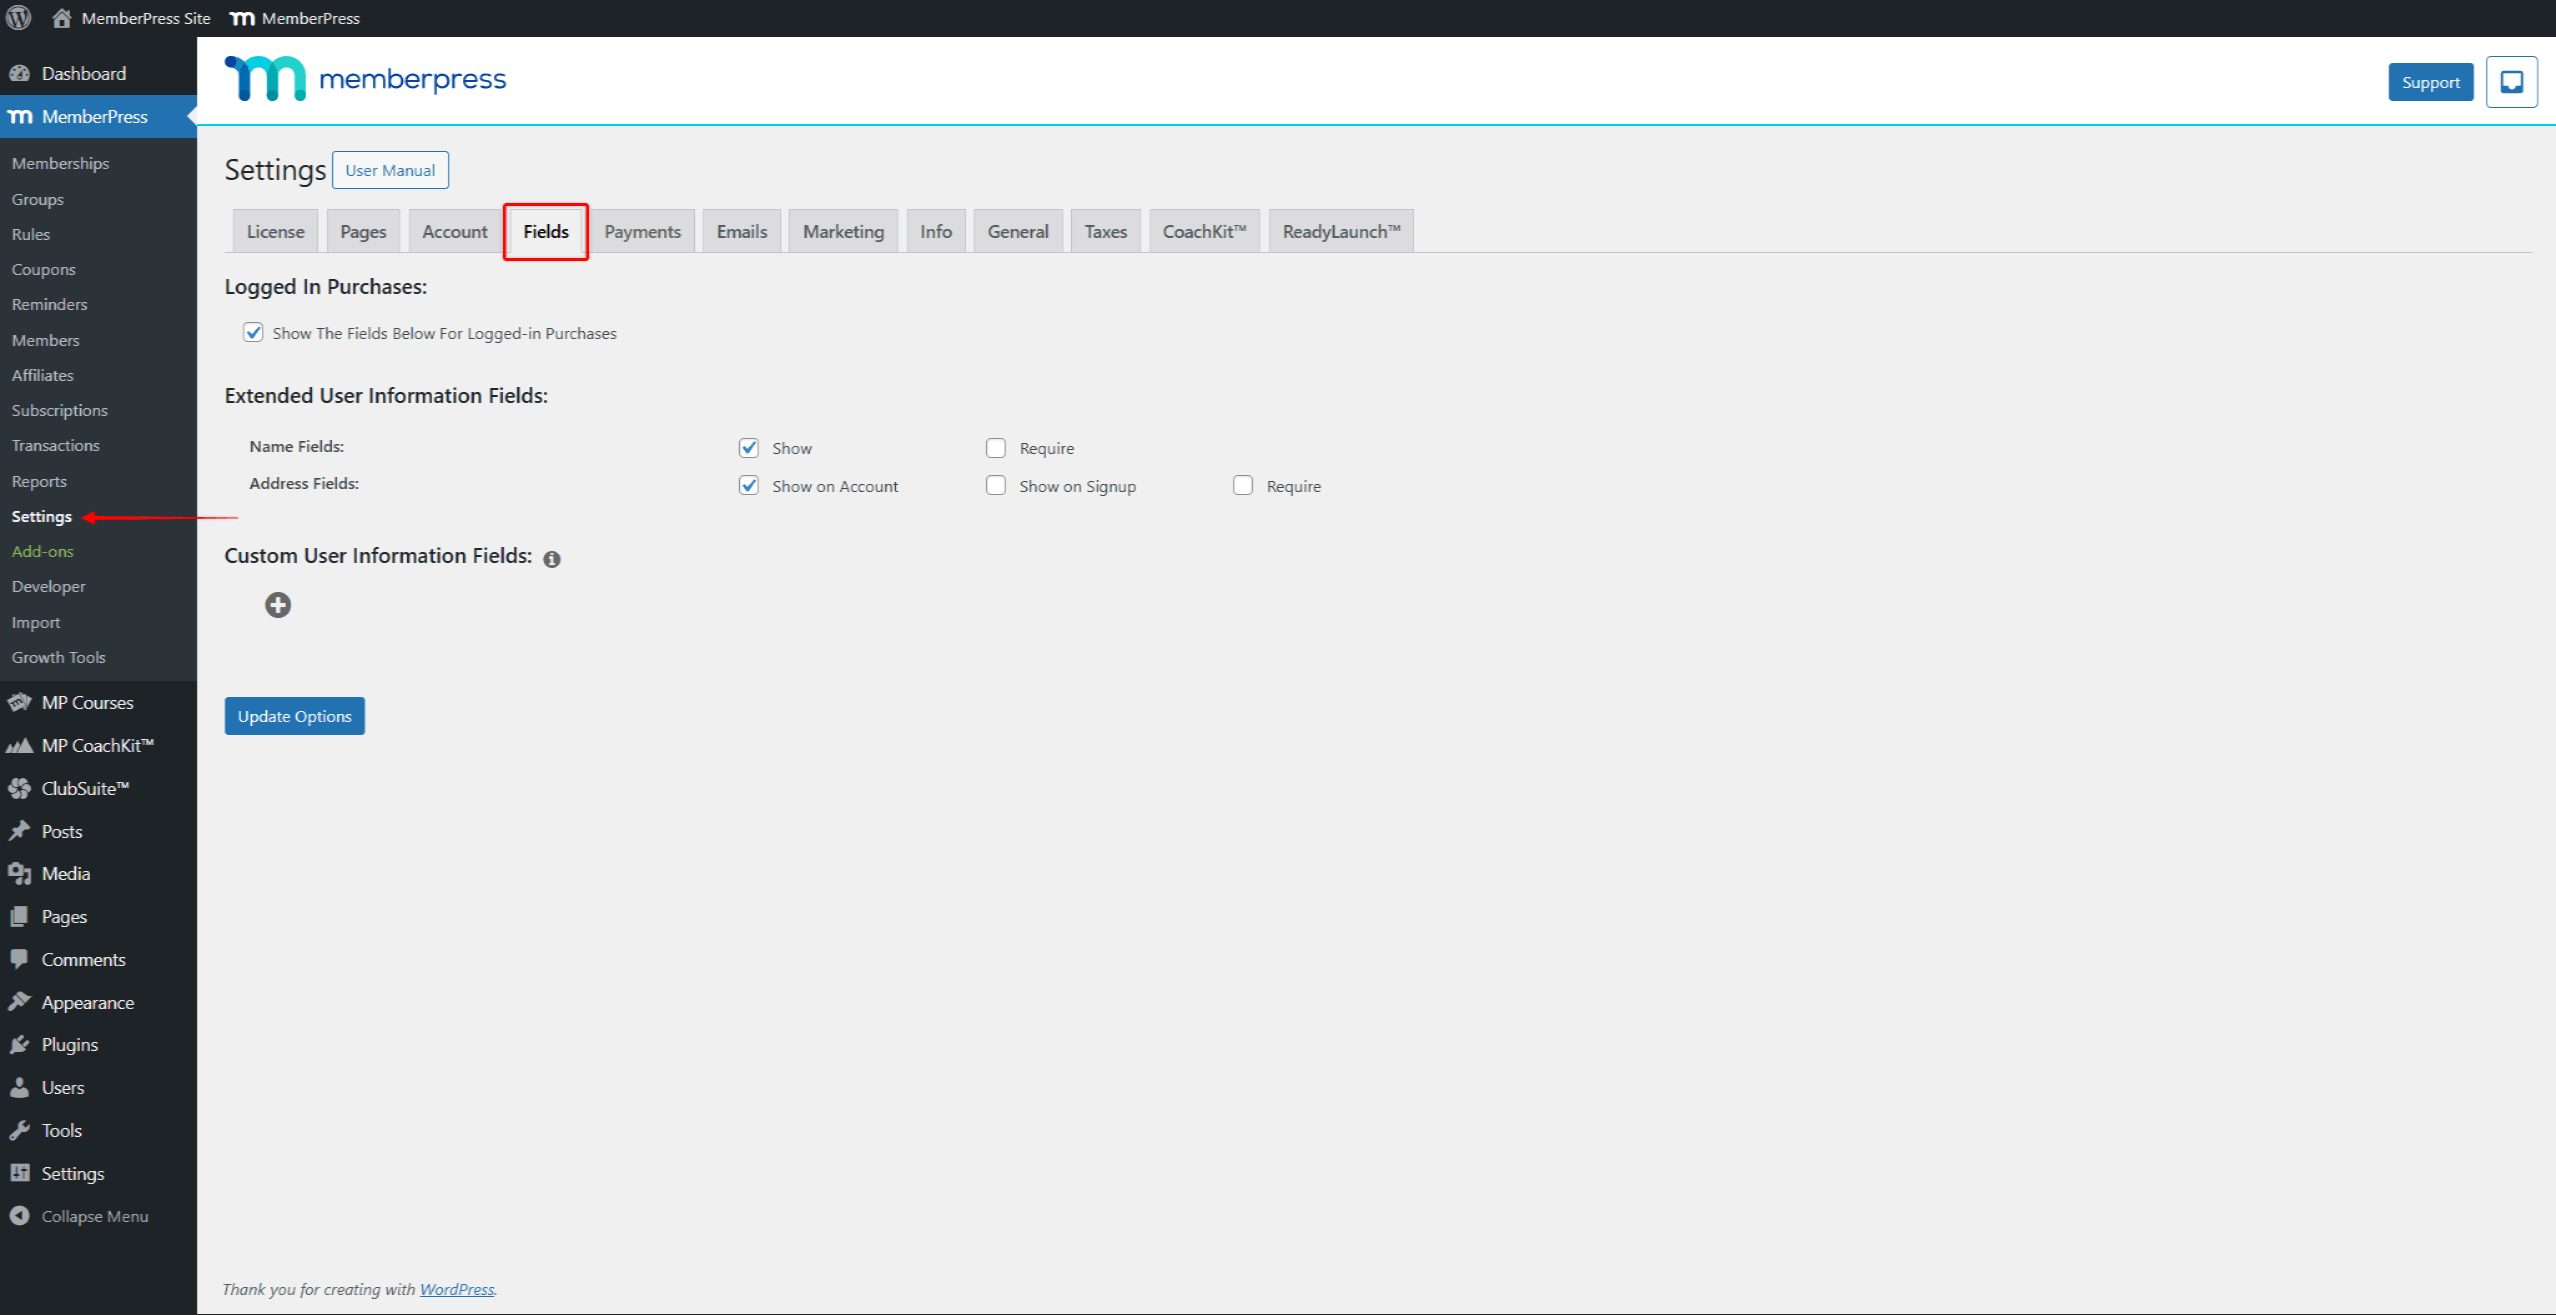
La première option que vous pouvez vérifier est de savoir si les paramètres du champ doivent être appliqués aux achats effectués par des utilisateurs existants. Désactivation de la Afficher les champs ci-dessous pour les achats connectés n'appliquera que les paramètres du champ aux nouveaux utilisateurs.
Ensuite, vous pouvez choisir d'afficher le Champs Nom et Adresse sur les pages et formulaires « Compte » et « Inscription ».
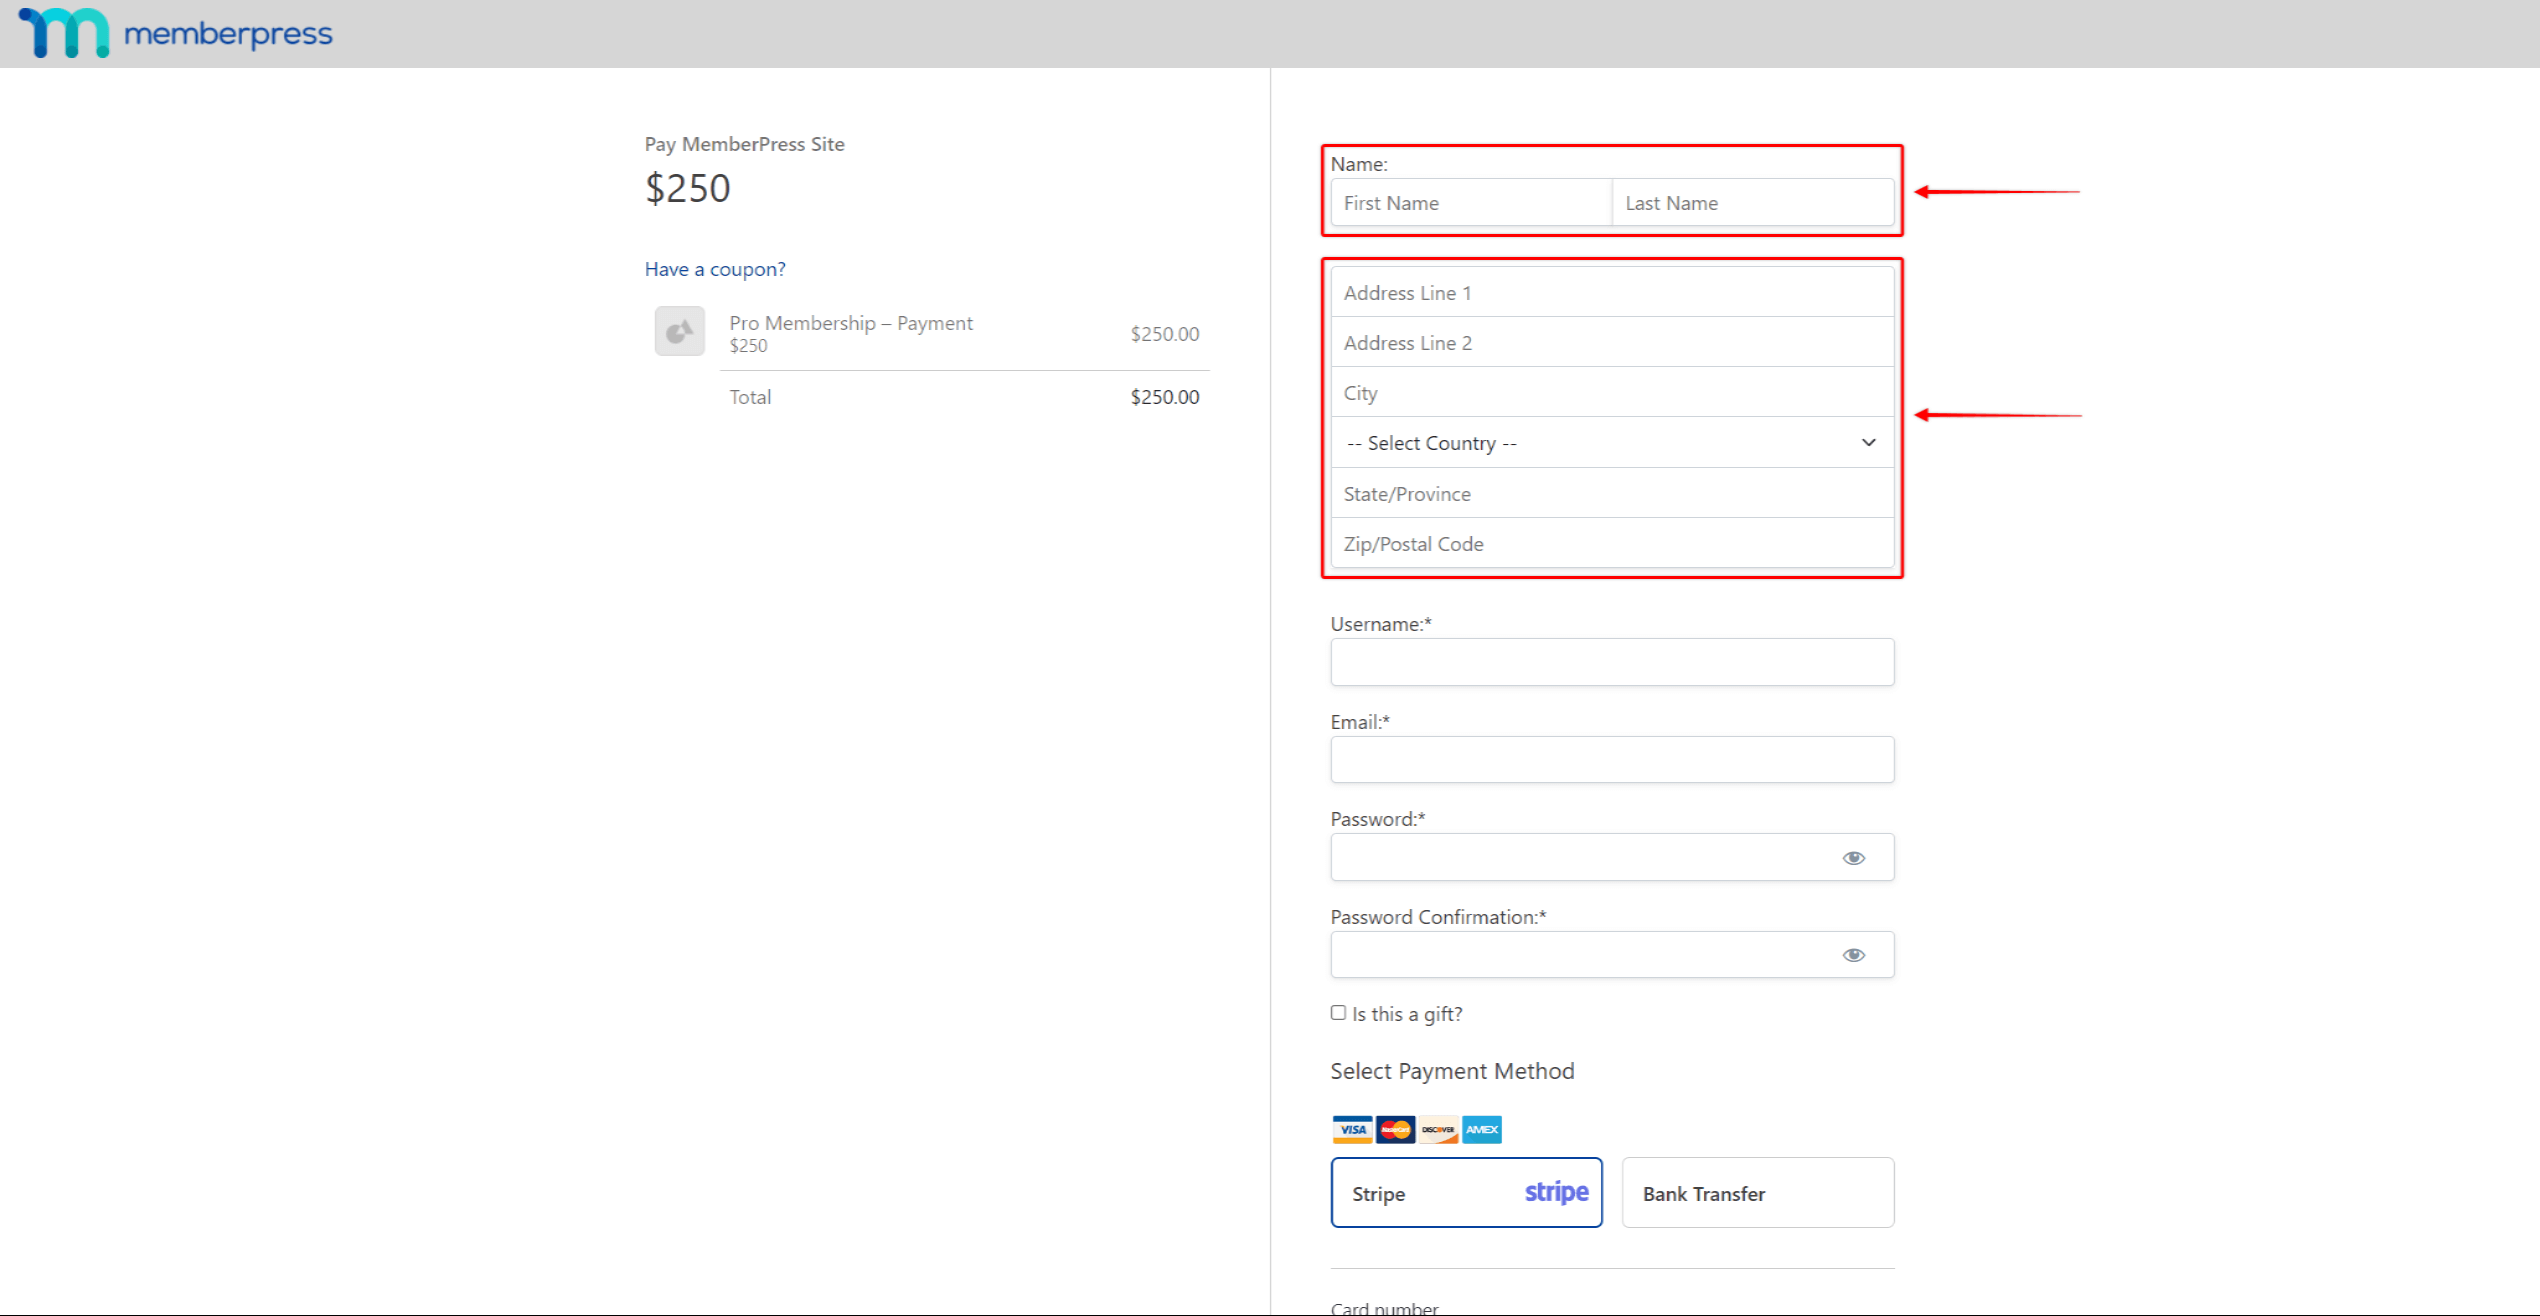
Ici, vous pouvez également définir si les champs Nom et Adresse sont obligatoires. En activant l'option Exigée Cette option empêchera les utilisateurs d'envoyer les formulaires d'inscription tant qu'ils ne les auront pas remplis.
Champs de noms
Les Champs de noms ajoutera le Prénom et Nom de famille champs à la fois au compte utilisateur et à l'inscription.
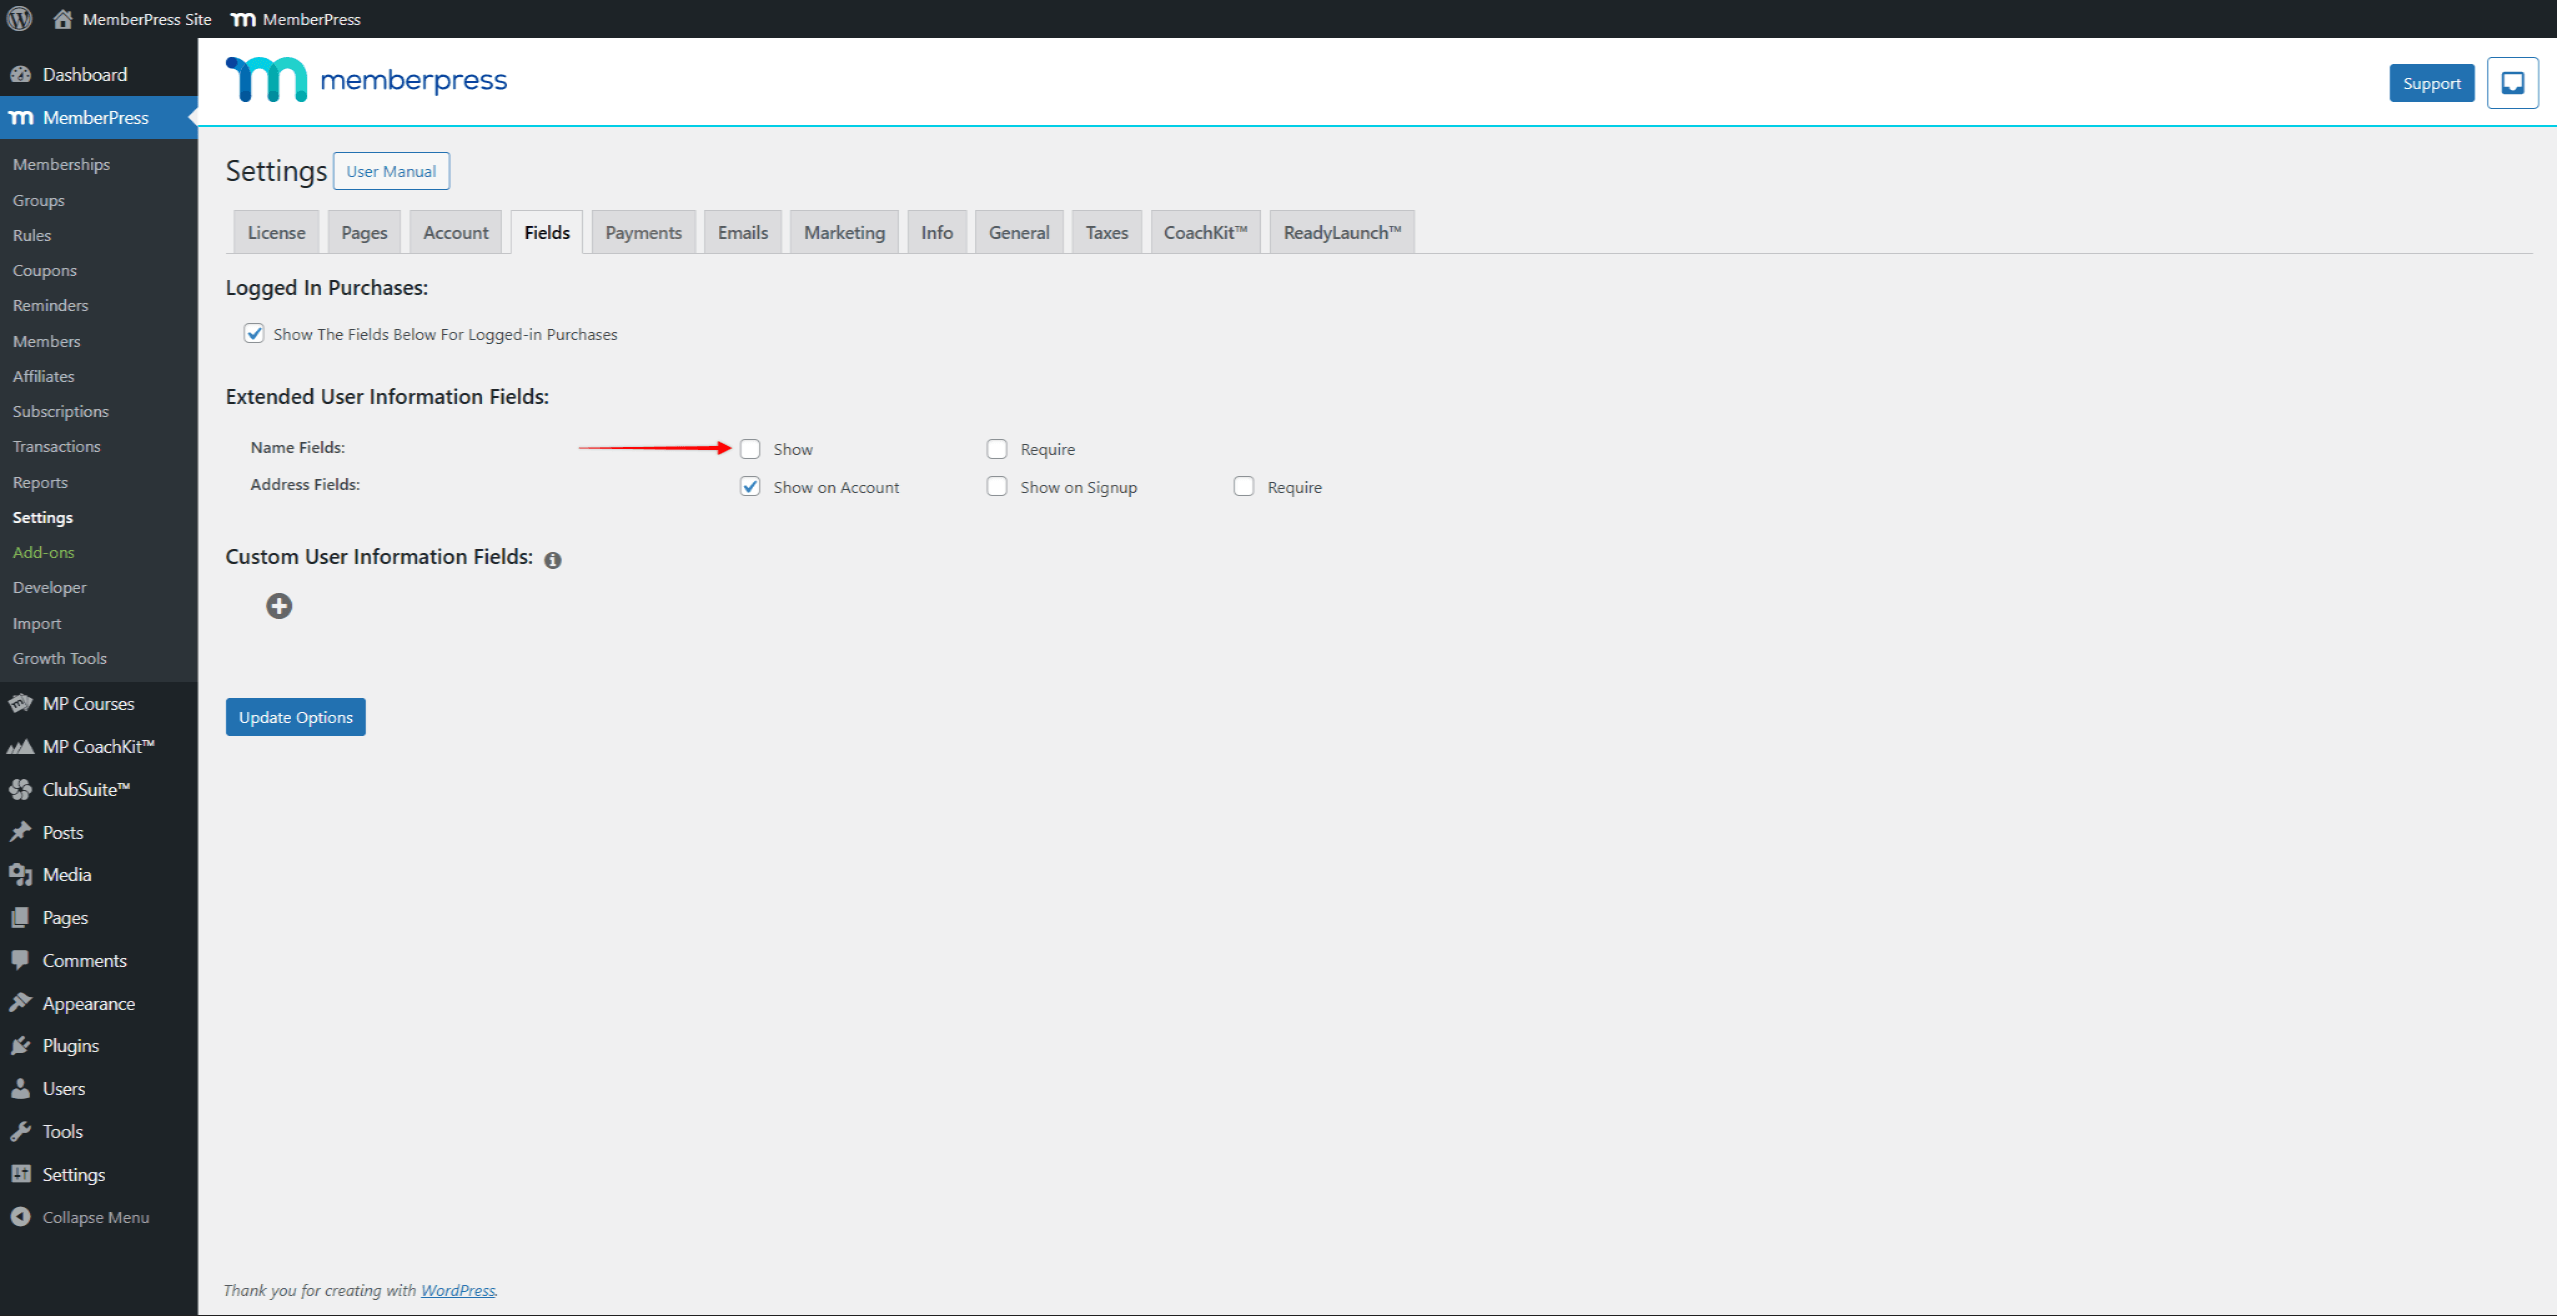
Les L'option Afficher sera activée par défaut. pour les champs Nom. Pour masquer ces champs sur les pages et formulaires Compte et Inscription, désactiver l'option Afficher.
Champs d'adresse
Til Champs d'adresse ajoutera l'adresse, la ville, le pays, le SÉtat/Province et Code postal. Vous pouvez choisir de Ajoutez les champs d'adresse uniquement à votre page Compte ou aux deux. les pages Compte et Inscription.
Par défaut, les Afficher dans le compte option pour les Champs d'adresse est activé, tandis que Afficher lors de l'inscription est handicapés. Cela les rend visible sur la page Compte et caché lors de l'inscription. Cette configuration permet aux utilisateurs de s'inscrire plus rapidement en remplissant moins de champs lors de l'achat d'abonnements. Ils peuvent ensuite saisir leurs coordonnées sur la page Compte.
Pour Activer les champs d'adresse sur vos pages d'inscription, suivez les étapes suivantes :
- Naviguez jusqu'à Tableau de bord > MemberPress > Paramètres > Onglet Champs.
- Faites défiler jusqu'aux champs d'adresse et cochez la case Afficher lors de l'inscription case à cocher.
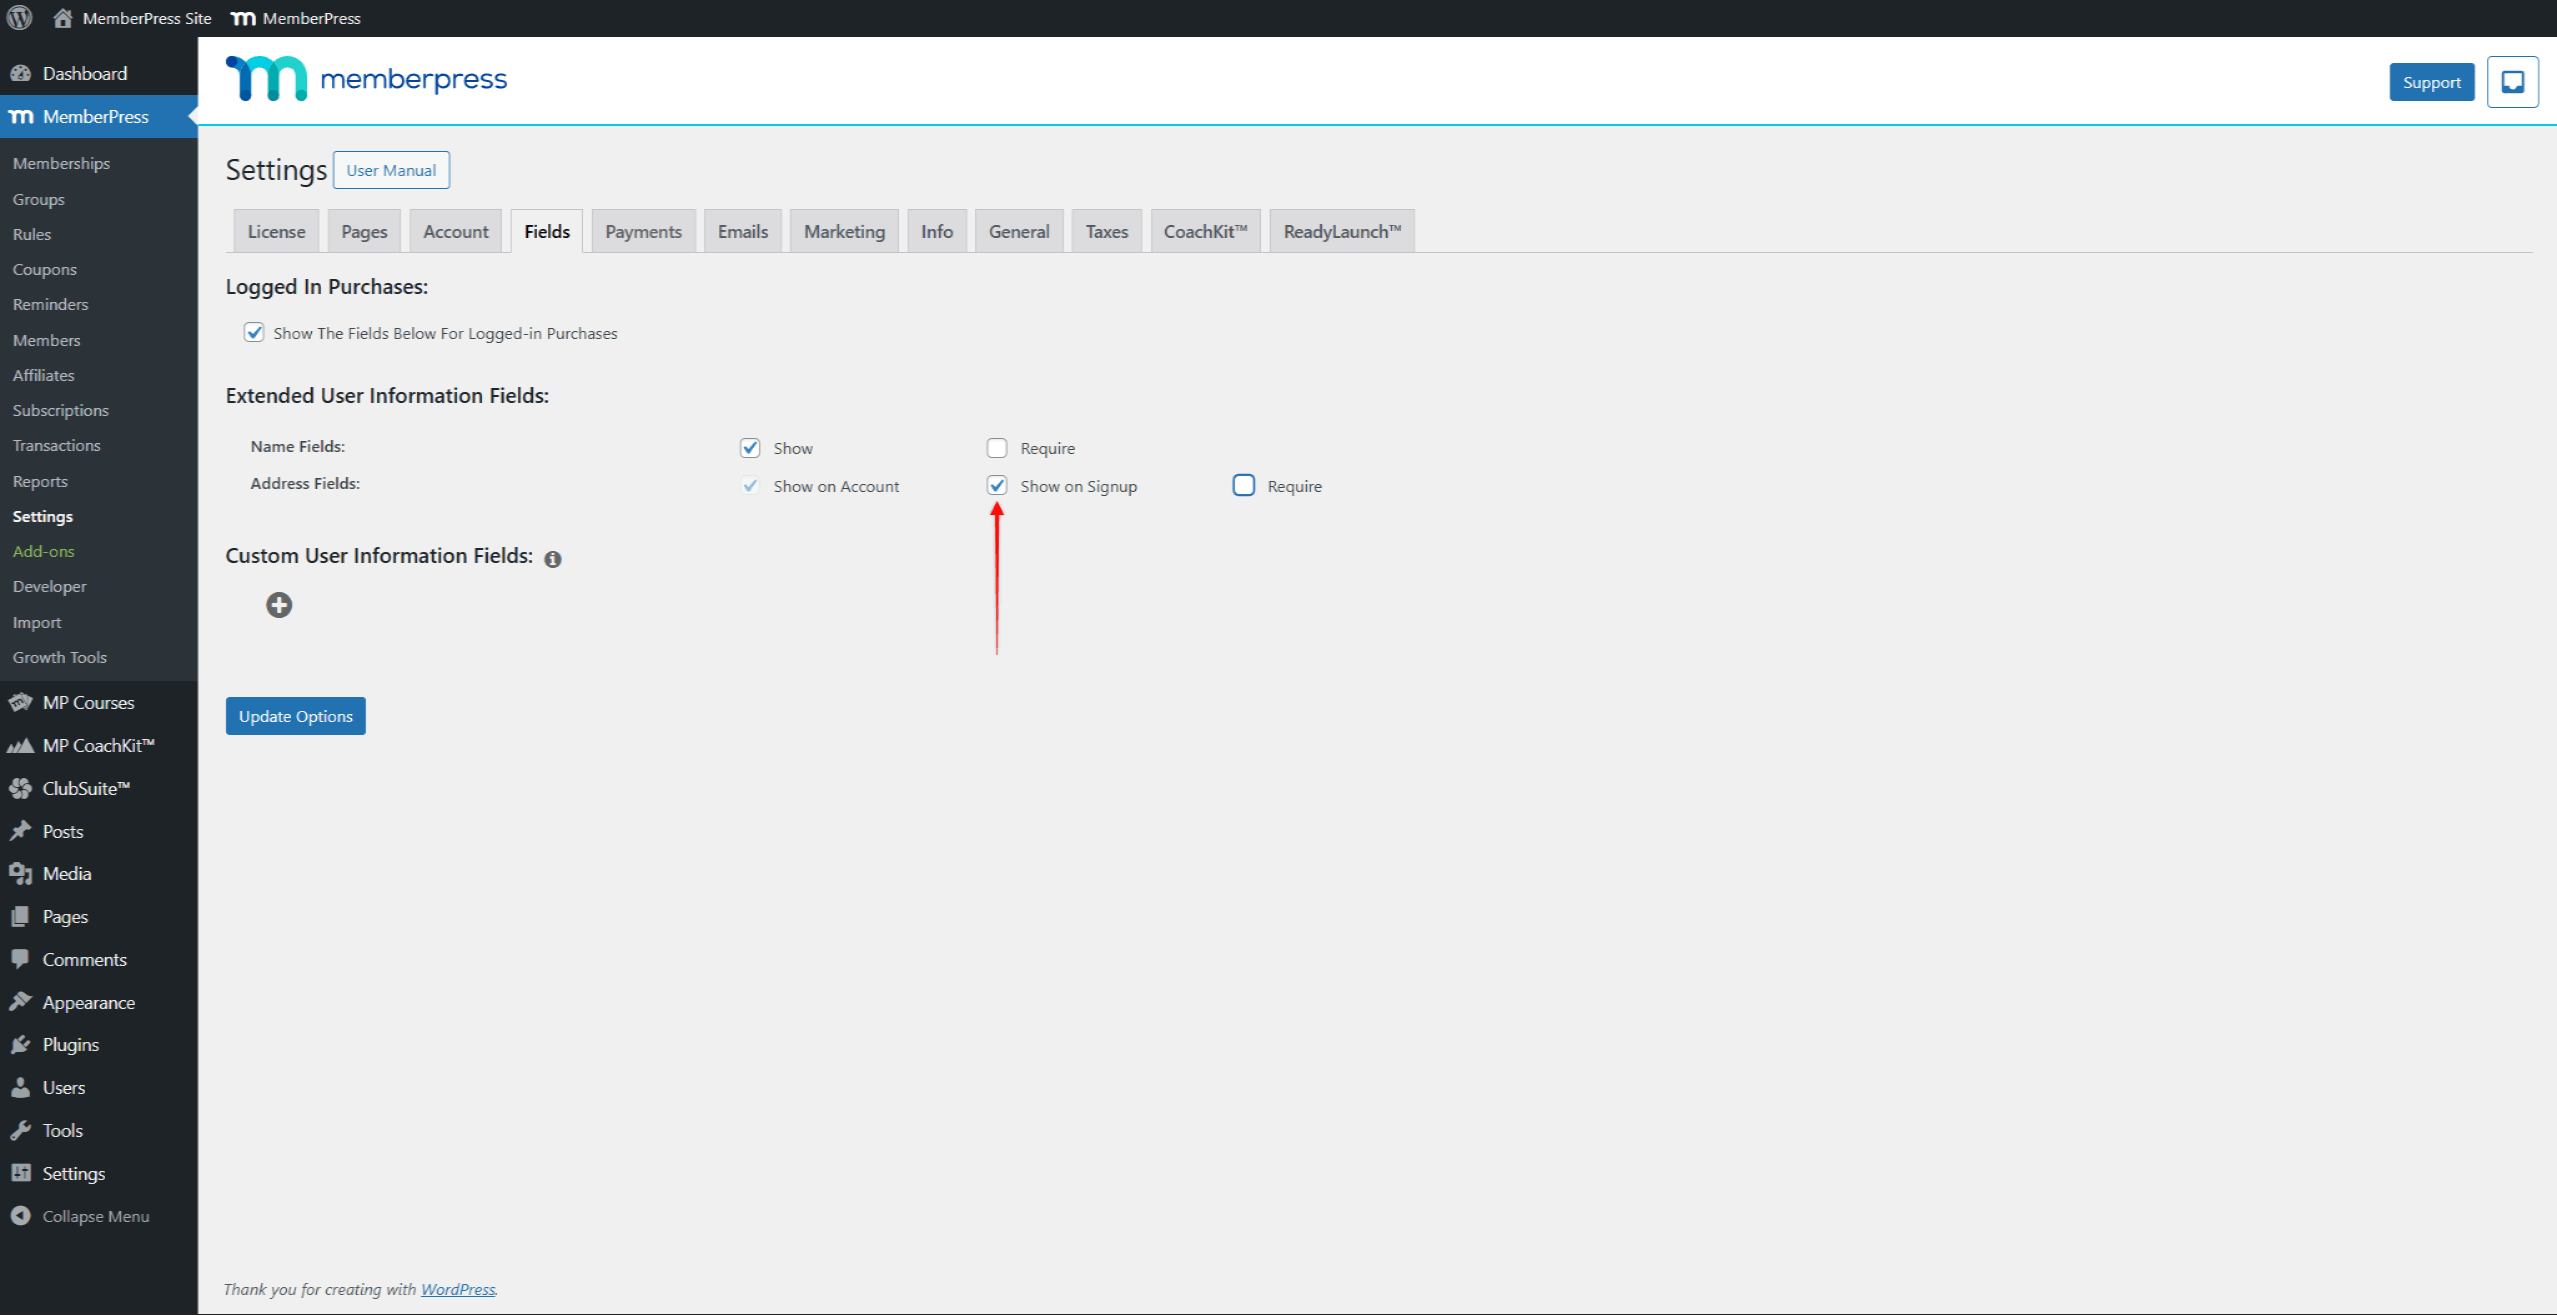
- Cliquez sur le bouton Options de mise à jour pour appliquer les modifications.
De plus, vous pouvez masquer complètement les champs d'adresse en décochant les deux cases Afficher dans le compte et Afficher lors de l'inscription options.
Création de champs personnalisés
Sur le site Domaines page, dans la section Champs d'informations utilisateur personnalisés, vous pouvez ajouter vos champs personnalisés :
- Cliquez sur l'icône + icône pour ajouter un nouveau champ personnalisé. Cela ouvrira le formulaire du champ.
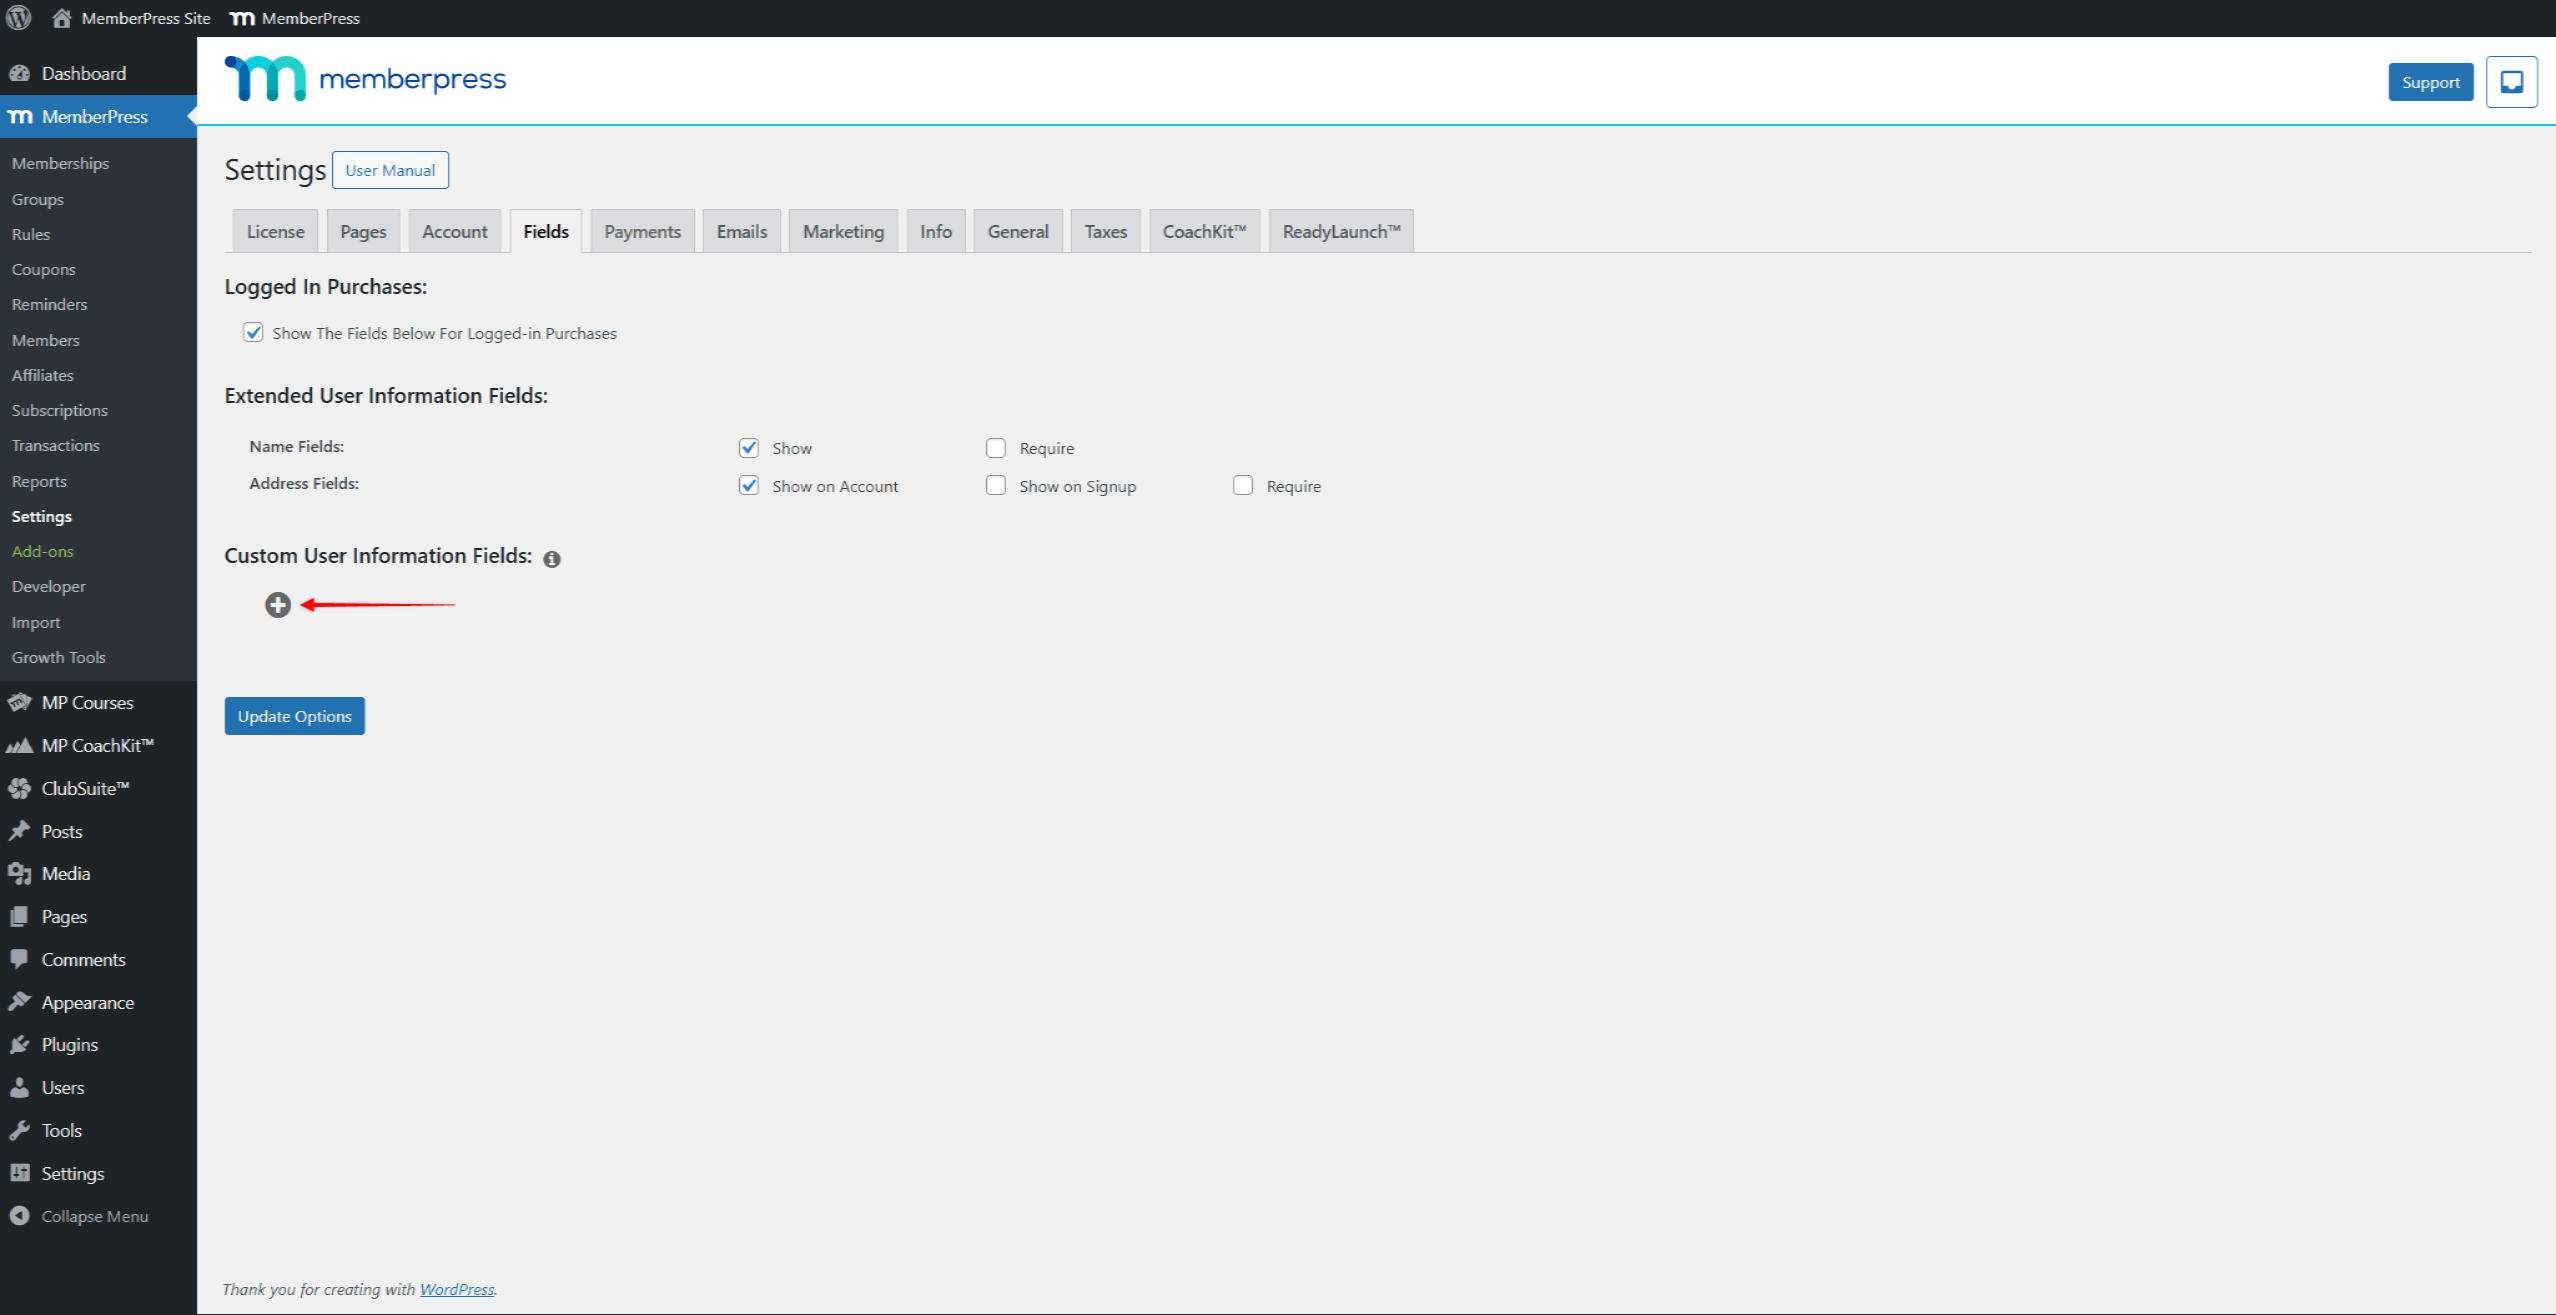
- Commencez par donner un nom à votre domaine. Ce champ Nom sera utilisé comme étiquette pour ce champ dans vos formulaires.
- Ensuite, vous devez choisir le Type du champ. Selon le type que vous choisissez, des options supplémentaires spécifiques à ce type apparaîtront.
- Les Valeur(s) par défaut Le champ doit contenir la valeur qui doit être chargée par défaut.
- Comme pour les champs Adresse, vous pouvez spécifier où votre champ personnalisé sera affiché. En activant le Afficher lors de l'inscription option affiche votre champ personnalisé sur les formulaires d'inscription. De plus, en sélectionnant l'option Afficher dans le compte L'option affiche le champ dans le formulaire du compte.
- Sélection de la Exigée Cette option empêchera l'inscription des utilisateurs tant que ce champ personnalisé n'aura pas été rempli..
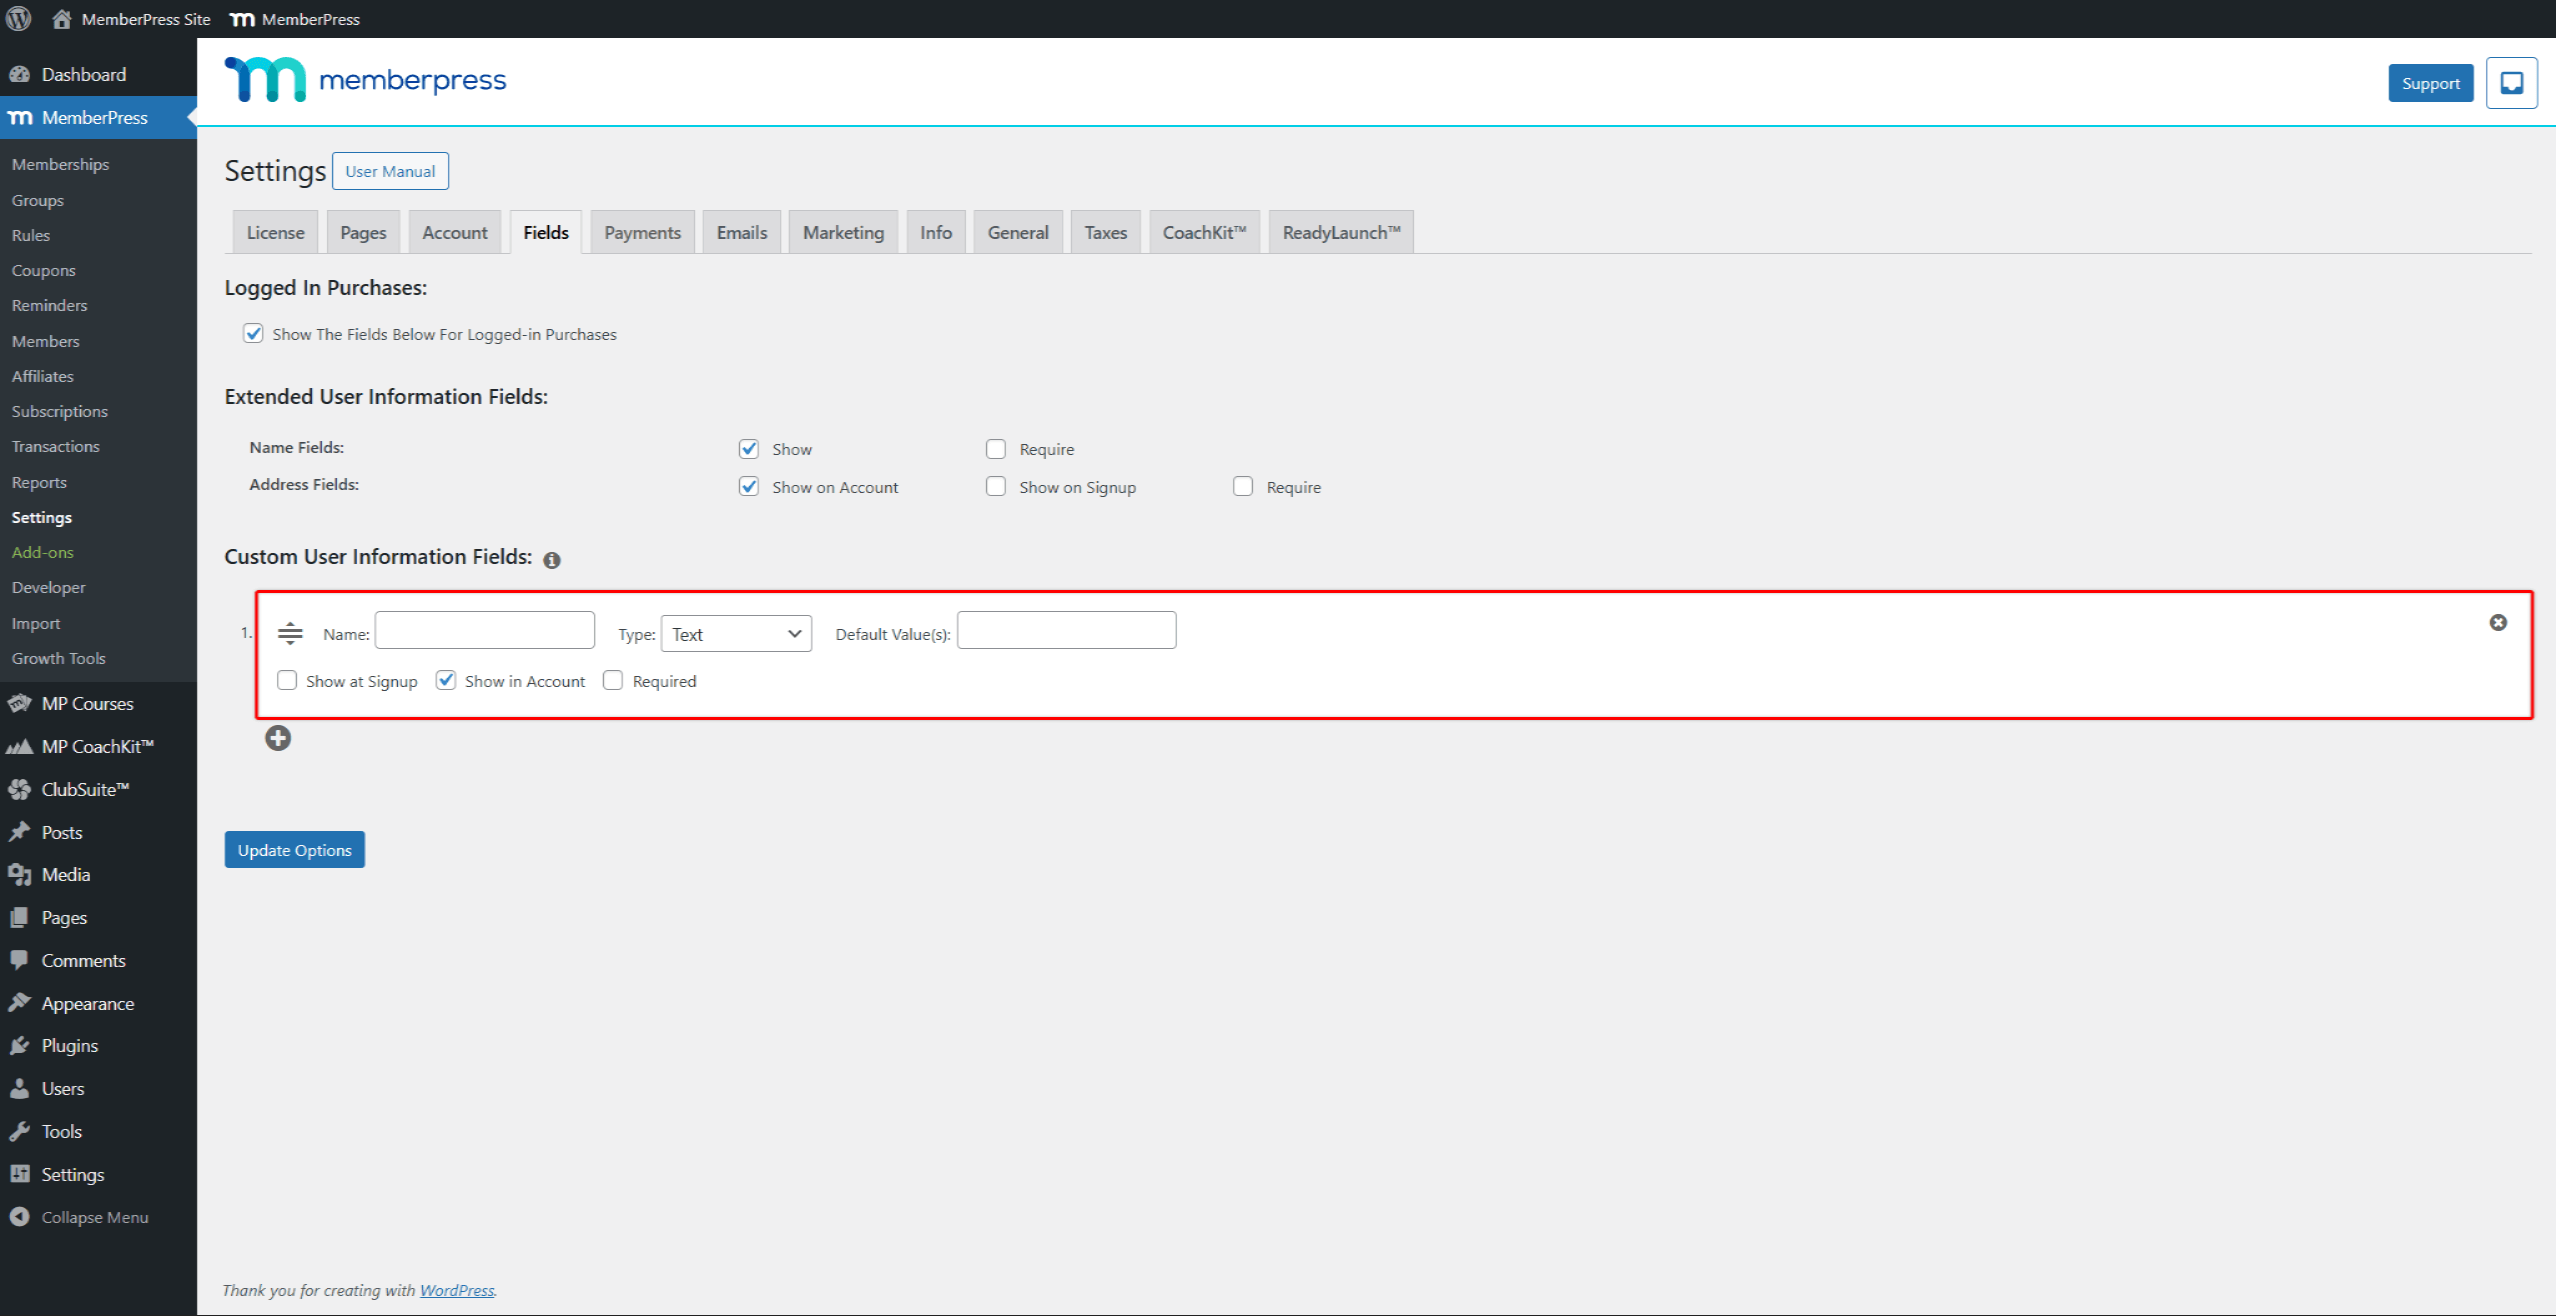
- Cliquez sur le bouton Options de mise à jour pour enregistrer le champ.
Vous pouvez créer un nombre illimité de champs personnalisés MemberPress que vos membres pourront remplir.
En outre, dans les paramètres de chaque adhésion, vous pouvez choisir d'afficher ou de masquer des champs spécifiques. Par défaut, tous les champs personnalisés définis comme Afficher lors de l'inscription wsera affiché sur les formulaires d'inscription de toutes les adhésions.
Cela vous permettra de n'afficher que les champs dont vous avez besoin sur les formulaires d'inscription pour chaque membre.
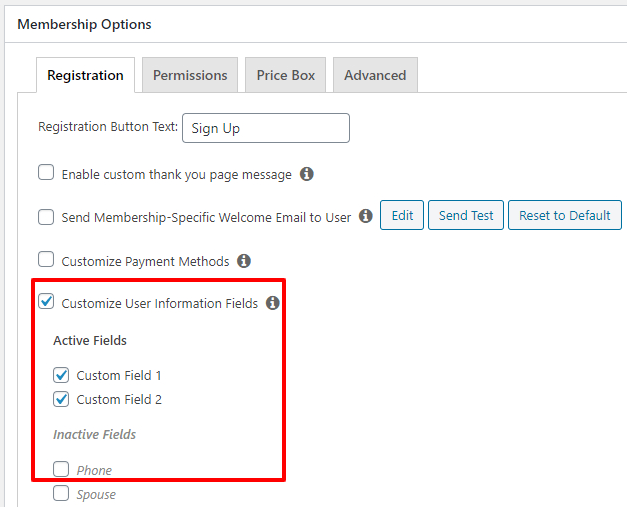
Champs personnalisés définis comme Afficher dans le compte sera visible dans les comptes des utilisateurs qu'après s'être inscrit pour devenir membre.
Création d'une option vierge par défaut pour un champ personnalisé de type liste déroulante
Pour ajouter une option "vide", ajoutez ce qui suit comme première option :
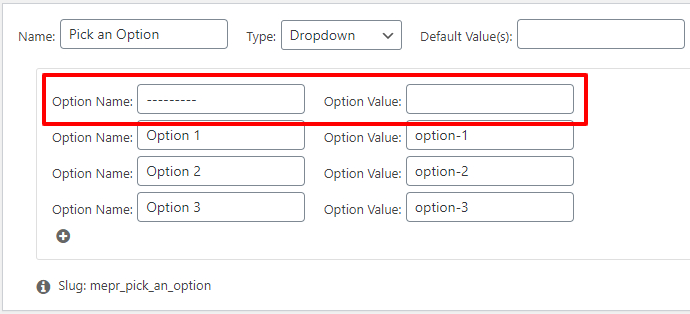
Ainsi, lorsque vos utilisateurs ne parviennent pas à sélectionner une option, MemberPress ne leur permet pas de soumettre le formulaire et affiche cette erreur :

Création d'une case à cocher cliquable
Pour créer un champ personnalisé avec case à cocher cliquable, il suffit d'ajouter quelques éléments html de base au nom du champ lors de sa création. Voici un exemple :
<a href='https://www.yoursite.com/special-policies' target='_blank'>Veuillez accepter nos politiques spéciales</a>

qui apparaîtra comme suit sur la page d'enregistrement :

Activation de plusieurs options "cochées" pour les champs personnalisés à sélection multiple et les cases à cocher
MemberPress vous permet de saisir une option par défaut à sélectionner ou à cocher pour les types de champs personnalisés Multi-Select et Checkboxes à l'aide de l'option
Valeur(s) par défaut pour le champ et saisir la valeur de l'option comme indiqué ici :

Pour que plusieurs options soient cochées, il suffit de séparer les champs
Valeur de l'optioninscrits dans la base de données des Valeur(s) par défaut comme indiqué ici (séparées par des virgules, sans espace entre les entrées) :

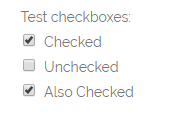
Voici à quoi cela ressemblerait sur votre page d'inscription :
