Os formulários de conta e registro do MemberPress têm um conjunto padrão de campos. Nas configurações do MemberPress, você pode ativar e desativar alguns campos padrão do MemberPress e adicionar seus campos personalizados.
Este documento explica como gerenciar campos MemberPress e criar campos personalizados para formulários de registro e conta.
Gerenciando campos MemberPress
As opções de campo do MemberPress estão disponíveis em Painel de controle > MemberPress > Configurações > Guia Campos. Aqui, você encontrará várias opções para gerenciar os campos padrão.
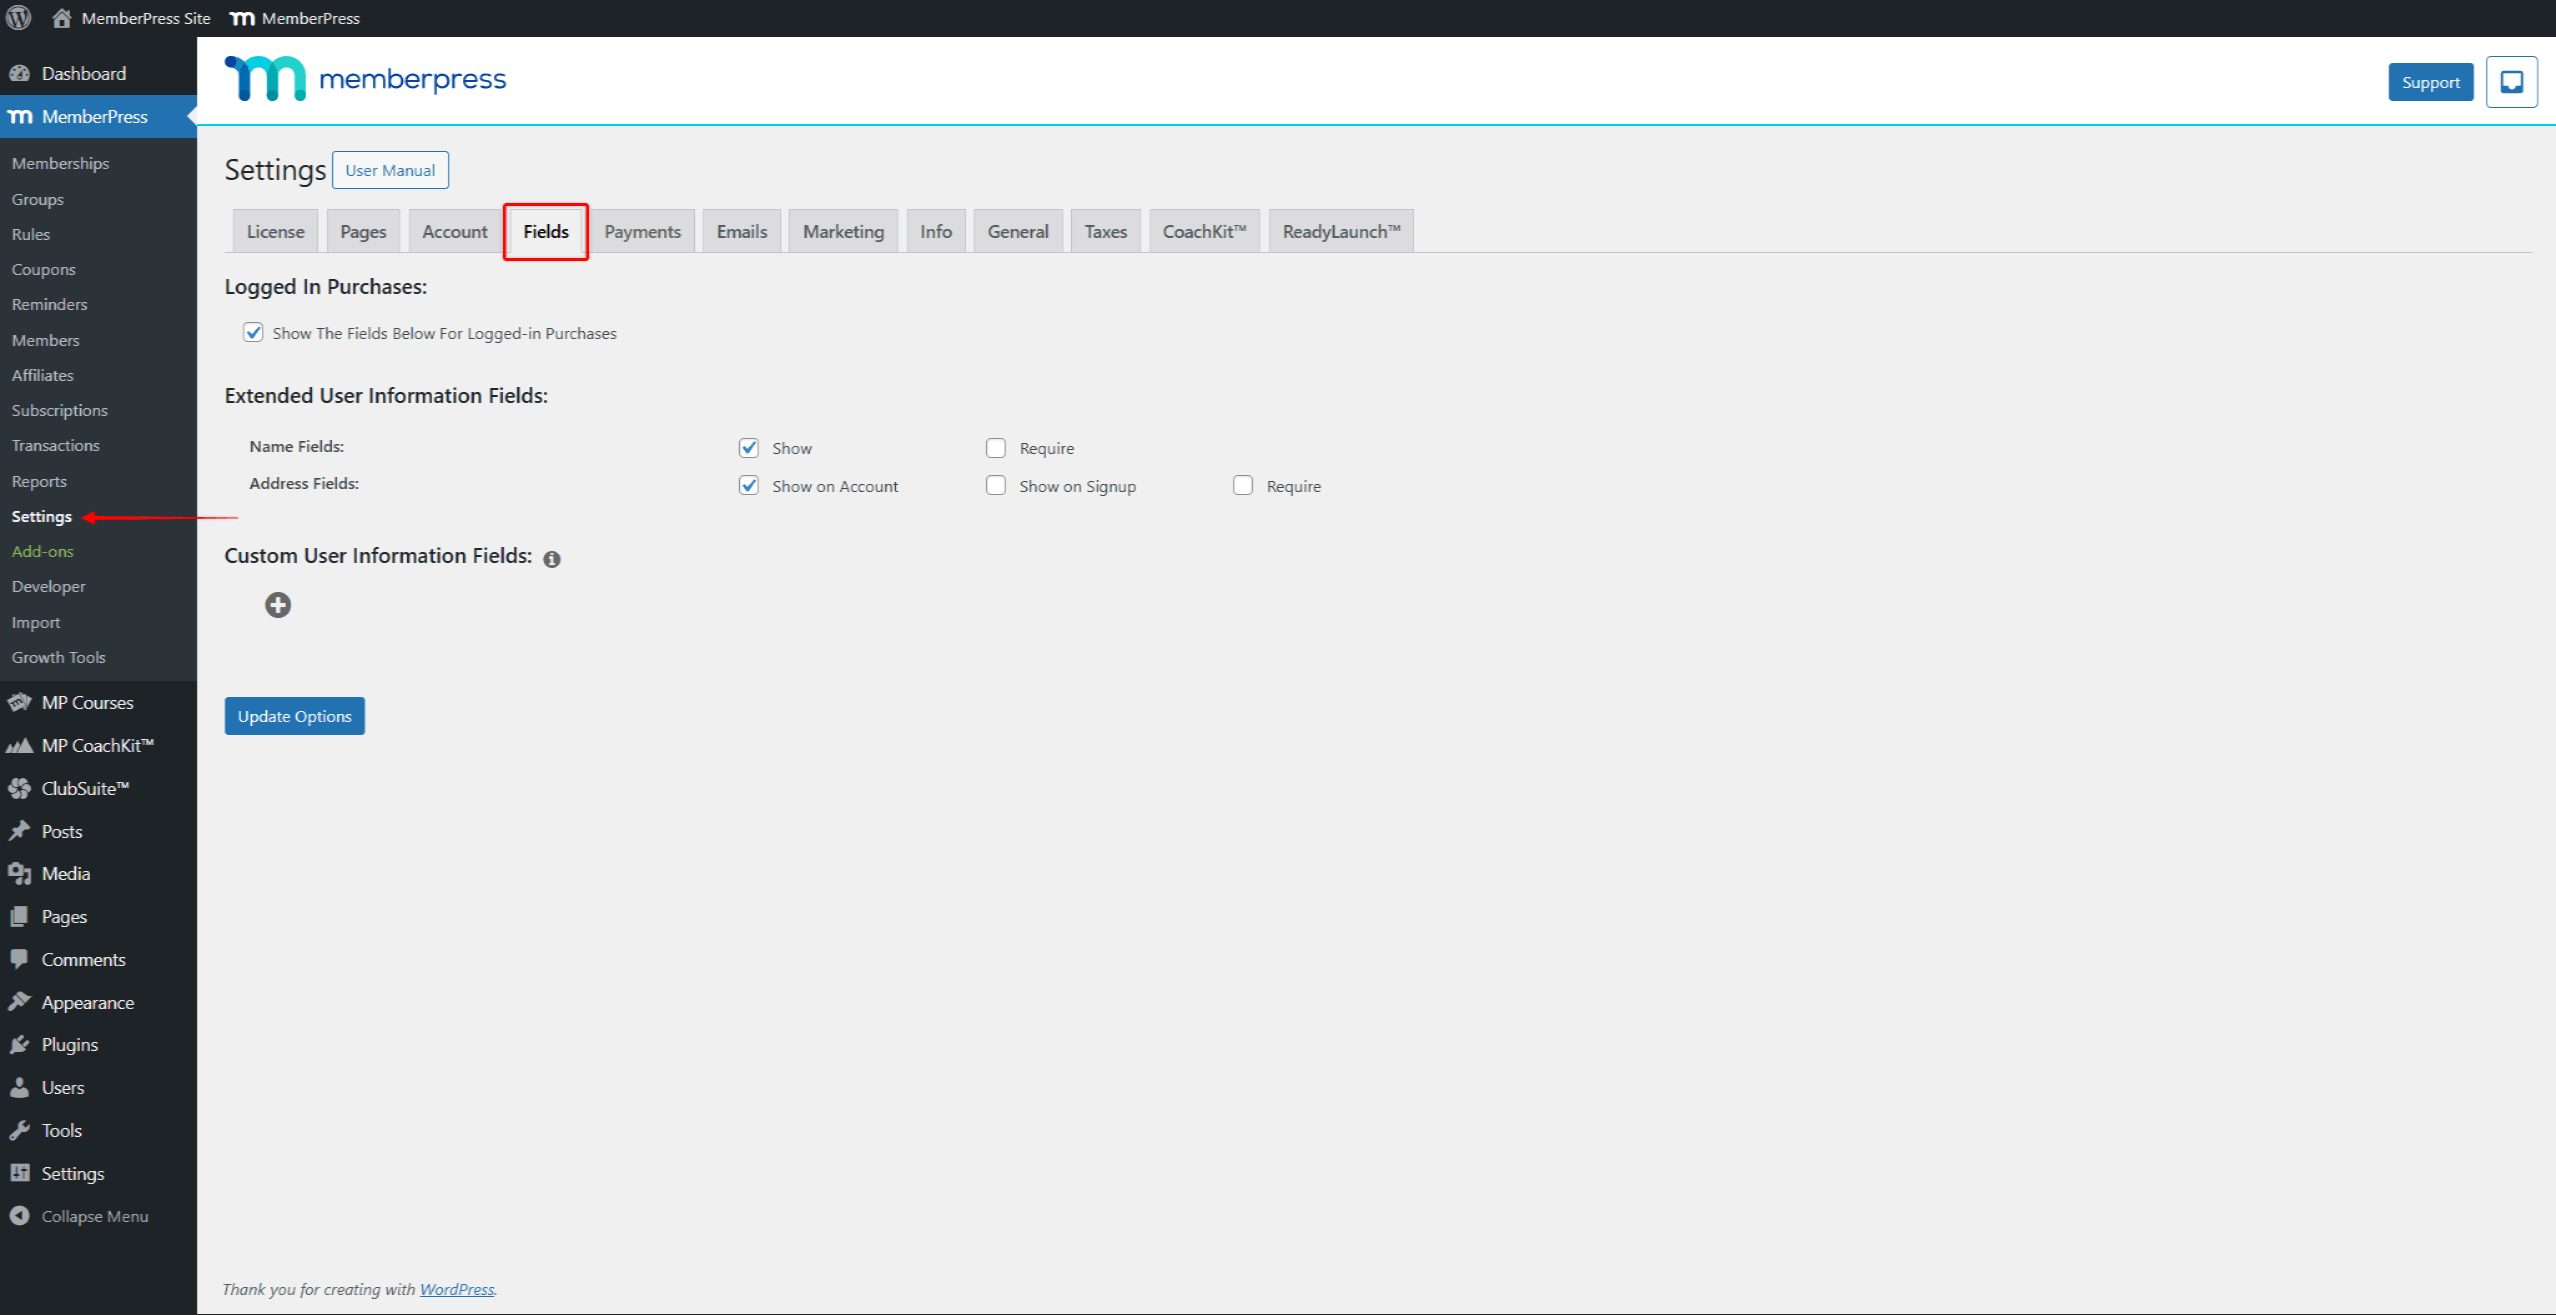
A primeira opção que você pode verificar é se as configurações de campo devem ser aplicadas às compras feitas por usuários existentes. Desativando o Mostrar os campos abaixo para compras registradas somente aplicará as configurações de campo para novos usuários.
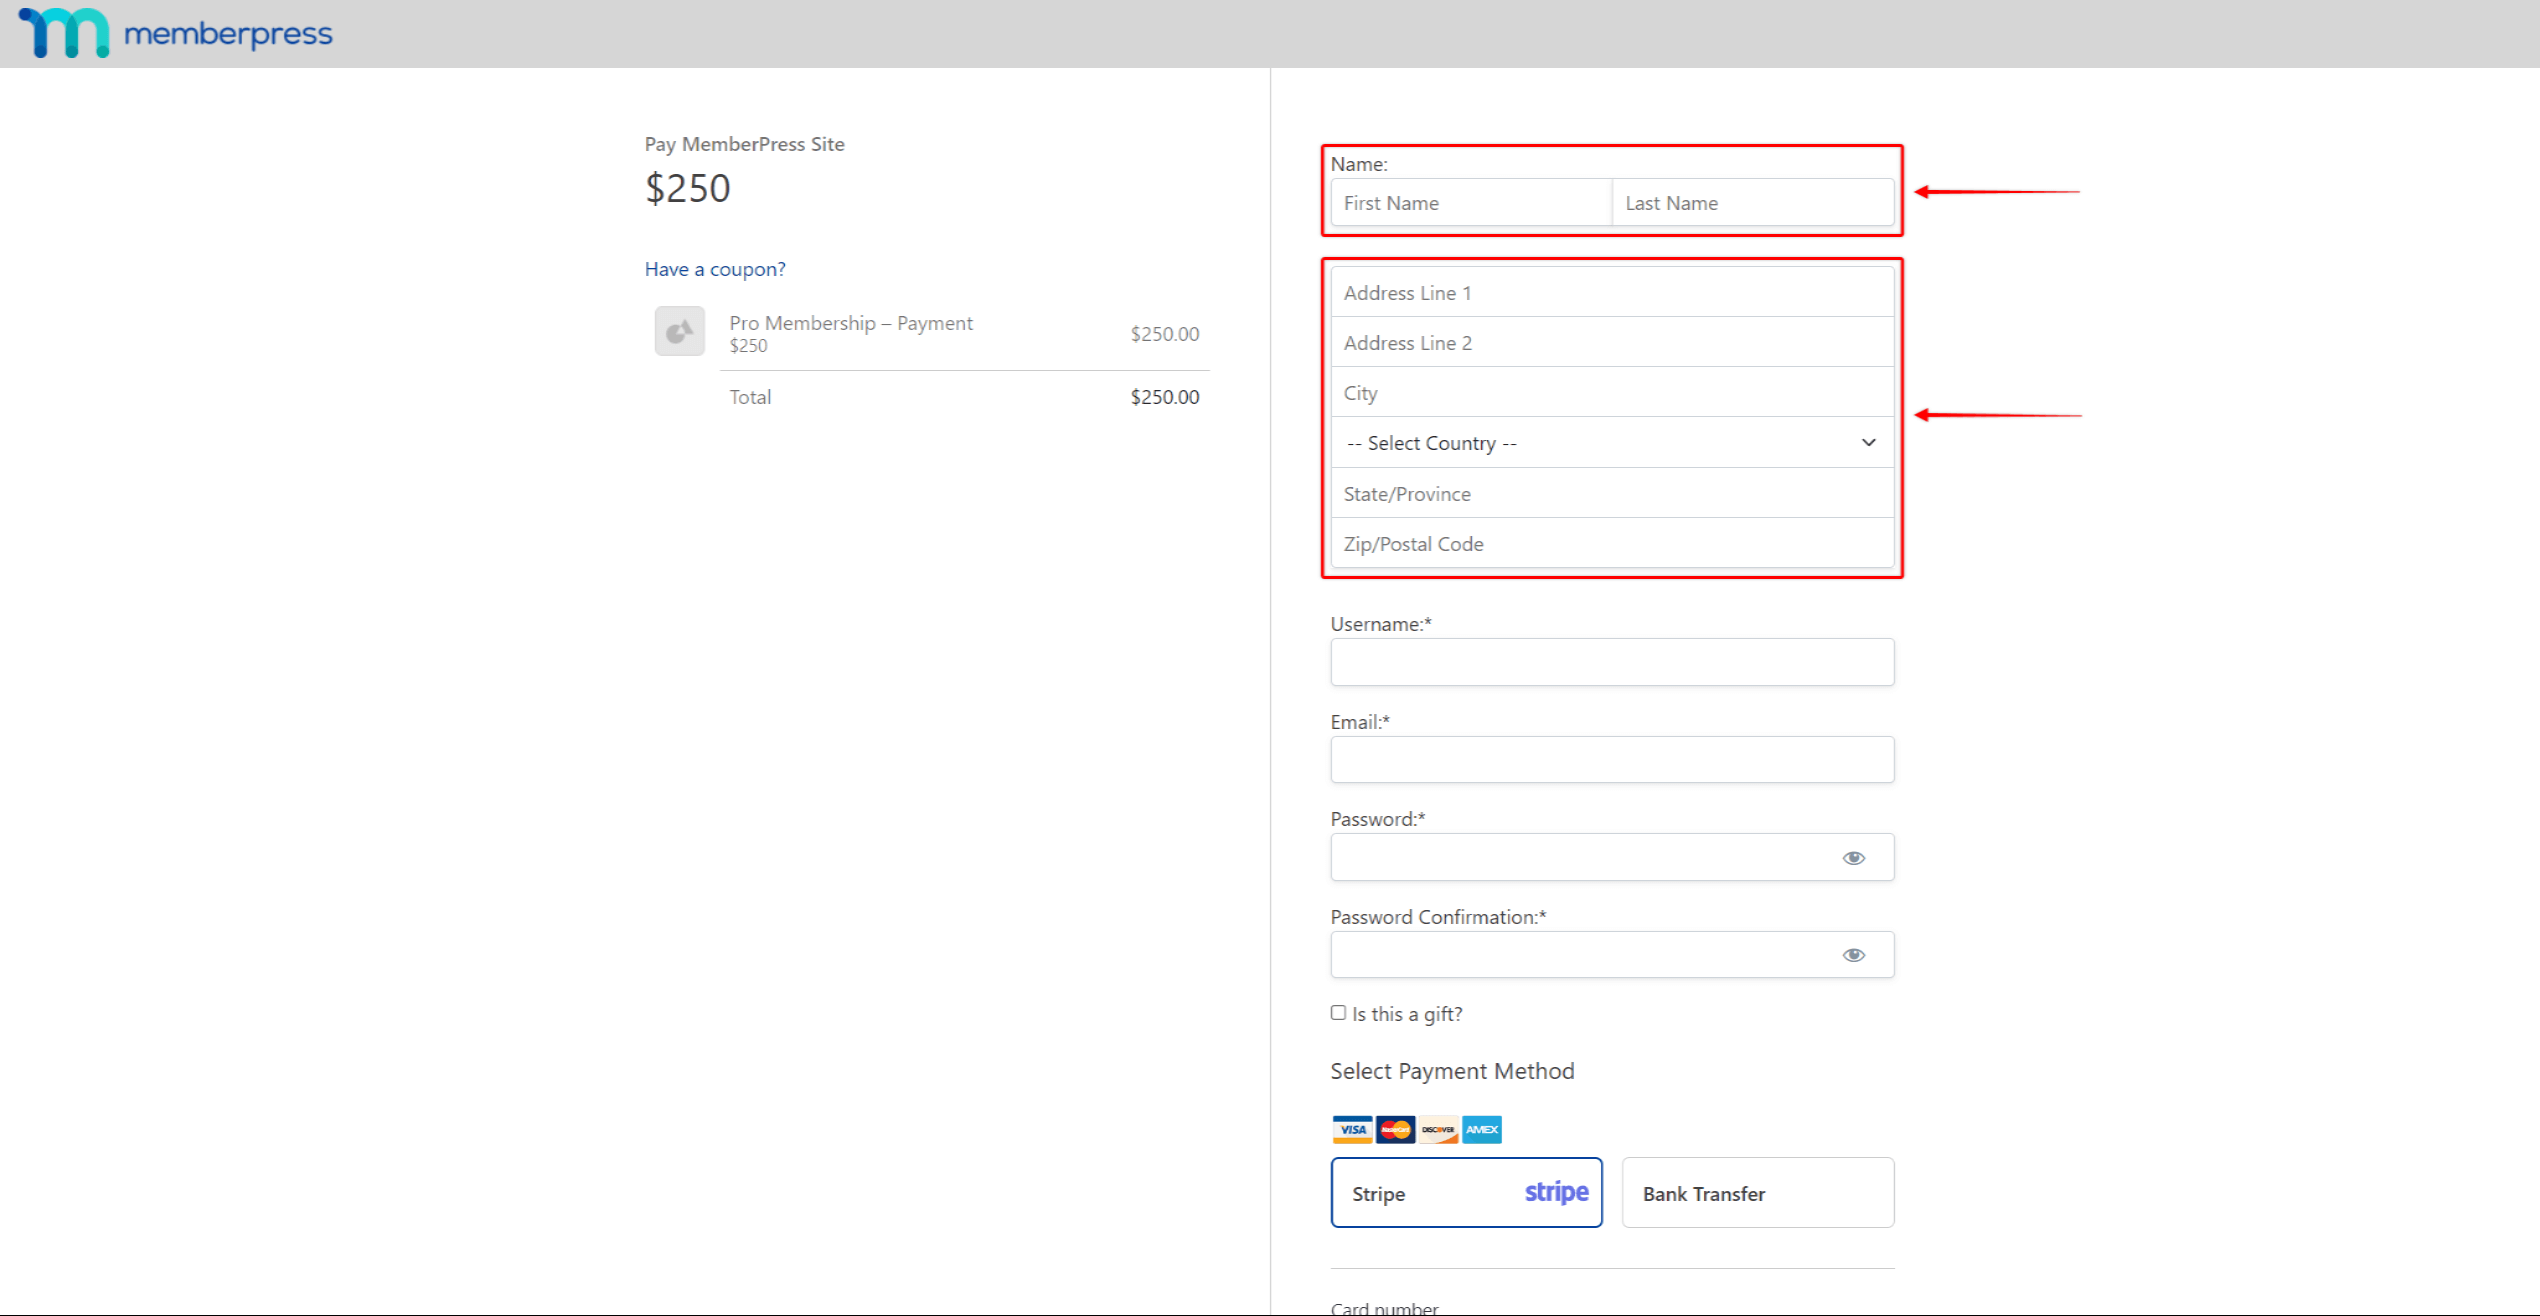
Em seguida, você pode optar por mostrar o Campos Nome e Endereço nas páginas e formulários de Conta e Registro.
Aqui, você também pode definir se os campos Nome e Endereço são obrigatórios. Ativando o Necessário A opção impedirá que os usuários enviem formulários de registro, a menos que os preencham.
Campos de nome
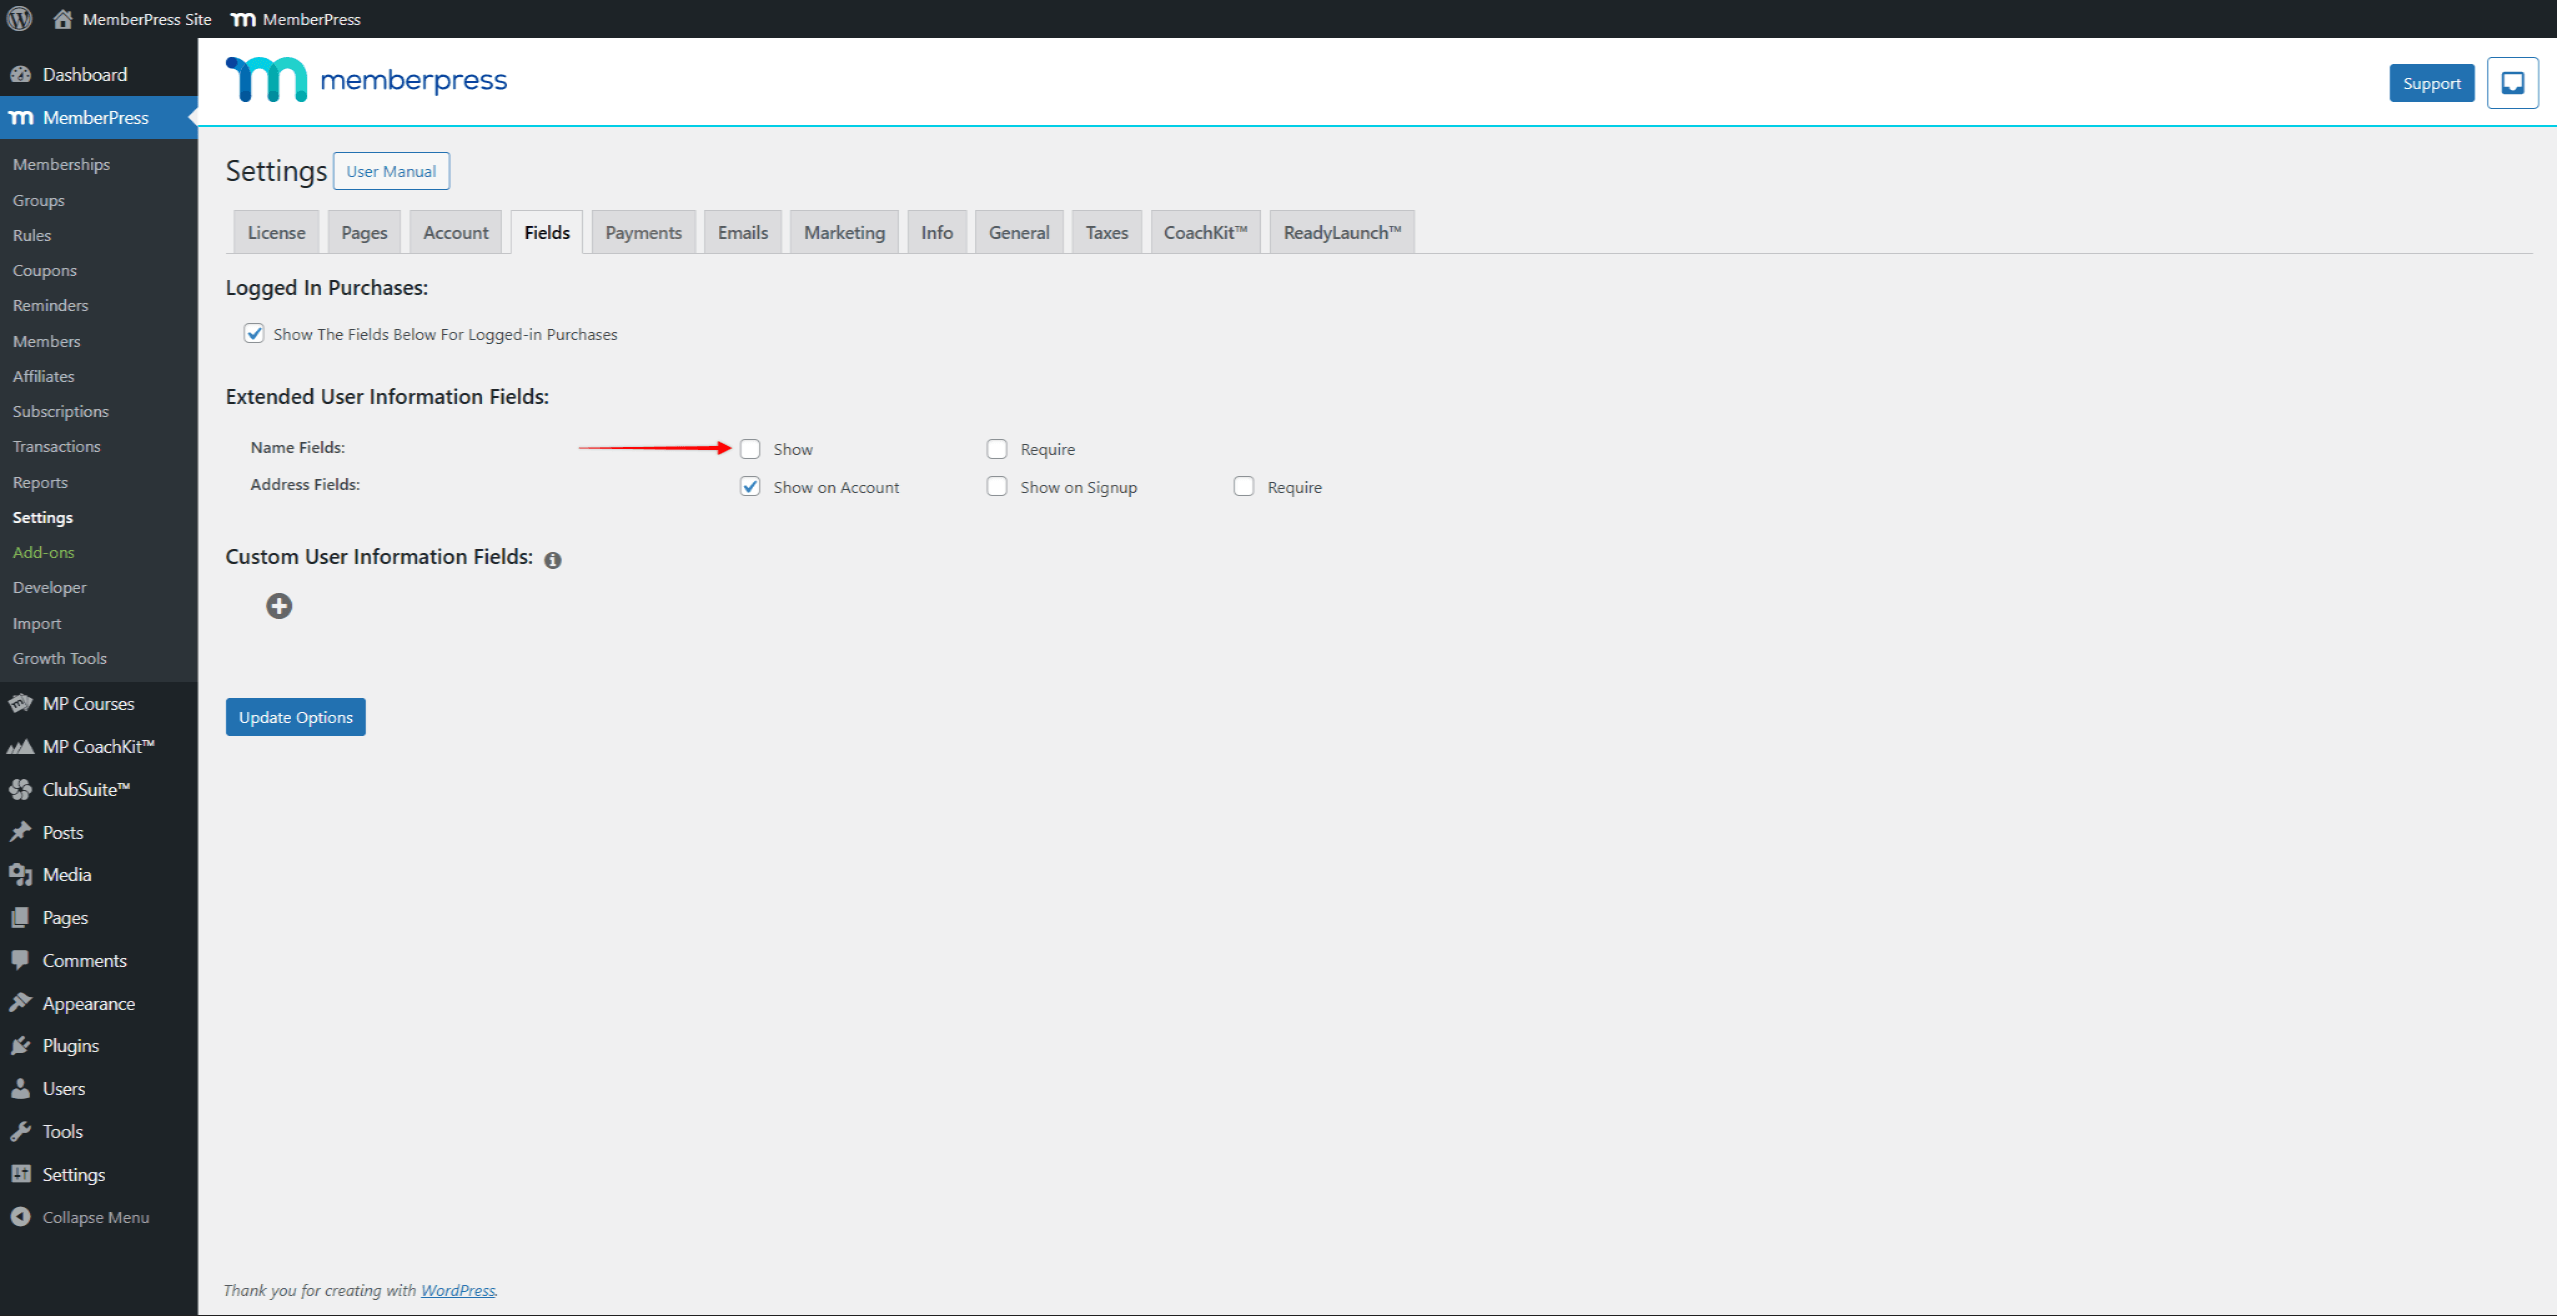
O Campos de nome adicionará o Primeiro nome e Sobrenome campos para a conta do usuário e para o registro.
O A opção Mostrar será ativada por padrão. para os campos Nome. Para ocultar esses campos nas páginas e formulários de Conta e Registro, desativar a opção Mostrar.
Campos de endereço
Tele Campos de endereço adicionará os campos Address, City, Country, Scampos Estado/Província e CEP/Código Postal. Você pode escolher Adicione campos de endereço apenas à sua página de conta ou a ambas. as páginas Conta e Registro.
Por padrão, o Mostrar na conta opção para Campos de endereço está ativado, enquanto Mostrar na inscrição é desativados. Isso faz com que eles visível na página Conta e oculto no Registro. Essa configuração permite que os usuários se registrem mais rapidamente, com menos campos para preencher ao adquirir assinaturas. Eles podem então inserir seus dados de endereço na página da conta.
Para Habilite os campos de endereço nas suas páginas de registroSiga estas etapas:
- Navegue até Painel de controle > MemberPress > Configurações > Guia Campos.
- Role até os campos de endereço e marque a opção Mostrar na inscrição caixa de seleção.
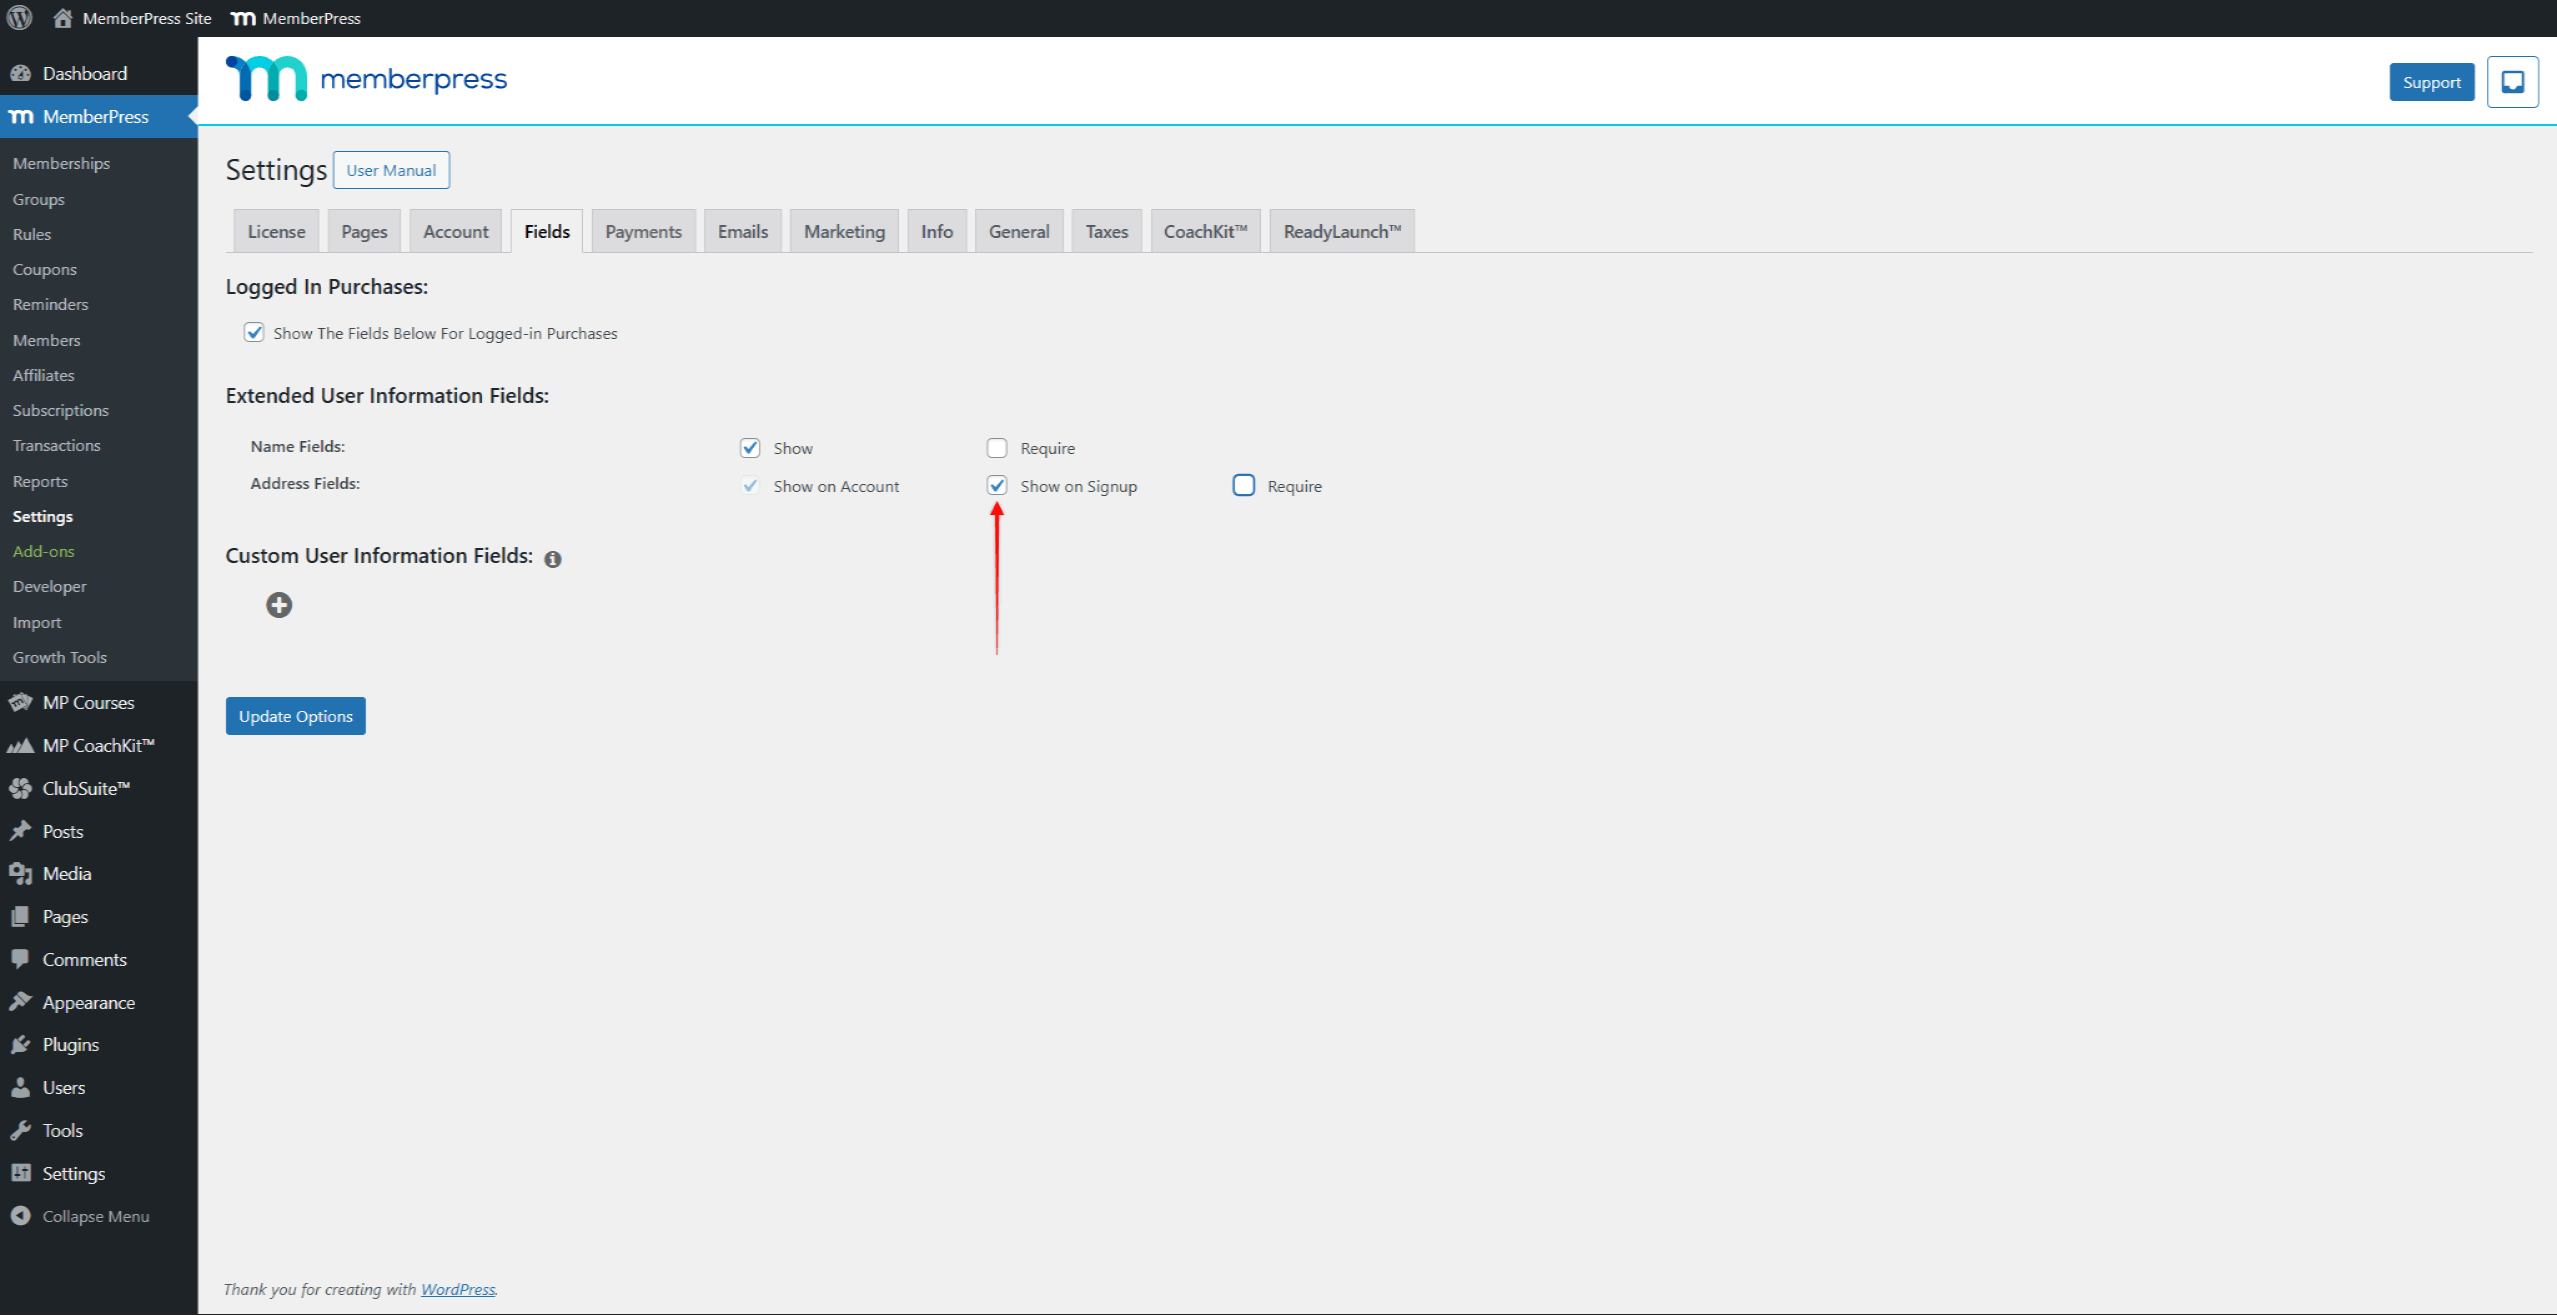
- Clique no botão Opções de atualização para aplicar as alterações.
Além disso, você pode ocultar completamente os campos de endereço desmarcando as opções Mostrar na conta e Mostrar na inscrição opções.
Criação de campos personalizados
No Campos Na página, na seção Campos de informações personalizadas do usuário, você pode adicionar seus campos personalizados:
- Clique no botão + ícone para adicionar um novo campo personalizado. Isso abrirá o formulário do campo.
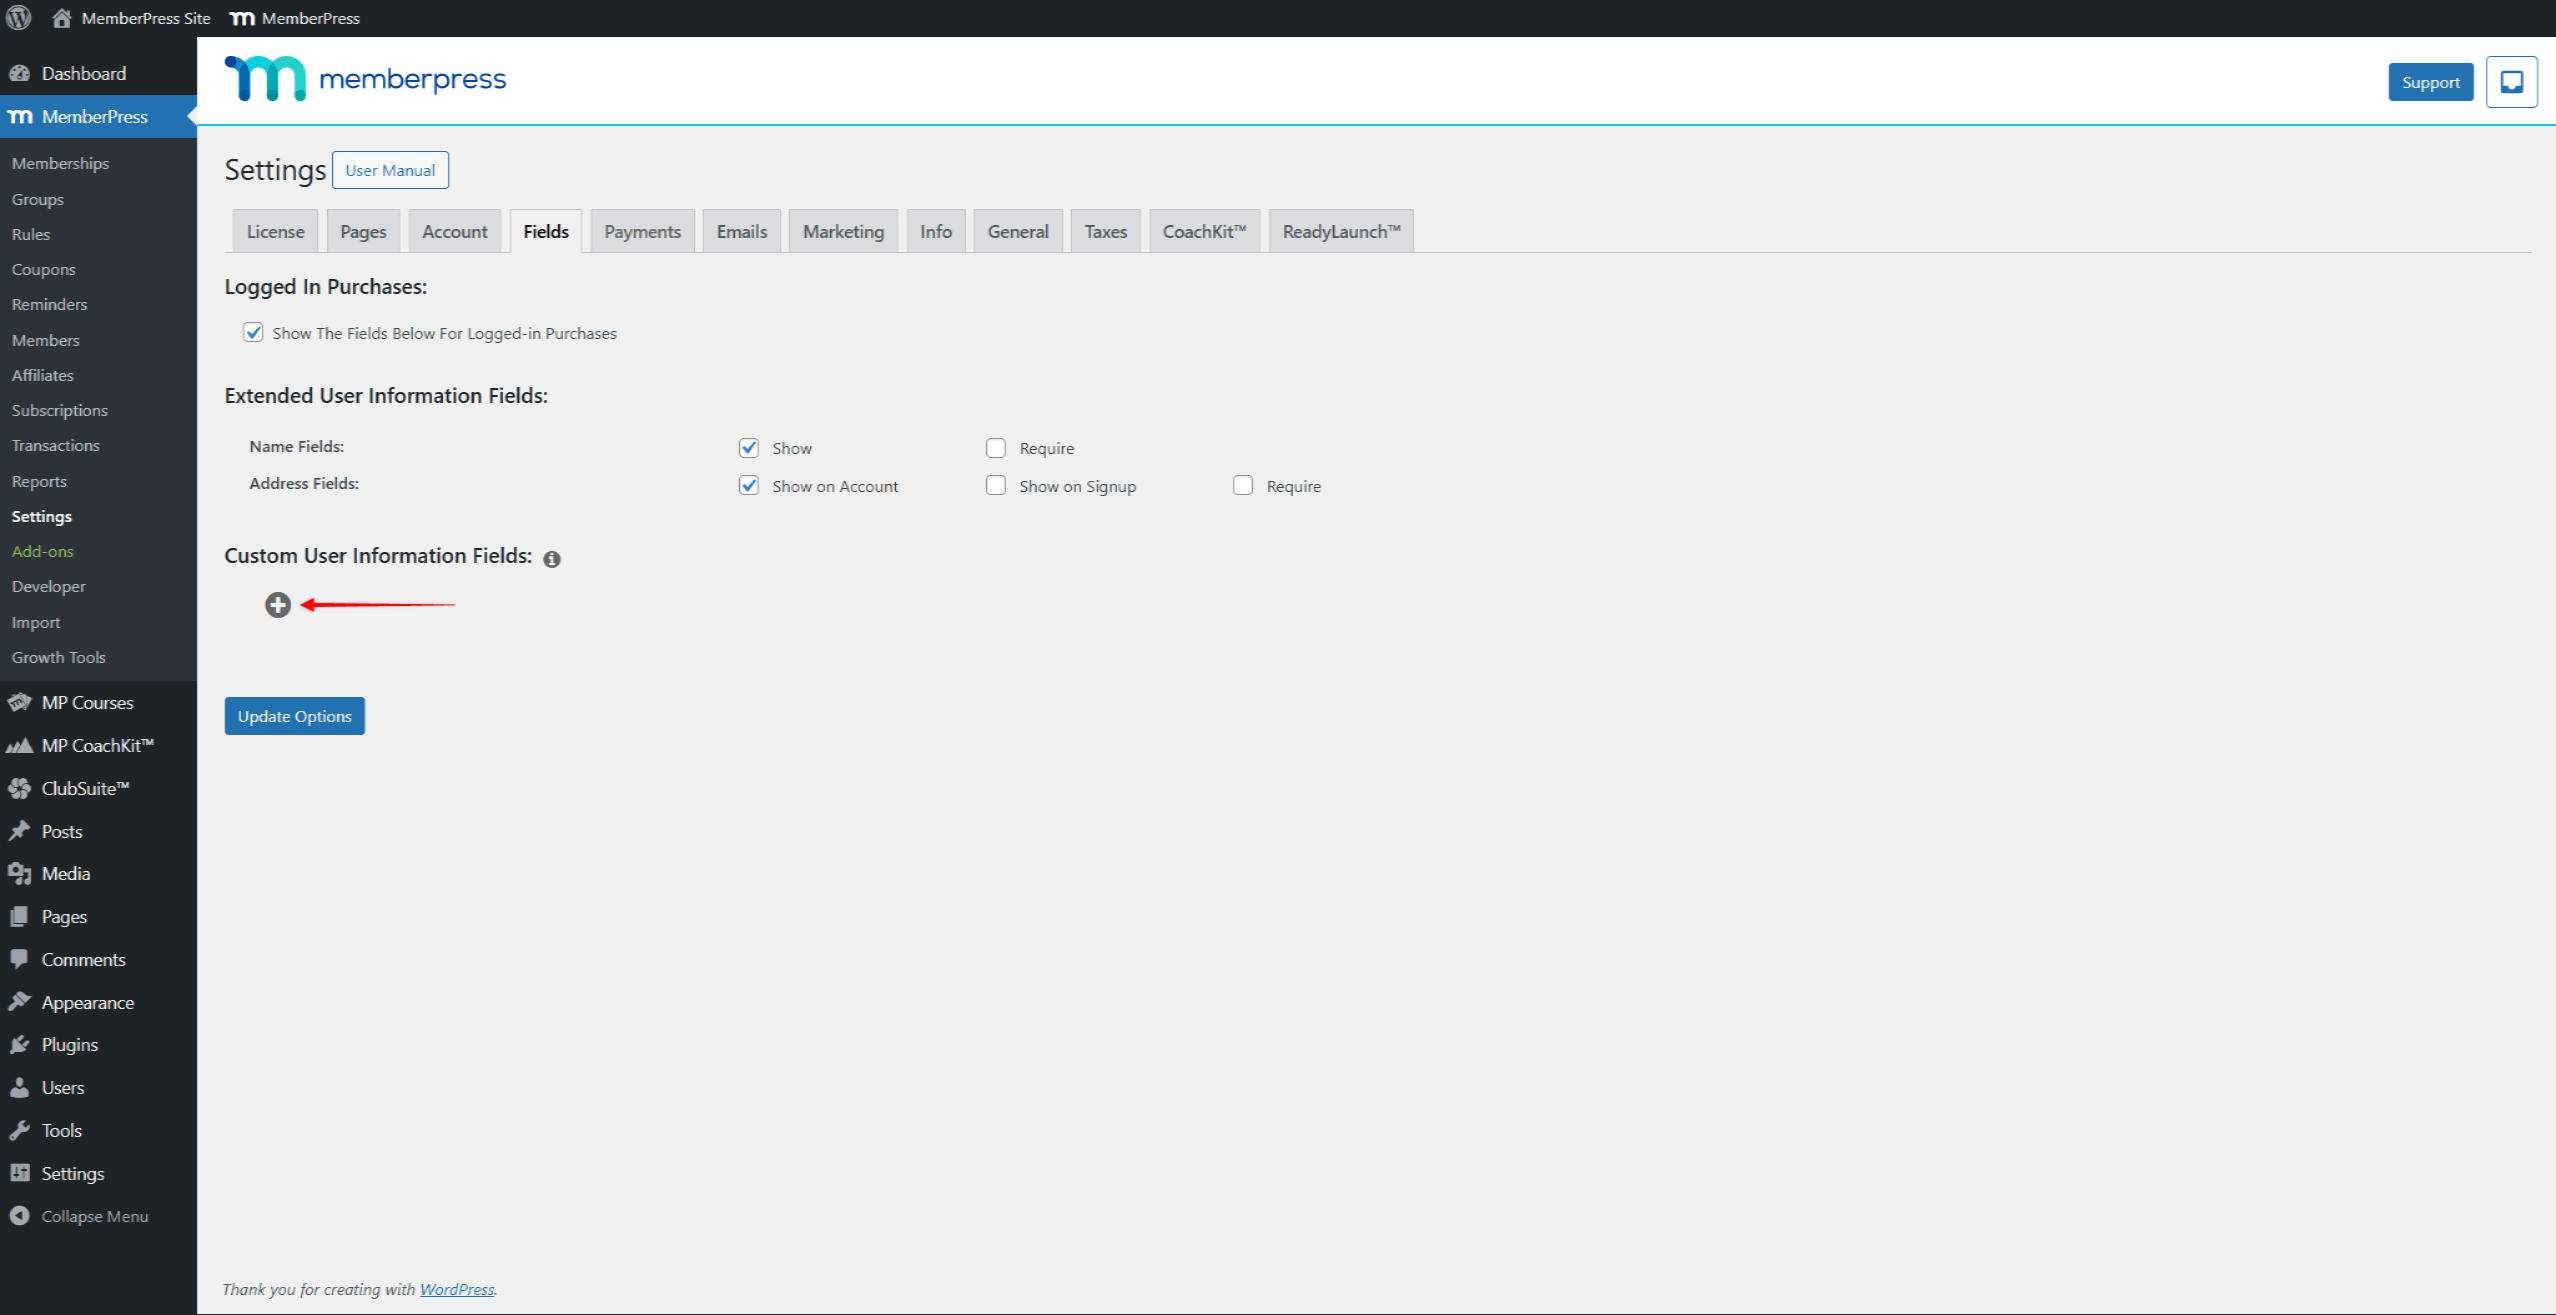
- Comece nomeando seu campo. Esse Nome será usado como o rótulo para esse campo em seus formulários.
- Em seguida, você precisa escolher o Tipo do campo. Dependendo do tipo escolhido, aparecerão opções adicionais específicas para esse tipo.
- O Valor(es) padrão O campo deve conter o valor que deve ser carregado como padrão.
- Assim como nos campos Endereço, você pode especificar onde seu campo personalizado será exibido. Ativando o Mostrar na inscrição A opção exibe seu campo personalizado nos formulários de registro. Além disso, selecionar a opção Mostrar na conta A opção exibe o campo no formulário da conta.
- Selecionando o Necessário A opção impedirá o registro do usuário, a menos que este campo personalizado seja preenchido..
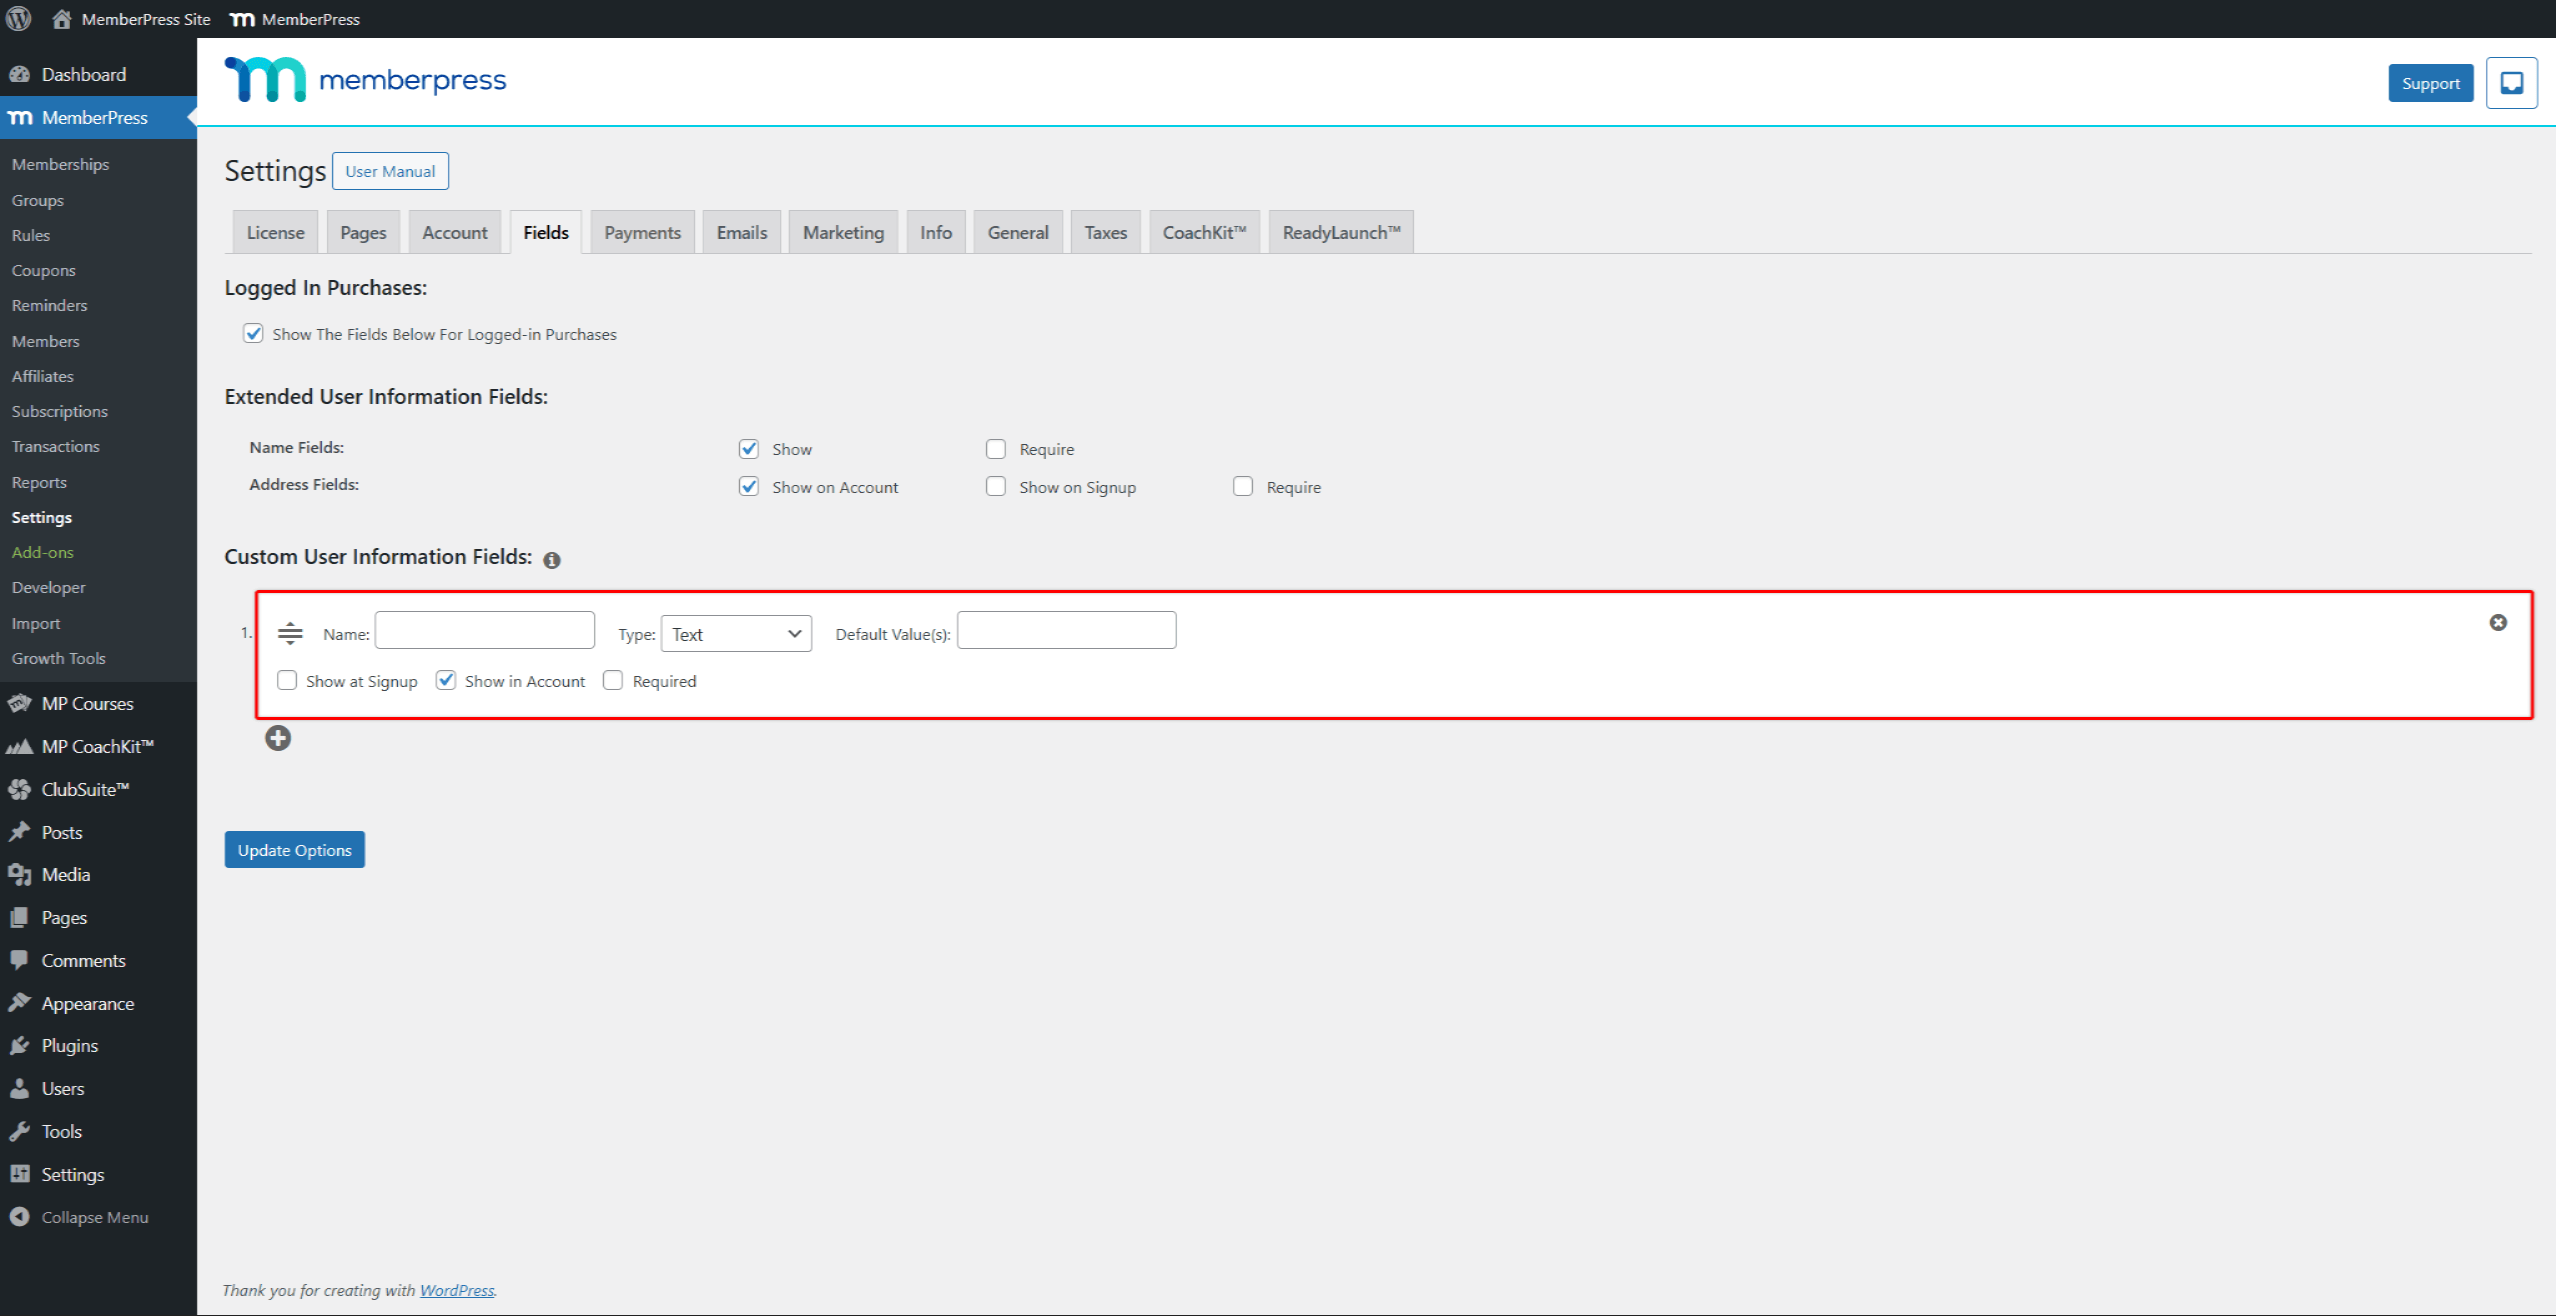
- Clique no botão Opções de atualização para salvar o campo.
Você pode criar campos personalizados MemberPress ilimitados para seus membros preencherem.
Além disso, nas configurações de qualquer associação, você pode optar por mostrar ou ocultar campos específicos. Por padrão, todos os campos personalizados definidos como Mostrar na inscrição wserá exibido nos formulários de registro de todas as associações.
Isso permitirá que você mostre apenas os campos necessários nos formulários de registro para cada associação.
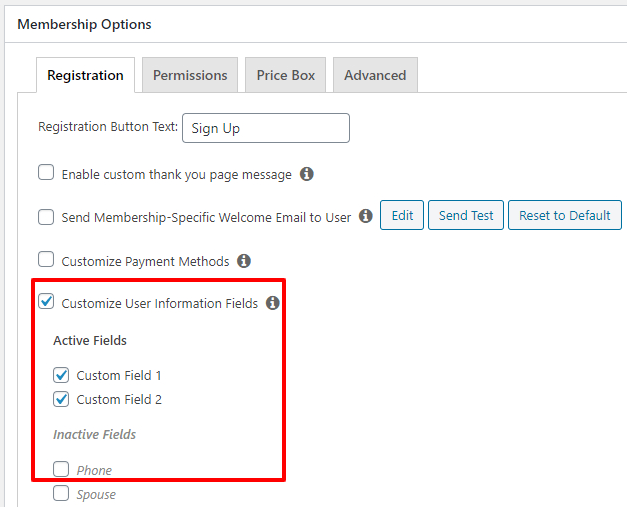
Campos personalizados definidos como Mostrar na conta será visível nas contas dos usuários somente após o registro de uma associação.
Criação de uma opção em branco padrão para o campo personalizado suspenso
Para adicionar uma opção "vazia", adicione o seguinte como sua primeira opção:
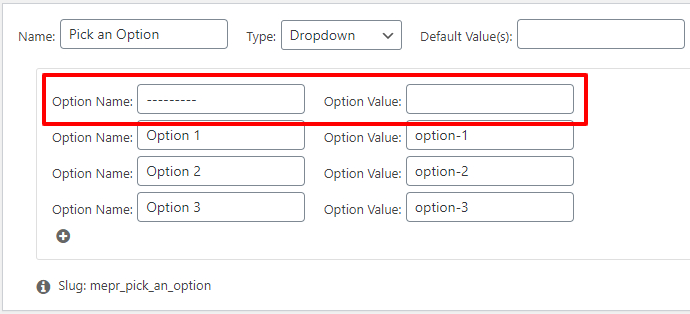
Dessa forma, quando seus usuários não conseguirem selecionar uma opção, o MemberPress não permitirá que eles enviem o formulário e mostrará esse erro:

Criação de uma opção de caixa de seleção clicável
Para criar um campo personalizado de caixa de seleção clicável, você pode simplesmente adicionar algum html básico ao nome do campo ao criá-lo. Aqui está um exemplo:
<a href='https://www.yoursite.com/special-policies' target='_blank'>Concorde com nossas Políticas Especiais</a>

Que aparecerá na página de registro da seguinte forma:

Habilitação de várias opções "marcadas" para campos personalizados de seleção múltipla e caixas de seleção
O MemberPress permite que você insira uma opção padrão a ser selecionada ou marcada para os tipos de campo personalizado Multi-Select e Checkboxes usando a opção
Valor(es) padrão para o campo e inserir o valor da opção, conforme mostrado aqui:

Para que mais de uma opção seja marcada, basta separar os
Valor da opçãos inseridos no Valor(es) padrão conforme mostrado aqui (separadas por vírgulas, sem espaços entre as entradas):

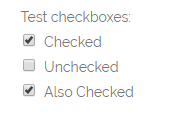
Veja como isso ficaria na sua página de registro:
