A migração de dados geralmente é necessária quando se migra para o MemberPress a partir de outro sistema de associação. Isso também se aplica se você estiver migrando para um novo domínio ou mesmo se estiver importando assinaturas para o seu site.
Este documento explicará o processo de migração e as etapas que você talvez precise seguir. Essas etapas são necessárias para todas as migrações, independentemente do sistema do qual você está migrando.
Importador MemberPress
O MemberPress Importer add-on permite que você importe dados relacionados ao MemberPress para seu site. O importador é mais comumente usado para adicionar usuários e suas assinaturas ao MemberPress a partir de uma solução de associação anterior.
Para começar a importar seus dados, você deve primeiro instalar e ativar o complemento Importer em seu site:
- Navegue até Painel de controle > MemberPress > Complementos.
- Navegue pela lista de complementos ou use a ferramenta de pesquisa para localizar o complemento Importer.
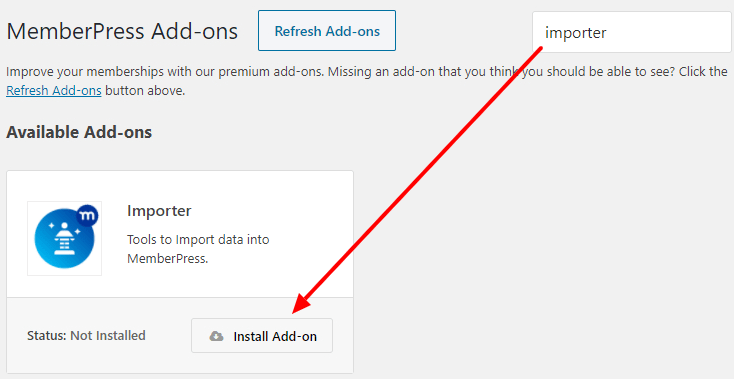
- Clique no botão Instalar o complemento para instalar e ativar o complemento.
Com o Importer instalado e ativado, você verá este novo Importação no menu MemberPress.
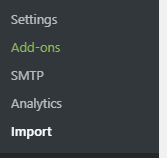
Aqui, você pode começar a importar seus arquivos CSV.
Criando seus arquivos CSV
Com o MemberPress Importer instalado, você pode começar a criar seus primeiros arquivos CSV para importar seus dados. CSV significa "valores separados por vírgula", um formato de planilha padrão.
Você pode criar e editar esses arquivos de planilha no Excel, Numbers, Open Office ou Google Spreadsheet.
Essa formatação de arquivo é essencial para a migração de dados usando o importador MemberPress. Lembre-se de que os arquivos CSV exportados de outros plug-ins e sistemas geralmente têm formatos diferentes.
Provavelmente será necessário reformatar os arquivos exportados e ajustá-los ao formato CSV do MemberPress.
Cada grupo de dados deve ser importado com um arquivo CSV separado. Isso significa que, por exemplo, você terá importar seus usuários usando um arquivo CSV. Em seguida, você precisará importar suas transações e assinaturas como arquivos CSV separados. O mesmo vale para outros tipos de dados (por exemplo importação de cupons e regras).
Todos os arquivos CSV devem ser formatados adequadamente. Cada tipo de dados tem seu modelo CSV e itens de dados exclusivos. Você pode fazer o download dos arquivos de modelo CSV de amostra para alguns dos diferentes tipos de dados aqui:
- Modelo CSV de usuários do WordPress
- Modelo CSV de assinaturas
- Modelo CSV de transações
- Modelo CSV de subcontas de contas corporativas
- Modelo CSV de cupons
Além disso, há algumas convenções que todos esses arquivos devem seguir:
- Cada arquivo CSV deve ter uma linha de cabeçalho (primeira linha do arquivo) contendo o nome do campo. Tudo o que estiver na coluna sob a primeira linha será sinalizado como sendo um valor para o campo definido no cabeçalho.
- As colunas do arquivo CSV não precisam estar em nenhuma ordem definida. Os campos de dados são determinados não pela ordem, mas pelo nome do cabeçalho.
- O arquivo deve estar em UTF-8 formato.
Depois de formatar e preparar os dados em arquivos CSV apropriados, você deve exportá-los da planilha.
Importação de arquivos CSV com o MemberPress
Para importar seus arquivos CSV para o MemberPress, siga estas etapas:
- Navegue até Painel de controle > MemberPress > Importar.
- Selecione o tipo de arquivo a ser importado usando o menu suspenso.
- Clique no botão Escolha o arquivo e o botão selecione o arquivo CSV correspondente para importar de seu computador. Por exemplo, se quiser importar as transações de um usuário, escolha o arquivo CSV Transactions aqui.
- Clique no botão Carregar abaixo para importar o arquivo.
Seus dados agora serão importados e adicionados ao seu site.
Etapas básicas de migração
- Instale o MemberPress e configure-o com suas associações e gateways, pelo menos. Você provavelmente não deve criar nenhuma regra ainda para evitar conflitos com o plug-in de associação existente (se estiver usando no mesmo site).
- Importar seus usuários (se ainda não estiver em seu site WordPress).
- Importar qualquer assinaturas recorrentes ou pagamentos únicos associados a eles (esses são arquivos separados do arquivo CSV de usuários importado na etapa 2).
- Teste se tudo está correto; se estiver, crie regras no MP.
- Desative seu plug-in de associação anterior.
- Realize mais testes para garantir que tudo esteja funcionando corretamente.
- Troque seus URLs de IPN ou Webhook - etc. - para garantir que os pagamentos sejam registrados corretamente no MemberPress, daqui para frente. Você pode encontrar links para seu(s) gateway(s) com instruções detalhadas sobre suas configurações com o MemberPress aqui.
- Revise suas assinaturas importadas em MemberPress > guia Subscriptions (Assinaturas) > Gateway coluna. Se o gateway os nomes aparecem como uma ID (por exemplo, pea5pn-8cz) em vez de “Listrado" ou "PayPal,” você precisará Corrigir as assinaturas de usuários. Certifique-se de que o ID exclusivo do gateway adequado seja usado.


