Los formularios de cuenta y registro de MemberPress tienen un conjunto de campos por defecto. En los ajustes de MemberPress, puedes activar y desactivar algunos campos predeterminados de MemberPress y añadir tus campos personalizados.
Este documento explica cómo gestionar los campos MemberPress y crear campos personalizados para los formularios de registro y de cuenta.
Gestión de campos MemberPress
Las opciones de campo MemberPress están disponibles en Panel de control > MemberPress > Configuración > pestaña Campos. Aquí encontrará varias opciones para gestionar los campos por defecto.
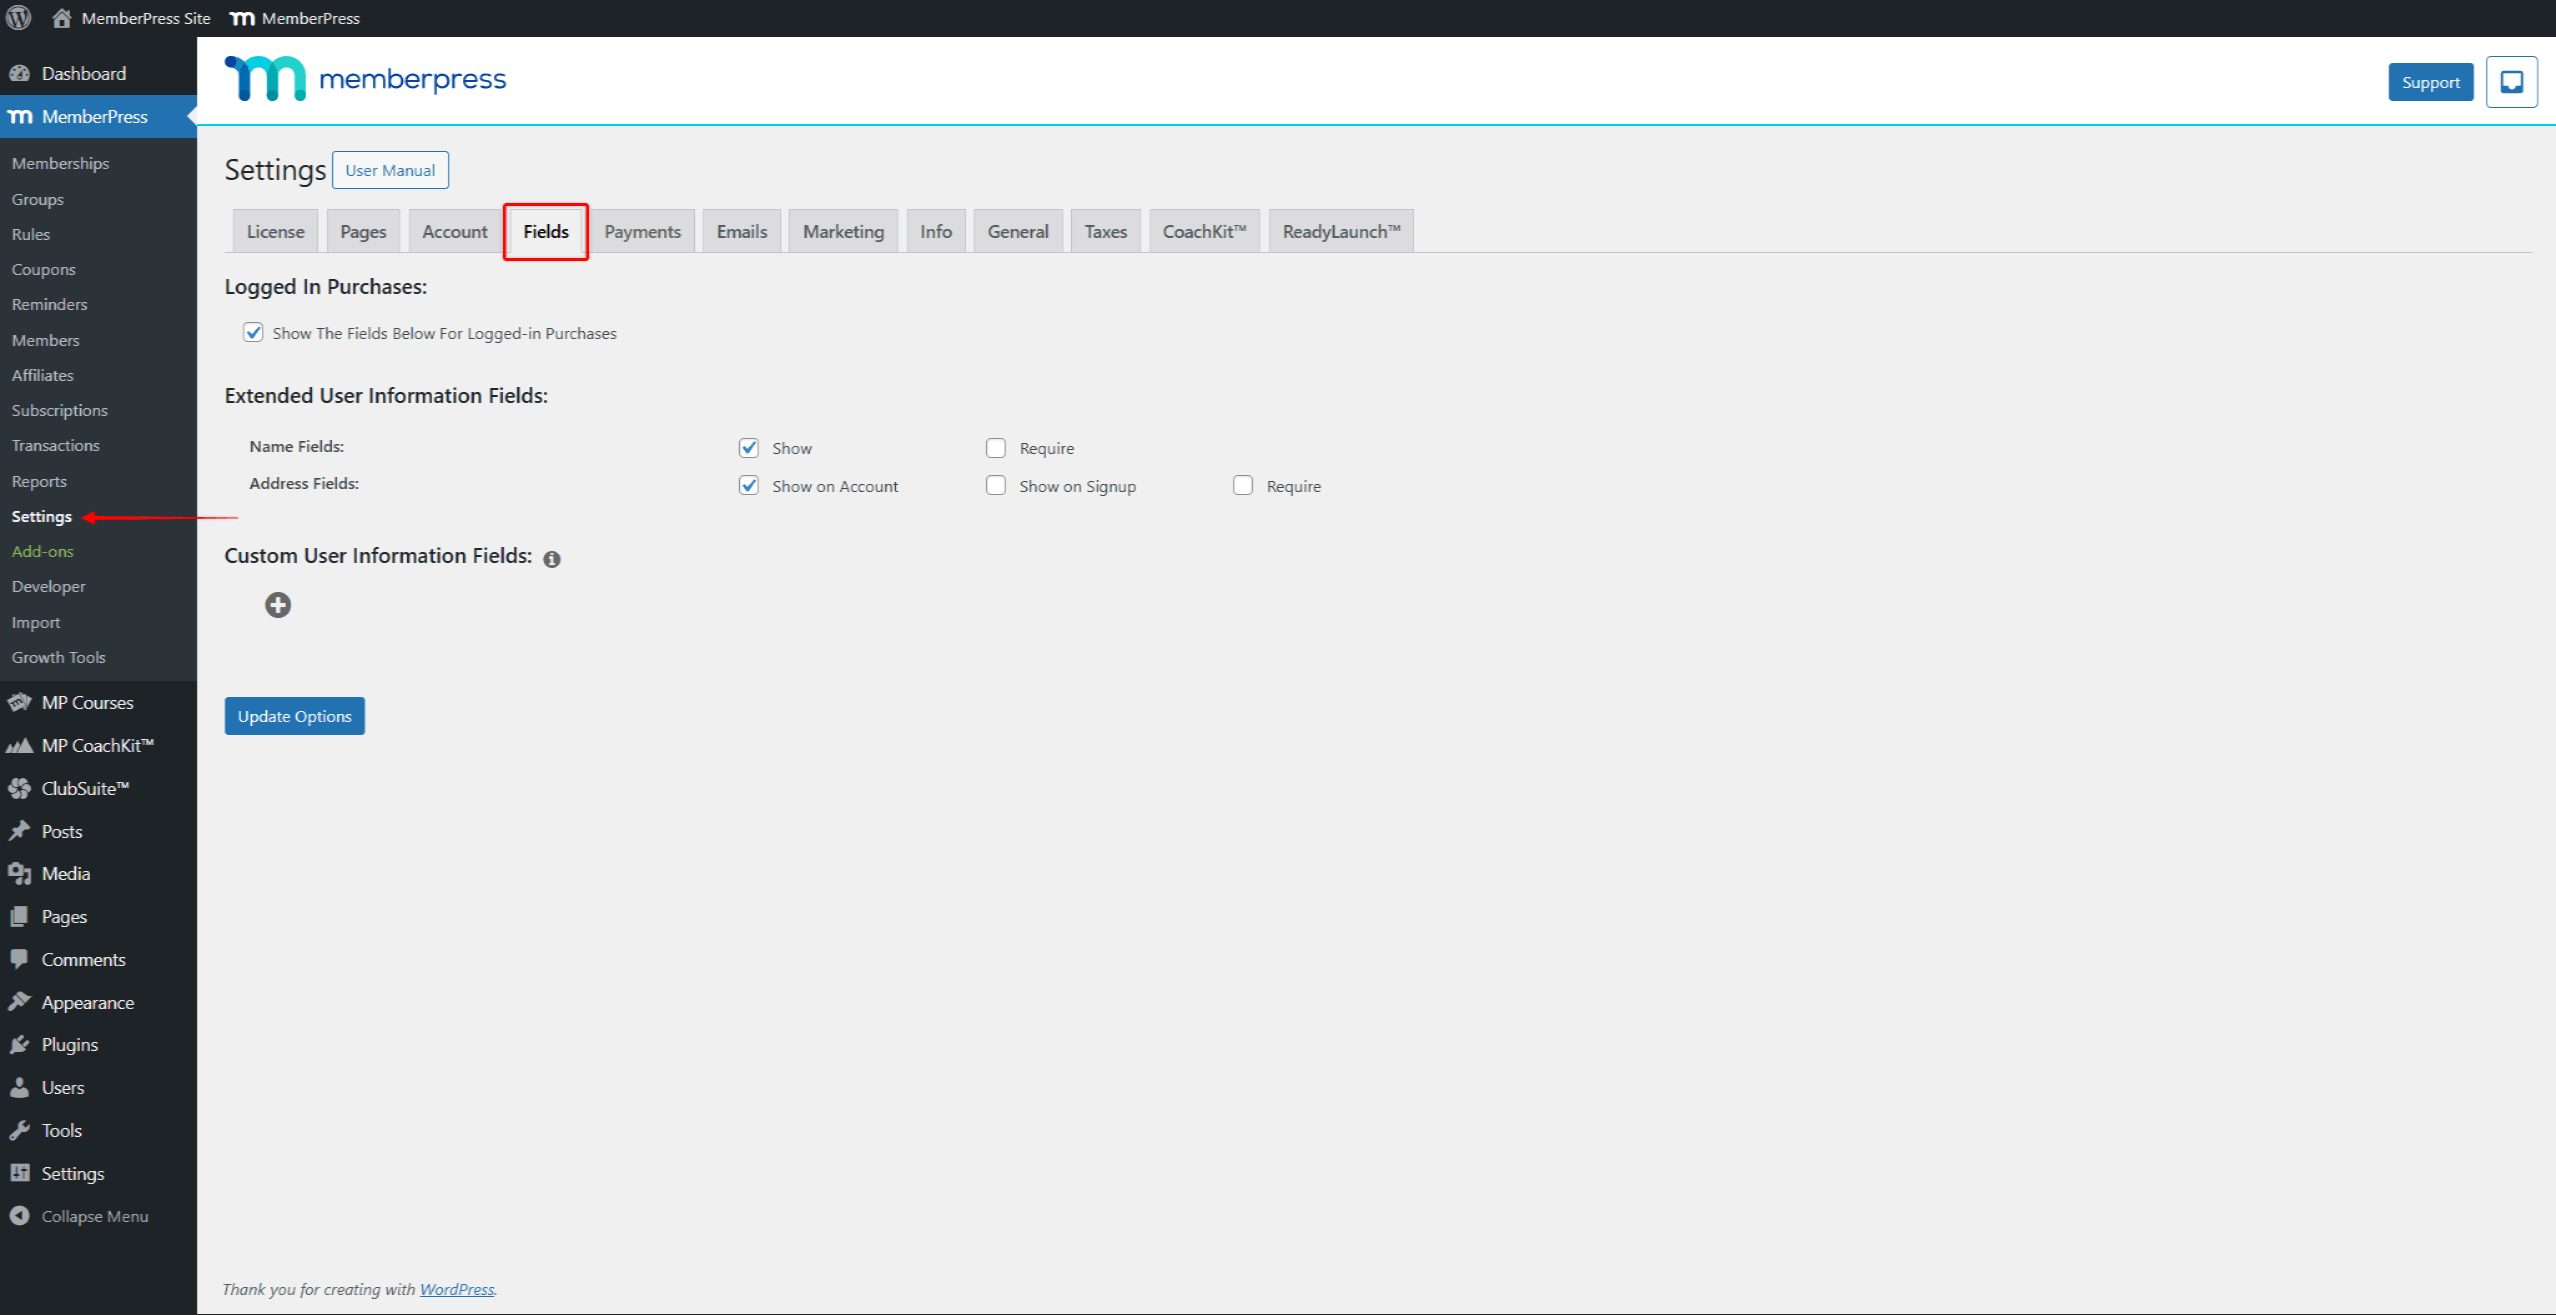
La primera opción que puede comprobar es si la configuración del campo debe aplicarse a las compras realizadas por usuarios existentes. Desactivación de la Mostrar los campos siguientes para las compras iniciadas sólo se aplicarán los ajustes de campo a los nuevos usuarios.
A continuación, puede elegir mostrar el Campos de nombre y dirección en las páginas y formularios de Cuenta y Registro.
Aquí también puede establecer si los campos Nombre y Dirección son obligatorios. Al habilitar la opción Requerido La opción impedirá que los usuarios envíen formularios de registro a menos que los rellenen.
Campos de nombre
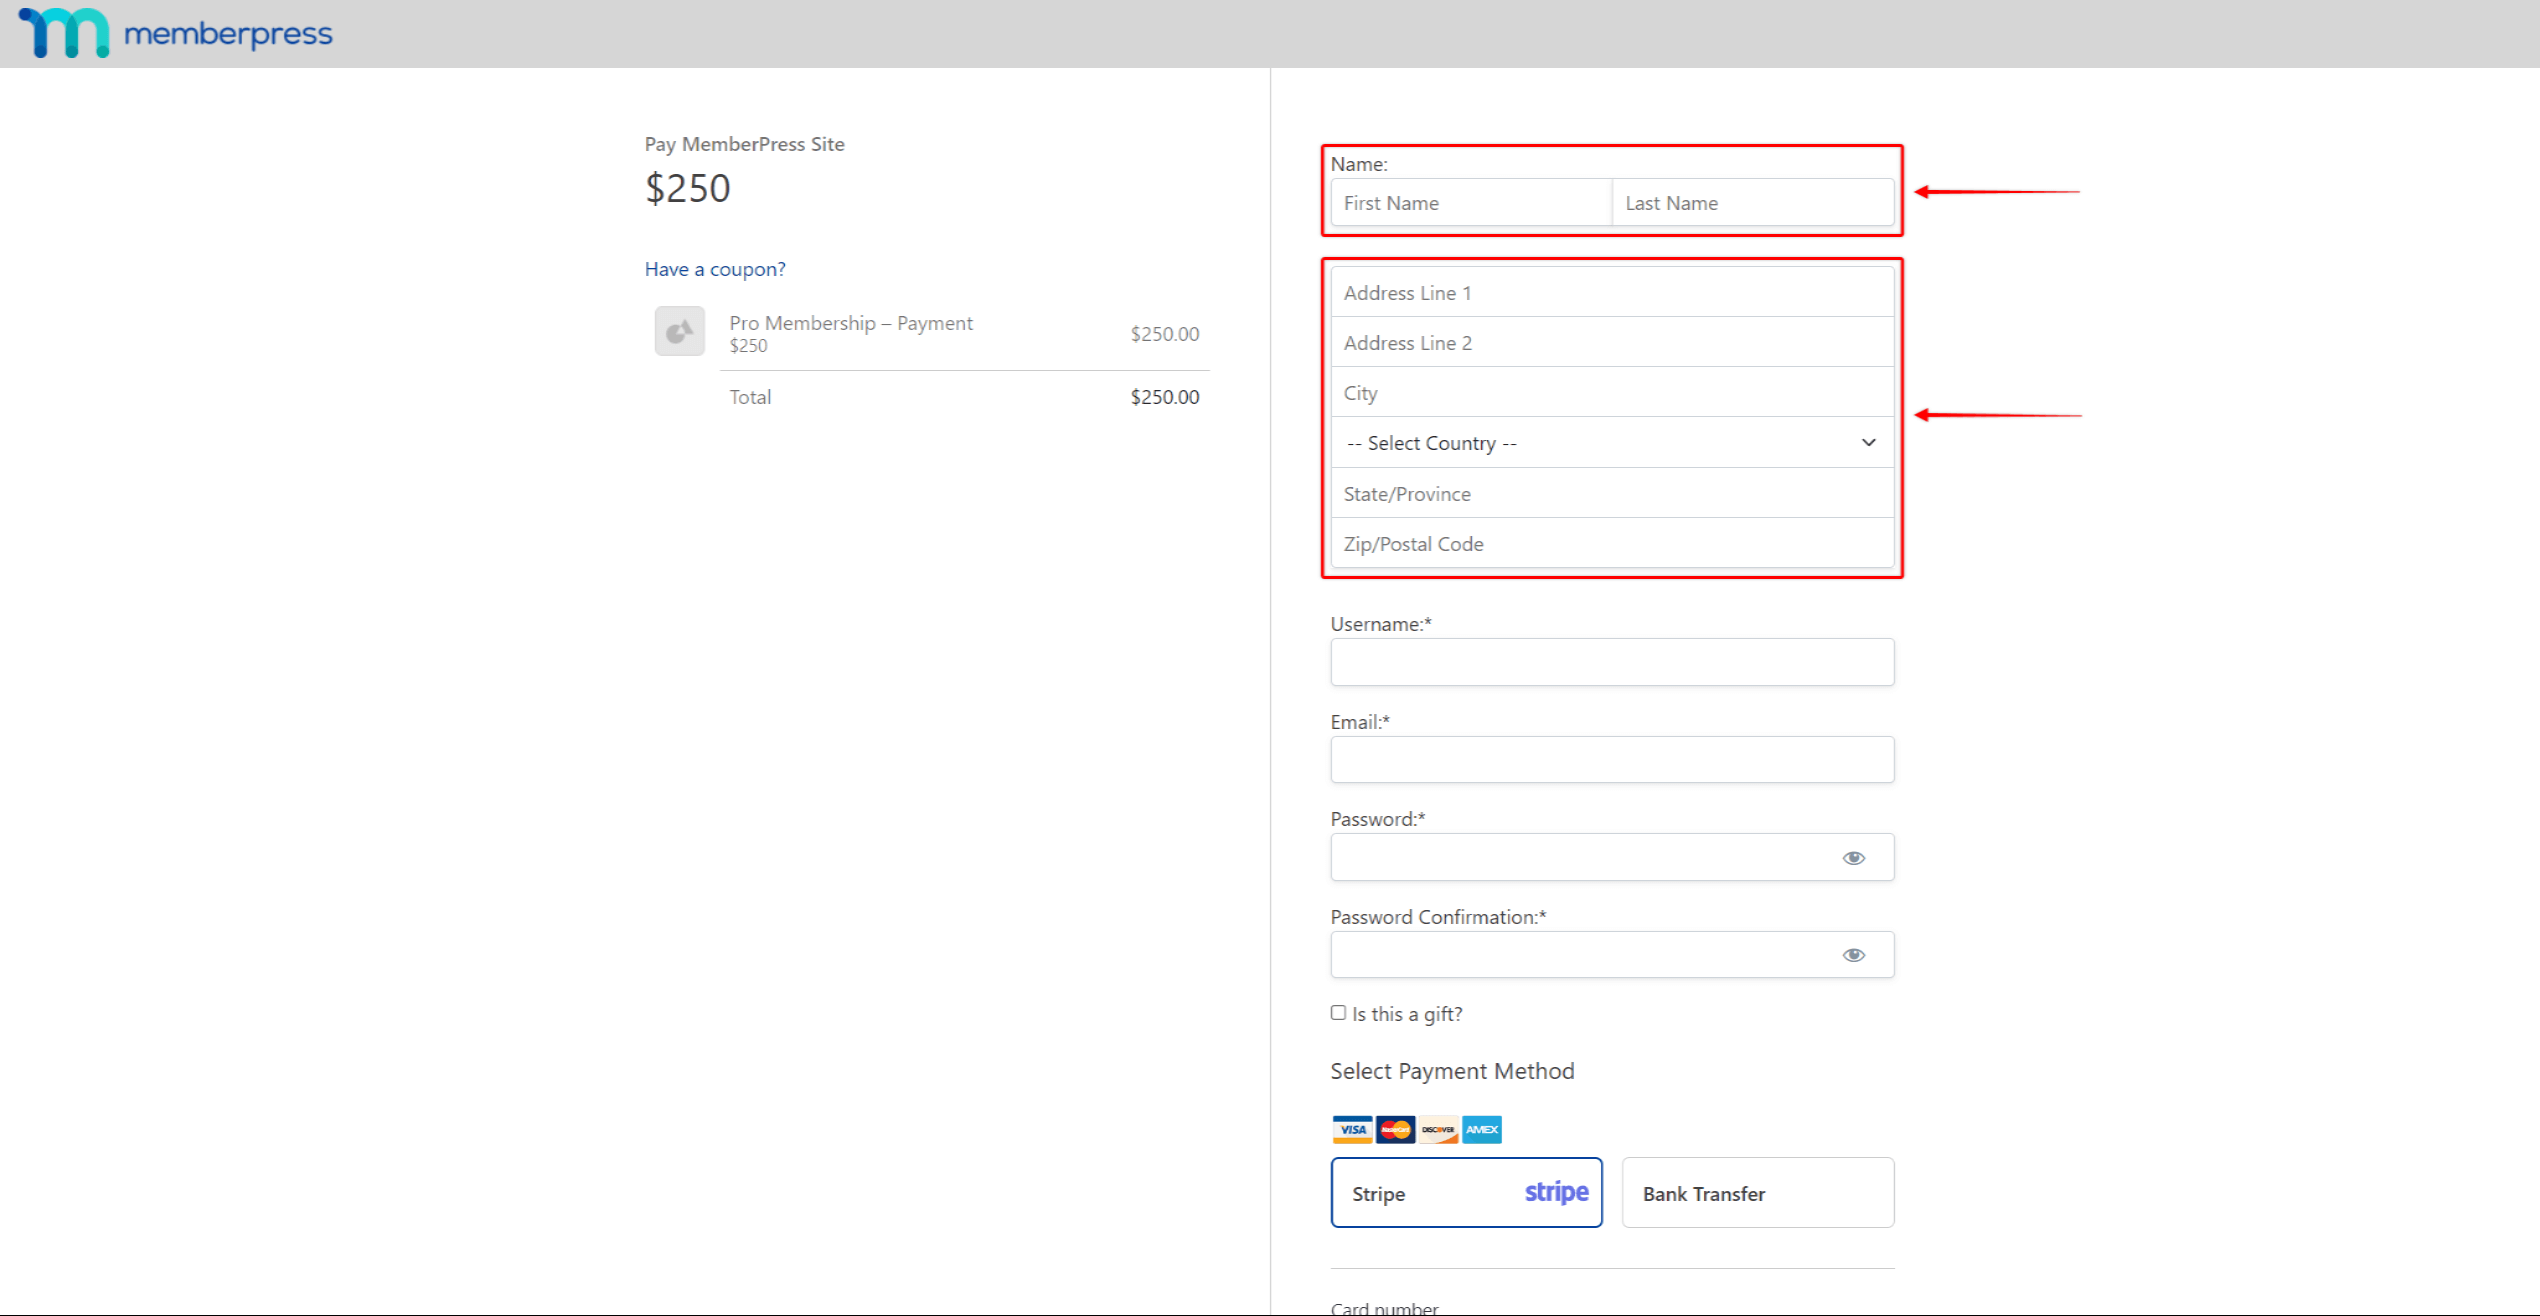
En Campos de nombre añadirá el Nombre y Apellido campos tanto para la cuenta de usuario como para el registro.
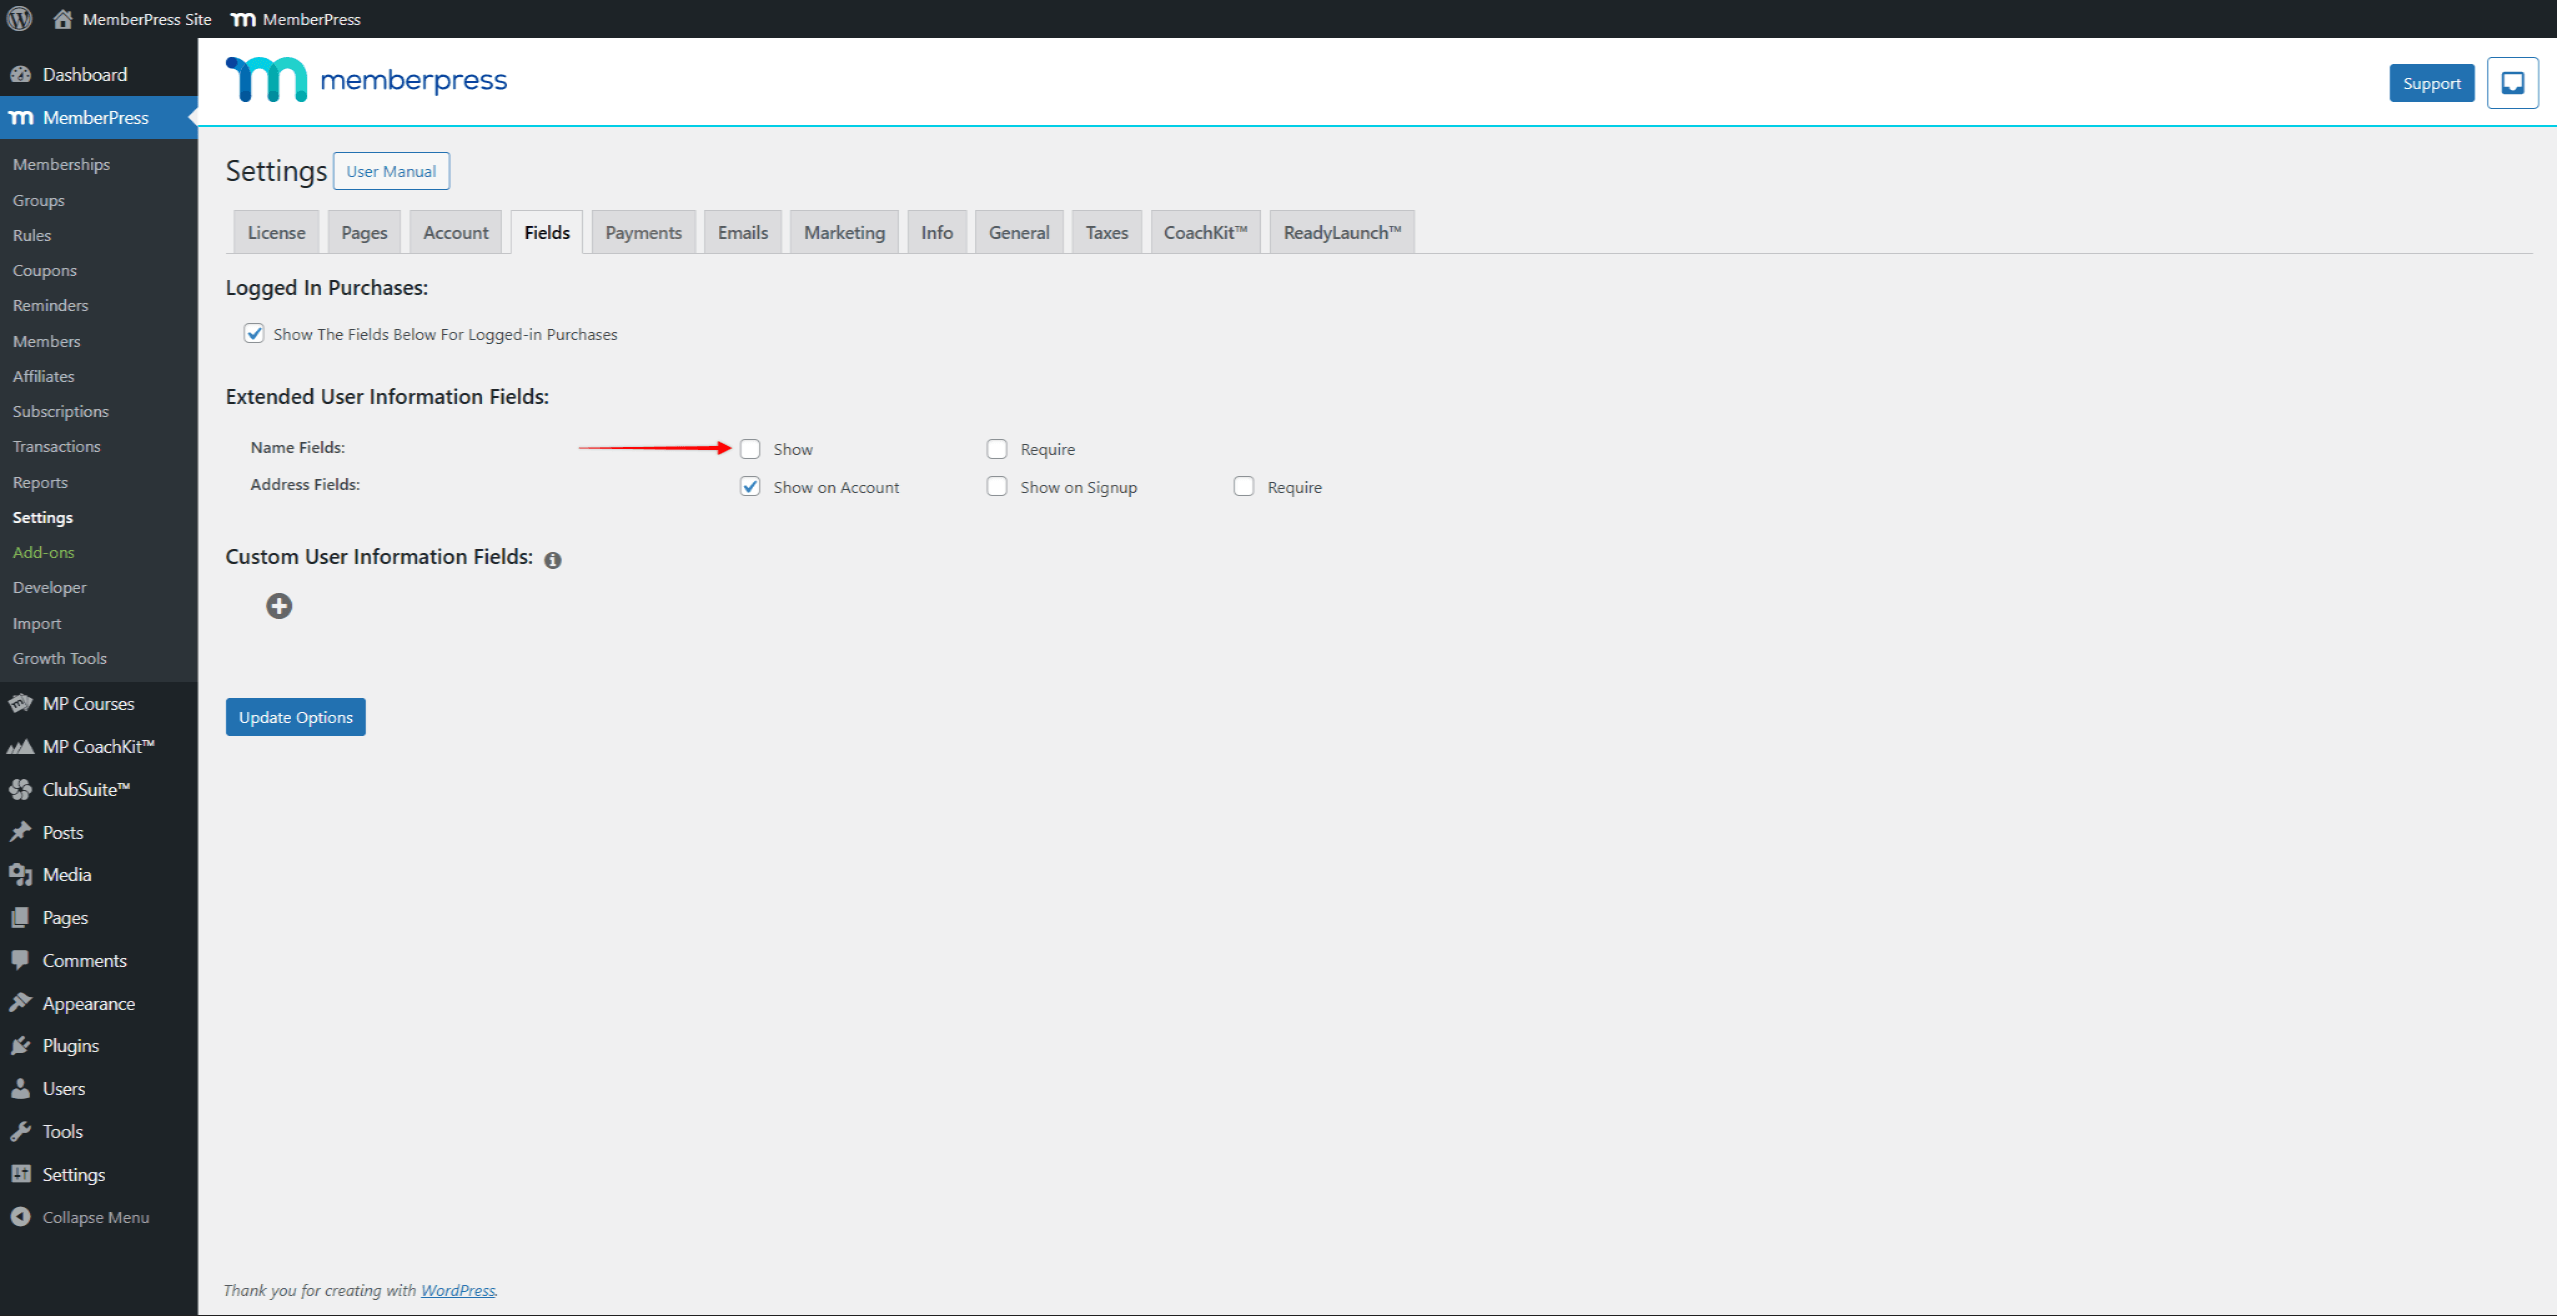
En La opción Mostrar estará habilitada de forma predeterminada. para los campos de nombre. Para ocultar estos campos tanto en las páginas y formularios de Cuenta como de Registro, Desactivar la opción Mostrar.
Campos de dirección
Tél Campos de dirección añadirá la Dirección, Ciudad, País, SCampos de estado/provincia y código postal. Puede elegir entre Añade los campos de dirección solo a tu página de cuenta o a ambas. las páginas de Cuenta y Registro.
Por defecto, el Mostrar en la cuenta opción para Campos de dirección está habilitado, mientras que Mostrar al registrarse es discapacitados. Esto los convierte en visible en la página Cuenta y oculto en el registro. Esta configuración permite a los usuarios registrarse más rápidamente con menos campos que rellenar al comprar suscripciones. A continuación, pueden introducir sus datos de dirección en la página de su cuenta.
A Habilita los campos de dirección en tus páginas de registro.sigue estos pasos:
- Vaya a Panel de control > MemberPress > Configuración > pestaña Campos.
- Desplácese hasta los campos de dirección y marque la casilla Mostrar al registrarse casilla de verificación.
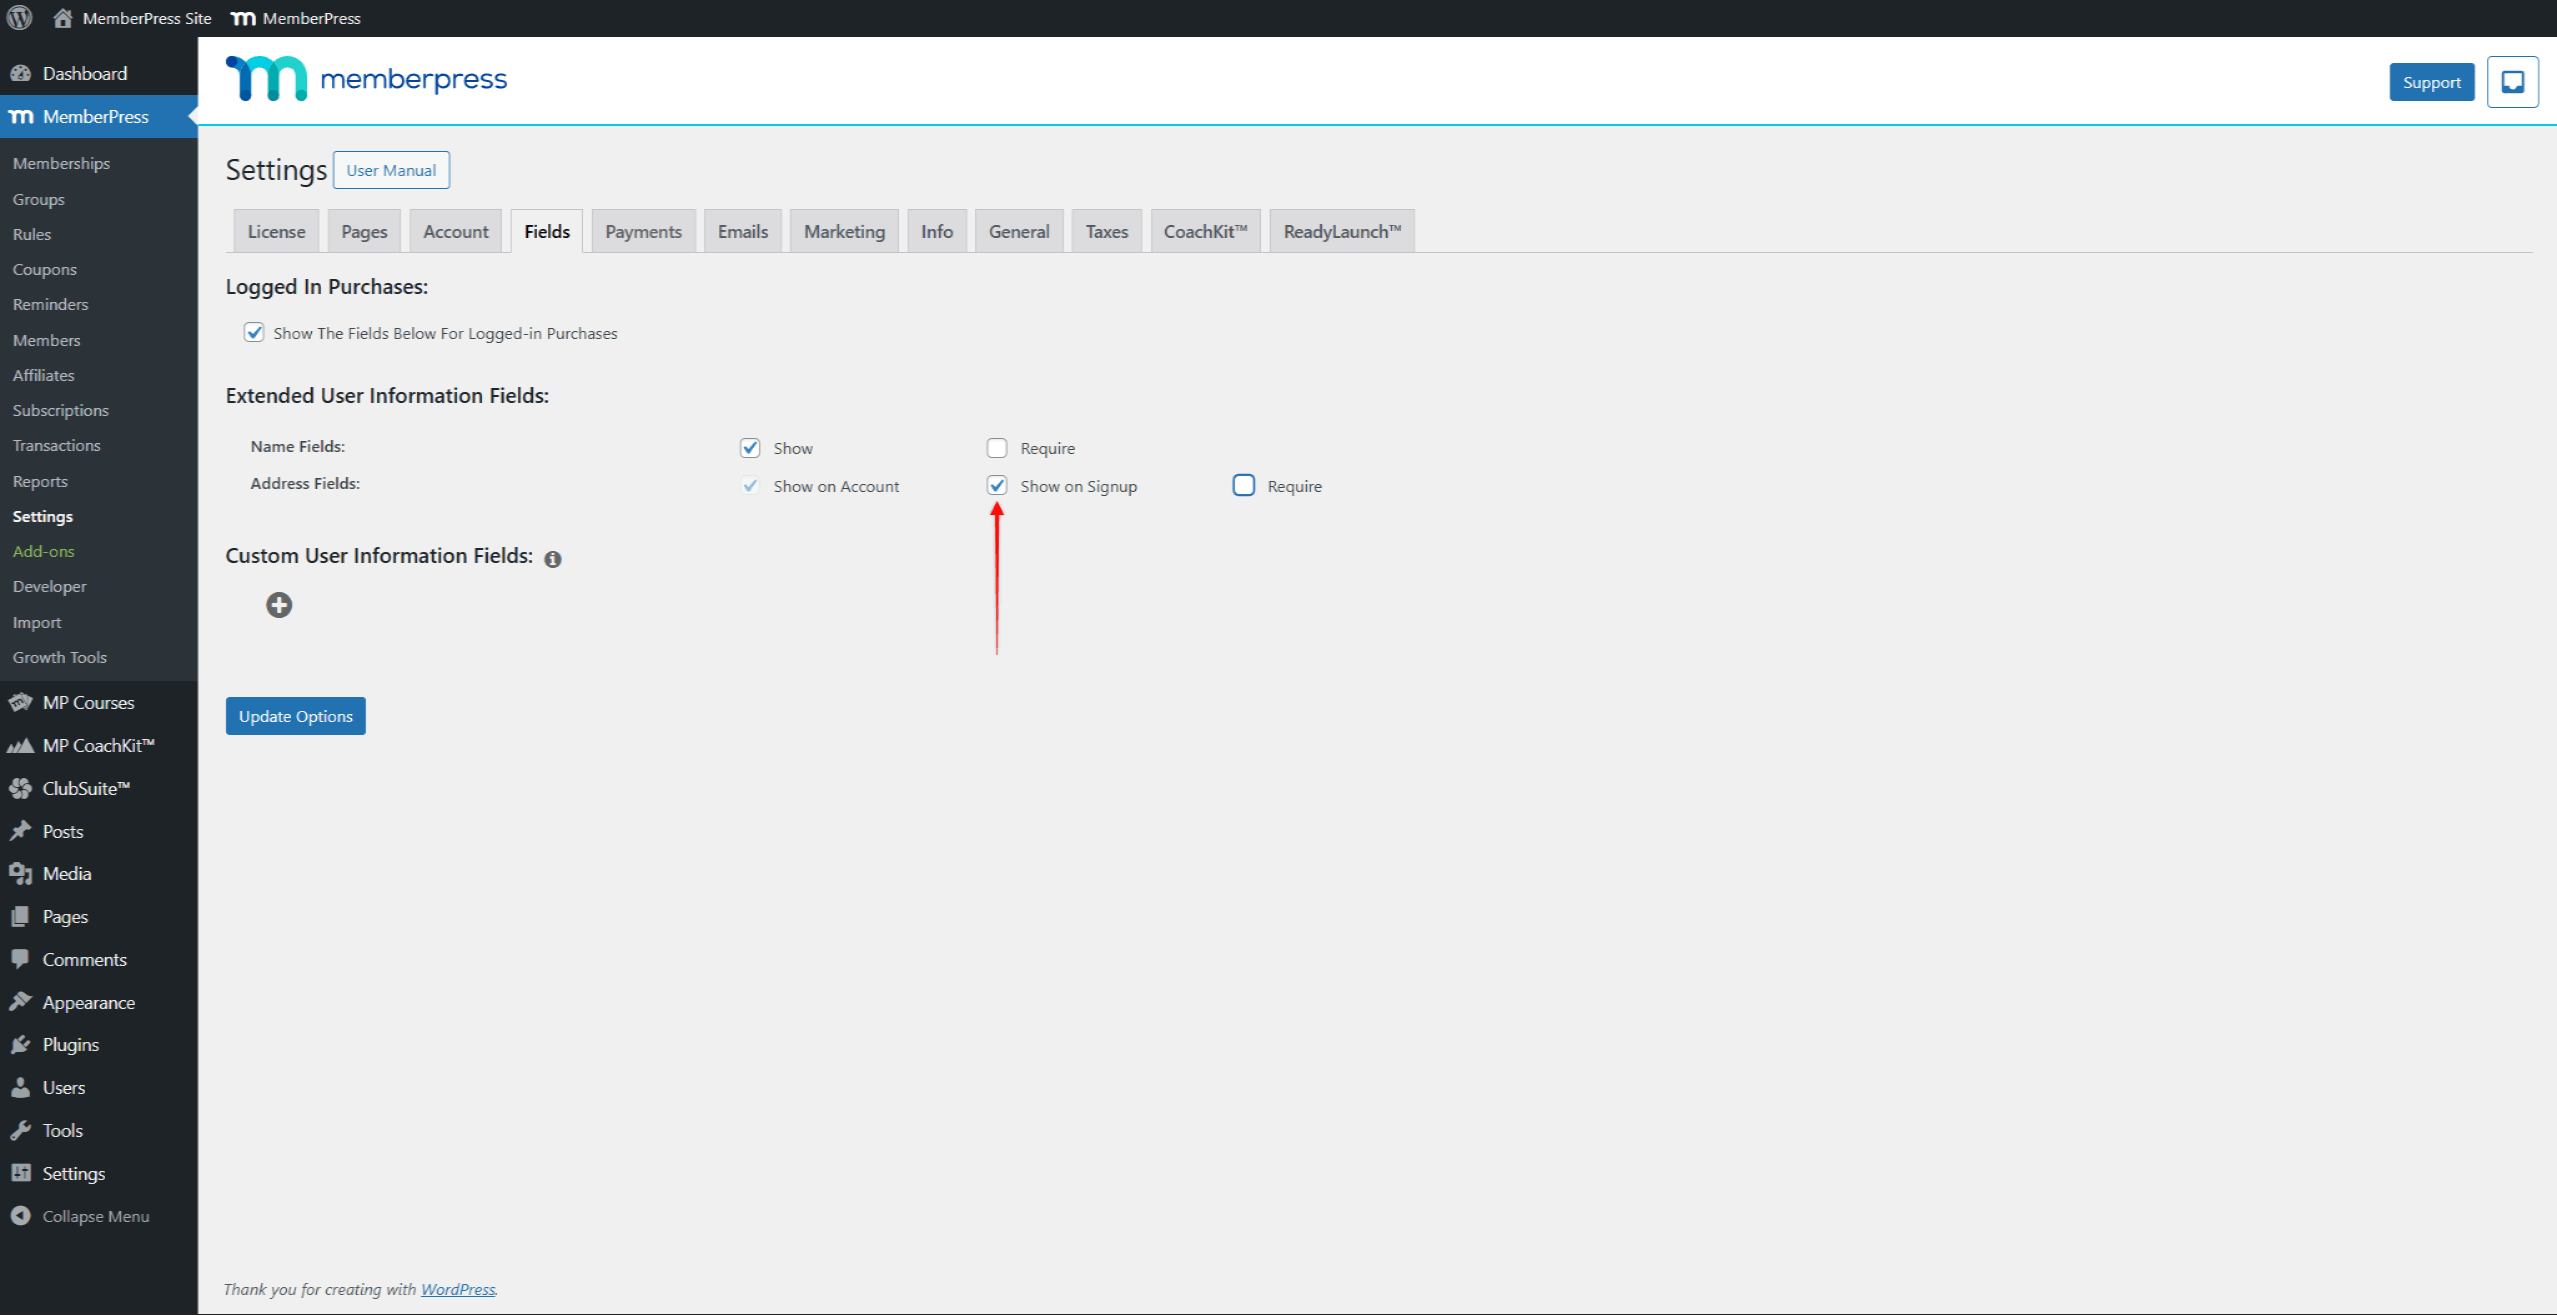
- Haga clic en el botón Opciones de actualización para aplicar los cambios.
Además, puede ocultar completamente los campos de dirección desmarcando ambas opciones. Mostrar en la cuenta y Mostrar al registrarse opciones.
Creación de campos personalizados
En el Campos En la página, en la sección Campos de información de usuario personalizados, puede añadir sus campos personalizados:
- Haga clic en el botón + icono para añadir un nuevo campo personalizado. Se abrirá el formulario del campo.
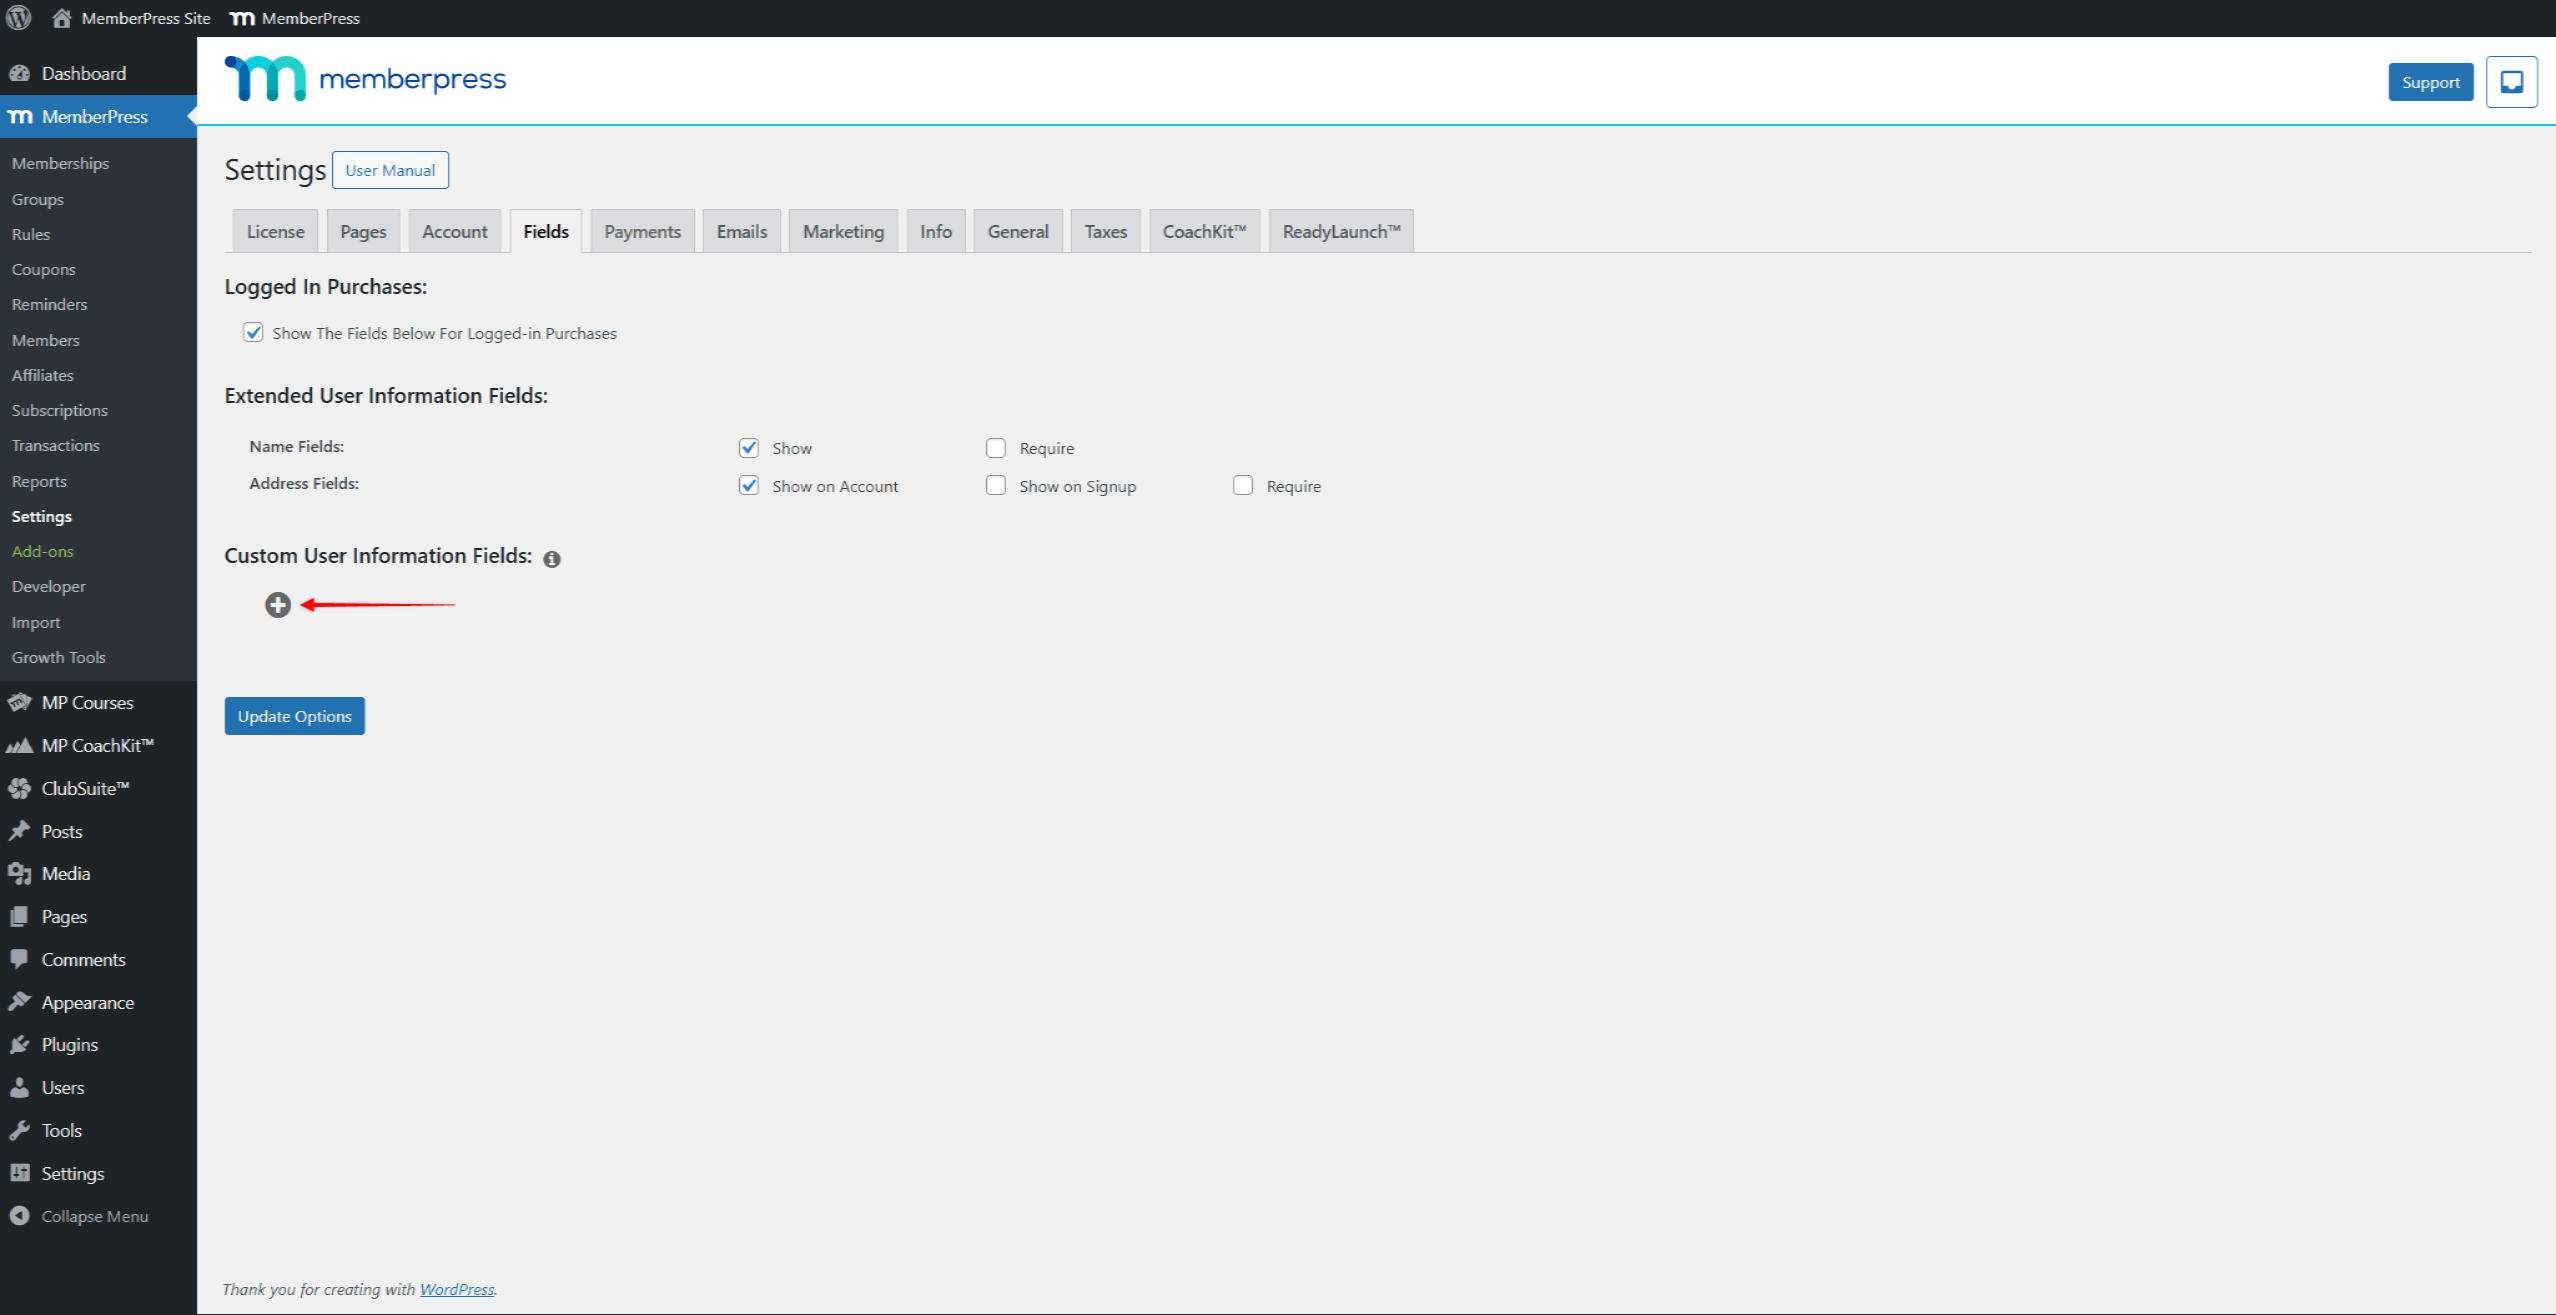
- Empiece por dar un nombre a su campo. Este Nombre se utilizará como etiqueta para este campo en sus formularios.
- A continuación, debe elegir el Tipo del campo. Dependiendo del tipo que elijas, aparecerán opciones adicionales específicas para ese tipo.
- En Valor(es) por defecto El campo debe contener el valor que se debe cargar como valor predeterminado.
- Al igual que con los campos de dirección, puede especificar dónde se mostrará su campo personalizado. Al habilitar la opción Mostrar al inscribirse La opción muestra su campo personalizado en los formularios de registro. Además, al seleccionar la opción Mostrar en cuenta La opción muestra el campo en el formulario de la cuenta.
- Selección del Requerido La opción impedirá el registro de usuarios a menos que se rellene este campo personalizado..
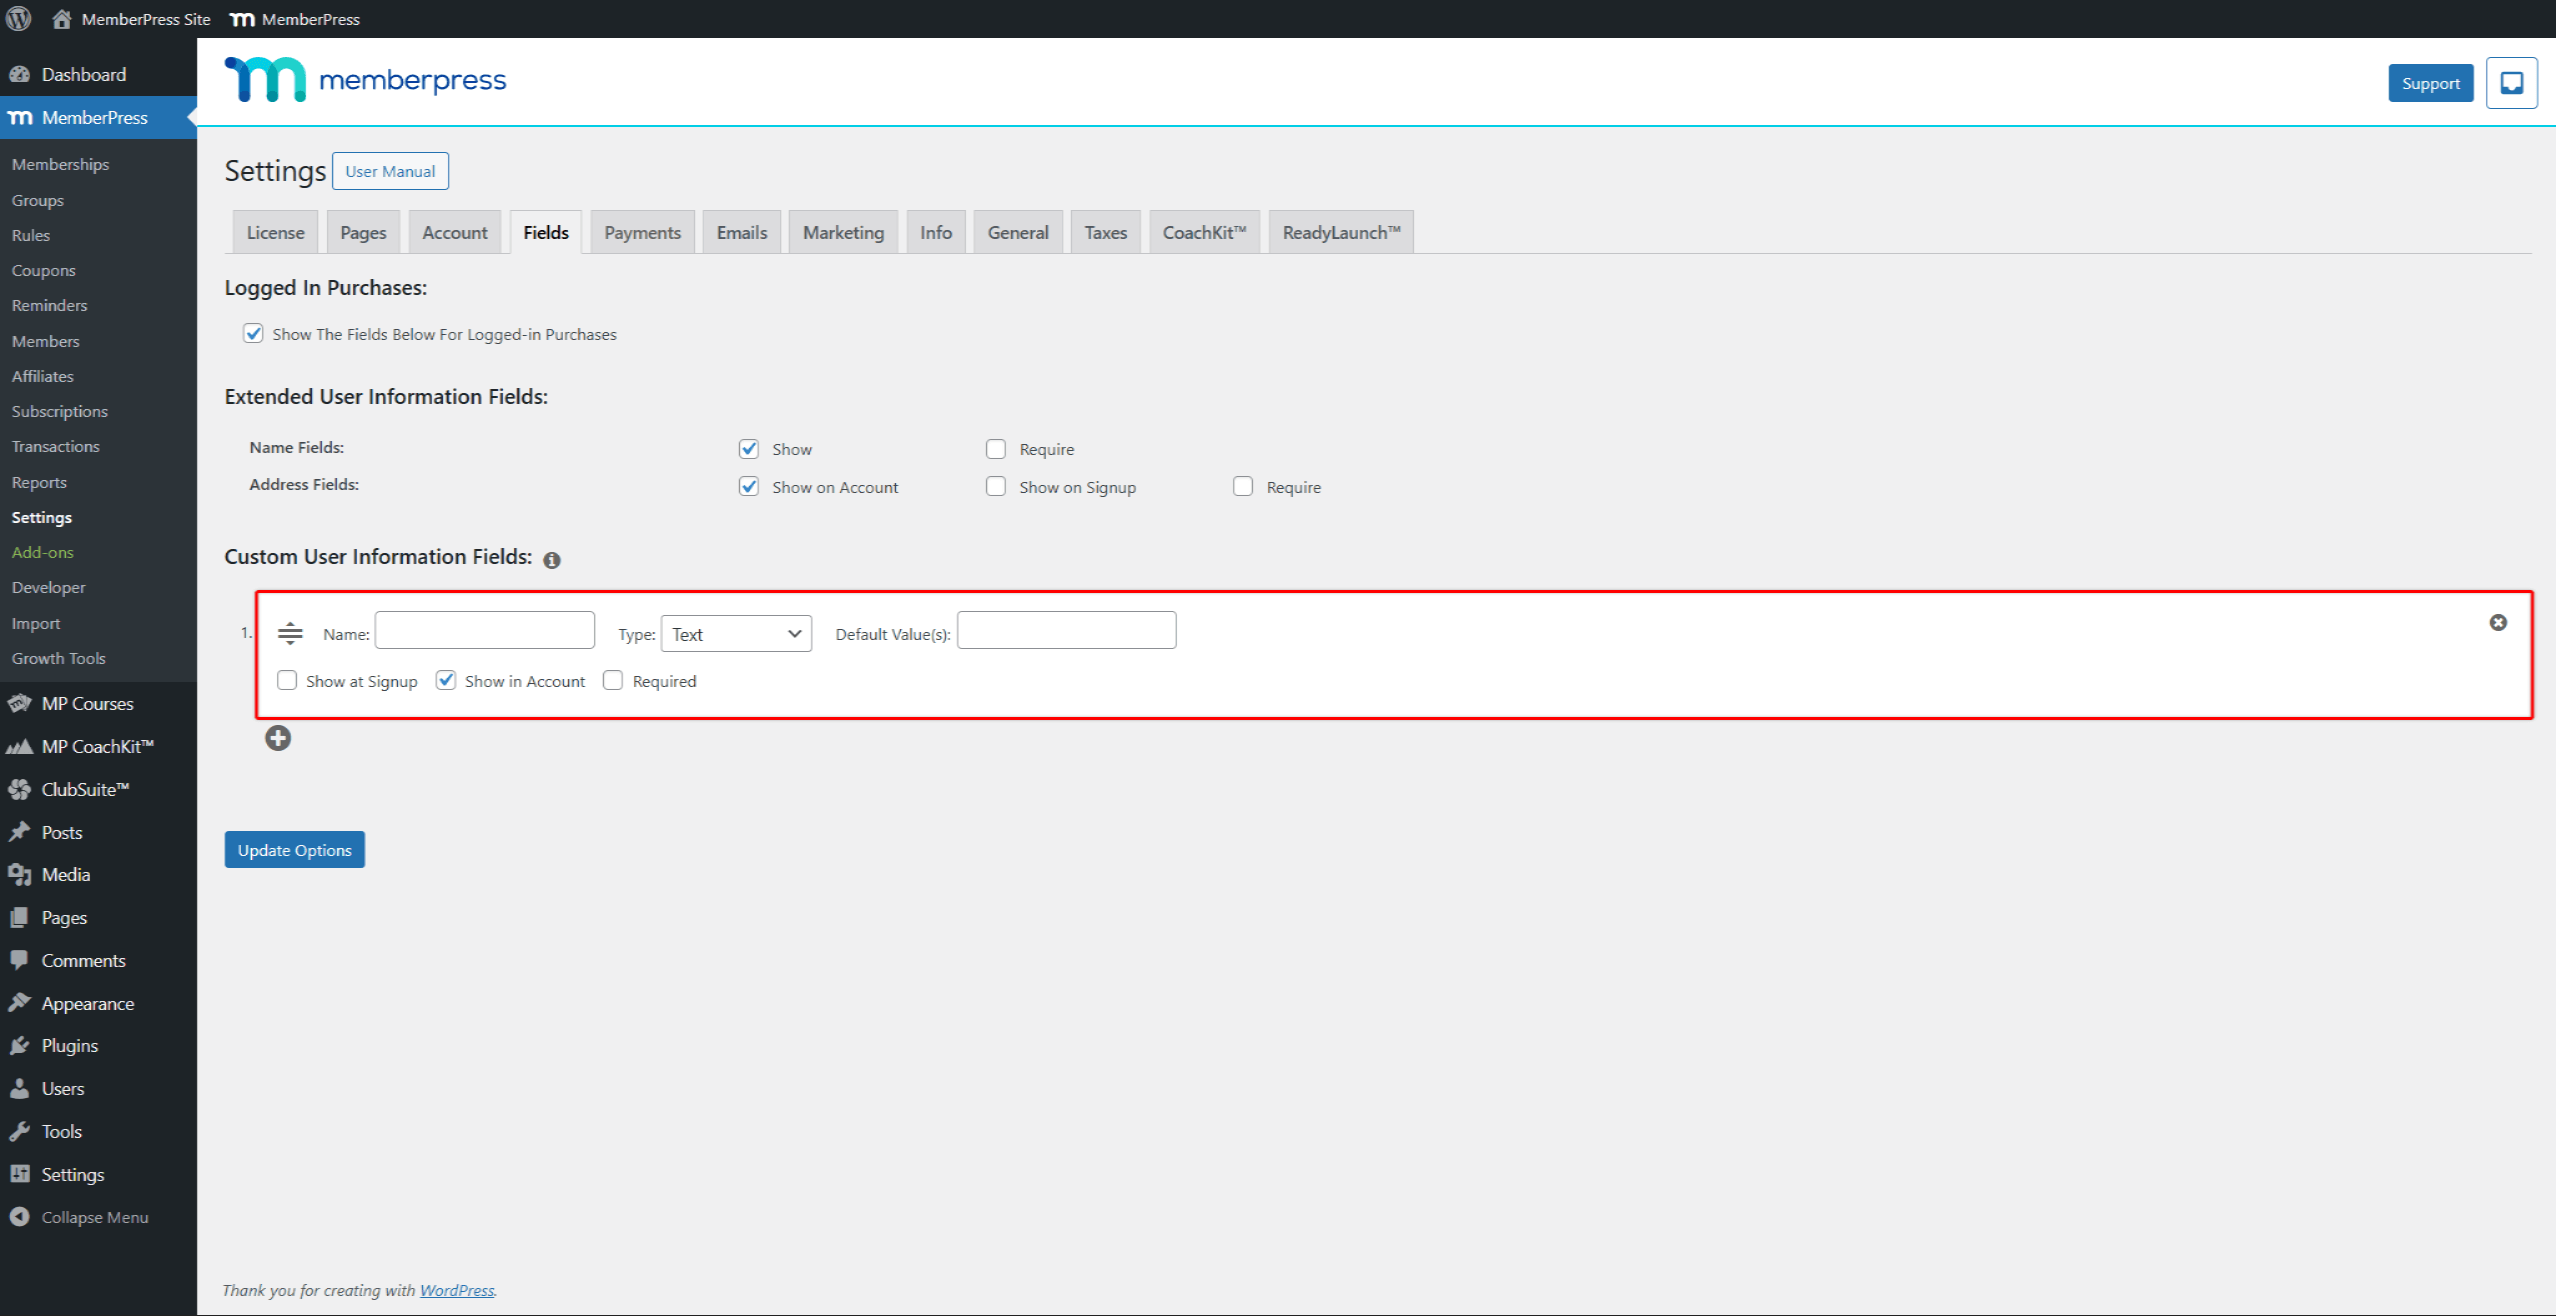
- Haga clic en el botón Opciones de actualización para guardar el campo.
Puedes crear campos personalizados MemberPress ilimitados para que tus miembros los rellenen.
Además, en la configuración de cualquier Membresía, puede elegir mostrar u ocultar campos específicos. Por defecto, todos los campos personalizados definidos como Mostrar al registrarse wfigurará en los formularios de inscripción de todos los Miembros.
Esto le permitirá mostrar sólo los campos que necesite en los formularios de inscripción de cada afiliación.
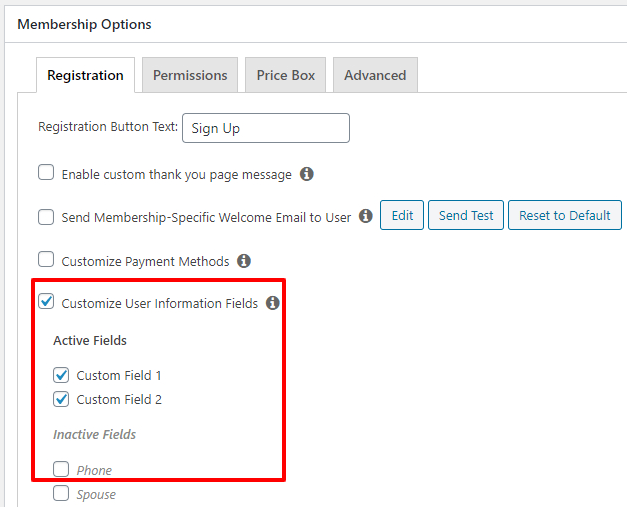
Campos personalizados definidos como Mostrar en cuenta será visible en las cuentas de los usuarios sólo después de inscribirse como miembro.
Creación de una opción en blanco por defecto para un campo personalizado desplegable
Para añadir una opción "vacía", añada lo siguiente como primera opción:
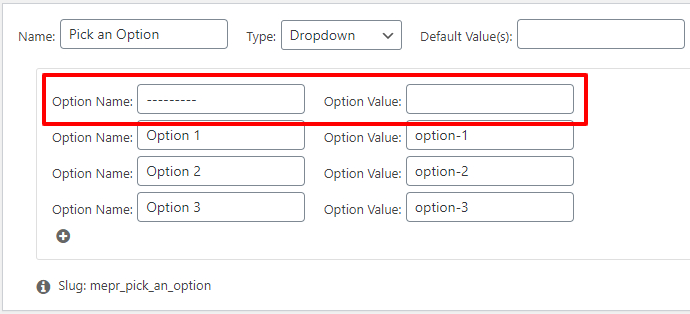
De este modo, cuando los usuarios no seleccionen una opción, MemberPress no les permitirá enviar el formulario y mostrará este error:

Creación de una opción de casilla de verificación en la que se puede hacer clic
Para crear un campo personalizado de casilla de verificación en el que se pueda hacer clic, basta con añadir algo de html básico al nombre del campo al crearlo. He aquí un ejemplo:
<a href='https://www.yoursite.com/special-policies' target='_blank'>Acepte nuestras políticas especiales</a>

Que aparecerá así en la página de registro:

Activación de varias opciones de "marcado" para campos personalizados de selección múltiple y casillas de verificación
MemberPress le permite introducir una opción por defecto que se seleccionará o marcará para los tipos de Campo Personalizado Multi-Select y Casillas de verificación utilizando la opción
Valor(es) por defecto para el campo e introduciendo el valor de la opción como se muestra aquí:

Para marcar más de una opción, basta con separar los campos
Valor de la opcións introducidos en el Valor(es) por defecto como se muestra aquí (separados por comas, sin espacios entre las entradas):

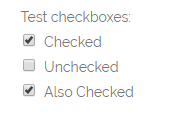
Este es el aspecto que tendría en su página de registro:
