MemberPress le permite calcular los impuestos con TaxJar o cargando tipos impositivos personalizados. El sitio Documentación fiscal cubre ambos métodos. El complemento Quaderno añade otra opción automatizando el cálculo de impuestos. Conecta Quaderno, una herramienta de automatización fiscal, a MemberPress.
Esta guía muestra cómo instalar el complemento Quaderno y configurar sus opciones principales.
Instalar el complemento Quaderno
- Vaya a Panel de control > MemberPress > Complementos.
- Busque el complemento Quaderno en la lista.
- Haga clic en el botón Instalar complemento para instalarlo y activarlo.
Configurar los ajustes de Quaderno
Tras la instalación, activa el complemento en los ajustes fiscales de MemberPress.
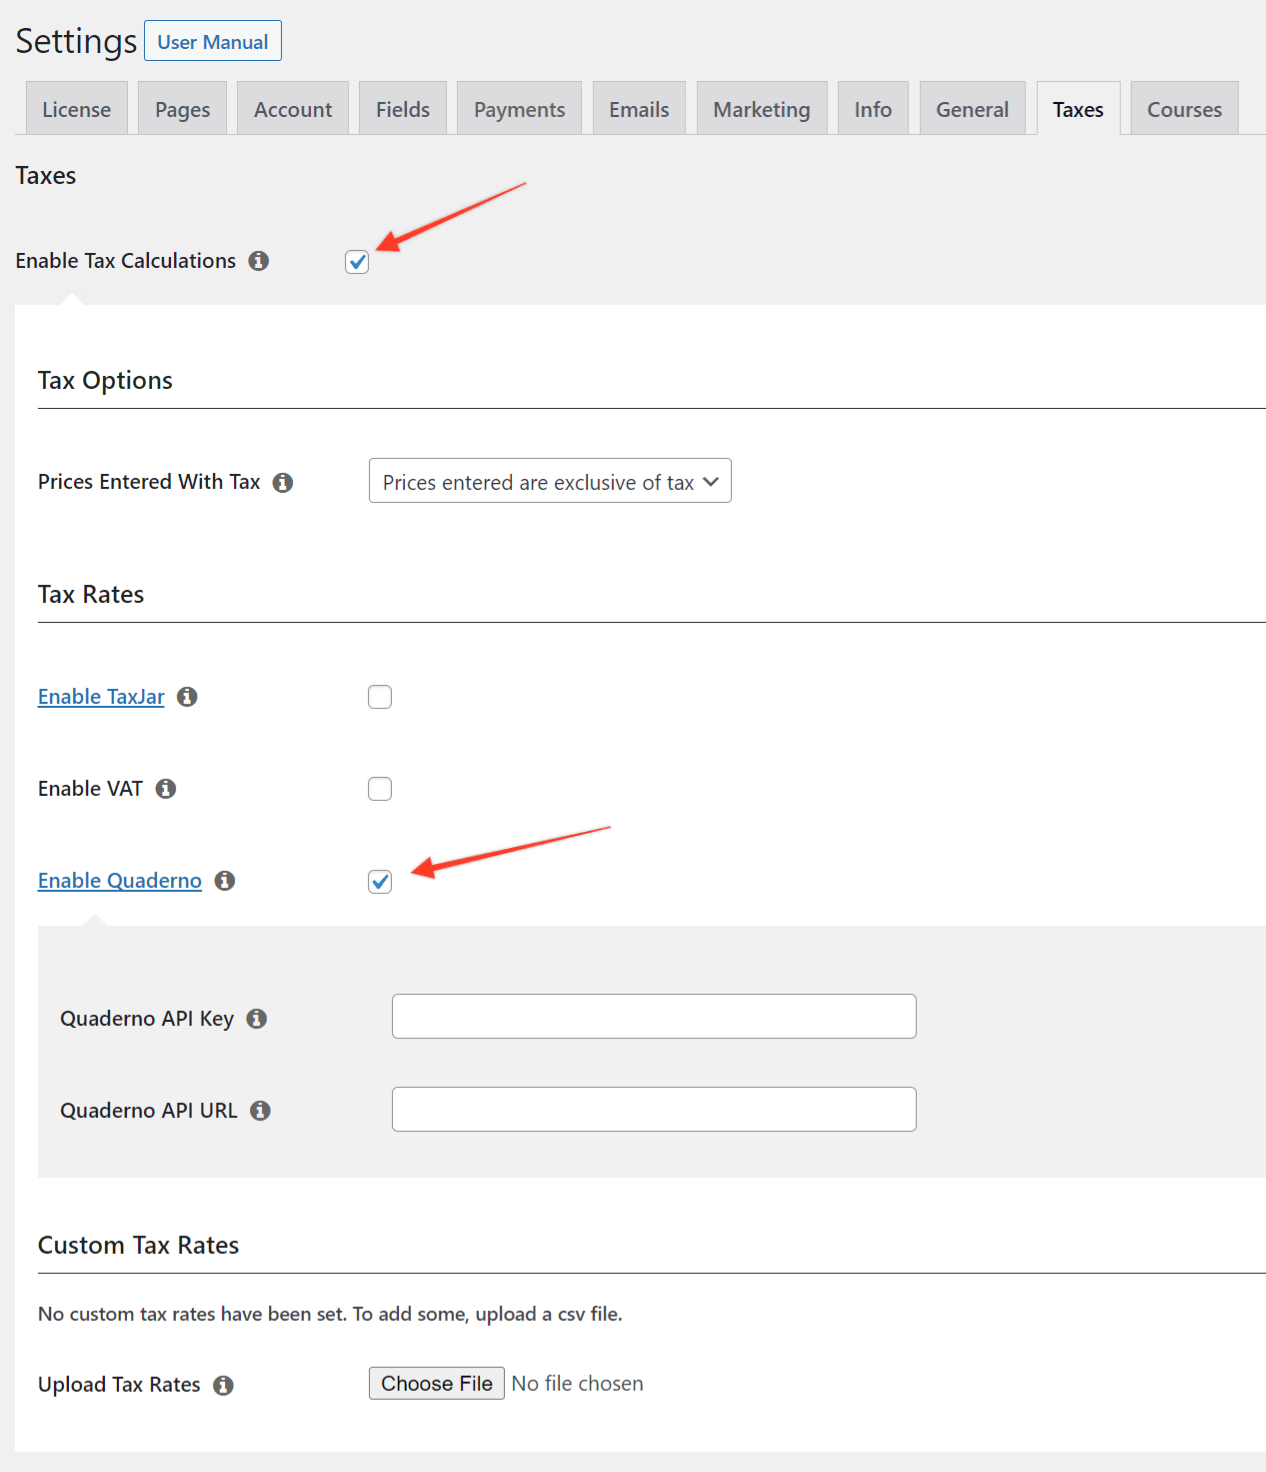
- Vaya a Panel de control > MemberPress > Configuración > Impuestos ficha.
- Compruebe el Activar el cálculo de impuestos si aún no está activada.
- Marque la casilla situada junto al Activar Quaderno opción.
- Encuentra los dos nuevos campos: Clave API de Quaderno y Quaderno API URL.
- Inicie sesión en Cuenta Quaderno y abra el Claves API página.
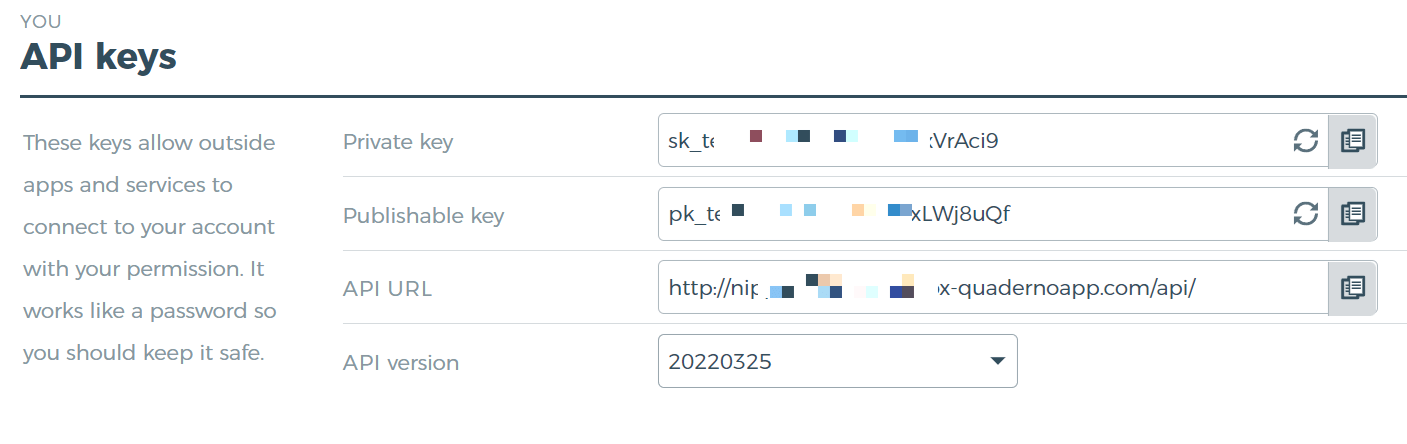
- Copie el Clave privada y el valor del URL API campo.
- Volver a Panel de control > MemberPress > Configuración > Impuestos ficha.
- Pegue el Clave privada en el Clave API de Quaderno campo.
- Pegue la URL en el campo Quaderno API URL campo.
- Haga clic en Guardar para almacenar los cambios.
MemberPress ahora se conecta a la API de Quaderno automáticamente. Calcula los tipos impositivos a partir de la dirección del cliente y tu configuración de Quaderno.
Establecer jurisdicciones Quaderno
Las jurisdicciones fiscales desempeñan un papel clave en Quaderno. En Guía de configuración fiscal de Quaderno los explica en detalle.
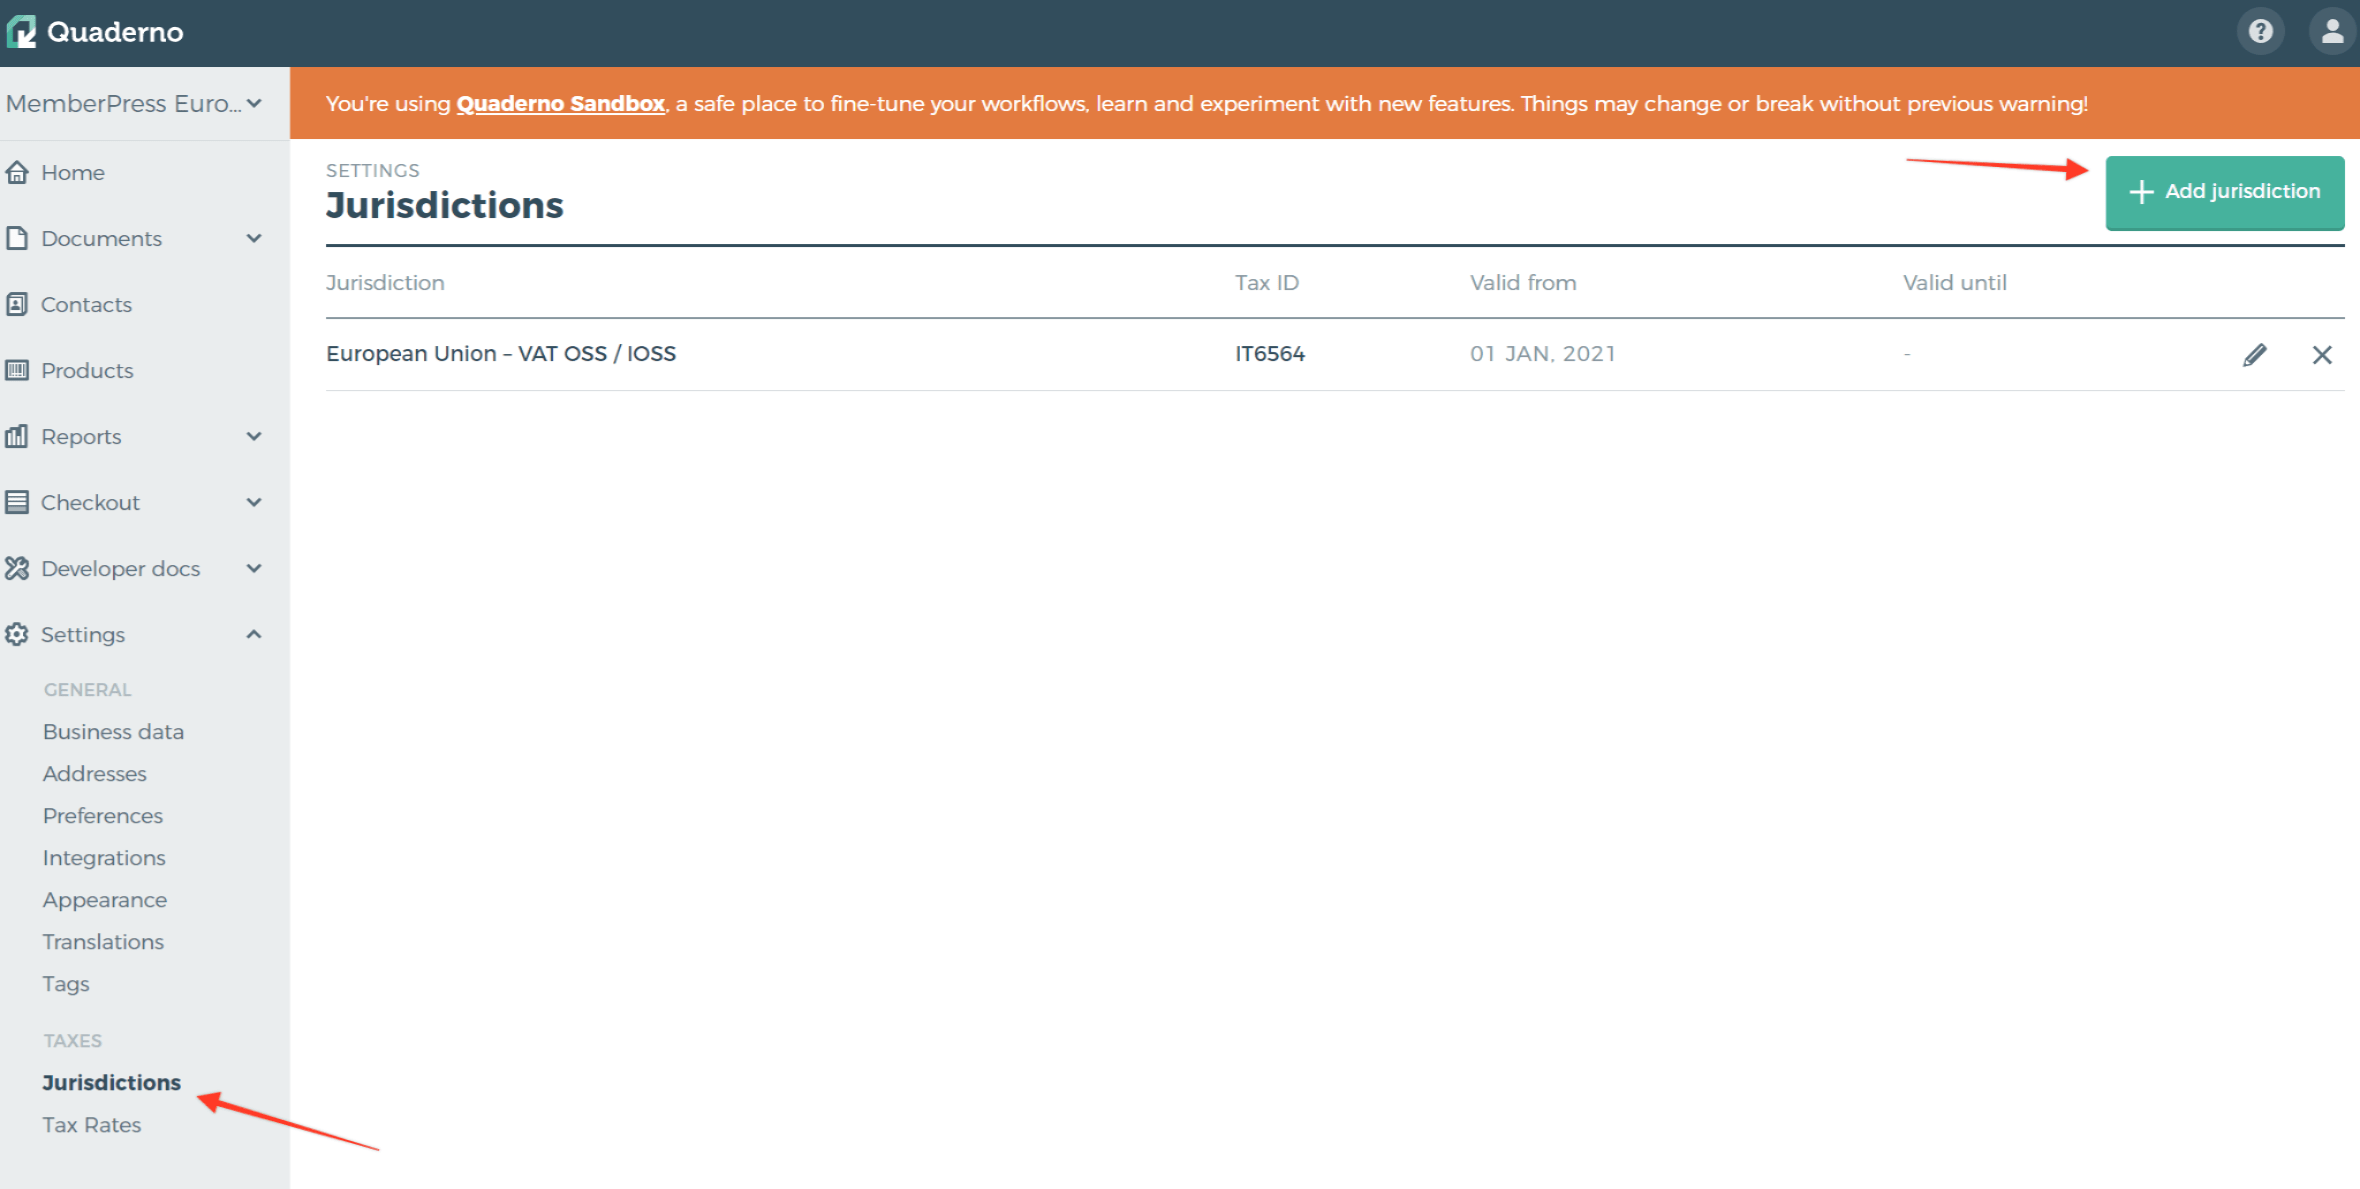
- Abrir Quaderno Dashboard > Configuración > Impuestos > Jurisdicciones.
- Haga clic en el botón Añadir jurisdicción botón.
- Rellene los campos obligatorios para la jurisdicción.
El ejemplo siguiente muestra una jurisdicción de la Unión Europea.
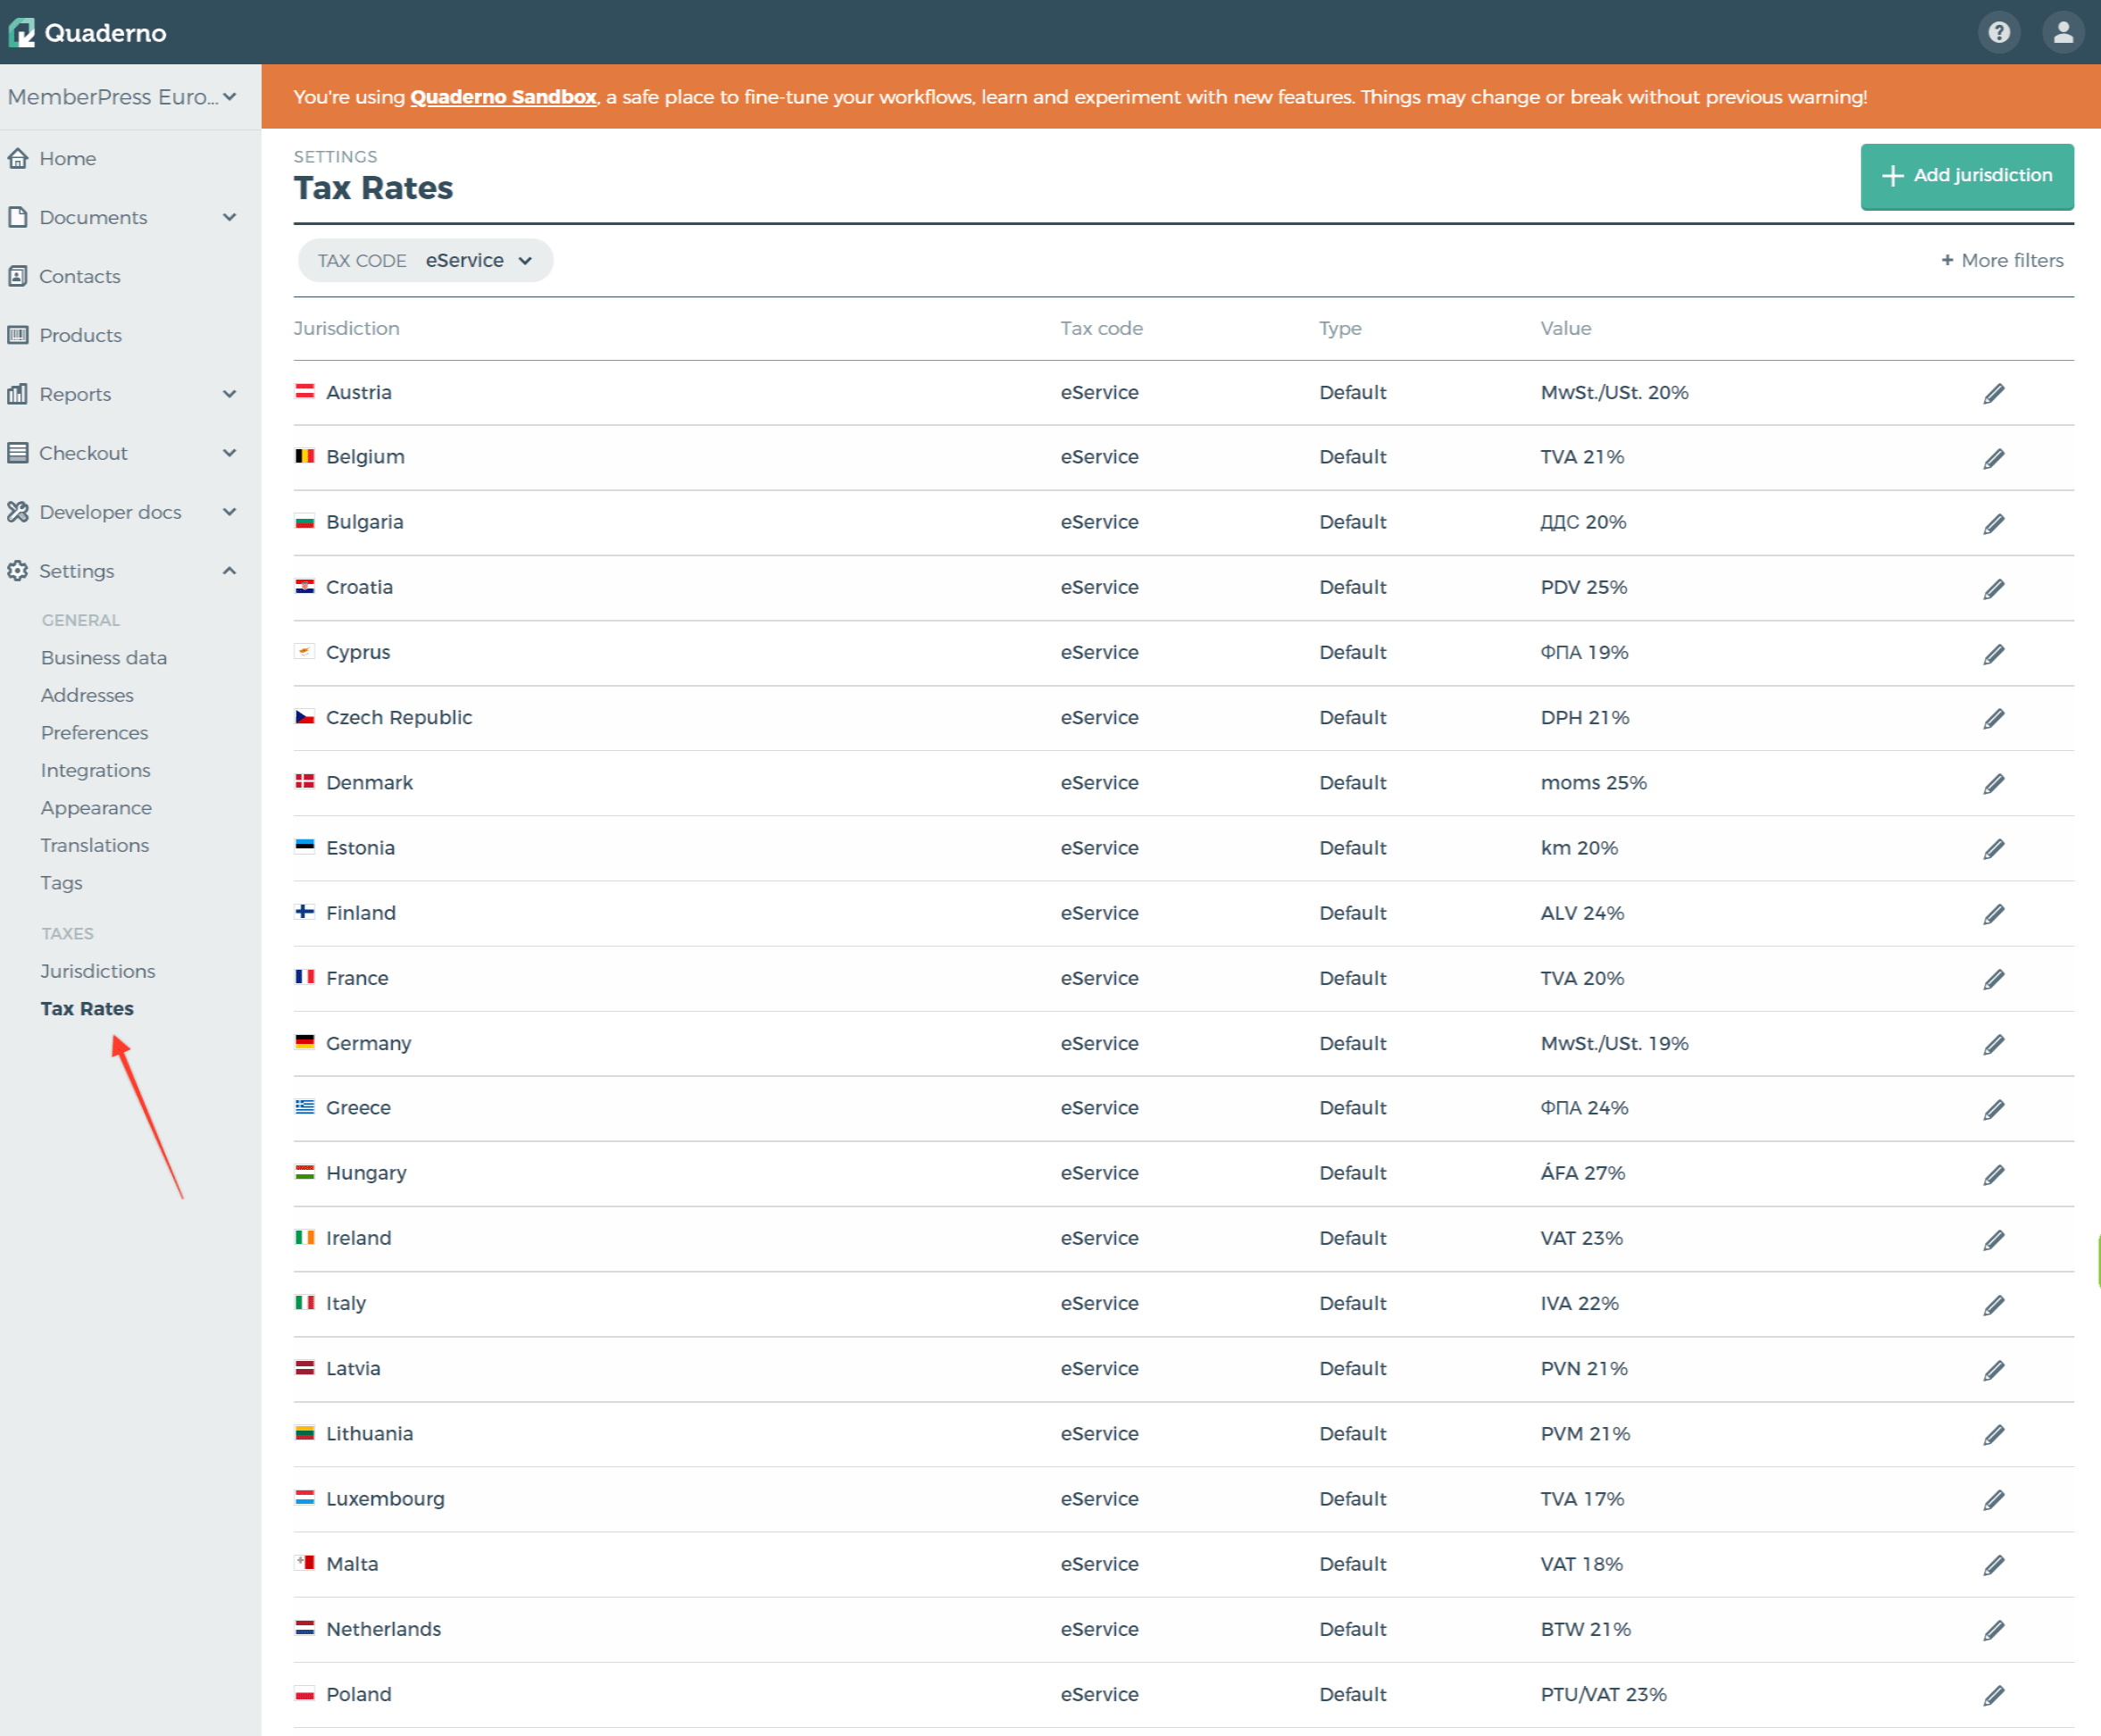
Quaderno añade todos los impuestos para esa jurisdicción automáticamente. Estos impuestos se aplican a cada pago futuro en su sitio. Para verlos, abra Quaderno Dashboard > Ajustes > Impuestos > Tipos impositivos.
Configurar el comportamiento fiscal en los ajustes de MemberPress
Volver a Panel de control > MemberPress > Configuración > Impuestos ficha.
A continuación, elija si los precios introducidos con impuestos son exclusivo o inclusivo. En Precios con IVA de la Documentación fiscal explica ambas opciones.
Opciones específicas para los afiliados
Por defecto, Quaderno utiliza el código fiscal y el tipo de producto de Quaderno Dashboard > Configuración > Preferencias.
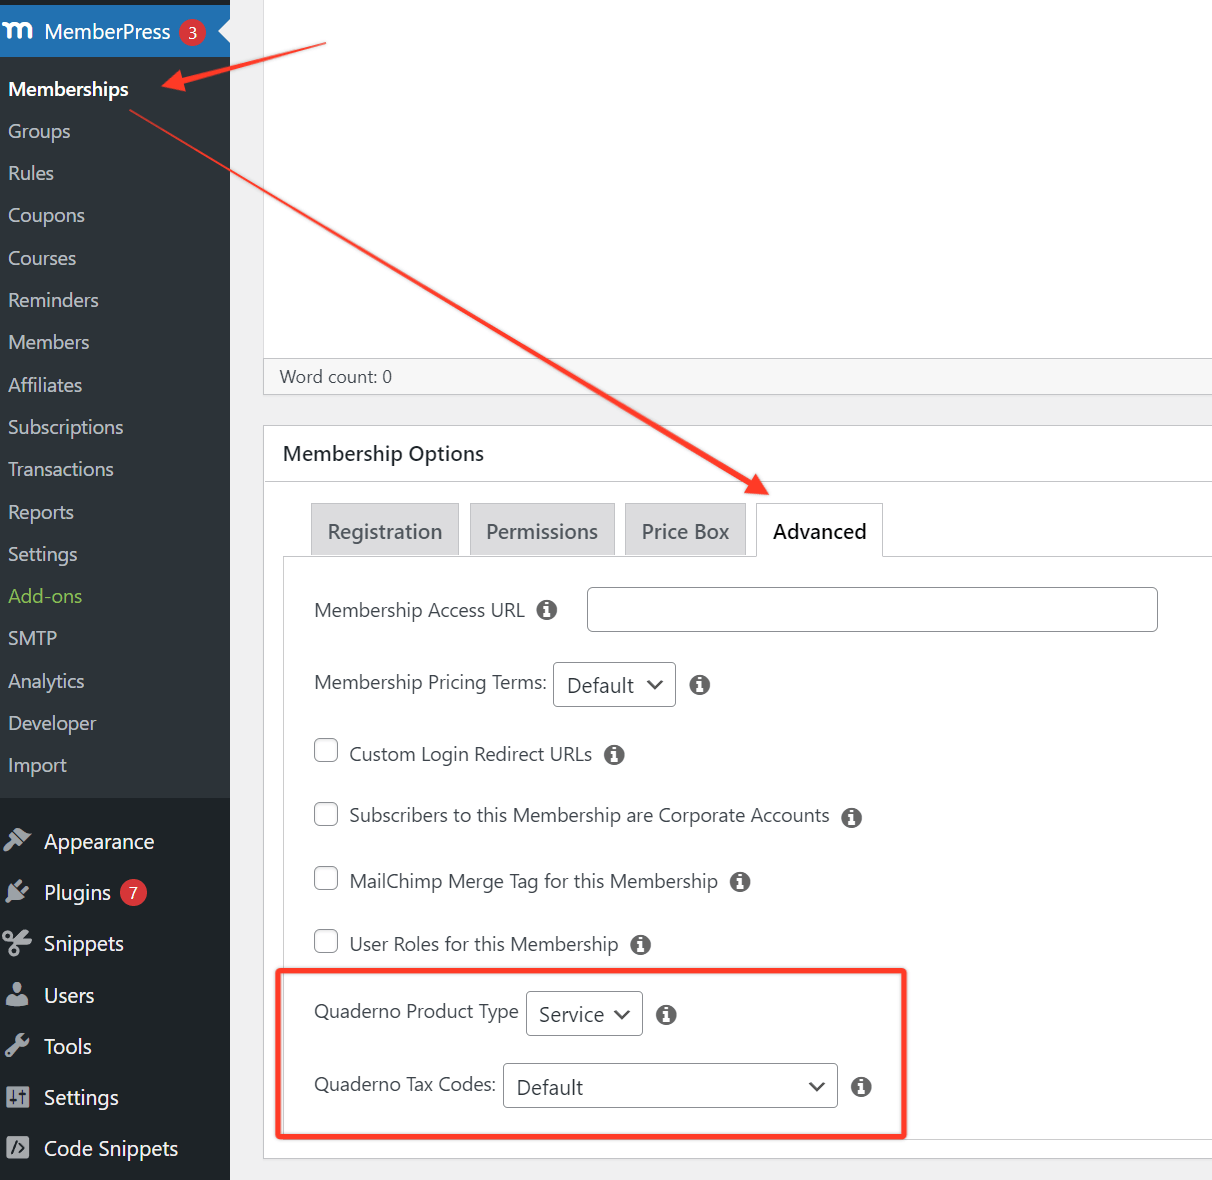
Puede modificar estos valores para cada afiliación. Abra el Avanzado en las opciones de afiliación y, a continuación, establezca Tipo de producto y Código fiscal campos.
Tipo de producto ofrece dos opciones: Servicio (por defecto) y Bien. Código fiscal ofrece varias opciones:
- Por defecto: el código fiscal desde la configuración de Quaderno;
- Consultoría: servicios de consultoría y profesionales, como abogados, diseñadores, ingenieros y asesores fiscales;
- Libro electrónico: un libro electrónico vendido con uso ilimitado;
- Servicios prestados por vía electrónica: servicios automatizados prestados a través de Internet con una intervención humana mínima;
- No imponible: bienes o servicios que no están gravados en jurisdicciones que sí lo están;
- Tipos impositivos reducidos: bienes y servicios específicos que pueden beneficiarse de una tarifa reducida;
- Software como servicio (SaaS): software en la nube suministrado a través de internet, no personalizado ni descargable;
- Generalmente imponible: bienes o servicios gravados al tipo normal en las jurisdicciones que aplican impuestos.
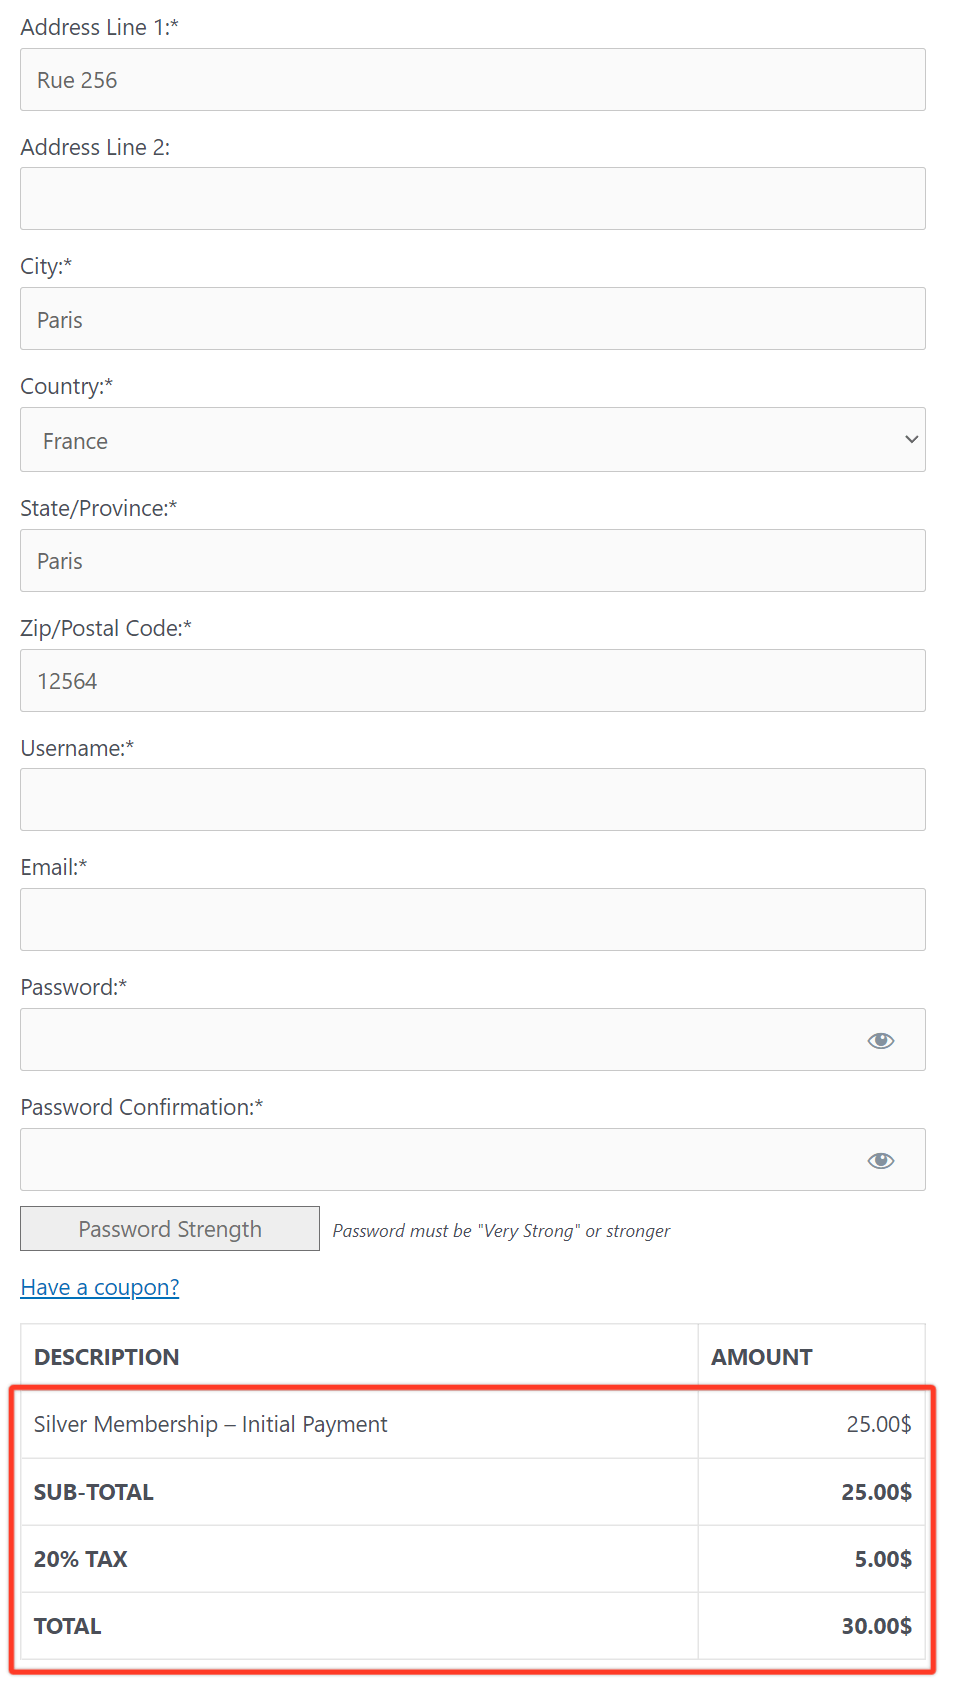
Tras la configuración, el cliente introduce su dirección en la página de registro. A continuación, MemberPress se conecta a Quaderno. Calcula los impuestos a partir de la dirección del cliente y su jurisdicción.
Tras registrarse correctamente, MemberPress envía los datos a Quaderno. Ver informes de impuestos y clientes en Quaderno Dashboard > Documentos > Ventas > Facturas y en el Contactos sección.
La configuración está completa. Cuando los clientes compran a través de MemberPress, el complemento recoge los impuestos y los registra en tu cuenta de Quaderno. Puedes gestionar todos los datos fiscales desde el panel de control de Quaderno.


