Lesson 17: How to Protect MemberPress WordPress Widgets
Widgets are small content blocks that can be added to various areas of your WordPress theme, such as sidebars, headers, and footers. By utilizing widgets, you can enhance the functionality of your website and boost member engagement
MemberPress offers several widgets that enable your members to conveniently log in, access their account page, view their current subscription, and more. These widgets can be a valuable addition to your website, enhancing the user experience for your members and making it easier for them to manage their membership.
If you're looking to have more control over the visibility of your widgets, you can combine the power of MemberPress with the Widget Options plugin. With this plugin, you can easily manage the display of your widgets on your MemberPress site, allowing you to show or hide them based on various criteria.
In this Video…
We’ll show how to add the MemberPress Subscription widget to your WordPress footer menu.
How to Add a MemberPress WordPress Widget
Step 1: Go to your WordPress dashboard > Appearance > Widgets
Step 2: Add Widget to Your Preferred Location
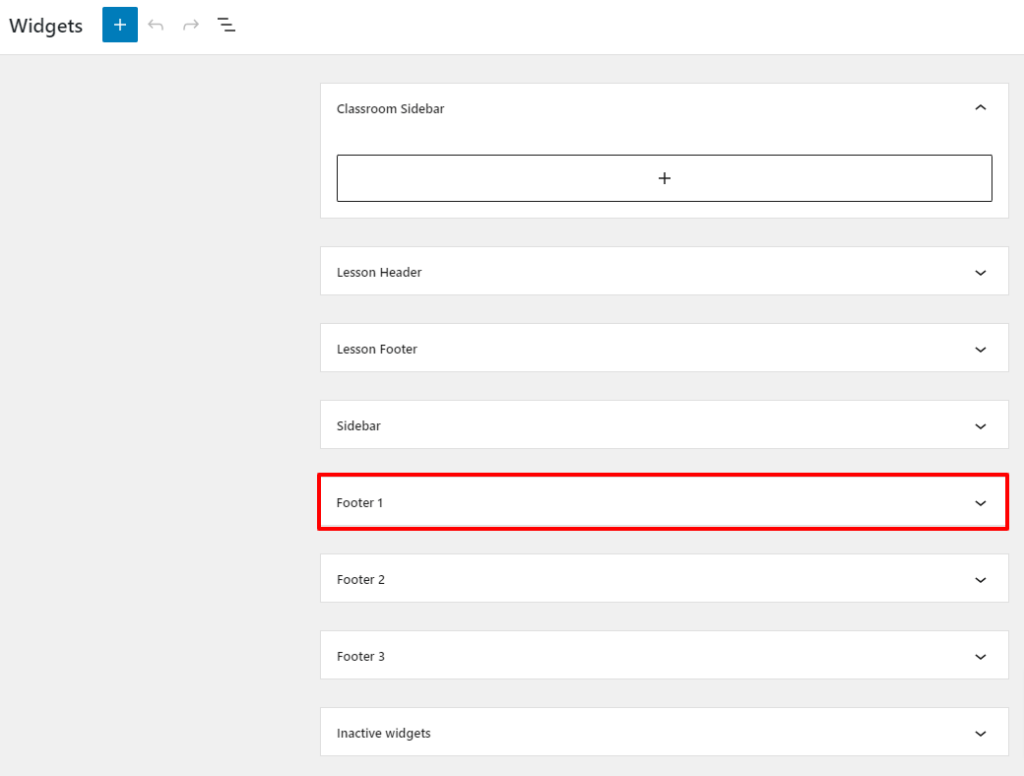
Again, for this example, we’re adding the MemberPress Subscriptions widget to the footer section. So we’ll select the drop-down arrow on the Footer 1 tab:
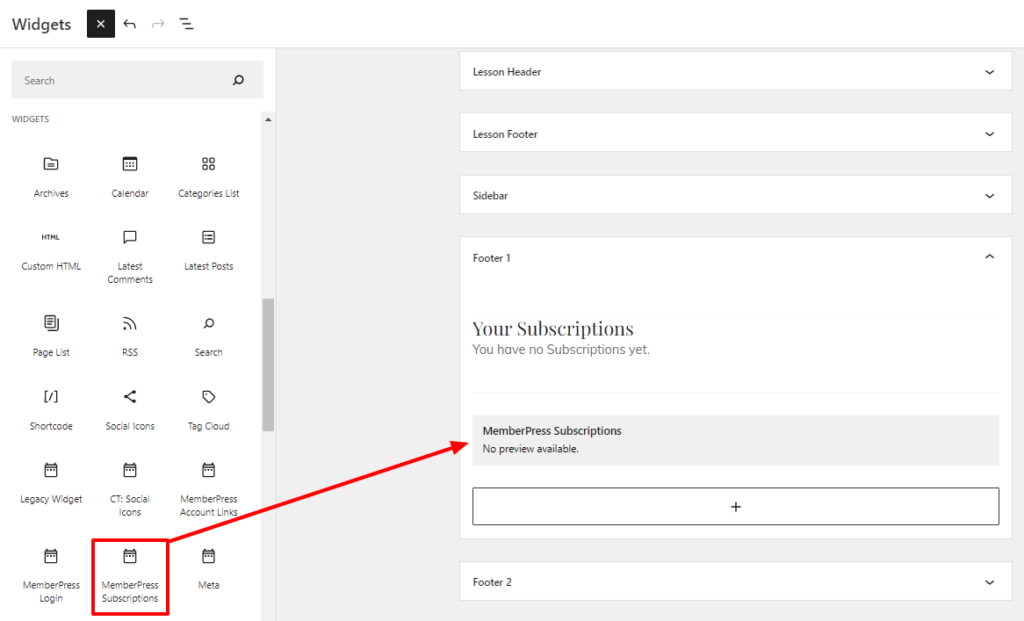
Next, click the blue + icon in the top left-hand corner to reveal the number of available WordPress and MemberPress widgets.
Locate the “MemberPress Subscriptions”, then drag and drop the widget to the Footer 1 section:
Step 3: Click the “Update” button.
How to Protect a MemberPress WordPress Widget
Step 1: Go to your WordPress dashboard > Plugins > Add New > and Search for “Widget Options”:

Click to “Install” and “Activate”.
Step 2: Go back to your WordPress dashboard > Appearance > Widgets
You’ll notice this screen looks a lot differently now, with much more options available:
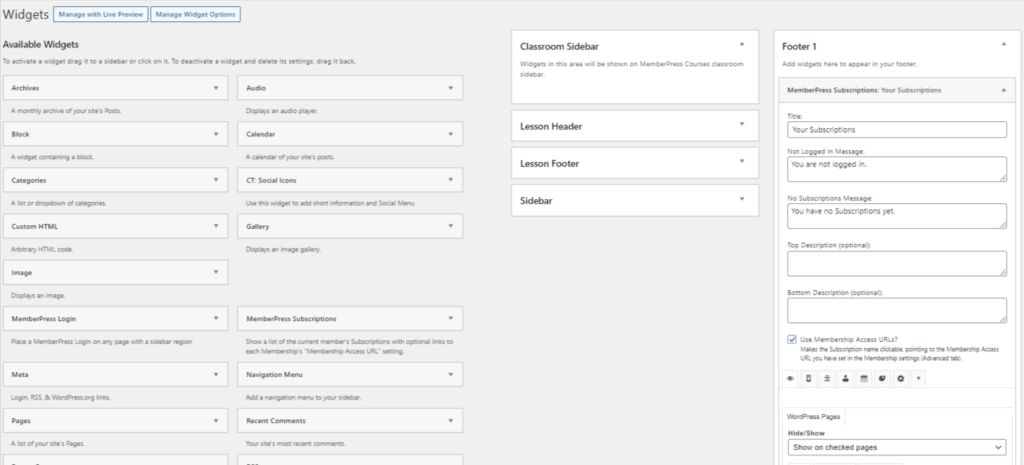
To see the look of your Widget in real-time, select the “Manage with Live Preview” button on the top left-left hand corner of your screen:

WordPress will automatically open up the Widgets customizer screen alongside your home screen preview. Here you can select where and which widget to edit.
Because we added a MemberPress Subscription Widget to our Footer 1, we’ll click here:
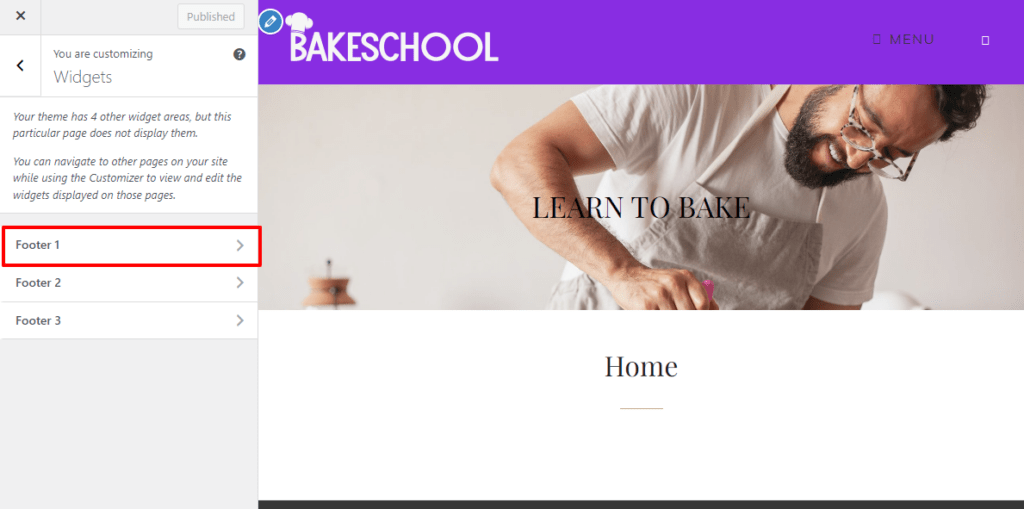
By selecting the MemberPress Subscription Widget drop-down arrow, we can make edits and preview them on the right:
Right now the Subscription Widget is viewable on the homepage to every site visitor. We want to protect this widget so that only members who are logged in to their account can see the Subscription Widget.
To do this, we’ll need to create a MemberPress Rule.
Step 3: Open a New Tab and Go to Your WordPress Dashboard > MemberPress > Rules > Add New
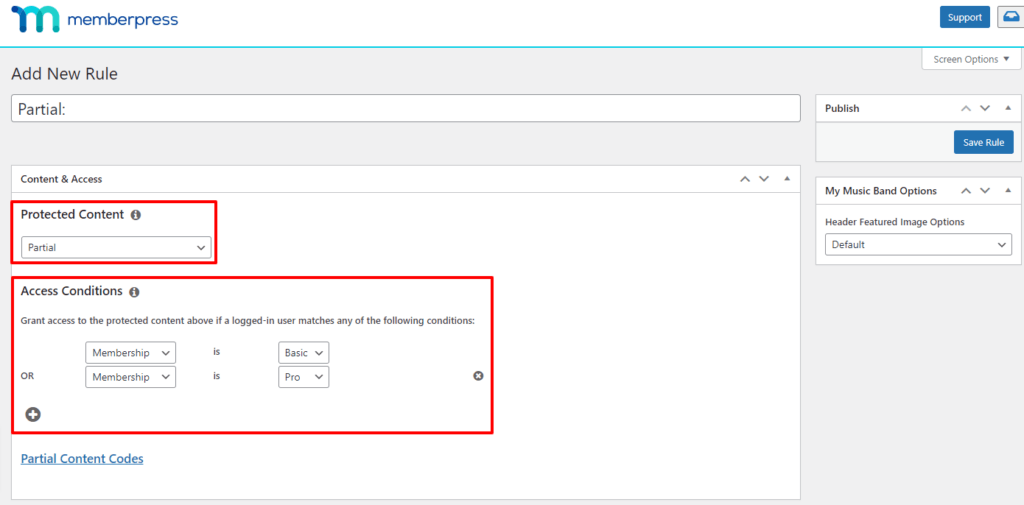
Step 4: Create a Partial Access Rule with Access Conditions
In the drop-down arrow under “Protected Content” select “Partial”. Next, select your membership(s) under the Access Conditions section:
Step 5: Click the “Save Rule” button.
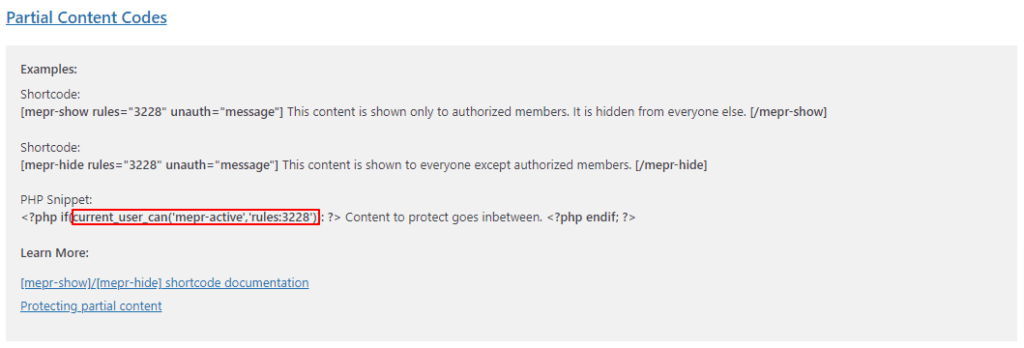
Step 6: Copy PHP Snippet
Click the “Partial Content Codes” underlined link and copy the portion of the PHP Snippet shown here:
Step 7: Paste PHP Snippet
Go back to your “Manage with Live Preview” Widget tab and paste your PHP Snippet here:

Step 8: Click “Done”, followed by the “Publish” button.
Related Reads + Resources
- Support Doc: Available Widgets
- Support Doc: Protecting Widgets

