


¿Estás pensando en crear una página web de suscripción con vídeos? Aquí tienes un tutorial rápido sobre cómo hacerlo con MemberPress y Wistia.
A decir verdad, puedes utilizar Wistia, Vimeo Pro, Brightcove o incluso Amazon Web Services (AWS) junto con MemberPress para crear un sitio web de membresía basado en vídeos. Sin embargo, hemos comprobado que Wistia es fácil de usar, cuenta con excelentes herramientas de gestión de vídeos y tiene un precio realmente competitivo. Utilización de nuestro complemento MemberPress AWS es un poco más eficaz y probablemente más barato, pero puede haber una curva de aprendizaje más pronunciada ... por lo que encontramos que Wistia es realmente una gran opción para cualquiera que desee iniciar un sitio de membresía de vídeo.
Antes de empezar, debes saber que no existe una solución milagrosa para proteger tus vídeos. Una persona suficientemente motivada y con conocimientos técnicos que sea miembro de tu sitio web suele encontrar la manera de descargar tus vídeos o grabarlos utilizando un programa de captura de pantalla. La clave está en hacer que a tus miembros les resulte muy difícil, o incluso imposible, descargar tus vídeos; esto suele ser suficiente para evitar la mayor parte de la piratería en tu sitio web. La buena noticia es que, al utilizar las técnicas que se describen en este artículo, podrás impedir por completo que las personas que no tengan acceso a tu sitio de membresía vean o descarguen contenido de vídeo, y dificultarás que tus miembros conserven copias de tus vídeos.
Esto es lo que necesitarás para empezar:
- Un sitio web WordPress autoalojado
- MemberPress
- Una cuenta Wistia
Configuración en Wistia
Así pues, a efectos de este artículo, daremos por hecho que ya dispones de un sitio web de WordPress autohospedado y que ya tienes instalado MemberPress, y nos centraremos principalmente en la parte relacionada con Wistia.
Antes de entrar en detalles técnicos, hablemos de los conceptos básicos de la protección de vídeos. Vamos a utilizar una función que ofrece Wistia (y la mayoría de los demás servicios premium de alojamiento de vídeos) para restringir la incrustación de los vídeos a un conjunto específico de nombres de dominio o direcciones IP. Esto significa que el vídeo solo se podrá incrustar en sitios web con los dominios que especifiques. A continuación, utilizaremos una regla en MemberPress para proteger las páginas en las que estén incrustados nuestros vídeos. Así pues, con esta técnica, MemberPress proporcionará la primera línea de protección, de modo que los no miembros ni siquiera podrán ver tus vídeos; a continuación, la segunda línea de protección es el filtrado de dominios en Wistia, para que tu vídeo no pueda incrustarse en otros sitios web.
Allá vamos:
1. Crea una cuenta y sube tu vídeo a Wistia
Esto es bastante sencillo y el equipo de soporte de Wistia es realmente bueno, así que no deberías tener problemas con este paso.
2. Habilite el bloqueo de dominios en el panel de su cuenta Wistia
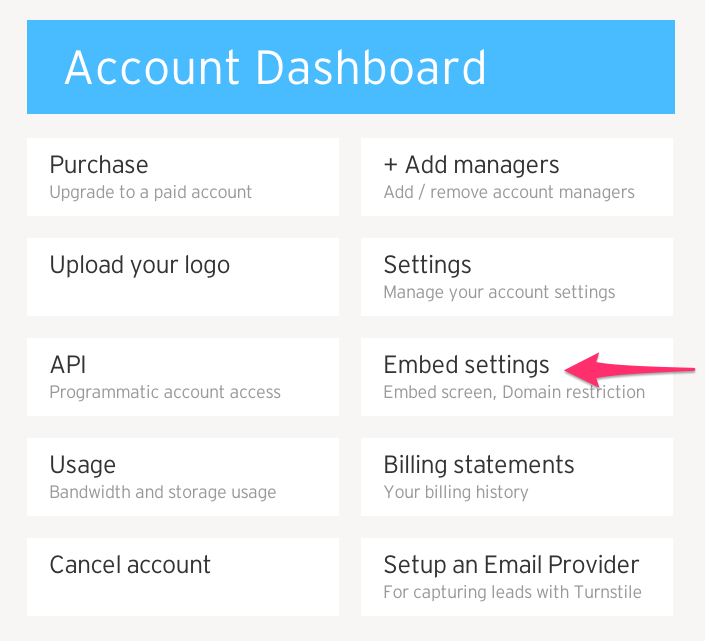
Encontrará los ajustes de incrustación en "Cuenta" -> "Panel de control de la cuenta" -> "Ajustes de incrustación":
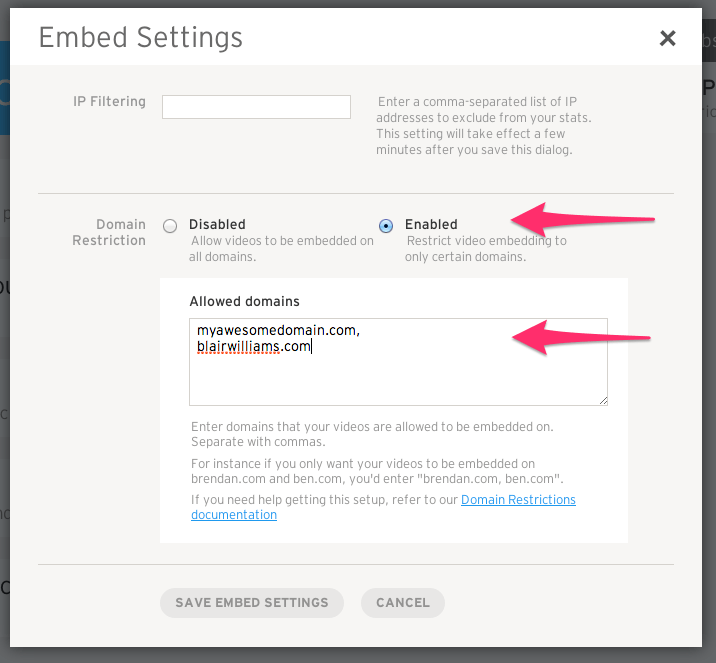
Una vez que hagas clic en “Configuración de incrustación”, podrás introducir los nombres de dominio de los sitios web a los que se les permitirá incrustar vídeos de tu cuenta de Wistia. Aquí es donde deberás introducir los nombres de dominio de tu sitio web de membresía de WordPress que utilice MemberPress:
Configuración de WordPress
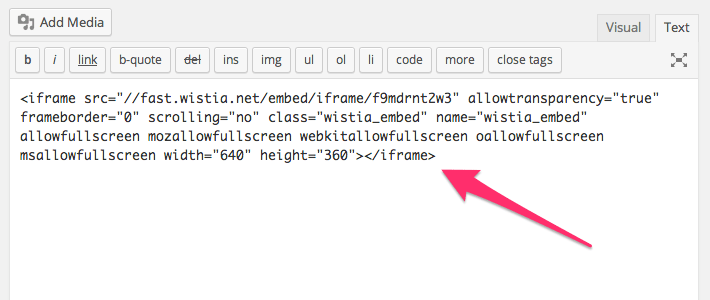
Ahora puedes tomar el código de incrustación de tu vídeo recién subido en Wistia y pegarlo en un nuevo post o página de tu sitio web WordPress:
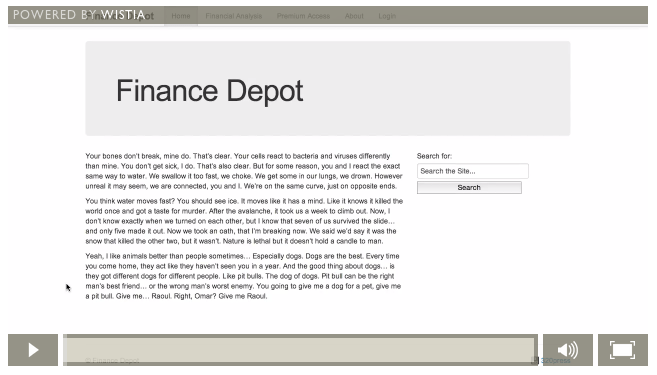
Y tienes un vídeo muy chulo en tu página de WordPress:
Una vez hecho esto, puedes impedir el acceso a la página en la que está incrustado tu vídeo creando una sencilla regla MemberPress:
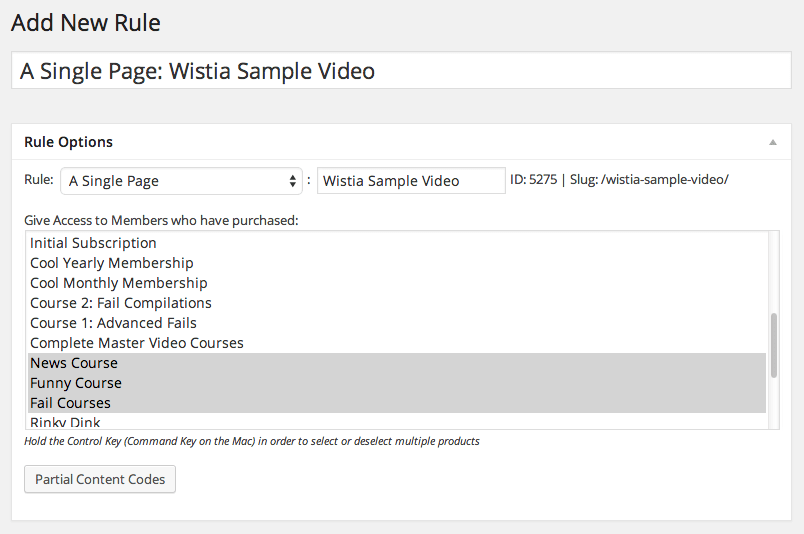
Por supuesto, con MemberPress puedes crear una regla que proteja grandes grupos de páginas o entradas, pero esto también funcionará.
Así pues, aunque Wistia no protege los vídeos con tanta eficacia como, por ejemplo, nuestro complemento MemberPress para AWS, ofrece unas buenas funciones de gestión de vídeos para quienes no quieren complicarse con AWS, ¡y todo ello a un precio muy razonable!











 ES
ES  EN
EN  FR
FR  DE
DE  PT
PT 