


Vous envisagez de créer un site d'abonnement vidéo ? Voici un petit tutoriel sur comment vous pouvez le faire avec MemberPress et Wistia.
À vrai dire, vous pouvez utiliser Wistia, Vimeo Pro, Brightcove ou même Amazon Web Services (AWS) en association avec MemberPress pour créer un site d'adhésion basé sur la vidéo. Mais nous avons constaté que Wistia est facile à utiliser, dispose d'excellents outils de gestion vidéo et propose un très bon rapport qualité-prix. Utilisation de notre module complémentaire MemberPress AWS est un peu plus efficace et probablement moins cher, mais il peut y avoir une courbe d'apprentissage plus raide ... nous trouvons donc que Wistia est une très bonne option pour tous ceux qui veulent démarrer un site d'adhésion vidéo.
Avant de commencer, sachez qu’il n’existe pas de solution miracle pour protéger vos vidéos. Un membre de votre site suffisamment motivé et doté de connaissances techniques suffisantes parviendra généralement à trouver un moyen de télécharger vos vidéos ou de les enregistrer à l’aide d’un logiciel de capture d’écran. L'essentiel est donc de rendre le téléchargement de vos vidéos très difficile, voire impossible, pour vos membres — cela suffira généralement à empêcher la majeure partie du piratage sur votre site. La bonne nouvelle, c’est qu’en utilisant les techniques présentées dans cet article, vous pourrez empêcher totalement les personnes n’ayant pas accès à votre site d’abonnement de visionner ou de télécharger du contenu vidéo, et vous rendrez difficile pour vos membres la conservation de copies de vos vidéos.
Voici donc ce dont vous aurez besoin pour commencer :
- Un site web WordPress auto-hébergé
- MemberPress
- Un compte Wistia
Mise en place de Wistia
Dans le cadre de cet article, nous partirons donc du principe que vous disposez déjà d'un site WordPress auto-hébergé, que vous avez déjà installé MemberPress, et nous nous concentrerons principalement sur l'aspect Wistia.
Avant d’entrer dans les détails techniques, parlons des principes de protection des vidéos. Nous allons utiliser une fonctionnalité disponible sur Wistia (et la plupart des autres services d’hébergement vidéo premium) pour limiter l’intégration des vidéos à un ensemble spécifique de noms de domaine ou d’adresses IP. Cela signifie que la vidéo ne pourra être intégrée que sur des sites web dont les noms de domaine auront été spécifiés par vos soins. Nous allons ensuite utiliser une règle dans MemberPress pour protéger les pages sur lesquelles nos vidéos sont intégrées. Ainsi, grâce à cette technique, MemberPress assurera la première ligne de protection : les non-membres ne pourront même pas visionner vos vidéos. La deuxième ligne de protection sera le filtrage par domaine dans Wistia, qui empêchera l’intégration de vos vidéos sur d’autres sites.
Nous y voilà :
1. Créez un compte et téléchargez votre vidéo sur Wistia.
C'est assez simple et l'équipe d'assistance de Wistia est vraiment géniale, vous ne devriez donc pas avoir de problèmes avec cette étape.
2. Activez le verrouillage du domaine dans votre panneau de compte Wistia
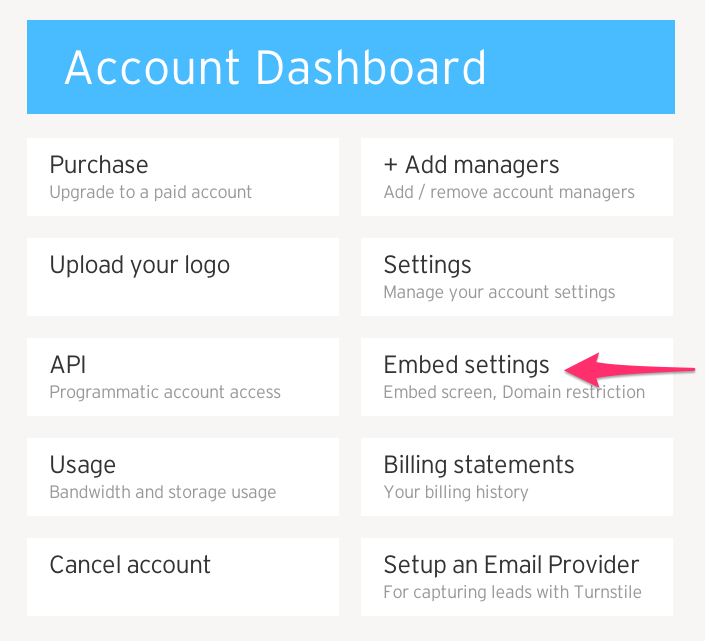
Vous trouverez les paramètres d'intégration sous "Compte" -> "Tableau de bord du compte" -> "Paramètres d'intégration" :
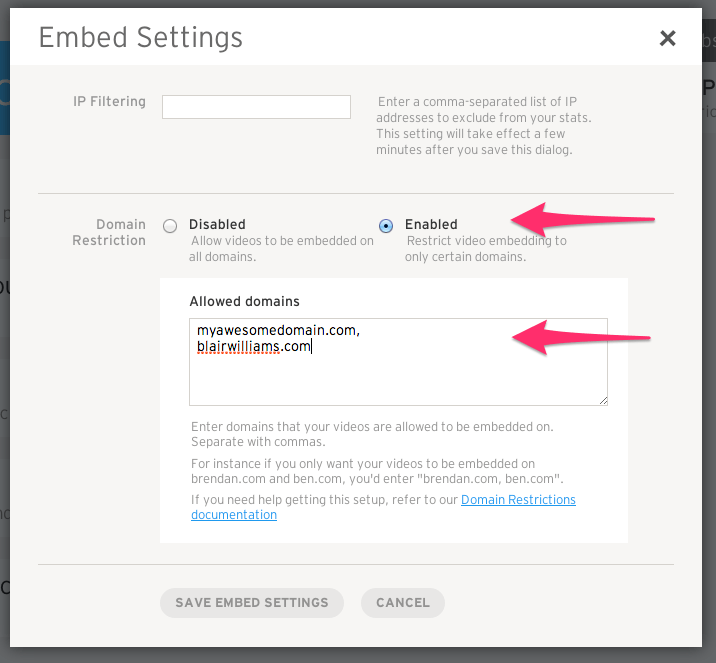
Une fois que vous aurez cliqué sur “ Paramètres d'intégration ”, vous pourrez saisir les noms de domaine des sites autorisés à intégrer des vidéos depuis votre compte Wistia. C'est ici que vous devrez saisir les noms de domaine de votre site WordPress d'adhésion fonctionnant sous MemberPress :
Mise en place du côté de WordPress
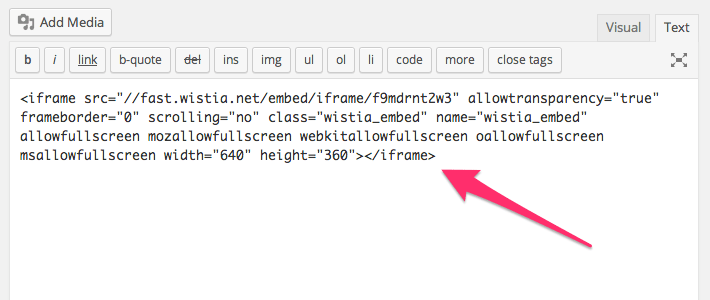
Vous pouvez maintenant prendre le code d'intégration de votre nouvelle vidéo téléchargée dans Wistia et le coller dans un nouvel article ou une nouvelle page de votre site Web WordPress :
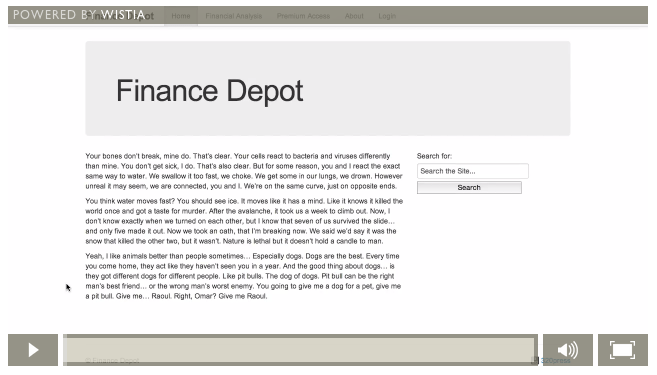
Et tu as une jolie vidéo sur ta page WordPress :
Une fois cette étape terminée, vous pouvez empêcher l'accès à la page où votre vidéo est intégrée en créant une simple règle MemberPress :
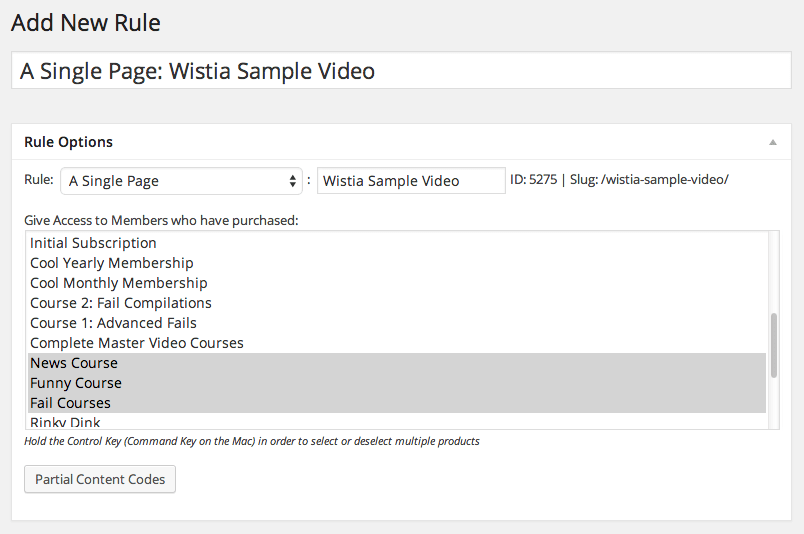
Bien sûr, avec MemberPress, vous pouvez créer une règle qui protégera de grands groupes de pages ou d'articles, mais cela fonctionnera également.
Ainsi, même si Wistia n'assure pas une protection des vidéos aussi efficace que celle offerte par un outil tel que notre plugin MemberPress AWS, il offre de bonnes fonctionnalités de gestion des vidéos pour ceux qui ne souhaitent pas se compliquer la vie avec AWS, le tout à un prix très raisonnable !











 FR
FR  EN
EN  ES
ES  DE
DE  PT
PT 