Lesson 16: How to Protect WordPress Menu Items with MemberPress
In a previous lesson, we mentioned the functionality of hiding and displaying specific navigation menu items based on user login status. Now, we’ll show you exactly how that’s done using the If-Menu plugin.
In this Video…
Discover how to effectively restrict access to specific menu items on your website, ensuring that only authorized members can access premium content.
As an example, we'll demonstrate how you can hide the member account page, then make it visible once a member has logged in.
How to Protect WordPress Menu Items with the If-Menu Plugin
Step 1: Install the If-Menu by going to WordPress > Plugins > Add New > and Search “If-Menu Visibility Control”:

Click to “Install” and “Activate”.
Step 2: Go to WordPress > Appearance > Menus
Just as we added a “Log in” link to our menu, now we’ll add and protect a “Member Account” link.
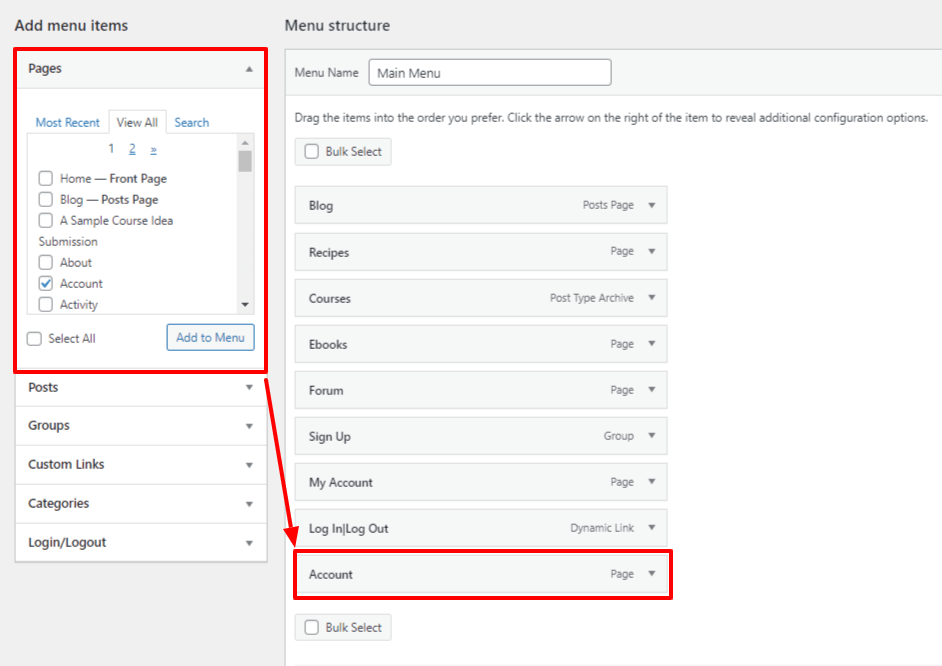
Locate your “Account” page in the Pages > View All column. Then click the Add to Menu button:

Feel free to drag and drop the newly added Account tab within the Menu structure.
Step 3: Enable Visibility Rules
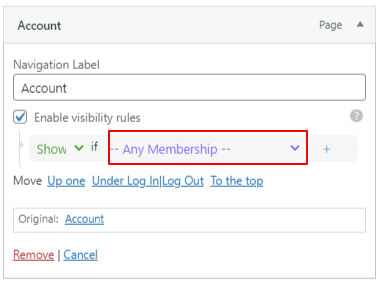
Click the drop-down arrow on the Account tab and check the “Enable visibility rules” box.
This will offer you additional protection options to Show or Hide the Account Menu item based on the condition you choose here:

We have selected to Show the Account menu item when an active member has logged into their account.
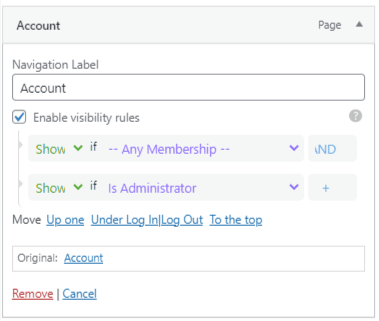
By clicking the + icon, you can add additional conditions, such as Showing the Account menu item when an active member AND Administer (You) has logged into their account:

Step 4: Click the “Save Menu” button.
