Lesson 7: How to Create a Membership Group and Pricing Page
MemberPress Groups allows you to set up a pricing table page where customers can view a side-by-side comparison of your memberships. Groups also make it easy for members to upgrade (or downgrade) between membership plan options.
In this Video…
We’ll start by showing you the basics on how to create a group. Then we’ll dig a little deeper to cover how to “group” memberships together and customize what features and benefits you want to highlight under each membership.
How to Create a Group in MemberPress
Step 1: Go to MemberPress > Groups and Click the “Add New” button.
Step 2: Give Your Group a Name
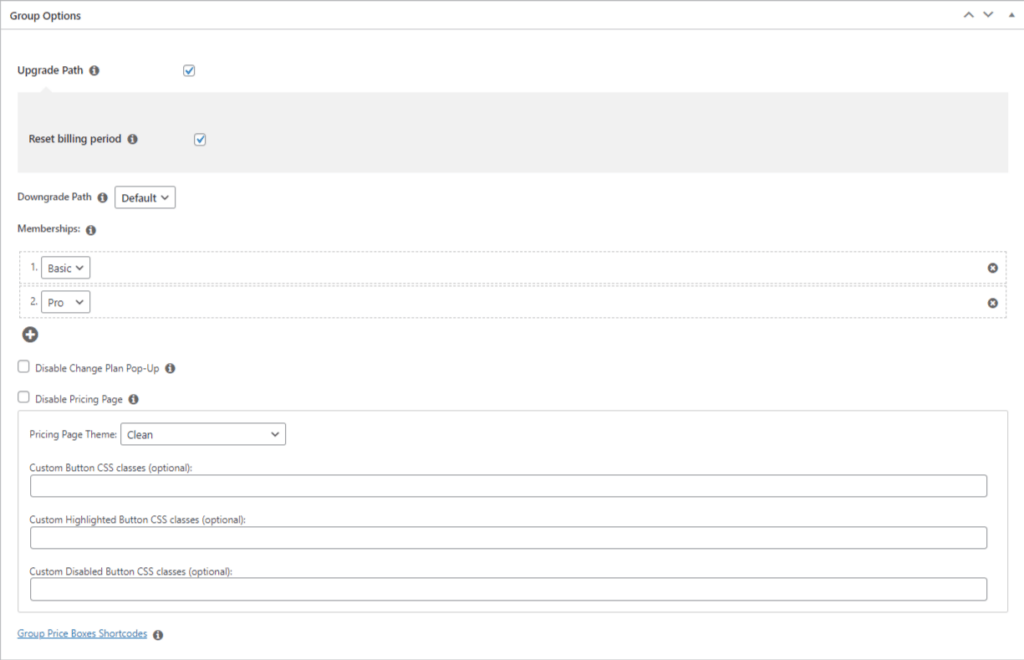
Step 3: Determine Your Group Options
There’s a lot to cover and take care of in the Group Options section. These options are discussed in detail below. But you may want to hop back up to our video above for a visual recap on each Option.

- Upgrade Path. When this is set, members can only subscribe to one membership at a time. If it's unset, members can subscribe to each membership in the group simultaneously.
- Memberships. This is where you can set which memberships should be displayed on this group pricing page. Enter your memberships in the order you want them to appear on the Group page.
- Downgrade Path. Use the drop-down to select the membership you would like a user to default back to should their subscription to any membership in the group become inactive (from a lapsed payment, failed payment, or subscription expiration). For this option to work, you must have the Upgrade Path option set. If set to “default”, then the user will NOT be placed into another membership automatically. Note: this automatic downgrade will always be free – even if the membership has a price. So it's recommended that your downgrade path Membership is a free Membership level.
- Disable Change Plan Pop-Up. Enable this option if you plan on using the normal Group Pricing Page or if you are planning to set your own (with the Disable Pricing Page option). This will take the user to the Group pricing page when they click on the Change Plan instead of showing them the quick selection pop-up.
- Disable Pricing Page. If you check this box, it will disable the front-end pricing page from being seen by users. If they try to access it, they will be shown a 404 message. You can use this if you want to create an upgrade path without having a front-end pricing page to display the Memberships on. When enabling this option, it will also reveal a box to enter an “Alternative Group URL” to create your own custom pricing page.
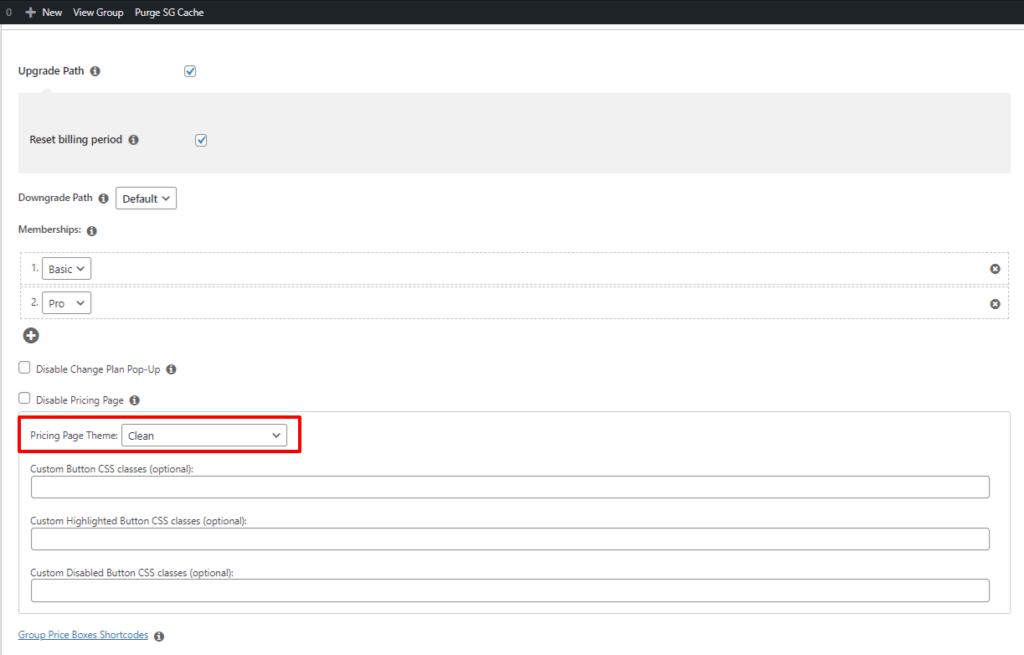
- Pricing Page Theme. Use this to set the appearance of the pricing page to one of our preset designs. Or choose Custom to use your own custom CSS.
Step 4: Customize Your Pricing page with ReadyLaunchTM
Need a ReadyLaunchTM refresher – click here. Or, disabling ReadyLaunchTM will default to the price table theme you choose here:

How to Edit Your Membership Group Boxes
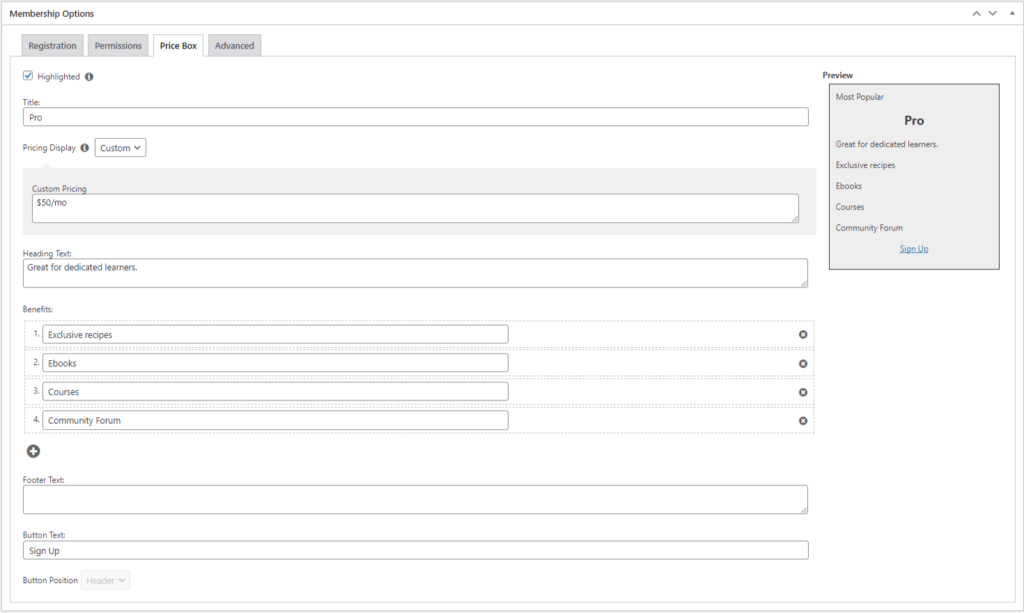
Once you have your Group set up, you can edit the price table boxes for each membership. This is a great opportunity to add eye-catching elements that draw special attention to your higher-tiered plan options. (You may remember this “advanced” membership-building option we introduced in Lesson 3.)
Step 4: Go back to MemberPress > Memberships and Choose which Membership(s) You Want to Edit.
Under Membership Options, select the Price Box tab to add information such as heading text, benefits, footer text, and button text:

And wa -la. You now have a Groups pricing table on your membership site. As exampled in the video, feel free to experiment with different themes and ReadyLaunchTM to find a design you like.
Related Reads + Resources
- Read >> How to Build a Pricing Table for Your Site
- Read >> Why You Should Offer Multiple Pricing Tiers for Your Membership Site
- Support Doc: Creating Groups
- Support Doc: How to Create a Membership Comparison or Pricing Page
