

Le thème ReadyLaunch™ comprend une variante de blocs Gutenberg, des styles de blocs et des groupes de blocs prédéfinis (modèles). Ces éléments constituent les fondements de votre site web. Vous pouvez importer des modèles ReadyLaunch™ prédéfinis dans n'importe quelle page ou n'importe quel article.
Ce document présente les blocs et les modèles ReadyLaunch™ disponibles. Il aborde également les principes de base de leur utilisation dans votre contenu.
ReadyLaunch™ Blocks
Le thème ReadyLaunch™ offre le Bloc « ReadyLaunch™ » à deux colonnes, une variante du bloc « Colonnes » par défaut. Le thème ajoute également des styles supplémentaires aux blocs par défaut « Bouton », « Médias et texte » et « Titre des commentaires ».
De plus, le plugin MemberPress propose ses propres blocs d'adhésion, tels que le Connexion, Compte, Inscriptionet Tableau des prix blocs. Le thème ReadyLaunch™ applique automatiquement une mise en forme à ces blocs. Ceux-ci reprennent les couleurs et la typographie que vous avez définies pour le thème. Un document distinct traite de la blocs Gutenberg MemberPress disponibles.
Bloc « ReadyLaunch™ » à deux colonnes
Le bloc « ReadyLaunch™ Two Columns » est une variante du bloc « Columns » par défaut. Il vous permet d'organiser le contenu en deux colonnes et de personnaliser l'apparence des colonnes et de leur contenu. La structure à deux colonnes est fixe, tandis que le contenu de chaque colonne reste entièrement modifiable.
Une fois le bloc ajouté à l'éditeur, personnalisez-le en appliquant les paramètres généraux du bloc et les options de mise en forme.
- Cliquez sur l'icône ReadyLaunch™ à deux colonnes le bloc que vous avez ajouté dans l'éditeur pour ouvrir le panneau de droite.
- Cliquez sur l'icône Paramètres onglet pour accéder aux paramètres du bloc.
- Stack sur mobile: cette option superpose les deux colonnes l'une au-dessus de l'autre sur les appareils mobiles. Elle est activée par défaut.
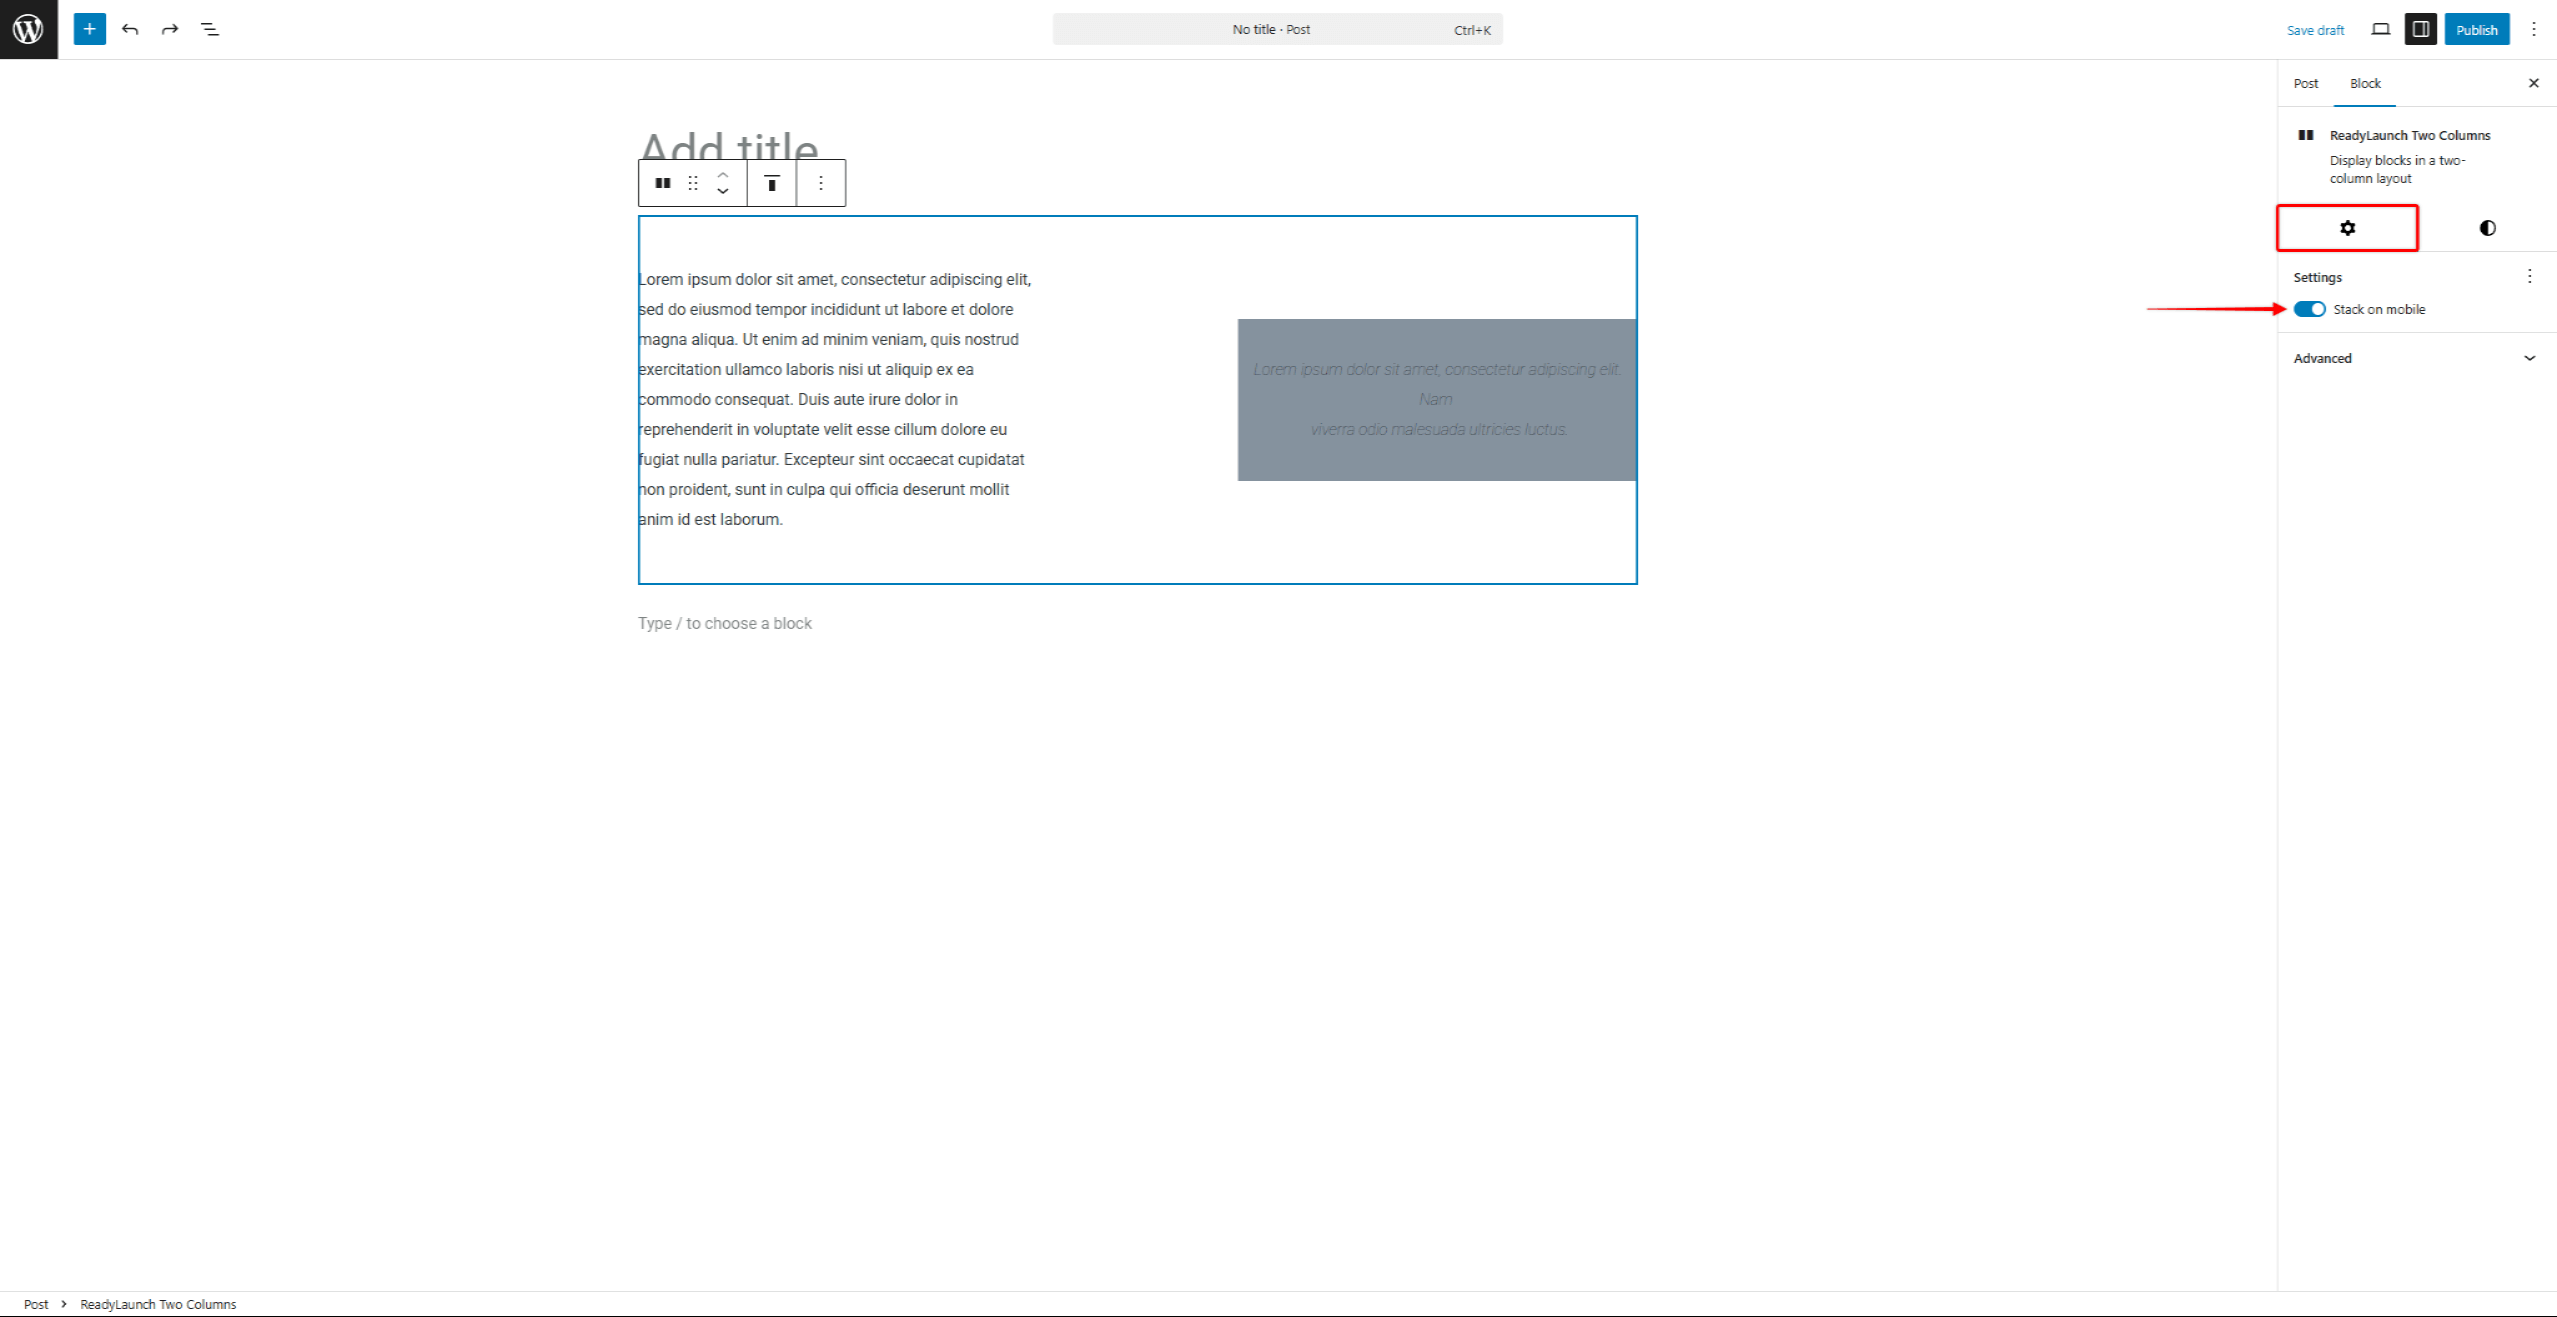
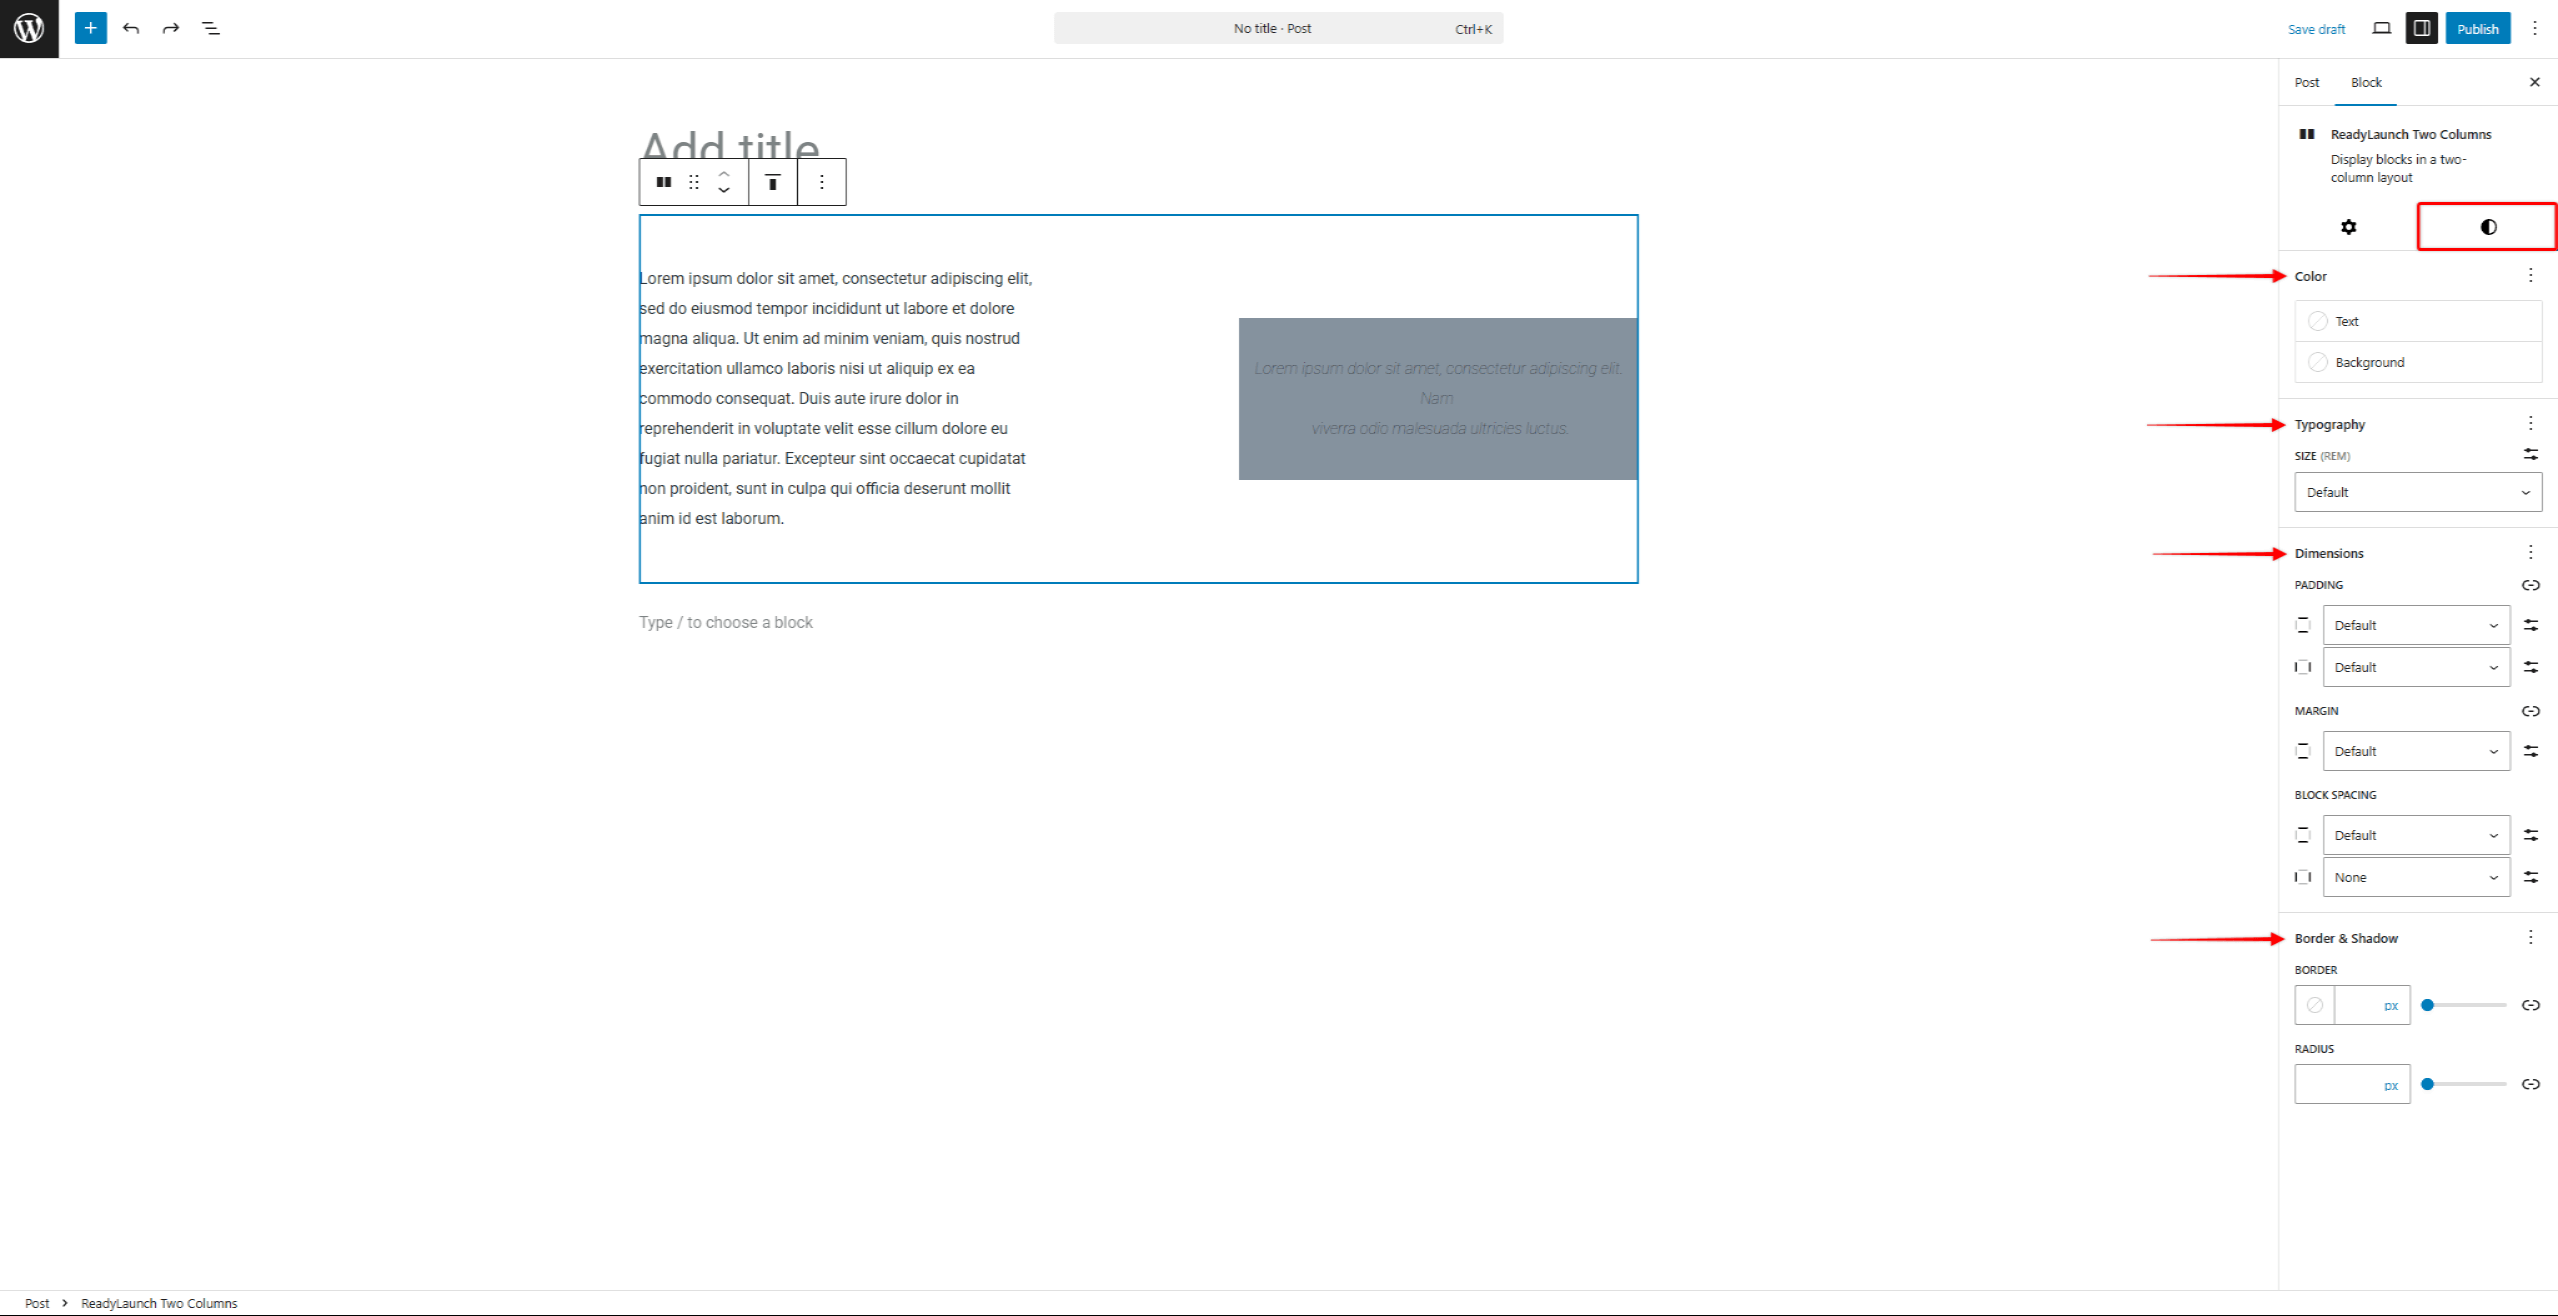
- Ensuite, cliquez sur le bouton Styles onglet pour modifier le style du bloc. Vous pouvez définir le Couleurs, Typographie, Dimensions, Frontièreet Ombres.
Modèles ReadyLaunch™
Vous pouvez ajouter des modèles ReadyLaunch™ à vos articles et à vos pages via l'éditeur par défaut (Gutenberg).
Ce thème comprend plus de 40 modèles, tels que des bannières de présentation, des sections d'appel à l'action, des listes de fonctionnalités, des témoignages, des FAQ et des sections consacrées aux membres de l'équipe. Il inclut également des modèles de contenu prêts à l'emploi pour des pages complètes : page d'accueil, « À propos », « Contact », « Fonctionnalités » et « S'abonner ».
Les modèles sont des ensembles composés de plusieurs blocs. Une fois que vous avez ajouté un modèle à votre éditeur, vous pouvez effectuer les personnalisations suivantes :
- Modifier les paramètres et la mise en forme du groupe (pour la plupart des modèles, il s'agit de blocs tels que « Groupe », « Empilement » ou « Couverture ») ;
- Modifier les paramètres et la mise en forme de chaque bloc du modèle (par exemple : paragraphe, titre, image, bouton) ;
- Supprimer ou ajouter des blocs.
De plus, vous pouvez parcourir tous les modèles ReadyLaunch™ prédéfinis dans l'éditeur de site. Vous pouvez également y apporter des modifications et créer des modèles personnalisés.
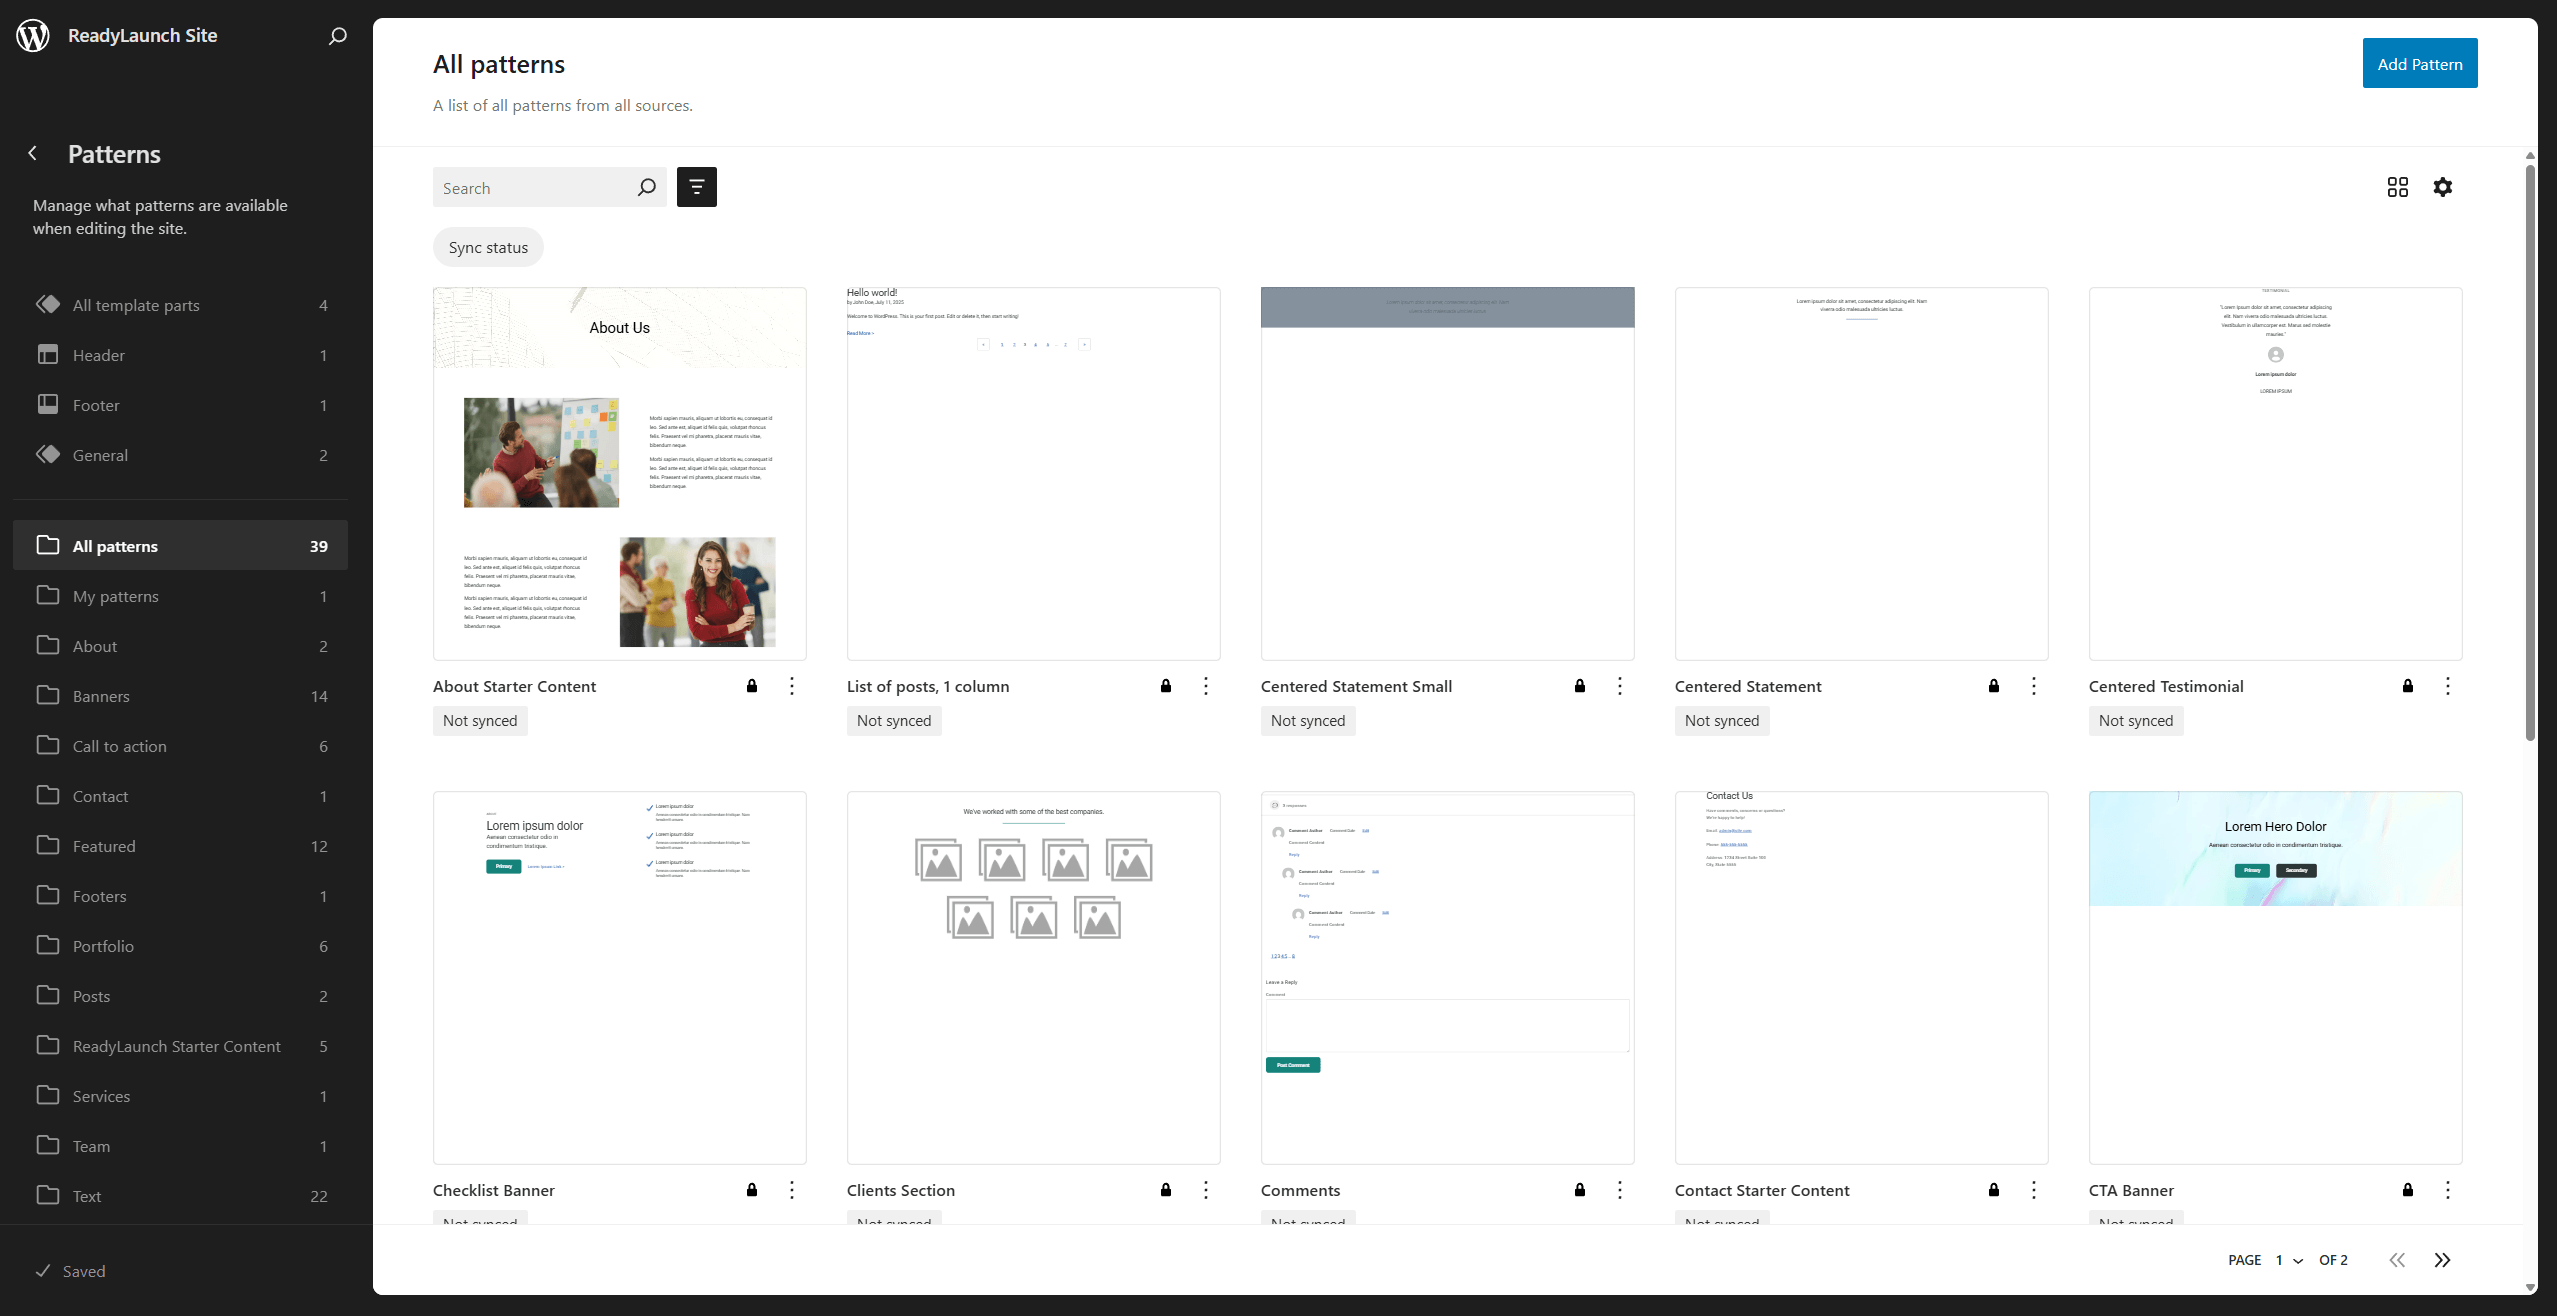
Création de versions personnalisées des modèles ReadyLaunch™
Les modèles ReadyLaunch™ prédéfinis sont des modèles thématiques. Les modifications apportées à un modèle inséré ne s'appliquent qu'à la page ou à l'article concerné. Pour réutiliser un design modifié sur l'ensemble de votre site web, créez une version personnalisée du modèle :
- Naviguez jusqu'à Tableau de bord > Apparence > Éditeur pour ouvrir l'éditeur de site.
- Dans le menu de gauche, cliquez sur le Modèles option.
- Parcourez la liste des modèles pour trouver celui que vous souhaitez modifier.
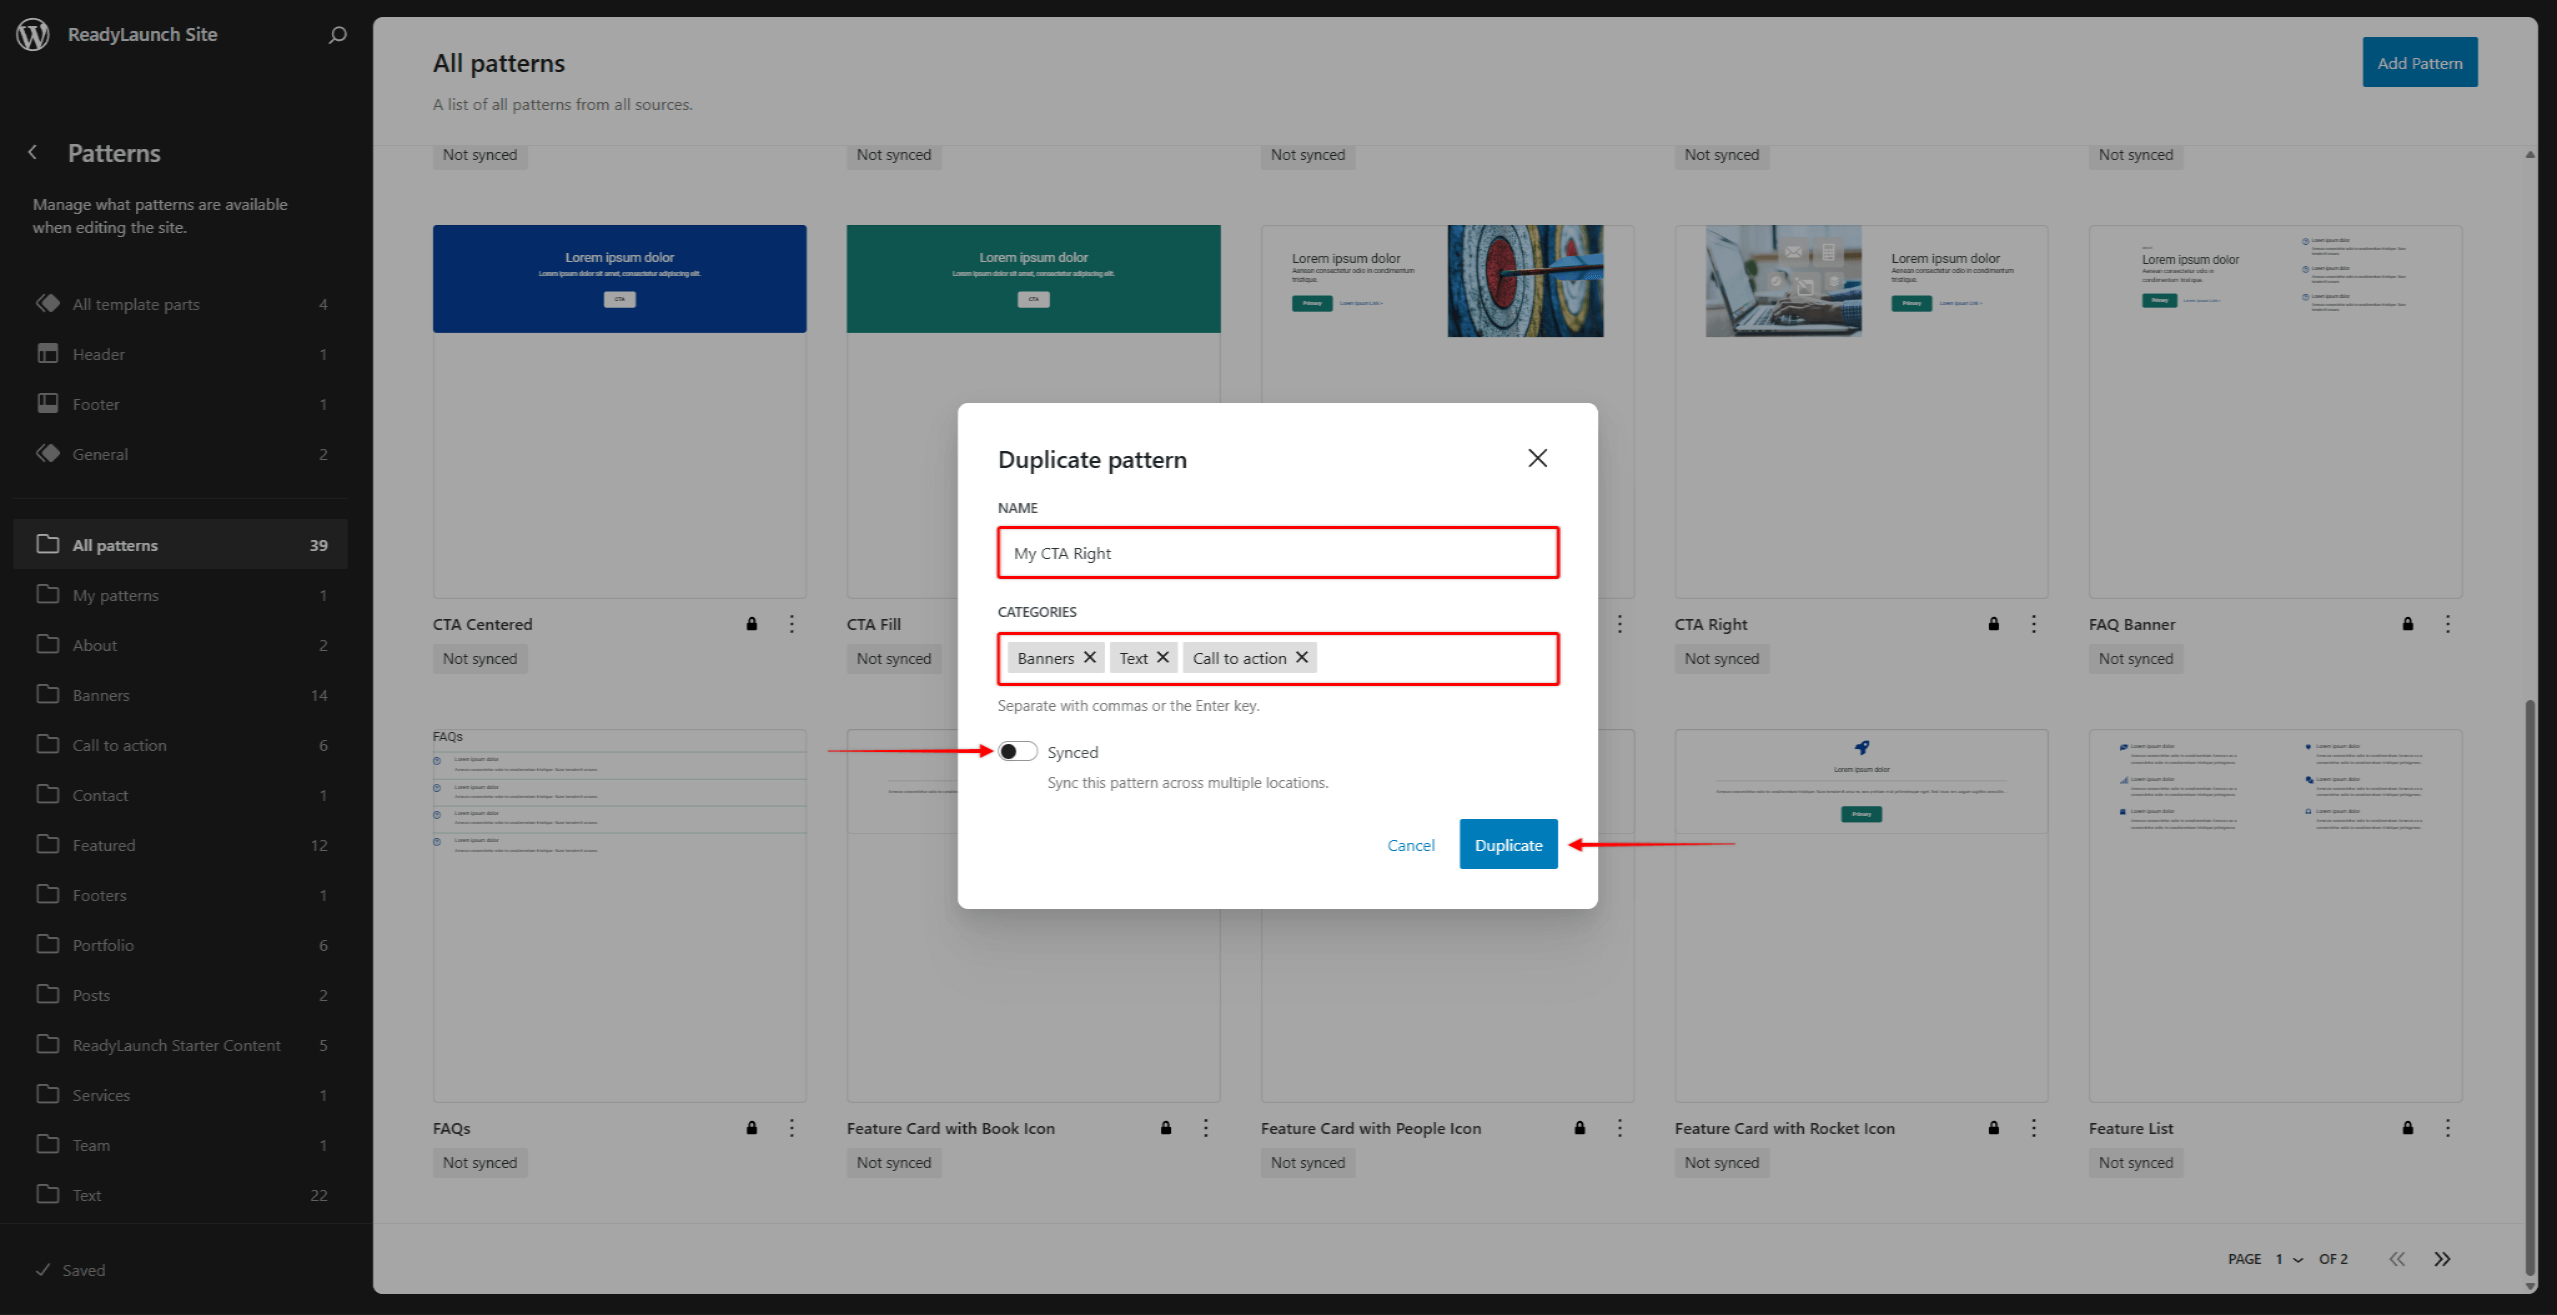
- Cliquez sur l'icône Icône à 3 points, puis le Duplicata option permettant de créer une copie du modèle par défaut.
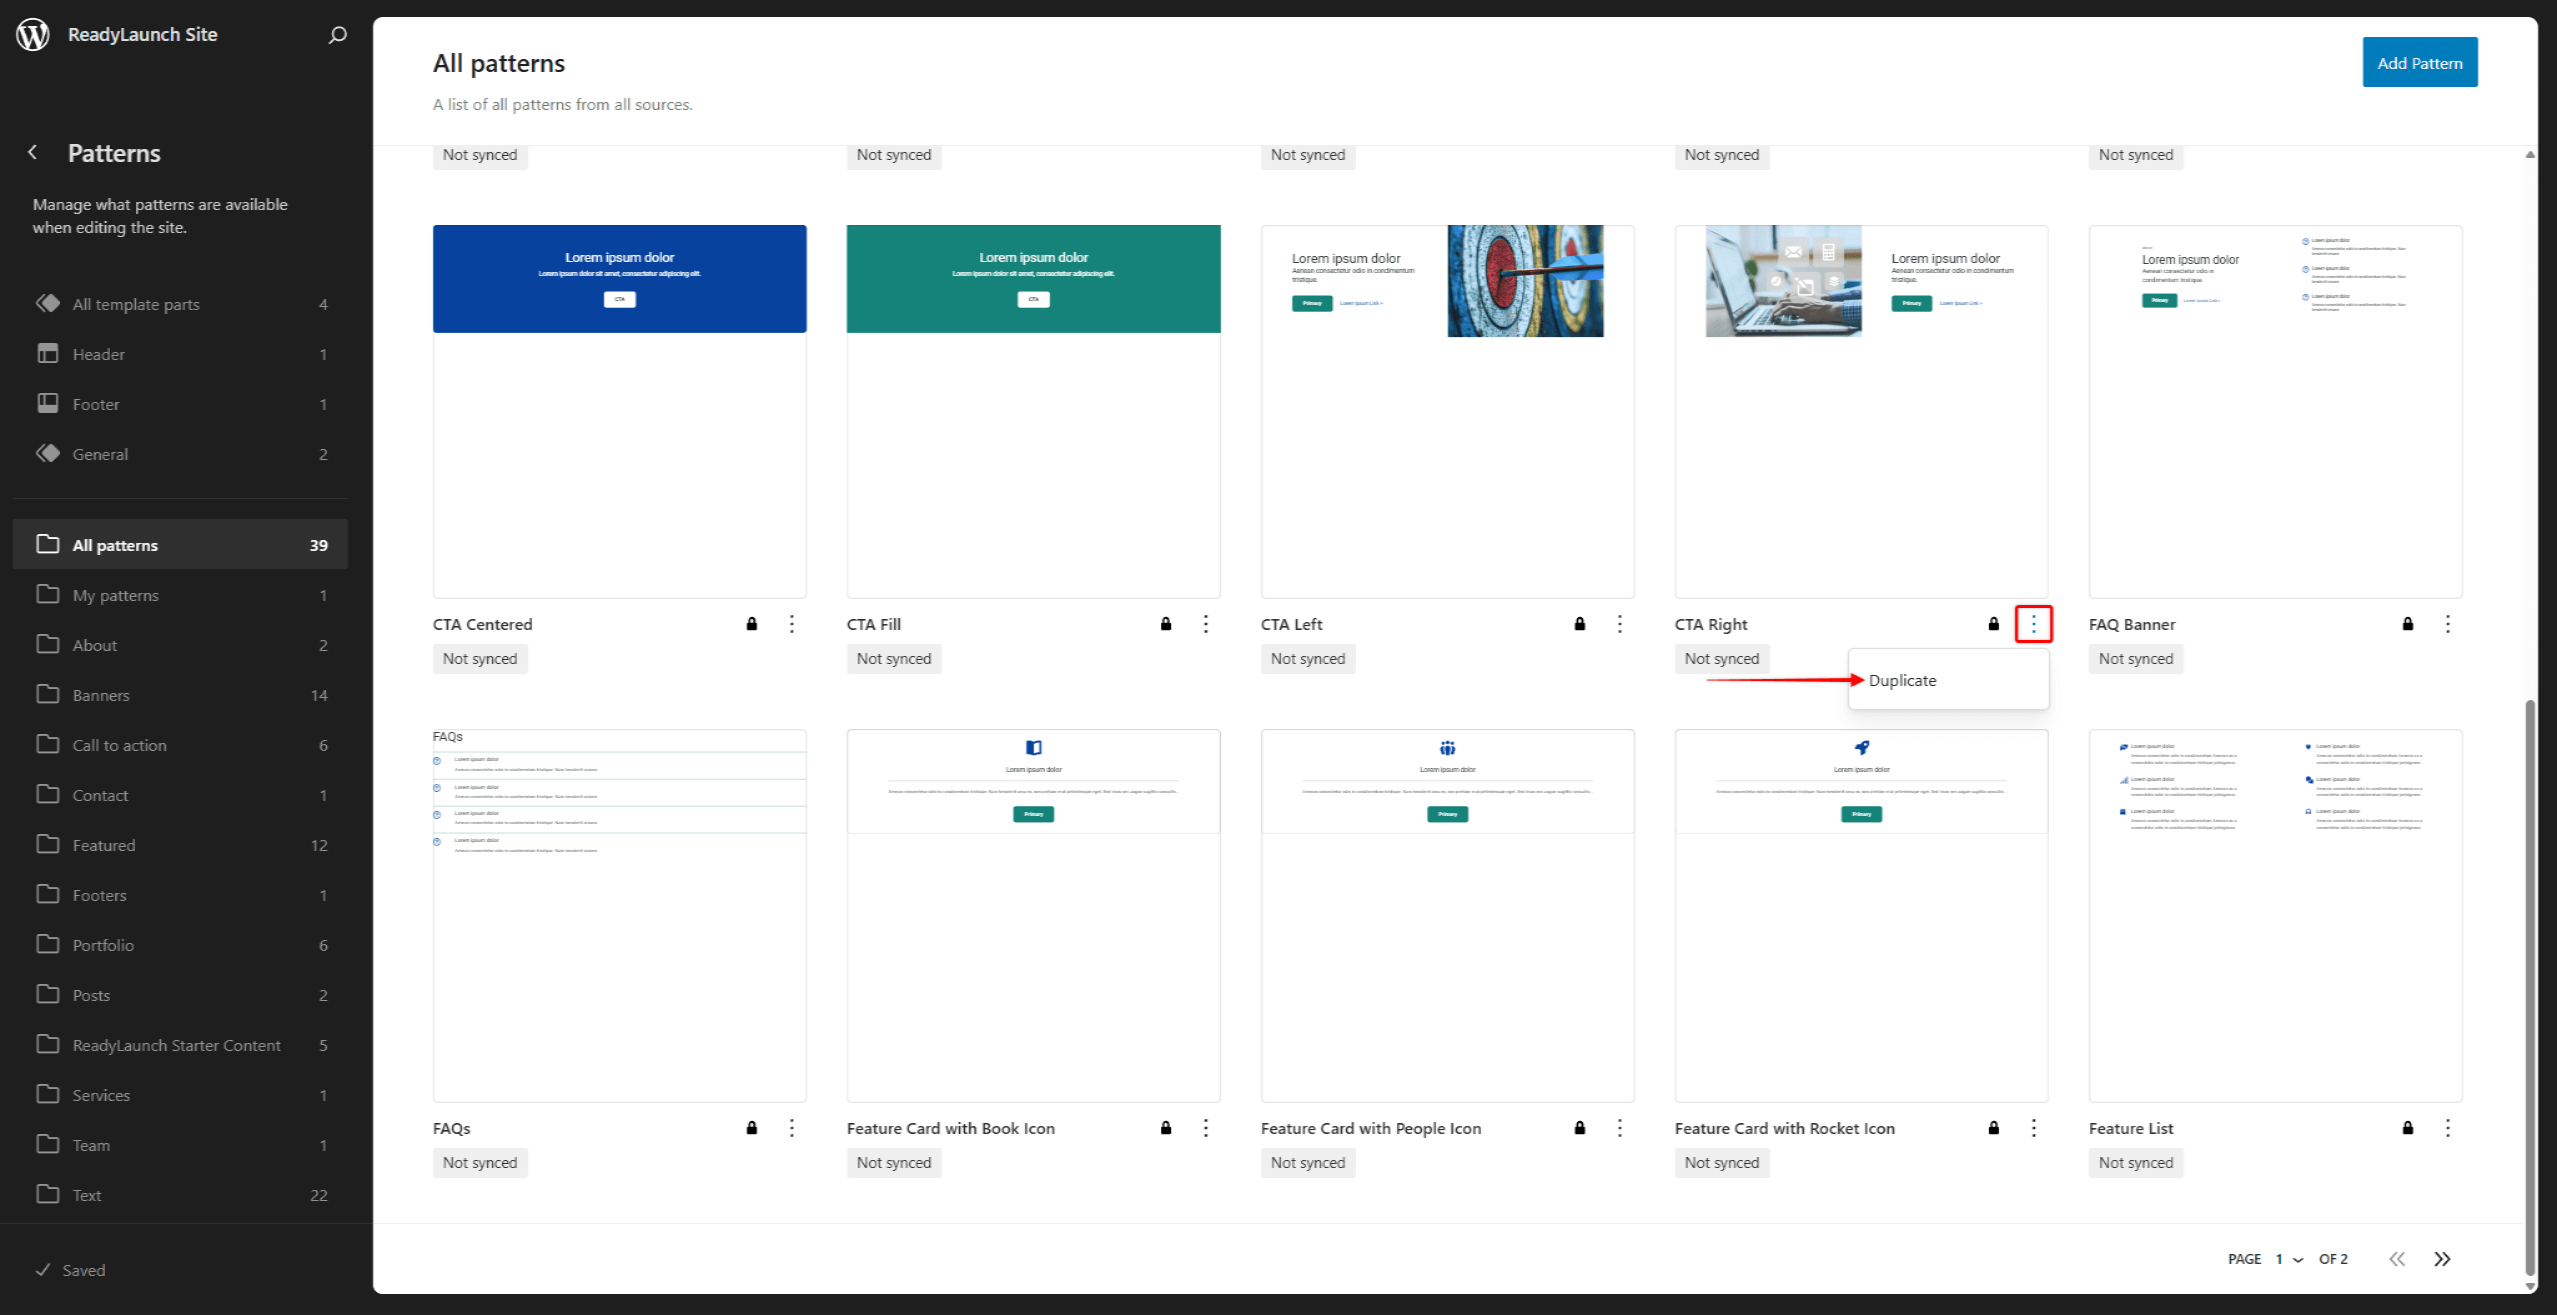
- Nom dupliquez le motif, puis sélectionnez le catégories de motifs pour cela.
- Si vous le souhaitez, activez la fonction Synchronisé option pour le doublon.
- Cliquez sur le bouton Duplicata bouton.
- Retrouvez le modèle que vous avez dupliqué en parcourant la liste des modèles, ou dans la section Mes patrons menu. Cliquez sur le Icône à 3 points là-dessus.
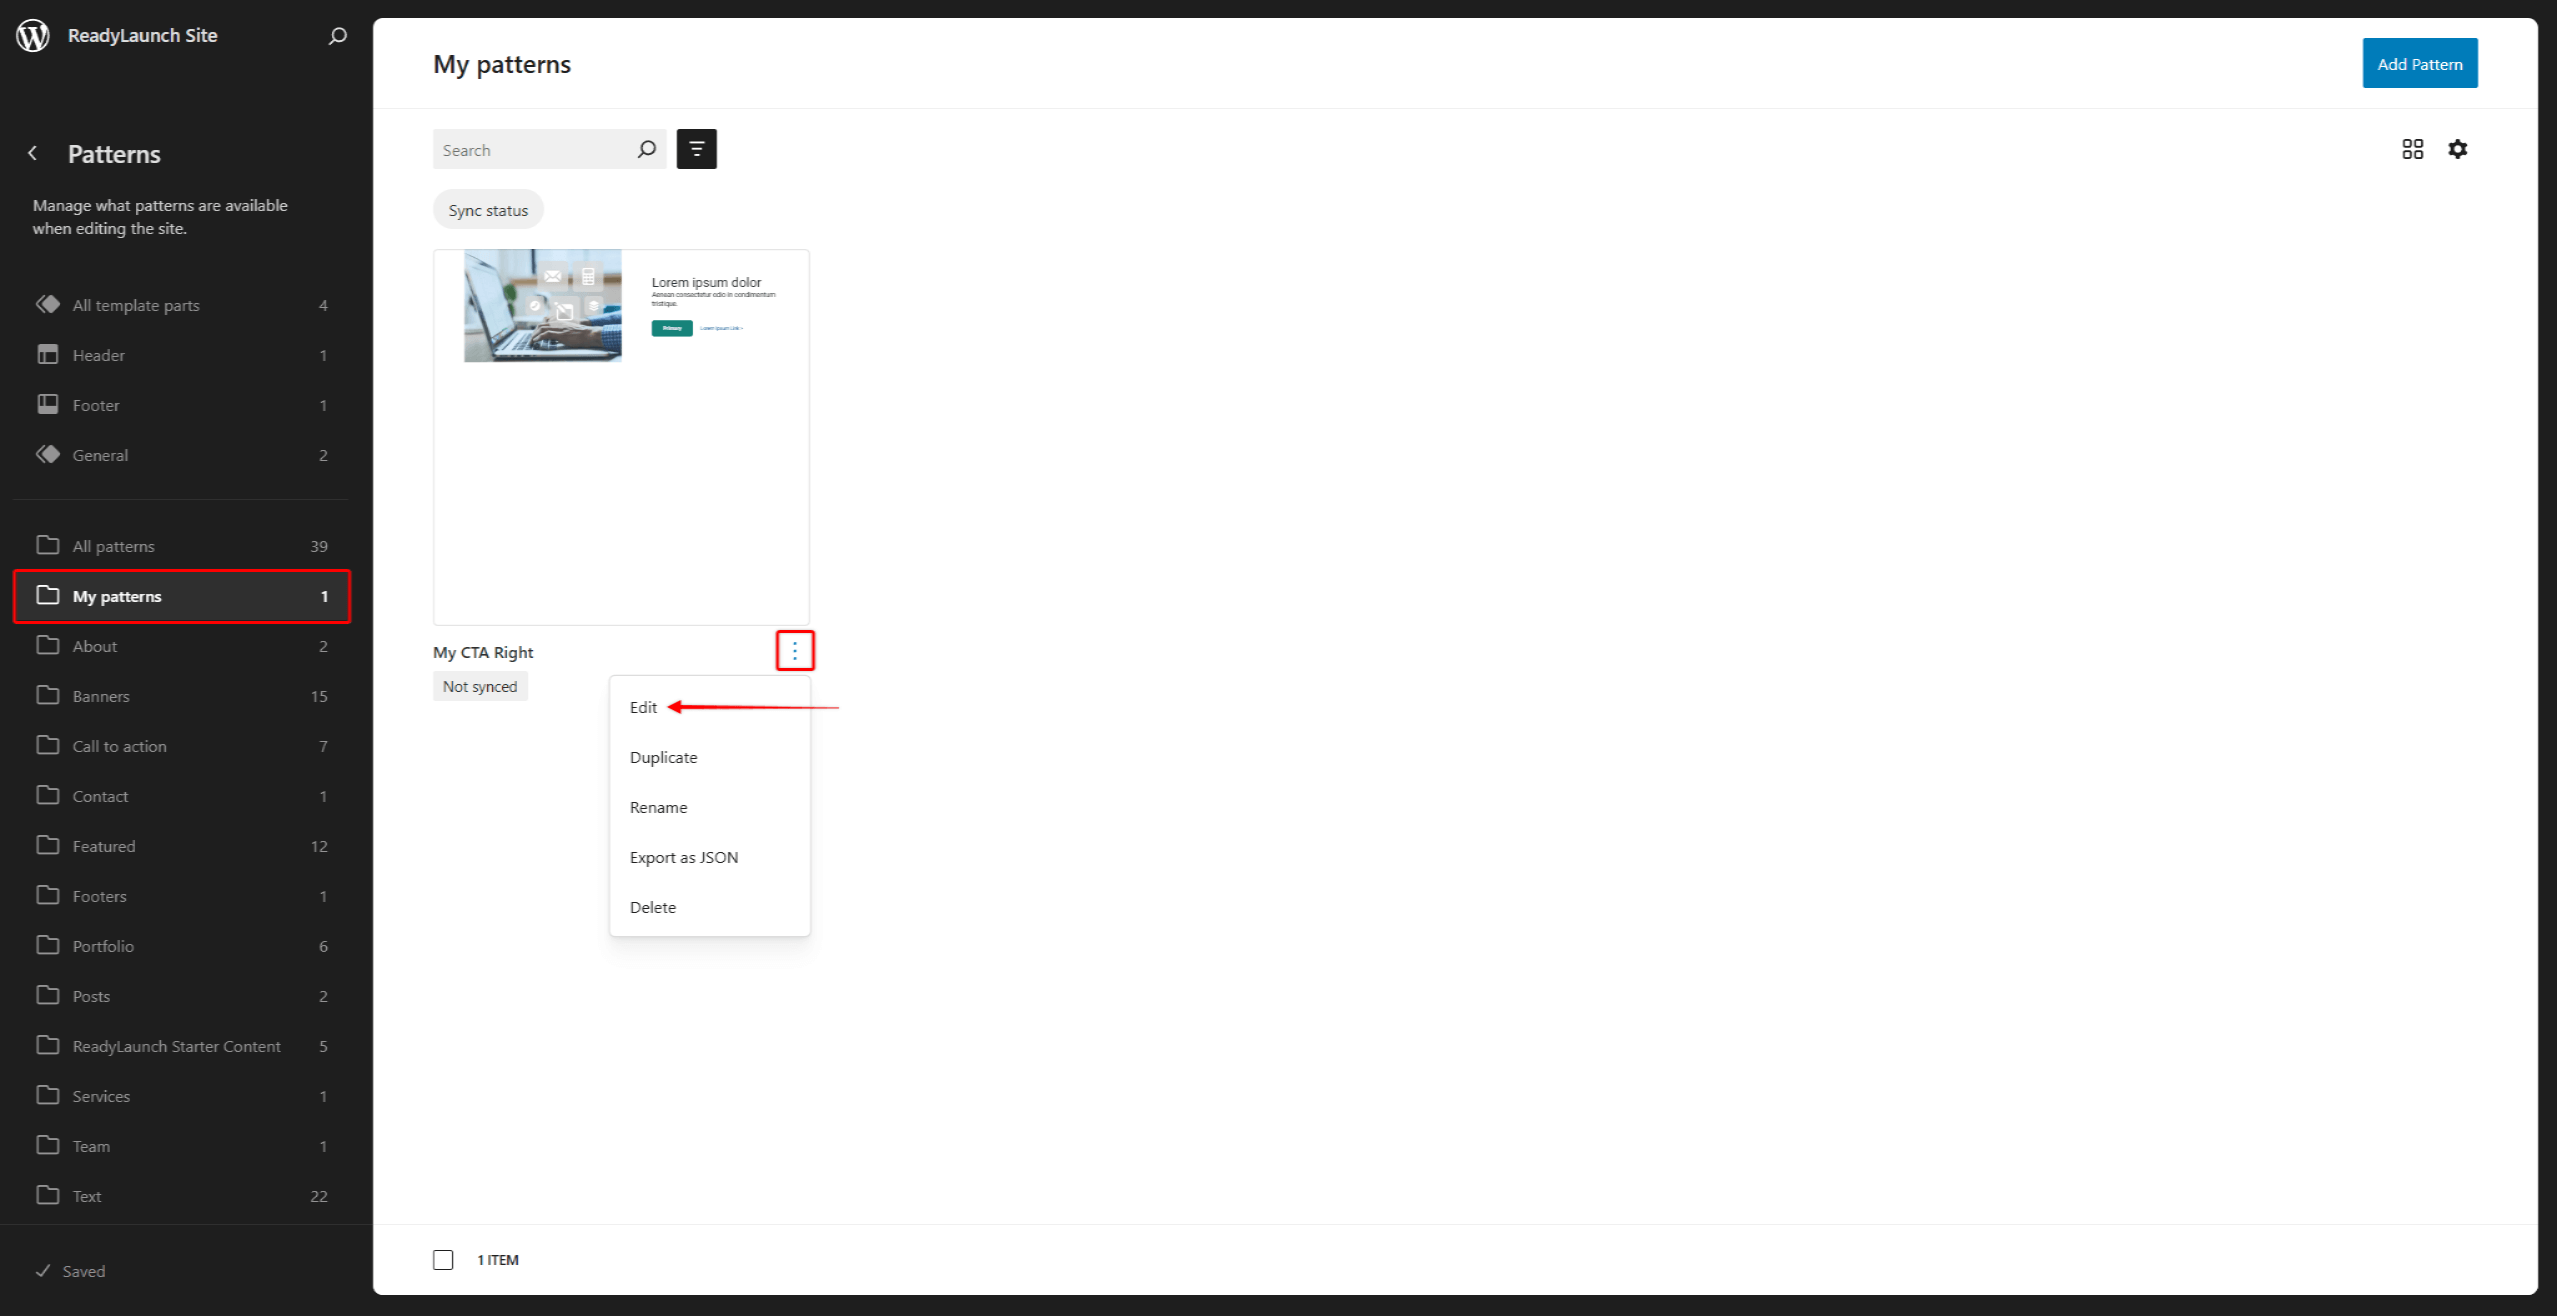
- Vous trouverez ici des options supplémentaires pour gérer le motif. Cliquez sur Editer pour accéder à l'éditeur de motifs.
- Appliquez les modifications au patron. Vous pouvez modifier les blocs existants, en ajouter de nouveaux ou supprimer ceux dont vous n'avez pas besoin.
- Une fois les modifications terminées, cliquez sur Économiser.
Vous pouvez désormais utiliser votre motif personnalisé de la même manière que n'importe quel autre motif.
Importation de blocs et de modèles ReadyLaunch™
Vous pouvez insérer des blocs et des modèles à l'aide de l'outil d'insertion de blocs disponible dans l'éditeur par défaut (Gutenberg).
Commencez par ouvrir l'article ou la page en mode édition. Suivez ensuite ces instructions pour rechercher et insérer les blocs ou modèles ReadyLaunch™ :
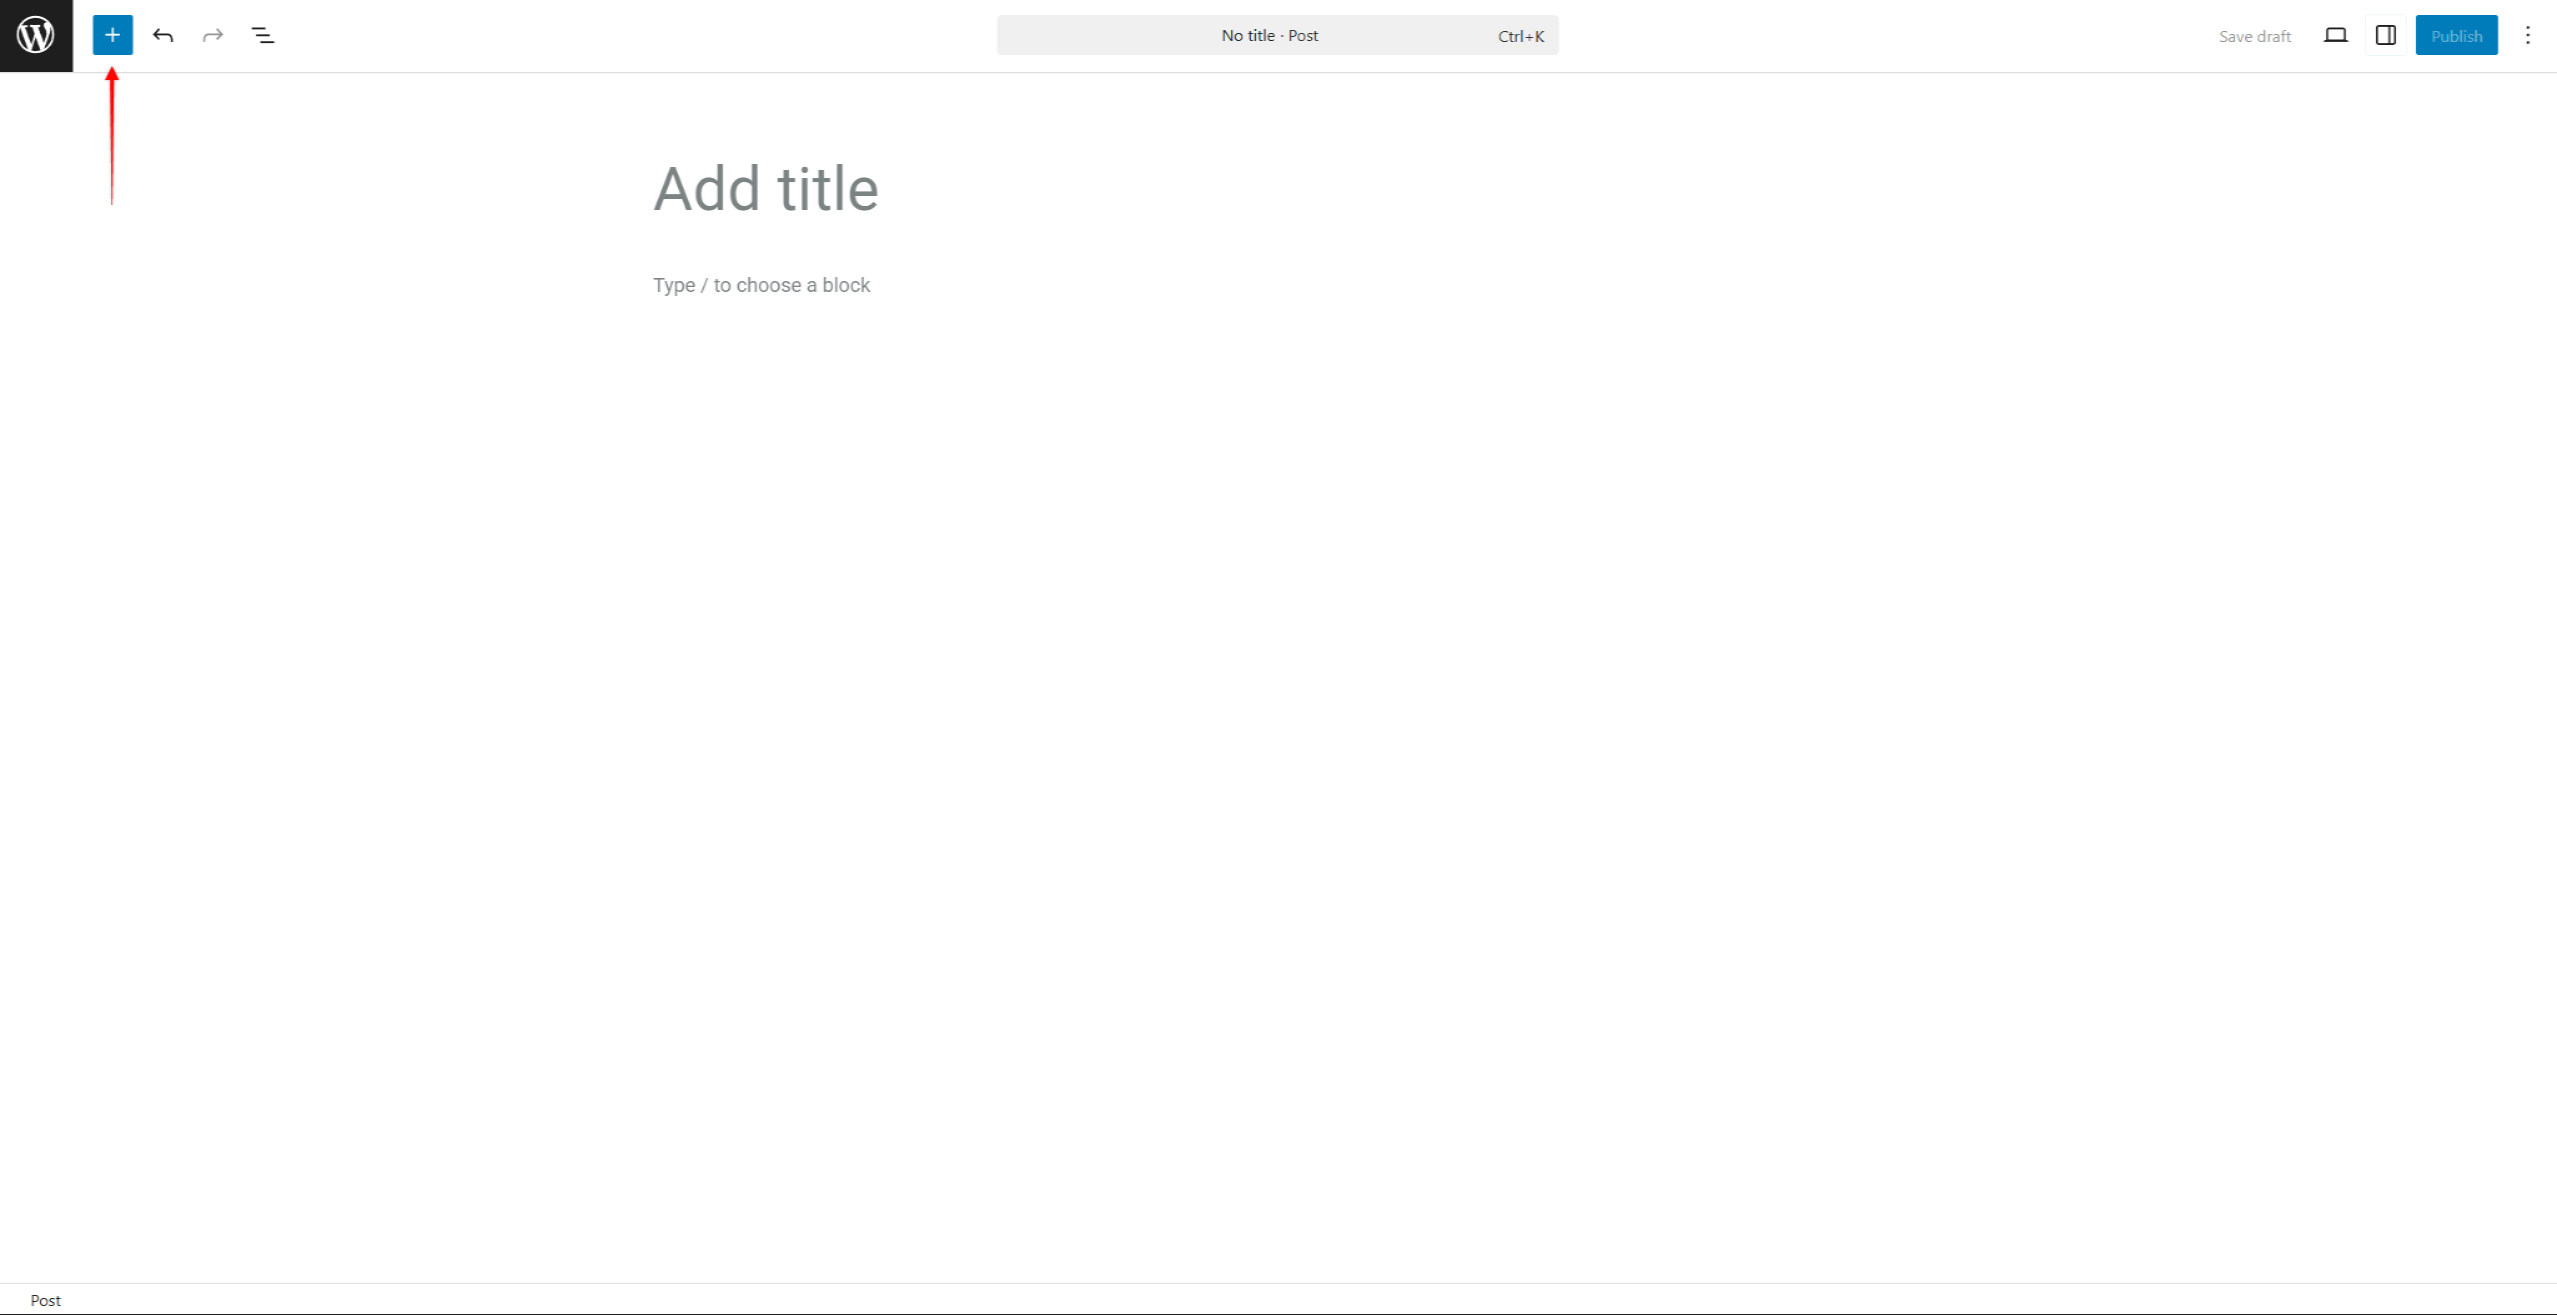
- Cliquez sur le bouton + icône pour ouvrir le Inséreur de blocs.
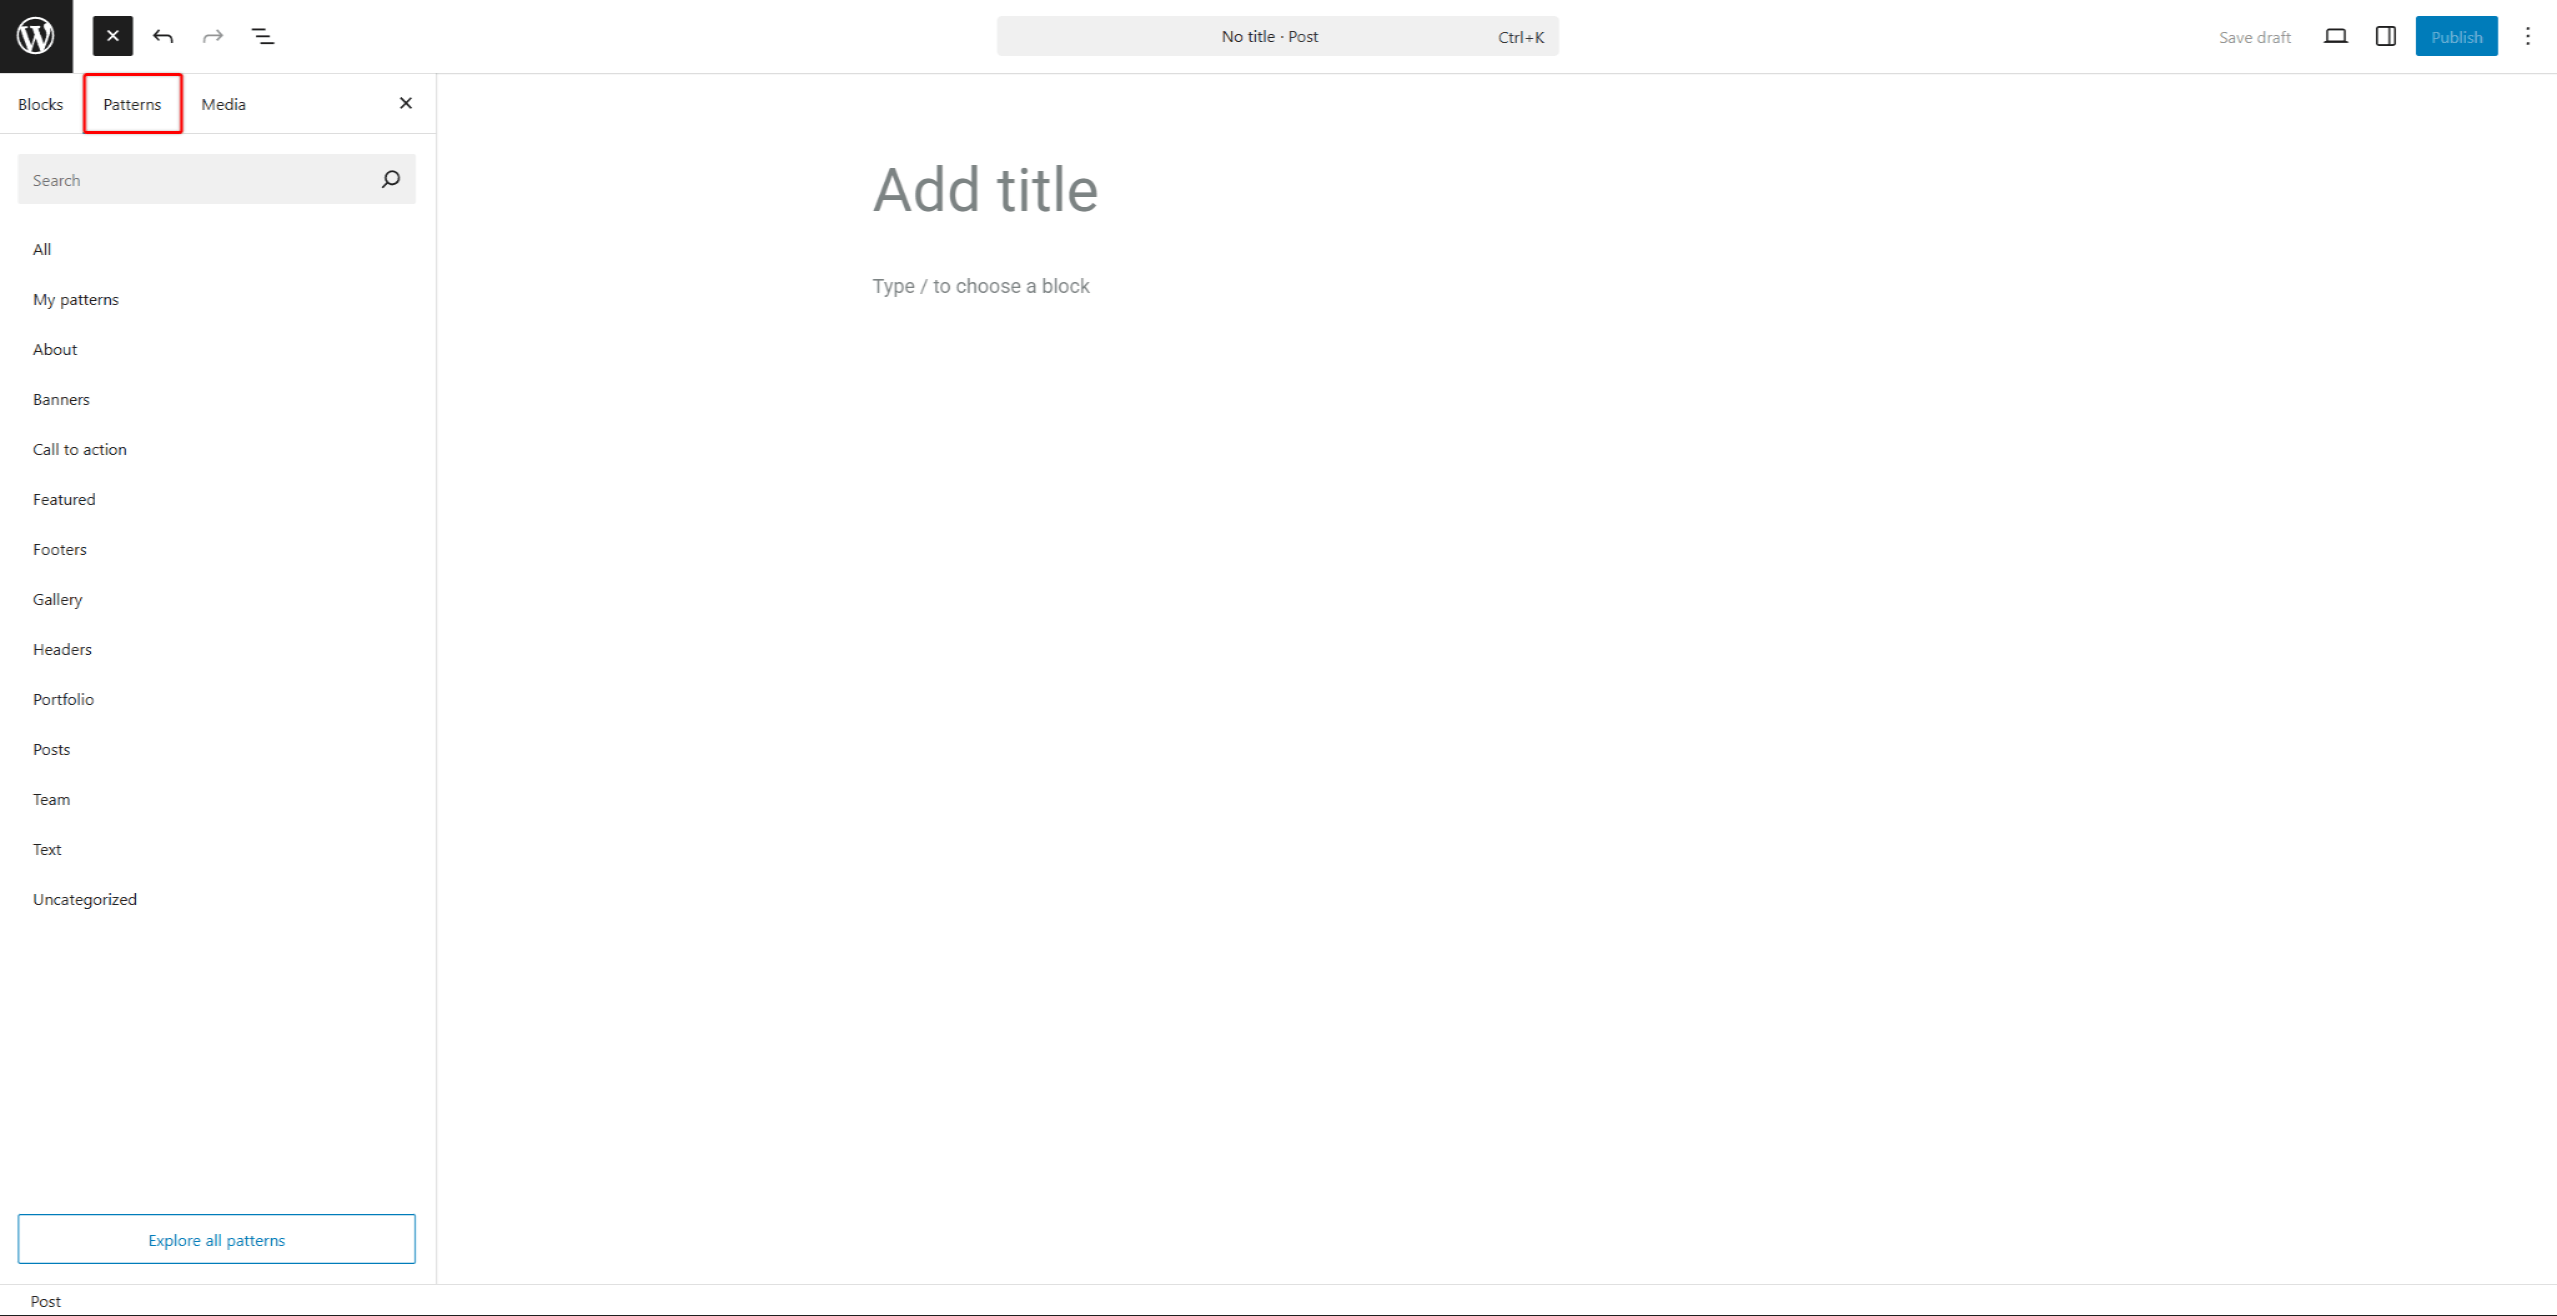
- Ici, vous pouvez parcourir la liste des blocs sous la rubrique Blocs onglet, ainsi que les motifs situés sous le Modèles tabulation.
- Recherche de la “ readylaunch ” terme utilisé dans l’outil d’insertion de blocs pour filtrer les blocs et les modèles liés au thème.
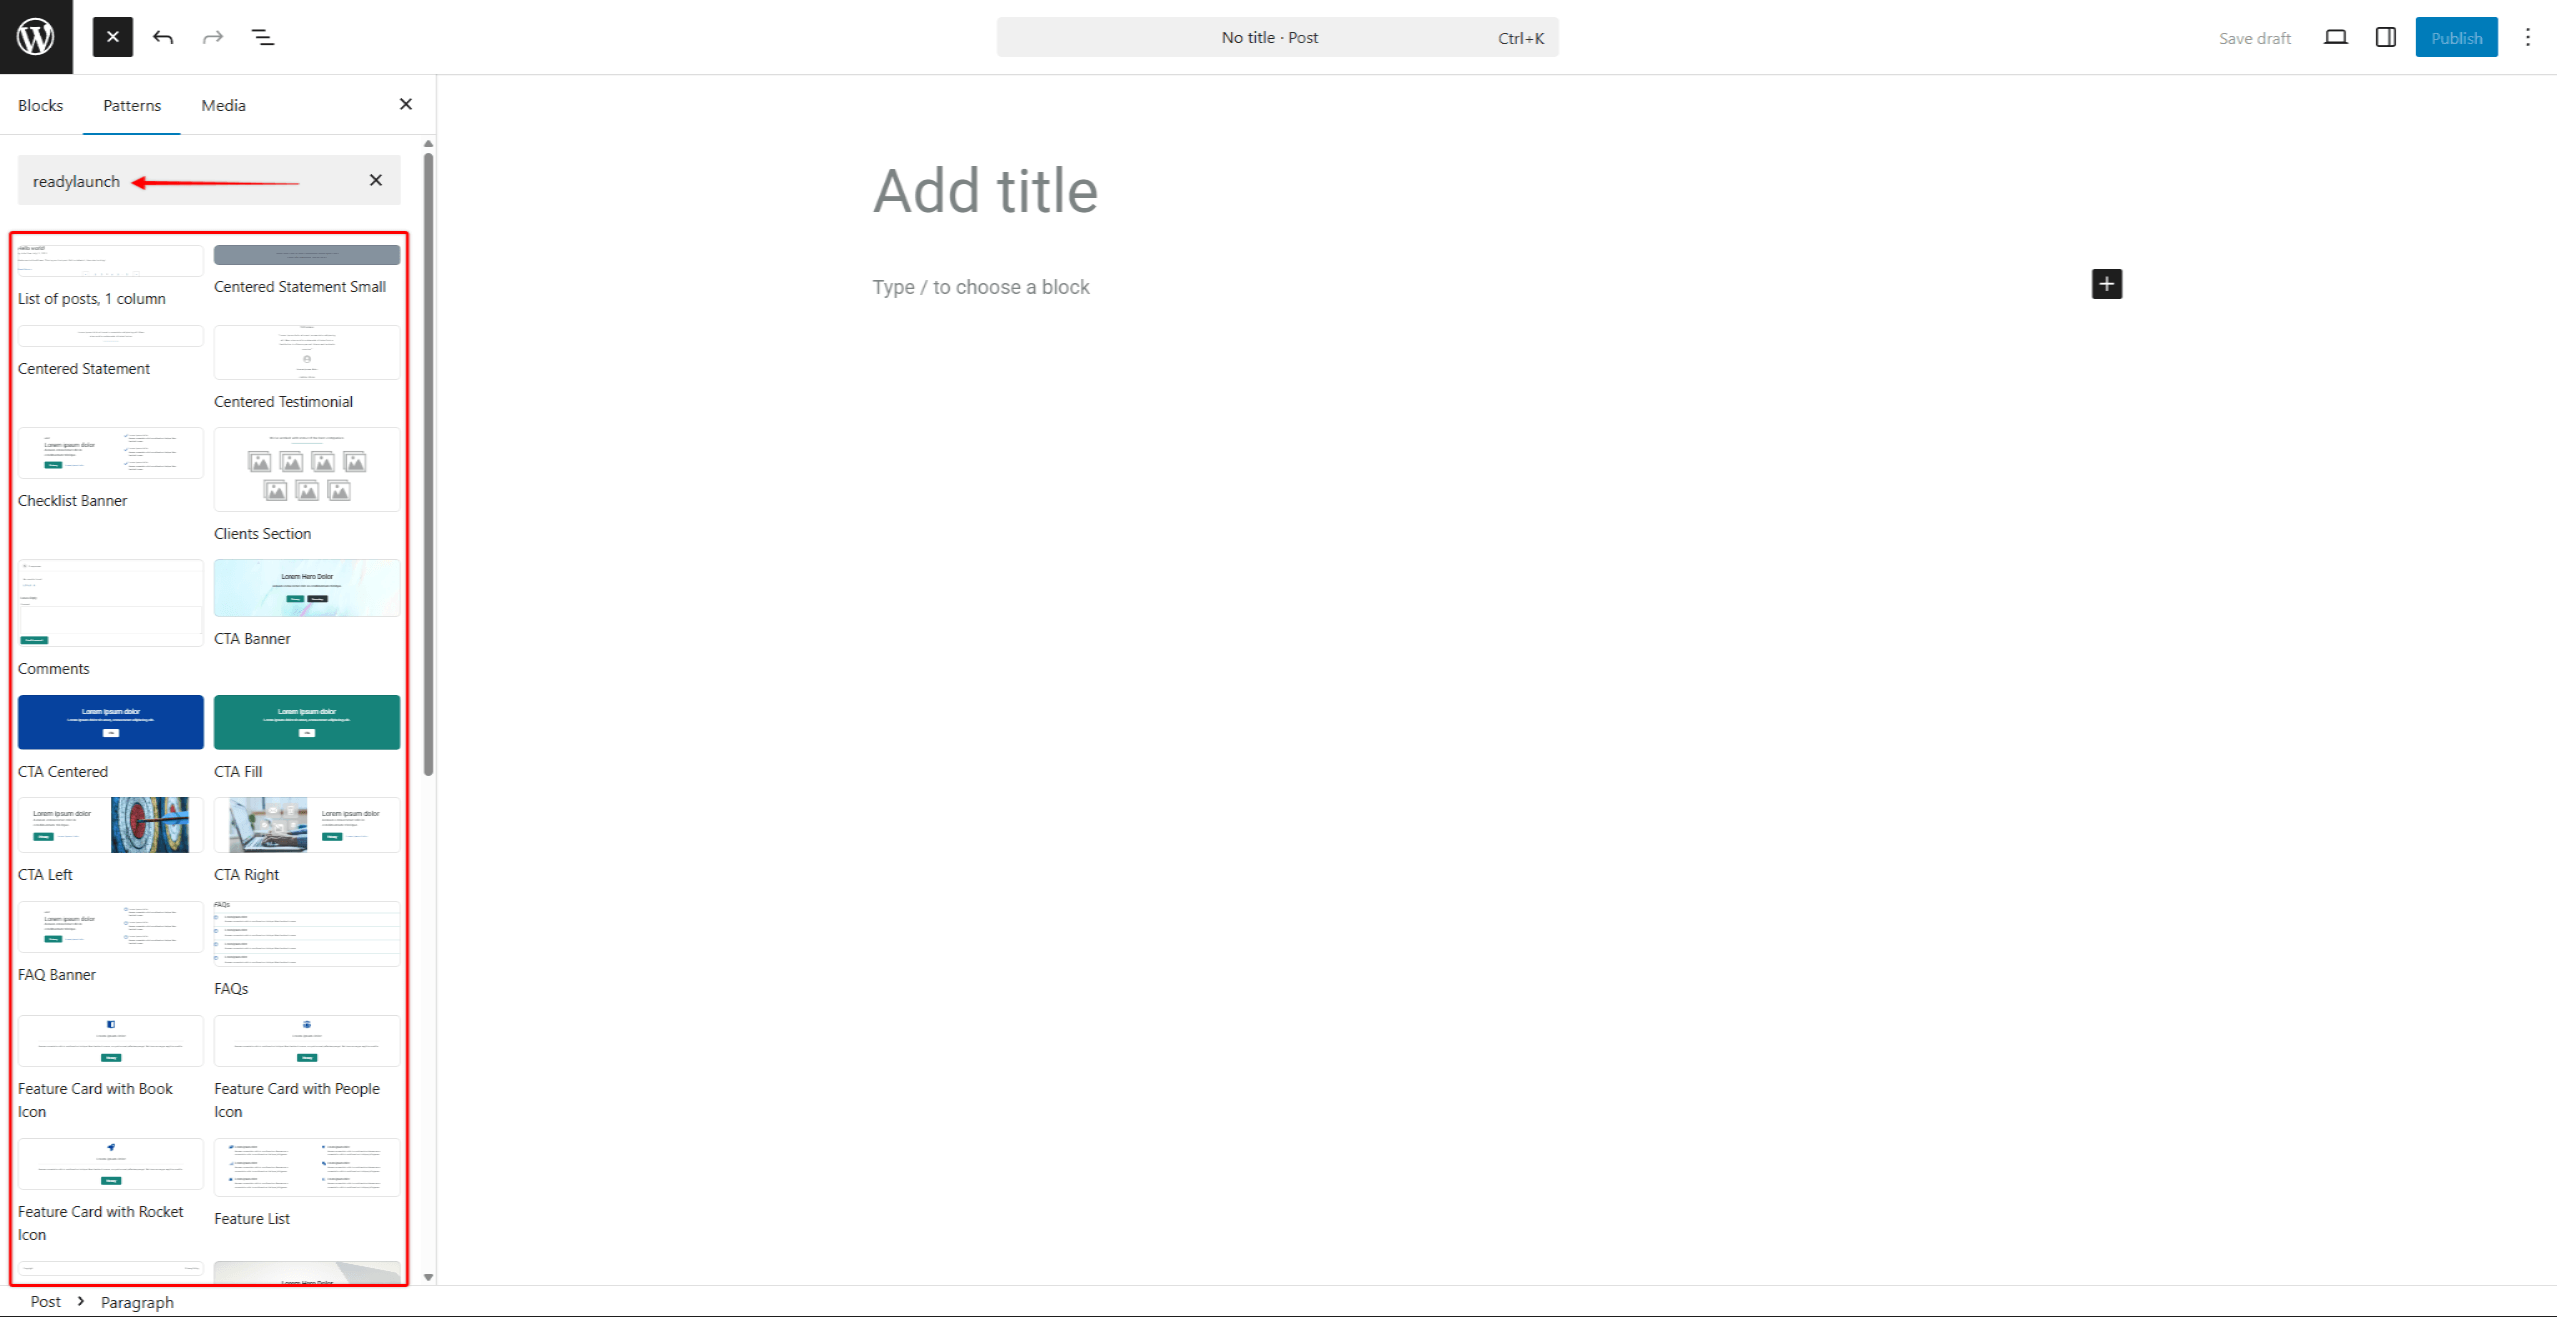
- Trouvez le bloc ou le motif dont vous avez besoin.
- Cliquez dessus pour l'ajouter à votre contenu. Vous pouvez désormais modifier le contenu importé selon vos besoins.
Personnalisation des modèles importés
Chaque motif est composé de plusieurs blocs. Les motifs, ainsi que les blocs individuels qui les composent, disposent chacun de leurs propres paramètres, ce qui permet de les personnaliser.
Ces paramètres s'affichent lorsque vous insérez le bloc ou le modèle dans un article ou une page. Cela vous permet de personnaliser ces éléments en fonction de vos besoins :
- Cliquez sur le motif ou sur n'importe quel bloc de ce motif.
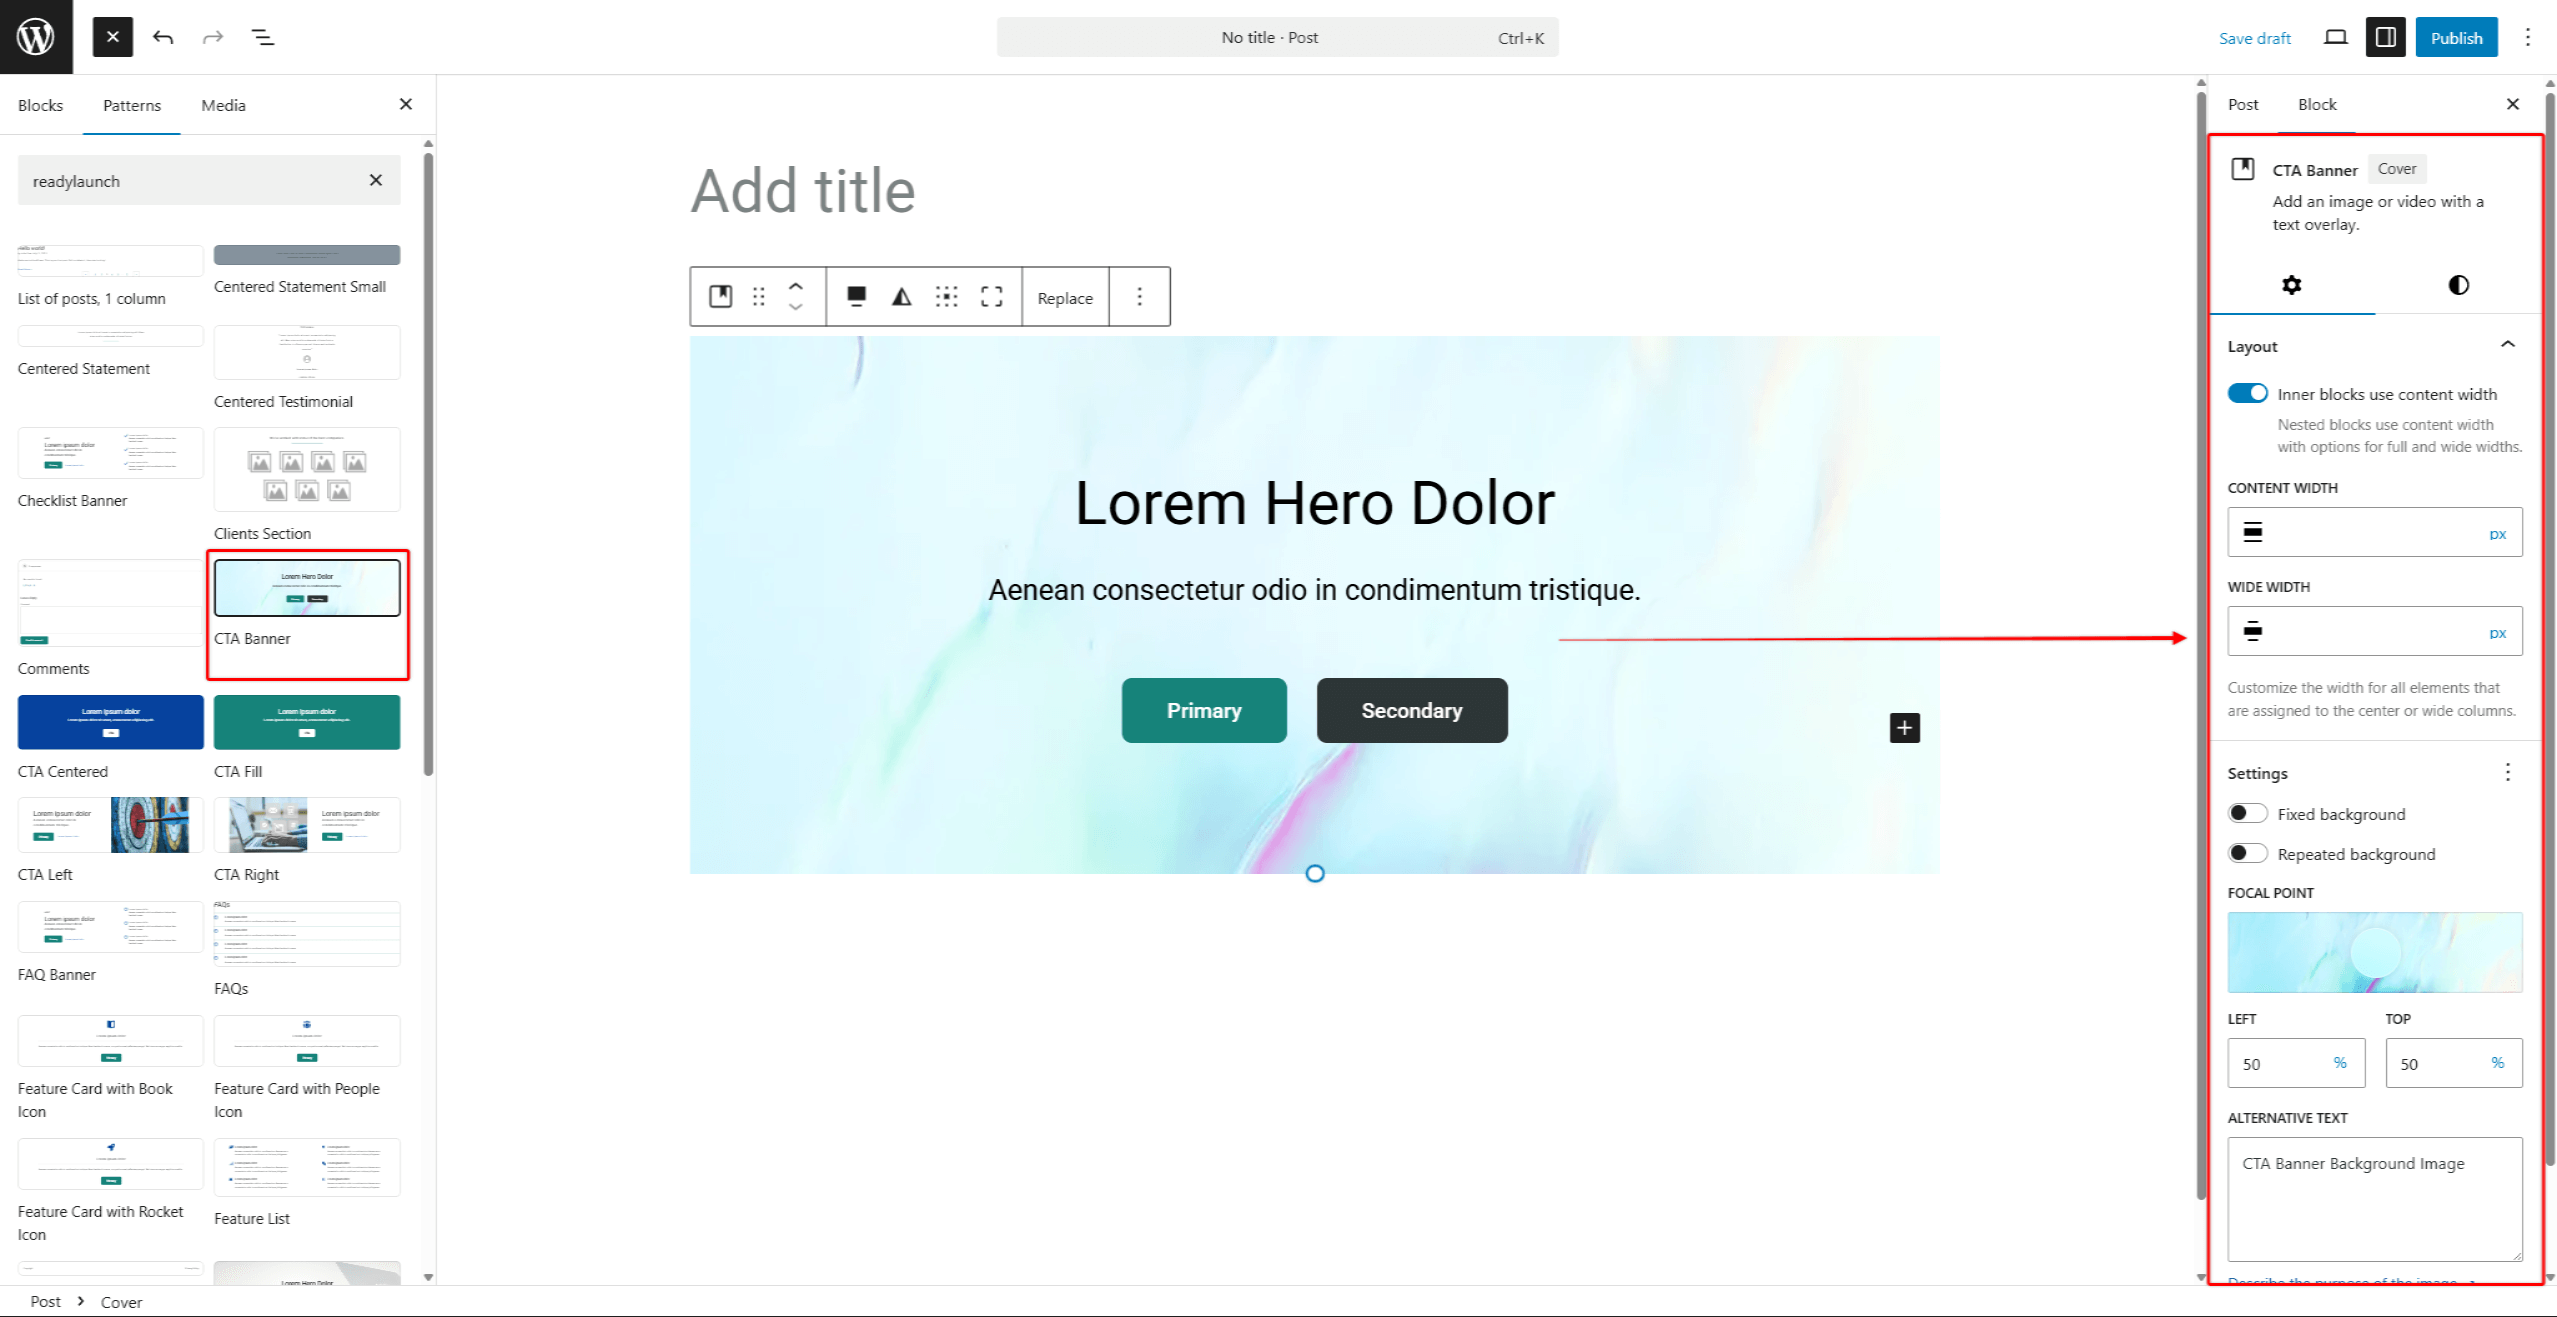
- Dans le panneau de droite, sous la rubrique Bloc Dans cet onglet, vous pouvez voir les options disponibles pour le bloc ou le motif sélectionné.
- Modifiez les paramètres de chaque bloc dans la section Paramètres tabulation.
- Ensuite, modifiez l'apparence du bloc ou du motif en ajustant les options disponibles sous la rubrique Styles tabulation.
- Cliquez sur Sauvegarder le projet ou le Publier/Mettre à jour pour enregistrer les modifications.
De plus, certains paramètres peuvent être disponibles mais masqués lors de l'application de personnalisations. Pour les afficher, procédez comme suit :
- Commencez à modifier la page ou l'article, puis repérez le bloc que vous souhaitez personnaliser.
- Cliquez dessus pour accéder au panneau des paramètres situé à droite de l'éditeur.
- Recherchez la section des paramètres qui vous intéresse. Cliquez sur le Icône à 3 points pour accéder à la liste complète des options de cette section.
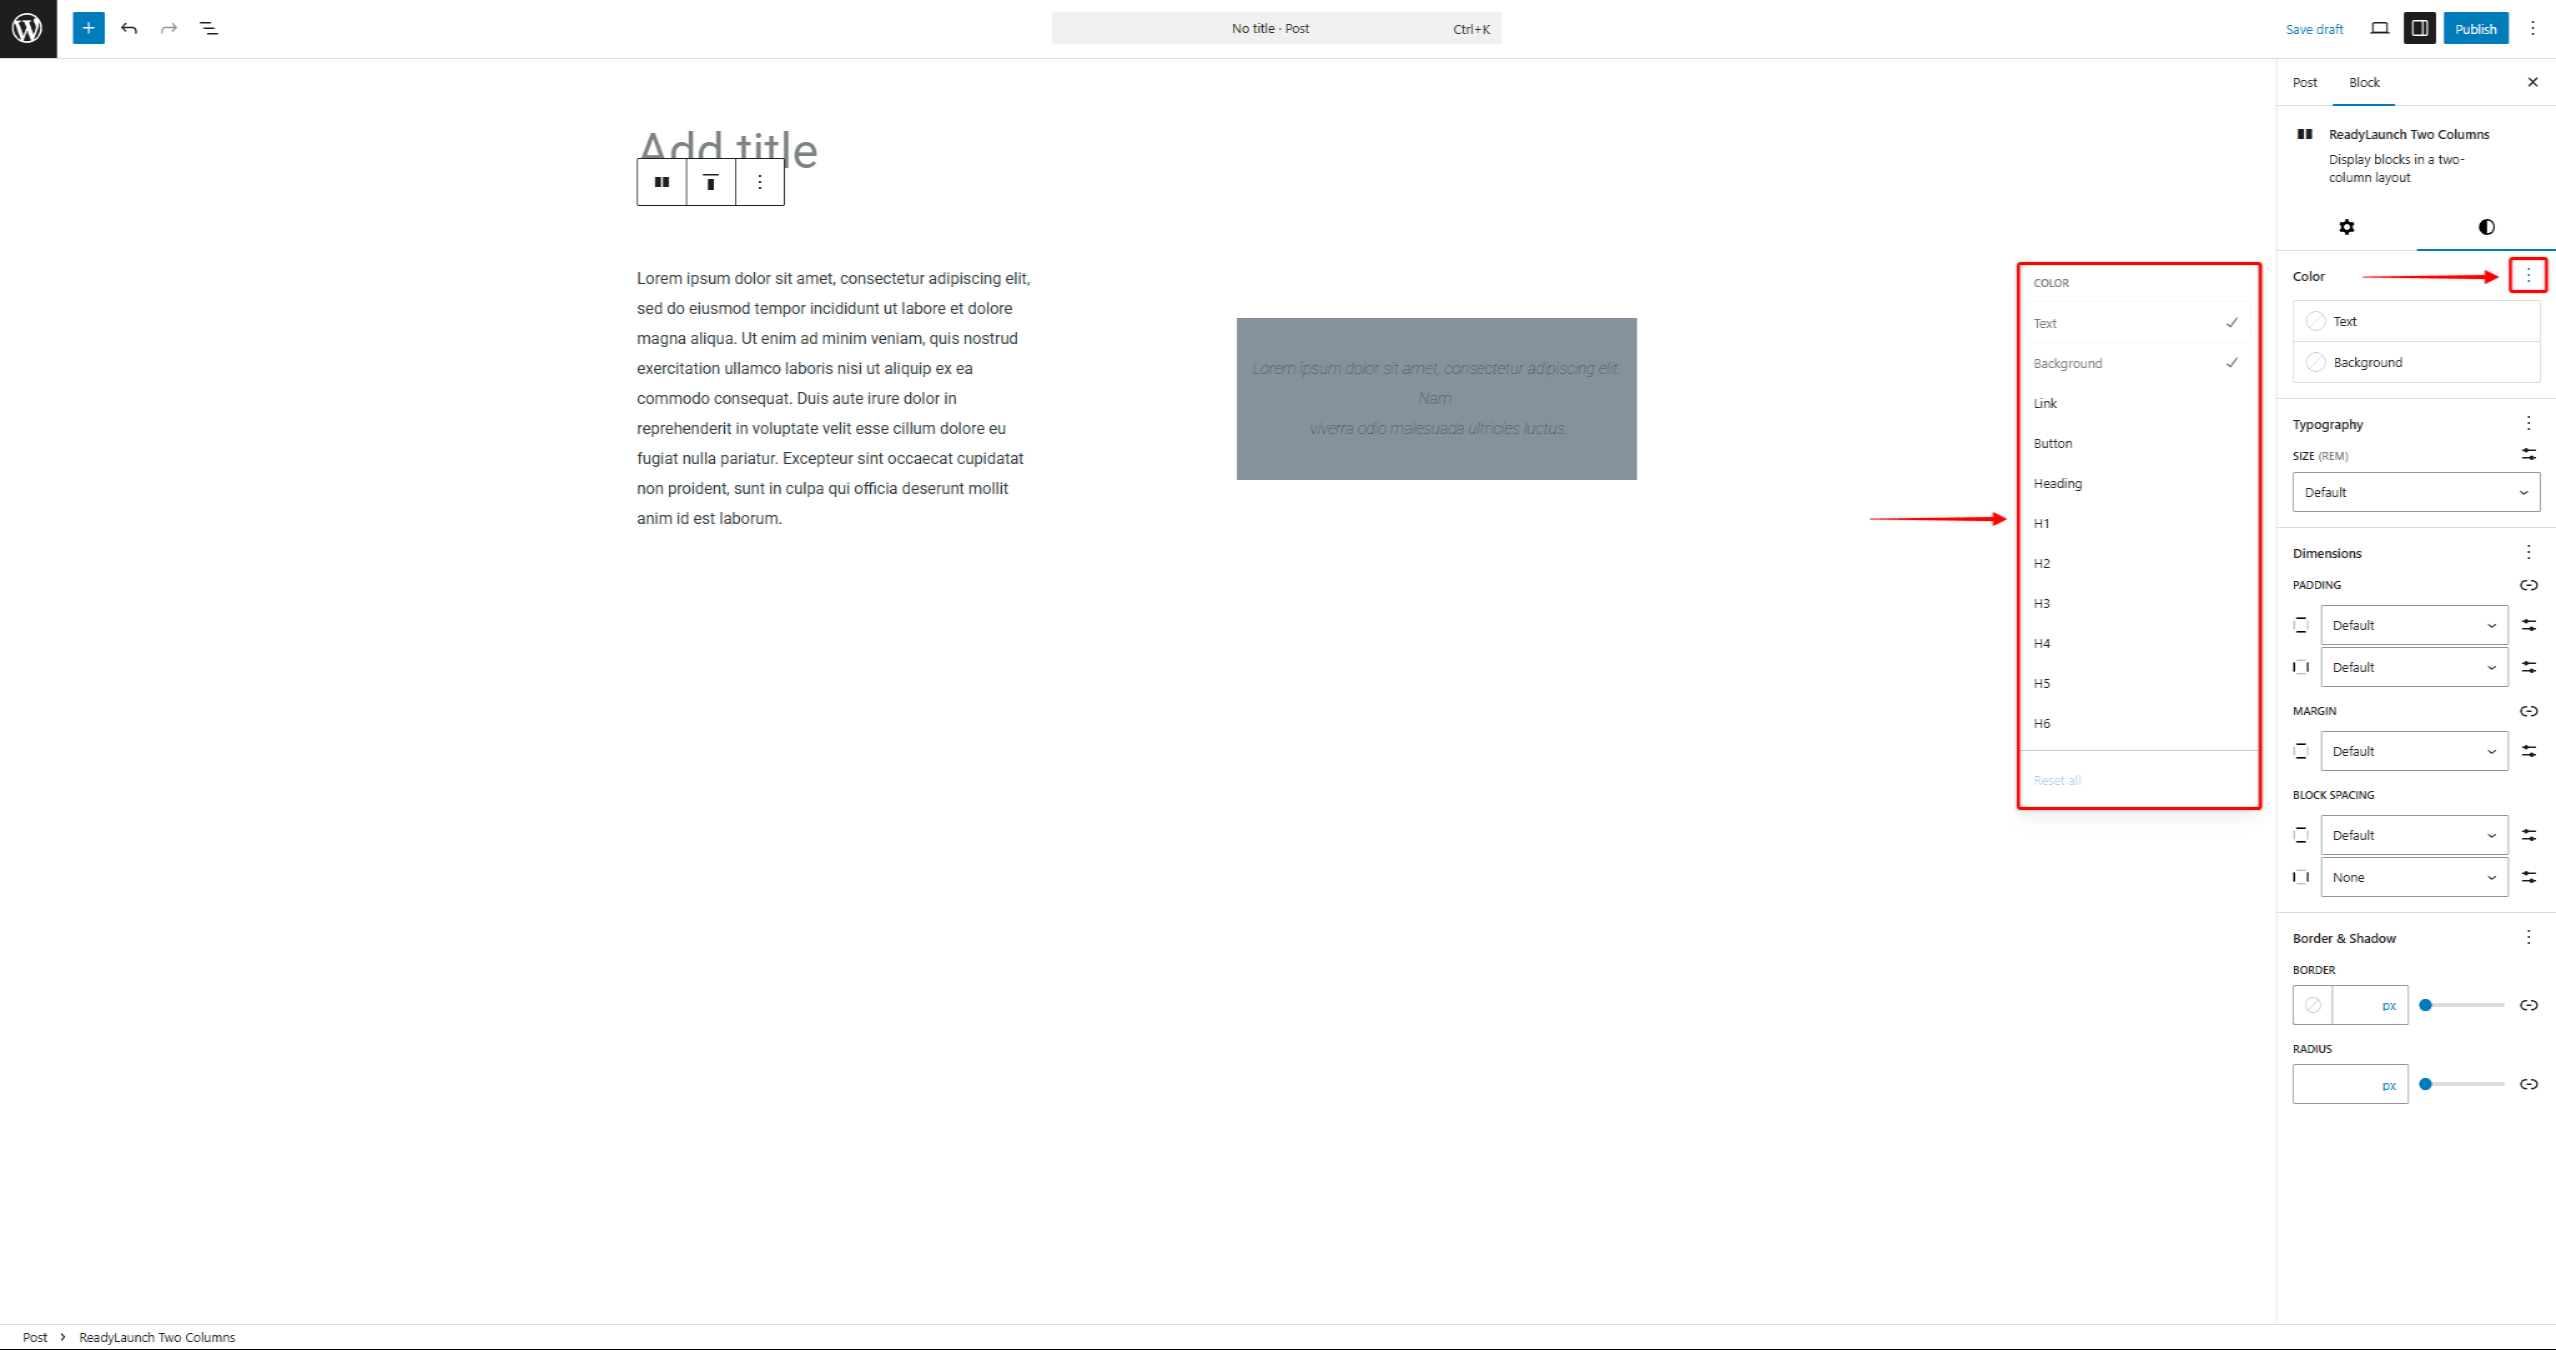
- Cliquez sur toutes les options que vous souhaitez afficher dans le panneau des paramètres.
Résumé
Les blocs et modèles ReadyLaunch™ accélèrent la création de pages grâce à des designs prédéfinis et personnalisables. Vous pouvez dupliquer et modifier les modèles du thème pour en faire des modèles personnalisés. Le plugin MemberPress ajoute les blocs d'adhésion, dont la mise en page est automatiquement prise en charge par le thème.
Pour gérer les mises en page pleine page, consultez la section Modèles de thèmes ReadyLaunch™. Pour la configuration générale du thème, commencez par le fichier Principes de base du thème ReadyLaunch™.










 FR
FR  EN
EN  ES
ES  DE
DE  PT
PT 