

The ReadyLaunch™ theme comes with a Gutenberg block variation, block styles, and pre-made groups of blocks (patterns). These elements provide the building blocks for your website. You can import pre-made ReadyLaunch™ patterns to any page or post.
This document explains the available ReadyLaunch™ blocks and patterns. It also covers the basics of using them in your content.
ReadyLaunch™ Blocks
The ReadyLaunch™ theme provides the ReadyLaunch™ Two Columns block, a variation of the default Columns block. The theme also adds extra block styles to the default Button, Media & Text, and Comments Title blocks.
In addition, the MemberPress plugin provides its membership blocks, such as the Login, Account, Registration, and Pricing Table blocks. The ReadyLaunch™ theme styles these blocks automatically. They adopt the colors and typography you set for the theme. A separate document covers the available MemberPress Gutenberg blocks.
ReadyLaunch™ Two Columns Block
The ReadyLaunch™ Two Columns block is a variation of the default Columns block. It allows you to organize content in two columns, and style the columns and their content. The two-column structure is fixed, while the content within each column remains fully editable.
After you add the block to the editor, customize it by applying the general block settings and styling.
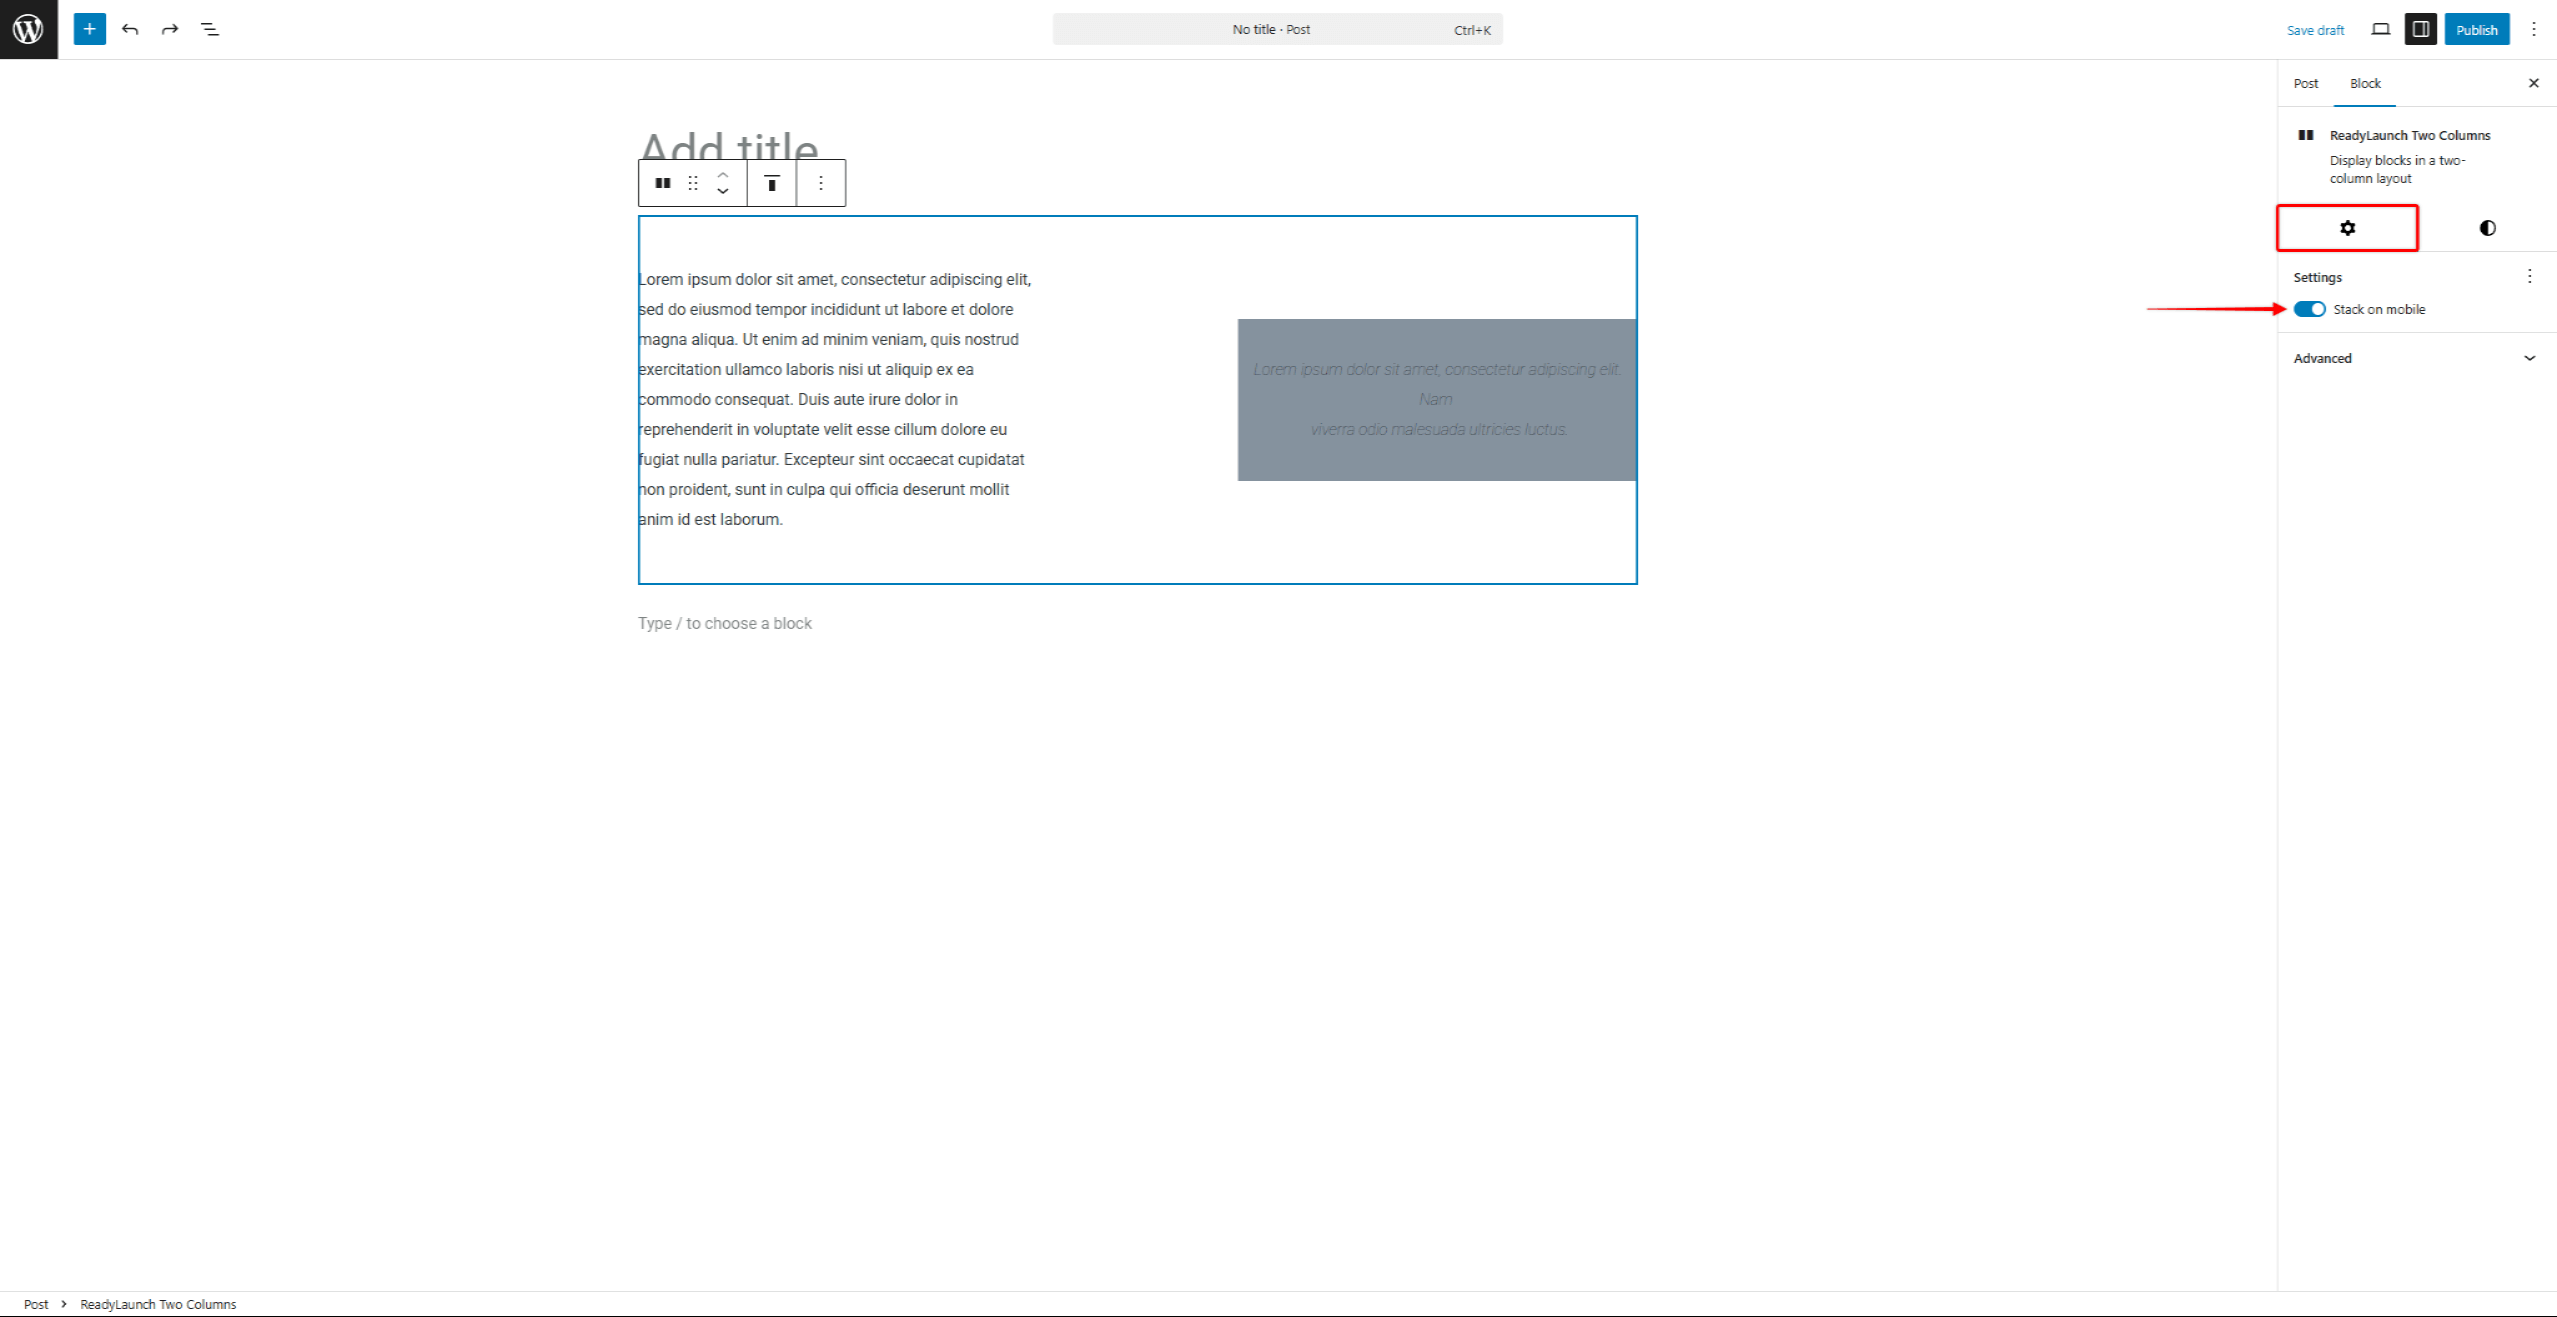
- Click on the ReadyLaunch™ Two Columns block you added to the editor to open the right-side panel.
- Click on the Settings tab to access the block settings.
- Stack on mobile: this option stacks the two columns one on top of the other on mobile devices. It is enabled by default.
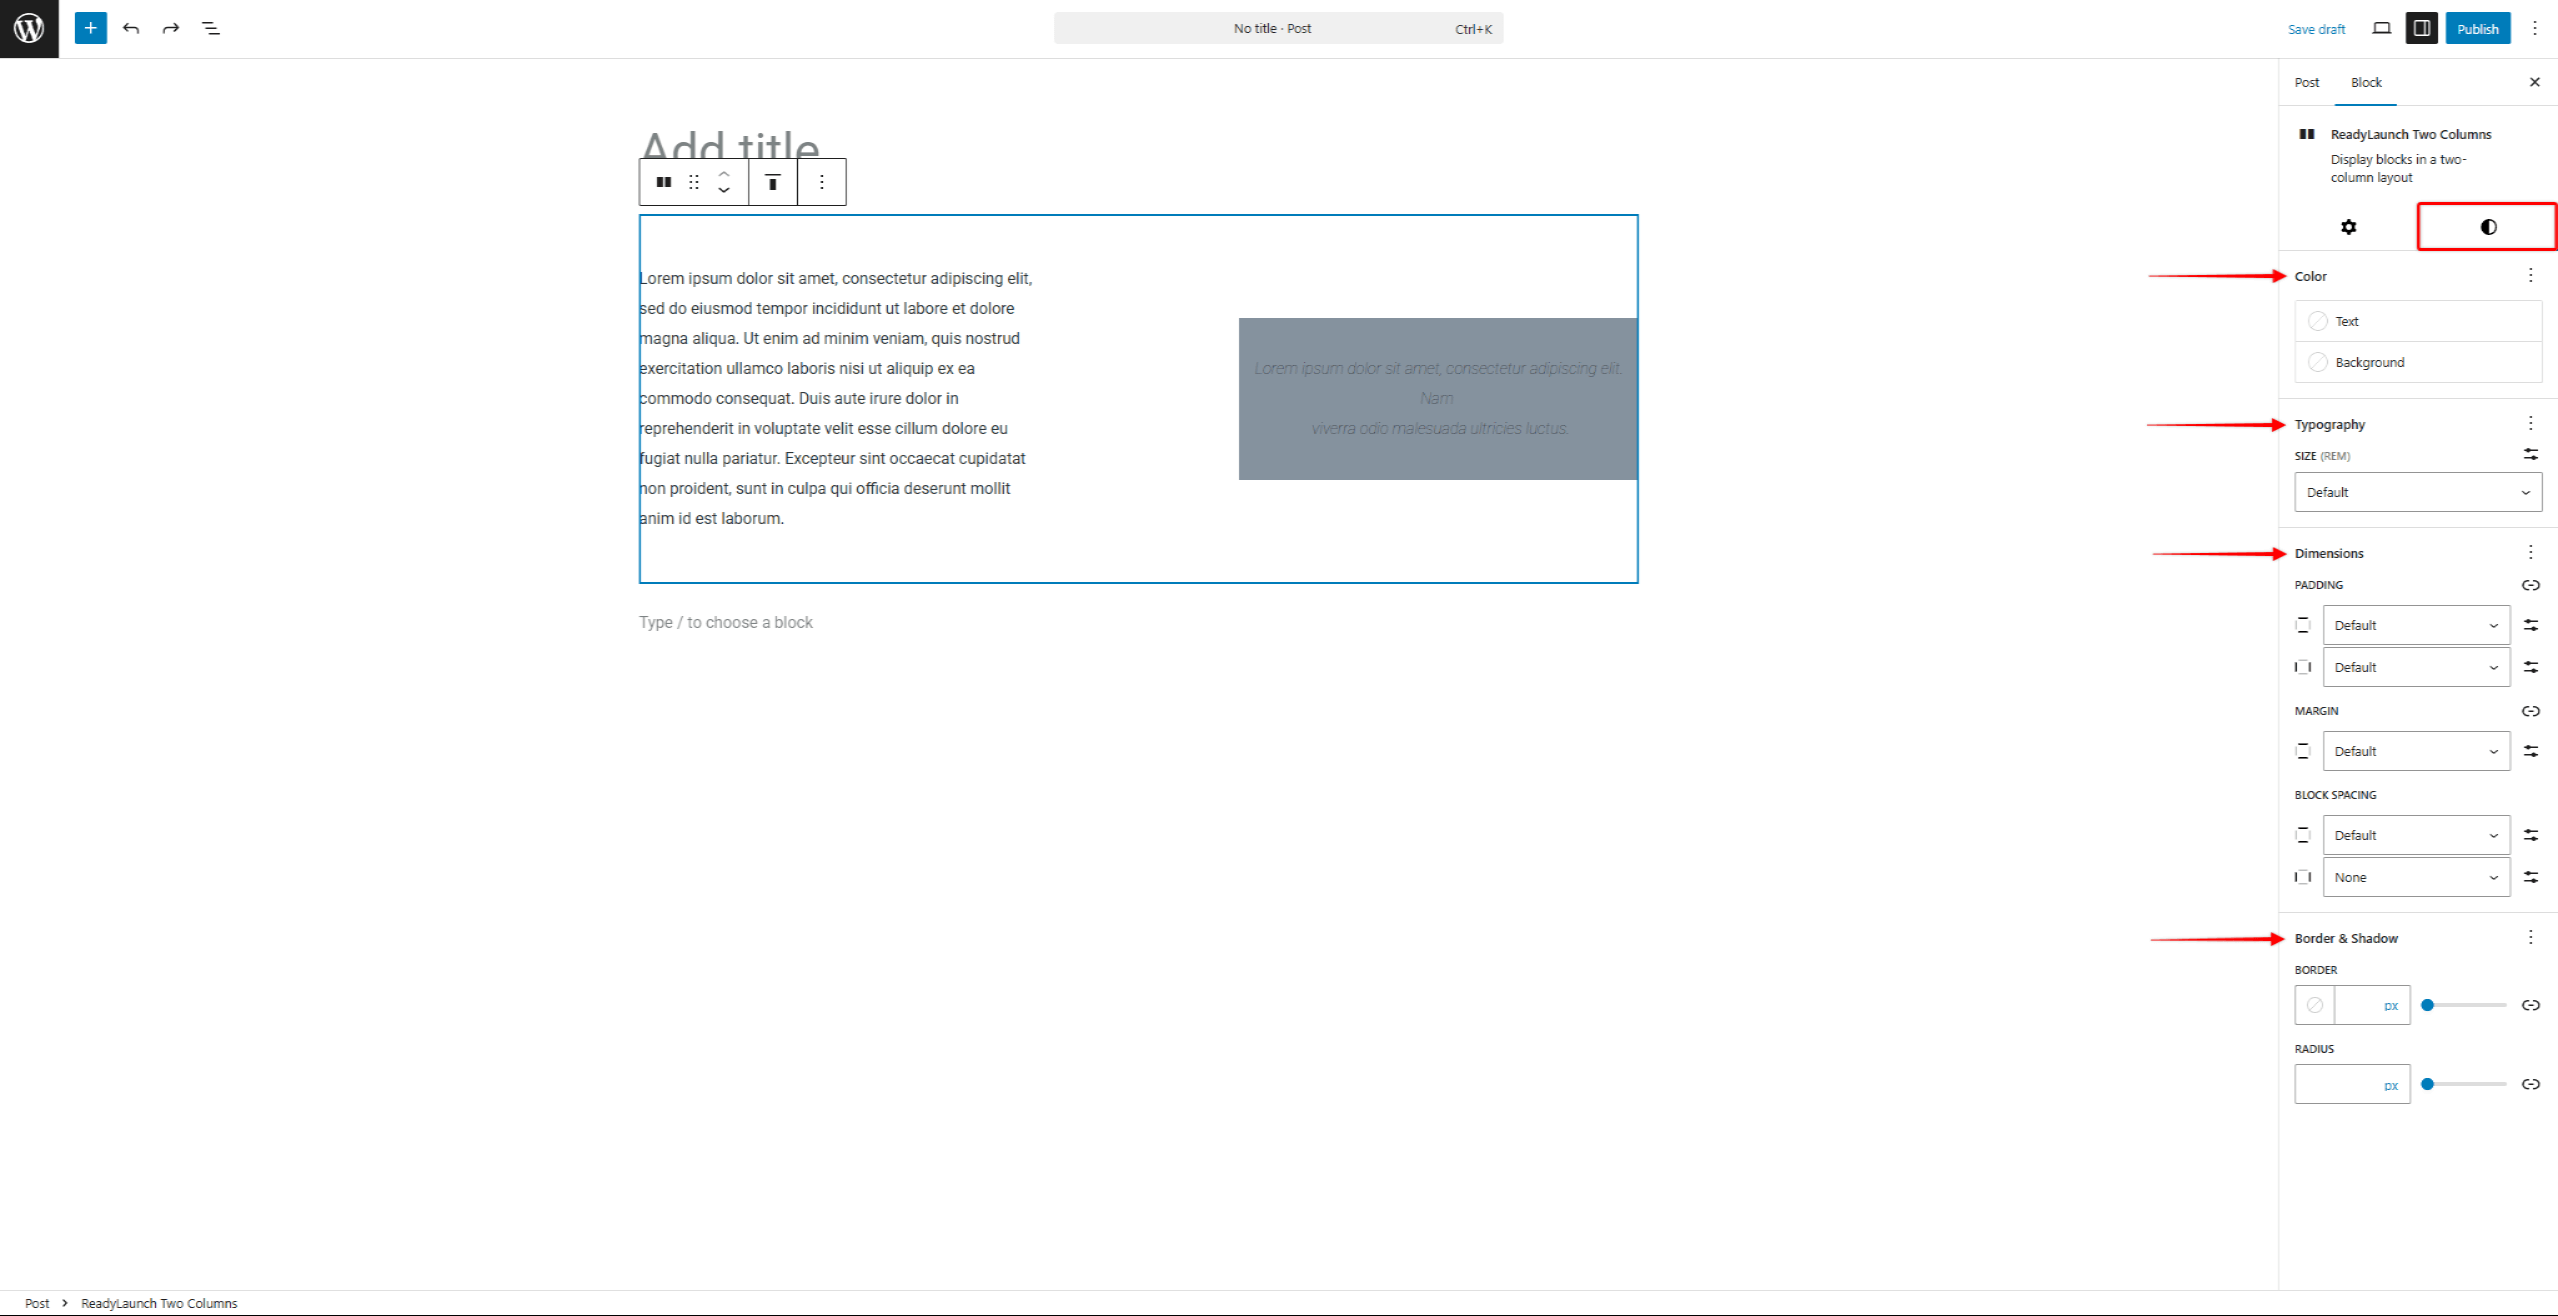
- Next, click the Styles tab to modify the block’s style. You can set the Colors, Typography, Dimensions, Border, and Shadows.
ReadyLaunch™ Patterns
You can add ReadyLaunch™ patterns to your posts and pages through the default (Gutenberg) editor.
The theme includes over 40 patterns, such as hero banners, call-to-action sections, feature lists, testimonials, FAQs, and team member sections. It also includes starter content patterns for complete home, about, contact, feature, and subscribe pages.
Patterns are groups of multiple blocks. Once you add a pattern to your editor, you can apply the following customizations:
- Modify the settings and styling of the group (for most patterns, these are blocks like Group, Stack, or Cover);
- Modify the settings and styling of each block within the pattern (e.g. Paragraph, Heading, Image, Button);
- Delete or add blocks.
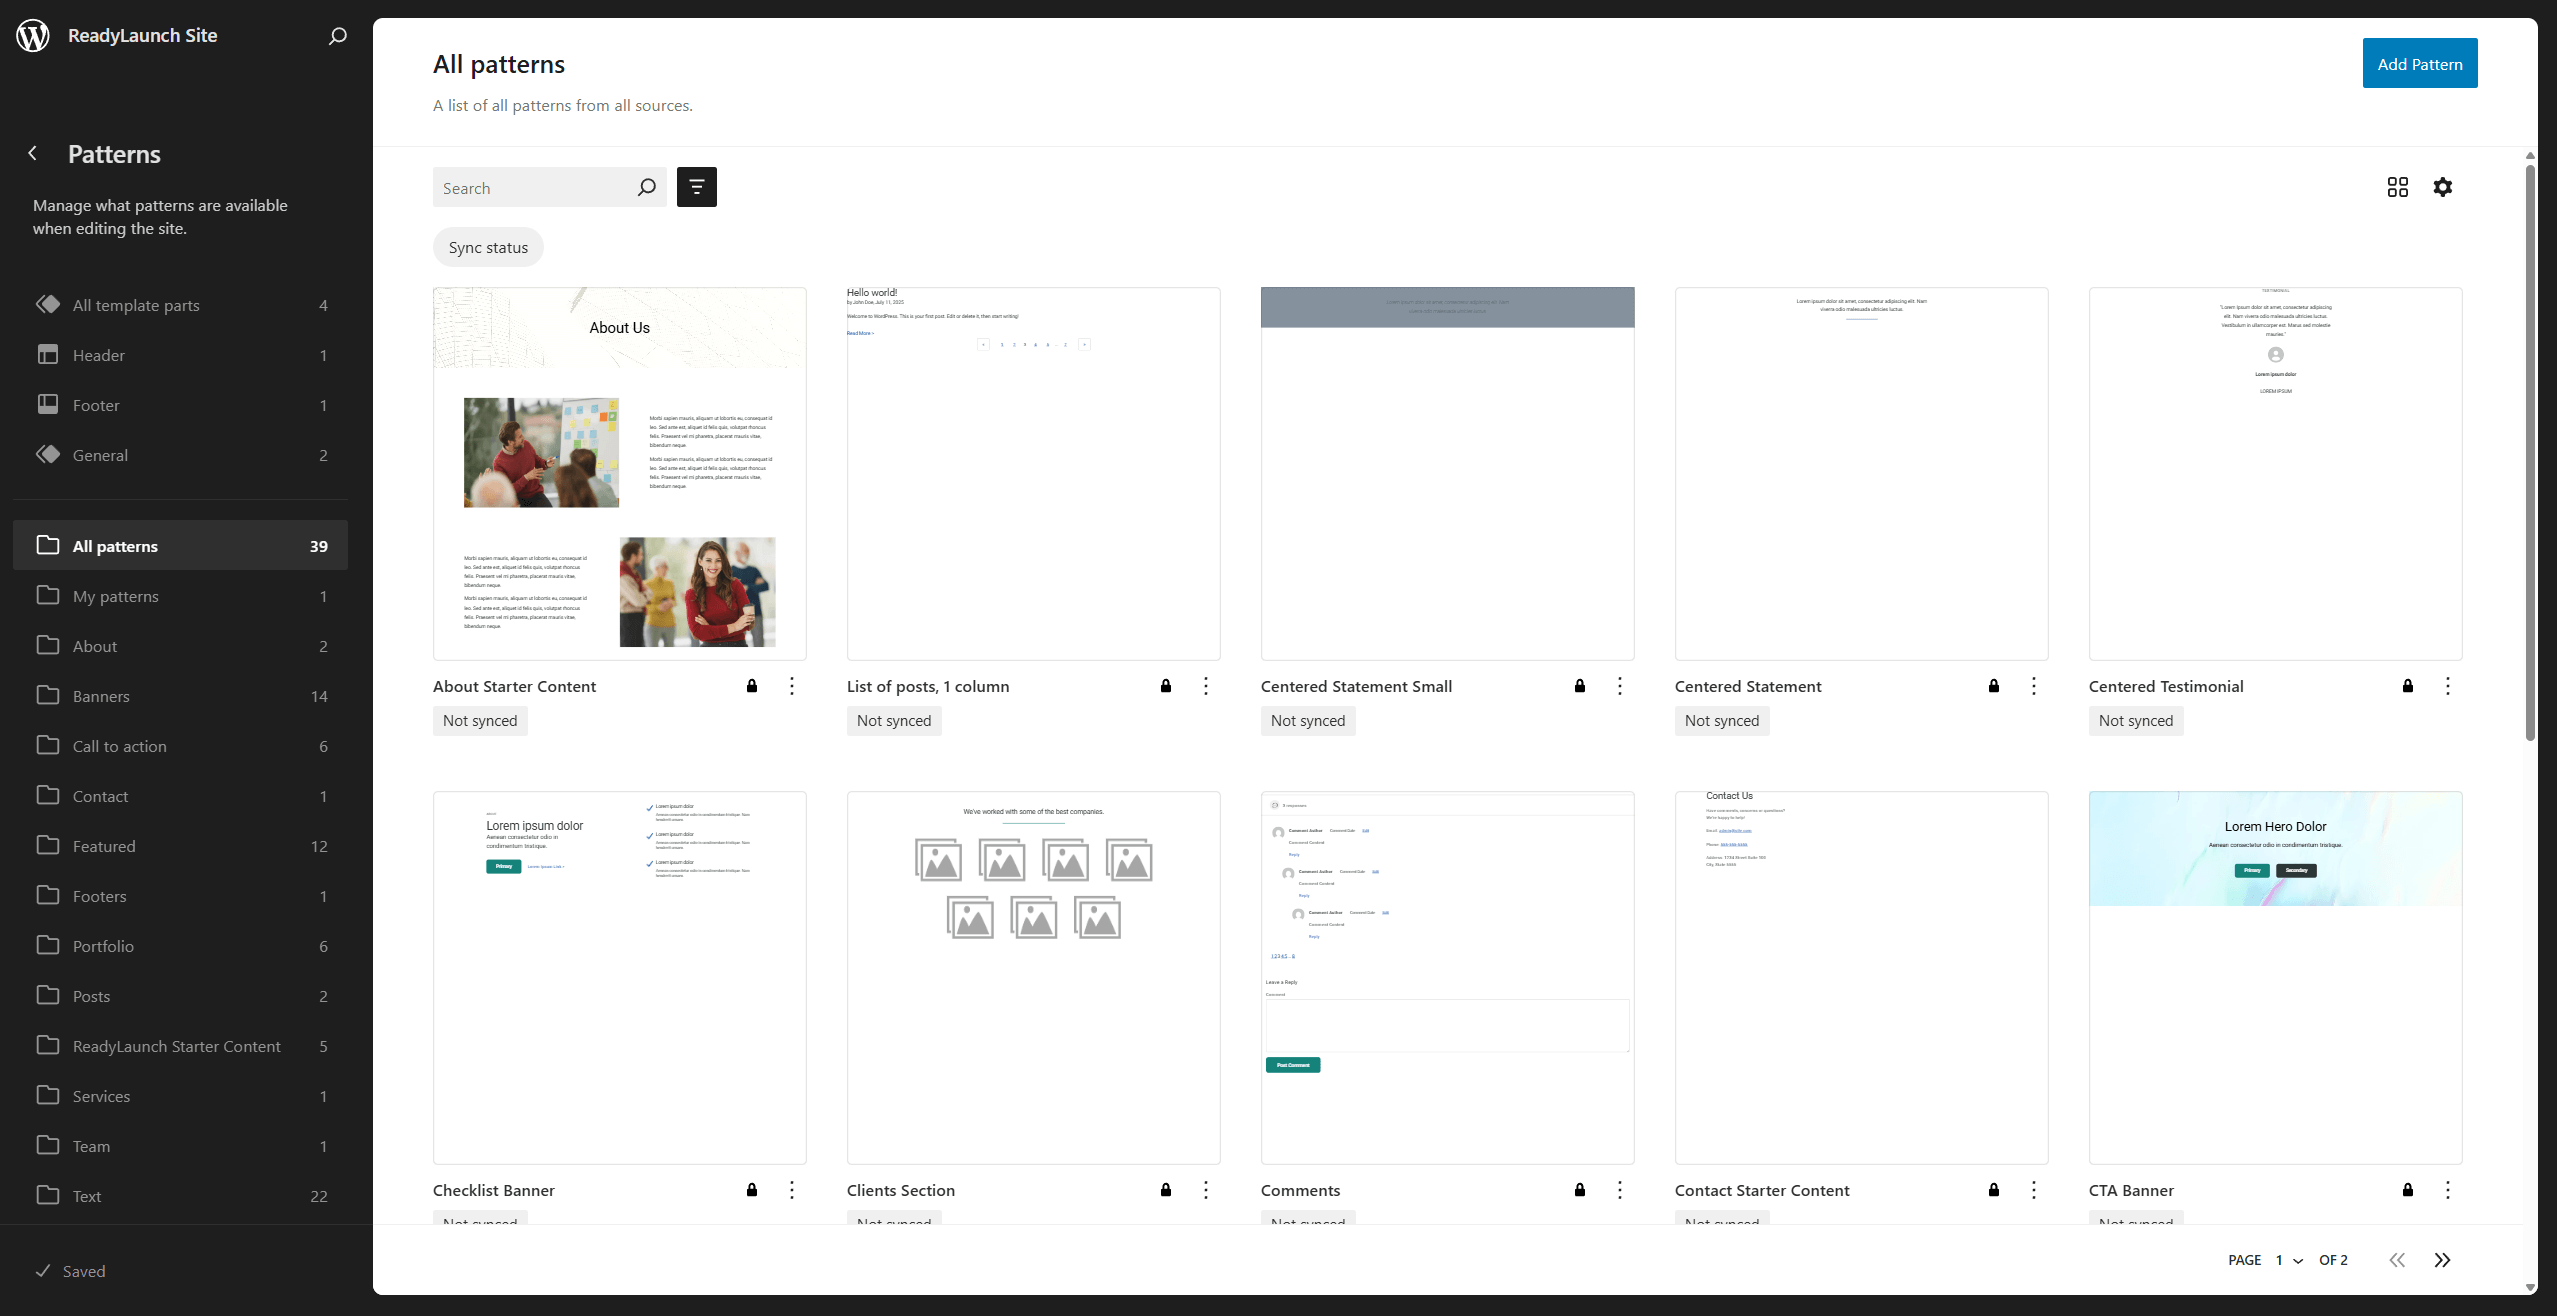
Furthermore, you can browse all pre-made ReadyLaunch™ patterns in the Site Editor. Here, you can also apply modifications and create custom patterns.
Creating Custom Versions of ReadyLaunch™ Patterns
The pre-made ReadyLaunch™ patterns are theme patterns. Changes to an inserted pattern apply only to that page or post. To reuse a modified design across your website, create a custom version of the pattern:
- Navigate to Dashboard > Appearance > Editor to open the Site Editor.
- In the left-side menu, click on the Patterns option.
- Browse the pattern list to find the pattern you wish to modify.
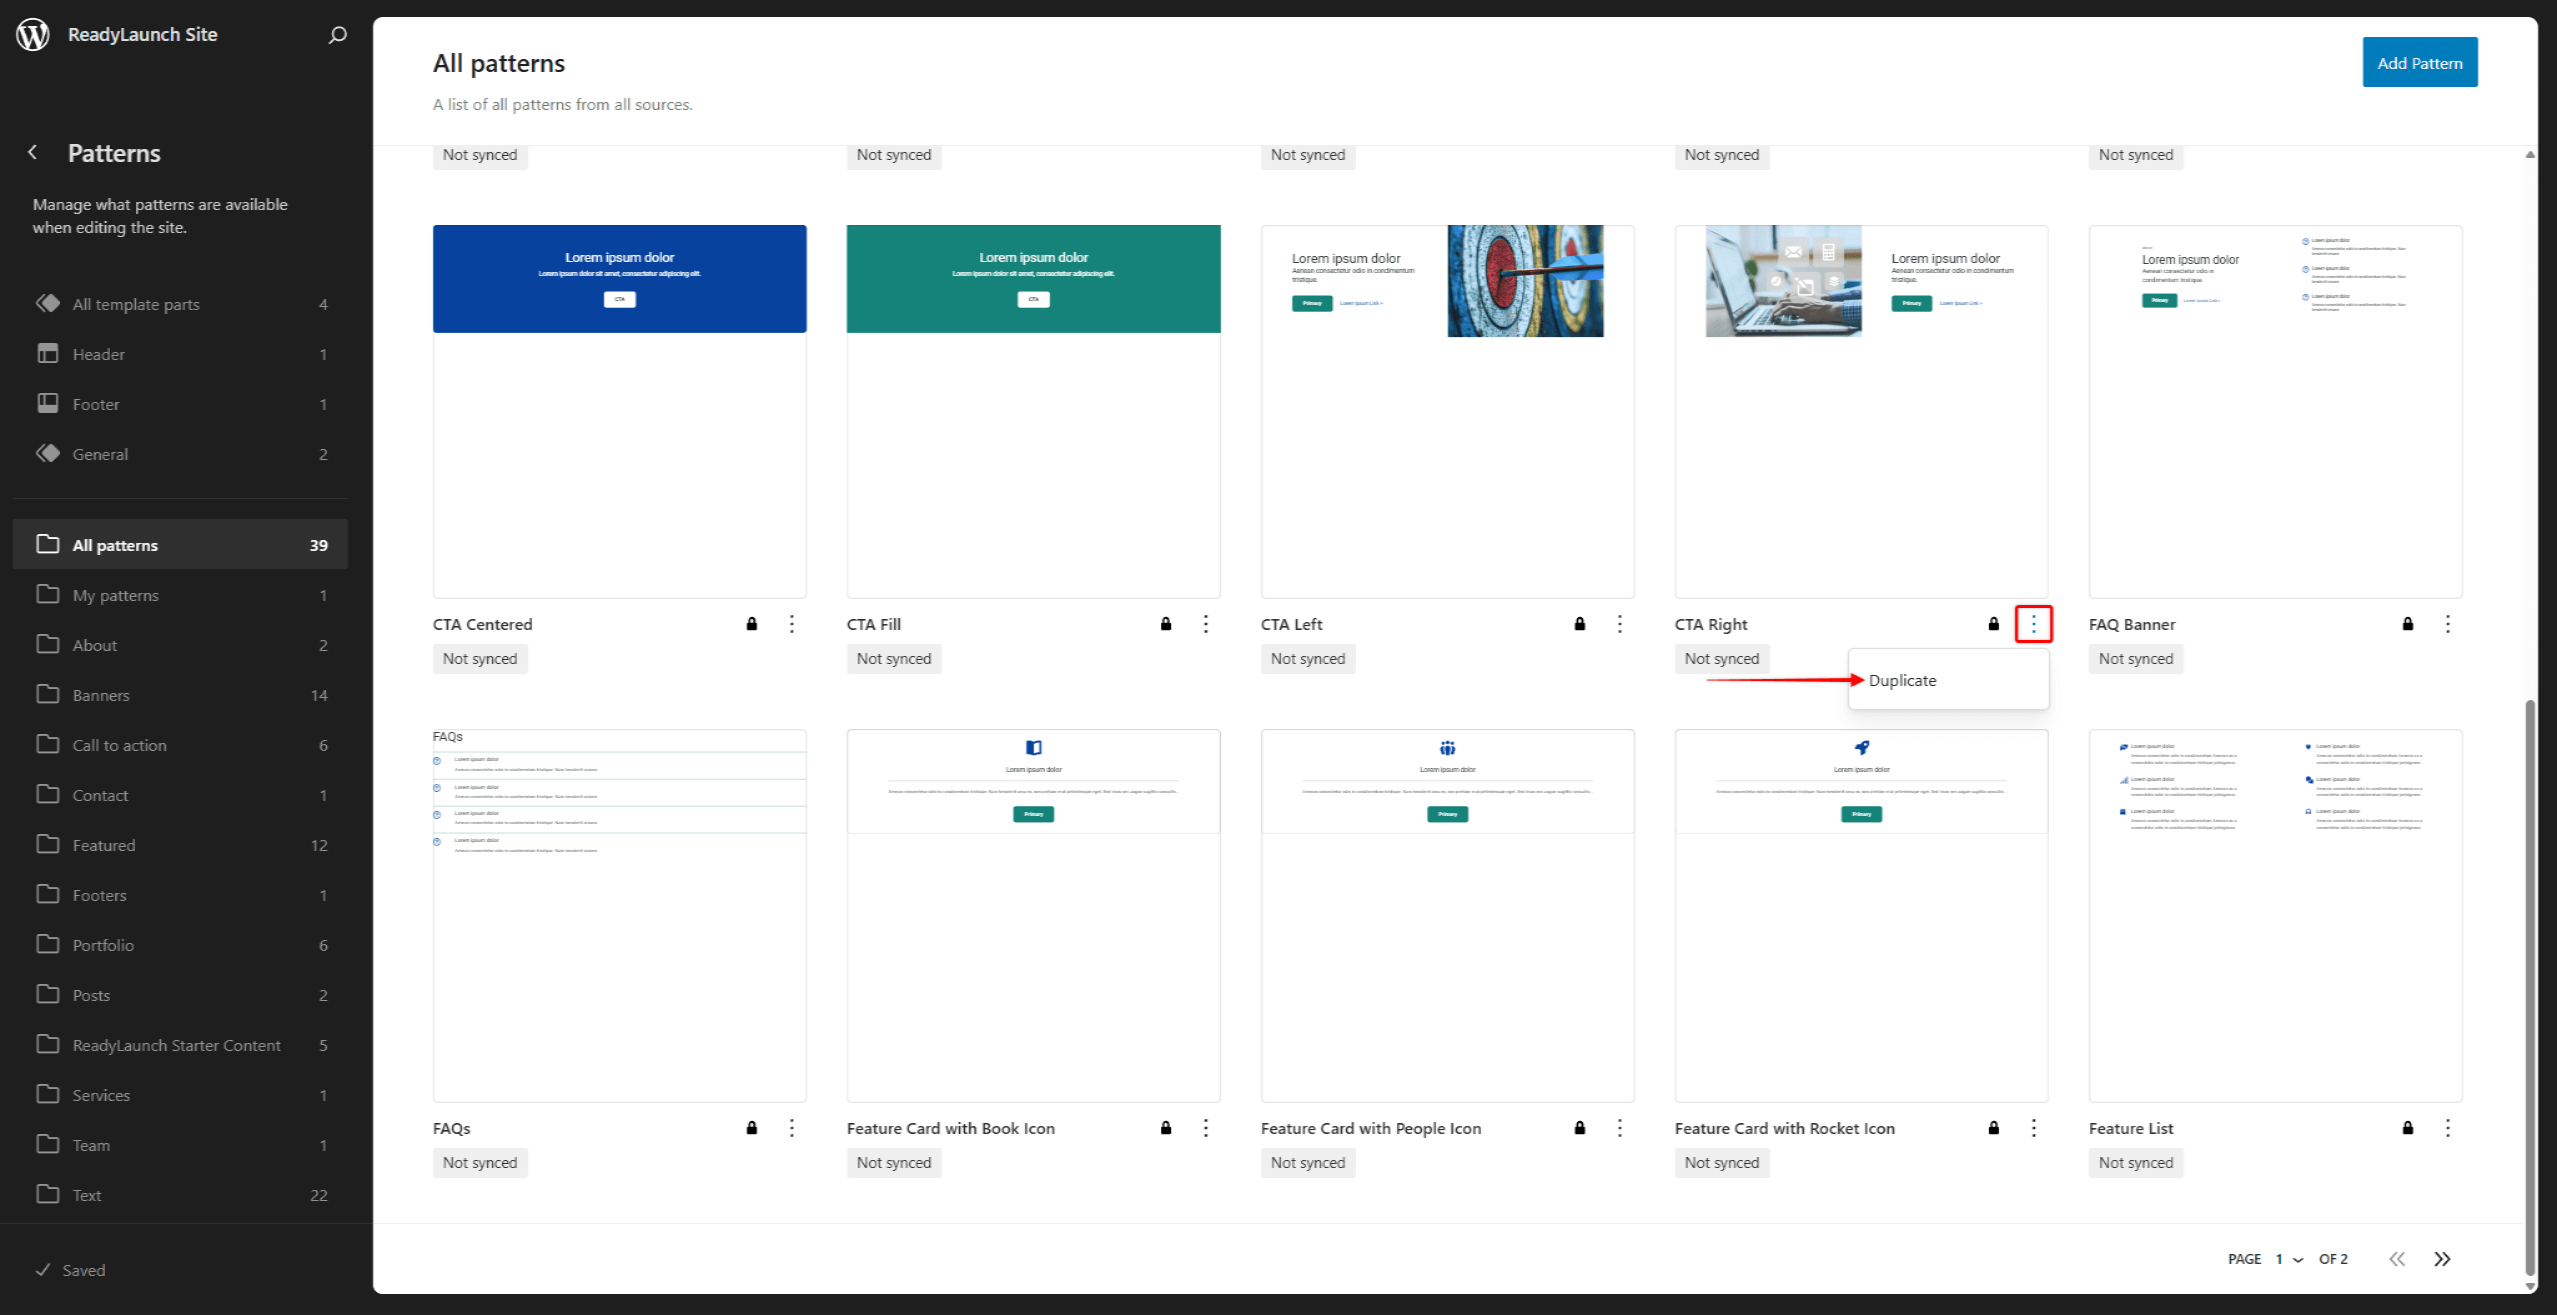
- Click on the 3-dot icon, and then the Duplicate option to create a duplicate of the default pattern.
- Name the pattern duplicate, and choose the pattern categories for it.
- Optionally, enable the Synced option for the duplicate.
- Click the Duplicate button.
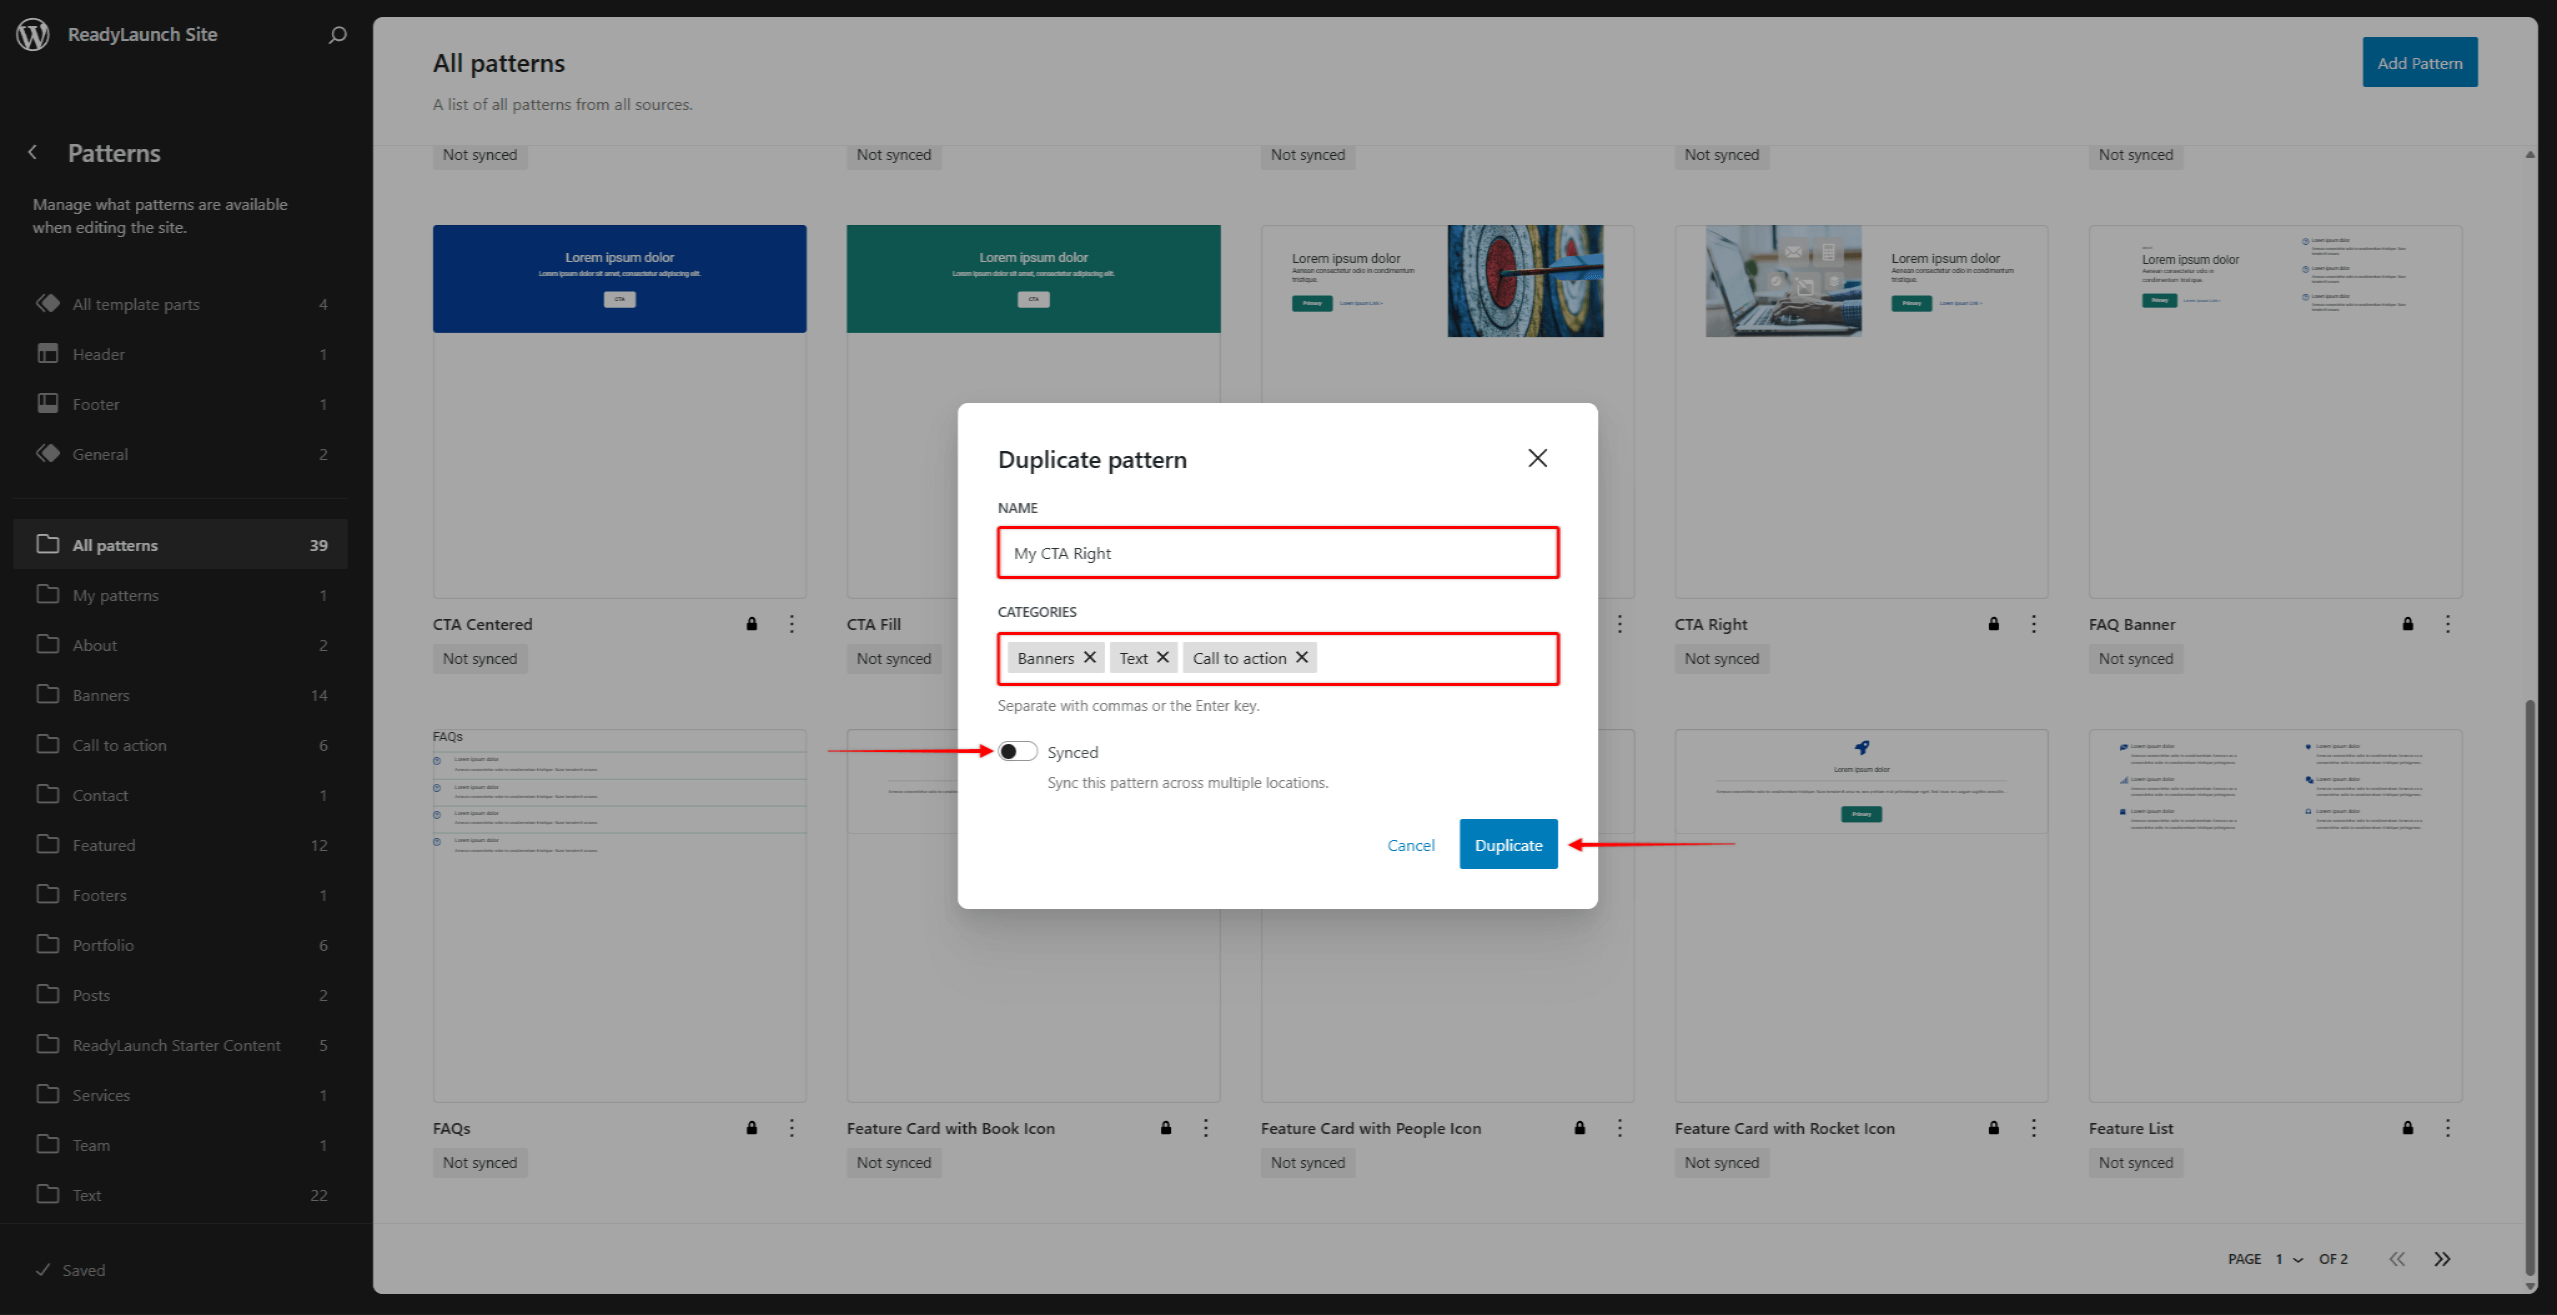
- Find the pattern you duplicated by browsing the patterns list, or under the My patterns menu. Click the 3-dot icon on it.
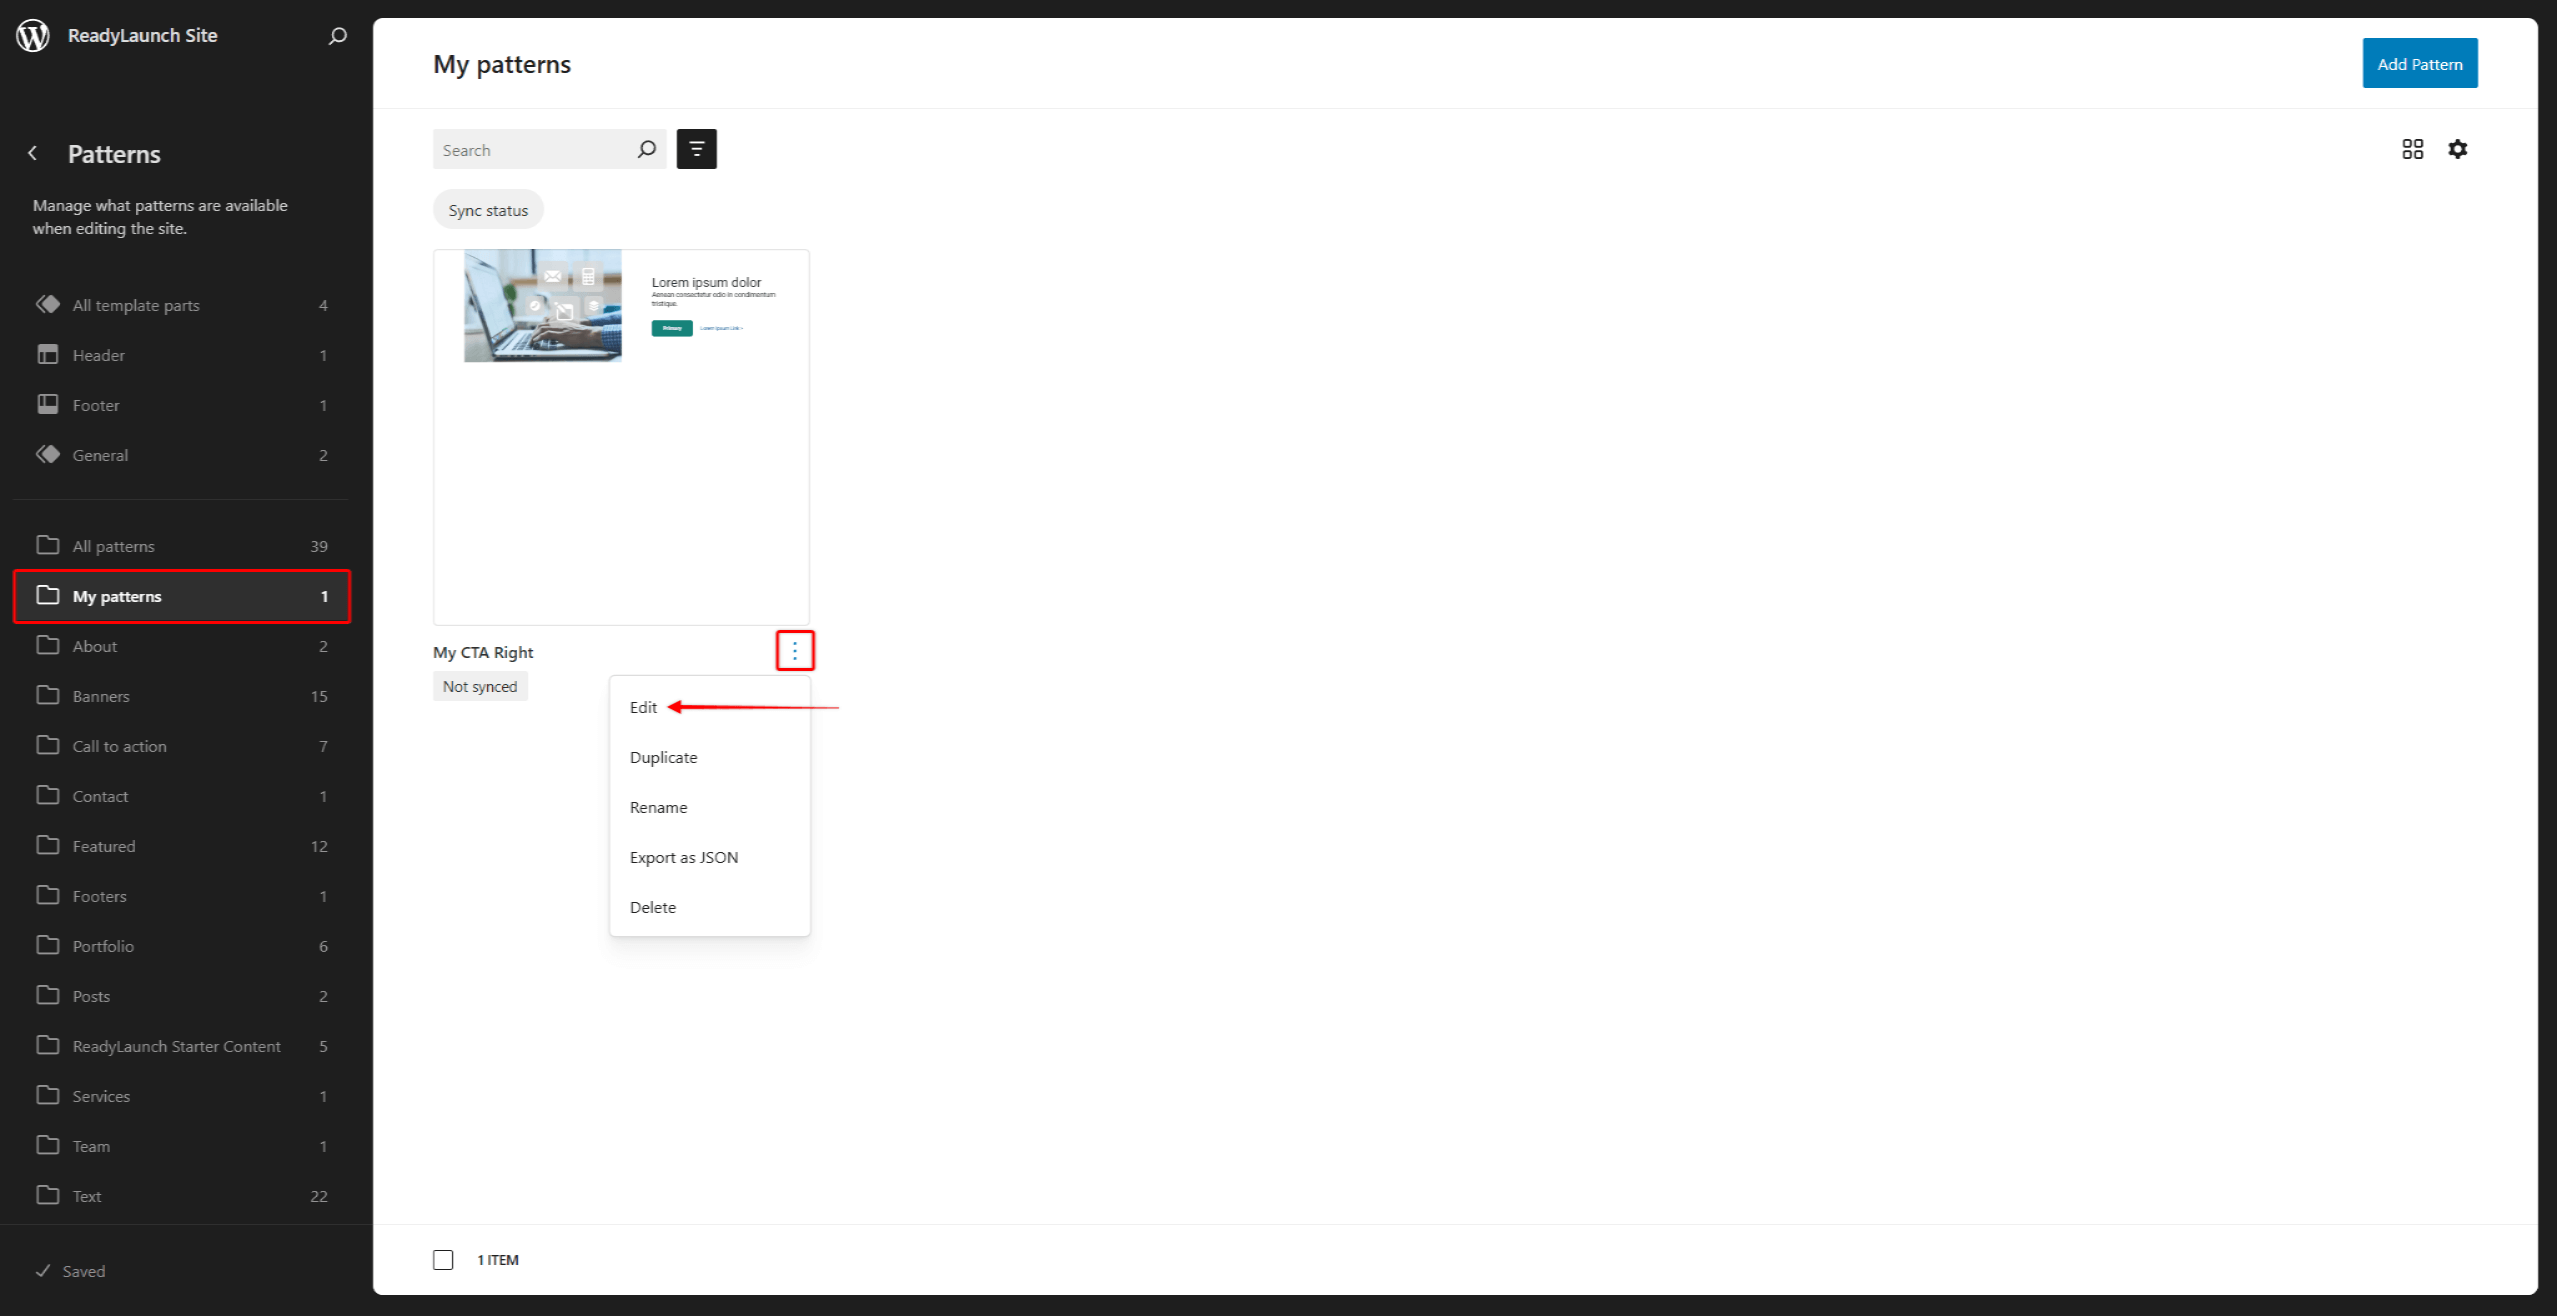
- Here, you find additional options for managing the pattern. Click Edit to access the pattern editor.
- Apply modifications to the pattern. You can modify existing blocks, add new ones, or remove the ones you do not need.
- Once you finish the modifications, click Save.
Now, you can use your custom pattern the same way as any other pattern.
Importing ReadyLaunch™ Blocks and Patterns
You can insert blocks and patterns using the Block inserter within the default (Gutenberg) editor.
First, start editing the post or page. Then, follow these instructions to find and insert the ReadyLaunch™ blocks or patterns:
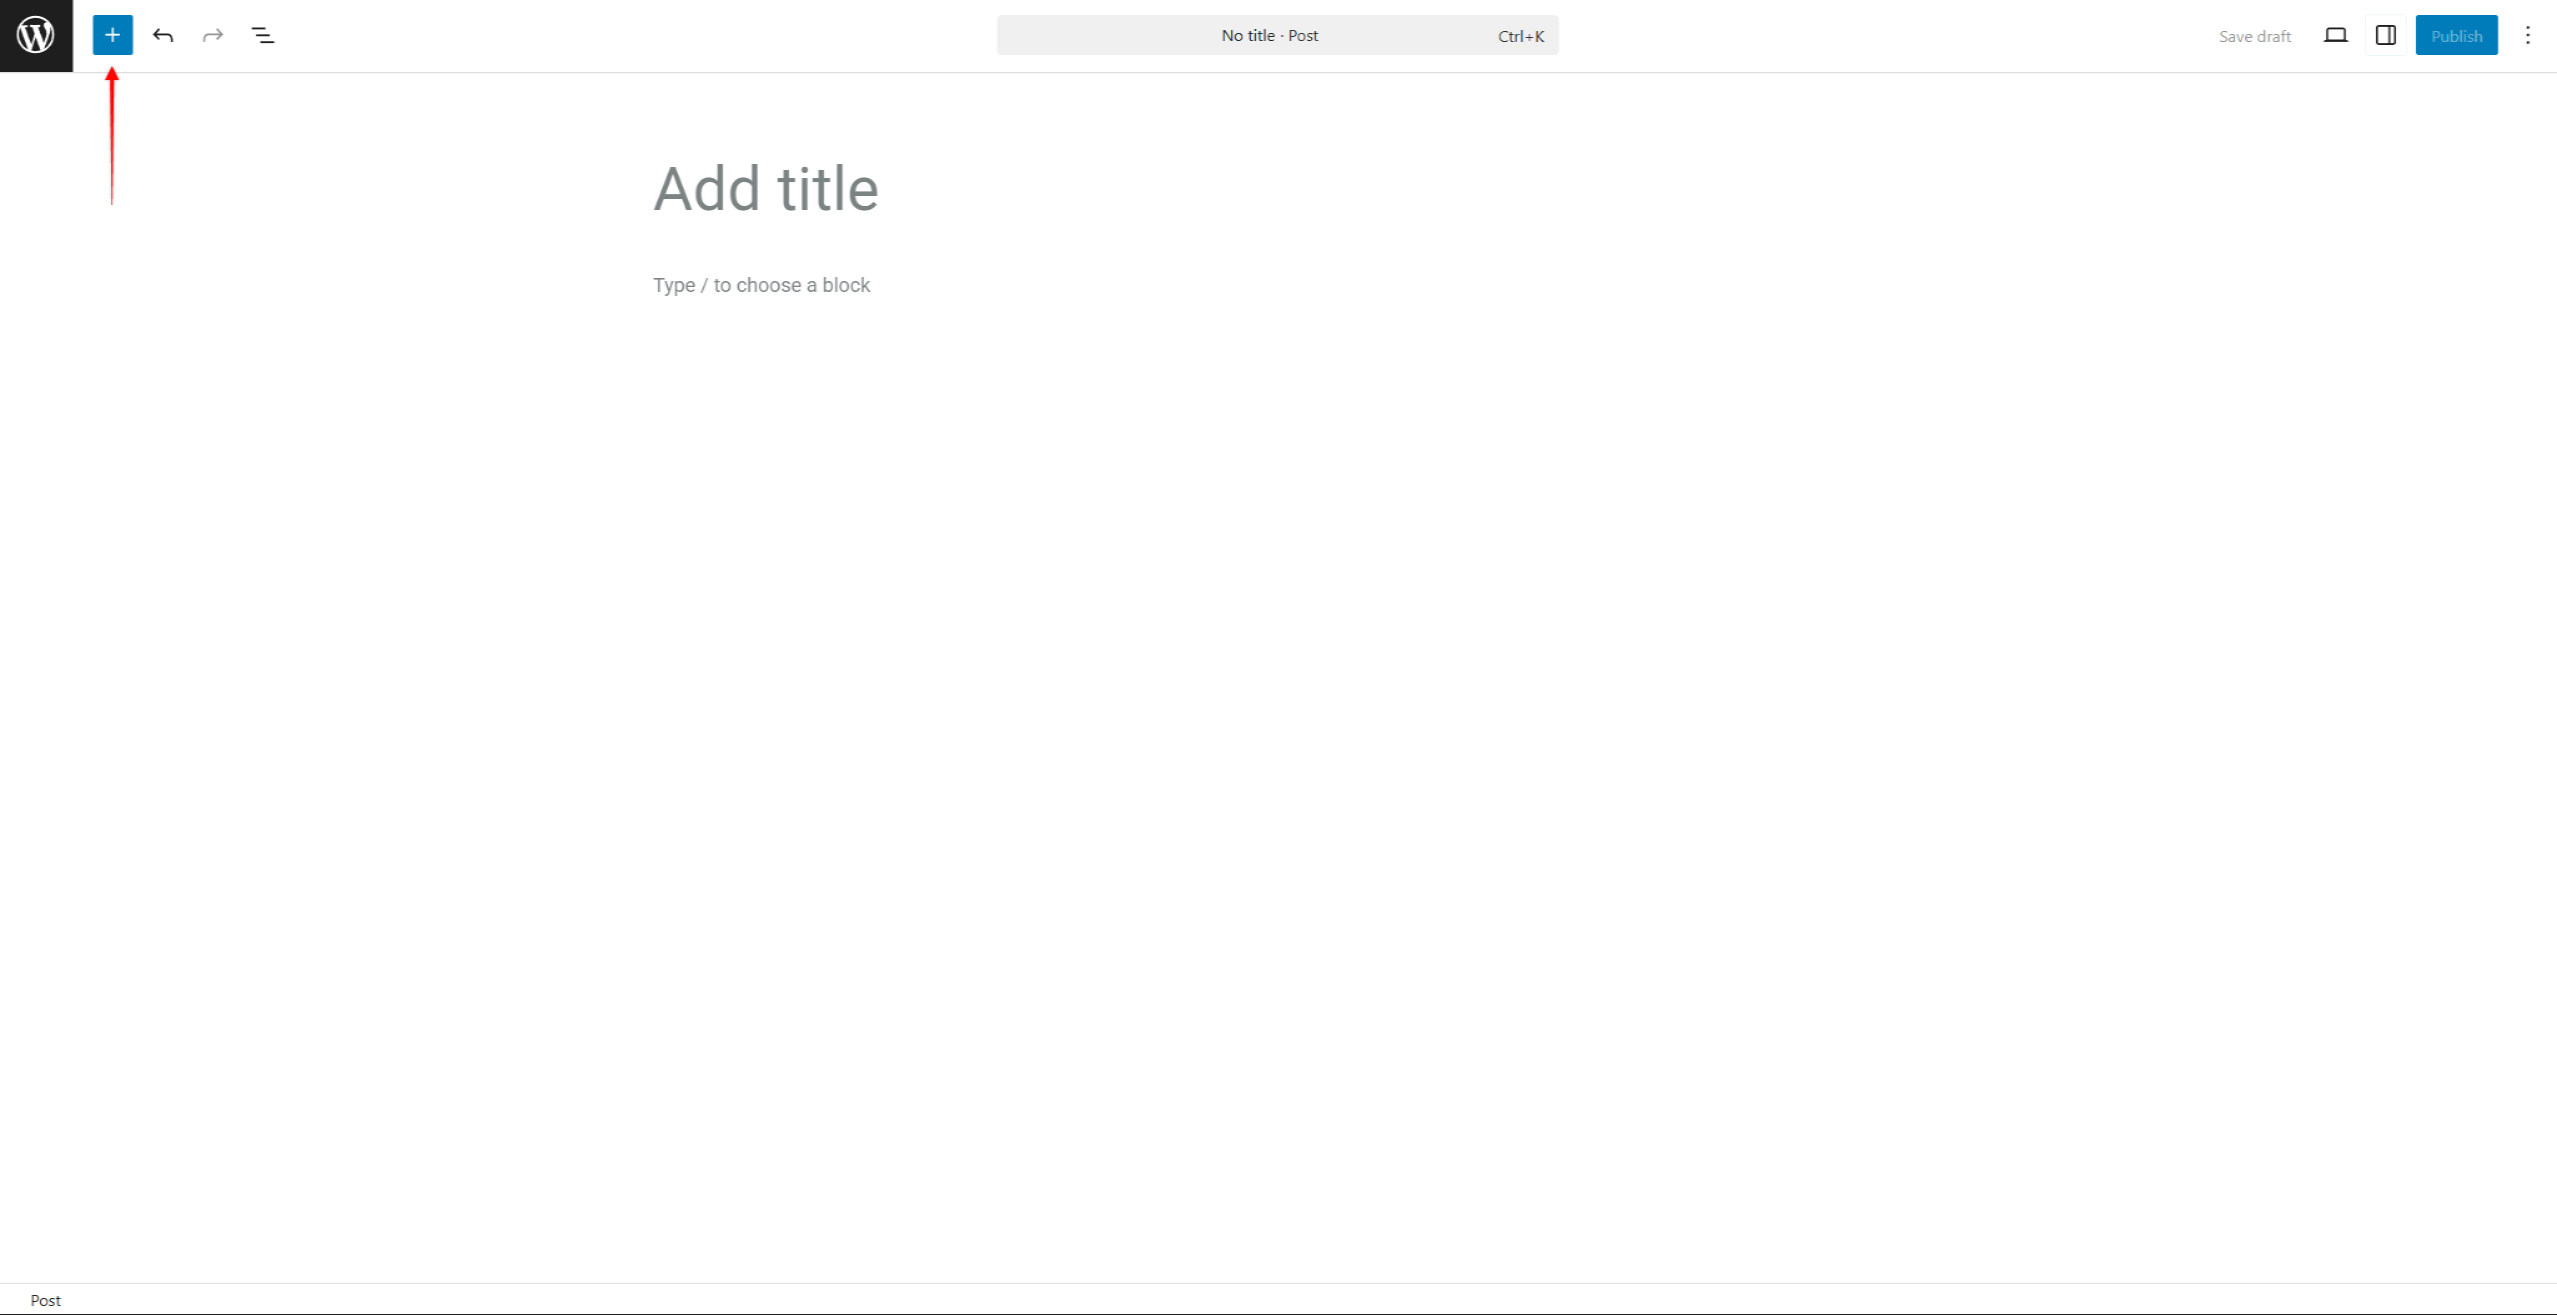
- Click the + icon to open the Block inserter.
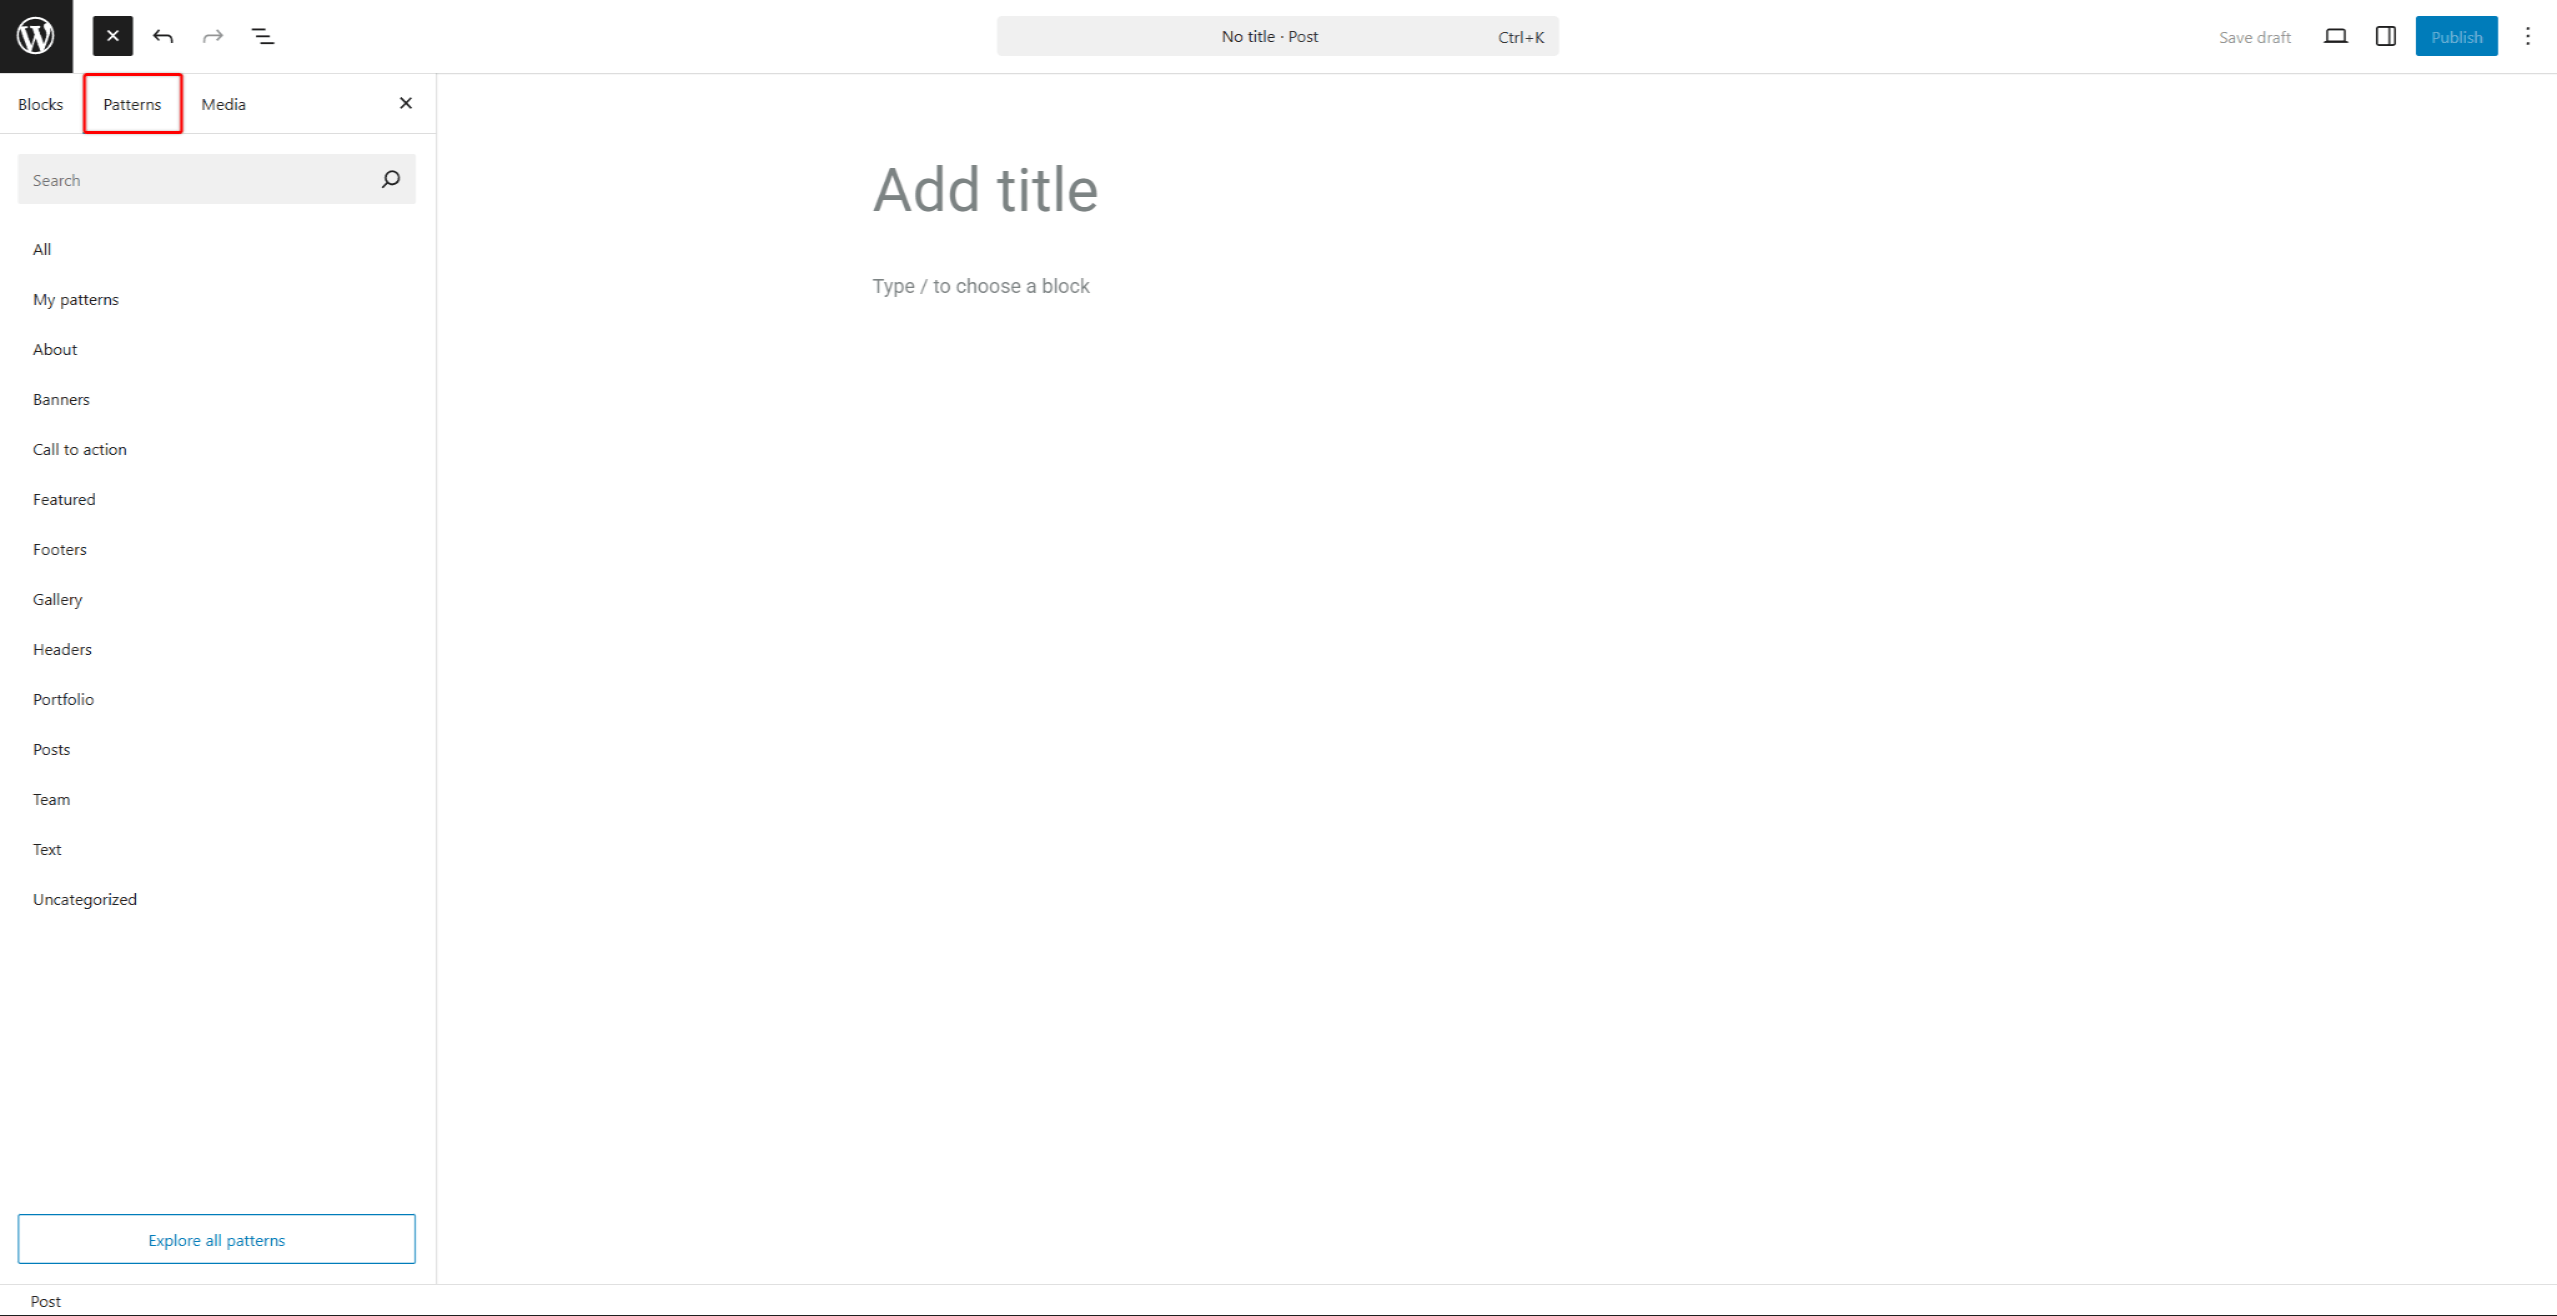
- Here, you can browse the blocks list under the Blocks tab, and the patterns under the Patterns tab.
- Search for the “readylaunch” term within the Block inserter to filter the theme-related blocks and patterns.
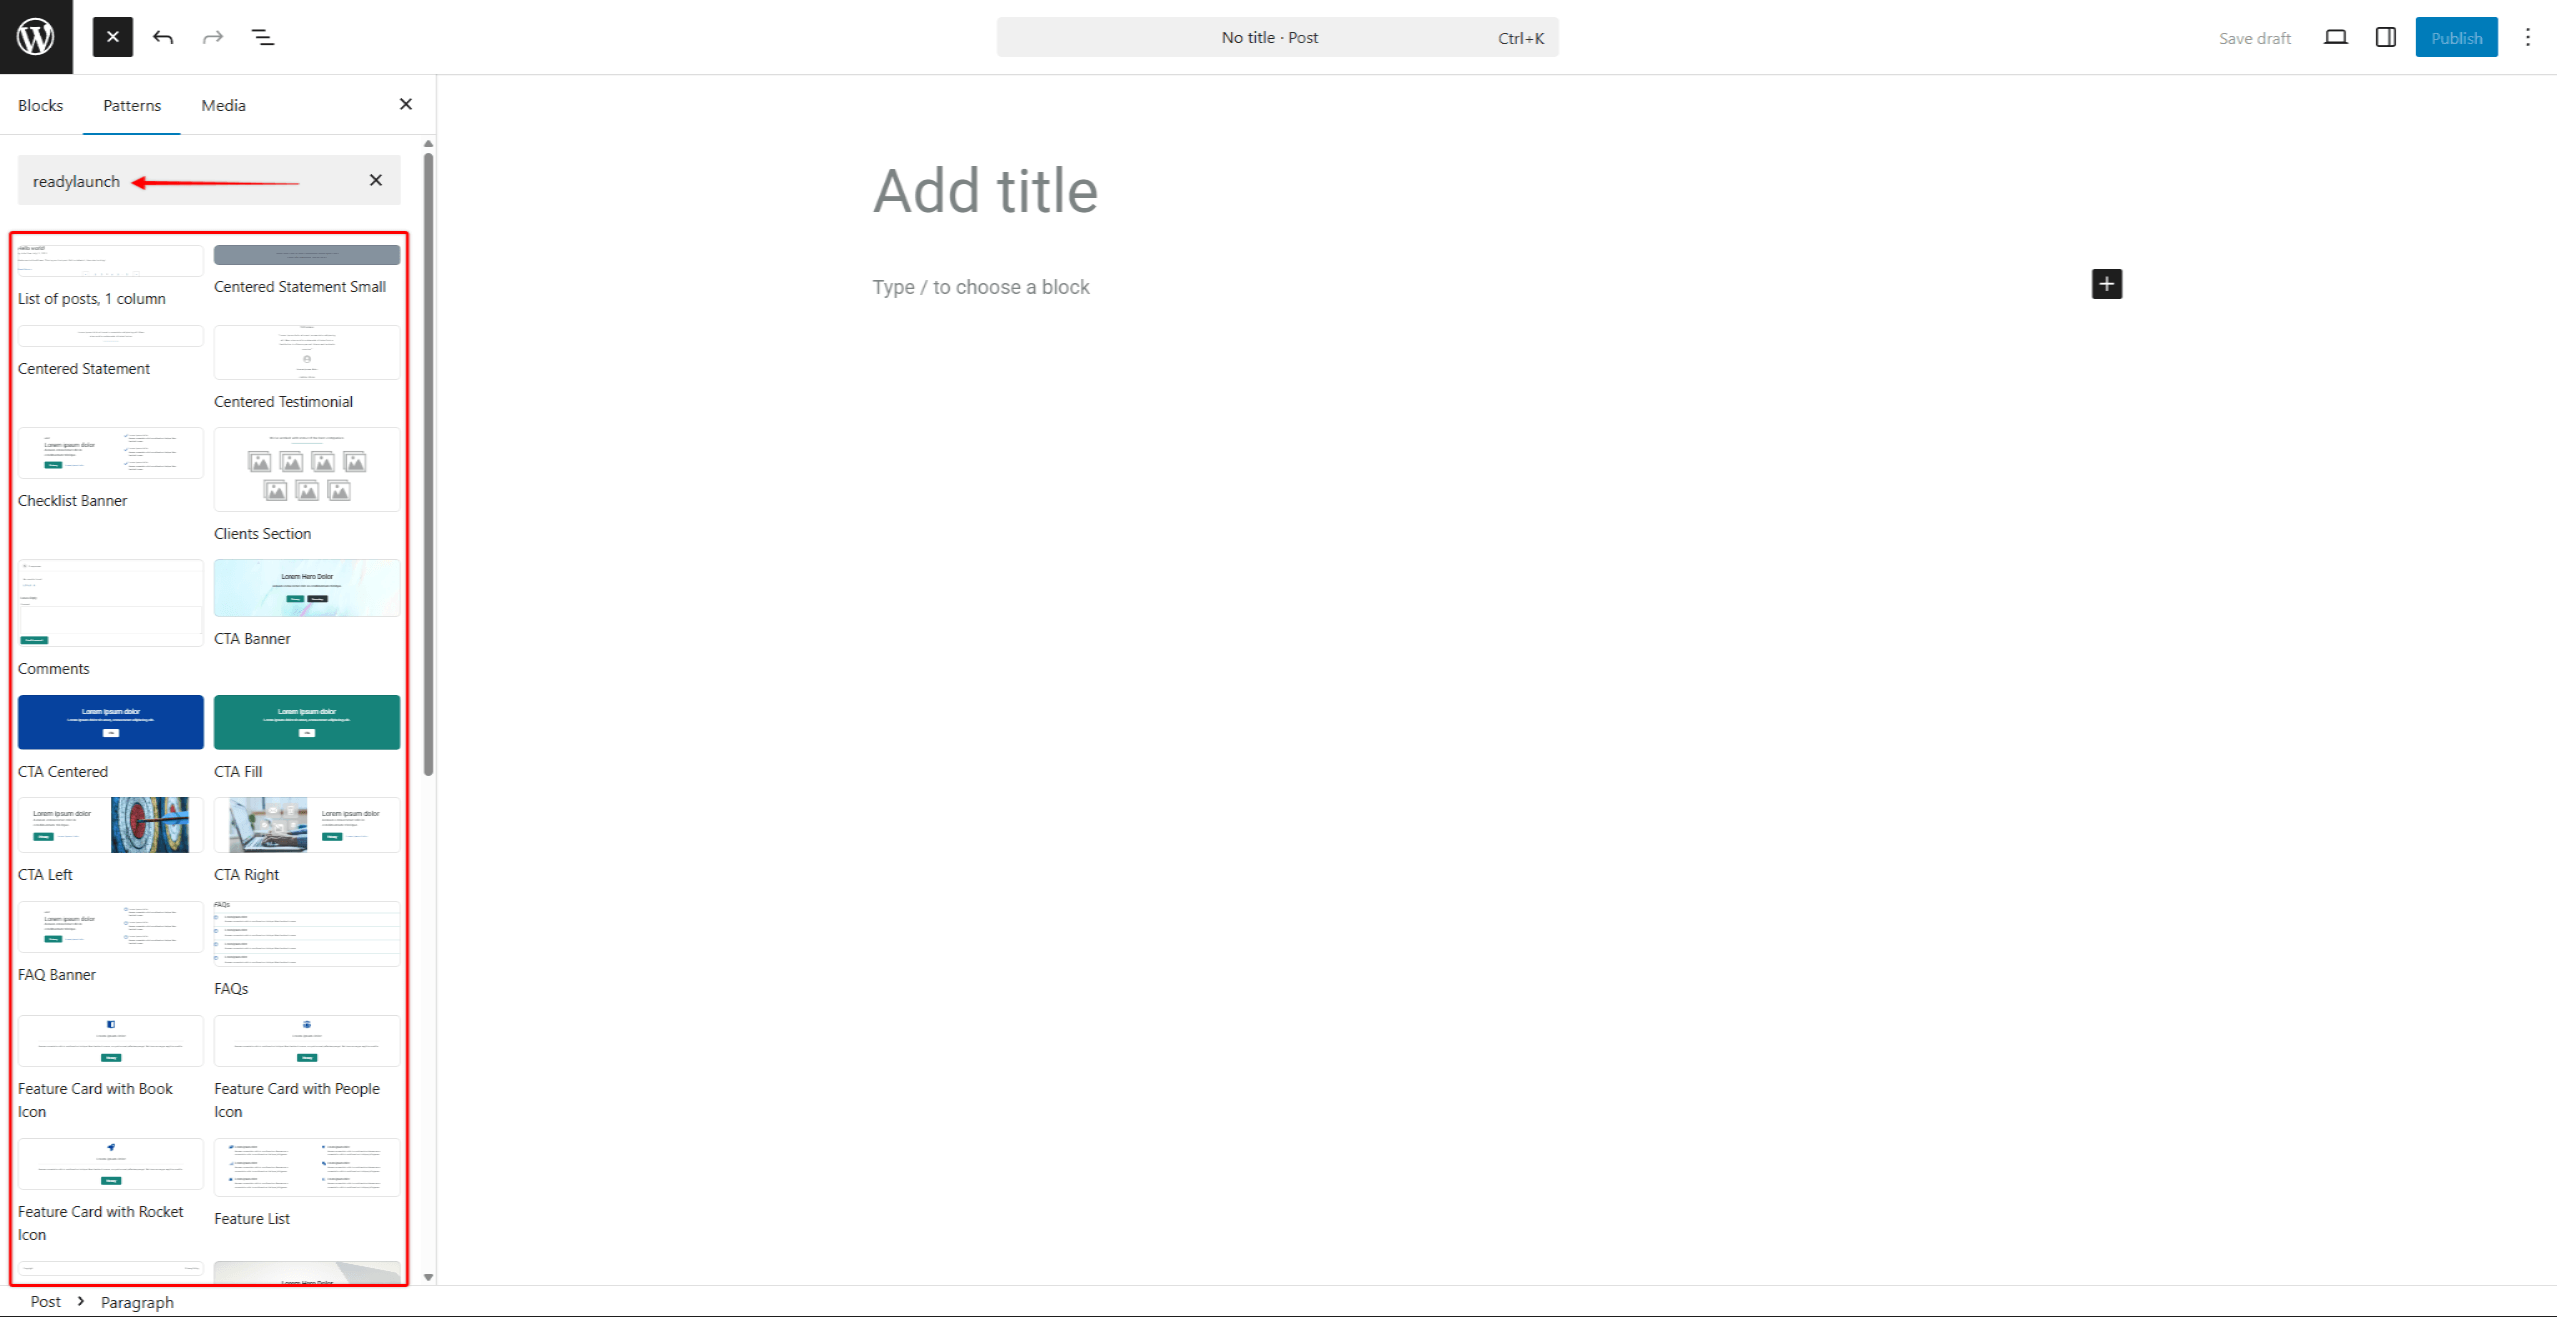
- Find the block or pattern you need.
- Click on it to add it to your content. Now, you can modify the imported content as needed.
Customizing Imported Patterns
Each pattern consists of multiple blocks. Both patterns and individual blocks within each pattern have their own settings, allowing customizations.
These settings become available when you insert the block or pattern into a post or page. This allows you to customize these elements to match your needs:
- Click the pattern or any individual block within the pattern.
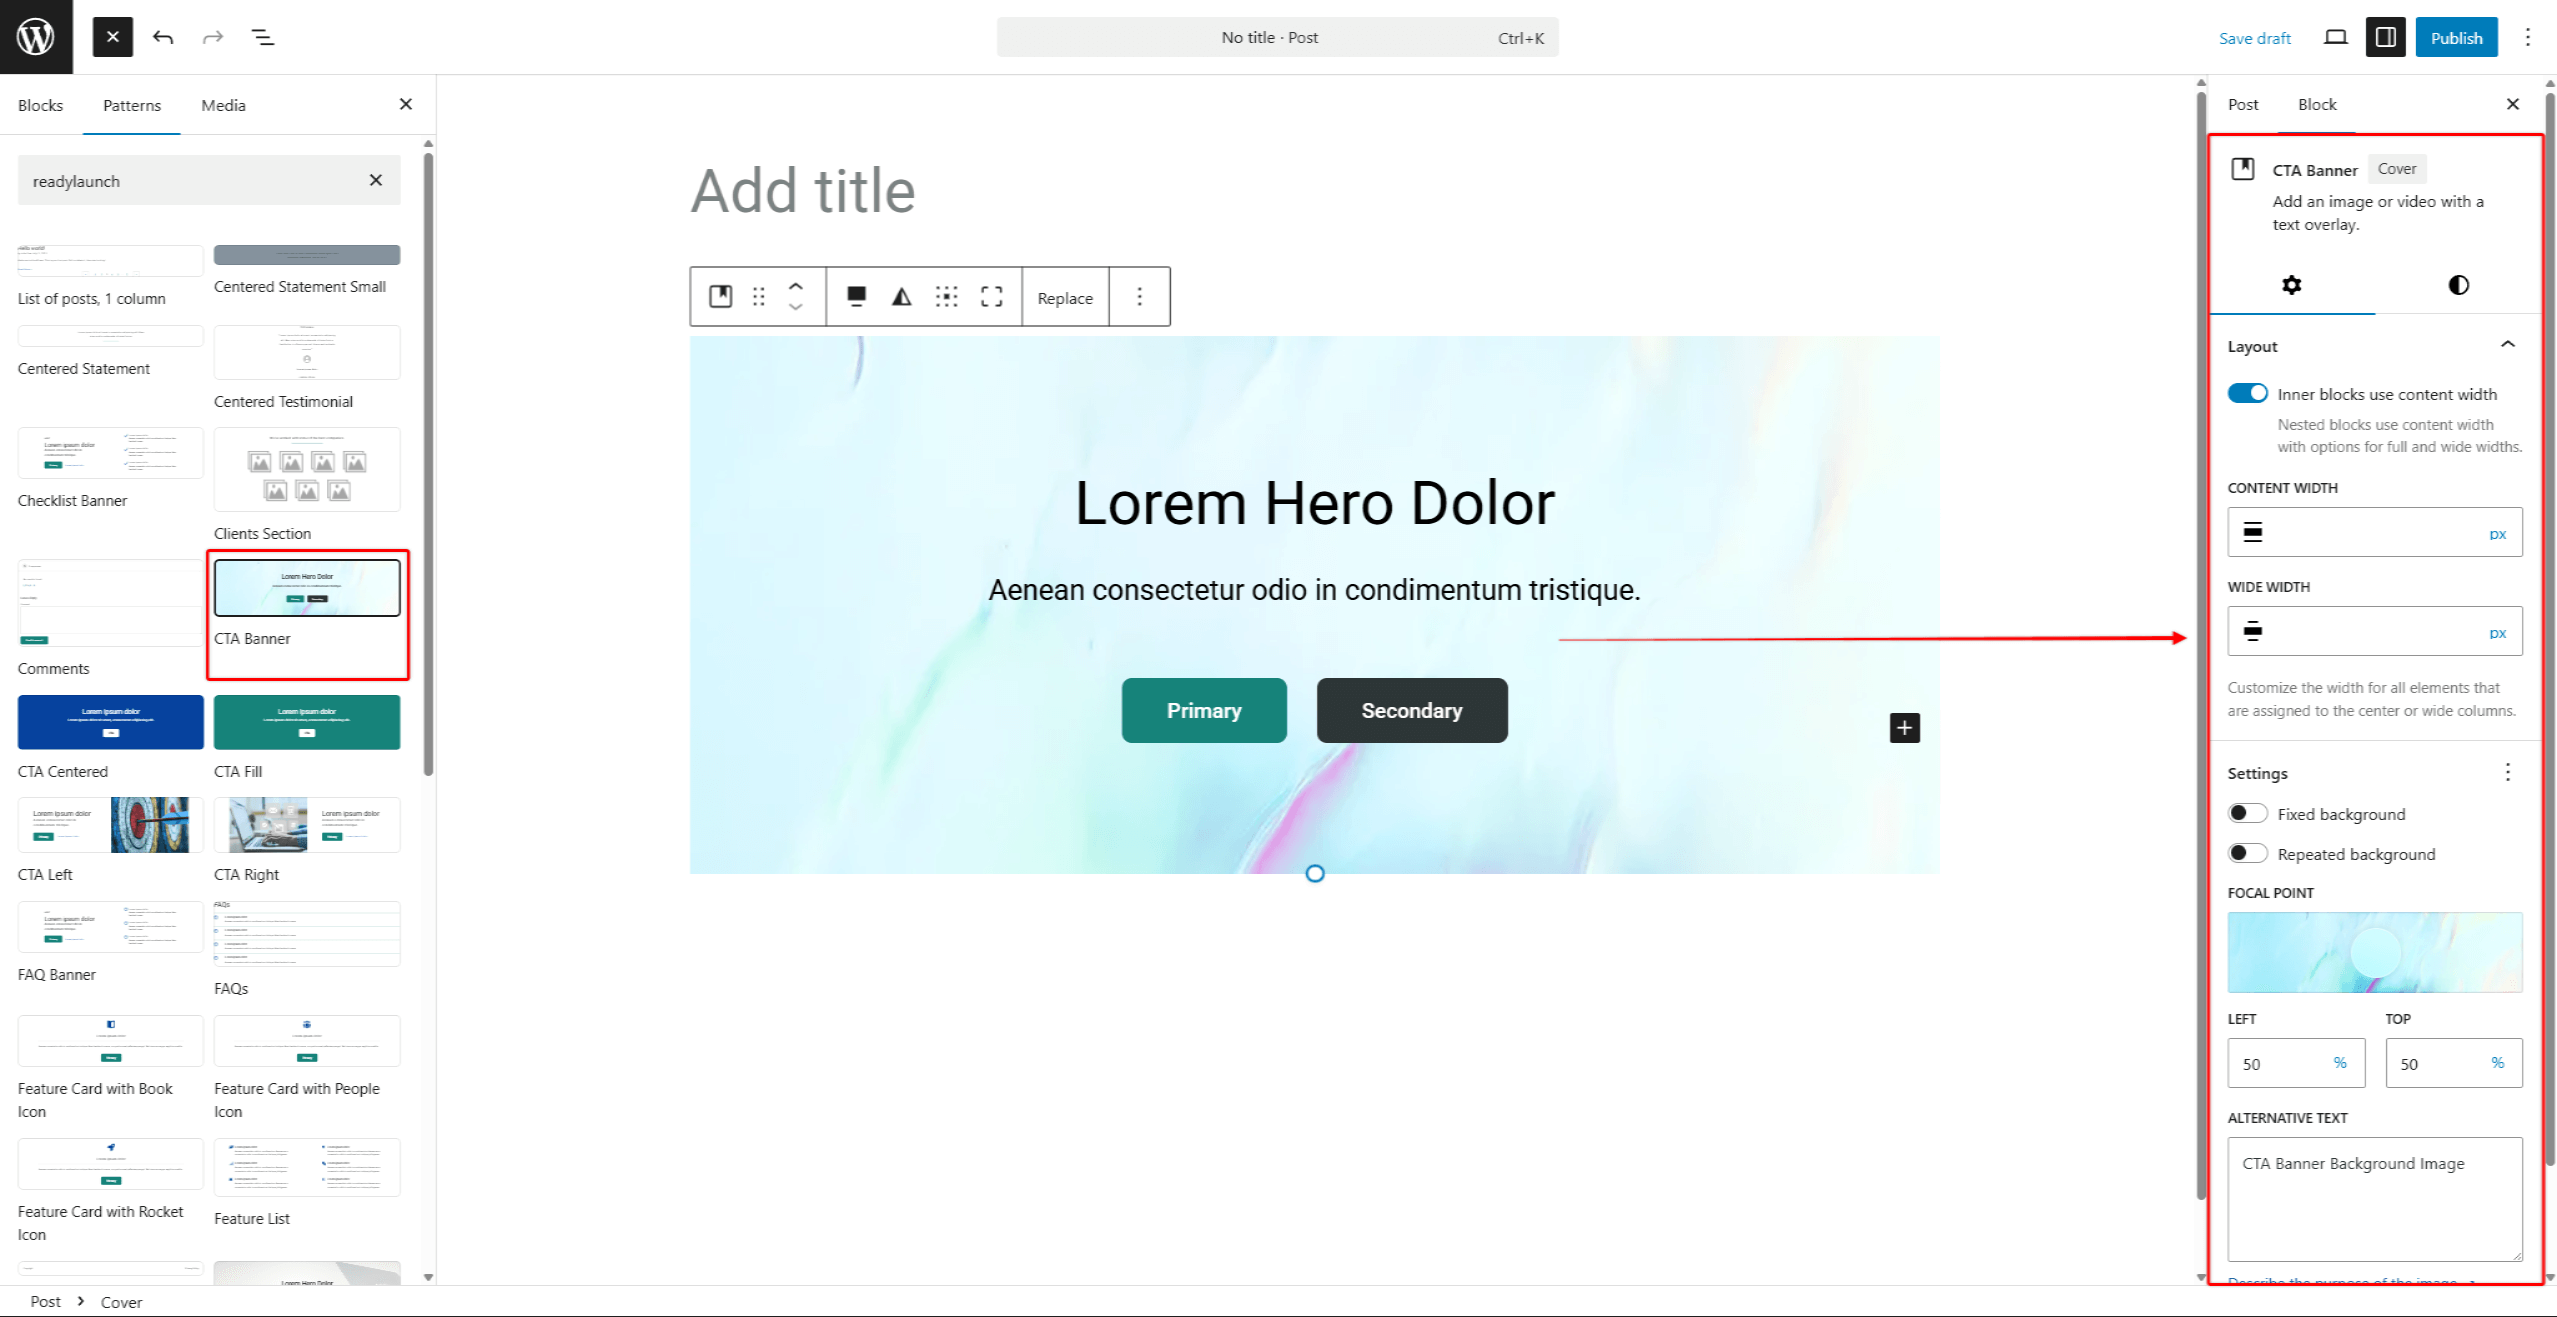
- On the right-side panel, under the Block tab, you can see the available options for the selected block or pattern.
- Modify the individual block settings under the Settings tab.
- Next, change how the block or pattern looks by modifying options under the Styles tab.
- Click Save Draft or the Publish/Update button to save changes.
Additionally, some settings may be available but hidden when applying customizations. To make these settings visible, follow these steps:
- Start editing the page or post, and find the block you want to customize.
- Click on it to access the settings panel on the right side of the editor.
- Find the settings section you need. Click on the 3-dot icon to access the complete options list for that section.
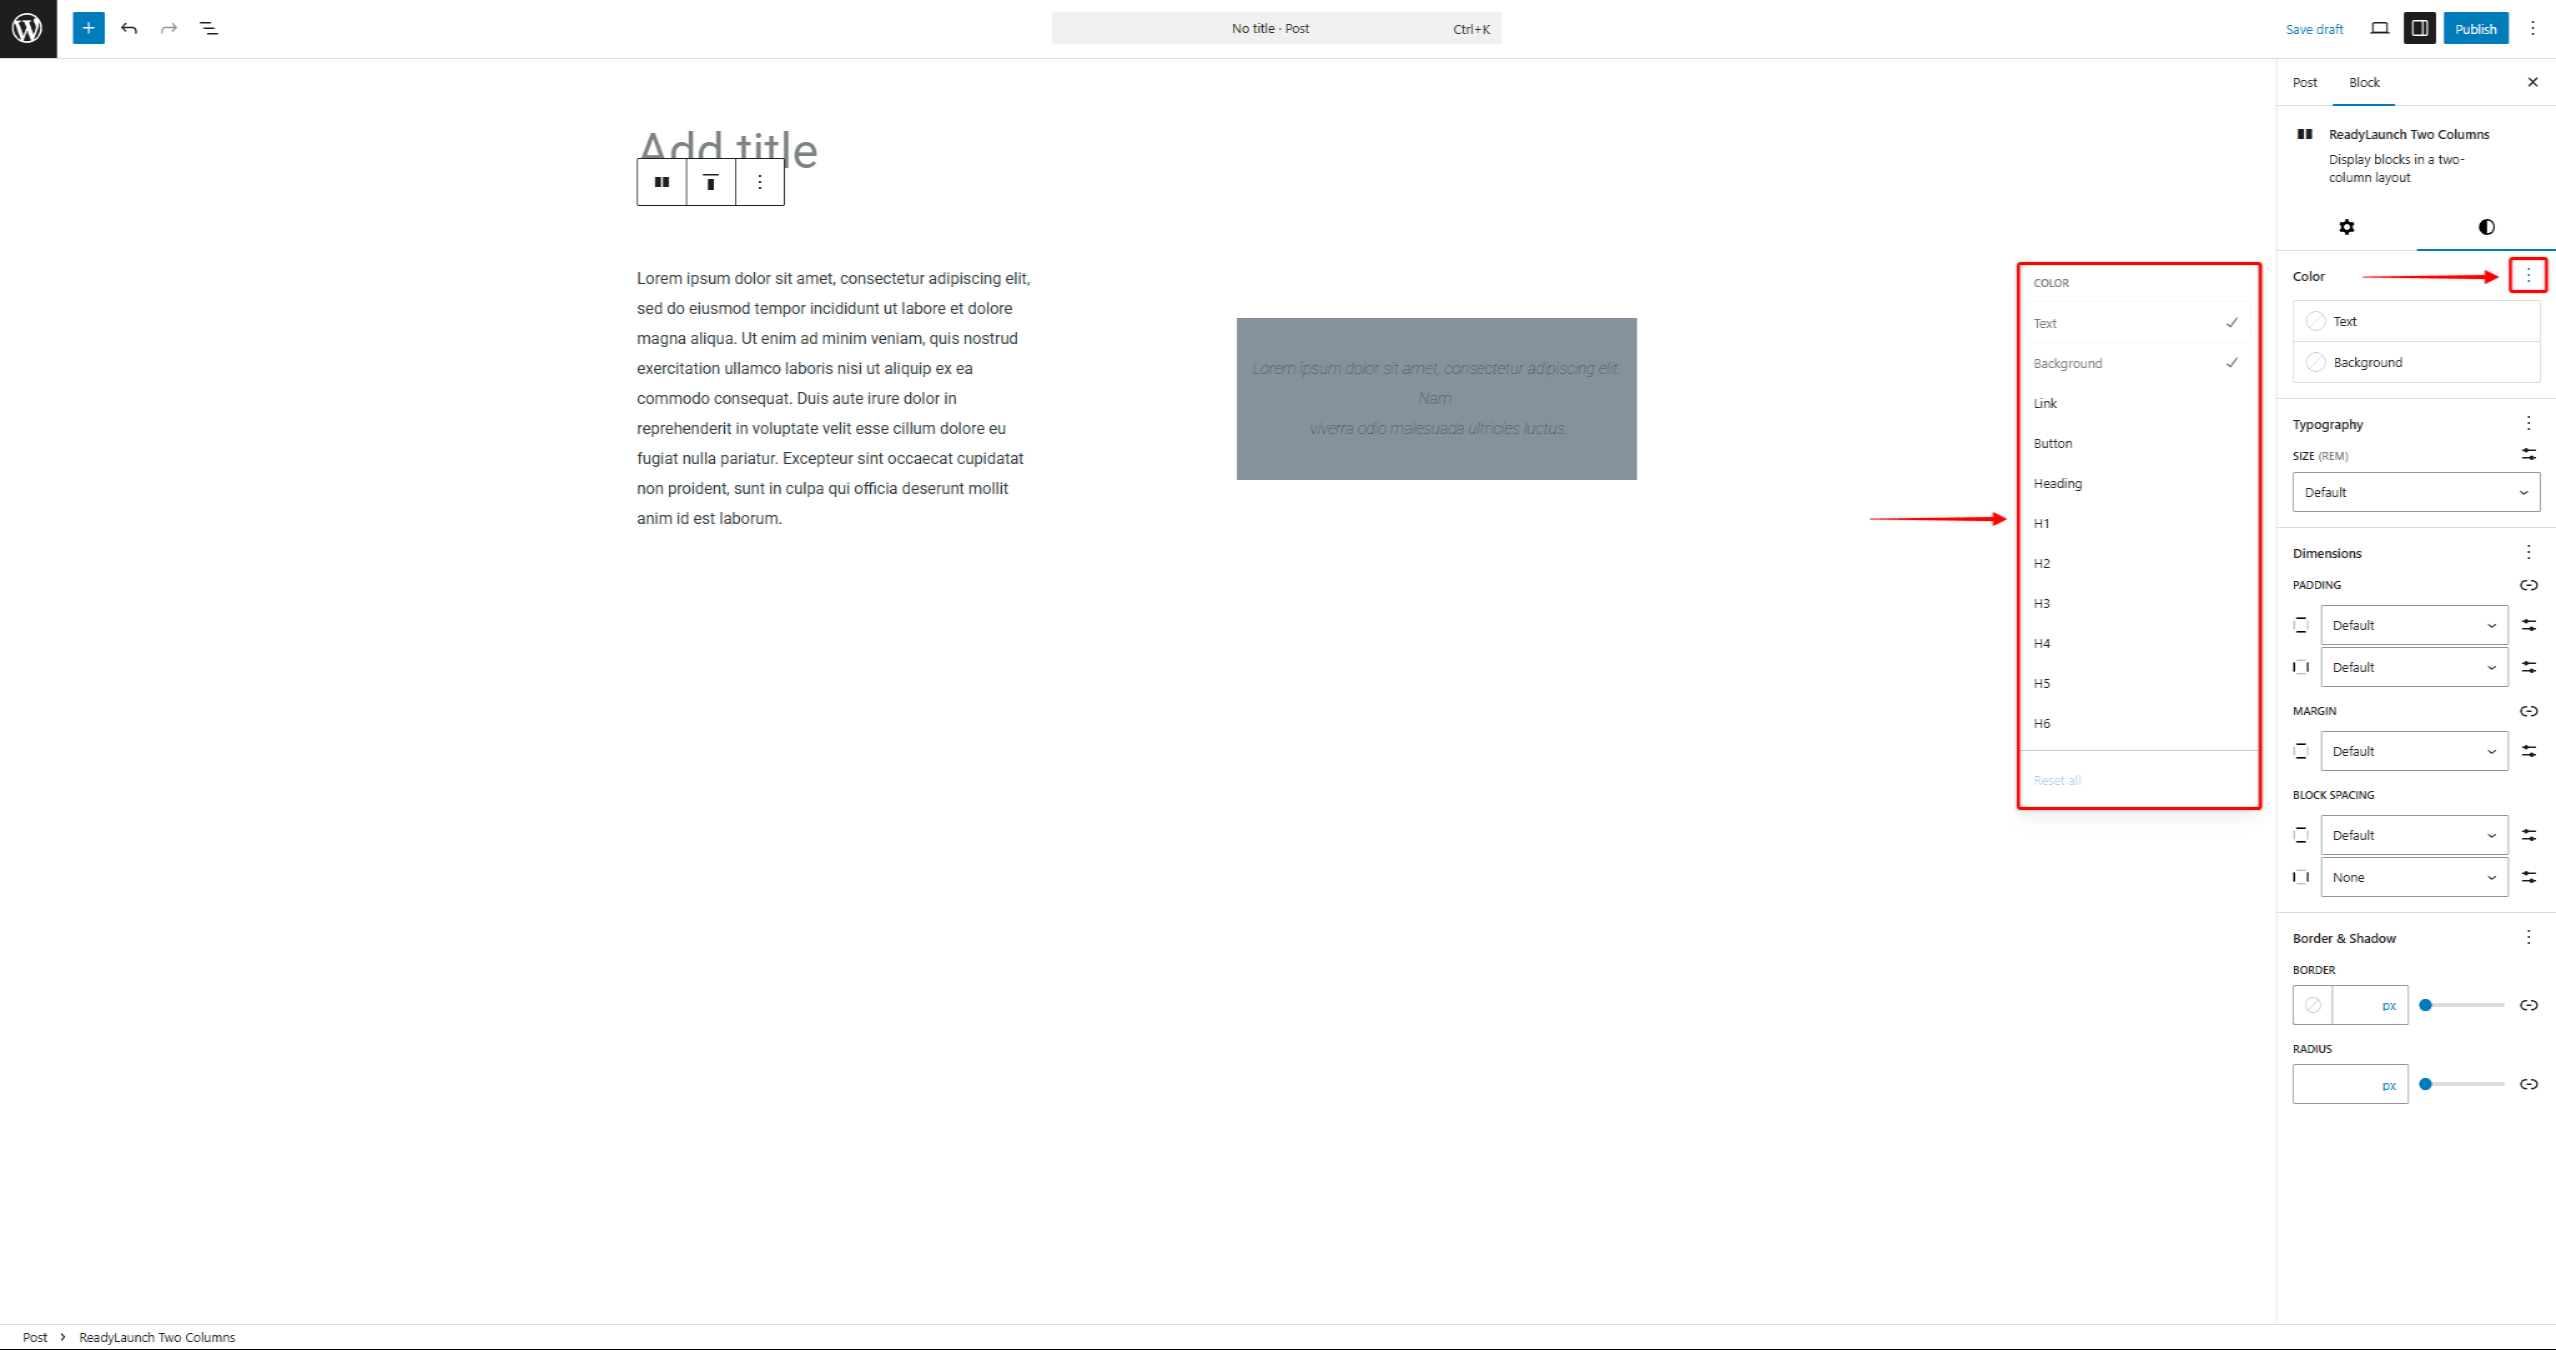
- Click on all the options you wish to show in the settings panel.
Summary
ReadyLaunch™ blocks and patterns speed up page building with pre-made, customizable designs. You can duplicate and edit theme patterns as custom patterns. The MemberPress plugin adds the membership blocks, styled by the theme automatically.
To control full page layouts, review the ReadyLaunch™ theme templates. For general theme setup, start with the ReadyLaunch™ theme basics.










