

El tema ReadyLaunch™ incluye una variante de bloques de Gutenberg, estilos de bloques y grupos de bloques prediseñados (plantillas). Estos elementos constituyen los componentes básicos de tu página web. Puedes importar las plantillas prediseñadas de ReadyLaunch™ a cualquier página o entrada.
En este documento se explican los bloques y plantillas de ReadyLaunch™ disponibles. Además, se describen los aspectos básicos para utilizarlos en tu contenido.
Bloques ReadyLaunch
El tema ReadyLaunch™ ofrece el Bloque «ReadyLaunch™» de dos columnas, una variante del bloque «Columns» predeterminado. El tema también añade estilos de bloque adicionales a los bloques predeterminados «Button», «Media & Text» y «Comments Title».
Además, el plugin MemberPress ofrece sus propios bloques de membresía, como el Inicio de sesión, Cuenta, Inscripcióny Tabla de precios bloques. El tema ReadyLaunch™ aplica estilos a estos bloques automáticamente. Estos adoptan los colores y la tipografía que hayas configurado para el tema. En un documento aparte se trata el tema de Bloques Gutenberg MemberPress disponibles.
Bloque de dos columnas ReadyLaunch™
El bloque «ReadyLaunch™ Two Columns» es una variante del bloque «Columns» predeterminado. Te permite organizar el contenido en dos columnas y aplicar estilos a las columnas y a su contenido. La estructura de dos columnas es fija, mientras que el contenido de cada columna sigue siendo totalmente editable.
Una vez que hayas añadido el bloque al editor, personalízalo aplicando la configuración general del bloque y el estilo.
- Haga clic en el botón ReadyLaunch™ de dos columnas el bloque que has añadido al editor para abrir el panel de la derecha.
- Haga clic en el botón Ajustes pestaña para acceder a la configuración del bloque.
- Stack en el móvil: esta opción apila las dos columnas una encima de la otra en los dispositivos móviles. Está activada por defecto.
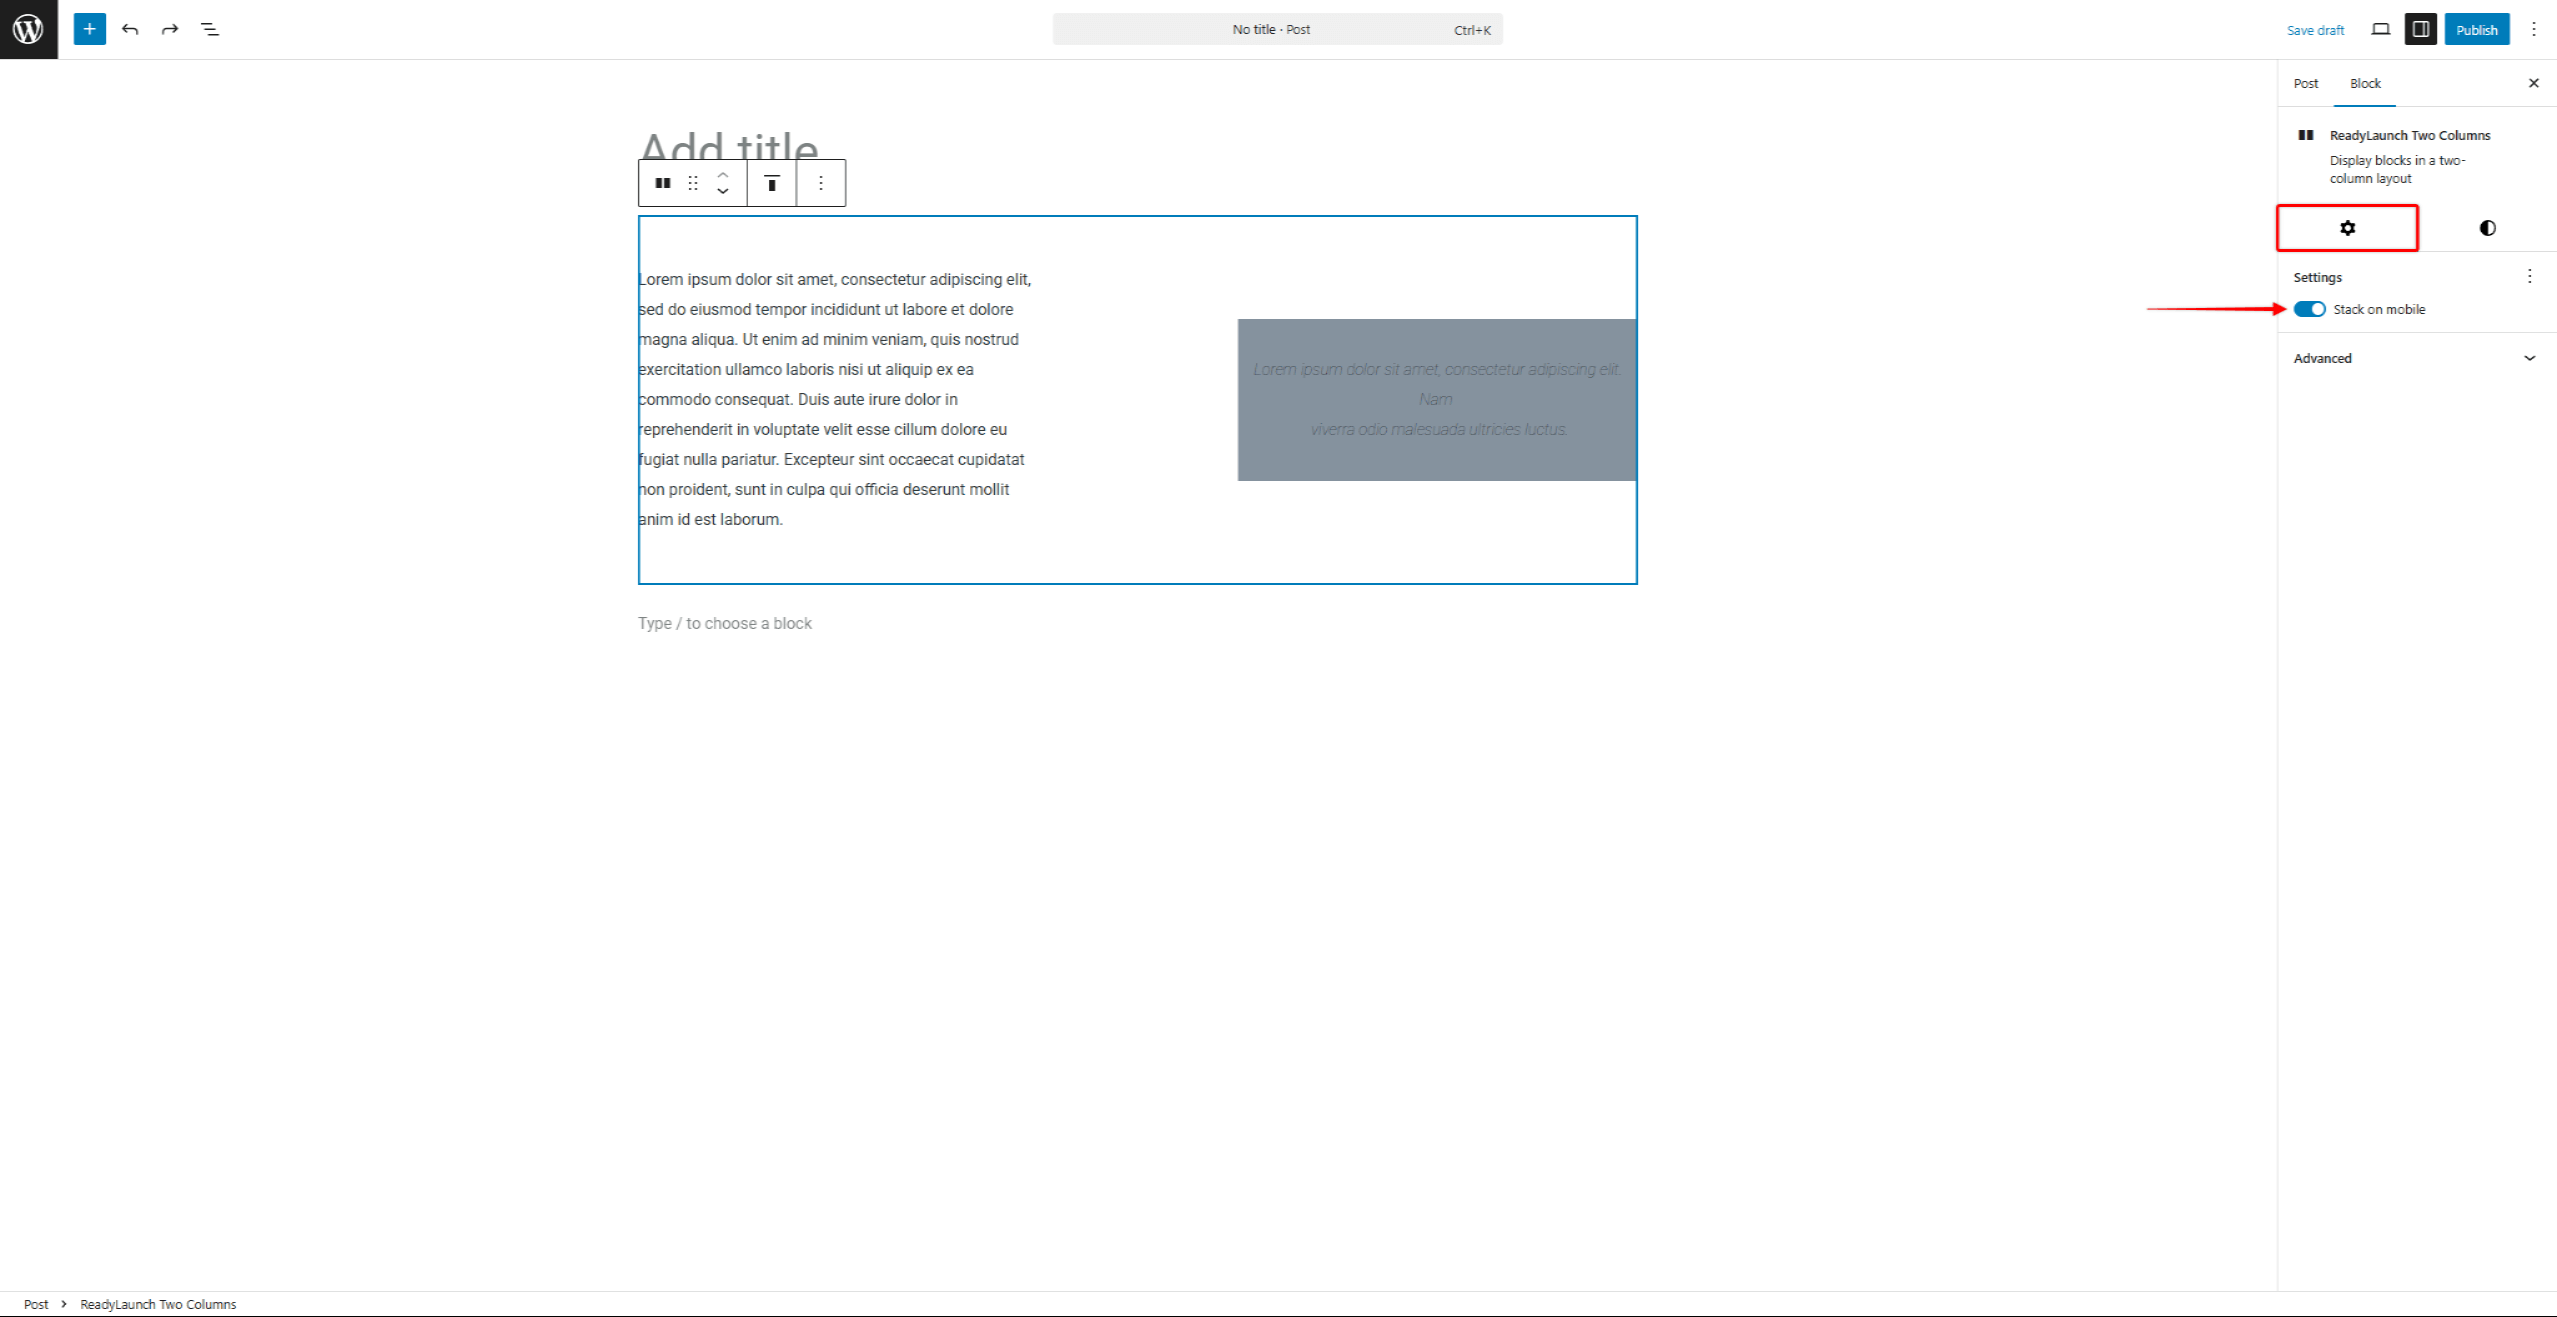
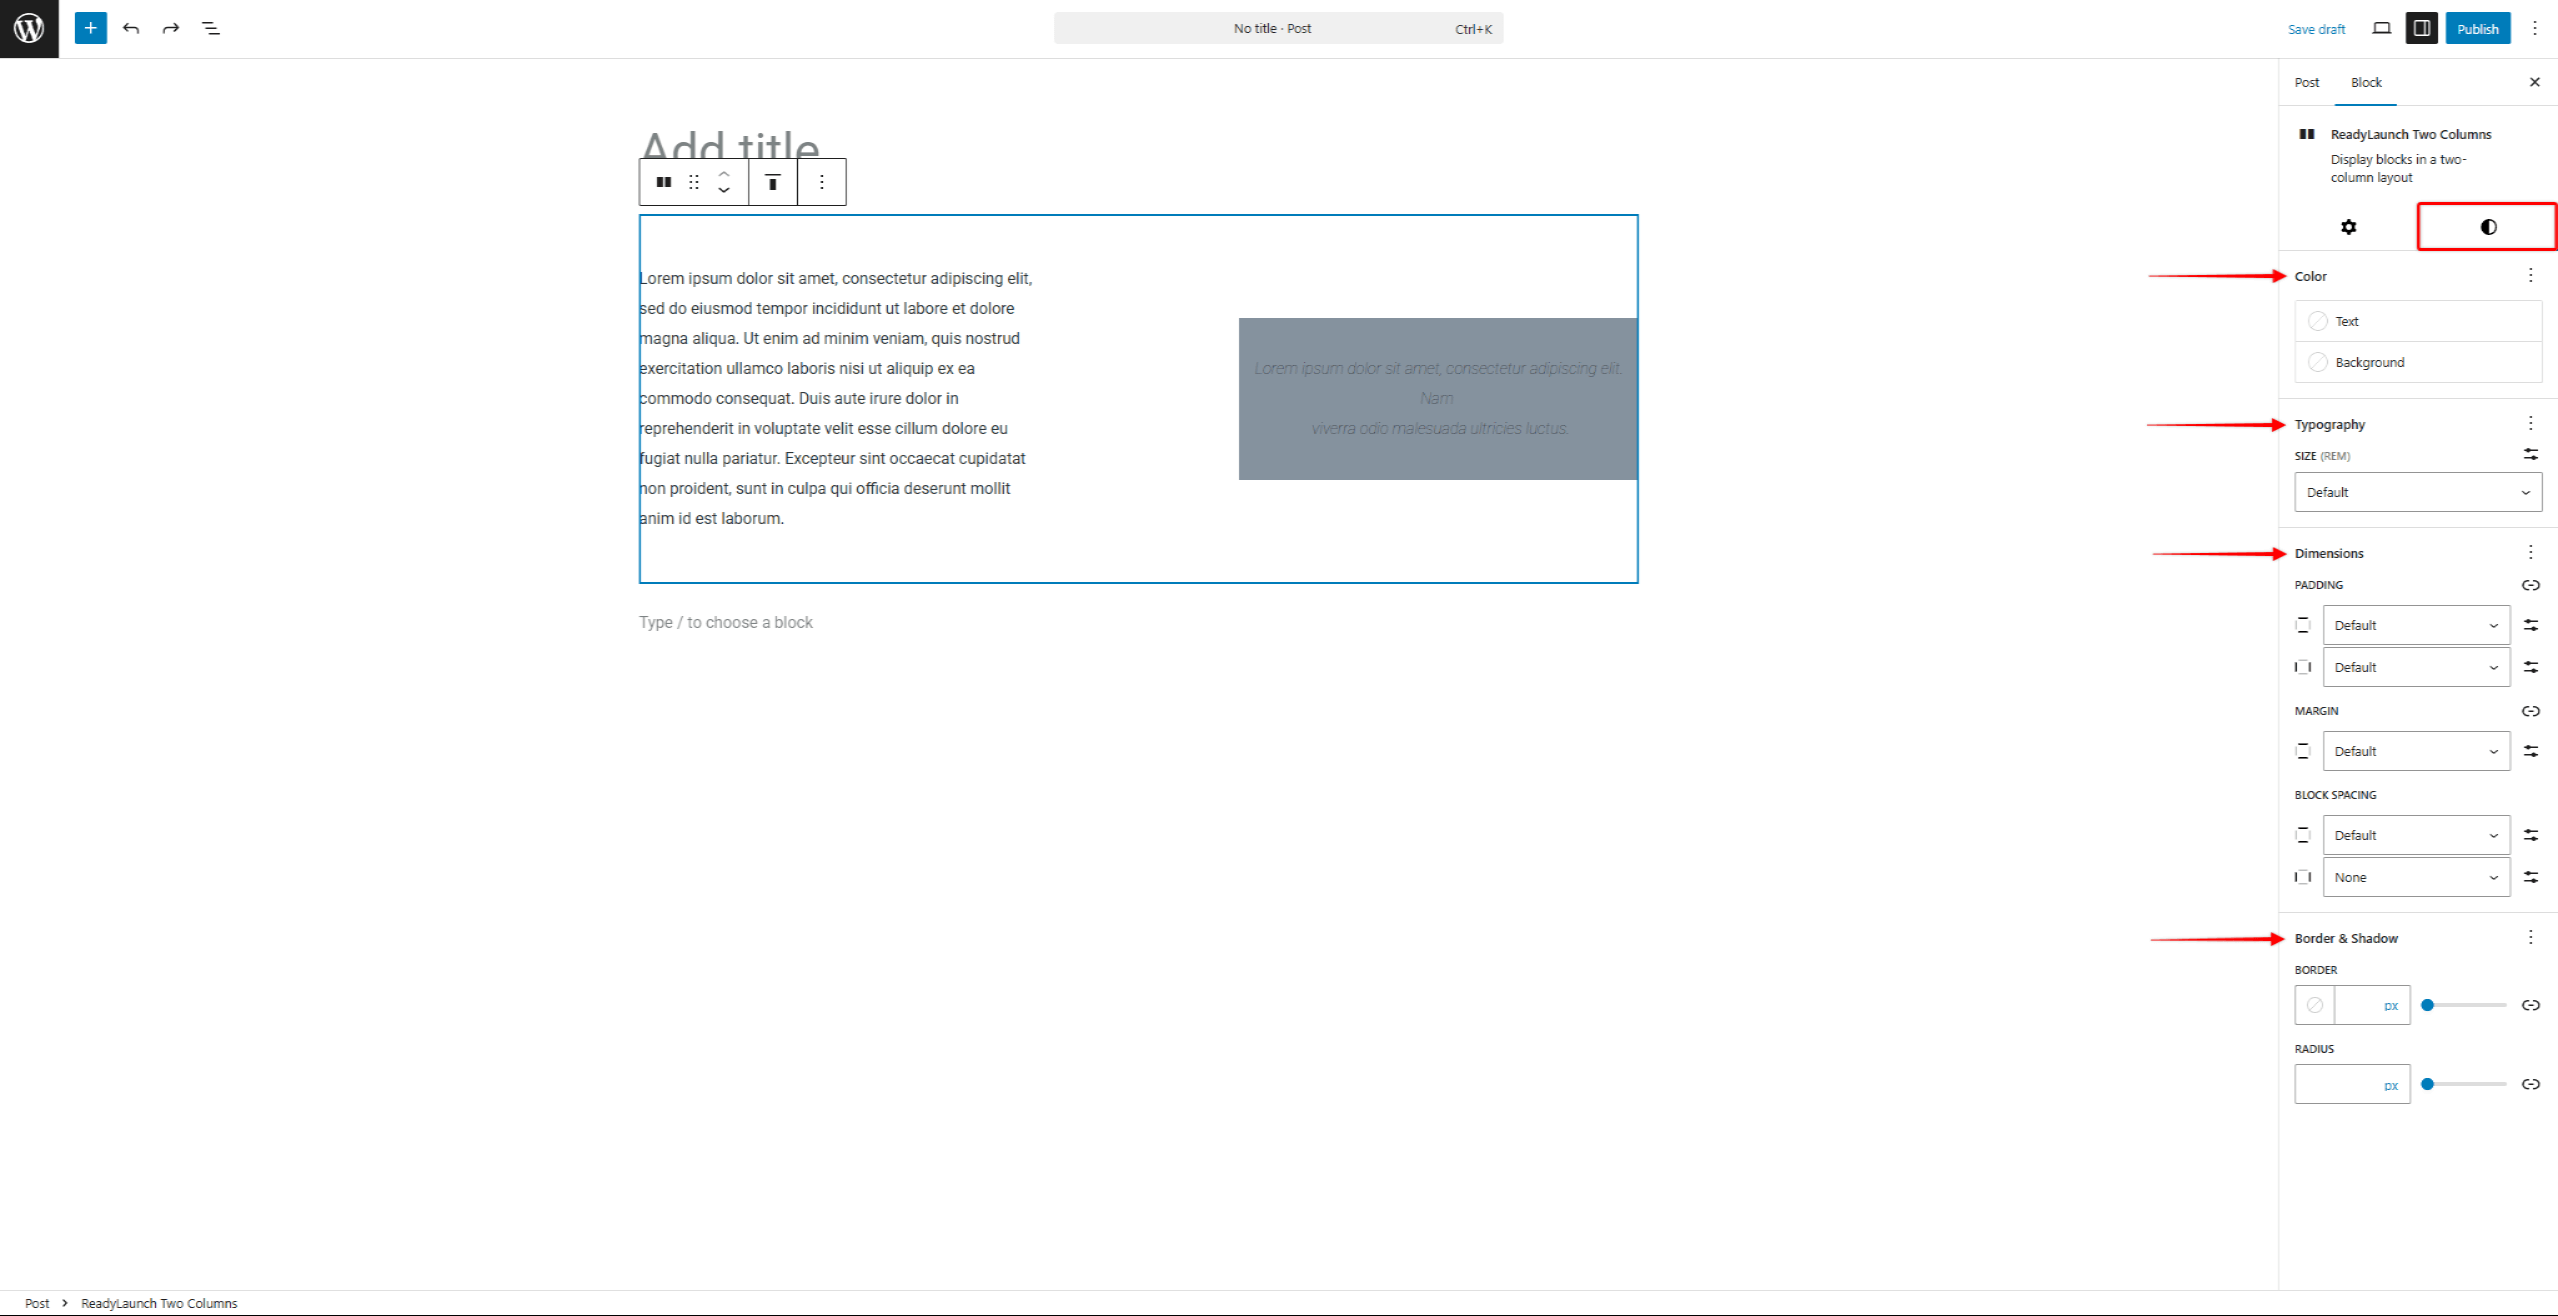
- A continuación, haga clic en el botón Estilos pestaña para modificar el estilo del bloque. Puedes configurar el Colores, Tipografía, Dimensiones, Fronteray Sombras.
Plantillas de ReadyLaunch™
Puedes añadir plantillas de ReadyLaunch™ a tus entradas y páginas a través del editor predeterminado (Gutenberg).
El tema incluye más de 40 plantillas, como banners de presentación, secciones de llamada a la acción, listas de características, testimonios, preguntas frecuentes y secciones dedicadas a los miembros del equipo. También incluye plantillas de contenido inicial para páginas completas de inicio, «Quiénes somos», «Contacto», «Características» y «Suscríbete».
Los patrones son grupos formados por varios bloques. Una vez que añadas un patrón a tu editor, podrás aplicar las siguientes personalizaciones:
- Modifica la configuración y el estilo del grupo (en la mayoría de los patrones, se trata de bloques como «Grupo», «Pila» o «Cubierta»);
- Modifica la configuración y el estilo de cada bloque del patrón (por ejemplo, párrafo, título, imagen, botón);
- Elimina o añade bloques.
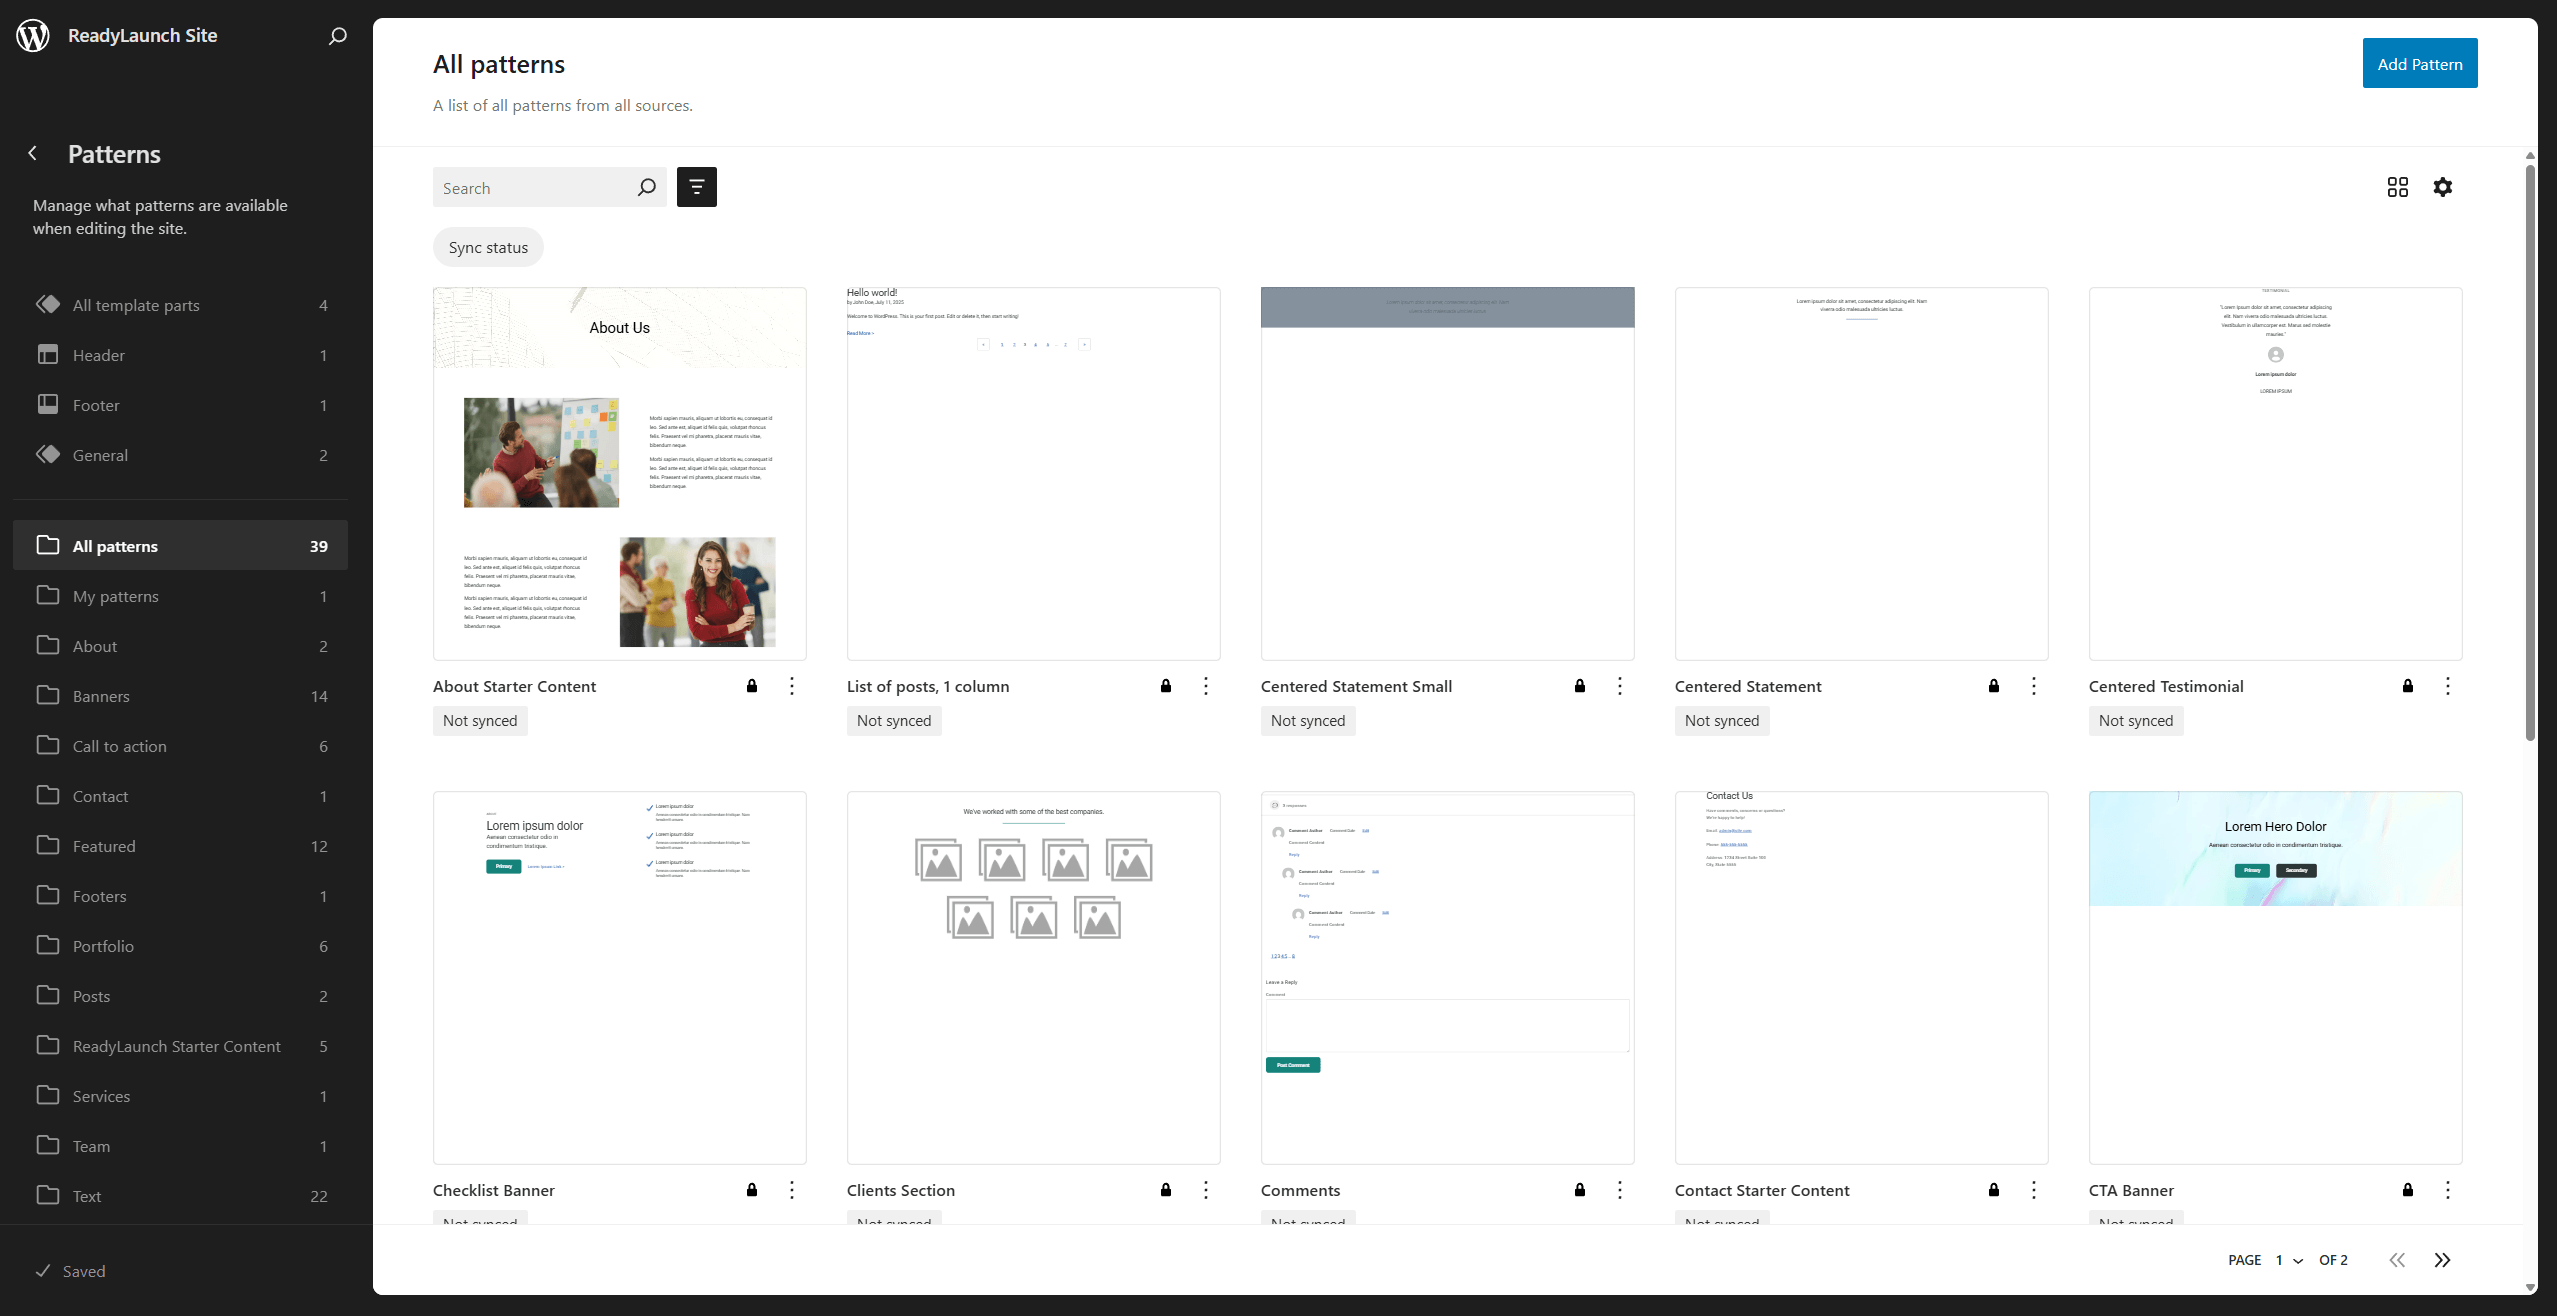
Además, puedes explorar todas las plantillas prediseñadas de ReadyLaunch™ en el Editor del sitio. Aquí también puedes realizar modificaciones y crear plantillas personalizadas.
Creación de versiones personalizadas de las plantillas de ReadyLaunch™
Las plantillas prediseñadas de ReadyLaunch™ son plantillas temáticas. Los cambios que se realicen en una plantilla insertada solo se aplican a esa página o entrada. Para reutilizar un diseño modificado en todo tu sitio web, crea una versión personalizada de la plantilla:
- Vaya a Panel > Apariencia > Editor para abrir el editor del sitio.
- En el menú de la izquierda, haz clic en el Patrones opción.
- Echa un vistazo a la lista de patrones para encontrar el que quieras modificar.
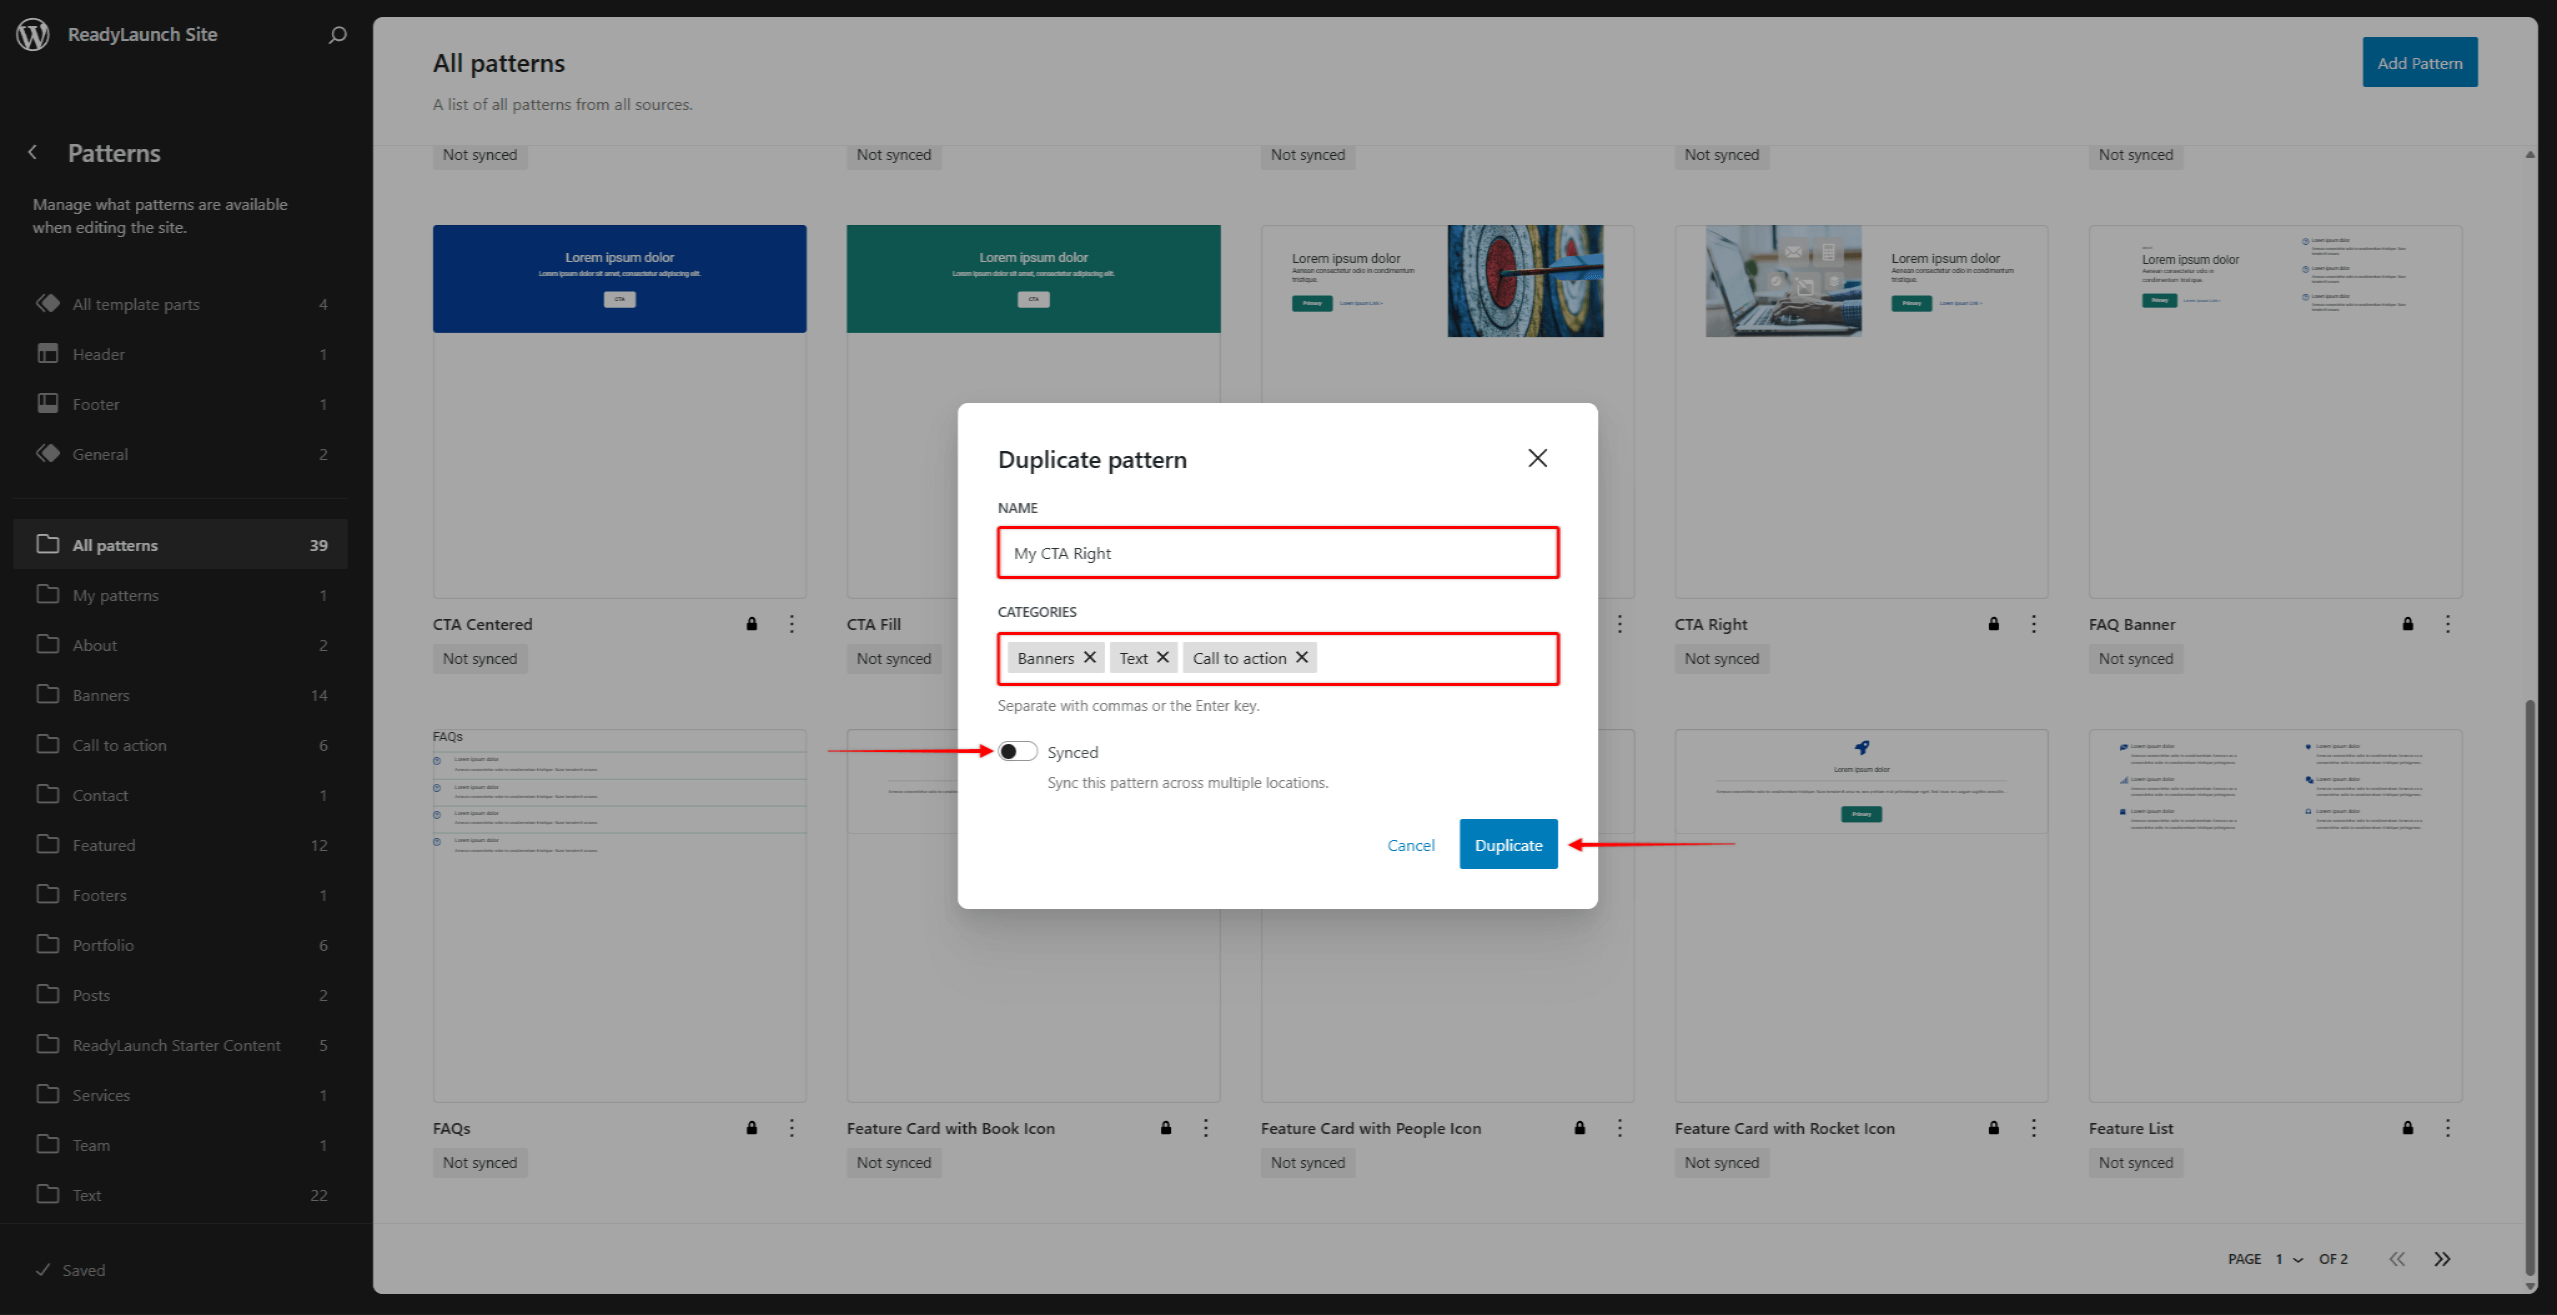
- Haga clic en el botón Icono de 3 puntos, y luego el Duplicar opción para crear un duplicado del patrón predeterminado.
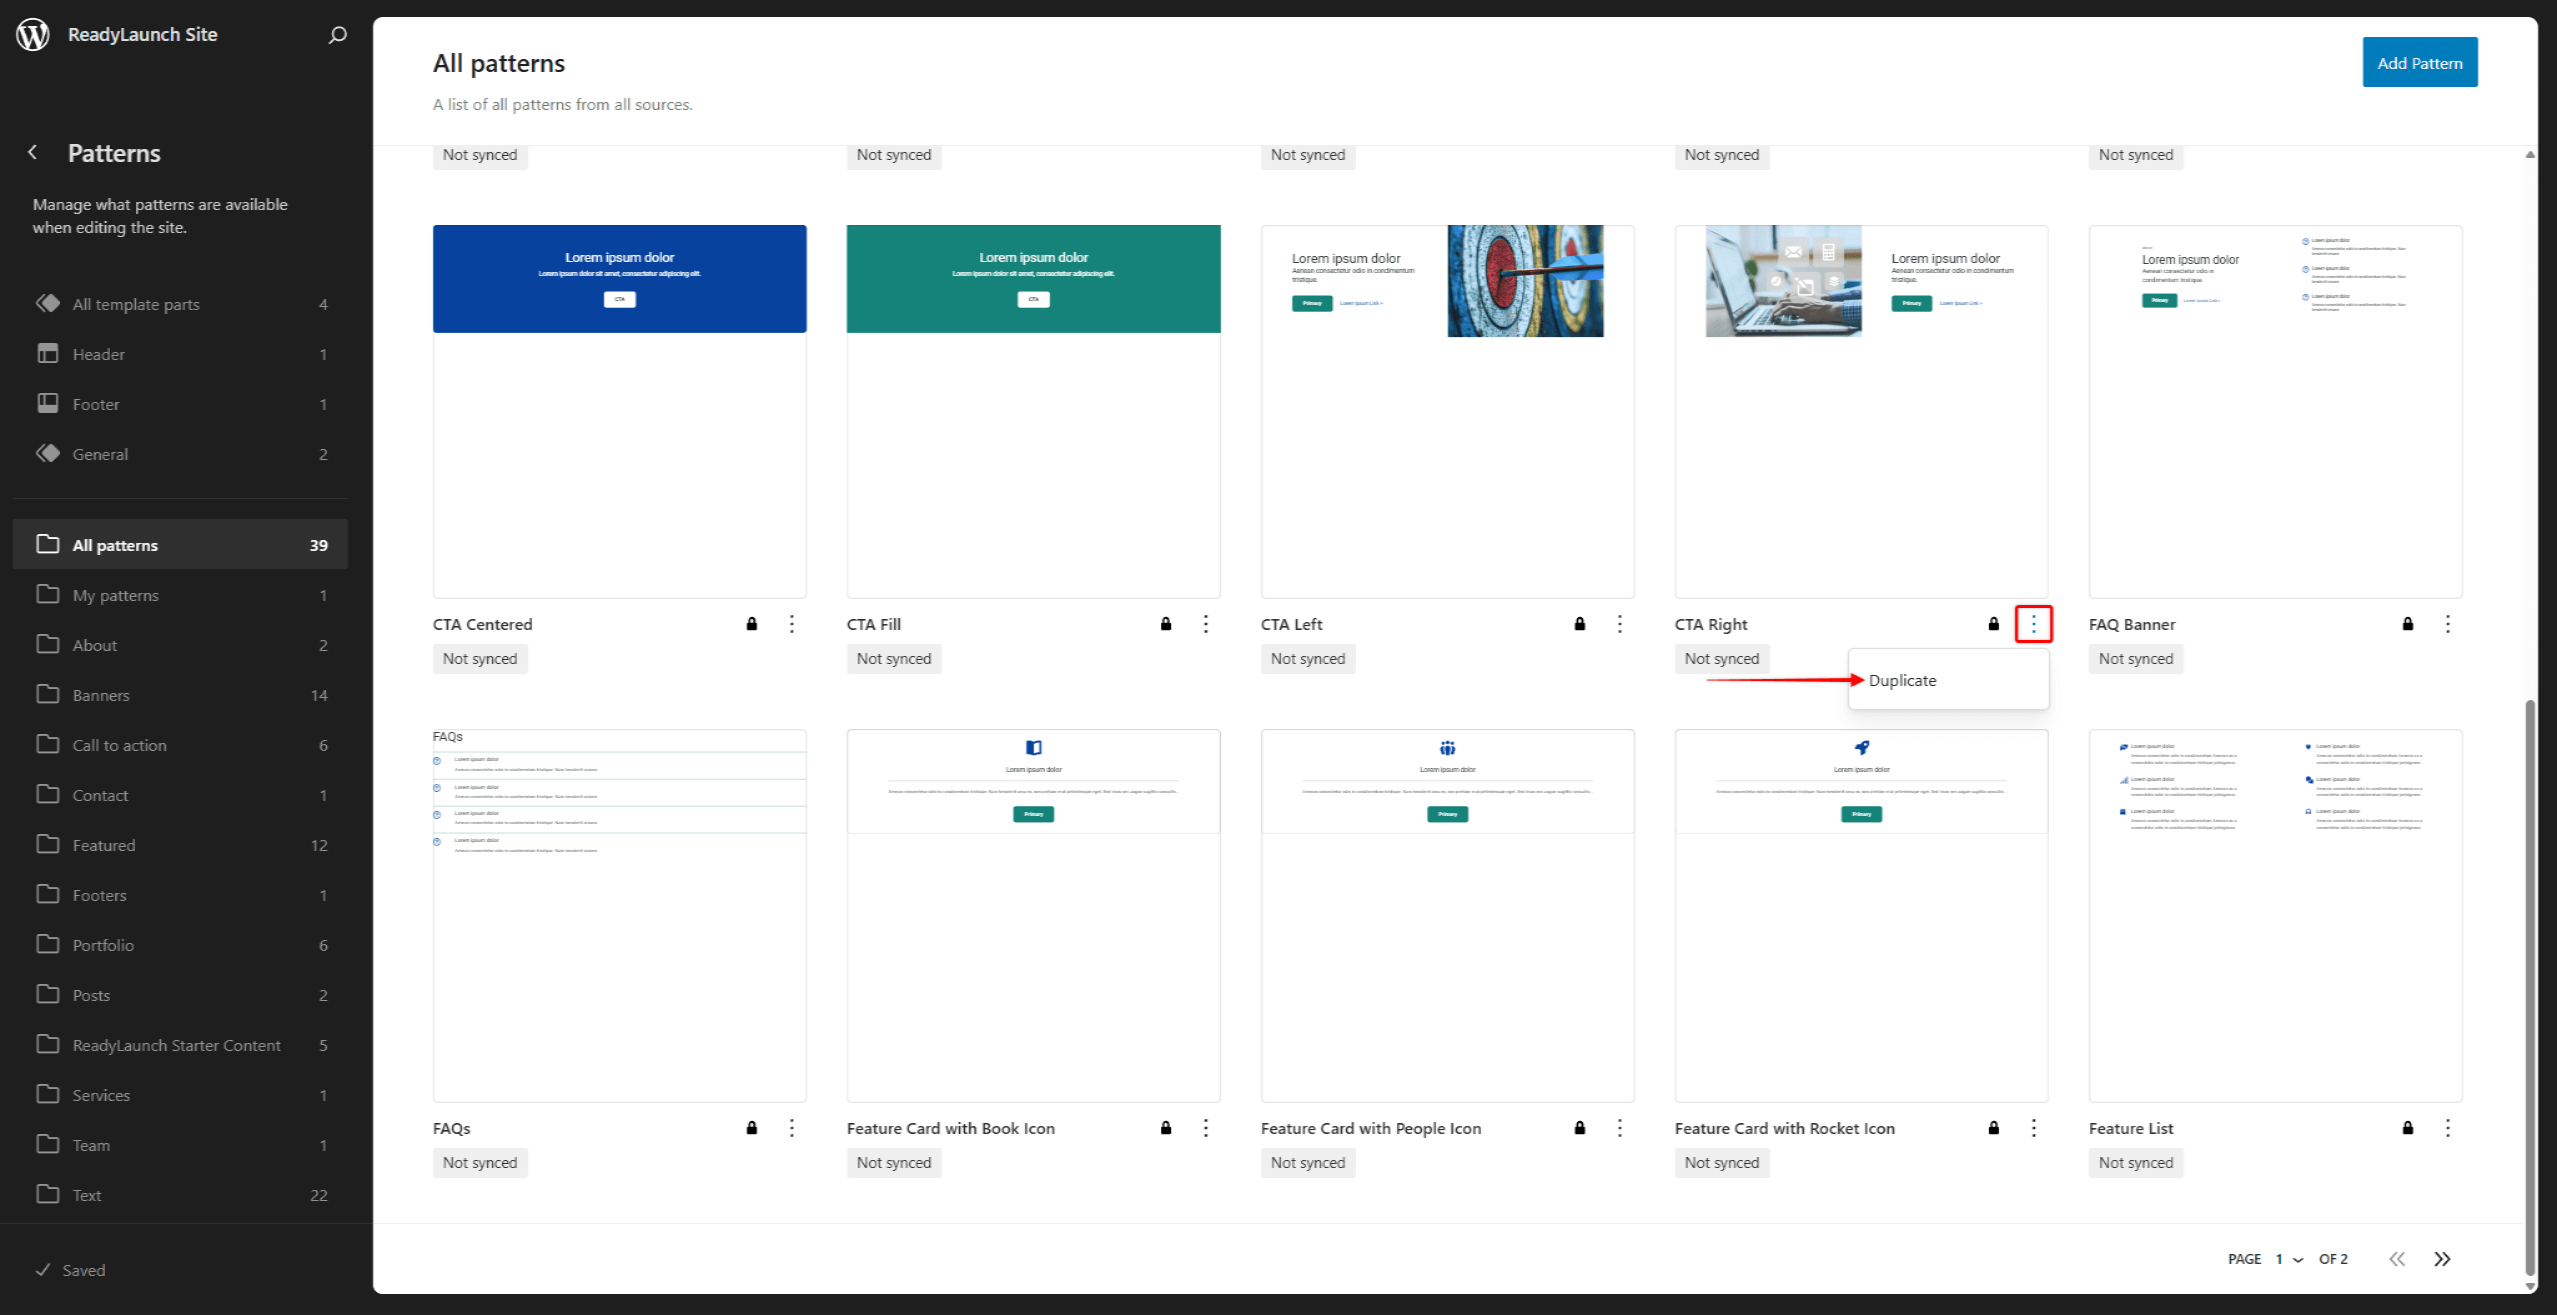
- Nombre duplica el patrón y selecciona el categorías de patrones para ello.
- Si lo deseas, activa la opción Sincronizado opción para el duplicado.
- Haga clic en el botón Duplicar botón.
- Busca el patrón que has duplicado en la lista de patrones o en la sección Mis patrones menú. Haz clic en el Icono de 3 puntos en eso.
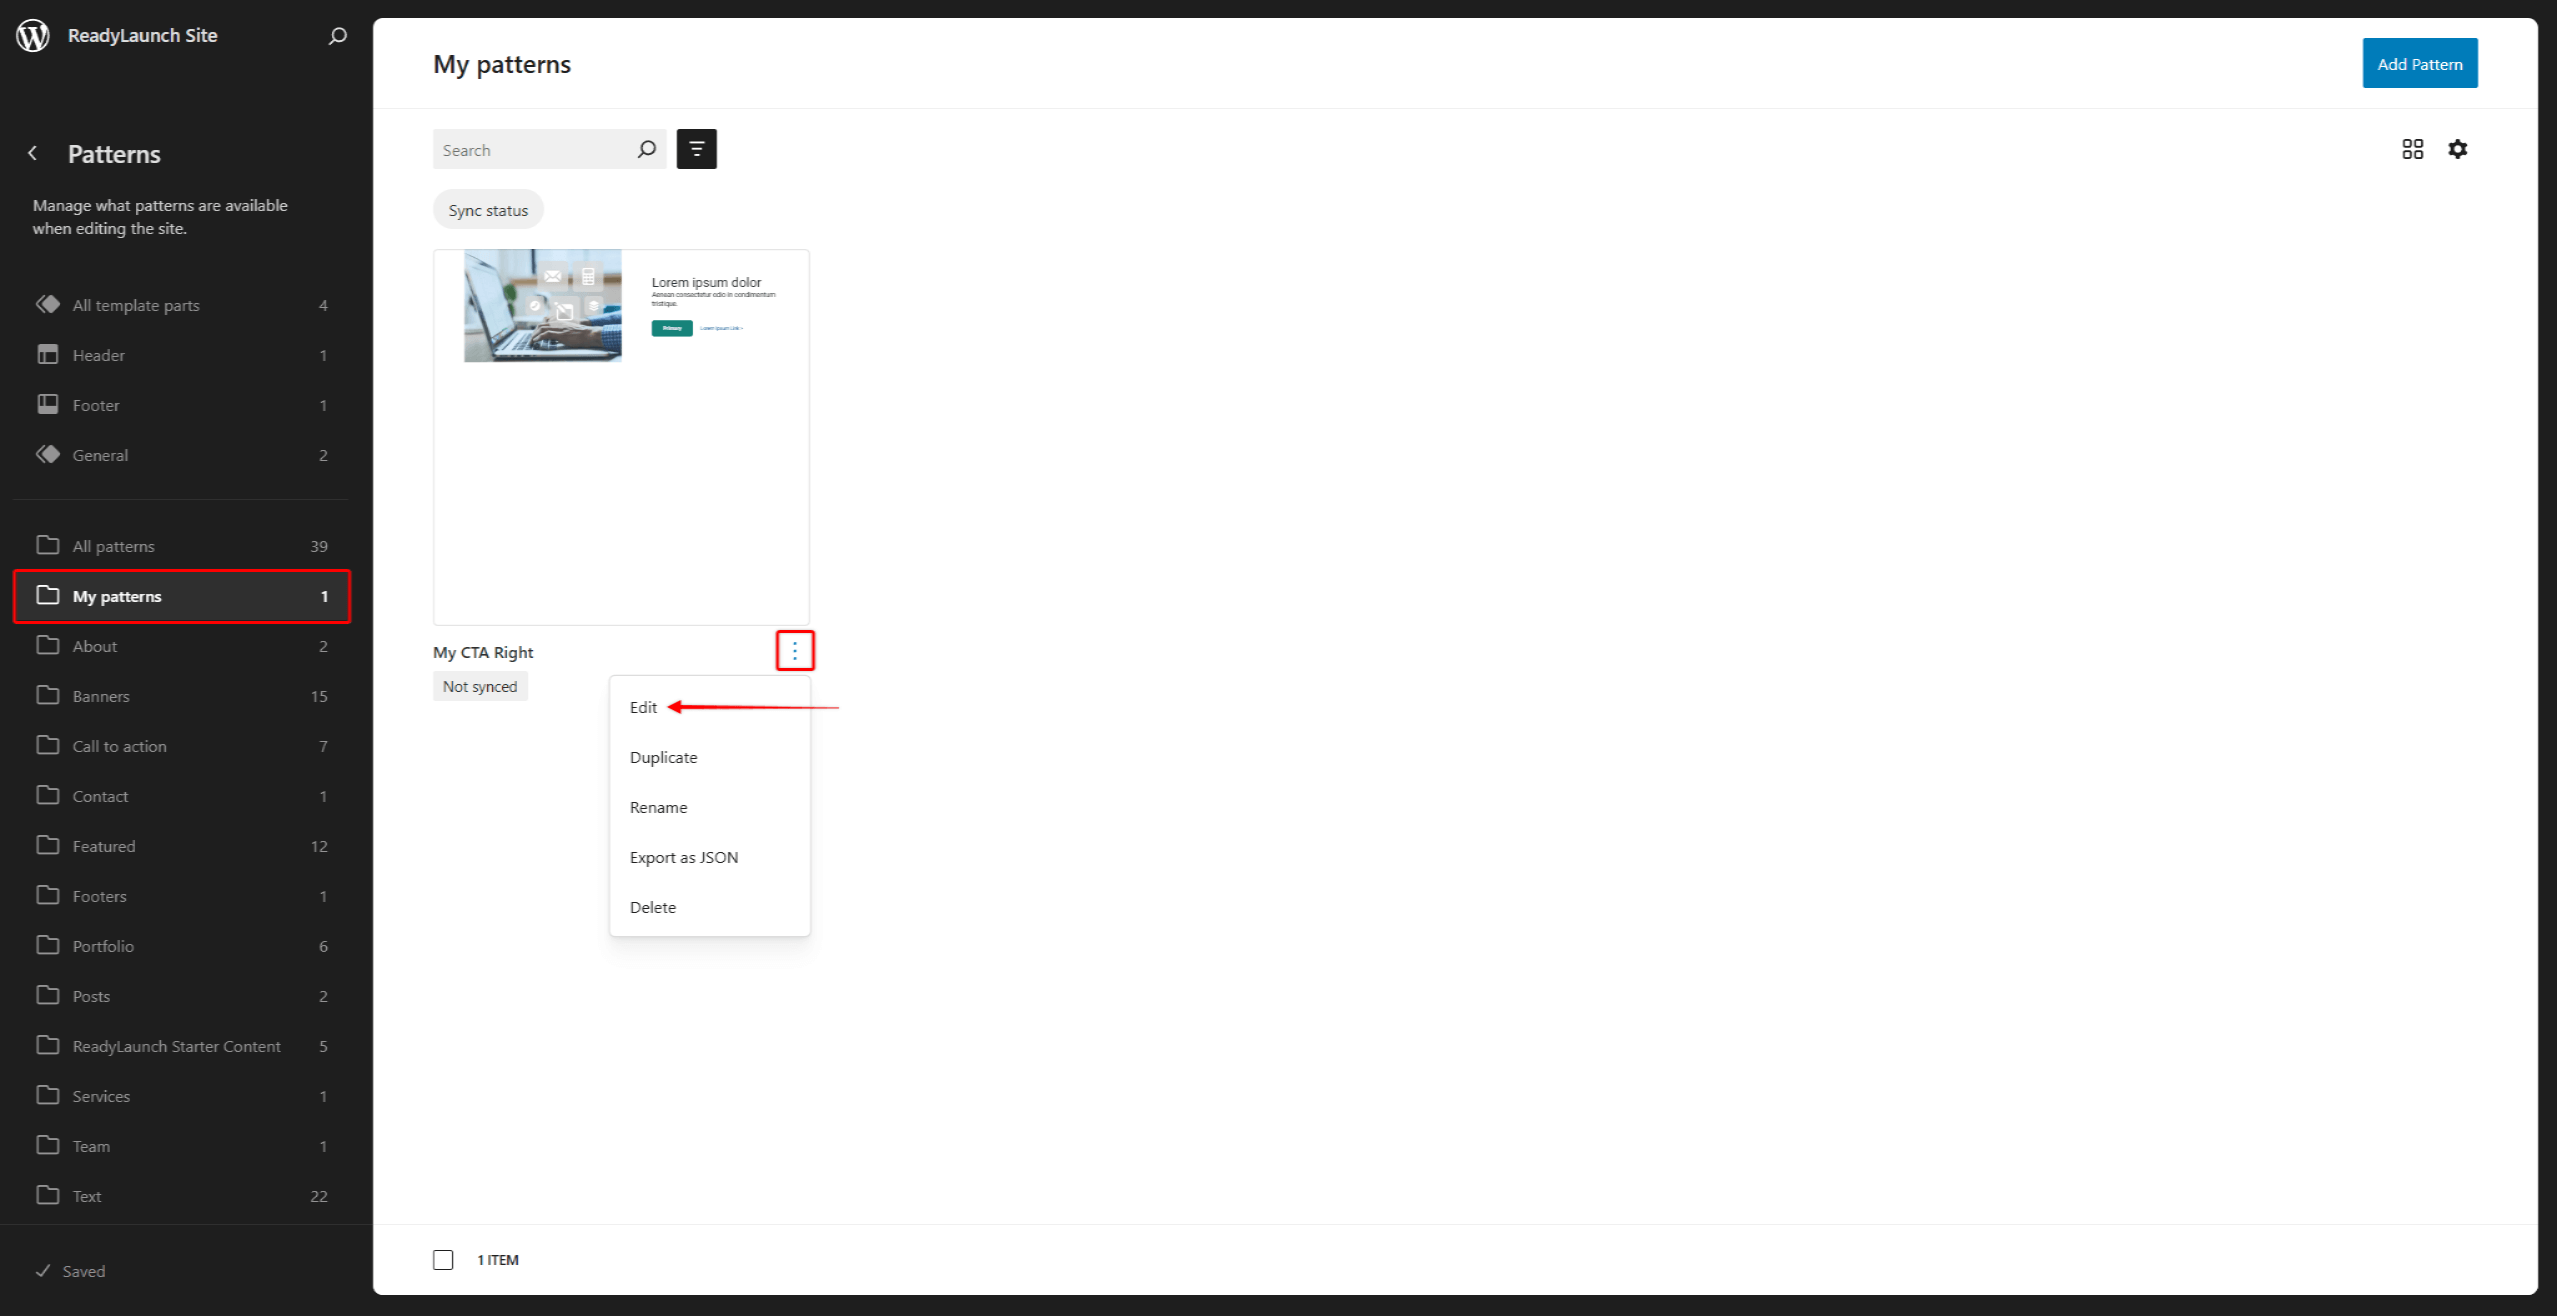
- Aquí encontrarás opciones adicionales para gestionar el patrón. Haz clic en Editar para acceder al editor de patrones.
- Aplica modificaciones al patrón. Puedes modificar los bloques existentes, añadir otros nuevos o eliminar los que no necesites.
- Cuando hayas terminado de realizar los cambios, haz clic en Guardar.
Ahora ya puedes utilizar tu patrón personalizado igual que cualquier otro patrón.
Importación de bloques y patrones de ReadyLaunch™
Puedes insertar bloques y plantillas mediante el «Inserificador de bloques» del editor predeterminado (Gutenberg).
En primer lugar, empieza a editar la entrada o la página. A continuación, sigue estas instrucciones para buscar e insertar los bloques o plantillas de ReadyLaunch™:
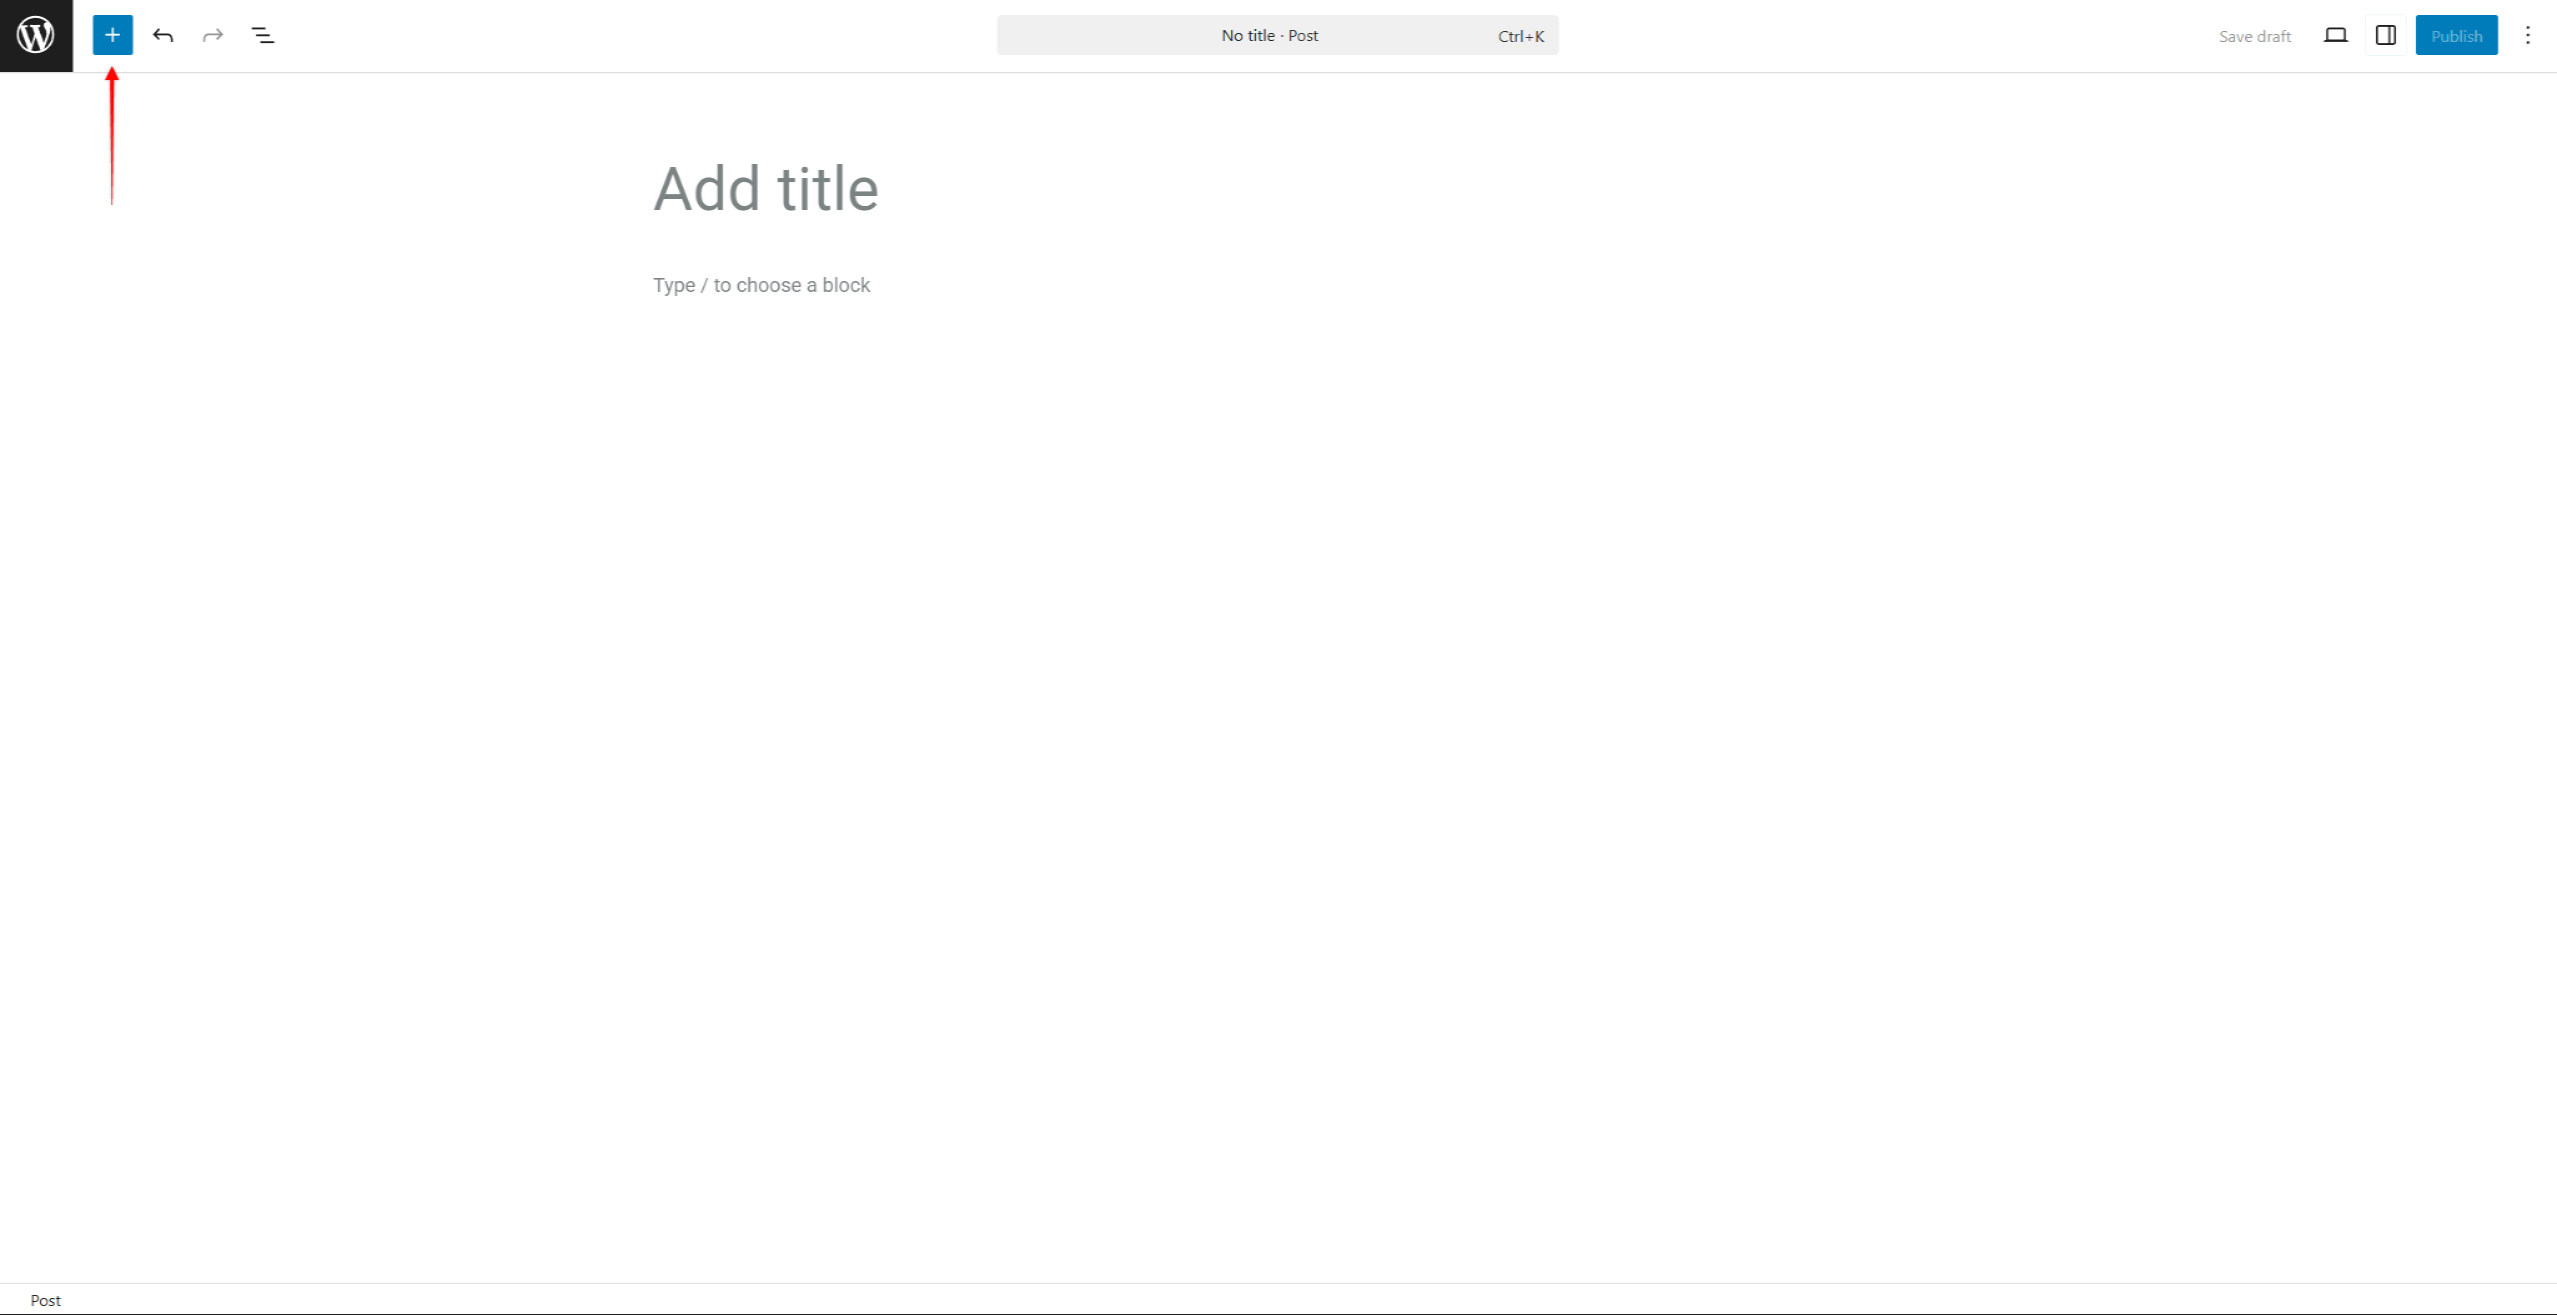
- Haga clic en el botón + icono para abrir el Inserto de bloques.
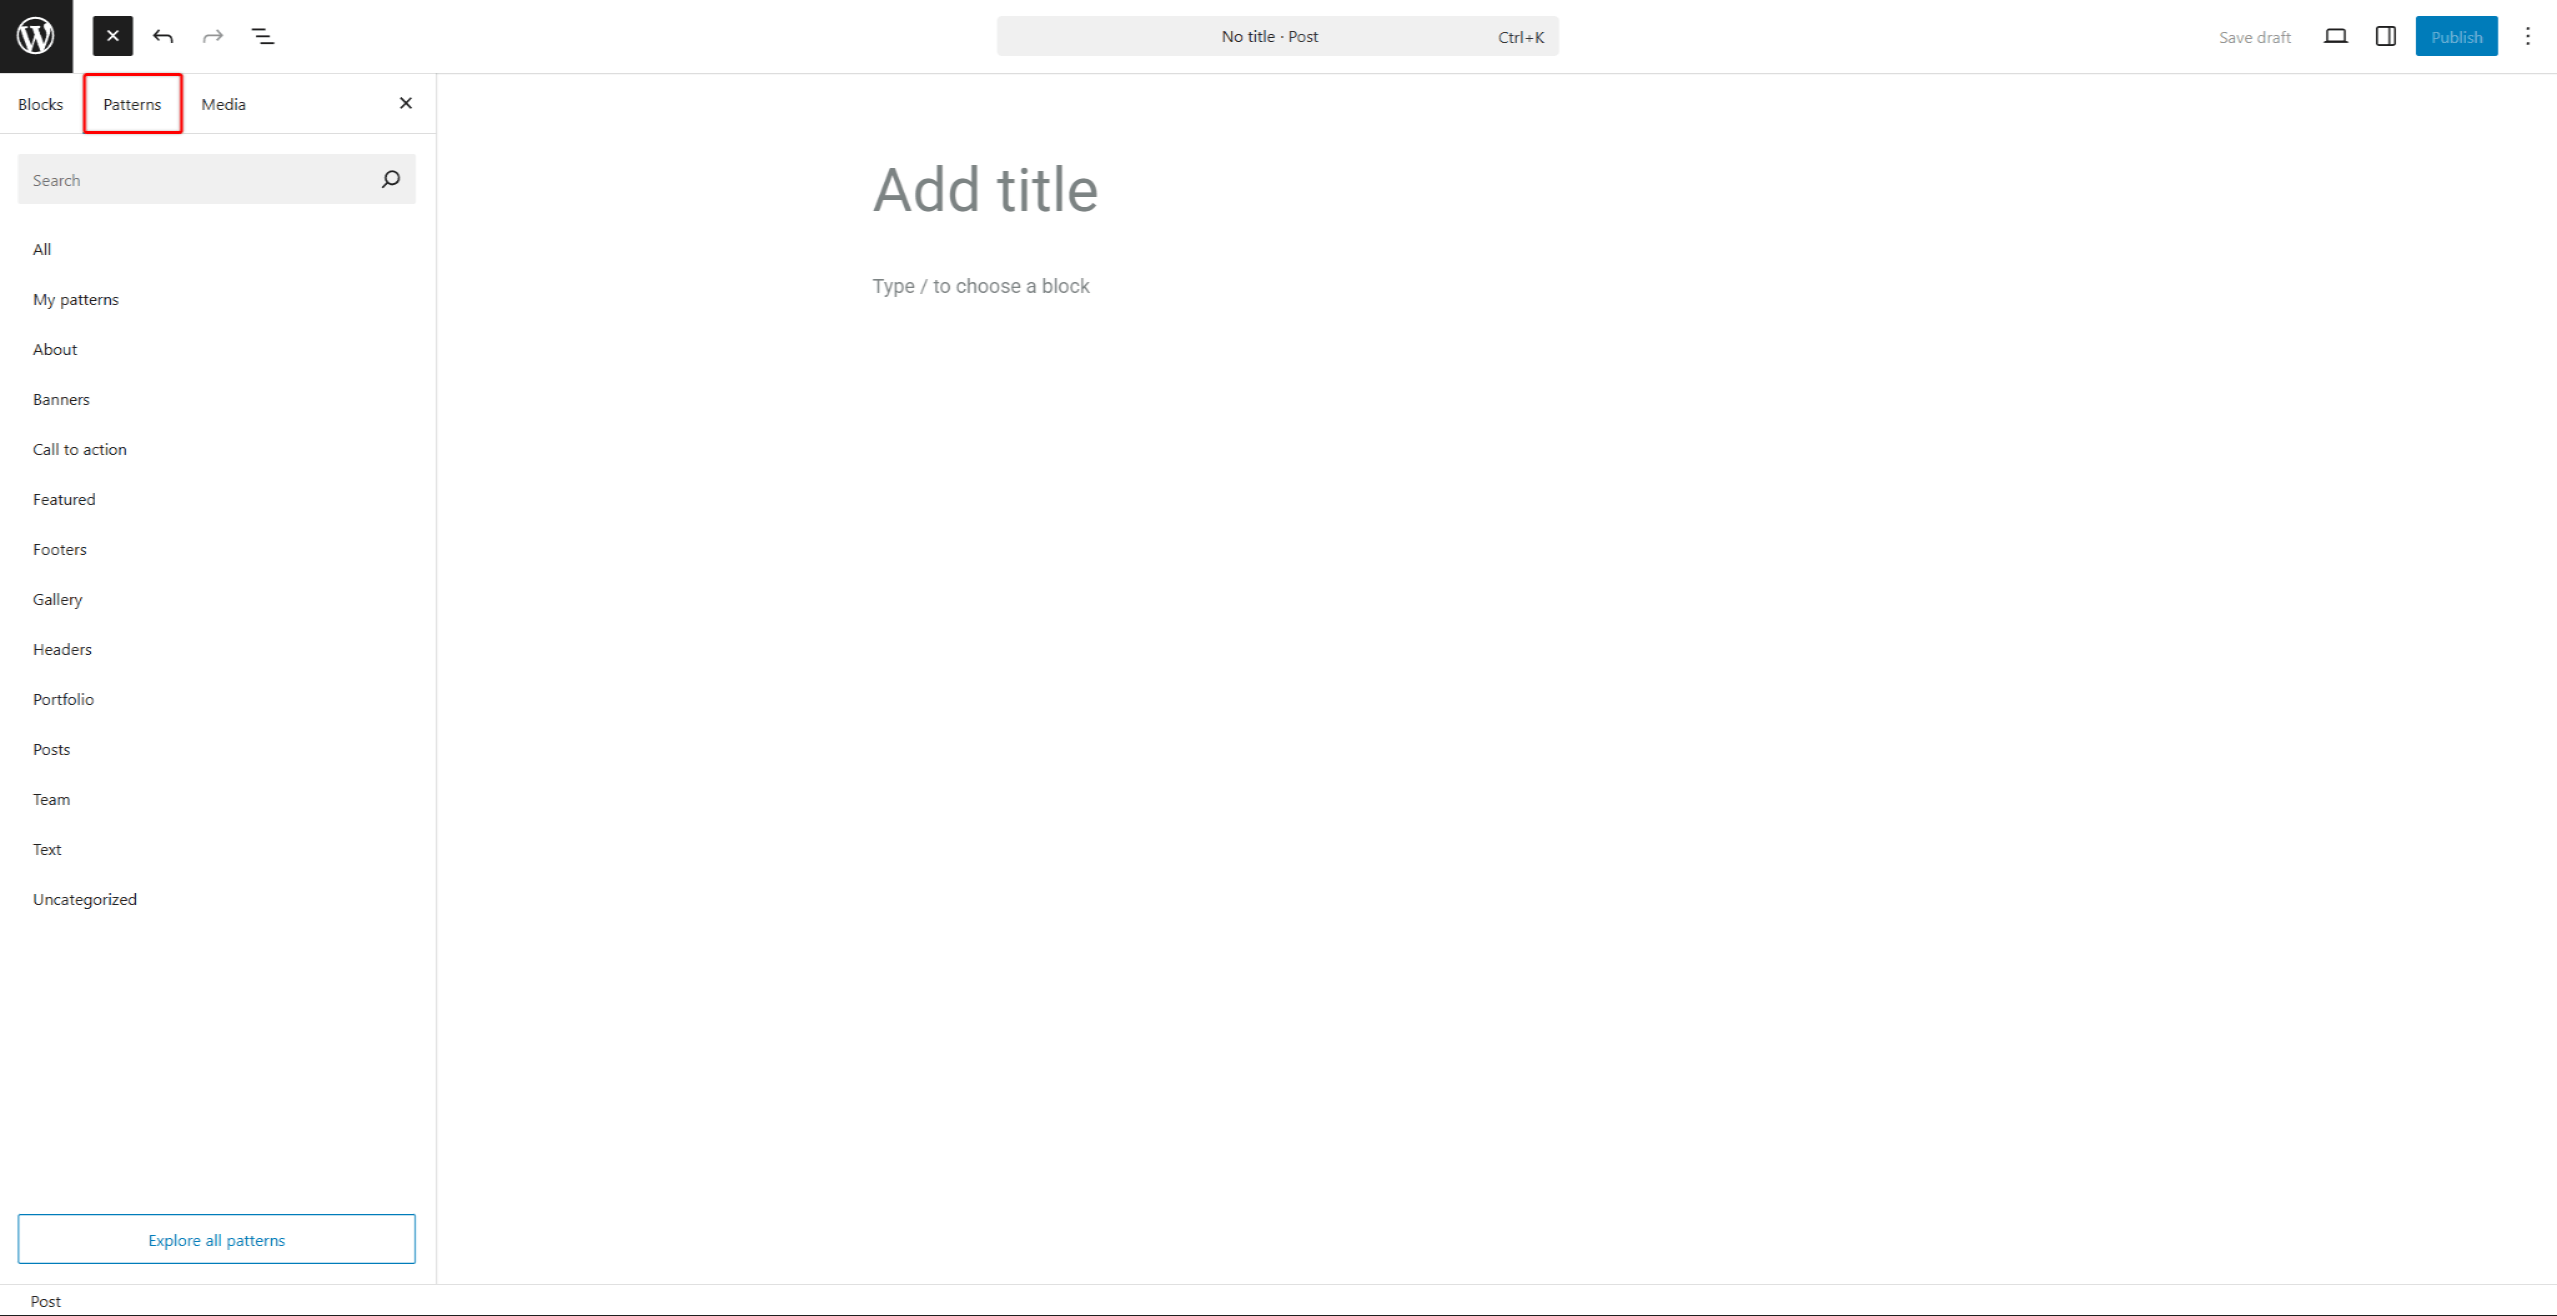
- Aquí puedes consultar la lista de bloques en la sección Bloquea pestaña, y los patrones que aparecen debajo de la Patrones ficha.
- Buscar el “readylaunch” término dentro del «Inserto de bloques» para filtrar los bloques y patrones relacionados con el tema.
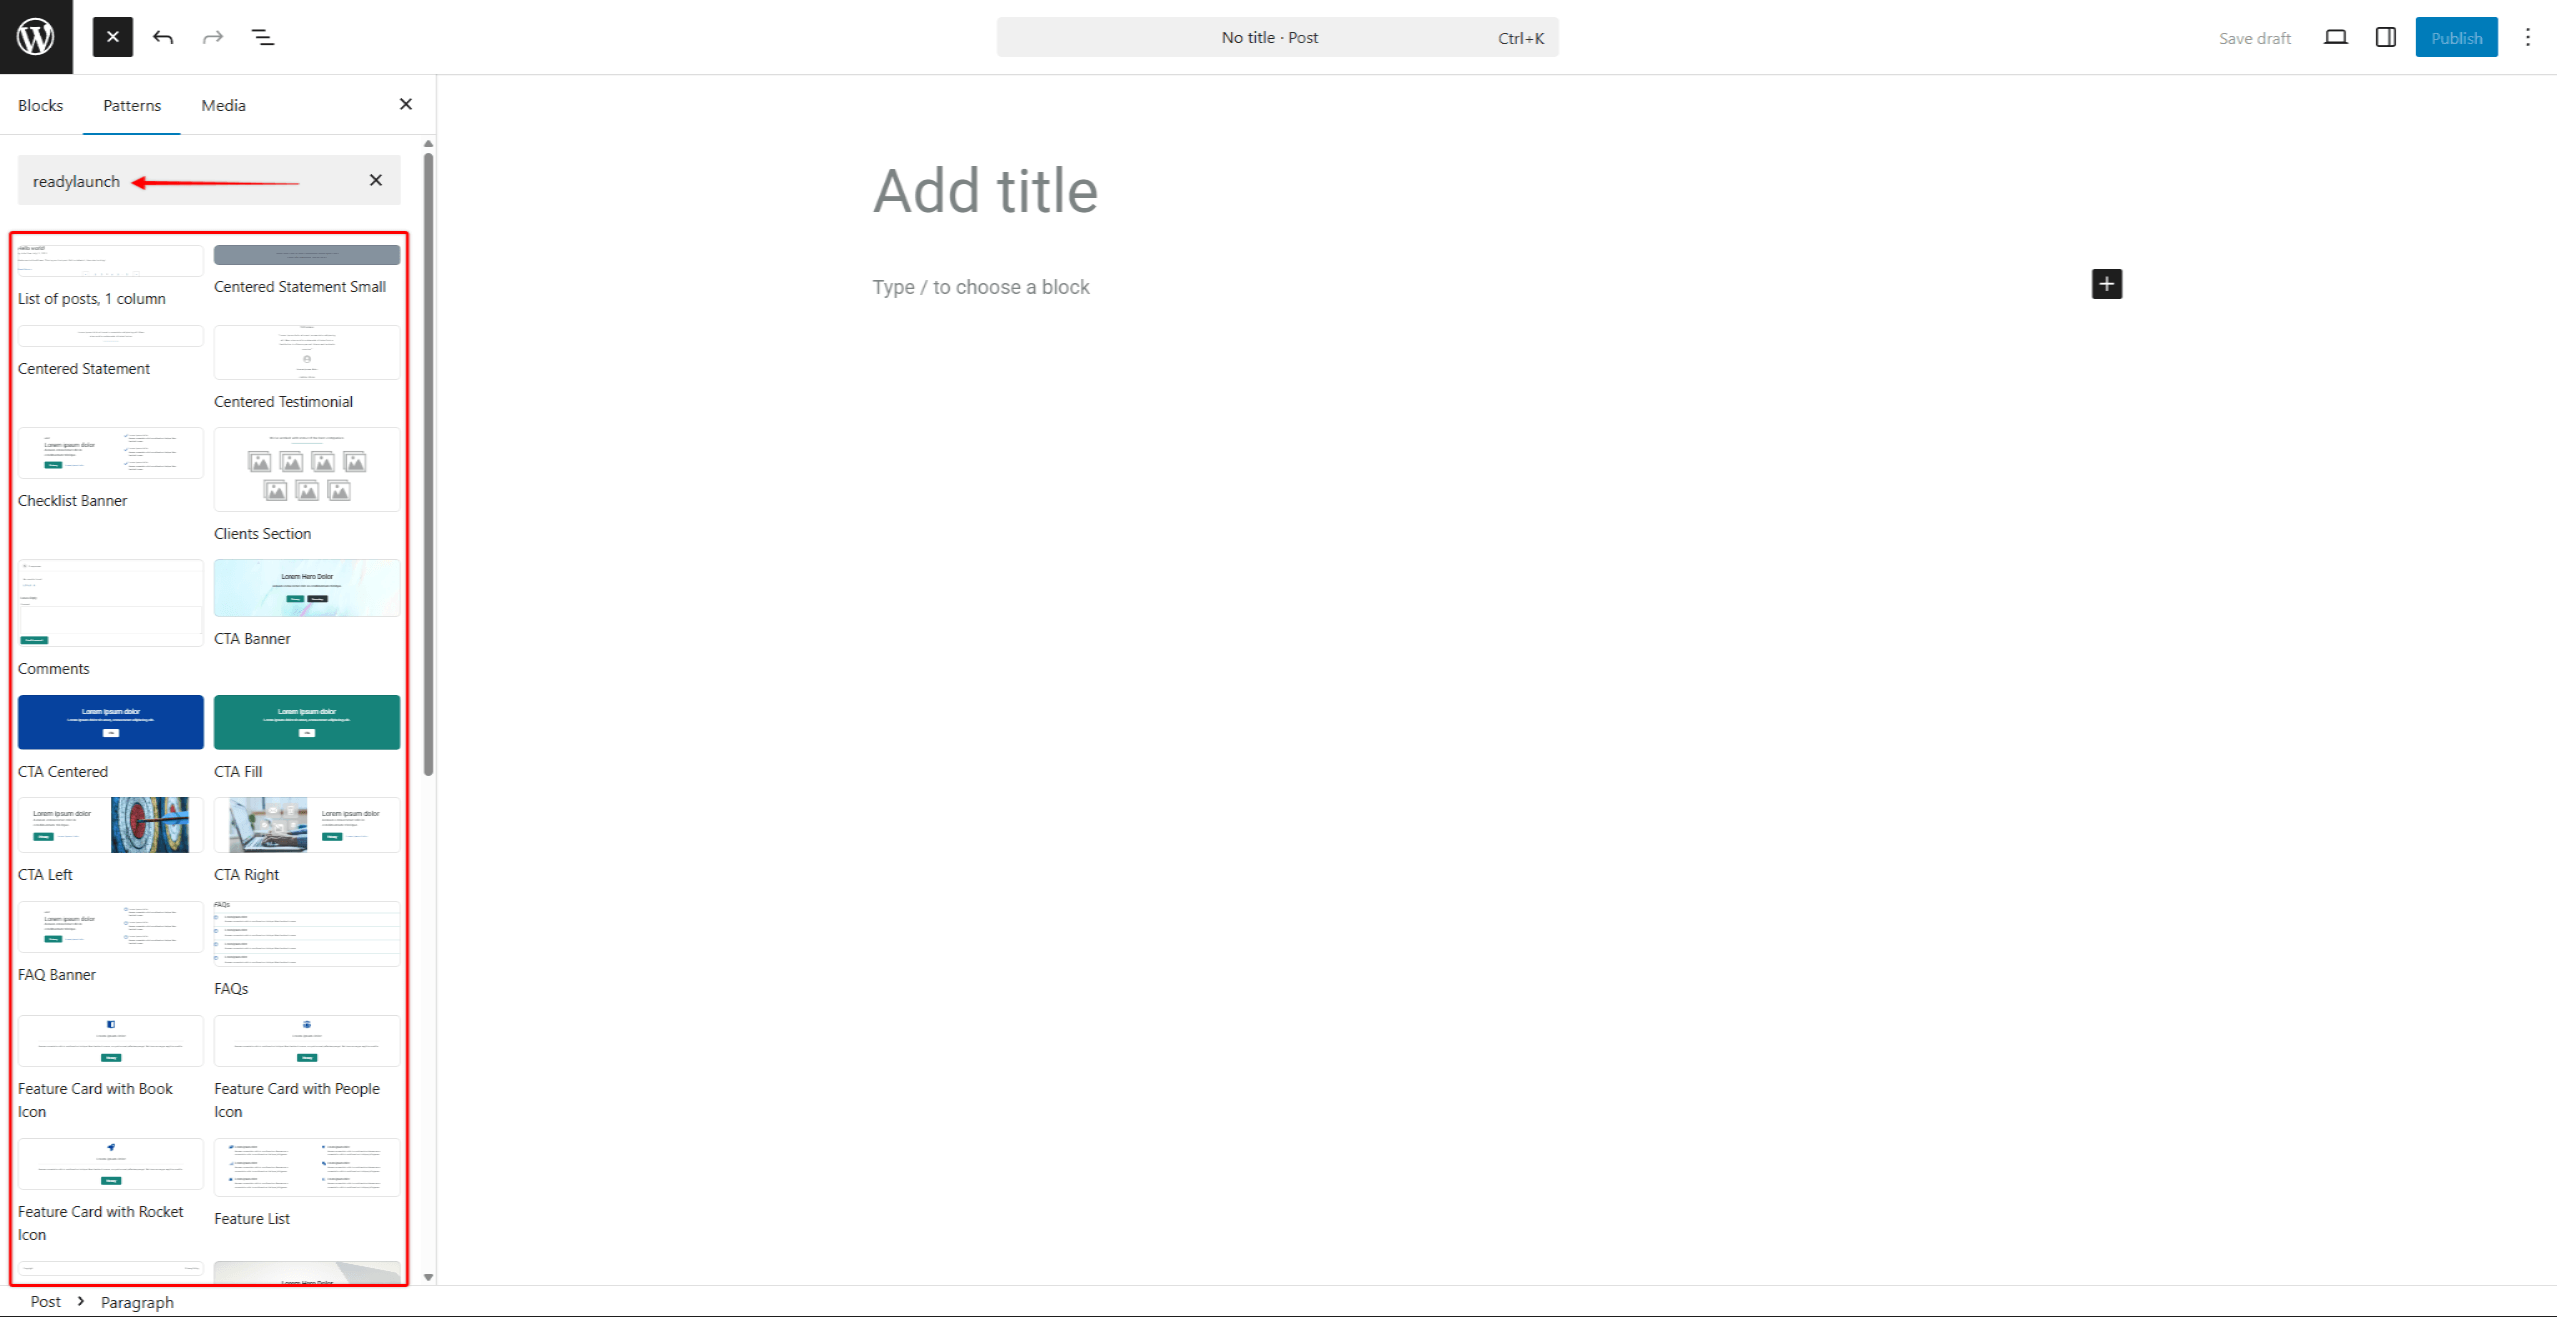
- Busca el bloque o el patrón que necesites.
- Haz clic en él para añadirlo a tu contenido. Ahora puedes modificar el contenido importado según sea necesario.
Personalización de patrones importados
Cada patrón está formado por varios bloques. Tanto los patrones como los bloques individuales que componen cada patrón tienen sus propios ajustes, lo que permite personalizarlos.
Estas opciones estarán disponibles cuando insertes el bloque o la plantilla en una entrada o página. Esto te permite personalizar estos elementos según tus necesidades:
- Haz clic en el patrón o en cualquier bloque concreto del patrón.
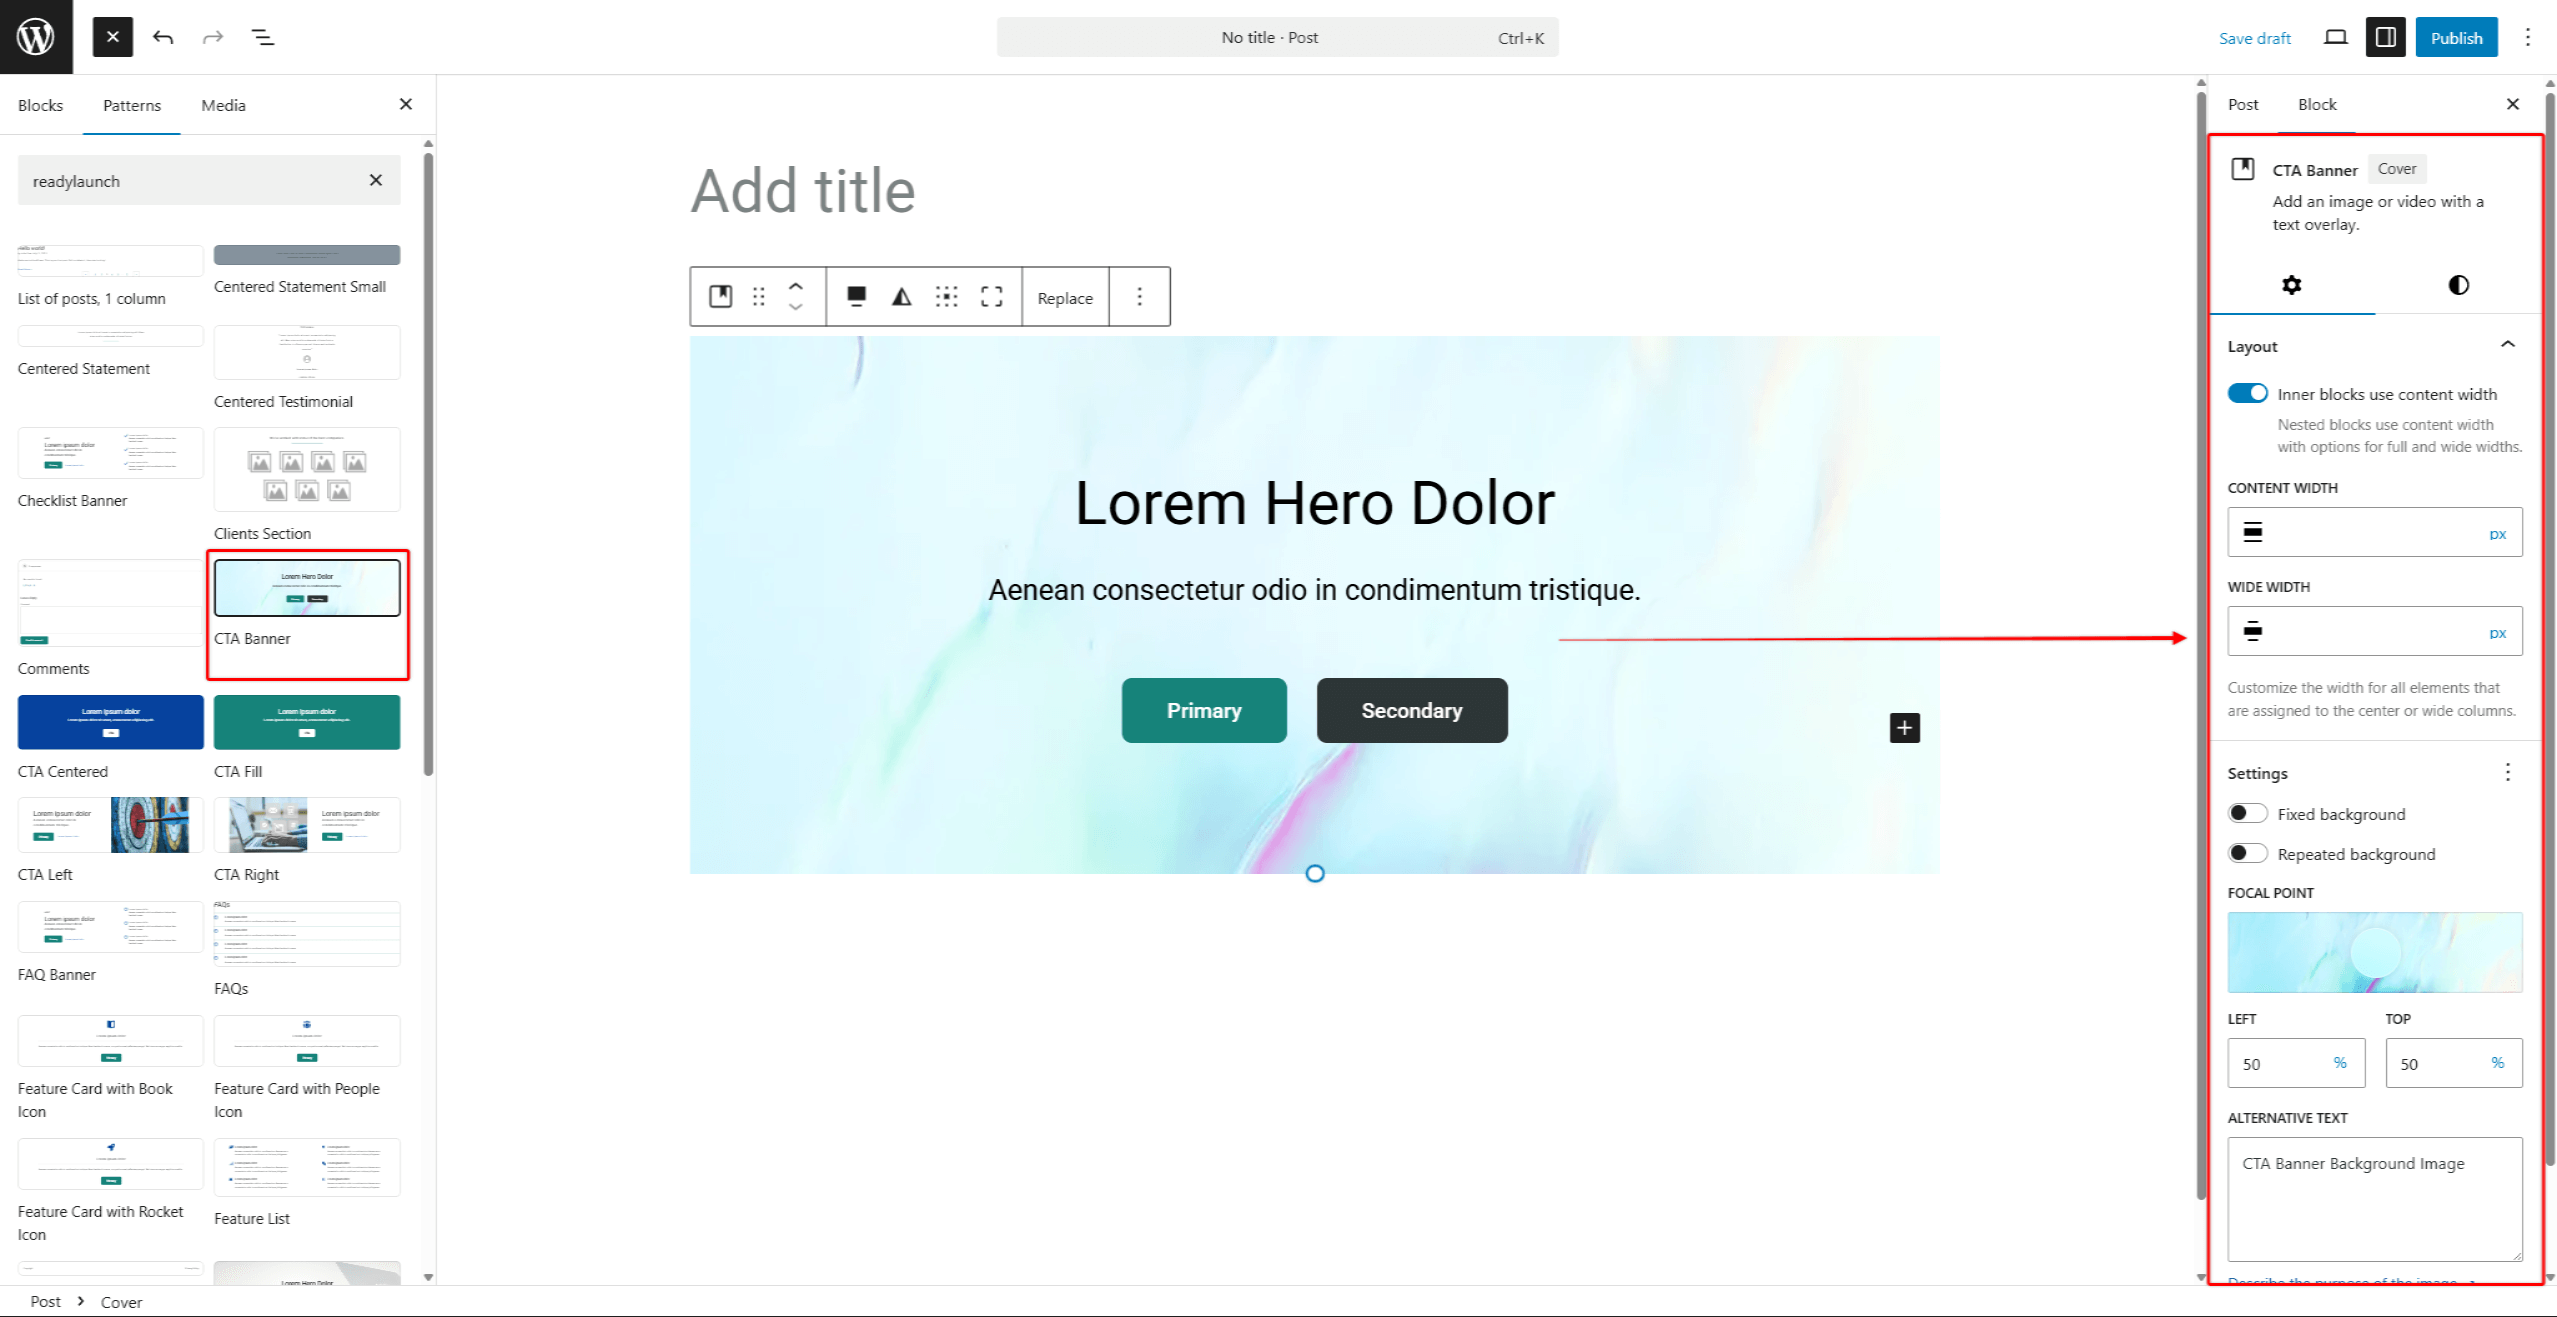
- En el panel de la derecha, debajo de la sección Bloque En la pestaña, puedes ver las opciones disponibles para el bloque o patrón seleccionado.
- Modifica la configuración de cada bloque en la sección Ajustes ficha.
- A continuación, cambia el aspecto del bloque o patrón modificando las opciones que se encuentran en la sección Estilos ficha.
- Haga clic en Guardar borrador o el Publicar/Actualizar para guardar los cambios.
Además, es posible que algunos ajustes estén disponibles pero ocultos al aplicar personalizaciones. Para que estos ajustes sean visibles, sigue estos pasos:
- Empieza a editar la página o la entrada y busca el bloque que quieras personalizar.
- Haz clic en él para acceder al panel de configuración situado a la derecha del editor.
- Busca la sección de configuración que necesites. Haz clic en el Icono de 3 puntos para acceder a la lista completa de opciones de esa sección.
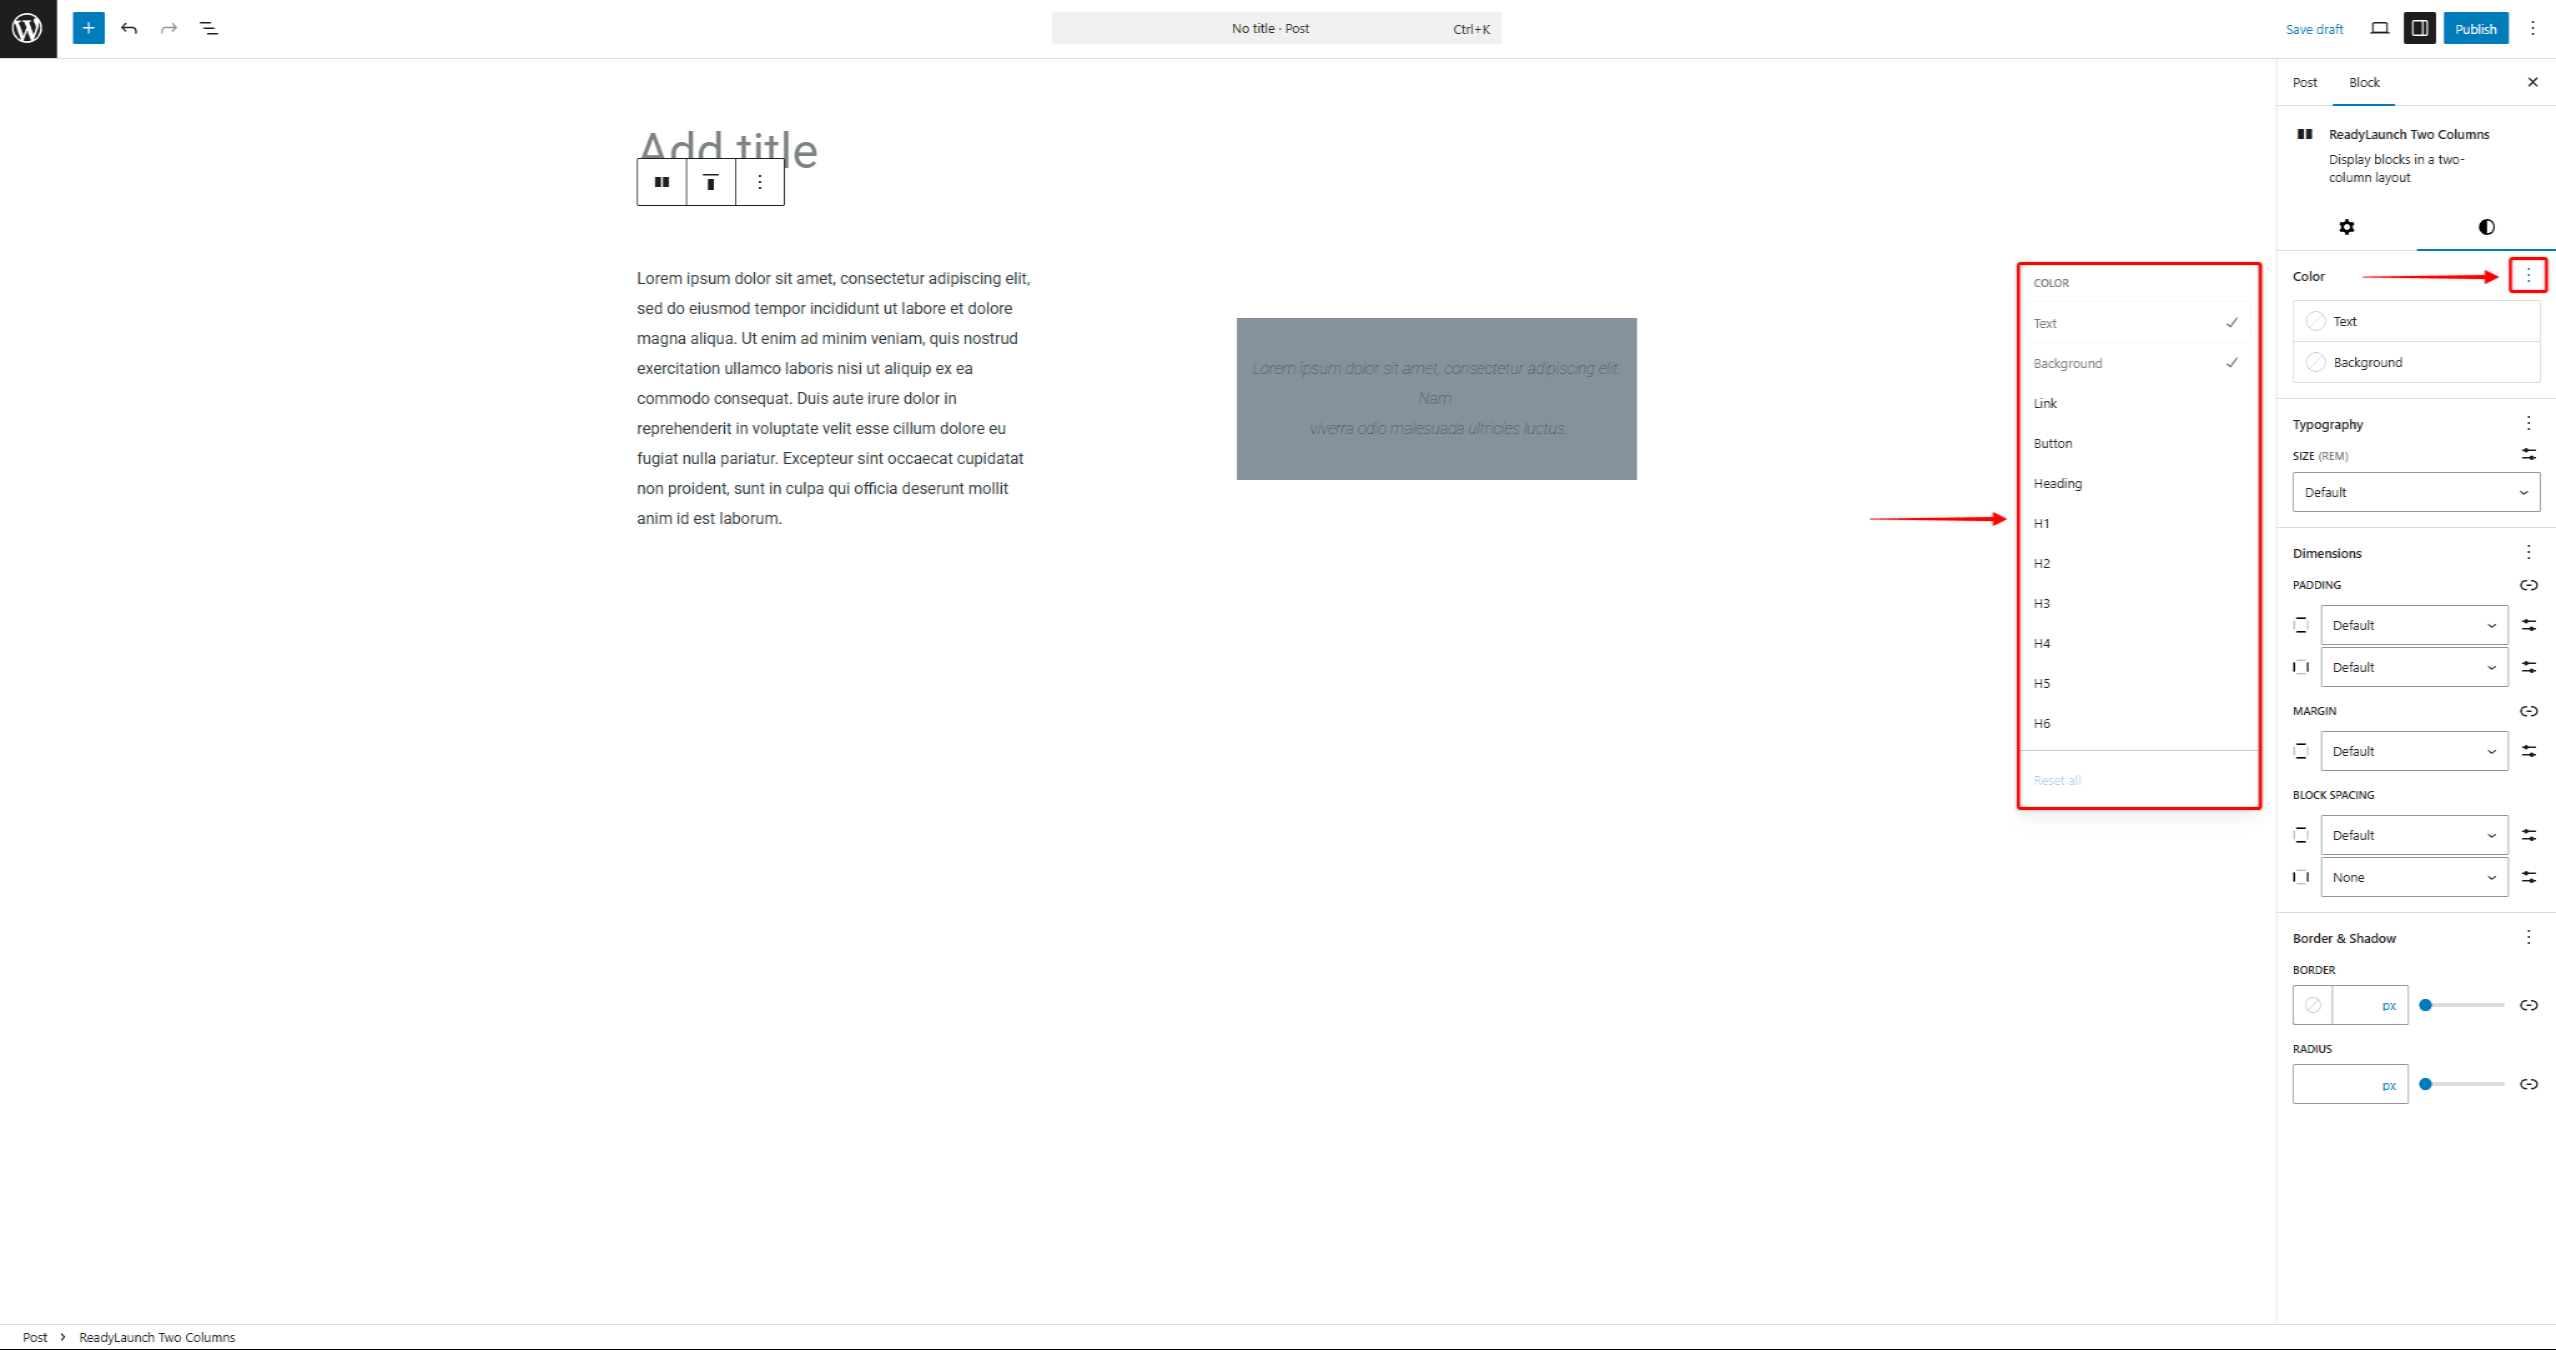
- Haz clic en todas las opciones que quieras que aparezcan en el panel de configuración.
Resumen
Los bloques y plantillas de ReadyLaunch™ agilizan la creación de páginas gracias a diseños prediseñados y personalizables. Puedes duplicar y editar las plantillas del tema para convertirlas en plantillas personalizadas. El plugin MemberPress añade los bloques de membresía, cuyo estilo se adapta automáticamente al del tema.
Para gestionar los diseños a página completa, consulta el Plantillas de temas de ReadyLaunch™. Para la configuración general del tema, empieza por el Conceptos básicos del tema ReadyLaunch™.










 ES
ES  EN
EN  FR
FR  DE
DE  PT
PT 