Creating an online store for your membership site – or even just offering one or two products your members can buy – is a great way to add another revenue stream to your business.
Perhaps you want to offer extras to your paying members, such as downloadable files, branded clothing, or some other type of product.
Maybe you’d like to give your membership content away for free but give your users the opportunity to purchase items like content upgrades or access to a newsletter.
It doesn’t matter the topic of your website or the way you’re currently monetizing it. Any way you look at it, there are plenty of benefits to setting up a members-only online store.
In this guide, we’ll show you how to create an online store for your MemberPress site. If you don’t already have MemberPress, you can check it out here.
Provided that you’re using WordPress – or you’re prepared to switch – by the time you’ve finished this article you’ll be ready to list physical products or digital downloads for sale right inside your membership site.
So let’s get started!
Benefits of Creating an Online Store for Your Membership Site
Listing items for sale is a popular and effective way to generate more revenue from your membership site.
That’s true whether you’re selling physical products like merchandise, books, or equipment, or digital downloads such as software apps, audio and video files, or ebooks.
While giving away content for free is a proven way to market your membership site, you don’t have to make everything freely available. After all, if your membership site isn’t profitable, it probably won’t be in business for long.
Some of your content will fall outside the existing pricing structure of your membership site – things like supplementary files or branded t-shirts. These are the kinds of items you’ll want to make available through a members-only online store.
As is often the case, if you’re using WordPress for your membership site, adding ecommerce functionality to your website is very straightforward and probably easier than you think.
By the end of this guide, you’ll know exactly how to create an online store for your membership site and control who can access its products.
Choose an Ecommerce WordPress Plugin
Out of the box, WordPress doesn’t have the ability to sell items online. However, thanks to some amazing plugins, you can get busy selling stuff in no time.
MemberPress integrates seamlessly with WooCommerce – zero coding required. So it’s an excellent option if you’d like to have a site with both membership and ecommerce store functionality.
WooCommerce is owned by Automattic, the company behind WordPress.com and core contributor to the WordPress software.

So you could say that WooCommerce is effectively the official ecommerce plugin for WordPress.
While there are other ecommerce plugins for WordPress, WooCommerce is free to use, easy to understand, and can be extended in countless ways thanks to its library of free and paid add-ons.
Wholesale Suite, which is designed for B2B use, is among the best of these add-ons.
Install an Ecommerce Plugin
If you do decide to use WooCommerce, you’ll be pleased to know it’s super easy to install.
Simply log in to your admin area in WordPress and navigate to the Plugins page. Then click on the Add New button and enter WooCommerce in the search field.
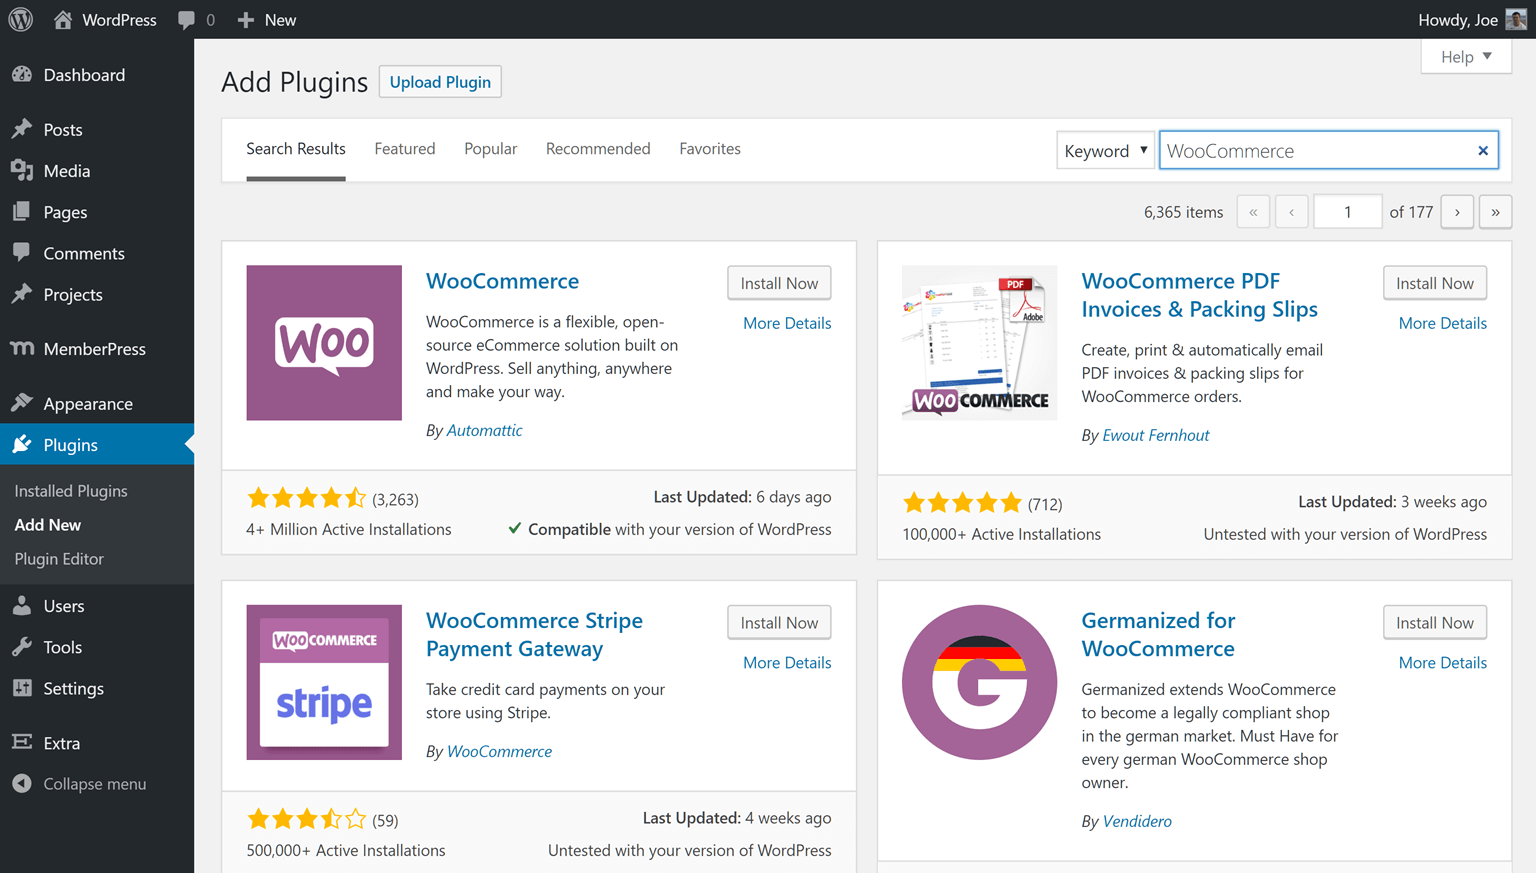
Next, click the Install Now button for the WooCommerce plugin, followed by the Activate button.
The WooCommerce setup wizard should then walk you through configuring your store.
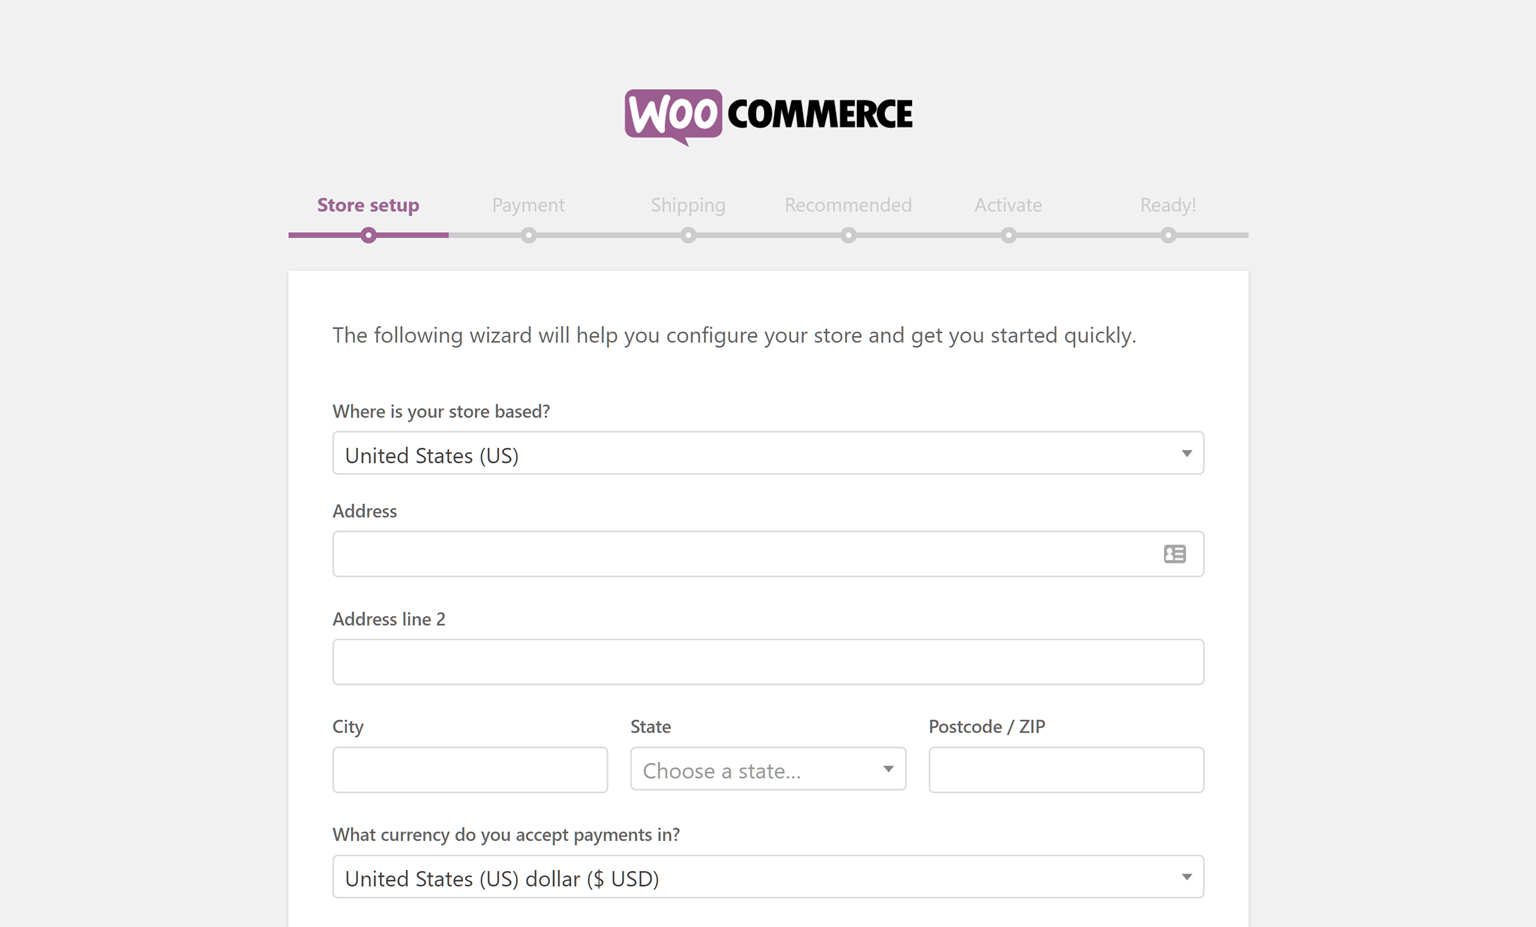
One important setting on the wizard establishes whether you want to sell physical products, digital products, or both.
You can change this later, but it’s a good idea to choose the right option from the outset.
Since you’re looking at both membership and ecommerce functions, you’ll definitely want to opt for both physical and digital products.

Once you’ve completed the wizard you can set up the MemberPress WooCommerce integration, and start creating the first product for your members-only online store.
Create a Product
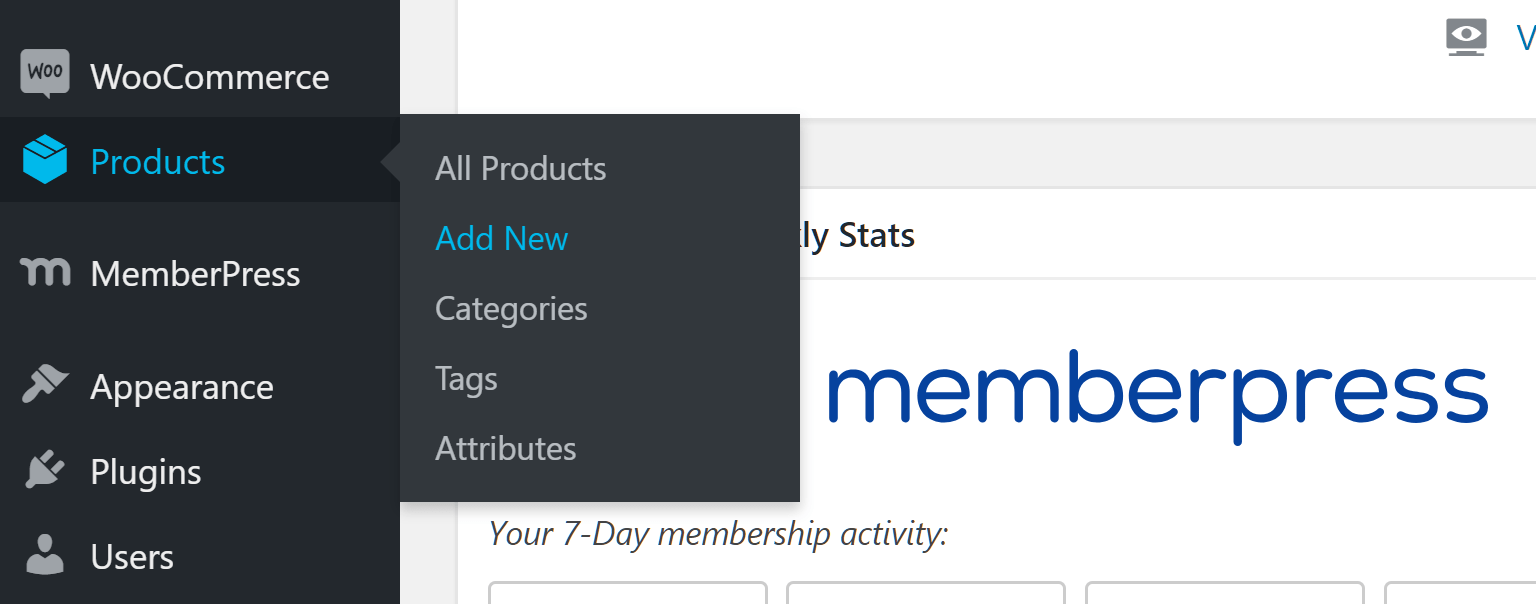
With WooCommerce active on your site, you’ll see that a new post type called Products has been added to WordPress.
To create the first item for your online store, click on the Add New item under the Products menu.
From the Add New Product screen, you can enter the details of your product. WooCommerce lets you add a product title and description in the main content area.
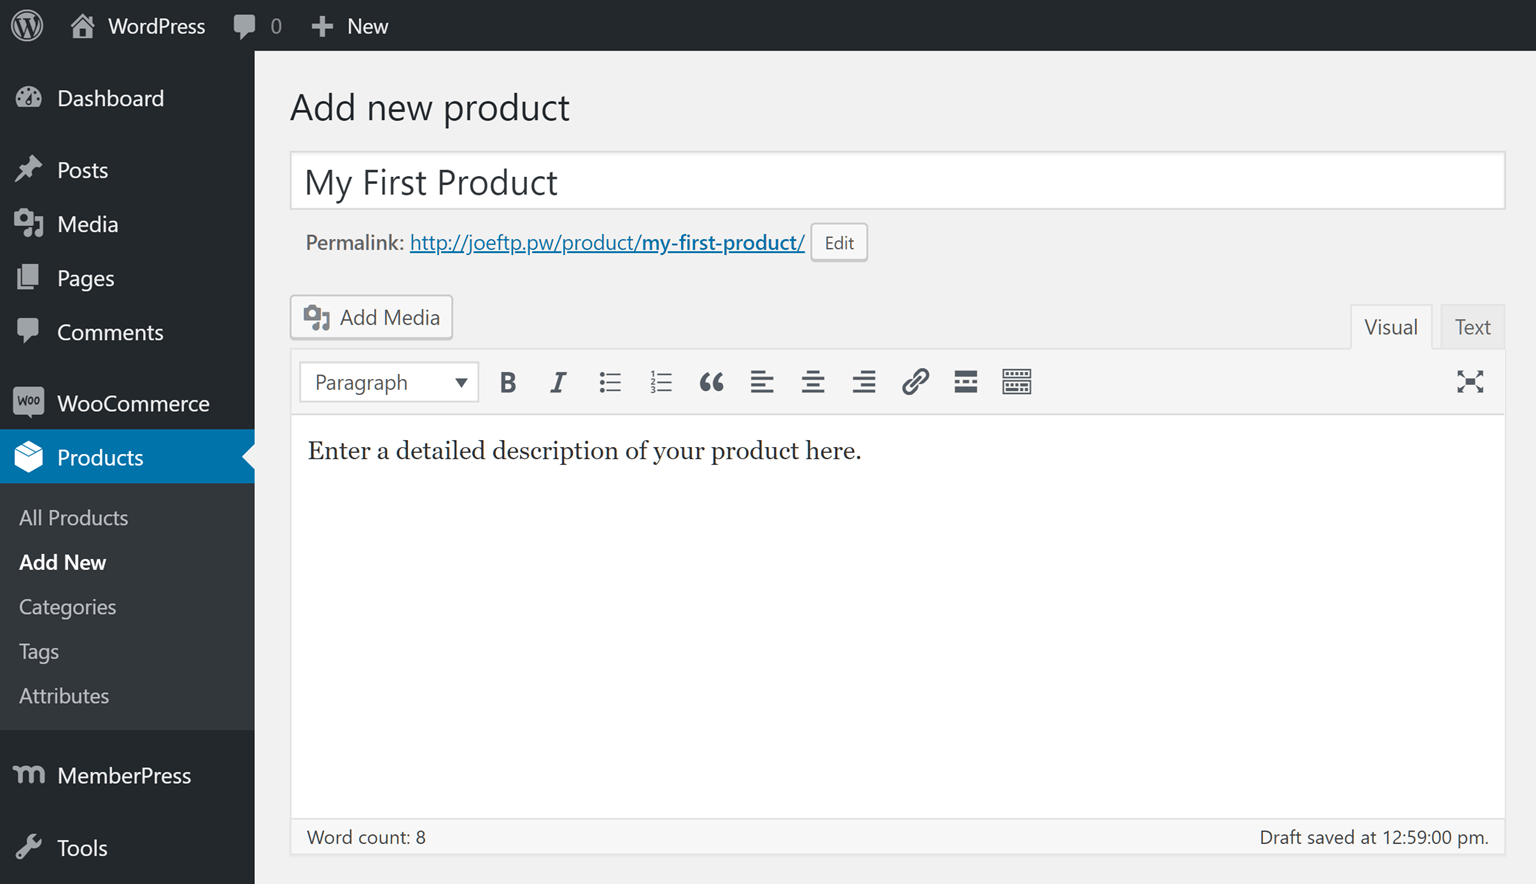
If you scroll down the page, there’s a space for adding a short product description that will be displayed on the category pages of your site and other areas, depending on your theme’s settings.
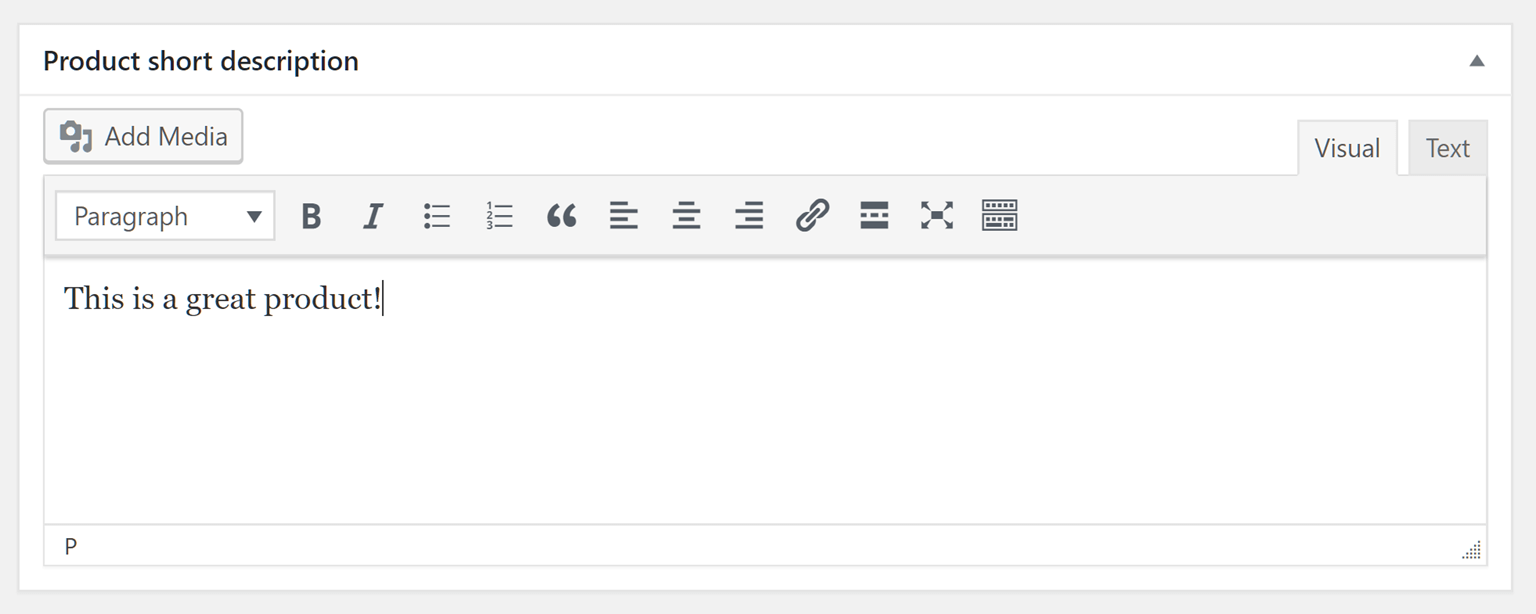
You can also upload a product image along with a collection of images that are displayed in the product gallery. As with any WordPress post type, you can use categories and tags to organize your products.
Once you’ve entered the main product information, you can move onto configuring your product by locating the Product data box on the same page.
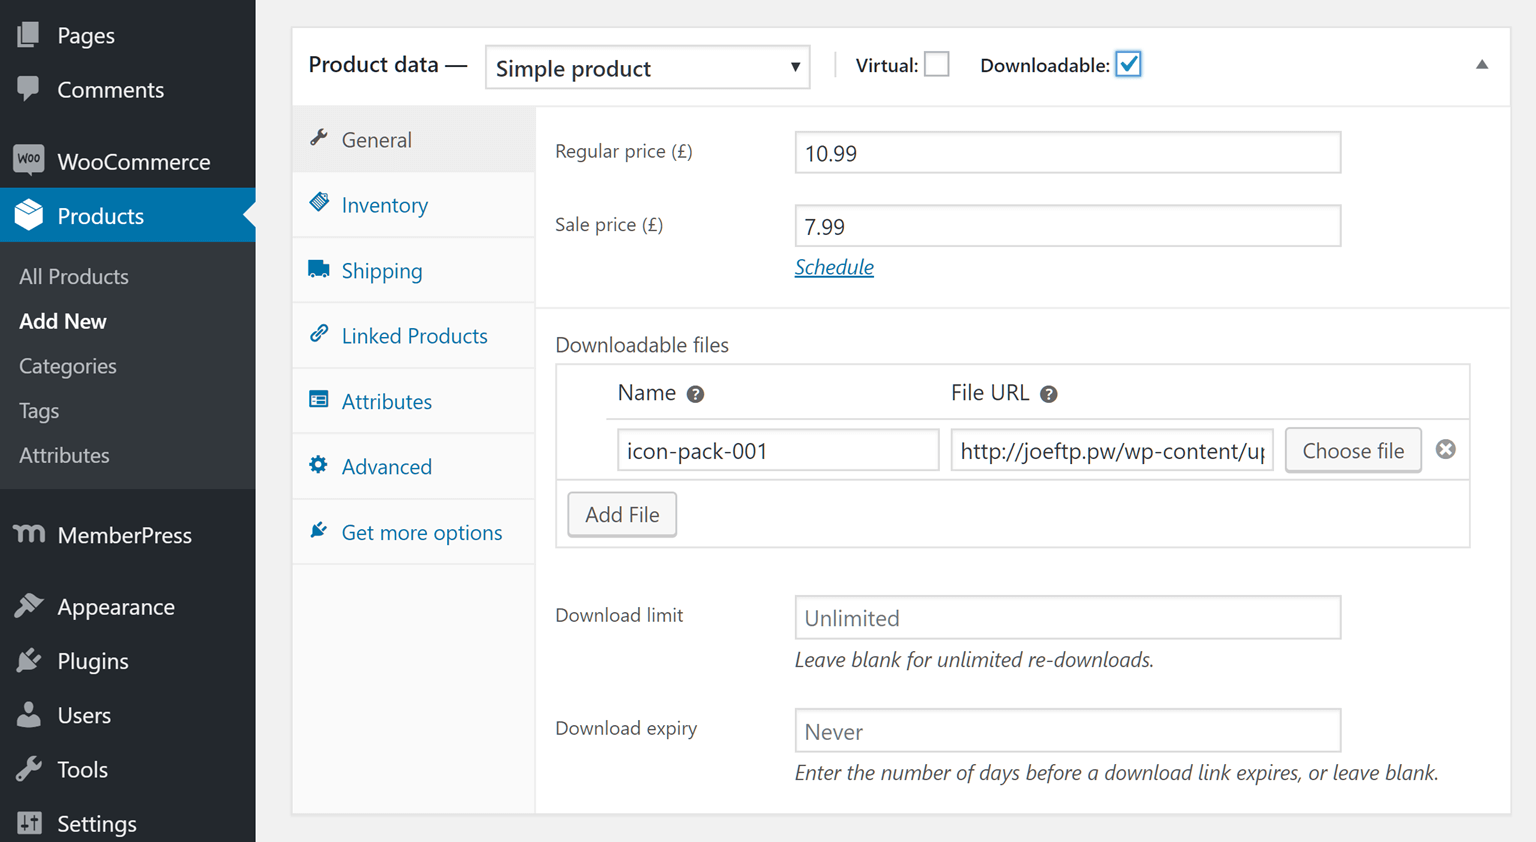
The free version of WooCommerce gives you lots of control over the types of products you can create.
For example, you can create schedules that control when a product is reduced in price, set a limit on how many times a digital product can be purchased, and create linked and grouped products.
We highly recommend you explore all the options and settings to make sure your products are configured just right for your website and its members.
You might consider doing some research on product listing best practices to make sure you’re making the most of your content.
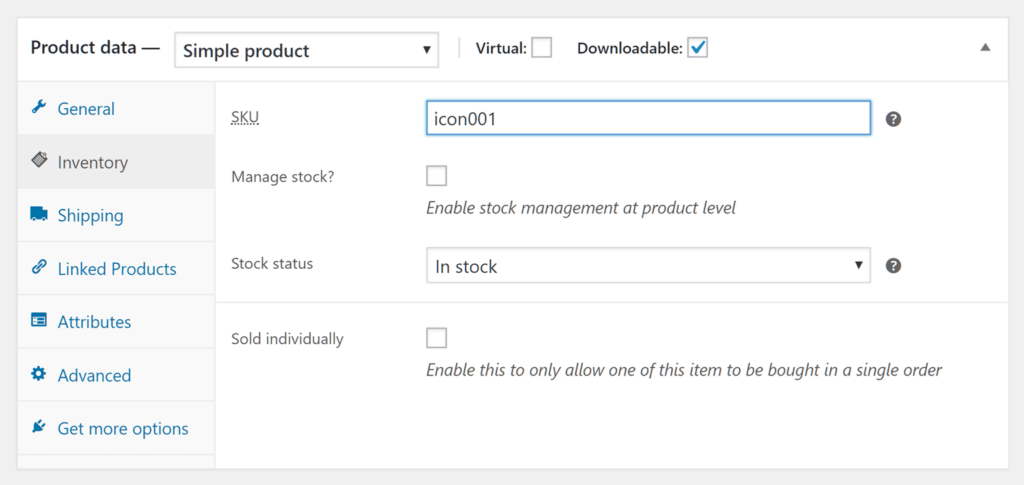
It’s also a good idea to give each product a unique stock keeping unit (SKU) number to make it more easily identifiable on your website. The SKU field can be found under the Inventory tab on the Product Data panel.
Once your product is ready, you can publish it to make it available to your website visitors.
However, in the next section of this guide, we’ll cover how to make the product available exclusively to your members. (This is where the magic of MemberPress comes in!)
Publishing Your Products
By default, published products will be accessible on your website like a regular page.
You can add links to the products in other content on your site, such as posts and pages. Or you can add links to your site menus and sidebars.
However, if you want to create an online store inside your membership site that’s only available to your members, you’ll need to adjust a few of the settings.
One option is to click on the Edit link next to the Catalog visibility option on the Publish panel of the product page. Doing so reveals the controls that let you set the status of the product.
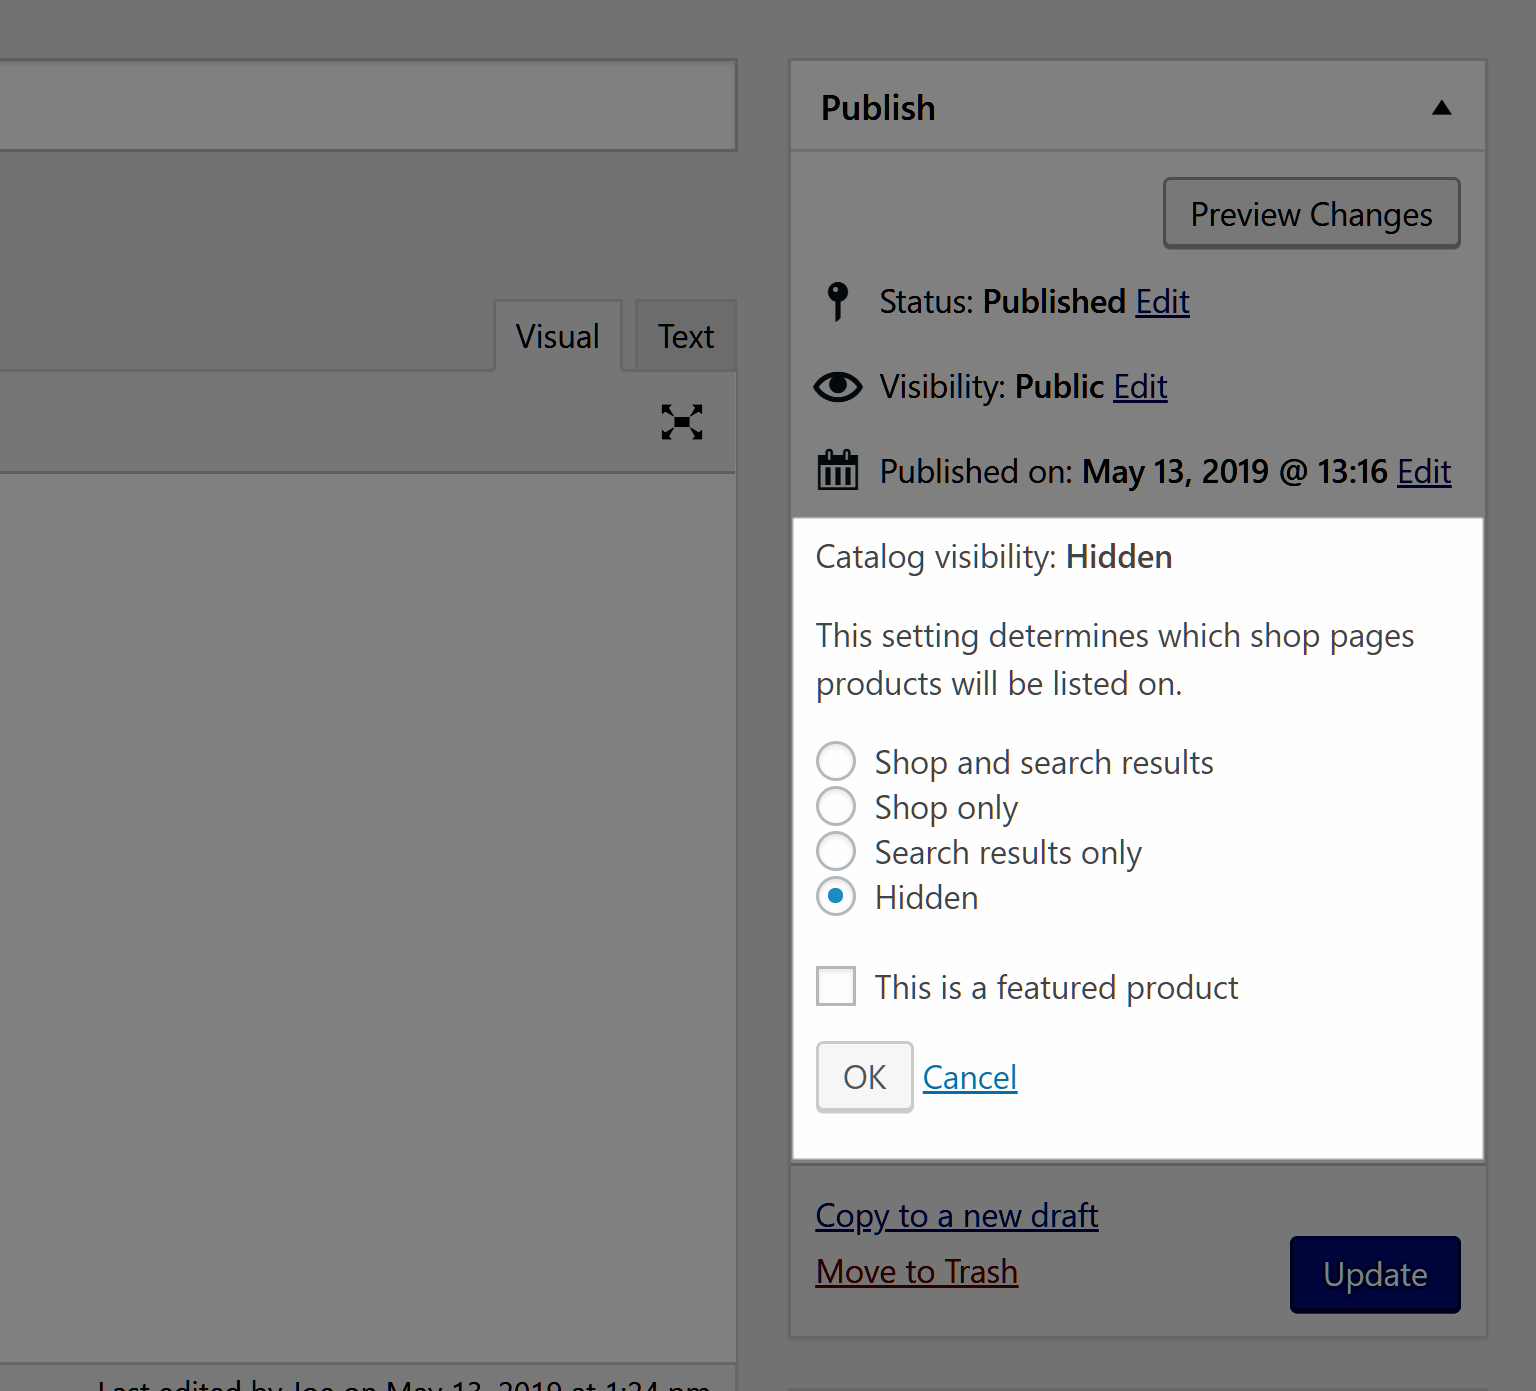
A hidden status means that the product won’t be displayed on your site unless a visitor follows a direct link to that product or you insert the product into a piece of content on your site using the WooCommerce shortcodes.
There are a few exceptions, but setting the status to hidden makes it unlikely that a regular visitor to your site will find the product as a general rule.
You can then make the product available to your members by inserting the product – or a link to the product – into a page or post only your members can access.
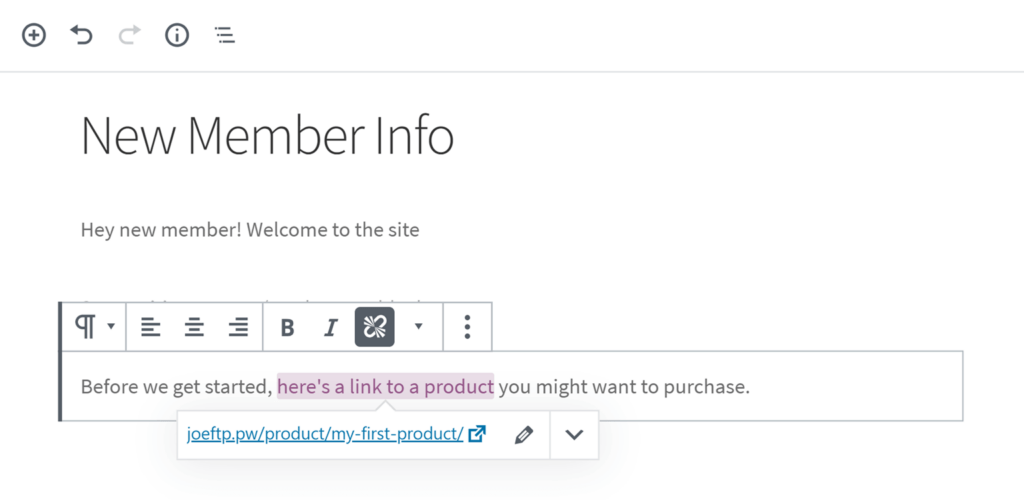
Alternatively, you can create a rule in MemberPress so that only members or members on certain membership plans can access the products.
To do so, click on Rules from the MemberPress menu. Then create a new rule and select All Products from the Protected Content drop-down menu.
You can then set the access conditions so that only members can access the products.
Rules are the real magic behind MemberPress.
You’ll find you can create ultra fine-grained configurations, like restricting access to some products or individual products, for some members or all members – and everything in-between.
You’ll find this function especially useful if you want to sell products that anyone can buy as well as products that are reserved for your members.
Another option is to restrict access to the checkout pages of your store but make your product pages available.
This approach could help increase sign-ups to your membership site. That’s because a user would have to become a member to complete a purchase.
The possibilities of what you can do with WooCommerce and MemberPress are endless.
Do You Need an Ecommerce WordPress Theme?
You may want to start a new membership site that will have a members-only online store, or you might want to offer just a few items for sale.
Either way, it’s a good idea to choose a WordPress theme that has good ecommerce support (with WooCommerce support in particular).
Any good WordPress theme should work with WooCommerce and the other leading ecommerce plugins.
However, choosing a theme that’s ecommerce-compatible specifically means you’ll get access to purpose-built templates for all the pages your online store will need.
These templates usually include a shopping cart, checkout, and customer dashboard areas.
Depending on your chosen theme, you might also get access to extras like one-click checkouts, wish lists, and other features found at popular online stores.
However, if your membership site is already up and running and you’re happy with your choice of WordPress theme, you don’t have to switch to an ecommerce-focused option if you don’t want to.
As mentioned, most good themes should work well enough with plugins like WooCommerce.
If you find that you’d like to add some extra ecommerce-focused pages to your website but don’t want to change themes, you could try creating them yourself with a page builder plugin like Elementor.
A Word on Shipping Solutions
If you’ve got physical goods, you’ve gotta have physical shipping. For that, we highly recommend the WooCommerce Shipping Services plugin by PluginHive.
As the #1 shipping solution for WooCommerce store owners, the plugin allows you to automate shipping with live rates.
It also features one-click label printing and order tracking for the big guys like UPS, USPS, FedEx, DHL, Stamps, Aramex, Blue Dart, Australia Post, Canada Post, and more.
WooCommerce Shipping Services plans start at $9 per month, and they offer a 14 day free trial, so you can try before you buy.
Final Thoughts
Hopefully, you’re now ready to start listing products on your website for your members to view and purchase.
MemberPress and WooCommerce are powerful plugins on their own. When you use them together, there’s no telling what you can accomplish!

Get Sale-Ready in Under a Day
Supercharge your site with multiple recurring revenue streams. Get MemberPress and integrate with WooCommerce today!
If you have any questions about creating an online store for your membership site with WooCommerce, let us know in the comments!


Hi Joe,
If I’m not mistaken, I think this is the first time MemberPress has recommended the plugin by HappyPlugins. I’m glad to see that you recommend it. Have you done testing on it and/or have you heard from users that have implemented this successfully?
Jeff
Yes, one of our developers ran some tests with it before we promoted it – we don’t have a lot of feedback from customer’s yet as it’s still quite new. But the little we’ve heard seems positive so far. Of course they’re still adding new features and bug-fixes all the time – so we expect their integration will only get better with time.
Hi Joe,
Also glad to hear you’re promoting the HappyPlugins bridge tool, but I’m wondering why you chose to use that plugin in the above scenario at all. What functionality is it bringing into the equation? If you wanted to offer products only to your members, can’t you just hide a product (or category of products) from the public WC catalog using a snippet, and then embed it into a protected page? -brad
Hi Brad, I think the biggest benefit is that the user’s can purchase more than one membership at a time using WooCommerce’s cart functionality. Or buy a membership and a product at the same time. Another benefit is that it opens your memberships up to the huge ecosystem of WooCommerce which allows many more payment gateway options and other integrations that MP doesn’t yet support. Hope that helps!
Hi Joe and Paul,
Thank you for recommending MemberPress WooCommerce Plus.
Yes, we are indeed adding new features to the plugin all the time based on customers feedback.
From the time the plugin was released about 8 months ago we have added many features, and we are always open for suggestions (through our support team).
We have received great responses so far 🙂
Thanks again for your kind words!
Regards, Bob