If you want to rebrand your membership site, then changing your domain name will probably be part of the process.
Many people are put off from choosing a better domain name for their website because they’re worried about losing traffic, especially hard-won search engine traffic. However, as this guide on how to change the domain name of your membership site without destroying your SEO shows, it’s not a task you should be afraid of.
By following our instructions, you’ll be able to change your membership site over to a new domain name, without any negative SEO-related consequences.
However, note that this guide assumes you’re using WordPress as the platform for your membership site.
Let’s get started…
Take a Backup of Your WordPress Membership Site
Before you begin changing domain names, it’s a good idea to take a backup of your WordPress membership site. This is something you should have in place anyway, but if not, this guide explains how to back up your membership site.
Having an up-to-date backup will come in handy should anything go wrong when changing the domain name of your membership site.
Register the New Domain Name
Again, you might've done this already, but if you’ve yet to register the new domain name for your membership site, you can quickly do so through a service like Namecheap.
Add the New Domain to Your Web Hosting Account
Assuming you’re not changing web hosts at the same time as changing the domain name of your site, the next step involves adding the new domain name to your account with your current hosting company.
By doing this, you’ll not only add your new domain name to your hosting account but you’ll also be instructing your host to display a holding page when anyone enters that domain name into their browser.
Connect the New Domain to Your Web Host
Adding the details of the new domain to your web hosting account is only part of the process. Next, you have to instruct the company you registered the domain with to connect or point the domain to your web host.
To do this, you’ll need to find the nameservers for your hosting account. You should be able to find these by logging into your hosting account area and having a look around.
Sometimes performing a Google search where you type in the name of your host and the word “nameservers” can help you find the relevant page on the host’s website.
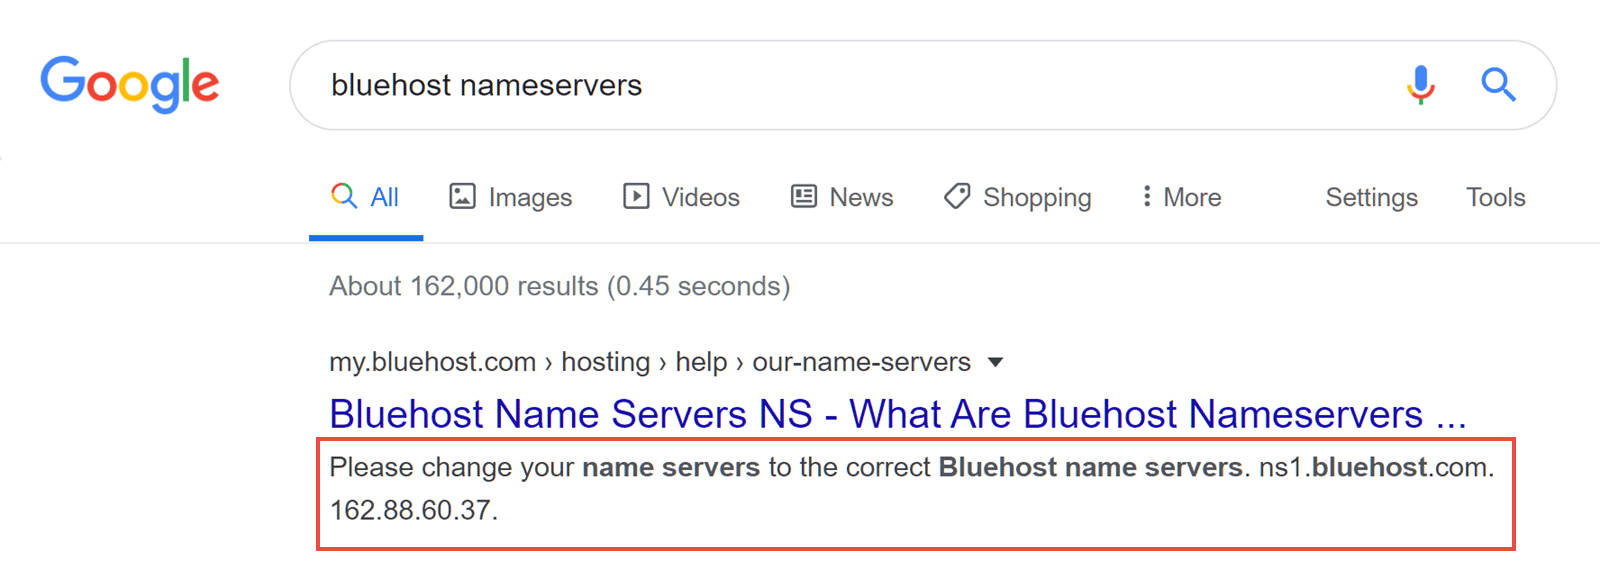
If in doubt, feel free to contact your web host via live chat or telephone. Ask them what are the nameservers you should use to point a domain name to your hosting account.
Once you have the two nameservers, log back into your domain name registrar account. For the new domain you plan to use, look for the settings that allow you to enter the nameservers.
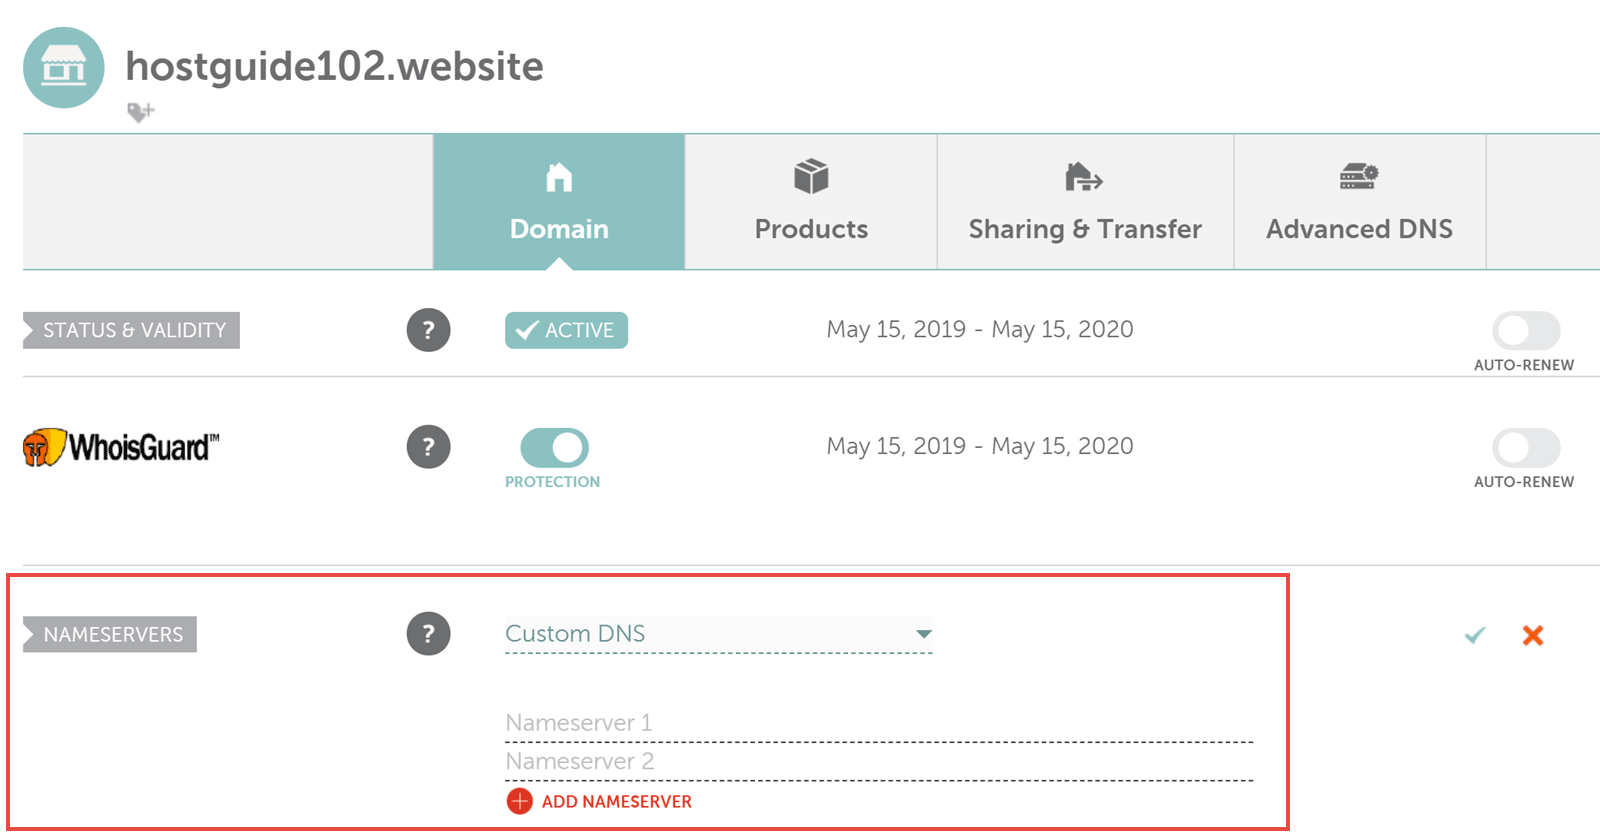
The process varies from host to host, and if you can’t find a way to do this, contact your host's support staff.
Once you’ve entered the two nameserver addresses, it can take up to 24 hours for the changes to take effect. However, it often takes a lot less time.
If you don't see the holding page of your web hosting company when you type your new domain into a web browser after this 24-hour period, contact the domain name company support staff to check that everything has been entered correctly.
Change the Domain Name in WordPress
Once your new domain name takes you to the holding page provided by your web host, it’s time to update the domain name for your membership site in WordPress.
To do so, log in to your WordPress dashboard. Once logged in, navigate to the General page by clicking on the Settings menu. From the General Settings page, replace your existing domain name with the new one by entering it into the two fields named WordPress Address (URL) and Site Address (URL).
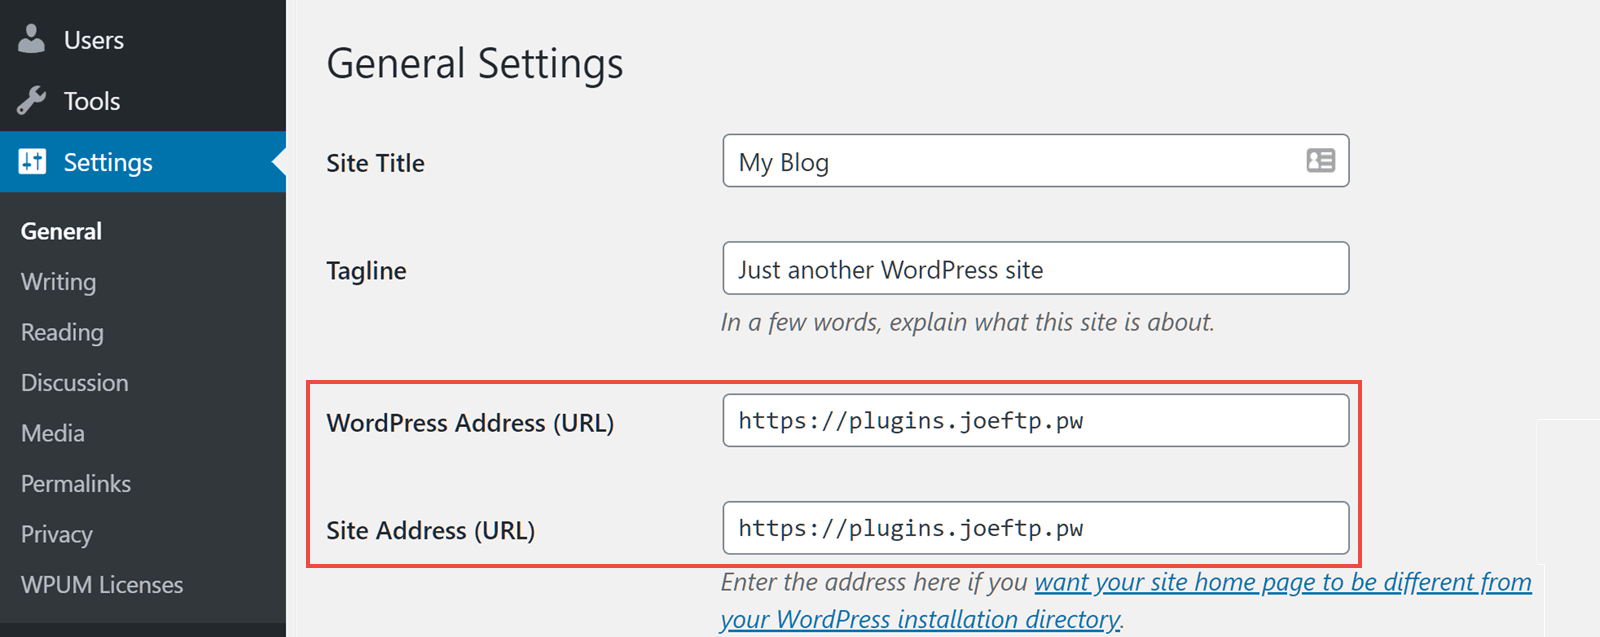
After adding your new domain to WordPress, scroll down the page and hit the Save Changes button.
Depending on your web host, you might now need to replace two references to your domain name in one of the WordPress software files. That file is called wp-config.php, and the two references to your domain name are:
define('WP_HOME','https://www.yourOldDomain.com');
define('WP_SITEURL','https://www.yourOldDomain.com');
To see if this change is necessary, you’ll need to open the wp-config.php file for editing.
One way to do this is to use the file manager app that’s part of the cPanel software often provided by your web host.
If you do have cPanel access on your hosting plan, log in to the cPanel. Once logged in, open the File Manager tool.

Once inside the File Manager software, open the wp-config.php file for your website by selecting the file then clicking on the Code Editor button on the toolbar.
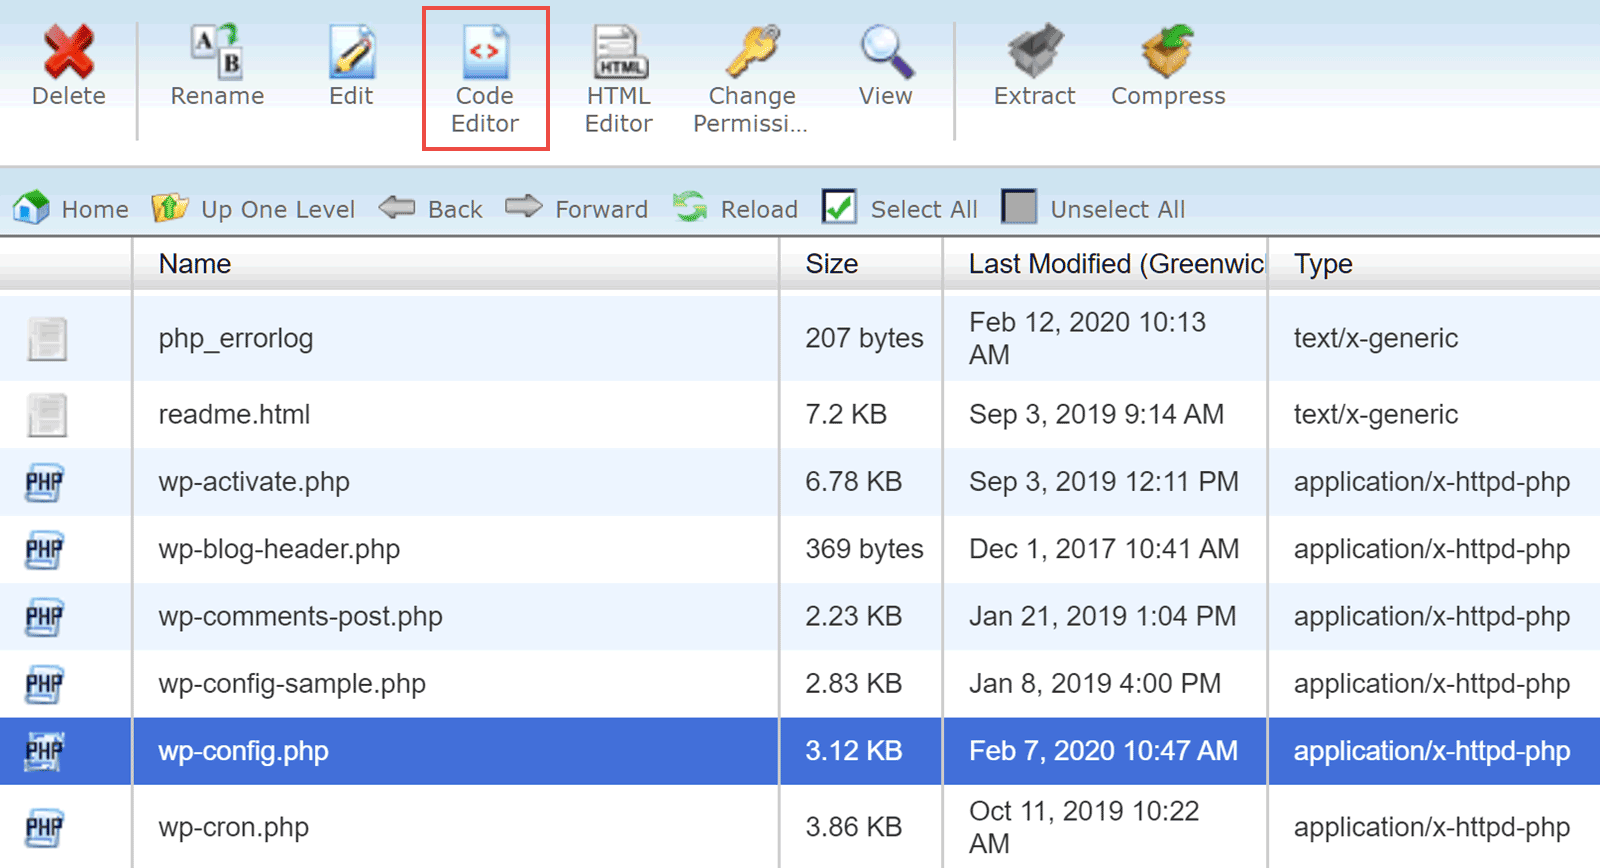
With the wp-config.php file open, search for define(‘WP_HOME, and if you find the following line…
define('WP_HOME','https://www.yourOldDomain.com');
replace the instance of your old domain with the new one. Then search for define(‘WP_SITEURL', and if you find the following line…
define('WP_SITEURL','https://www.yourOldDomain.com');
again, replace the instance of your old domain with the new one.
Remember that you might not find these lines in your wp-config.php file. If you don’t, changing the domain name in your WordPress dashboard as you did in the previous step should be enough.
Update Your WordPress Database
Next up, you’ll need to replace every instance of your old domain in your WordPress posts and pages with the new domain. This should fix any potential issues with internal links or files hosted on your site that reference the old domain name.
Thankfully, you can do this in one go by installing a suitable plugin that allows you to search and replace strings from your WordPress database. An example of such a plugin is the free and popular Better Search Replace extension.
After installing this plugin on your WordPress website, you can use the tool to search for references to your old domain and replace them with your new domain.
As we’re only interested in references to the old domain in posts and pages on your site (the earlier steps took care of other references), just select the wp_posts table (or in the case of the site being changed below, wpvz_posts).
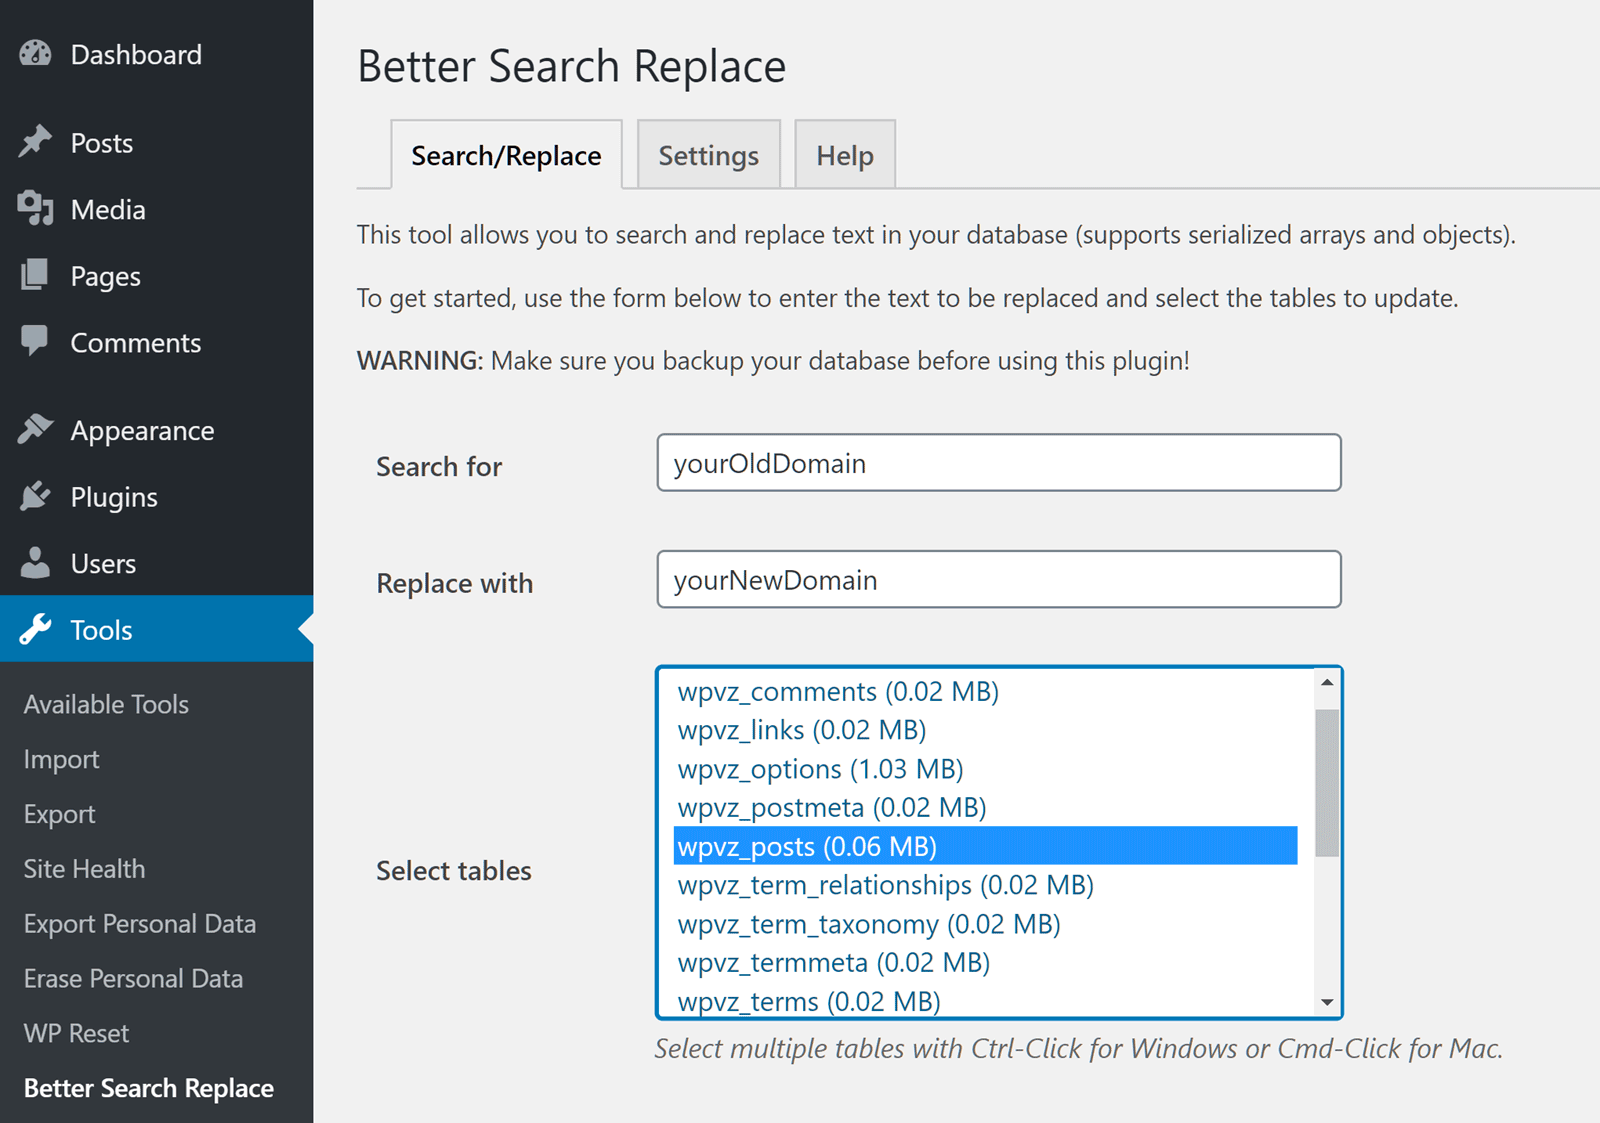
Click the Run Search/Replace button. The first time you run the search and replace, the plugin will perform a dry run. A message will inform you of this, as well as tell you how many instances of the search term were found.
If you’re happy with what you see (such as a good number of cells that need to be changed) uncheck the dry run box and click the Run Search/Replace button again.
Once you’ve run the search and replace for real, it's time to move on to the last step in our guide on how to change the domain name of your membership site without destroying your SEO.
Redirect Your Old Domain to the New Domain
This final step will ensure you don’t ruin the SEO of your membership site and lose out on any traffic from search engines like Google, as well as any other sources of traffic to your site.
To do this, you’ll need to create a 301 redirect for your old domain that points to the new one. To get started, head back to the file manager you were using in a previous step. Once there, you’ll need to find a file called .htaccess and open it for editing.
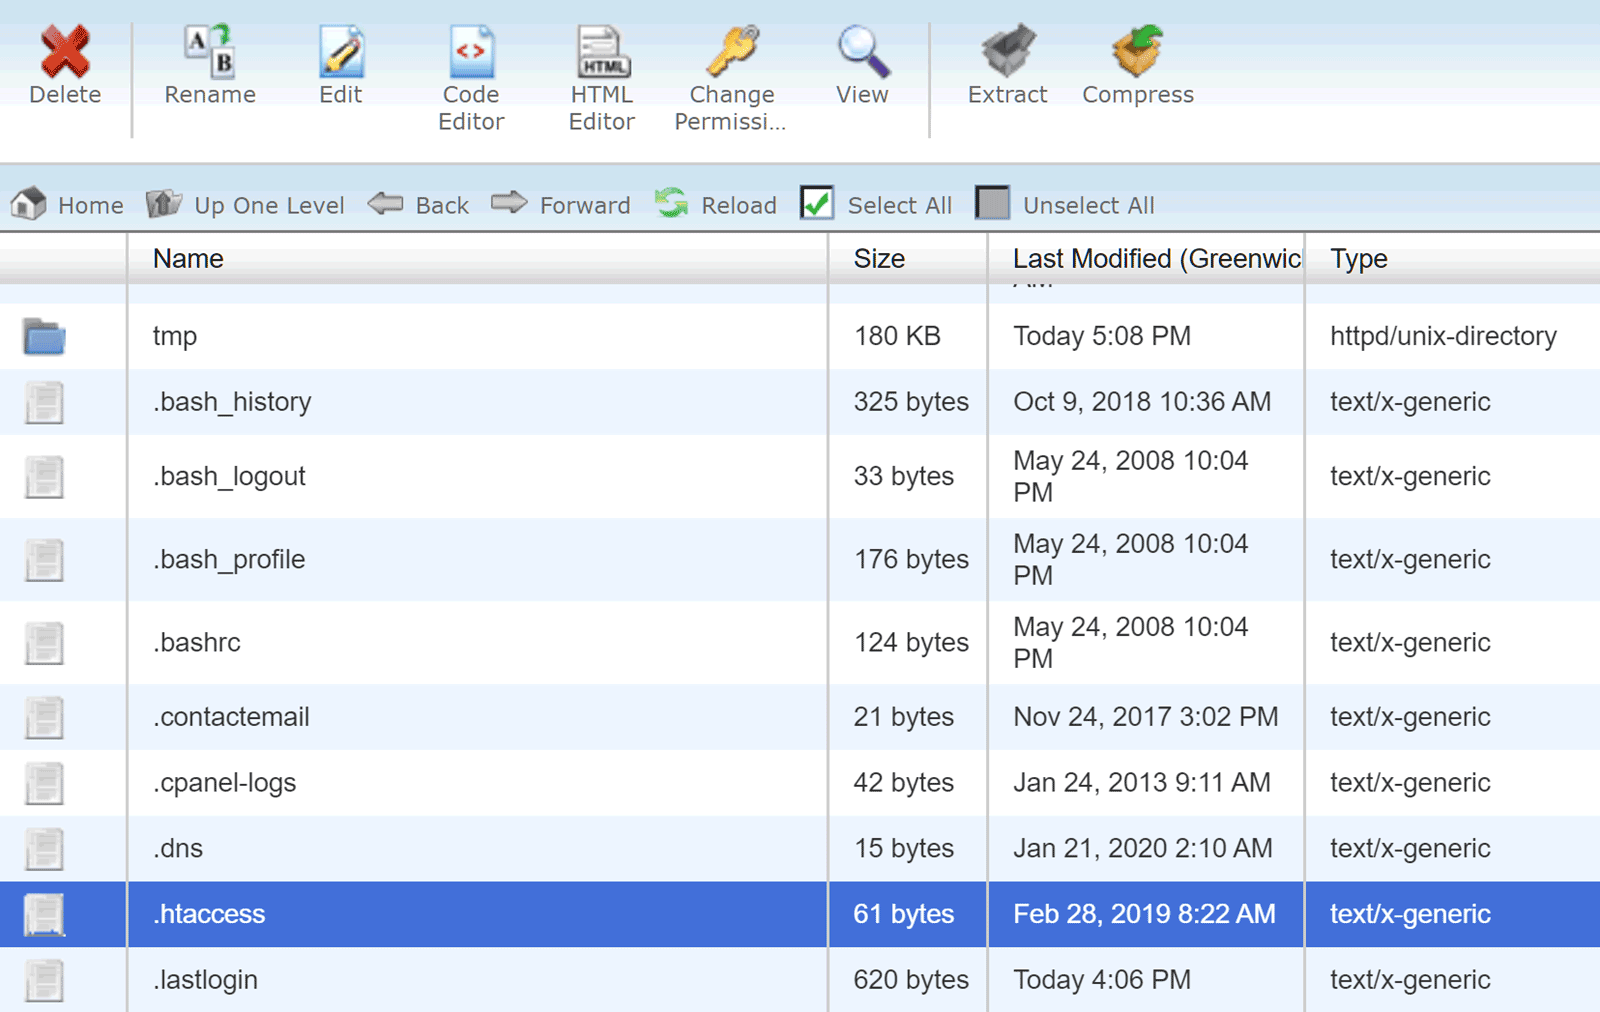
Once you’ve selected the .htaccess file and clicked the Edit button, add these three lines to the top of the file, replacing YourOldDomain.com with your actual old domain and YourNewDomain.com with your actual new domain:
RewriteEngine on
RewriteCond %{HTTP_HOST} ^YourOldDomain.com [NC,OR]
RewriteCond %{HTTP_HOST} ^www.YourOldDomain.com [NC]
RewriteRule ^(.*)$ https://YourNewDomain.com/$1 [L,R=301,NC]
For more information on how this 301 redirect works, please check out this page on .htaccess rules.
Now save your .htaccess file for the changes to be applied to your site.
You can check if everything worked by entering your new domain into a web browser and seeing where it takes you. If your site is displayed, then congratulations, you’ve changed the domain name of your membership site successfully.
If your site isn’t loading as expected, please go through the steps again to check for any mistakes you might’ve made. If it’s still not working, please leave a comment below.
Final Thoughts
There are many reasons why you might want to change the domain name of your website.
However, regardless of your reason, this guide has demonstrated that changing domains isn’t too difficult a task. It shouldn’t take long, and as we’ve just seen, you shouldn’t lose any traffic to your membership site, whether that’s traffic earned from your SEO strategies or other marketing efforts.
Are you ready to change the domain name of your membership site without destroying your SEO? Please let us know your thoughts in the comments below.


What about recurring payment is they still work as before?