A membership site offers you the ability to allow access to content based on membership level. For instance, a bronze level membership may provide access to an in-depth article, while a gold membership includes a video series on the topic as well.
But, what if you want to protect content based on other criteria?
This may be especially helpful if you’re using third-party integrations with your website. Thanks to MemberPress roles and capabilities rules, you have more control over your content. You can restrict access to any piece based on your chosen parameters with just a few clicks.
In this article, we’ll walk you through how to protect content based on roles and capabilities with MemberPress. We’ll also explain what roles and capabilities are, and cover a few reasons why you may want to use this feature. Let’s get to it!
An Introduction to WordPress Roles and Capabilities
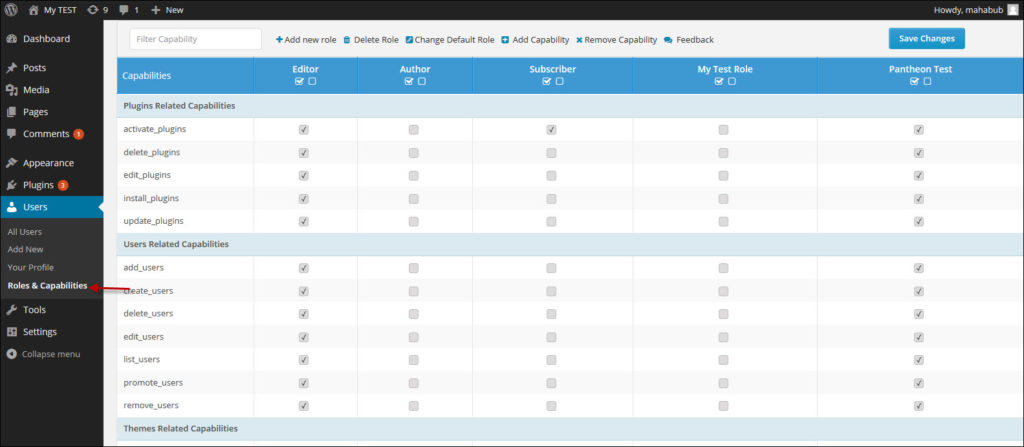
Roles and capabilities are built into WordPress and enable you to control users' privileges. If you’ve used WordPress for any amount of time, you’re probably familiar with its default roles. These include:
- Administrator: Has unlimited permissions, including installing and activating plugins and themes.
- Editor: Can make changes to their own posts, and those of other users.
- Author: Is able to write and publish their own posts.
- Contributor: Can write (but not publish) their own posts.
- Subscriber: Only has permission to read posts.
Roles operate as a hierarchy. A Subscriber has the least amount of privileges and the most limited access. Each successive level has the capabilities of the role beneath it, plus additional privileges and access. A WordPress Administrator has full privileges and access.
You can use these WordPress roles to control access to content on your MemberPress membership site:

A WordPress capability is a task that a user can perform. Capabilities are hidden in WordPress and operate based on the roles they’re attached to. They include operations such as edit a post, add a page, or delete a user.
Although many membership site owners protect content based on membership, there may be instances where you want to protect it based on WordPress roles or capabilities instead. For example:
- A third-party plugin may automatically create additional WordPress roles for which you’d like to grant specific access.
- All users with the capability to edit posts might need access to a page with confidential or proprietary information.
With the MemberPress Rules function, you can easily protect any content on your site using the parameters that make the most sense for the situation.
How to Protect Content Based on Roles and Capabilities with MemberPress (2 Methods)
In most circumstances, you’ll protect your site content based on membership designation. However, if you do find it necessary to protect content based on roles or capabilities, MemberPress gives you the flexibility to do so. Here’s how.
Method 1: Protect Content Based on a Role
If you haven’t already done so, create the content you want to protect.
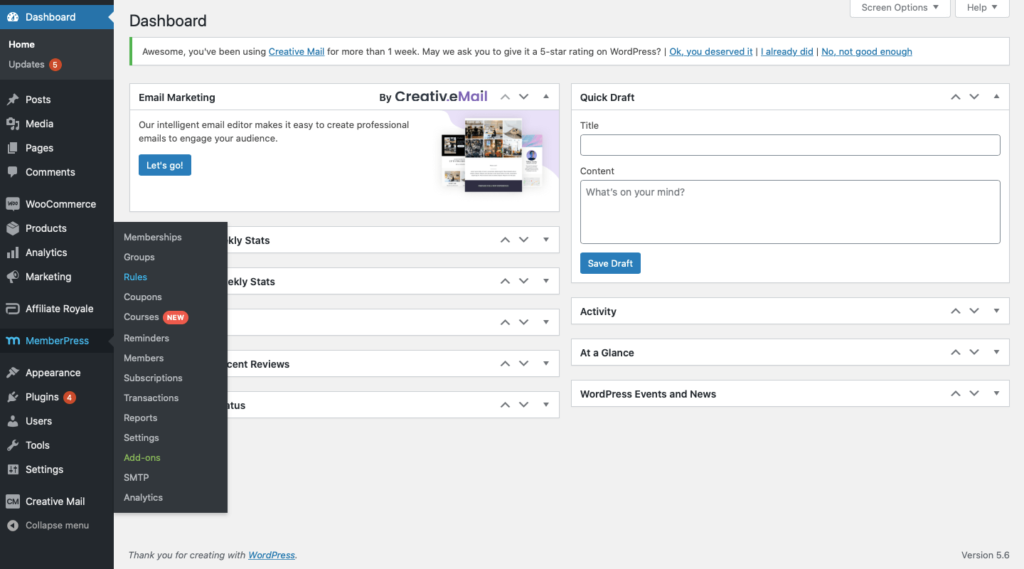
Next, from your WordPress dashboard, go to MemberPress > Rules > Add New:
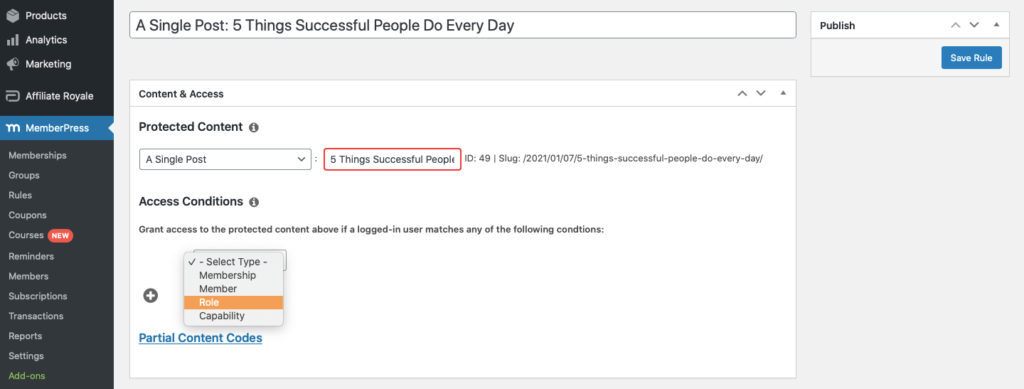
Under Protected Content, select the post or page you want to protect. In the Access Conditions menu, select Role:
Once you do, a dropdown menu will appear to the right. From it, select the specific role you want to allow access to:
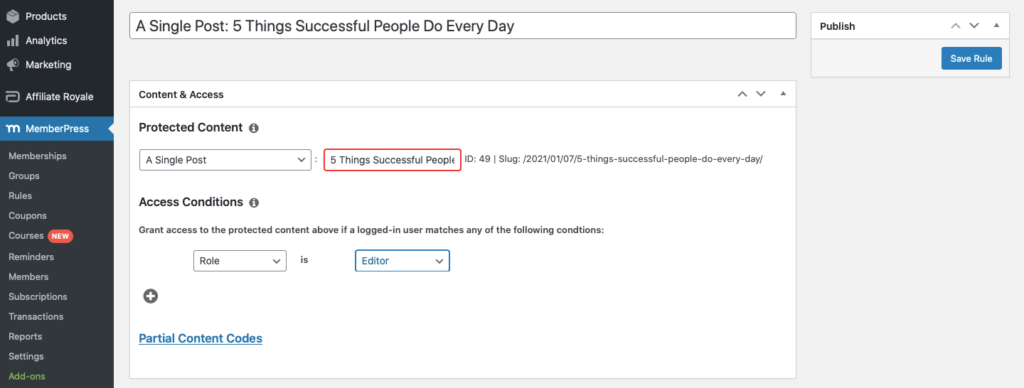
If you have third-party plugins that automatically create WordPress roles, you'll notice these are listed here in addition to the default WordPress roles of Administrator, Editor, Author, Contributor, and Subscriber.
For example, WooCommerce adds the roles of Customer and Shop Manager to WordPress. If you wanted to create content and make it visible only to those who have purchased products from you, you could use a role-based rule to do so.
You can also add additional rules to any piece of content by selecting the Plus (+) icon under Access Conditions. This gives you the ability to completely customize your permissions.
Method 2: Restrict Content Based on a Capability
Create the content you want to protect, then go to MemberPress > Rules > Add New as we described above.
Under Protected Content, select the content you want to protect. Go to Access Conditions and select Capabilities:
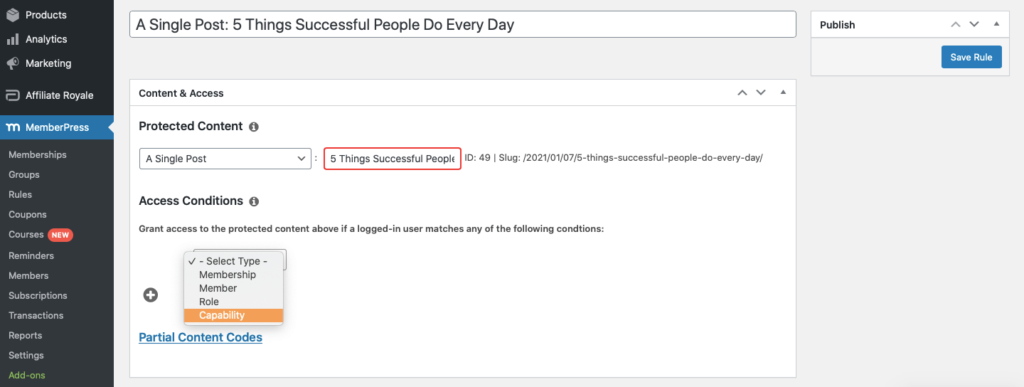
In the field that appears to the right, type the function for the capability you want to grant access to. Any user with that capability will be allowed to access the content:
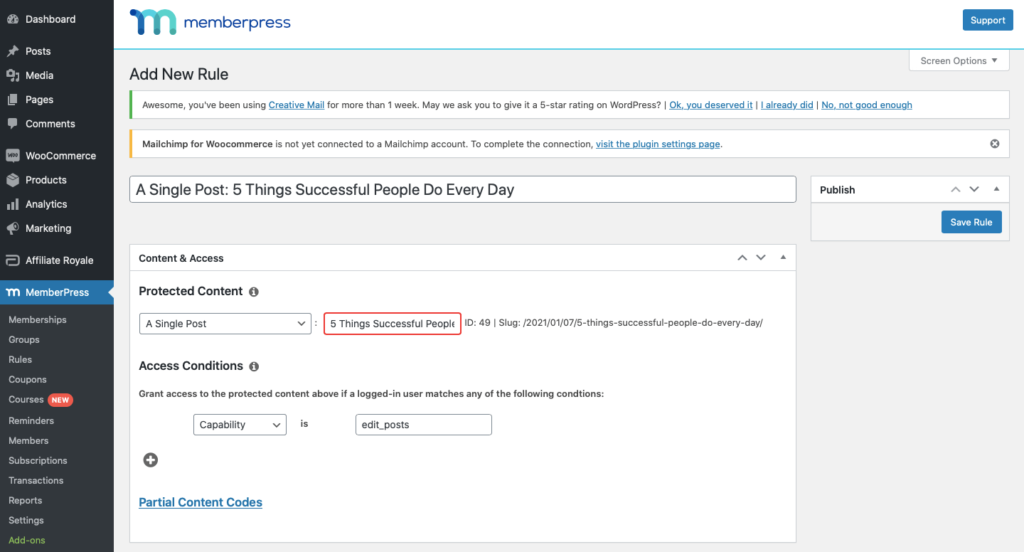
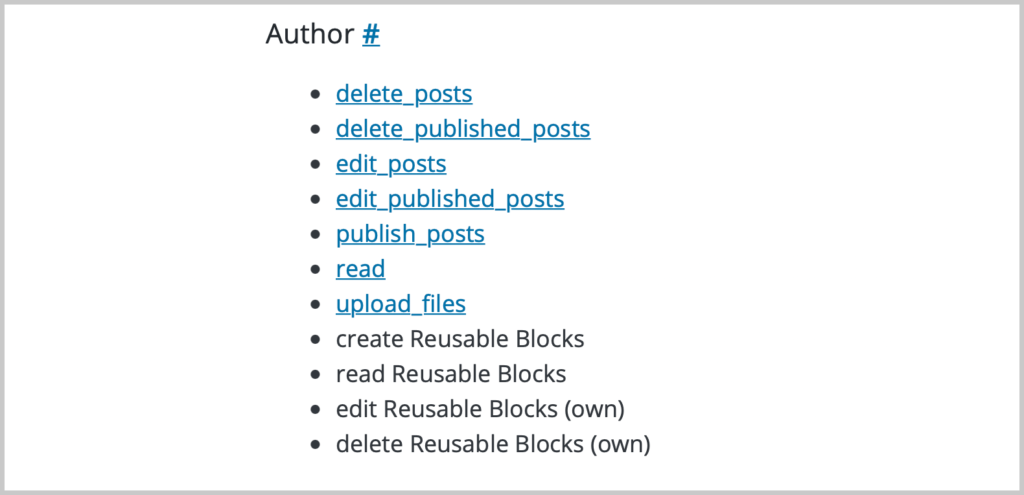
You can find a list of default capability functions in the WordPress Codex. To create a rule based on capabilities, you must type the capability name in the same format as it is listed in the WordPress Codex:
You can add additional rules to any piece of content by selecting the Plus (+) icon under Access Conditions.
Conclusion
Generally, you'll protect content on your membership website based on membership tiers. However, there may be instances where it’s helpful to protect content based on a WordPress role or capability.
MemberPress gives you the flexibility and freedom to create these rules and control your content in the way that makes the most sense for your site.
In this article, we discussed the Roles and Capabilities rules feature of MemberPress. We shared a few reasons you may want to use these options, and showed you how to add these rules in a few simple steps.
Do you have any questions about protecting your content based on roles or capabilities? Let us know in the comments section below!
If you liked this article, be sure to follow us on Facebook, Twitter, Instagram, and LinkedIn!




Add a Comment