« Configuring the Marketing Tab
Step 1 – Download the MailPoet plugin
Download and Install the MailPoet Newsletters plugin from WordPress.org.
NOTE: To enable enhanced features, you can purchase the MailPoet paid plugin.
Step 2 – Configure MailPoet settings
Go to your WordPress dashboard and navigate to MailPoet > Settings.
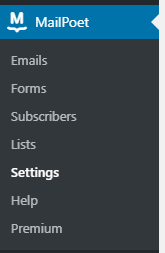
Complete the Settings page.
Step 3 – Install the MemberPress MailPoet Add-on
From your WordPress Dashboard, head to MemberPress menu > Add-Ons, and click to install the MailPoet add-on. After you activate the plugin, you’ll see the MailPoet integration available in the “Marketing” tab of the MemberPress Settings page.
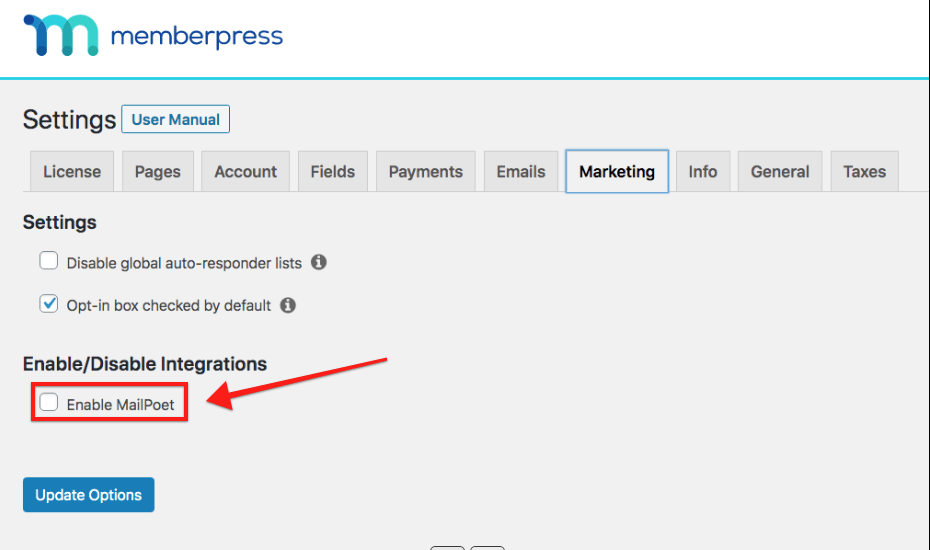
Step 4 – Select an Email List
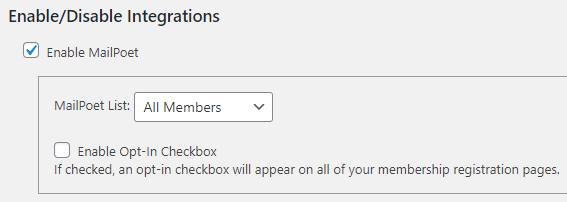
Once MailPoet is enabled, MemberPress will connect with the plugin, and you should see and select your list from the drop-down menu as shown below:
Global Lists
Once you’ve completed the steps above, MemberPress will automatically add the email address for everyone who signs up through your membership registration form to your Global email list in MailPoet by default. MemberPress never removes a user from the Global list.
Step 5 – Setup Per-Membership lists (Optional, but STRONGLY recommended)
Per-Membership lists allow you to automatically segment your members into different lists for marketing purposes.
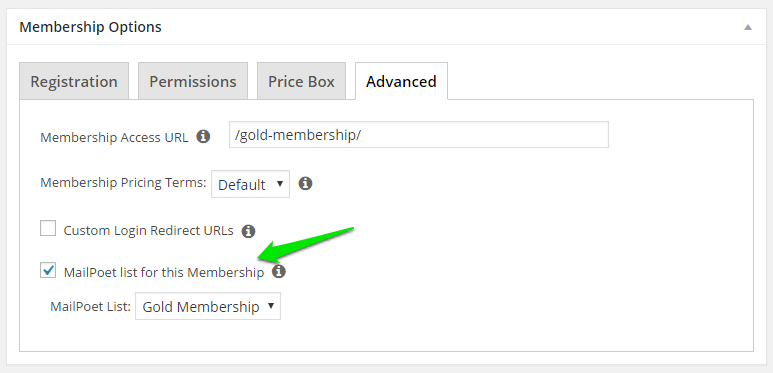
When MailPoet is enabled, you’ll see a new option available under the “Advanced” tab of the Membership edit pages. This option allows you to select a list that only members who purchase that Membership will be added to. Members will be automatically added to or removed from this list depending on their current subscription status for that Membership. This list must be different from the Global list you have specified in the Options and should be different from other Per-Membership lists as well.
Here’s how to enable and set up your Per-Membership lists:
Step 6 – Configure the Signup Confirmation Settings
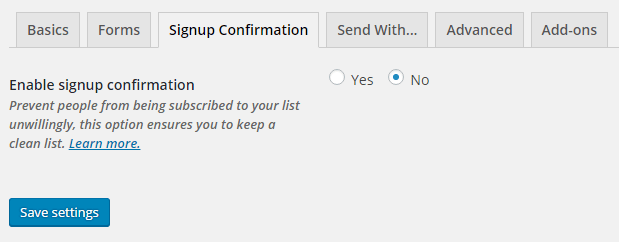
Login to your MailPoet account, navigate to the “Sign Up Confirmation” tab, and set Enable signup Confirmation to No, as shown below.
NOTE: If you’re using the MailPoet paid version sending service, this may not be an option for you. That’s because the Signup Confirmation is required when using MailPoet’s Sending Service. To avoid it, you’ll need to switch MailPoet to a manual SMPT sending service like SendGrid, MailGun, or Amazon SES.
This concludes all the necessary steps needed for this integration.
In case you need to approve members manually
MailPoet requires a double opt-in confirmation by default.
However, in certain situations, that might not be possible. For example, some government officials can’t access the internet via outside links and can’t access their emails from home. In such a case, go to the subscriber’s page in MailPoet, select the person whose subscription needs to be confirmed, click edit, and change the drop-down box from Unconfirmed to Subscribed.
That setting is accessible from your WordPress Dashboard > MailPoet > Subscribers section.
I’m confused. Help!
Shoot us an email from our support page if you need any further assistance with this integration.


