If you’re a designer, you probably put a lot of energy into your craft and have little time for business strategy. Setting up a monetized membership site can be an effective way to sell your work. However, this task may seem too daunting.
Fortunately, the process doesn’t have to be complicated. By focusing on the most essential parts of a membership website, you can start reaching enthusiastic audiences and boosting your sales.
In this article, we’ll cover the reasons you might want to set up a website to sell your design services. Then we’ll show you how to start a graphic design business online with MemberPress in 3 steps.
How a Membership Site Can Benefit Designers
When it comes to selling your design work, you have a lot of options for where to promote it, including social media platforms. However, the competition there can be stiff.
For instance, nearly 17 million creators use social media to sell their work in the U.S. alone. That means you might want to look for a more specialized way to profit from your skills.
An online agency built on MemberPress could be the perfect option. Take CH Creative for example – an online creator who provides design services ranging from single web pages to total custom CMS design.

CH Creative uses MemberPress to power subscription plans. They name these the Starter Landing Page, Pro Website, and Custom CMS Design packages.
With an online agency like CH Creative's, you can still use social media to promote your services, but you can also branch out into affiliate marketing, display advertising, and a whole lot more.
Fortunately, setting up a membership site like CH Creative's can be a straightforward process. With a little bit of time and the right tools, you can build a powerful site and start sharing your services with more consumers.
How to Start a Graphic Design Business Online (In 3 Steps)
Before we get started, make sure you have a WordPress site up and running. It doesn’t need to be fancy – as long as you have the basics, this walkthrough will help you do the rest.
You'll also want to choose a theme for your WordPress site. Fortunately, you've got lots of incredible options.
Once your WordPress site is all ready to go, it's time to create your design business and community!
Step 1: Add MemberPress to Your WordPress Website
MemberPress is a powerful tool to help you sell membership access to your content. To help business owners and creators, we’ve made sure our plugin is user-friendly and easy to set up.
That means you can focus more on producing artwork and less on learning the technology you need to sell it.
First, you’ll want to choose a pricing plan. If this is your first membership site, our Launch plan might be a perfect fit. However, you might want to consider the Growth plan if you’re more experienced and are looking for extended features.
Once you’ve made your choice, purchase your product and download the zip file. You’ll also want to make note of your license key for later.
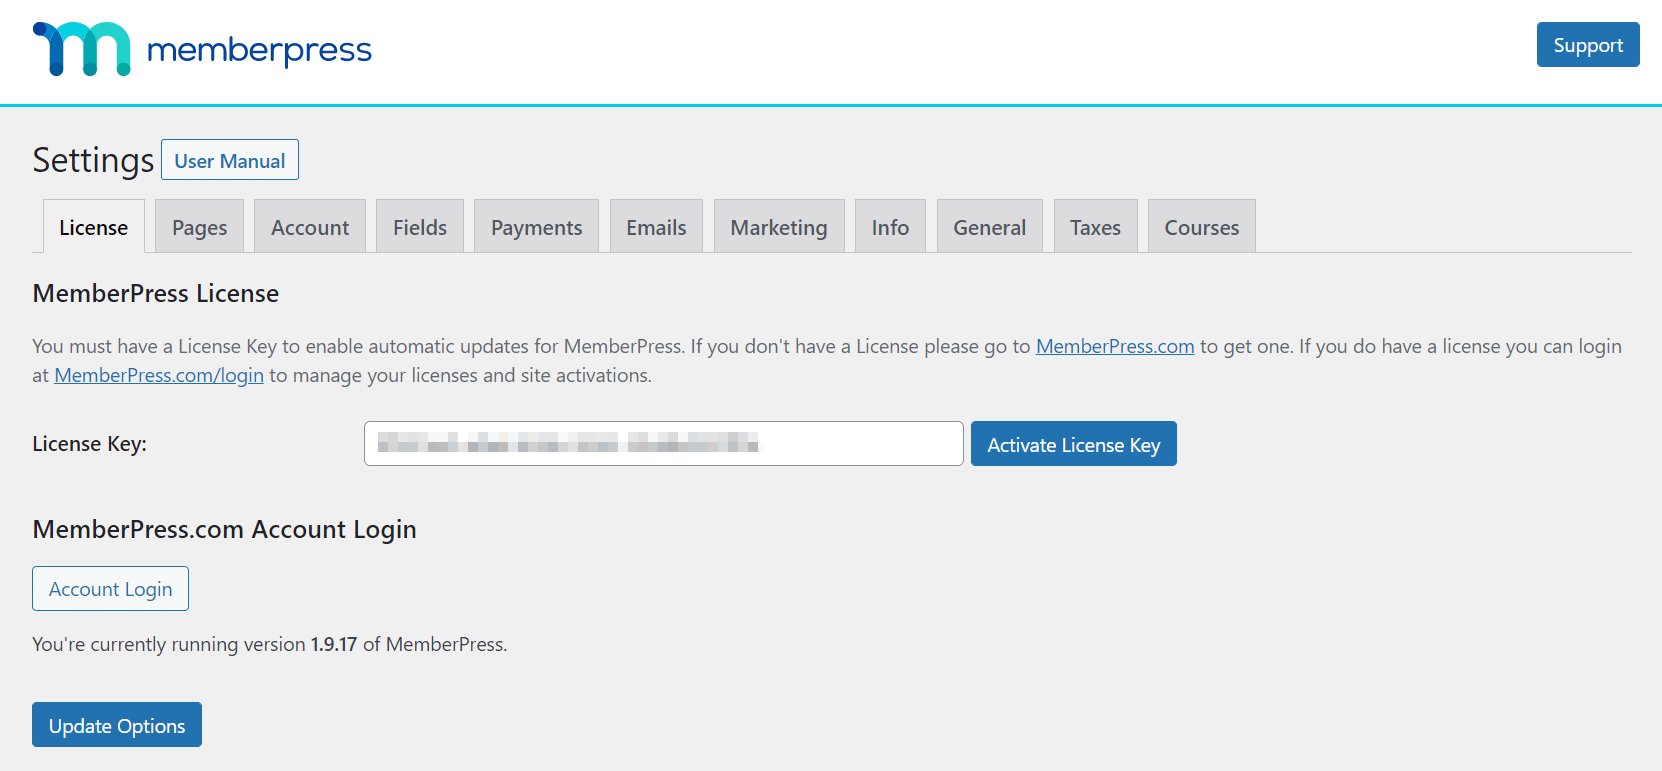
Next, navigate to your WordPress dashboard. Select Plugins > Add New > Upload Plugin. Click Choose File from the dialogue box and select Install Now to upload the MemberPress zip file:
After the upload is completed, navigate to MemberPress > Settings > License. Enter the license key you saved earlier in the field below and click on Activate License Key:
That's it – the setup is complete. From here, you can start customizing MemberPress to fit your needs. Feel free to take a moment and explore the plugin before you move on.
Step 2: Create Membership Options for Your Fans
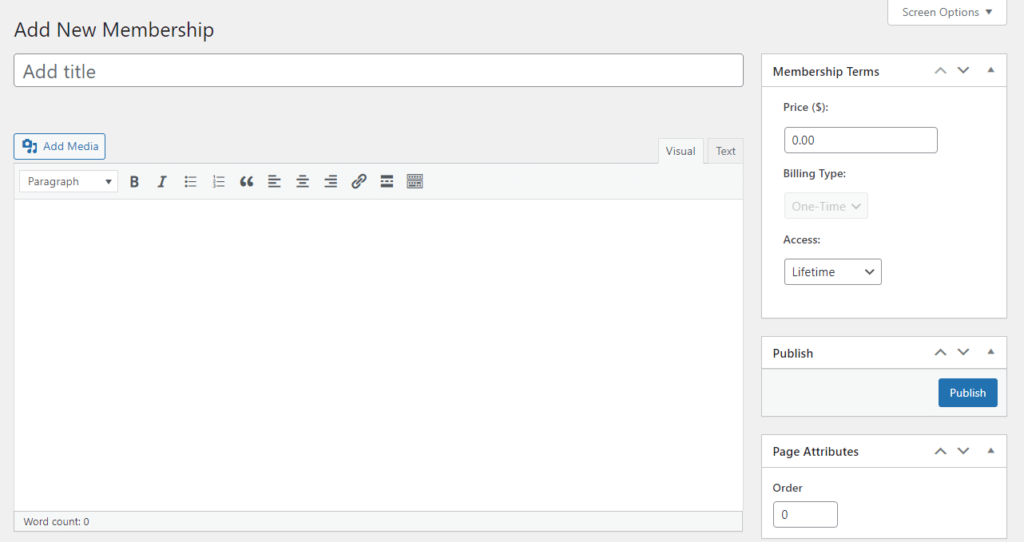
Now you can start making membership options available to your users. To get started, navigate to MemberPress > Memberships > Add New:
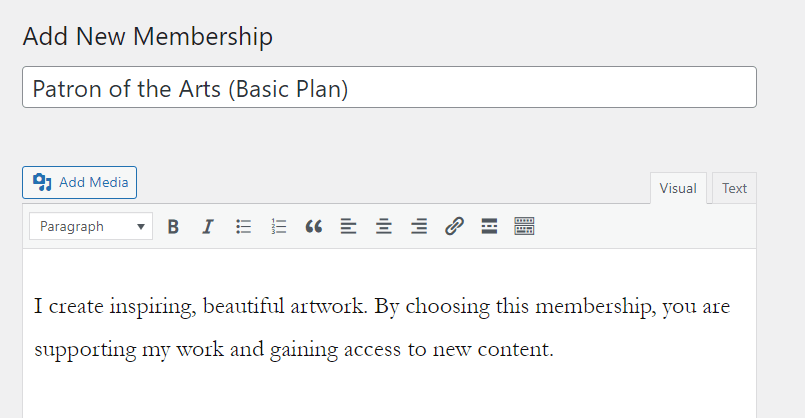
You can begin by adding the title and entering a brief description:
We recommend that you try to write powerful sales copy to increase your chances of conversion. Additionally, you might want to consider using the Add Media button to provide an example of the features or products this membership will unlock.
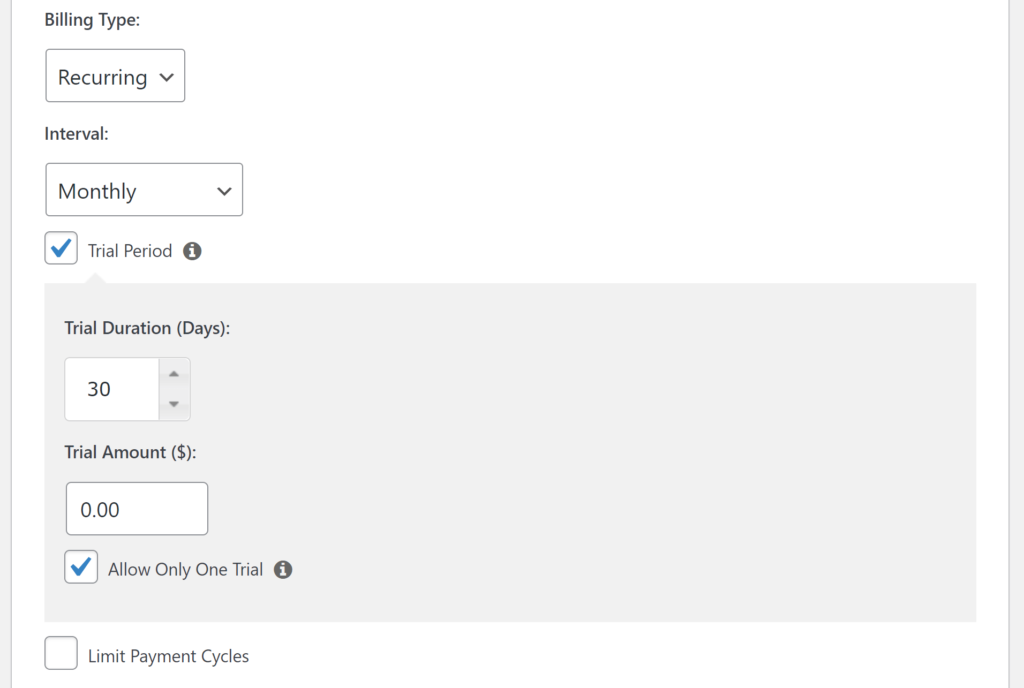
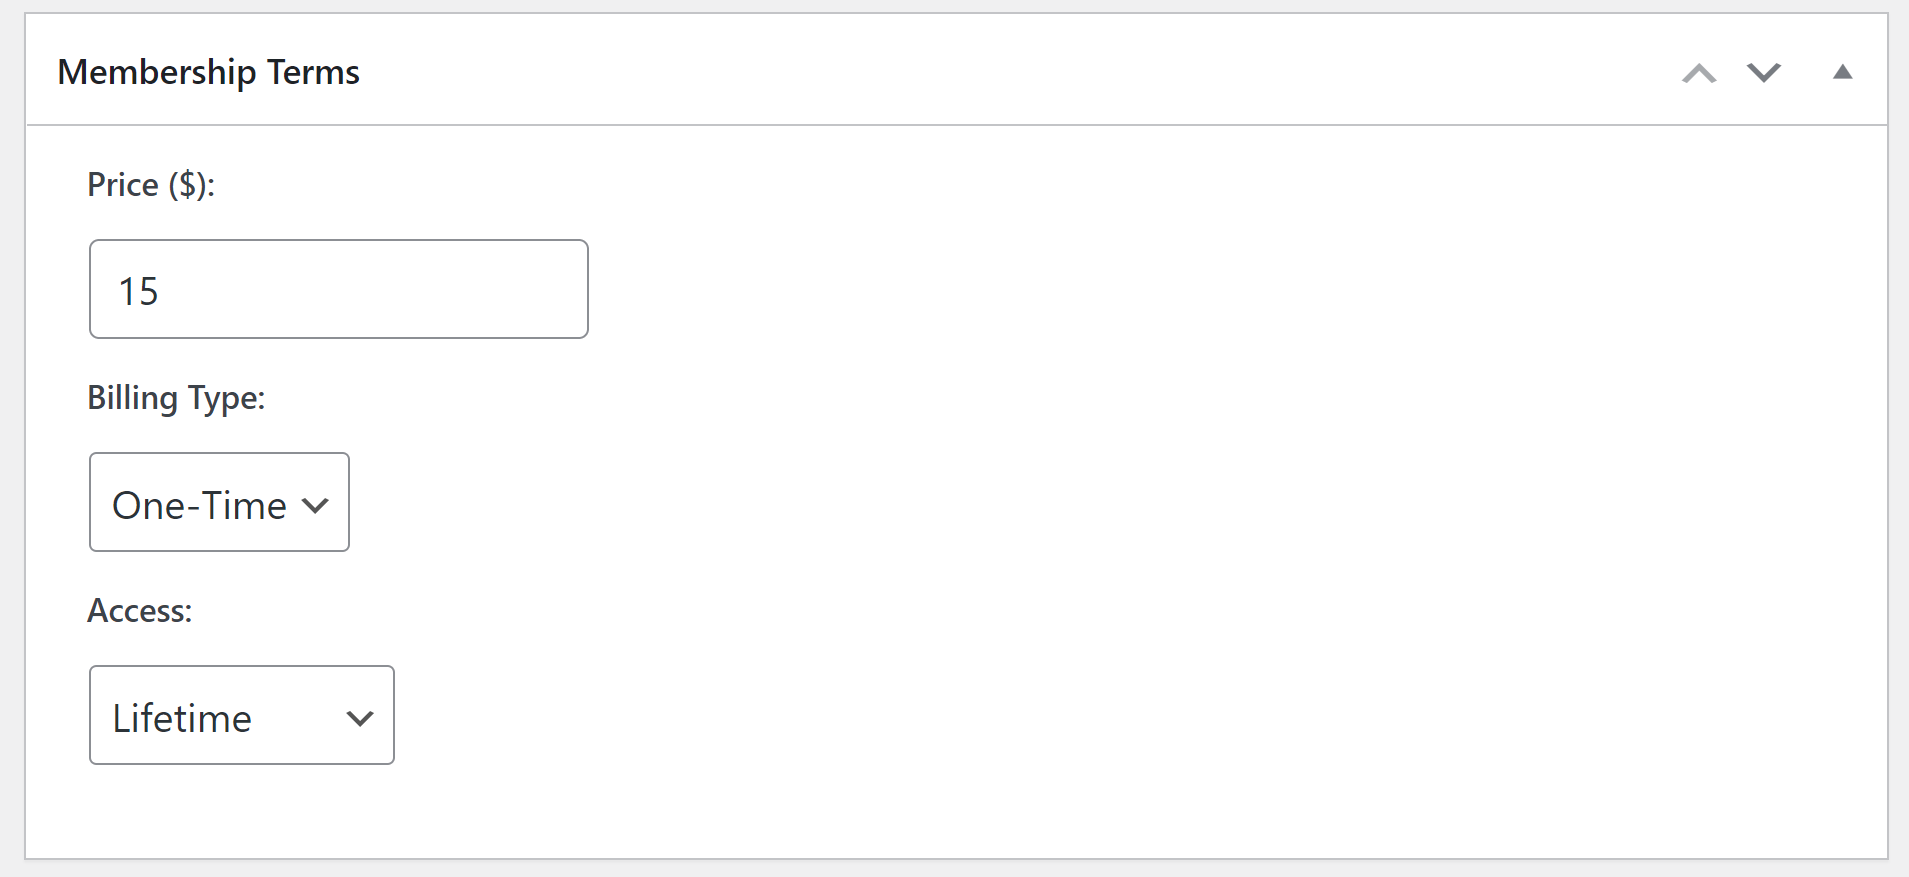
Afterward, move over to the Membership Terms module. First, set your price. If it will be a one-time payment, select that category from the Billing Type drop-down menu. You can then decide if it’s a lifetime membership, or if access will expire on a certain date:
You can also choose a recurring membership, which can help keep your fans engaged. To do this, select Recurring from the Billing Type menu.
After that, you’ll be able to choose the membership charge interval. You can also opt to offer a trial period or limit payment cycles:
Lastly, we'll look at Membership Options. This section enables you to customize the administrative needs of a membership.
For example, you can personalize the registration button, design a unique thank you page, and limit who can sign up for memberships.
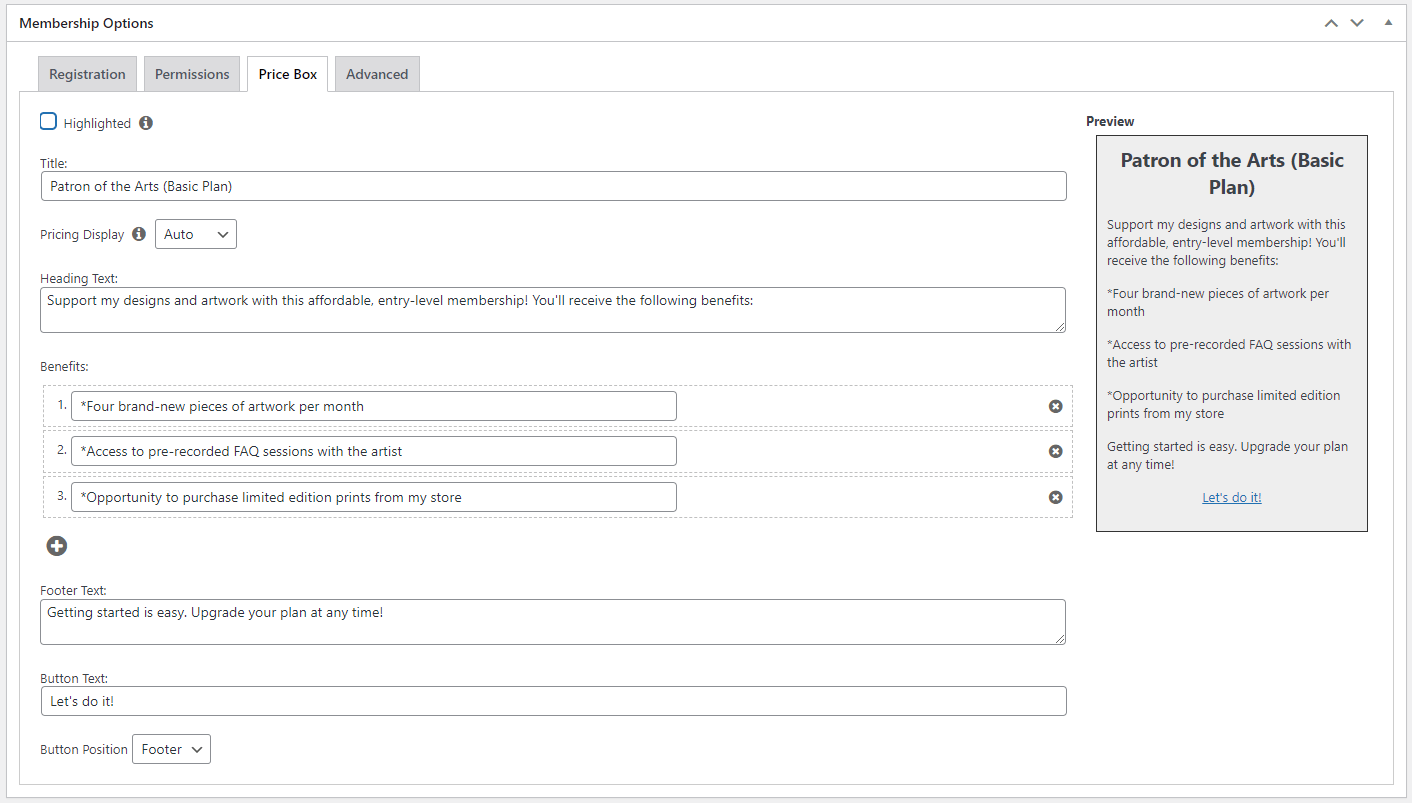
For now, we’ll focus on the Price Box. Fill in the fields to the left as applicable. This will also generate a preview on the right:
A price box can be a powerful visual tool for presenting your memberships. So it might be worth spending some time to perfect it. Save your work by clicking the Publish button. You can repeat the above steps for as many membership plans as you need.
Step 3: Add Advanced Features
Once you have the basic memberships set up, you can add more features. This can enhance the experience for your users and help increase your conversions.
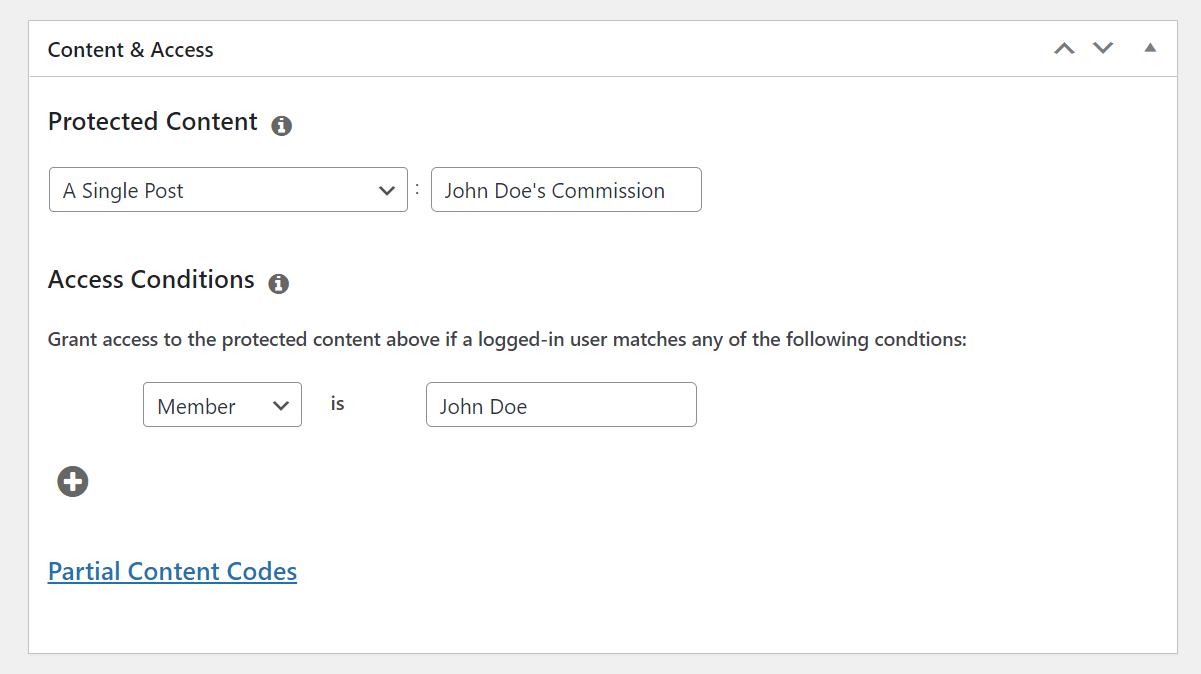
Let’s start with the Rules option. With this setting, you can obtain control over what users can view on which pages. Go to MemberPress > Rules > Add New, and scroll down to the Content & Access module.
For instance, you may want to enable only the person commissioning a campaign to view a particular post.
For our example, we'll select A Single Post and enter the post’s title next to it. Then we’ll add an access condition that only enables John Doe, a single person who already has a membership, to view it:
With this granular control over posts, you can personalize the user experience for individual members. Additionally, this can be an effective way to boost your revenue beyond existing memberships.
If you're looking for another way to boost your conversions, you might want to consider using our Courses add-on.
For example, an online course can serve as a great format for new client onboarding. Think about it. Bringing a new client on board usually means a seemingly endless, scattered exchange of emails and contracts.
Instead, you could integrate everything into an engaging, easy-to-understand process. In MemberPress Courses, you create “Lessons” right in the WordPress block editor. That means you can do things like add downloadable documents (such as contracts) to your lessons…
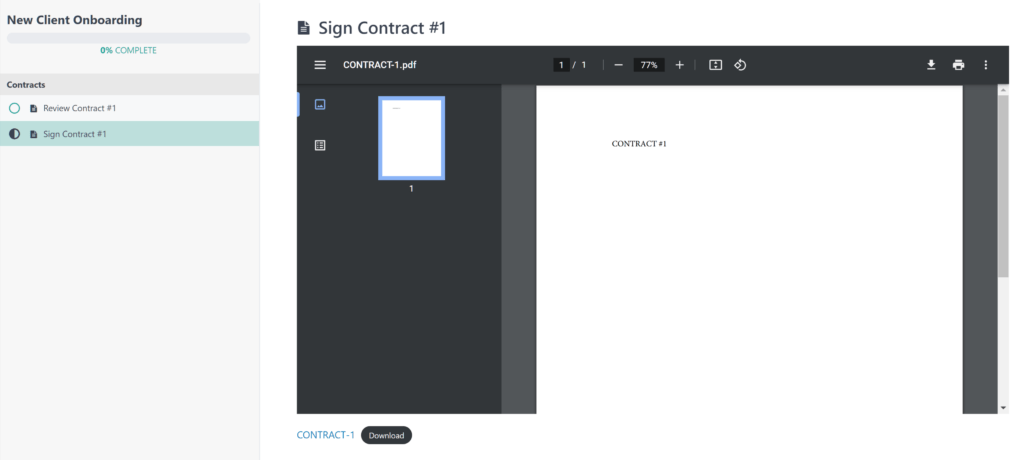
In this way, “lessons” operate more like tasks in the onboarding process.
Our Courses add-on integrates directly with the MemberPress plugin and is included with all plans – Launch, Growth, and Scale. Check out this tutorial video to learn more:
Conclusion
Membership sites can be a profitable investment for your creative business. However, setting one up can seem tough. Fortunately, the process is simple with the help of powerful tools and strategic design.
In this article, we showed you how to create a graphic design business online in 3 basic steps:
- Add MemberPress to your WordPress website.
- Set up basic membership options.
- Explore more advanced features, like MemberPress Courses, to provide more value to your clients.
Do you have any questions about setting up a membership site to sell design services? Let us know in the comments section below!
If you liked this article, be sure to subscribe to the MemberPress blog!





Thanks so much for the shout out to my business in this article! I actually am using Memberpress for Learn English with Camille to sell her course and for one of my clients LONGevity Fitness Community to manage their fitness membership subscriptions. Thanks for creating a great product to help me and my clients. ????✌
You’re welcome, Calvin 🙂