A contact form is an essential part of any website. But when it comes to interactive websites, such as membership sites, a contact form is even more vital. Furthermore, if your goal is to generate revenue from your site, a contact form becomes increasingly important.
In this guide, we’ll show you how to quickly and easily add a contact form to your WordPress membership website for free. After following these steps, your site visitors will be able to get in touch and ask questions about your membership site or send you messages on any topic they like. This channel of communication should give you a good opportunity to deal with any pre-sales queries from potential members and turn more of your visitors into paid-up members.
We’ll also give you a few tips on ways you can help your visitors help themselves in order to reduce the number of unnecessary emails you receive as well as some advice on managing messages from visitors and members more efficiently.
How to Add a Contact Form with WPForms
One of the best tools for adding contact forms to WordPress websites, including membership sites, is WPForms. The free version of this popular plugin provides you with everything that’s needed to quickly and easily add a fully functioning contact form to a WordPress website.
If you have more advanced needs, or your needs grow over time, there are paid upgrades available to unlock the features that make WPForms one of the most powerful form builder plugins for WordPress. So whatever your online form requirements, WPForms comes highly recommended due to its range of features and ease of use.
Although WPForms is one of the most straightforward form plugins for WordPress, our guide will now walk you through all the steps to ensure you’re able to add a contact form to your site. If you follow along, you’ll have a fully functioning online contact form up and running on your website in just a few minutes
Installing the Free WPForms Online Form Builder Plugin
As the free version of WPForms is available from the official WordPress Plugin Directory, it can be installed on your website in just a few clicks. Simply log into your WordPress dashboard, navigate to the Add New Plugins page and then search for WPForms.
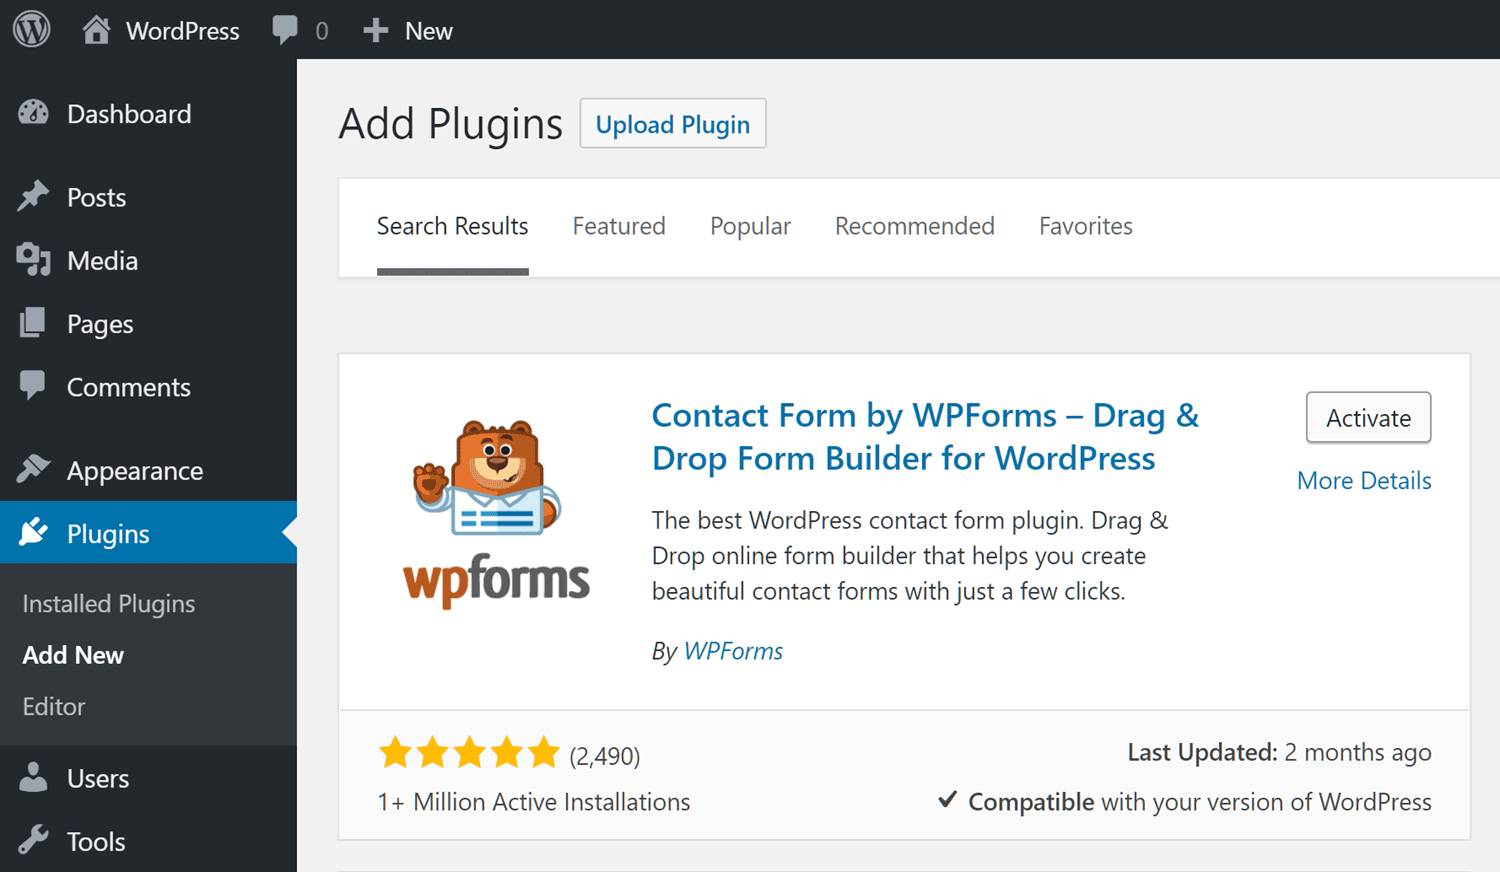
After clicking on the Install Now and Activate buttons, WPForms will be running on your WordPress website.
Creating an Online Contact Form with WPForms
To help you get started, a Welcome page is displayed with a video tutorial that will walk you through the process of creating your first online form. If you have time, the video is a great resource that will get you up to speed with WPForms. But if not, simply scroll down the page slightly, and click on the Create Your First Form button.

Although there are a few different WPForms online form templates, the Simple Contact Form template is the best option for our purposes today.
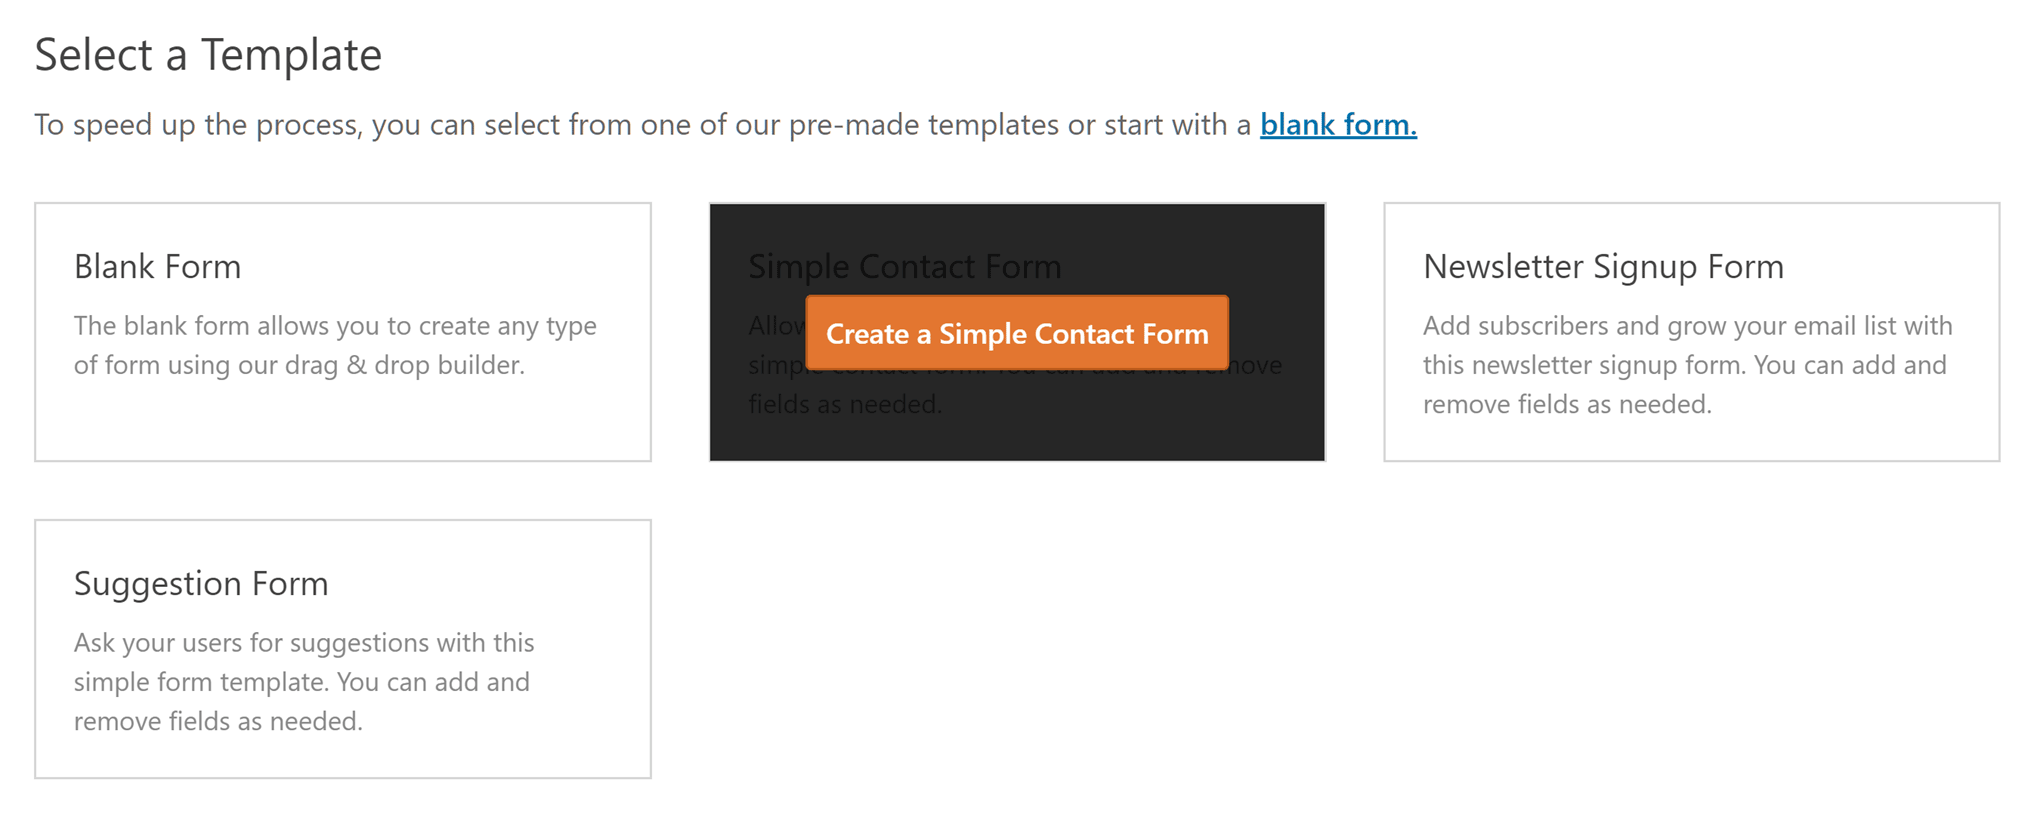
Once you’ve chosen the appropriate template, you’ll be able to customize it through the WPForms drag-and-drop form editor.
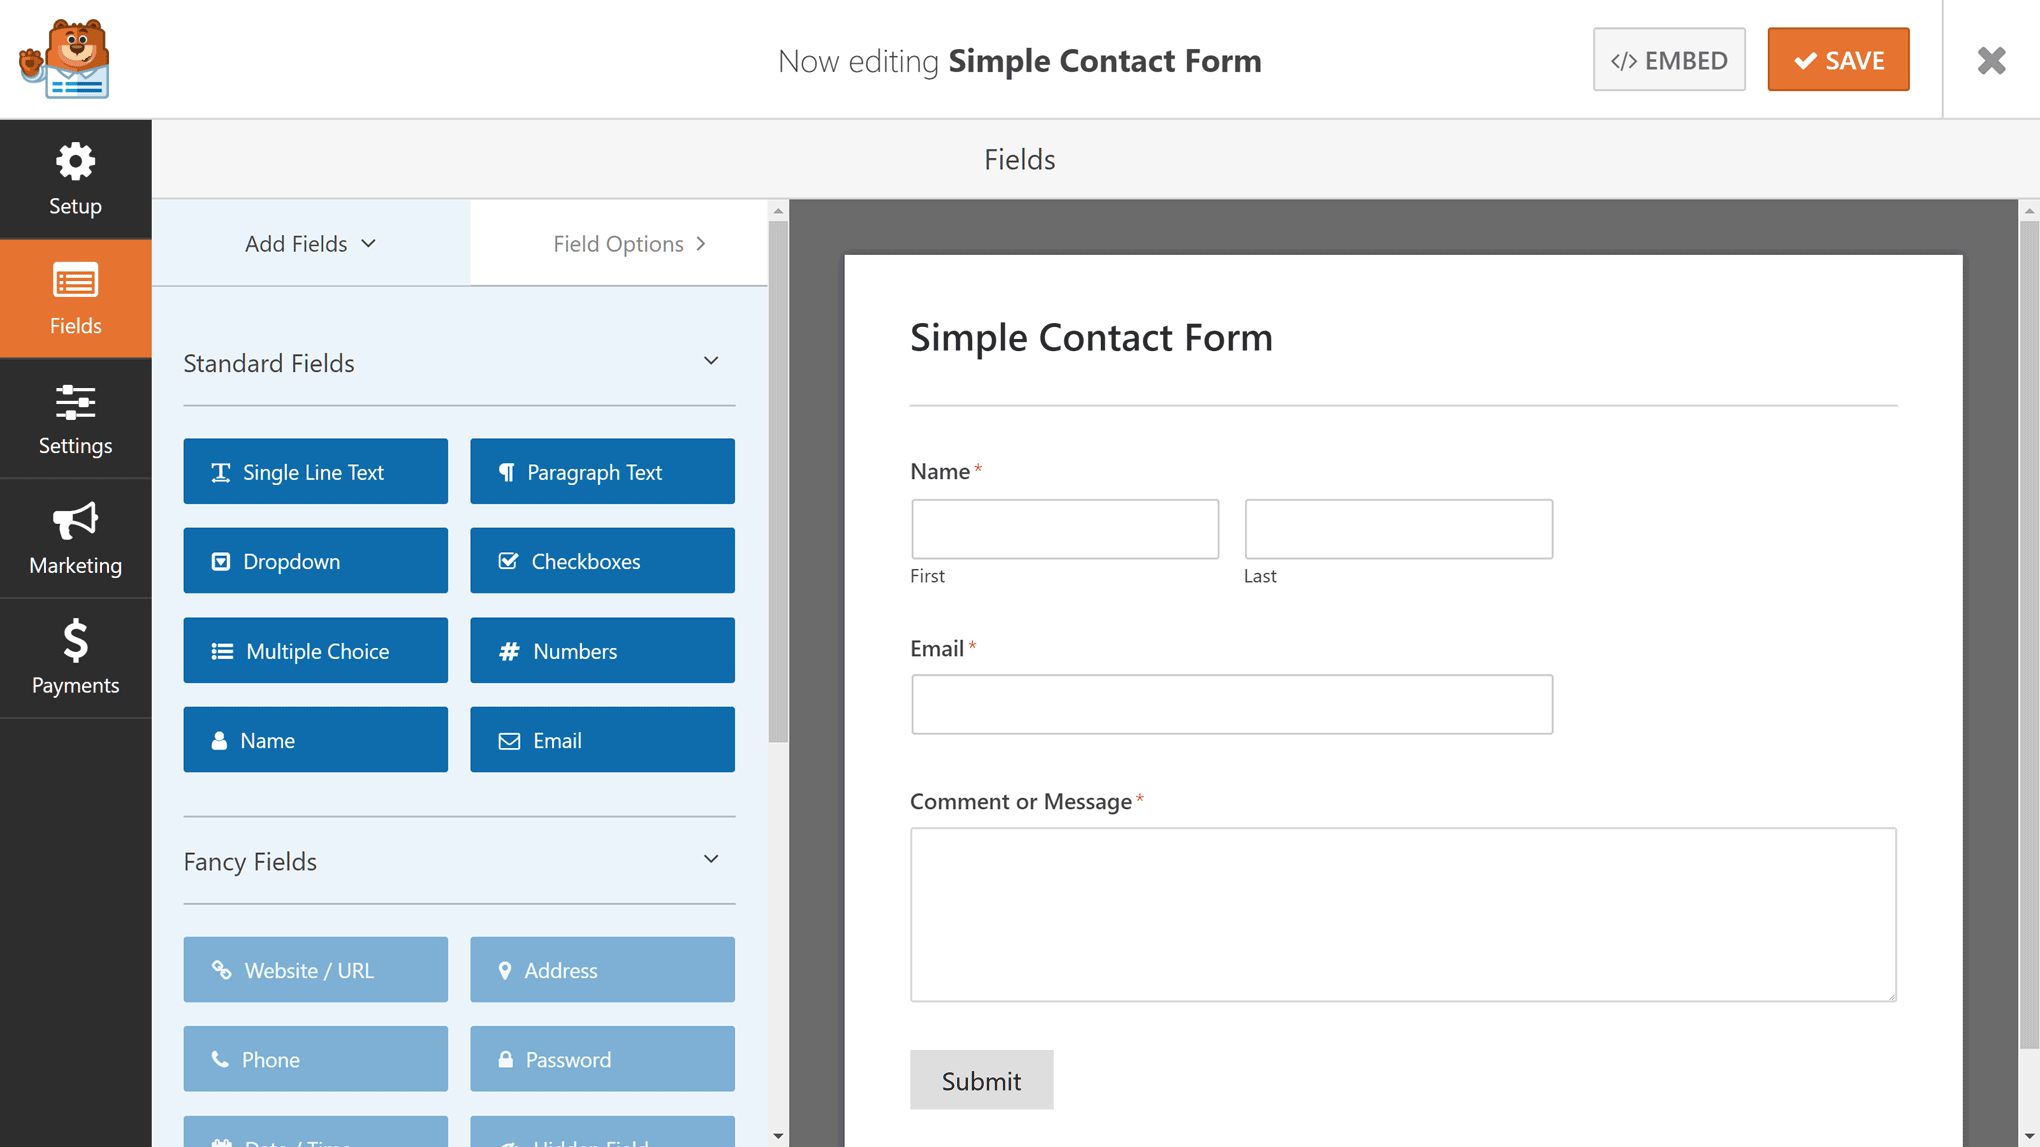
As you can see, the Simple Contact Form template includes name, email, and message fields. However, thanks to the intuitive form builder interface of WPForms, you can easily add more fields to the form. Although most of the form fields are reserved for the paid versions of WPForms, you can still add a range of useful fields to your form, such as single line text, paragraph text, checkboxes, dropdown, multiple choice fields, and more. As WPForms has its own custom drag-and-drop user interface, you can simply drag a field onto the form layout and drop it into place.
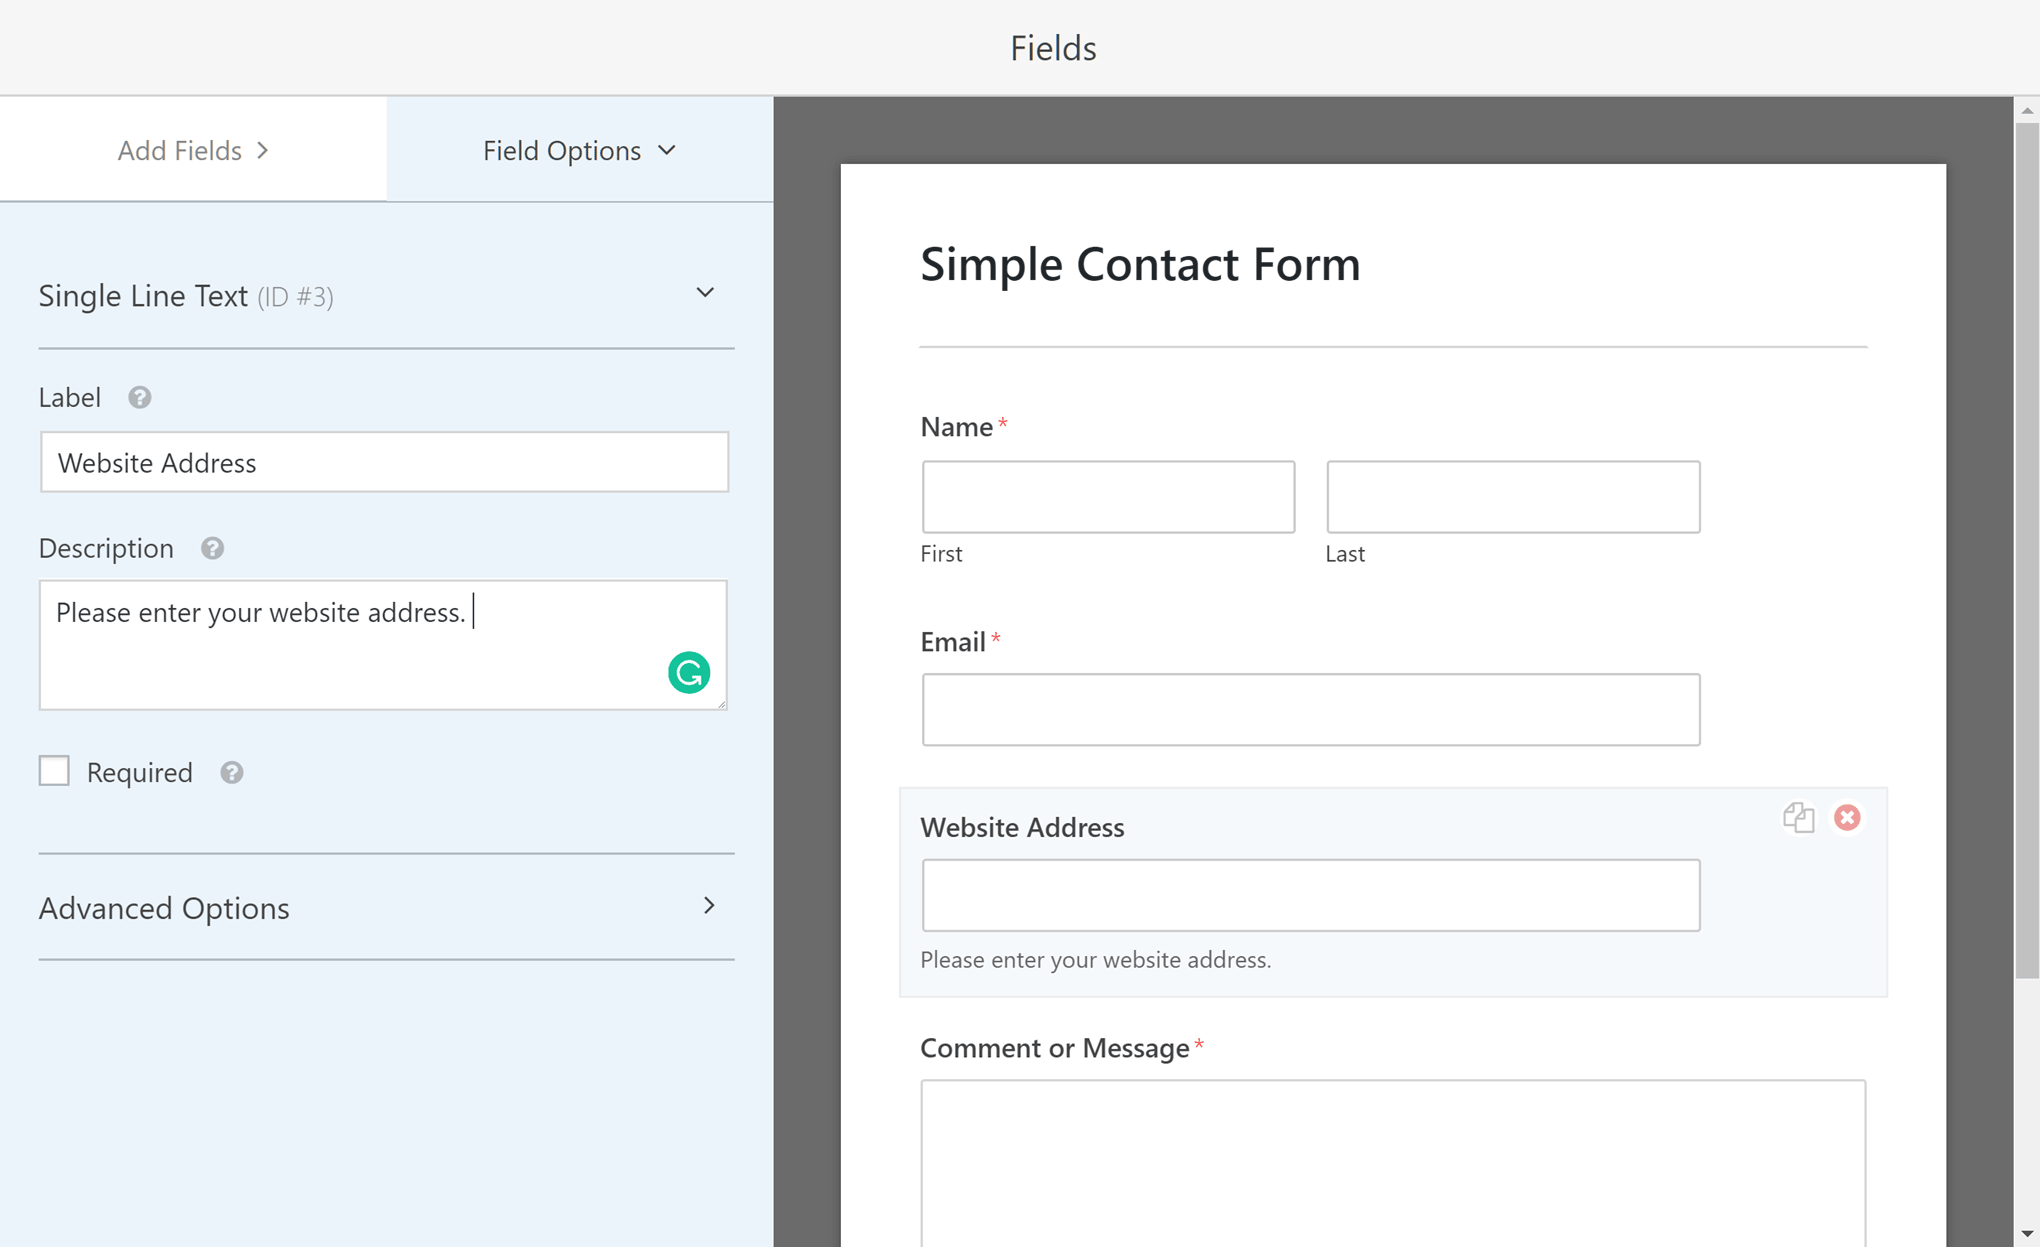
Editing the form fields is very straightforward too. Simply select the field you’d like to edit, then use the control panel displayed to the left of the form.
By default, form submissions are sent to the email address associated with your WordPress admin account. However, you can change this by going to the Notifications settings of the form. Through these settings, you can enter a different address in the Send To Email Address field.
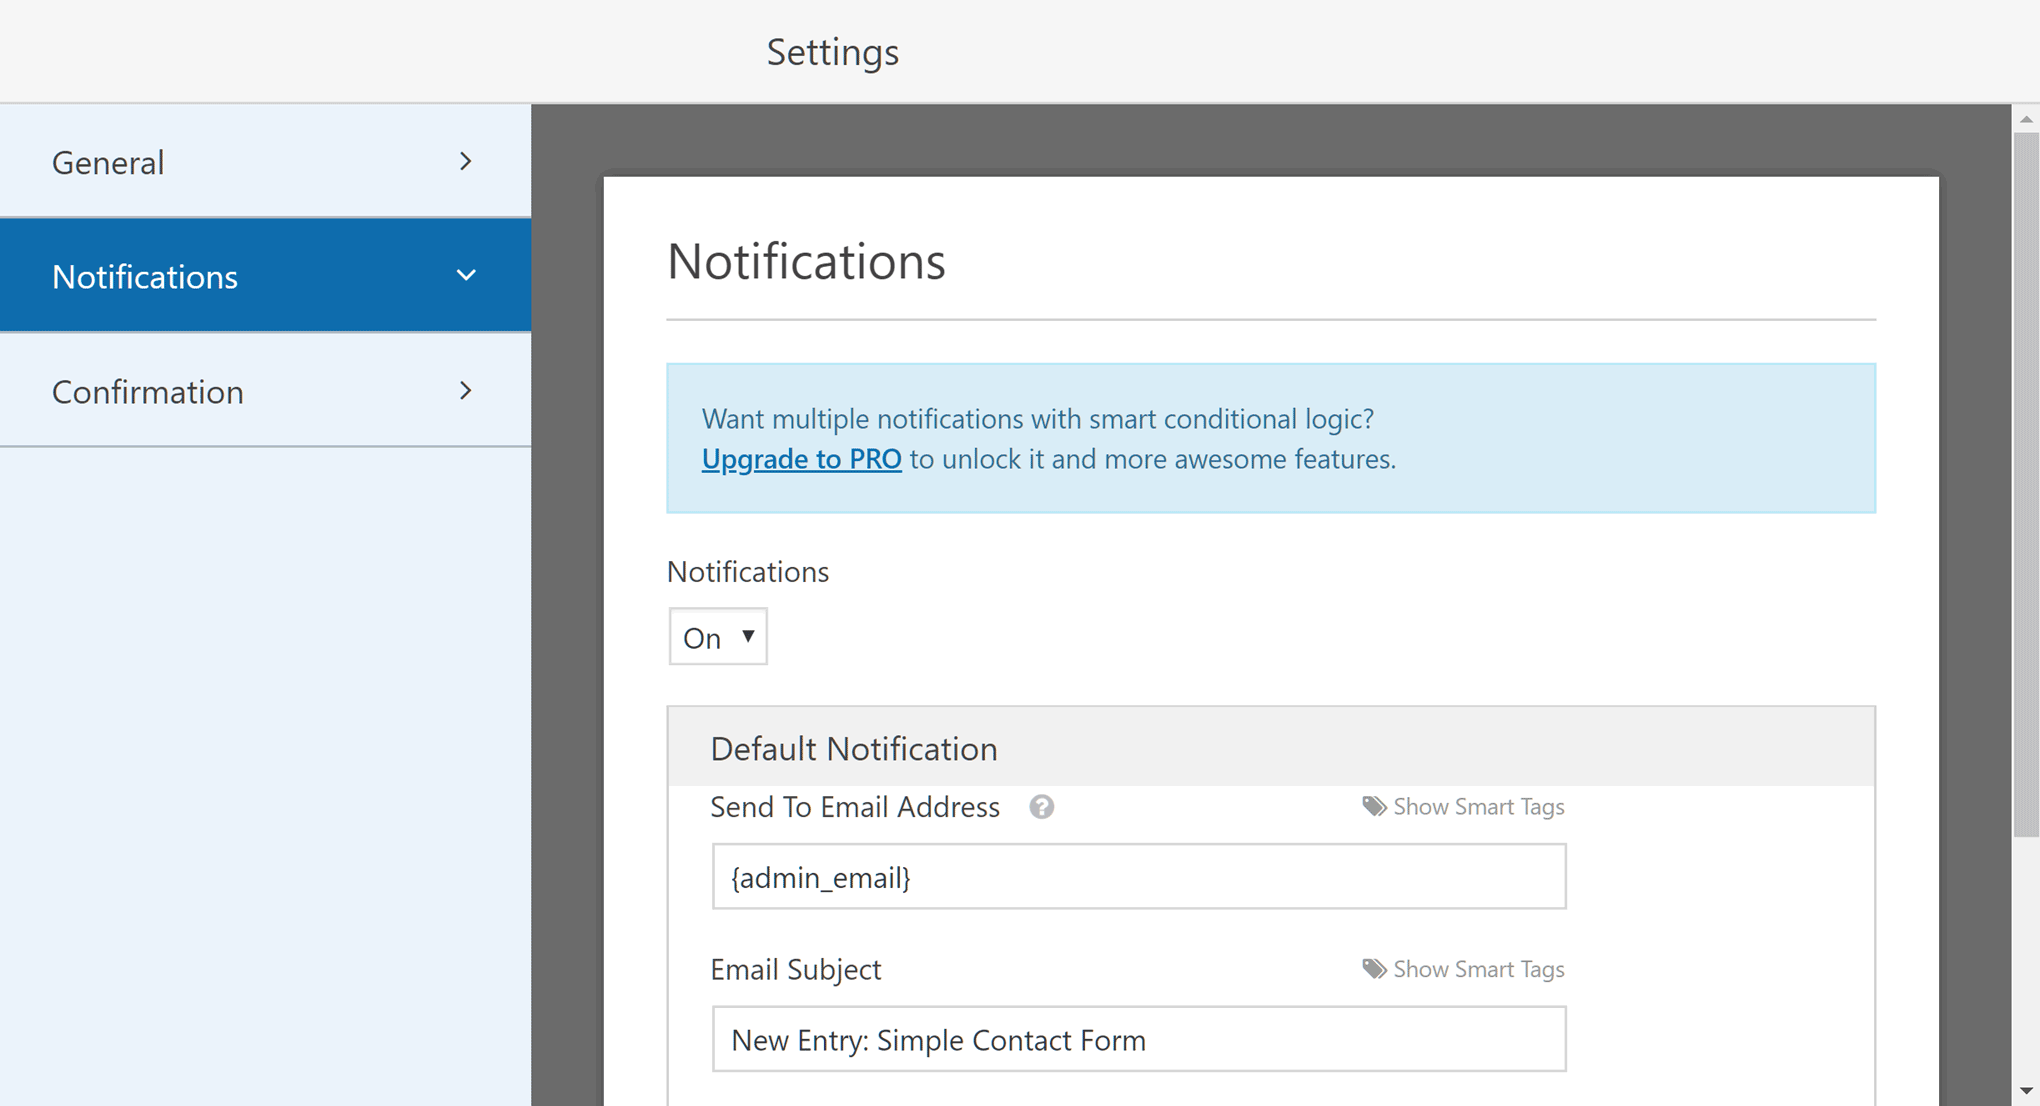
Then when you’ve finished editing the form, click the save button, and then the large X in top right-hand corner to return to your WordPress Dashboard.
Publishing the WPForms Contact Form on Your Website
Forms created with WPForms can be added to WordPress posts and pages in just a few clicks. So either create a new post or page or open an existing one for editing. You should notice that a new Add Form button has been added to the WordPress Editor.
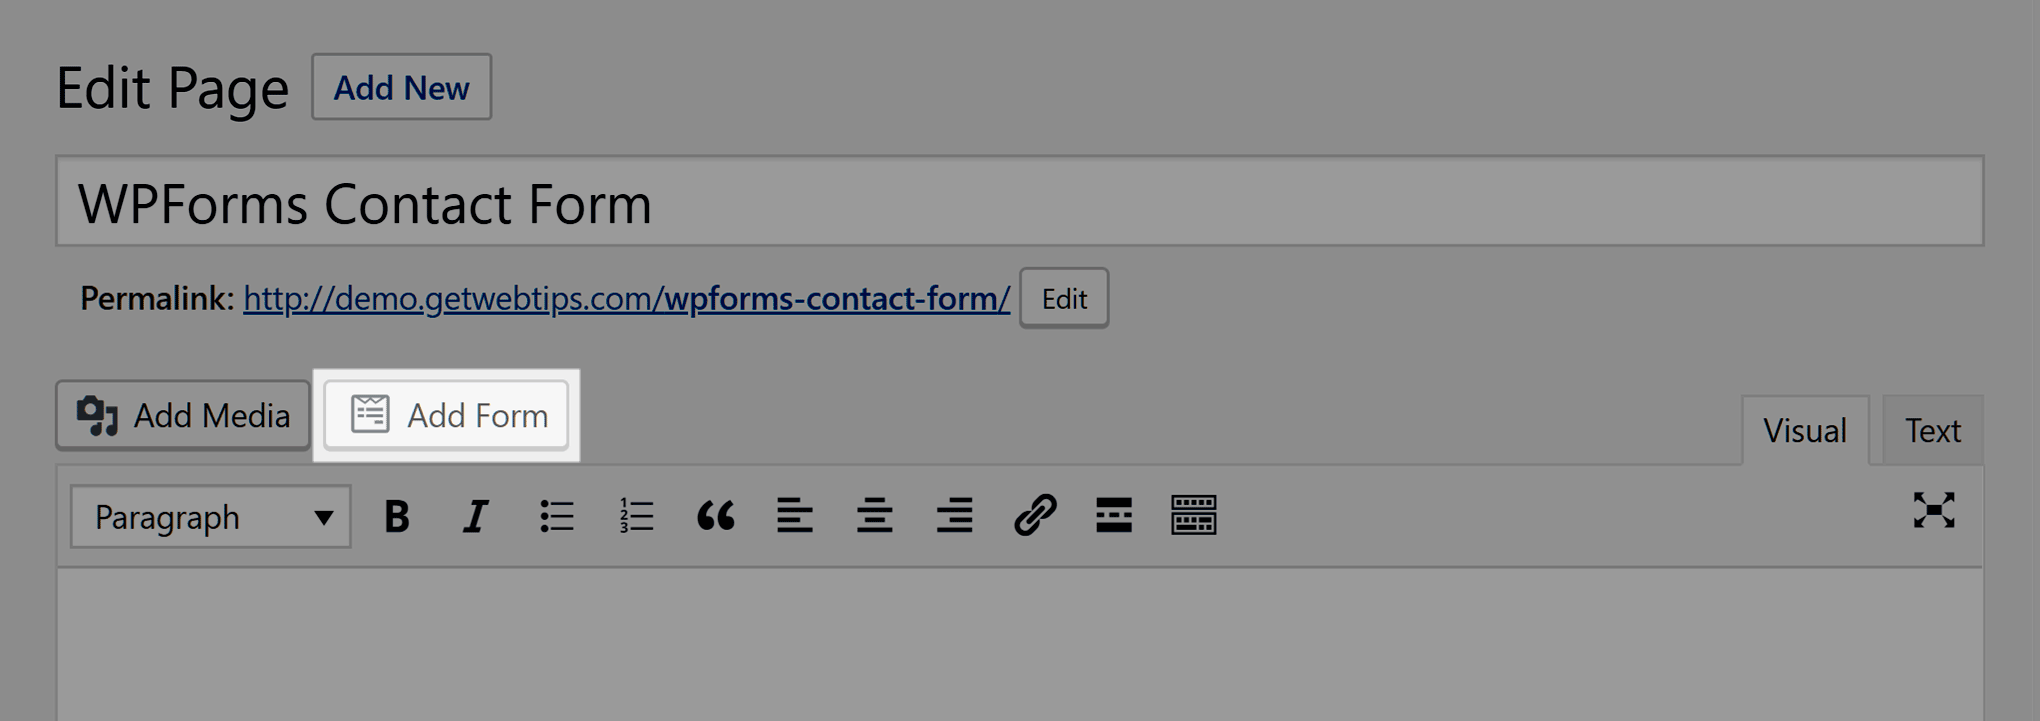
Pressing this button opens up a dialogue box that allows you to choose which of your forms to add to your page.
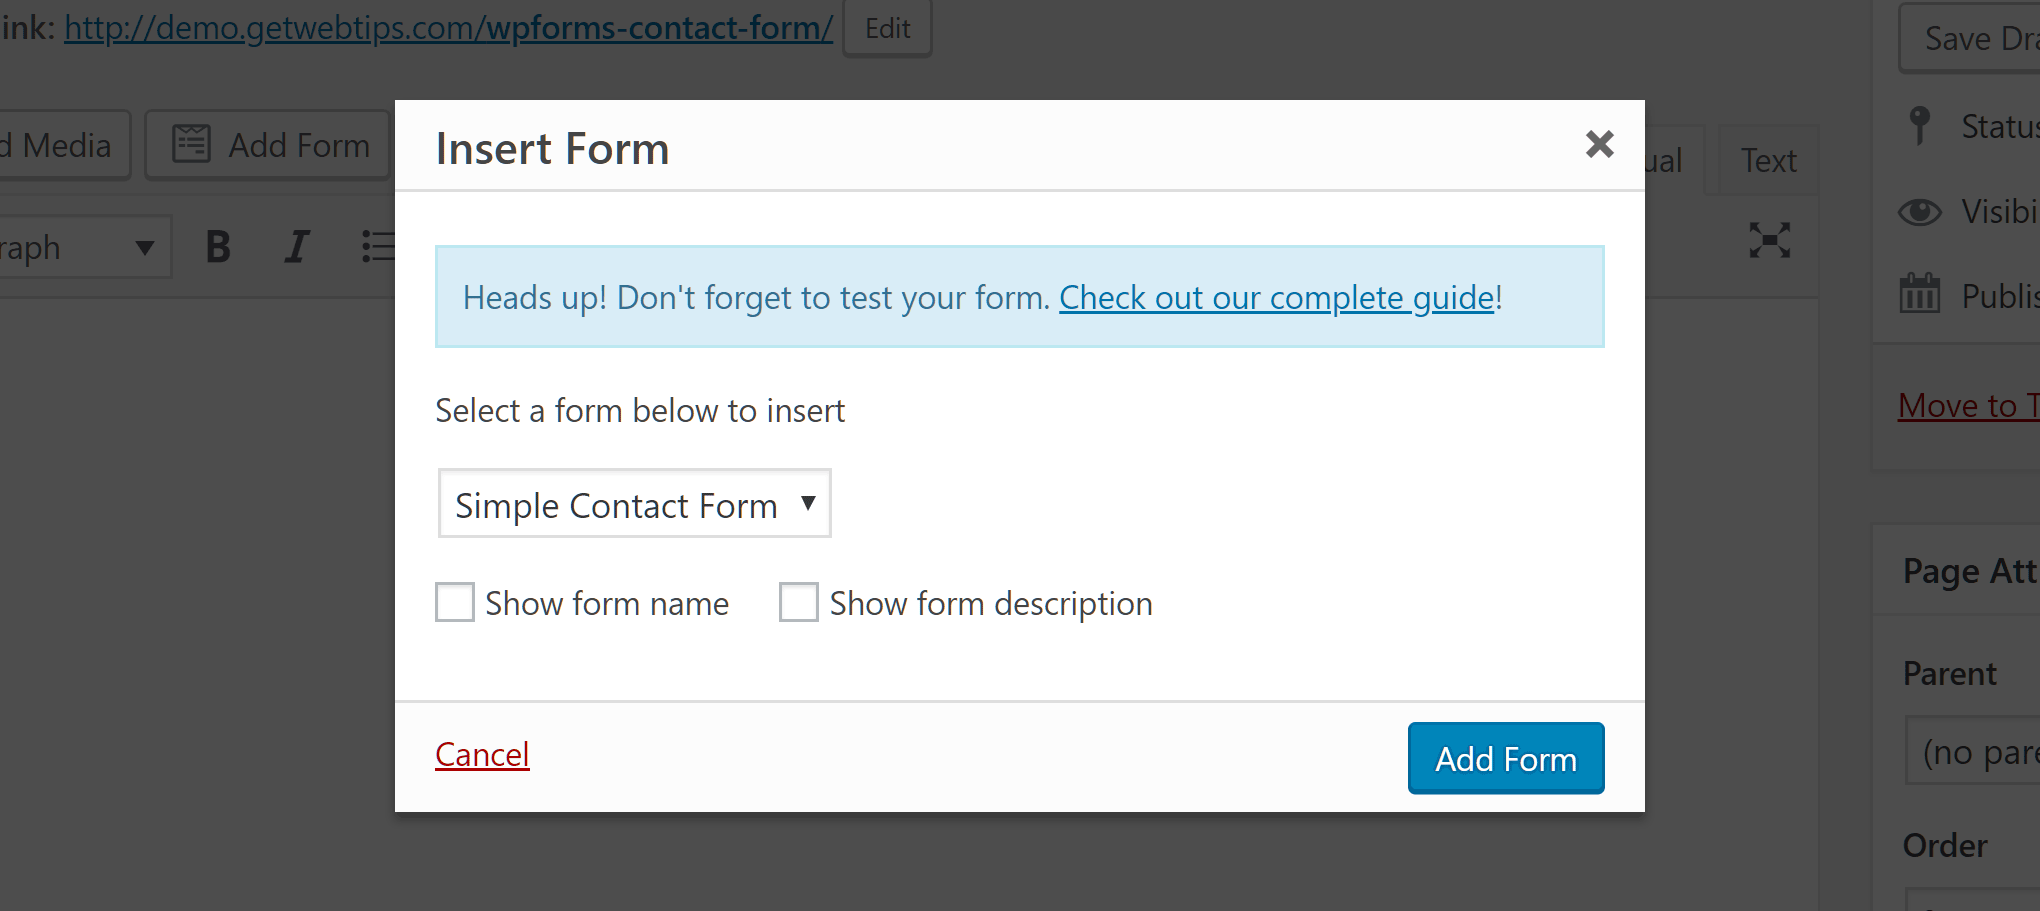
As well as choosing which form to insert, you also have the option of displaying the form title and description with the form. For a basic contact form, you probably won’t need to add or display a title or description as your visitors should be able to determine the purpose of the form. But for other types of forms, this extra information might be useful and can be added through the form builder interface.
Once you’ve made your selection and hit the Add Form button, a shortcode will be inserted into your post or page. Now, when your post or page is published, the shortcode will be replaced with the form you created.

One of the great things about WordPress shortcodes like this is that if you edit the form, every instance of it on your site will be updated to reflect those changes without any extra work on your part.
You can check out the form by hitting the Preview button on the Edit Page or Post screen. If all looks as it should, then you can publish your post or page when you’re ready to make it available to your audience.
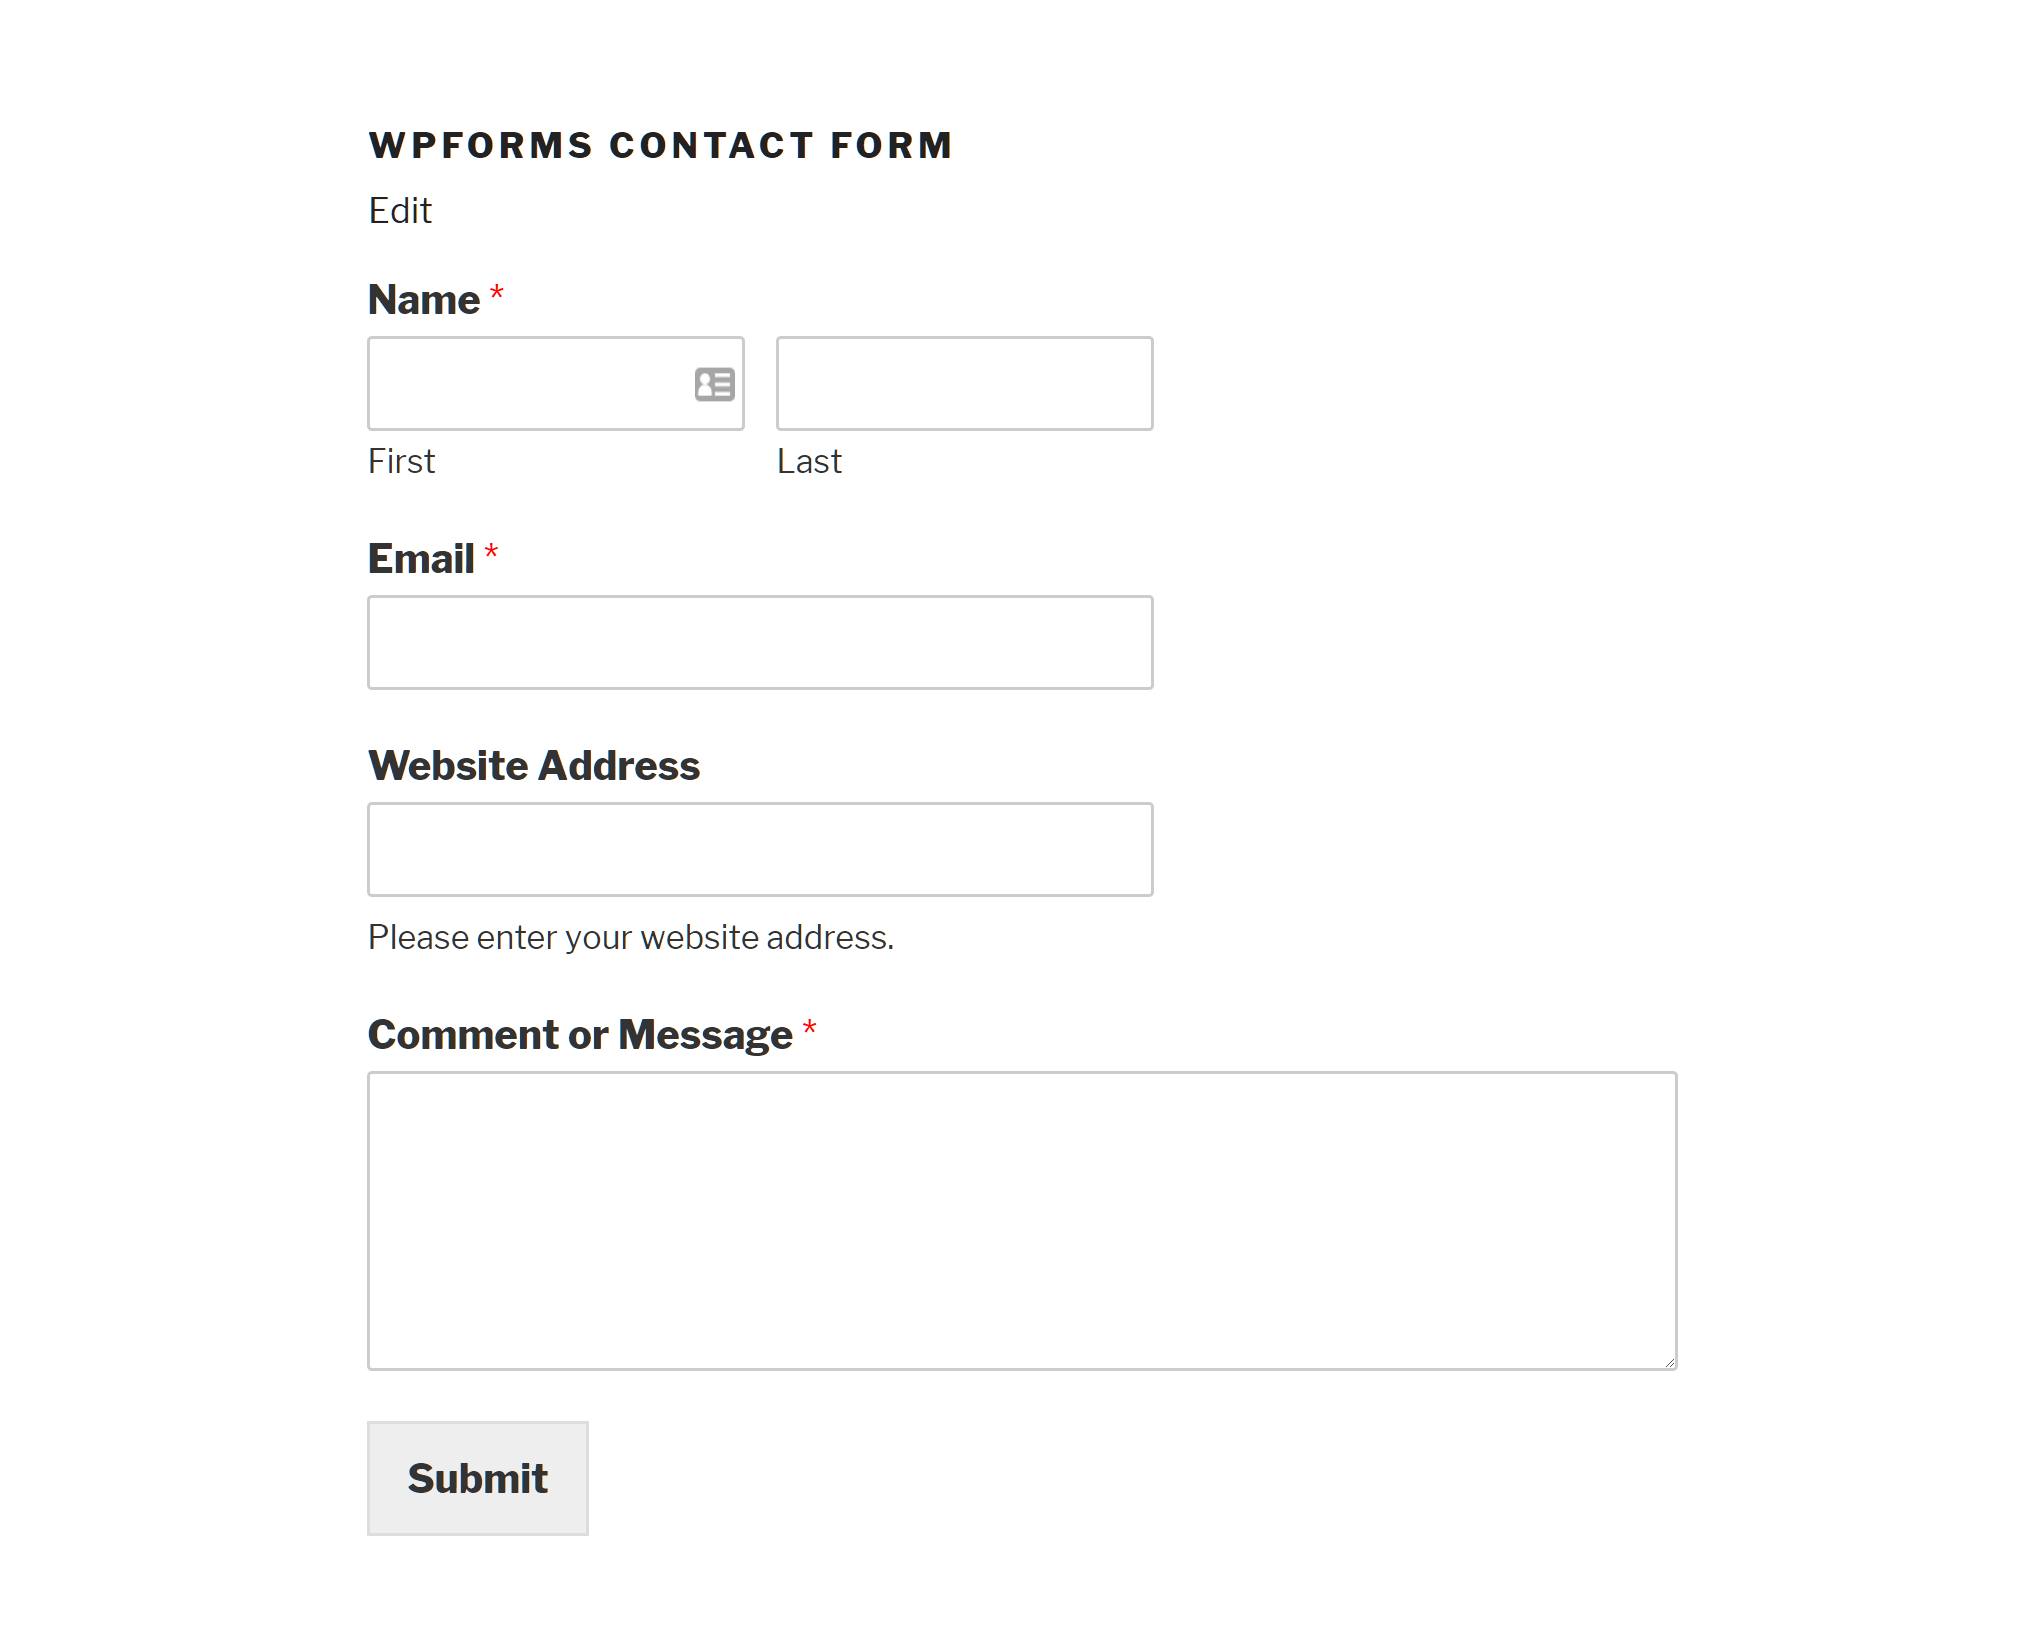
Make sure to test your form by completing it and hitting the Submit button. If all is working as it should, the contents of the form will be sent to the specified email address.
Alternatives to WPForms
If WPForms and its drag-and-drop form builder interface and long list of features isn’t the right option for your membership site, then there are plenty of other great WordPress contact form plugins to choose from. For example, Contact Form 7 is a very popular free option that’s quick and easy to set up.
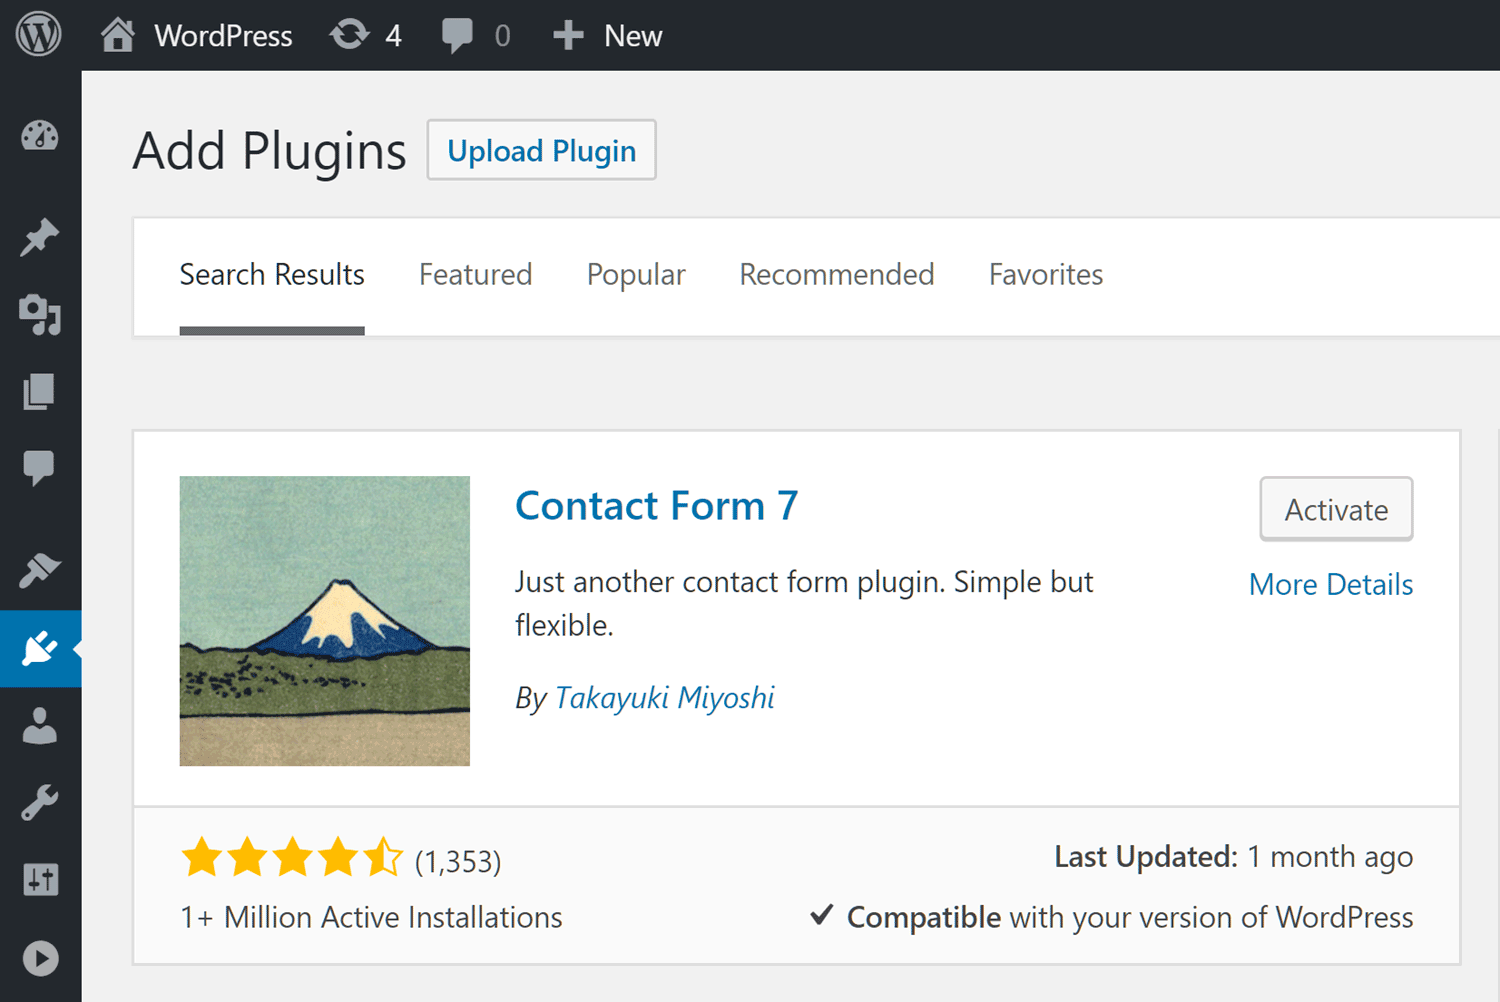
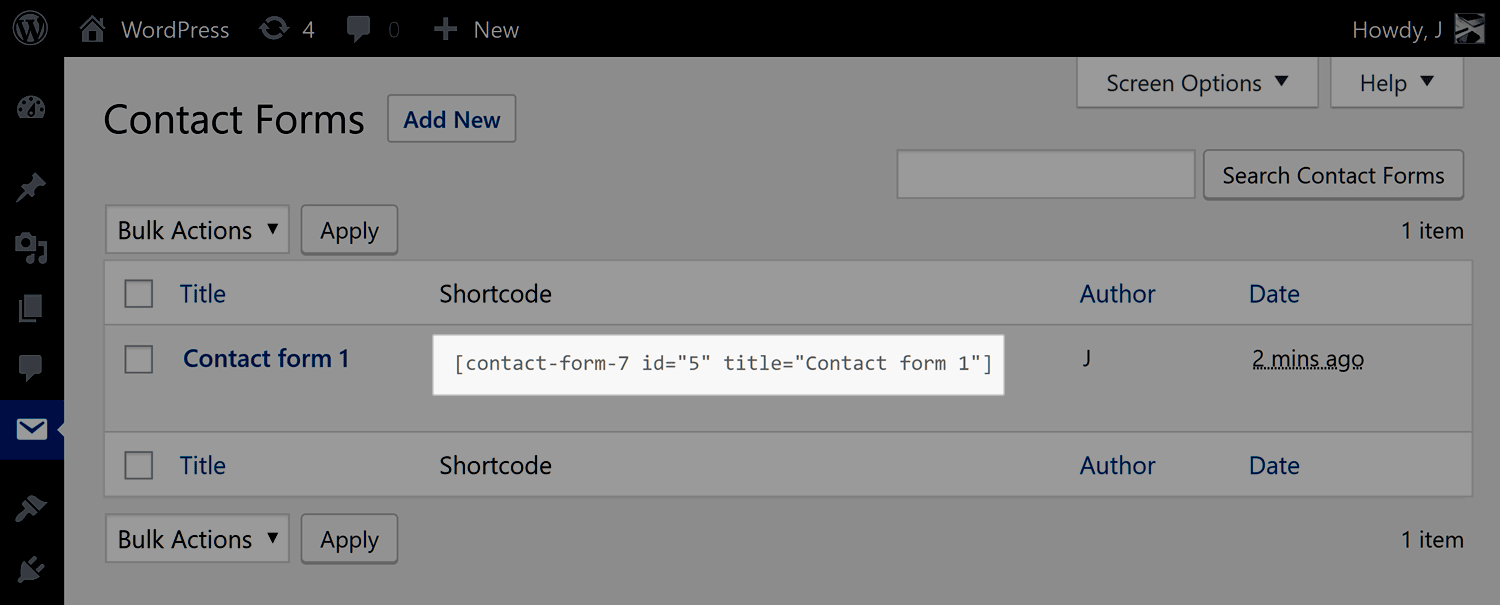
Simply install and activate the plugin from inside your WordPress Dashboard. Then navigate to the Contact Forms area in your WordPress Dashboard. Now copy the shortcode for the contact form.
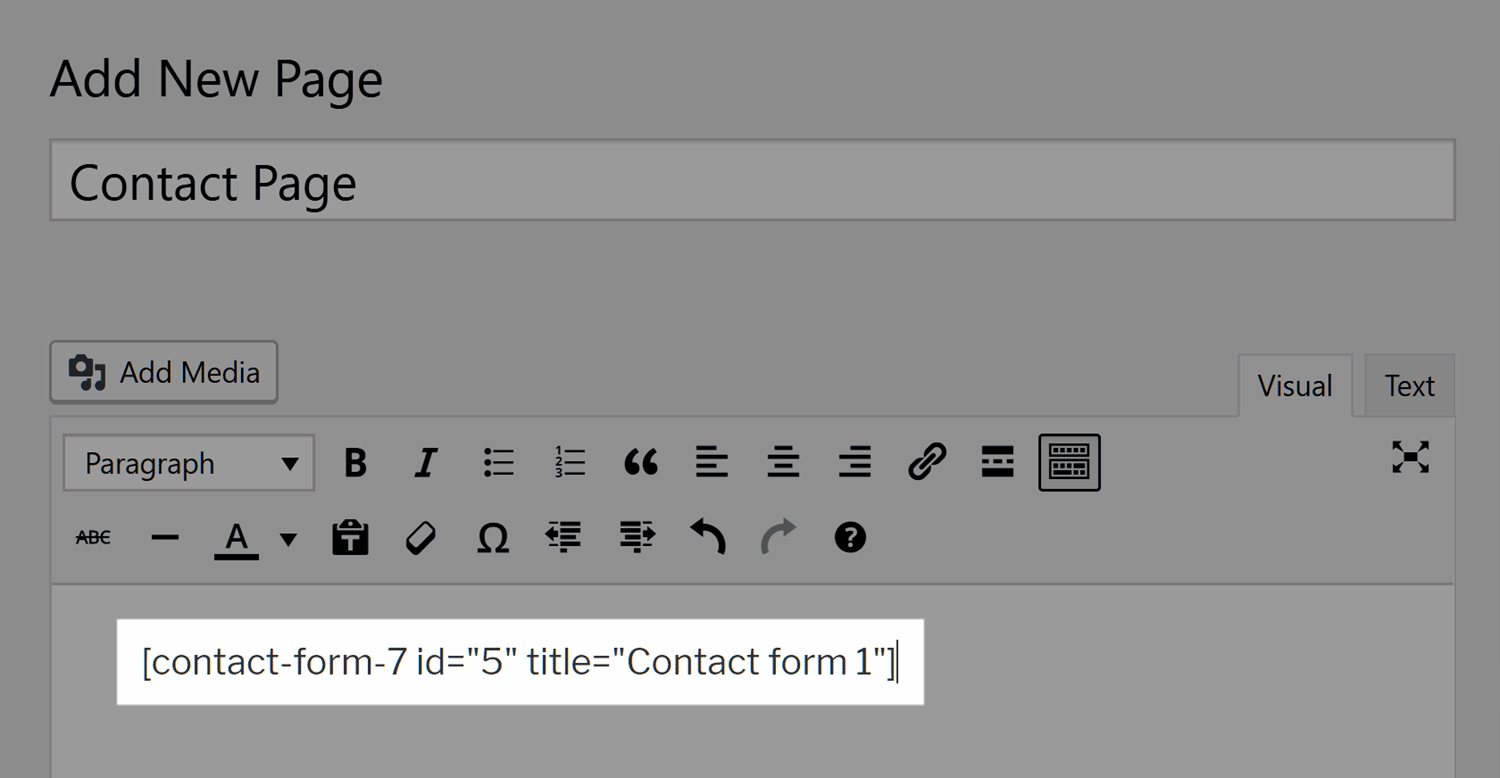
Then create a new post or page, or open an existing one for editing, and paste in the shortcode that you just copied.
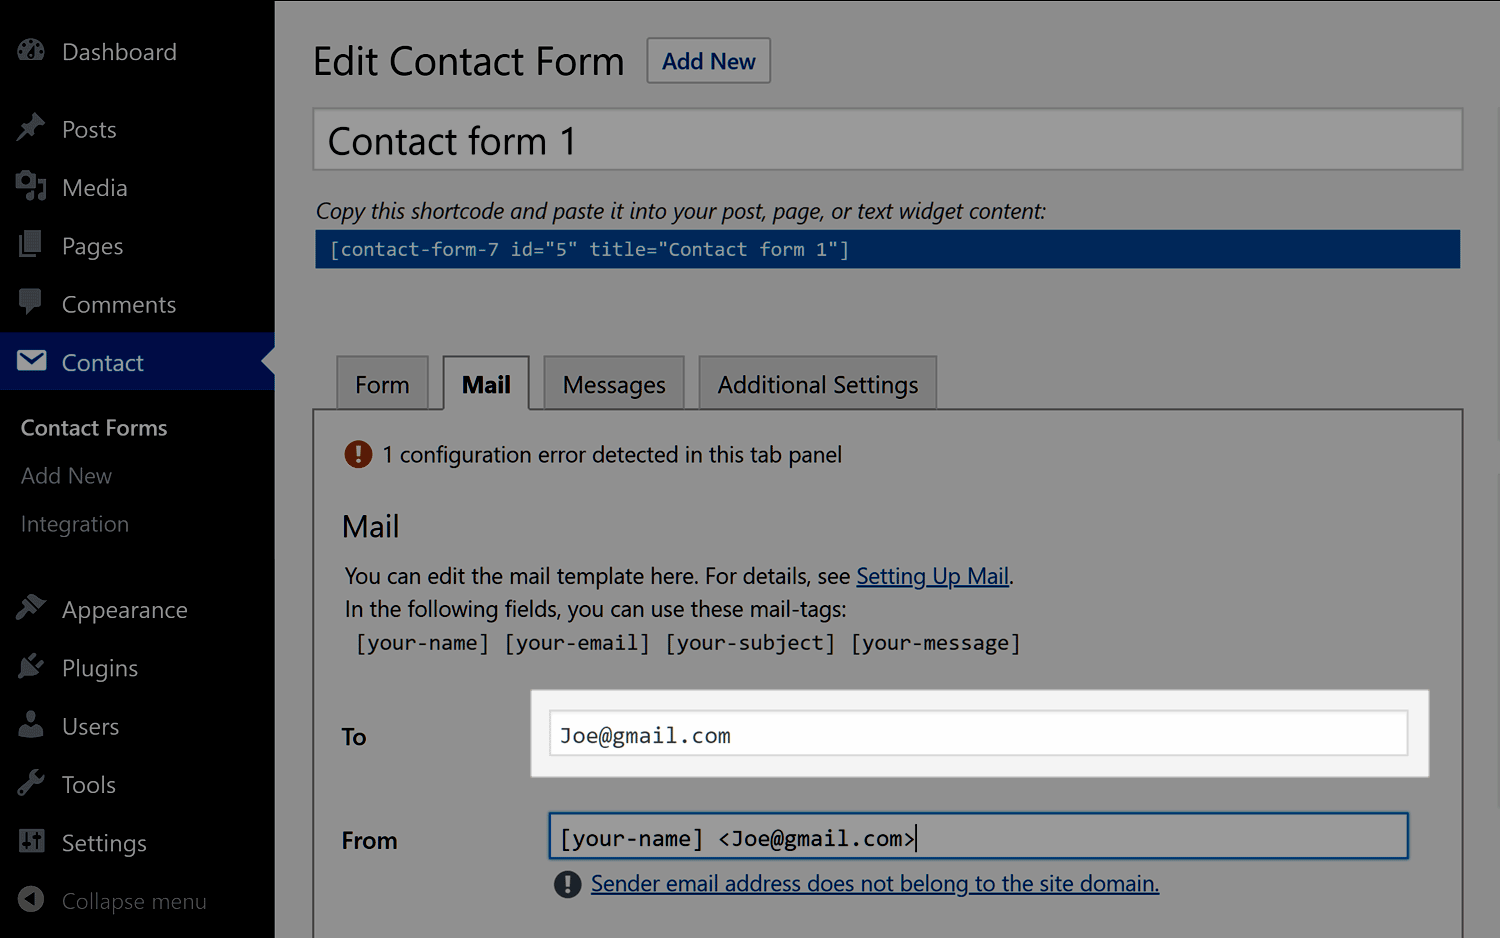
By default, the form submissions will be sent to the email address associated with your WordPress website admin user profile. However, you can change this by editing the form and entering the updated email address in the Mail settings.
Although Contact Form 7 is easy to use, it's only really recommended for creating the most basic of online forms. If your requirements are more advanced, such as the need to store form submissions in your WordPress Dashboard or the ability to use a wider range of field types, freemium plugins like WPForms and Formidable Forms are well worth checking out. Also, Jetpack — a suite of tools we recently covered on our blog — has a contact form module, so if you're using this plugin already, enabling that module is another quick way to add a contact form to a WordPress website.
Final Thoughts
If you followed along with the above instructions, you should now have a working contact form on your WordPress website. WPForms has lots of other features and settings that can help you do much more with online forms on your website, including the ability to store form entries in your WordPress Dashboard, collect payments, and manage user registrations.
However, as this guide has mentioned, WPForms isn’t the only high-quality WordPress forms plugin available, so there are plenty of other options to consider. But if you’re looking for the quickest and easier way to add forms to your website, with the ability to do more with forms in the future, WPForms is hard to beat.
If you want to reduce the number of emails you receive from your visitors, you can try adding a knowledgebase or FAQ to your membership website so that your users can find solutions to any problems without the need to send you an email. If you start receiving a large volume of email, you might want to consider adding a help desk system to your membership site to improve your ability to manage and respond to those messages.
Which plugin will you use to add an online form to your WordPress membership site? Let us know in the comments below.


Add a Comment