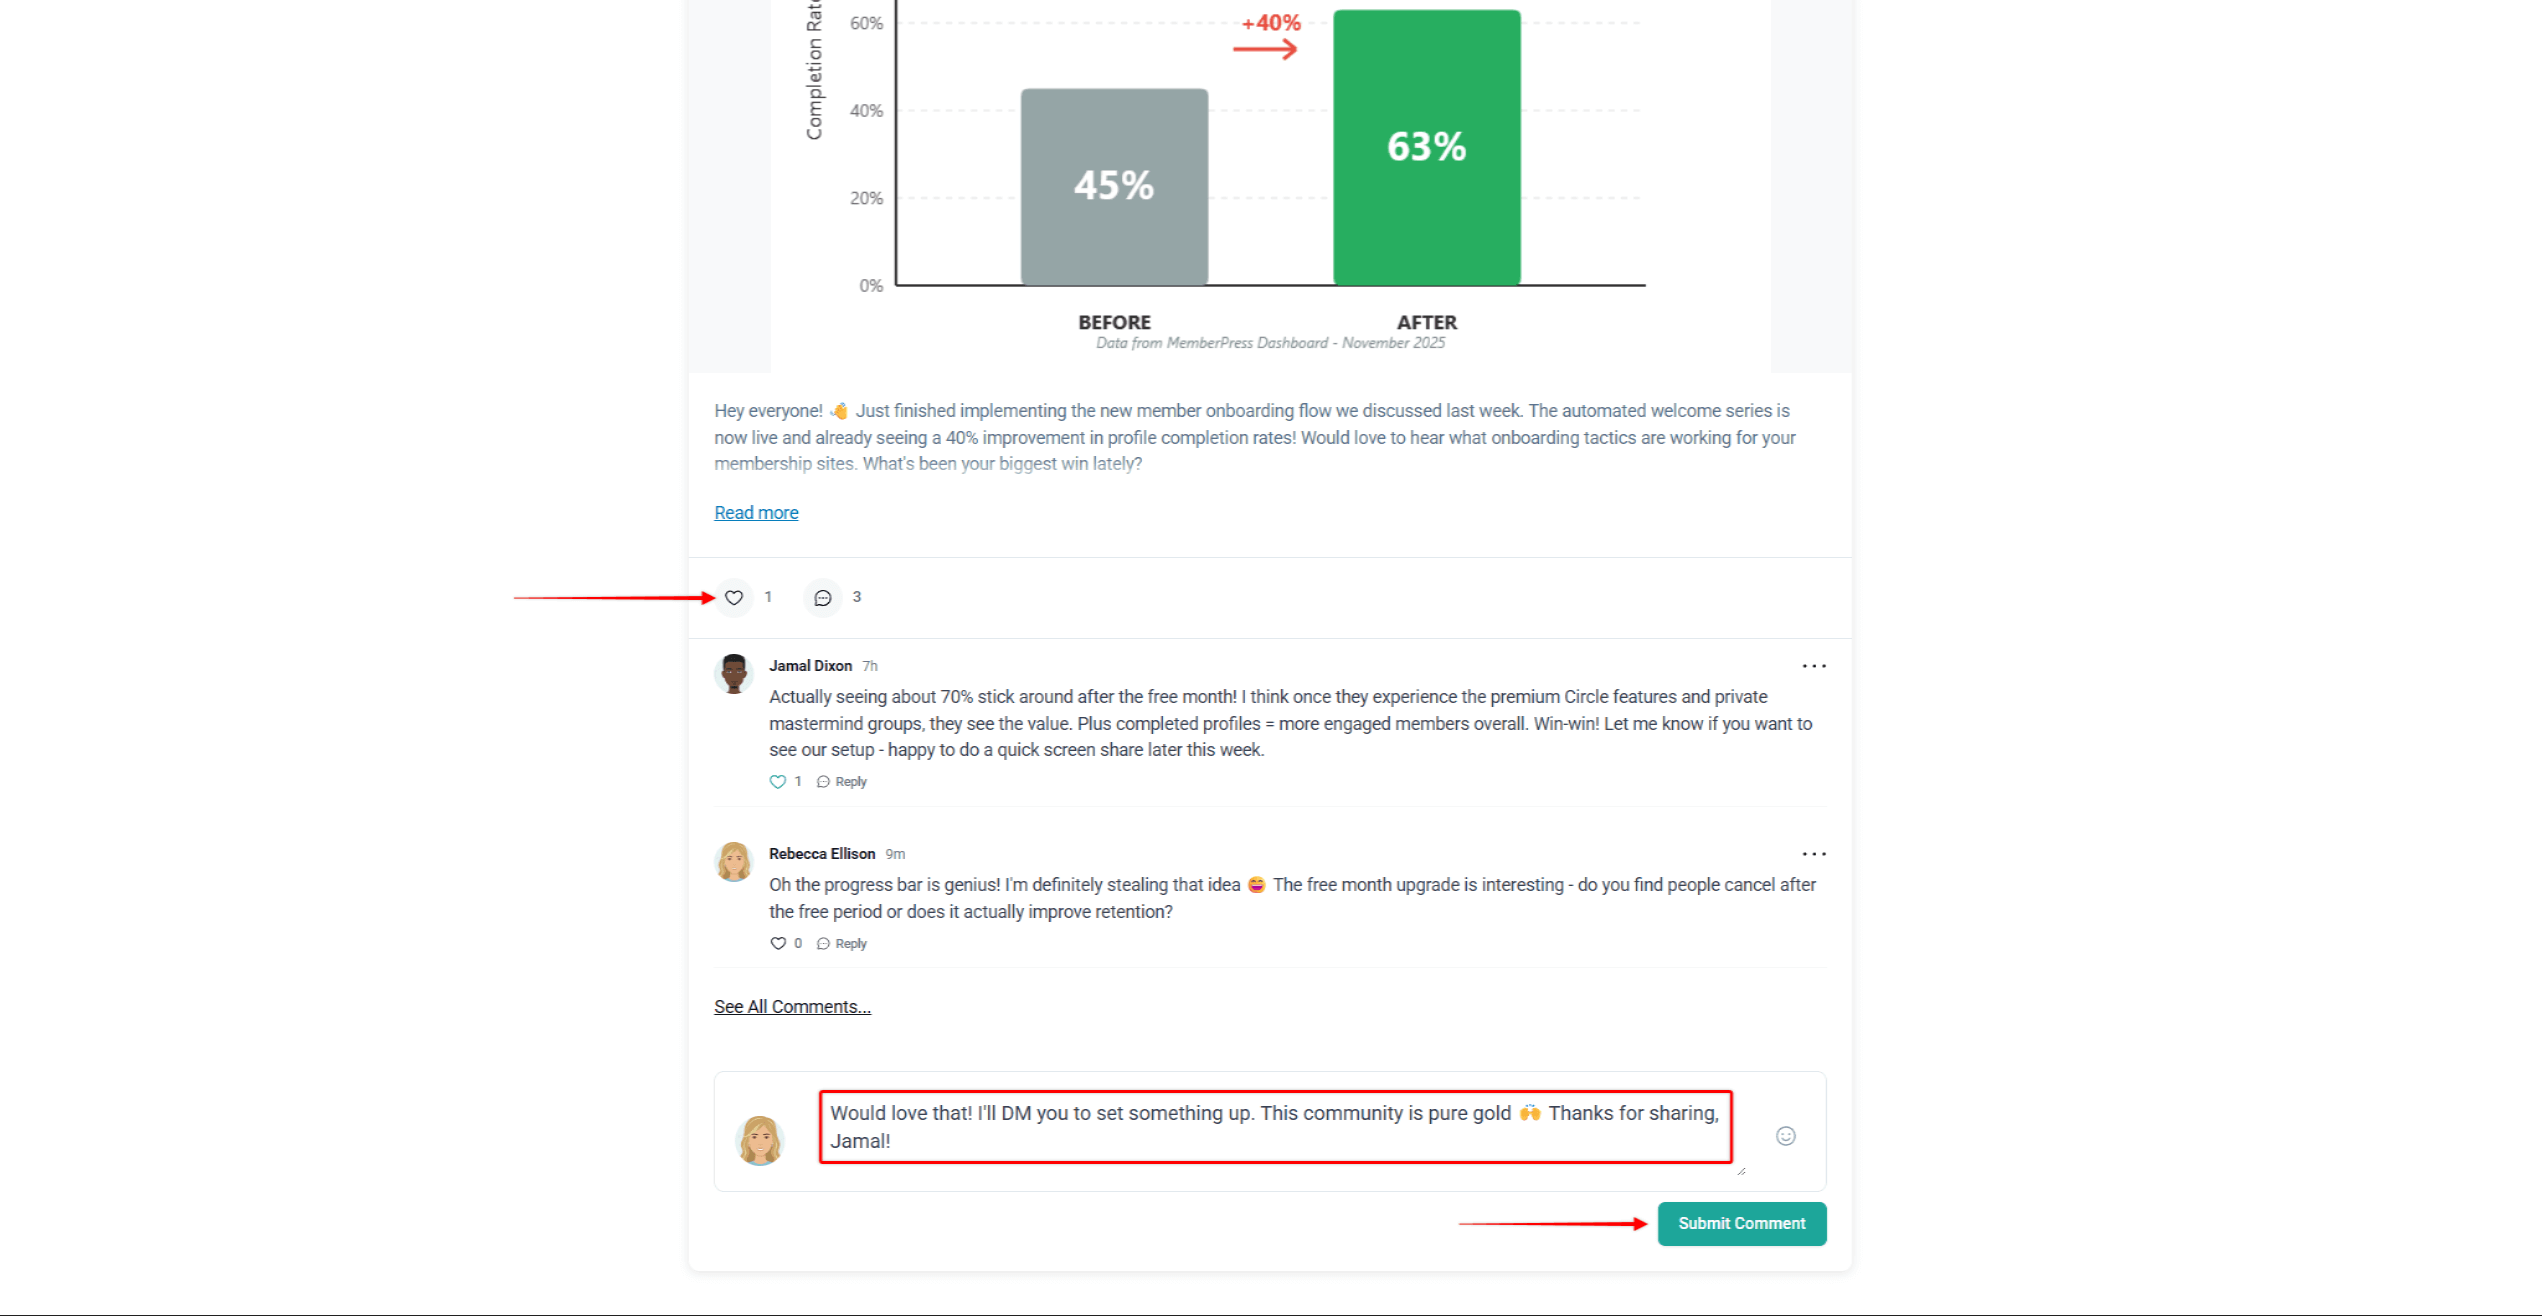
MemberPress Circles are communities built around MemberPress profiles and directories. These communities create focused spaces where members engage through discussions and shared content. Members can post their own content and engage with other members by commenting or reacting to posted content.
This document explains how members discover, join, and participate in Circles. It’s aimed at helping administrators understand the member experience and effectively manage communities and provide support.
Video Tutorial
Discovering and Exploring Circles
Members find Circles through various pathways designed to match them with relevant communities. The discovery process helps members identify Circles aligned with their interests while respecting membership access levels.
Circles Directory
The Circles directory page serves as the primary discovery hub where members explore community options. This page will use the /mp-circles slug (e.g., https://yourdomain.com/mp-circle).

On the Circle directory page, users can find your circles and join them. Members can find specific Circles within the directory by entering keywords in the search bar or by browsing. They can also sort circles by popularity or the creation date (newest or oldest).
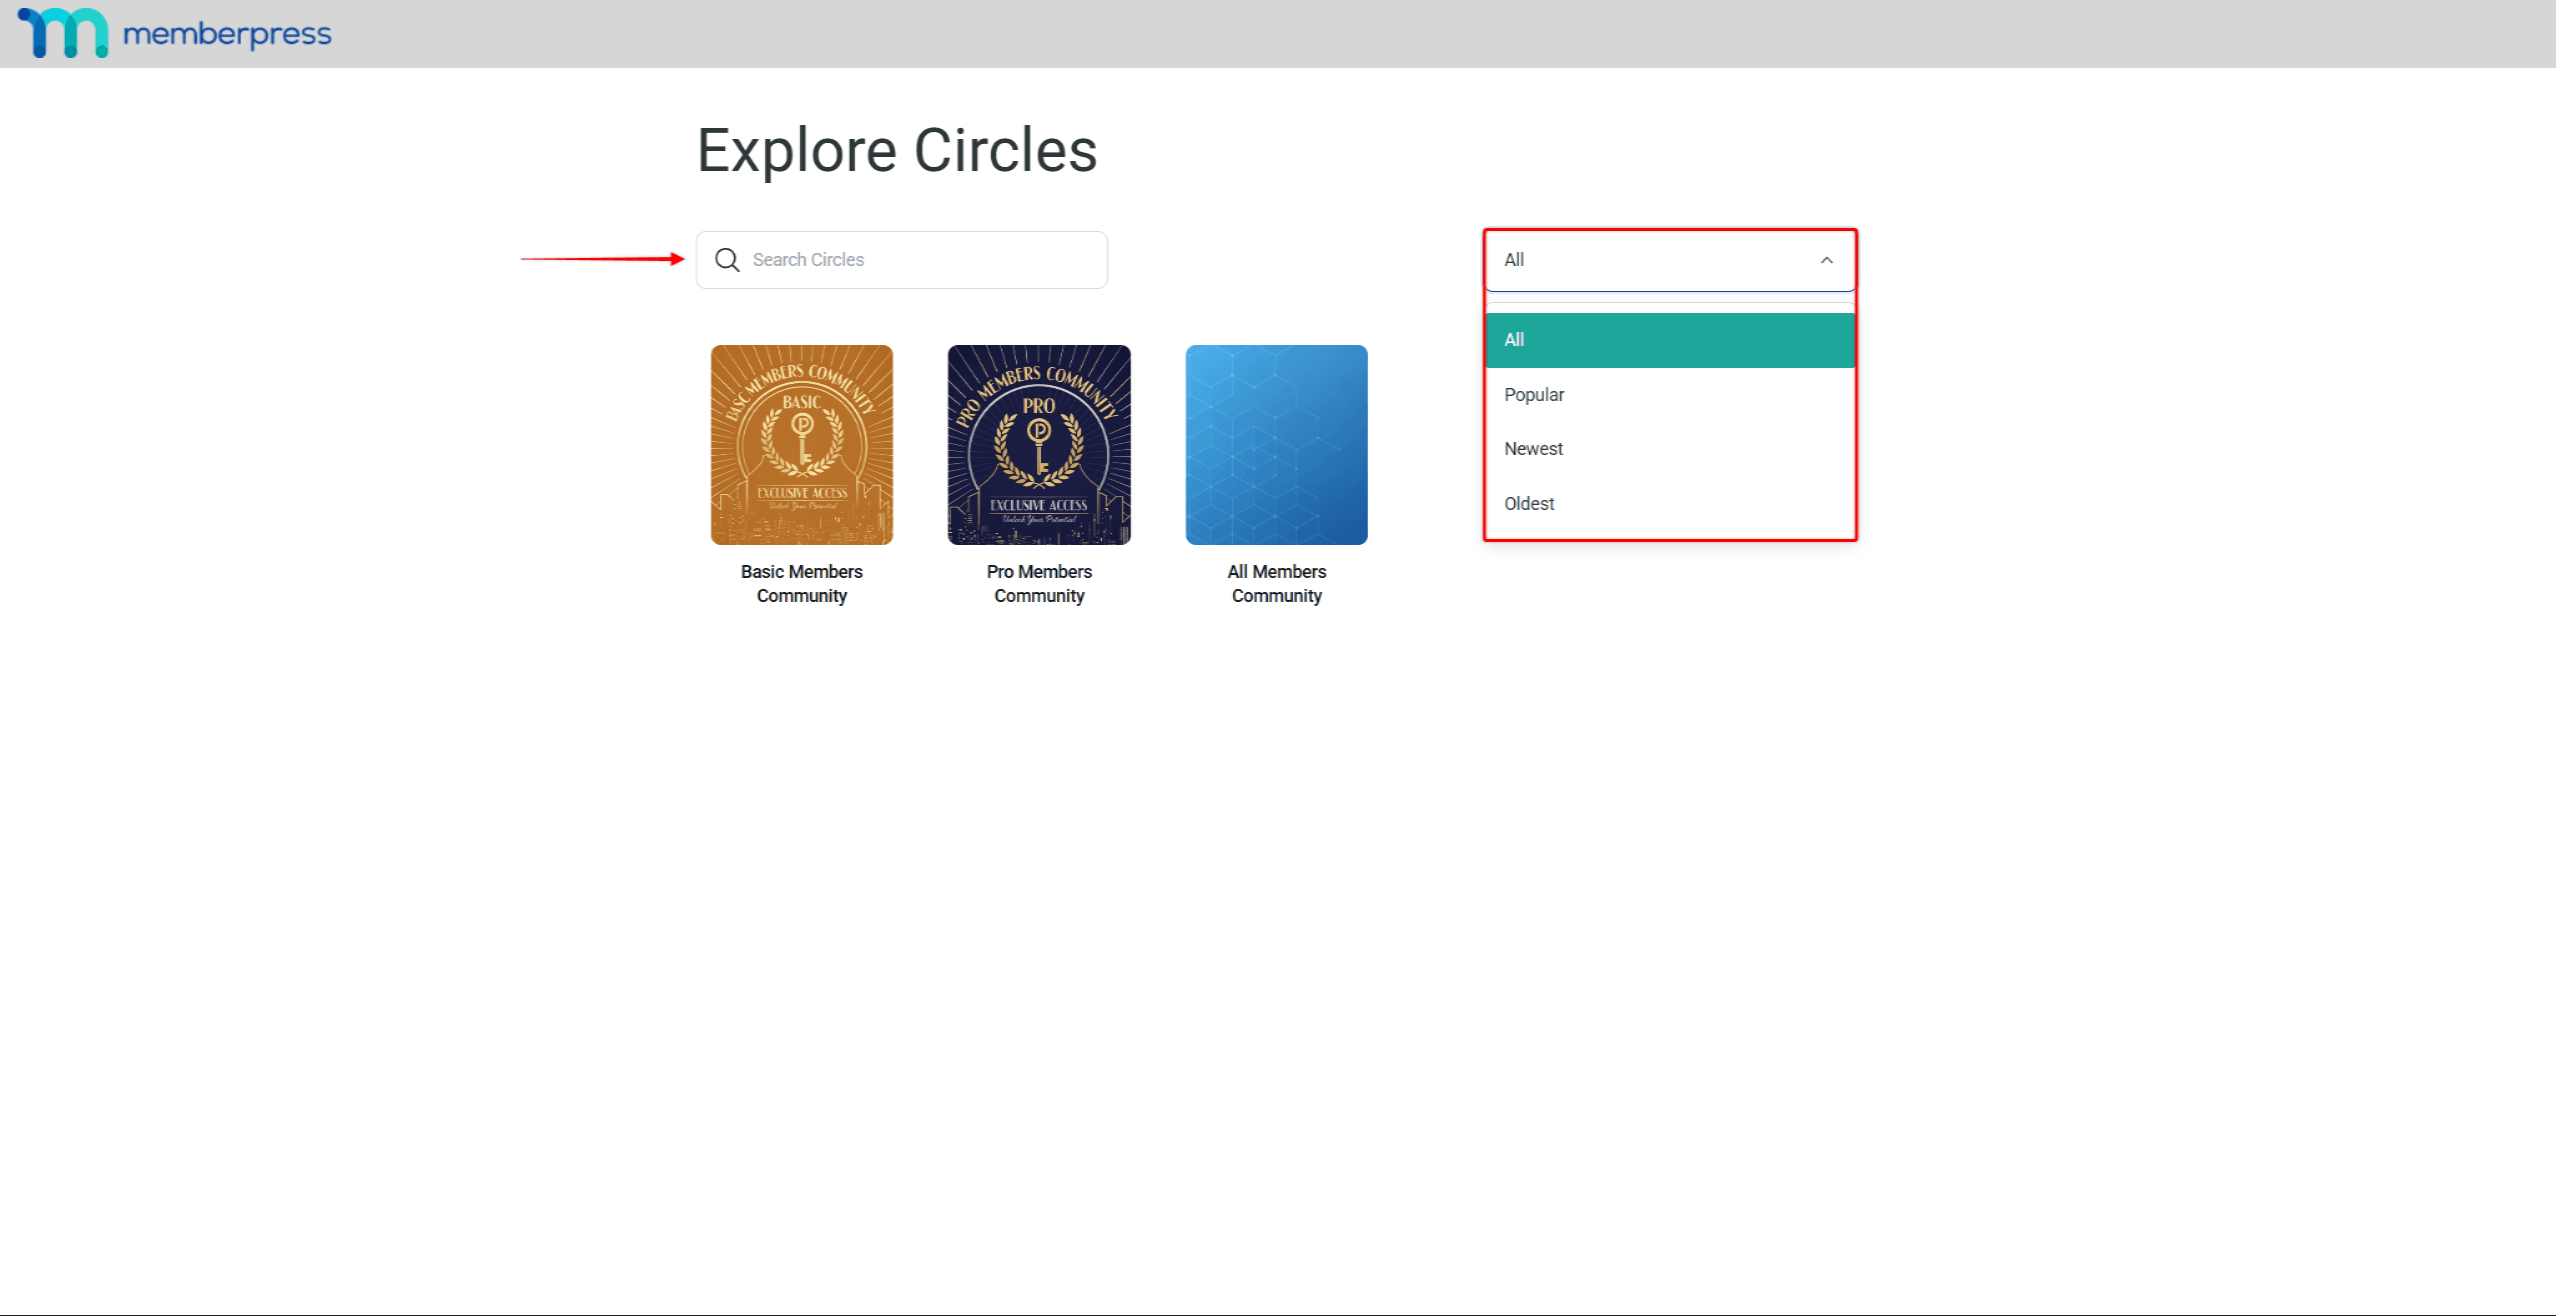
Each circle’s visibility settings will determine how the circle will be displayed in the Circle directory:
- Public visibility will display a circle in the Circle directory, and its content (posts/comments) to all visitors, encouraging broad participation;
- Logged In visibility will display a circle in the Circle directory. On the other hand, the Circle content will be visible only to logged-in users;
- Members Only visibility will display a circle in the Circle directory. Here, to access the Circle content, users must be logged in and subscribed to a required membership;
- Hidden visibility will make a circle and its content visible only to members who have already joined it (e.g., invitation-only communities).
Setting up tiered visibility creates monetisation opportunities. By creating exclusivity while giving users a glimpse of Circle content, it highlights the value of each community.
To preview the Circle content, users can simply click the Circle they want to preview. If they fulfill the visibility conditions (e.g. logged in), they’ll be able to browse the Circle feed, members, and rules. The preview can help members decide whether to join the community.
Joining and Leaving Circles
The process for joining Circles varies based on Circle settings and membership requirements. Understanding these variations helps members navigate community participation smoothly.
Joining Circles
Public Circles offer immediate access for all eligible members. To join, members should navigate to a circle and click the Join Now button.
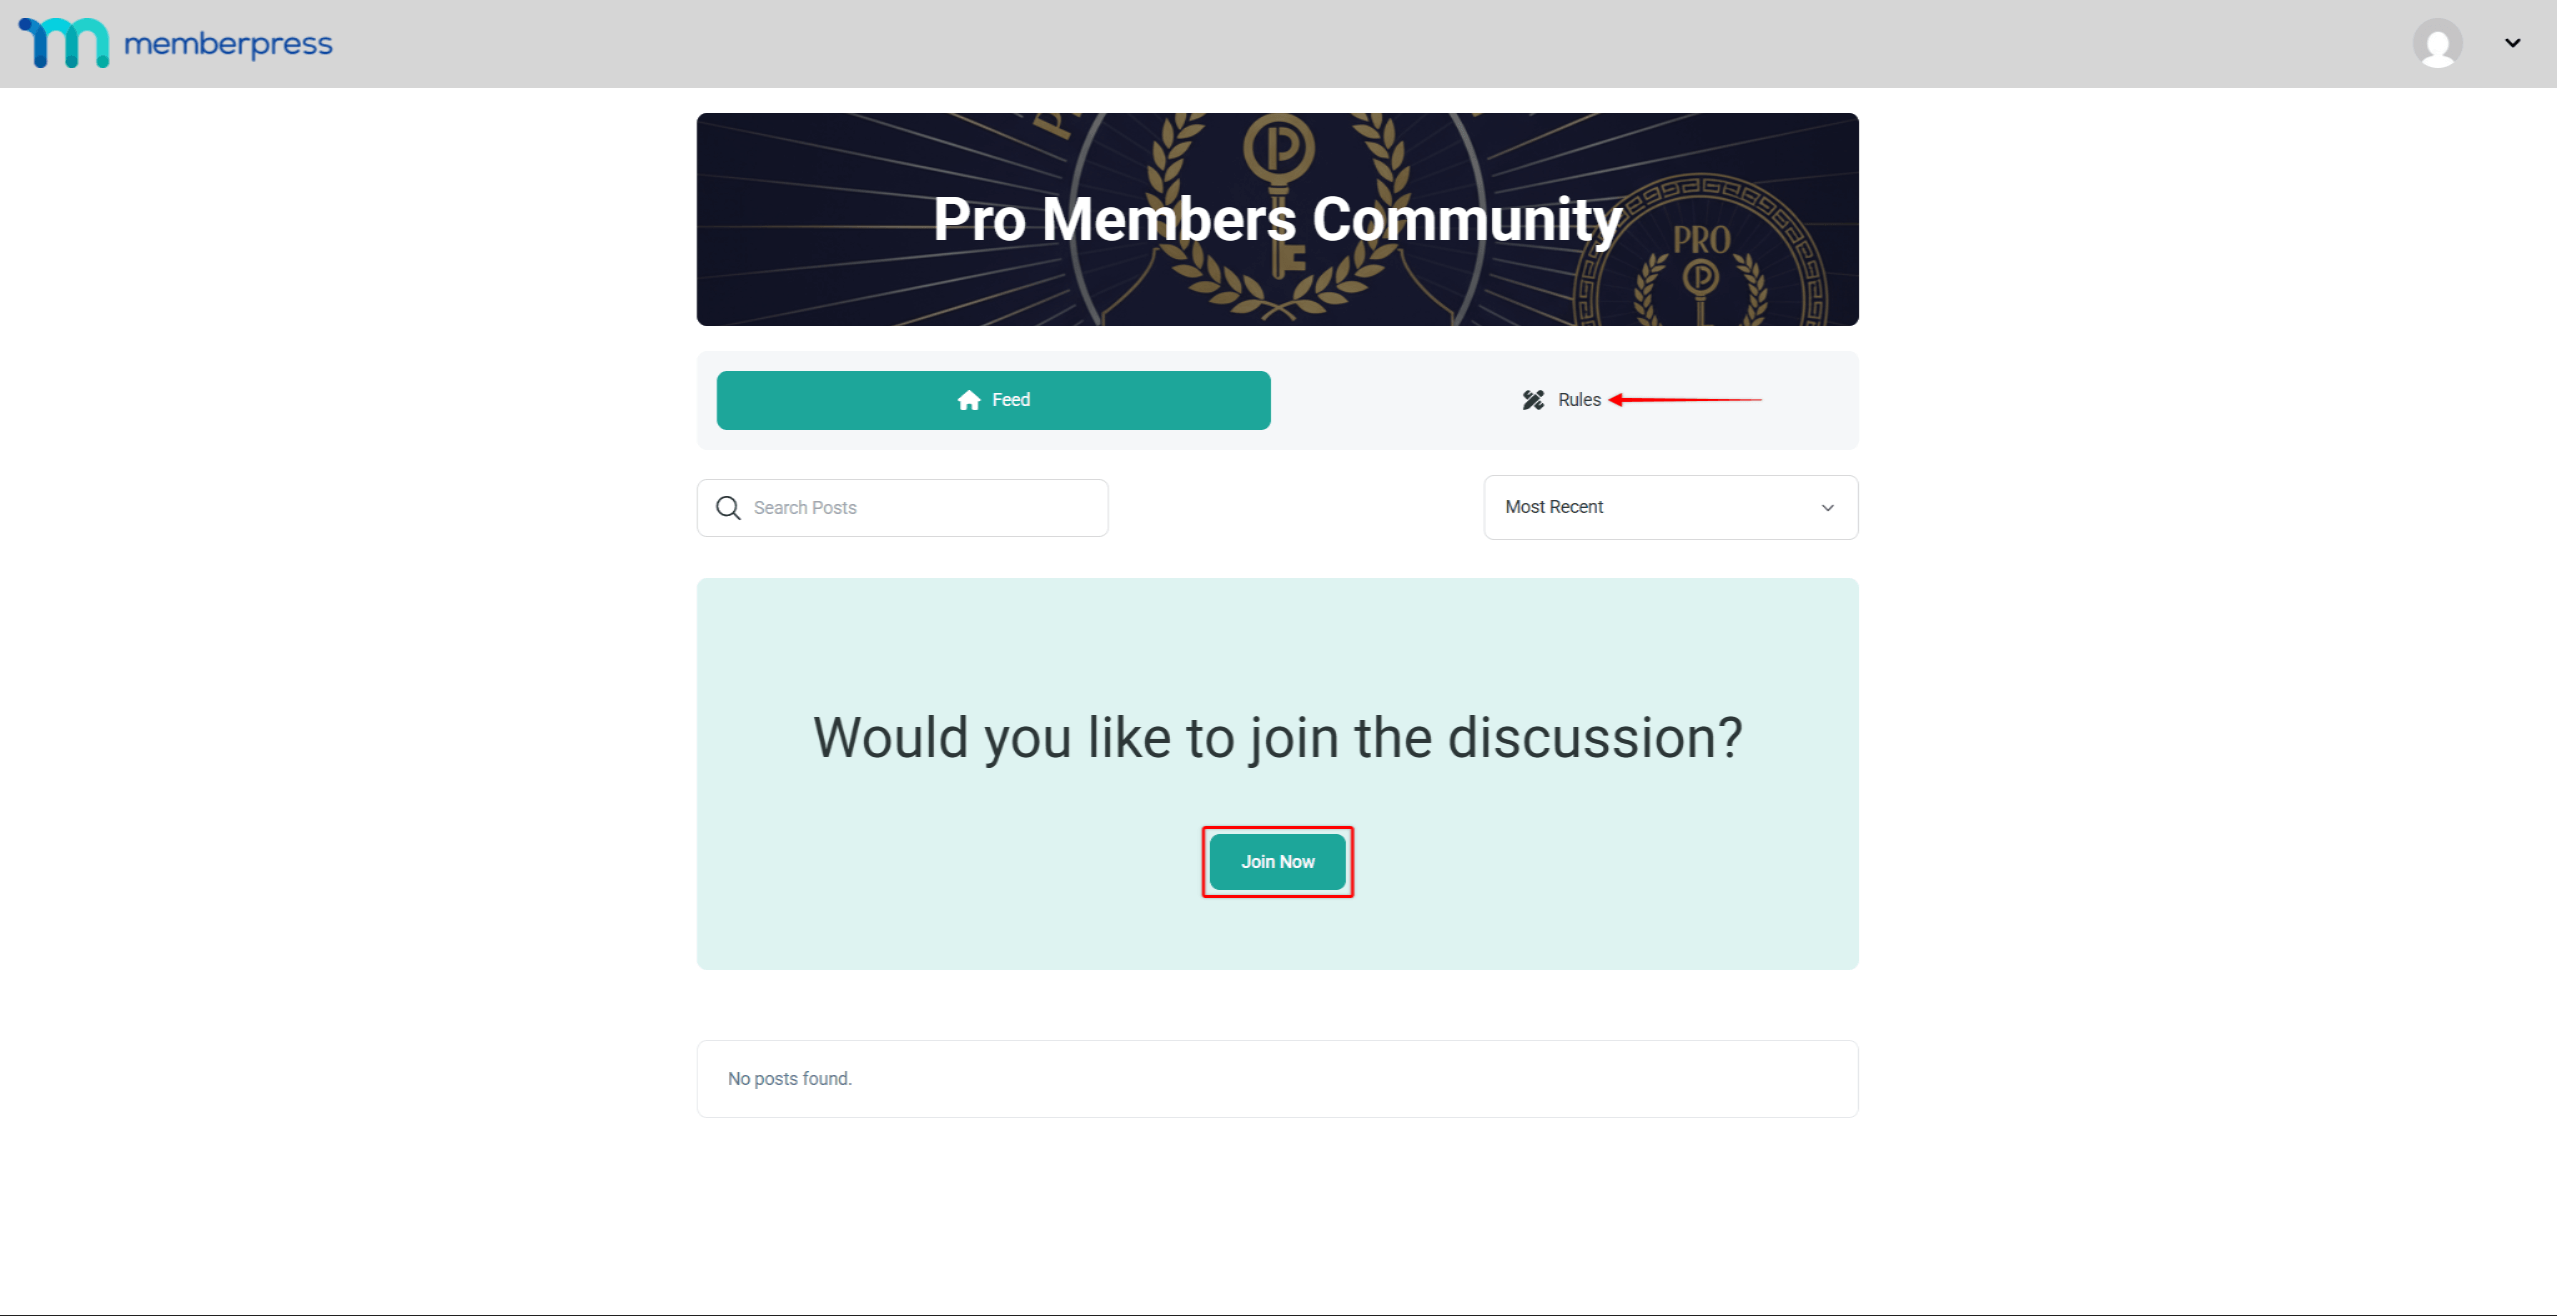
Members can also check the cycle rules by clicking the Rules tab on the circle page.
Join notifications are sent to Circle admins by default every time a new member joins the circle.
Accessing Restricted Circles
Membership-based Circles require specific subscription levels. When members don’t match the Circle requirements, they should follow these steps to join:
- Navigate to a Circle.
- Click the Join Now button to join. This will automatically redirect you to the Join page (based on the circle's Join Page URL).
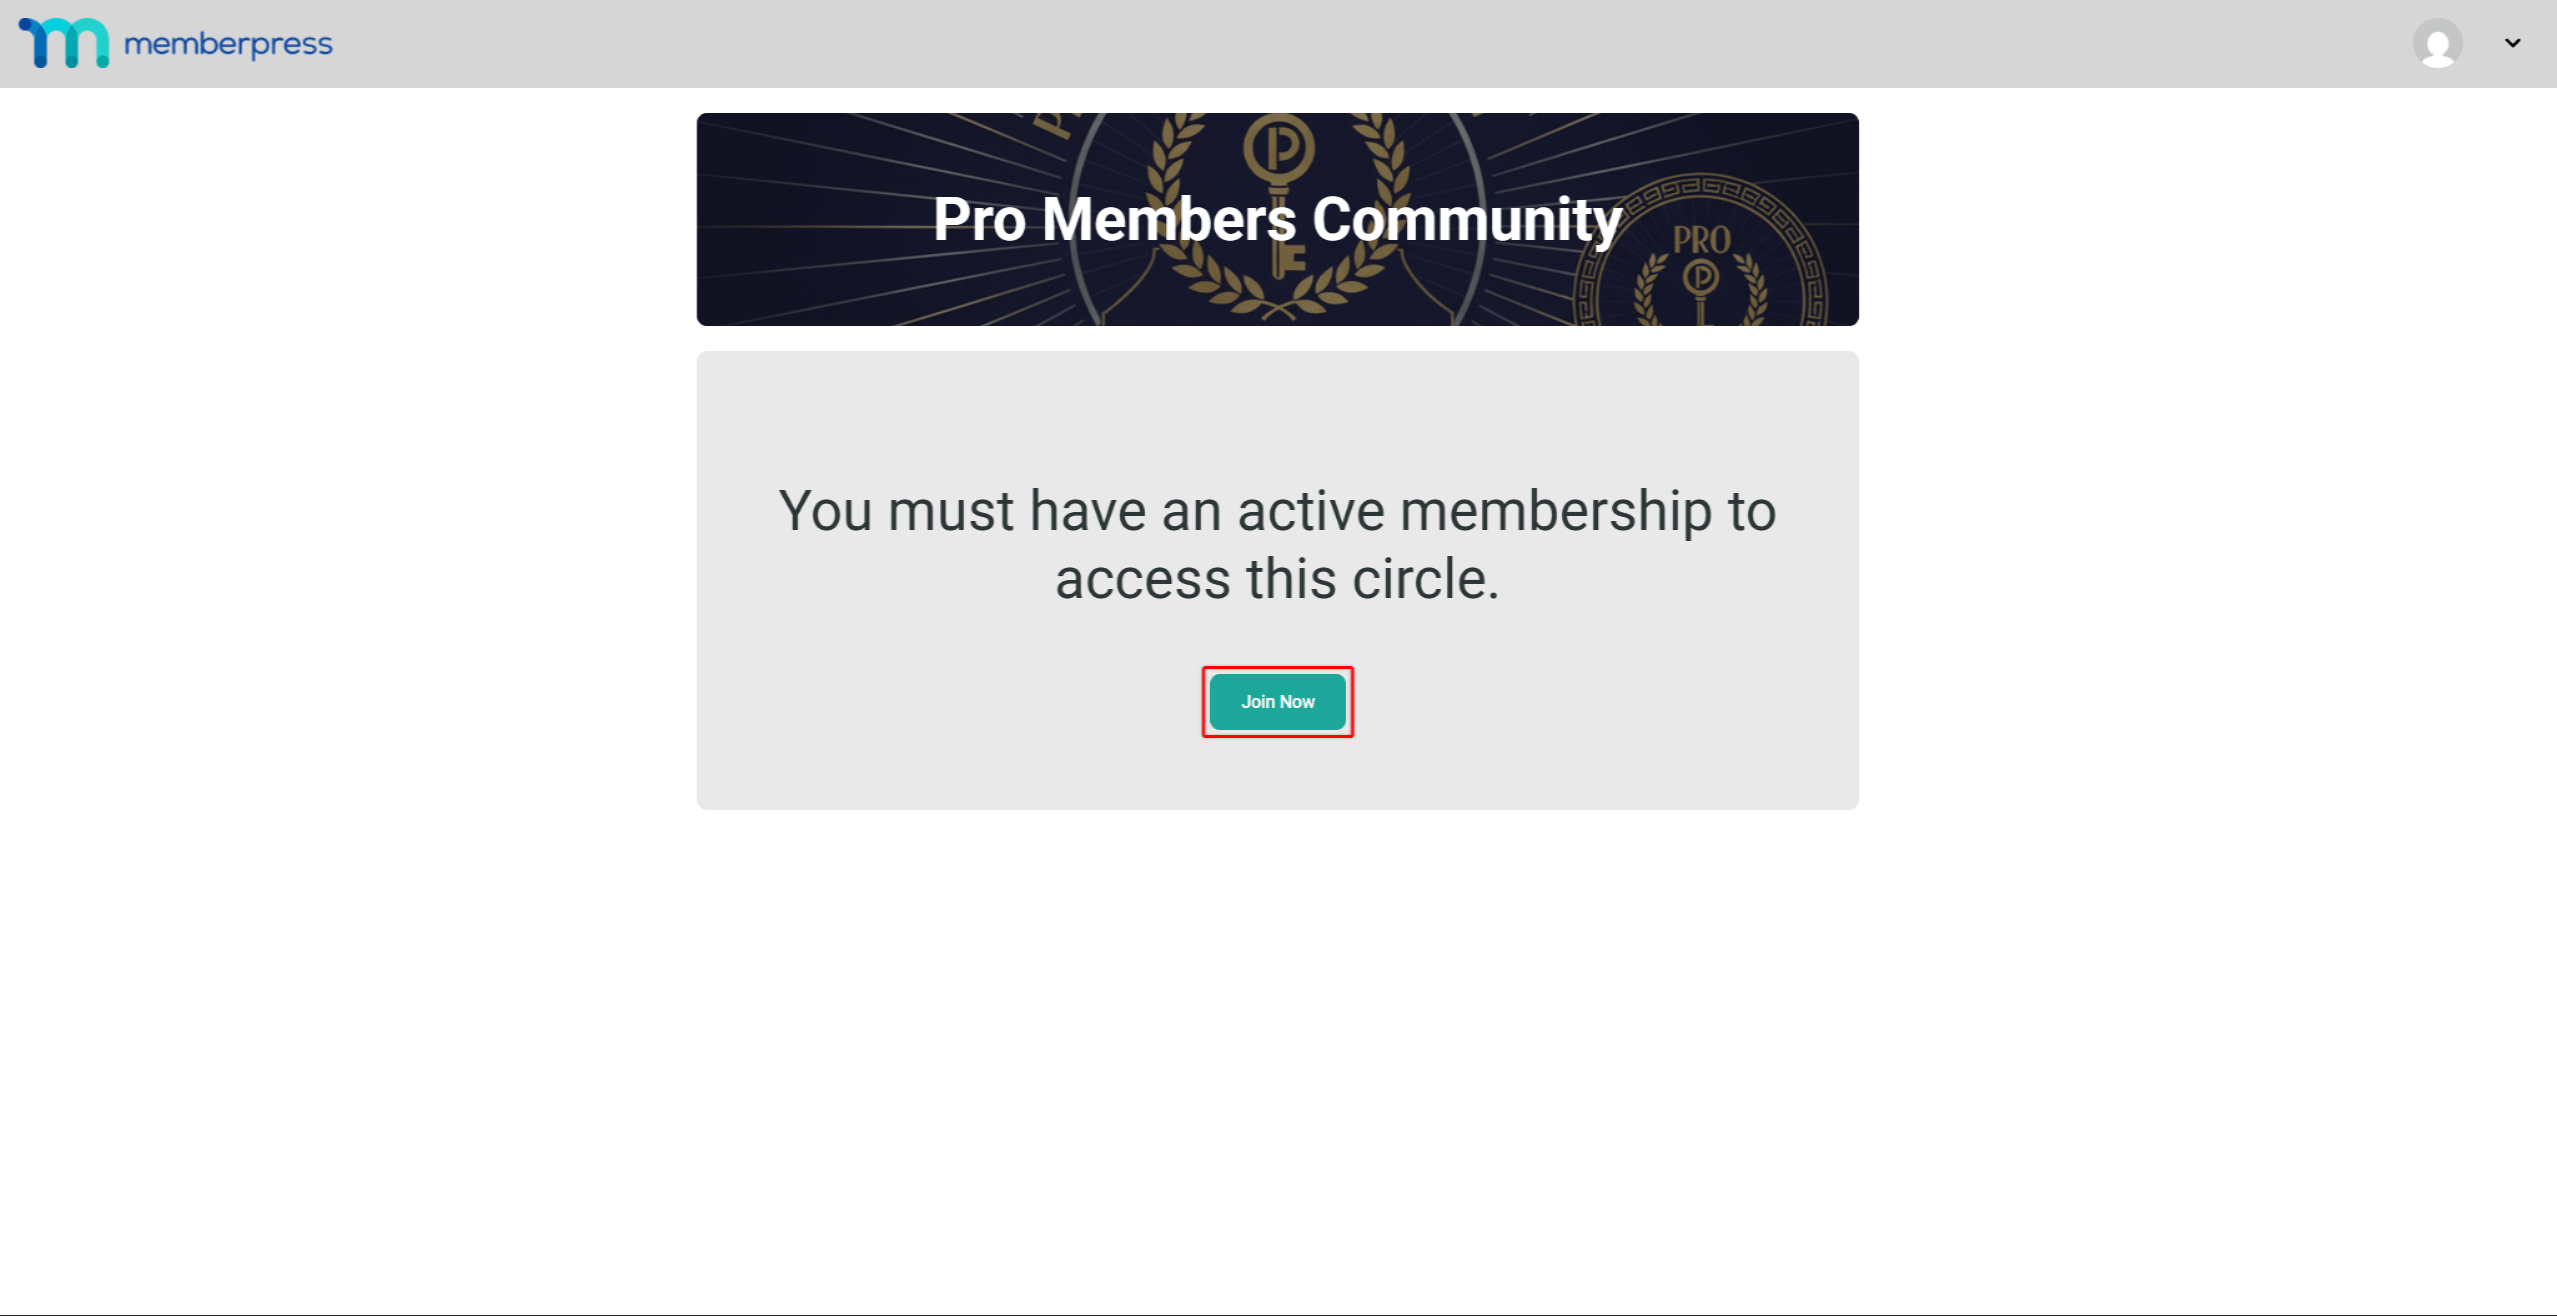
- Register for the required membership through the standard process, or upgrade from your current membership.
- Return to the Circle page, and click the Join Now button again.
Some Circles use automatic assignment, enrolling members immediately upon reaching required membership levels. This seamless integration rewards upgrades with instant access to the community.
Leaving Circles
Members can leave any circle at any moment. They should follow these steps to leave a circle:
- Navigate to the Circle.
- Click on the Settings tab.
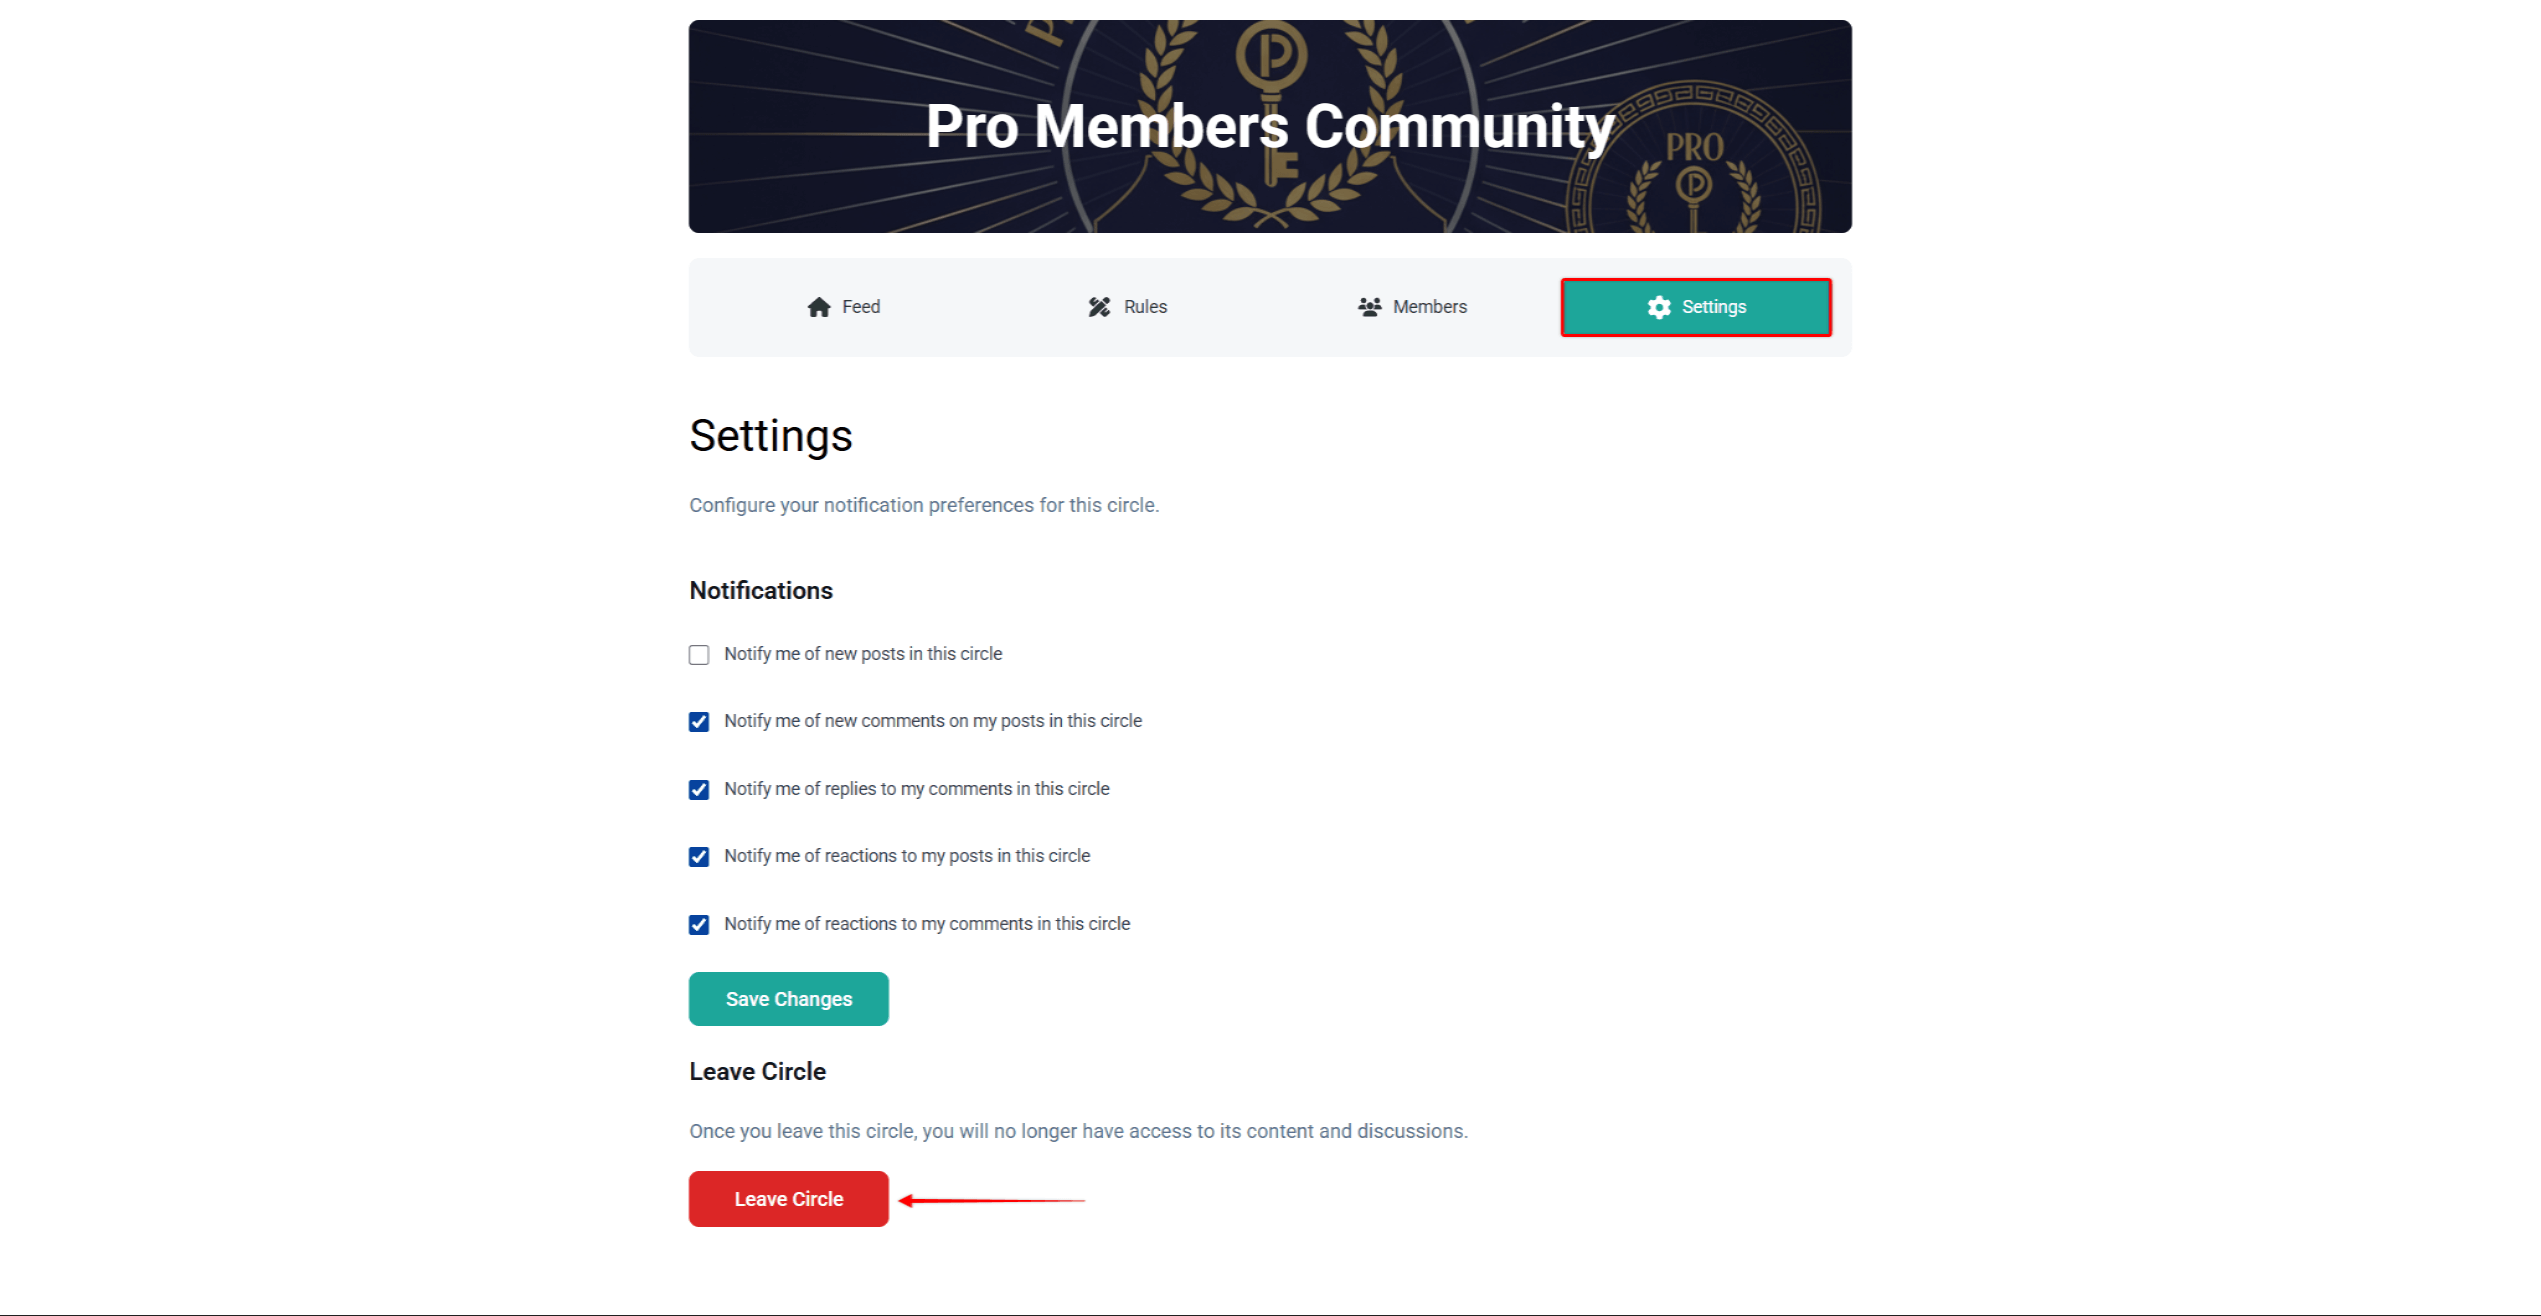
- Scroll down and click the Leave Circle button.
Leaving doesn't affect other Circle memberships or overall site membership. Members can rejoin public Circles anytime, but may need re-approval for private ones.
Managing Circle Notifications
Notification settings help members balance engagement with information overload.
Configuring Email Preferences
Members can enable and disable email alerts separately for each circle. Members can update email preferences under circle settings:
- Navigate to the circle, and click the Settings tab.
- Under the Notifications section, enable or disable each email notification by clicking its checkbox.
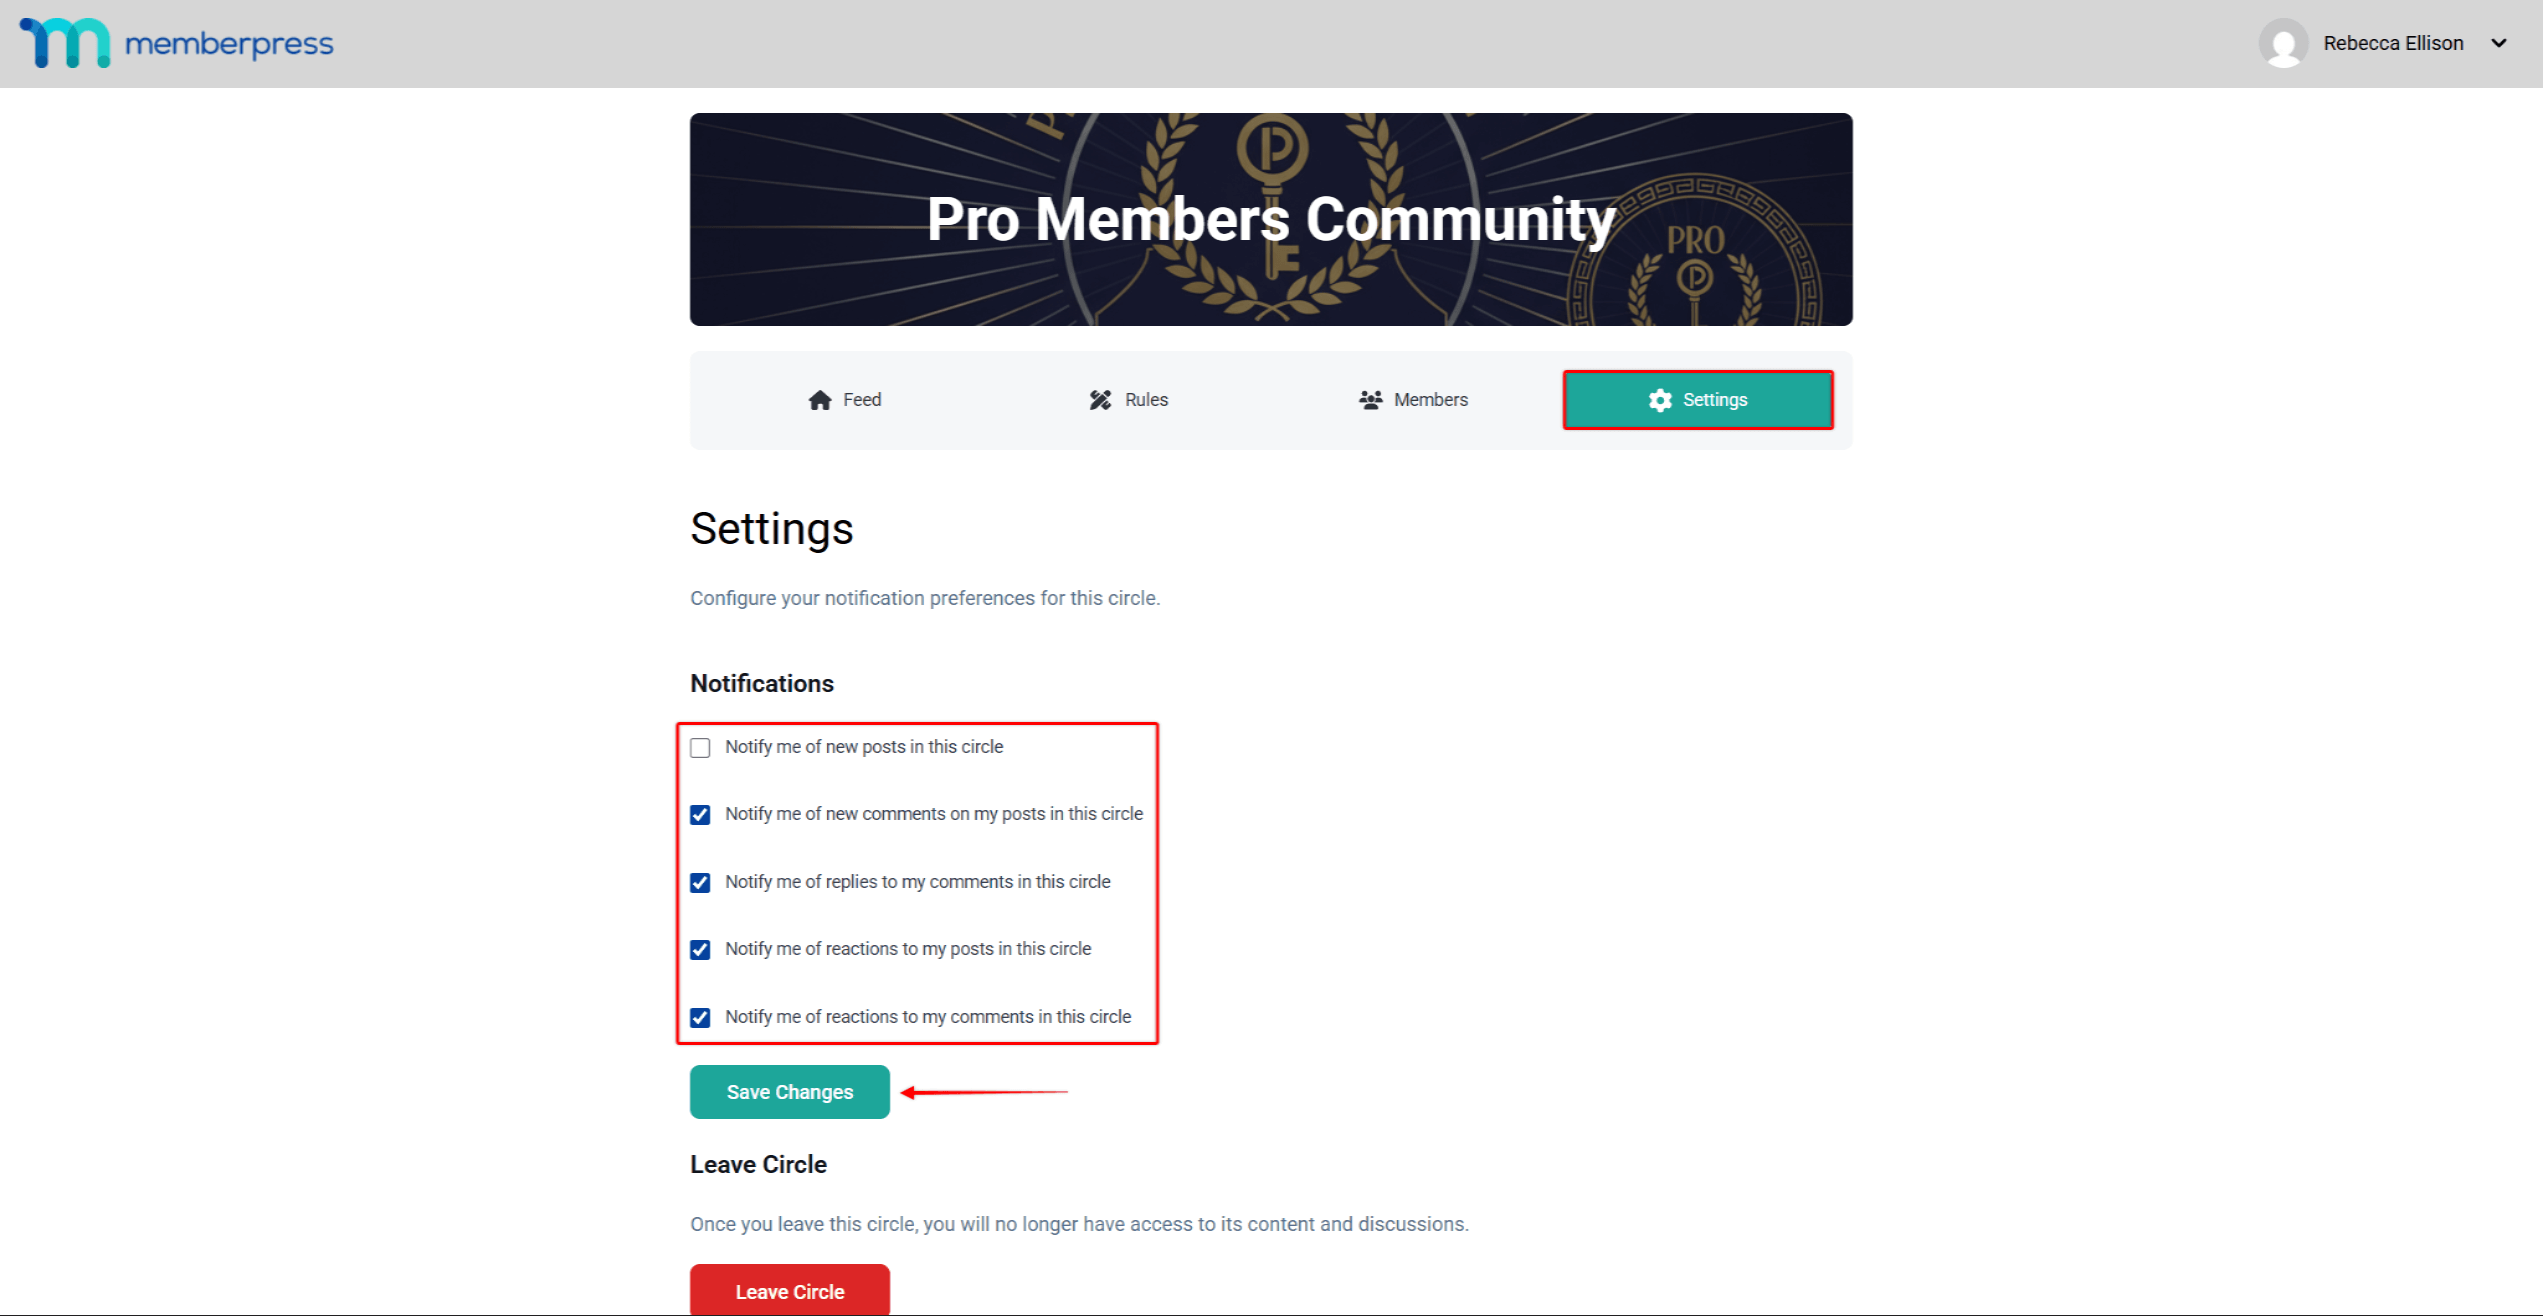
- Click Save Changes to apply.
Creating and Sharing Content
Circle participation centers on the activity feed, where members create posts and engage with community content.
Writing Circle Posts
Members share thoughts, questions, and resources by creating posts:
- Navigate to the Circle > Feed tab.
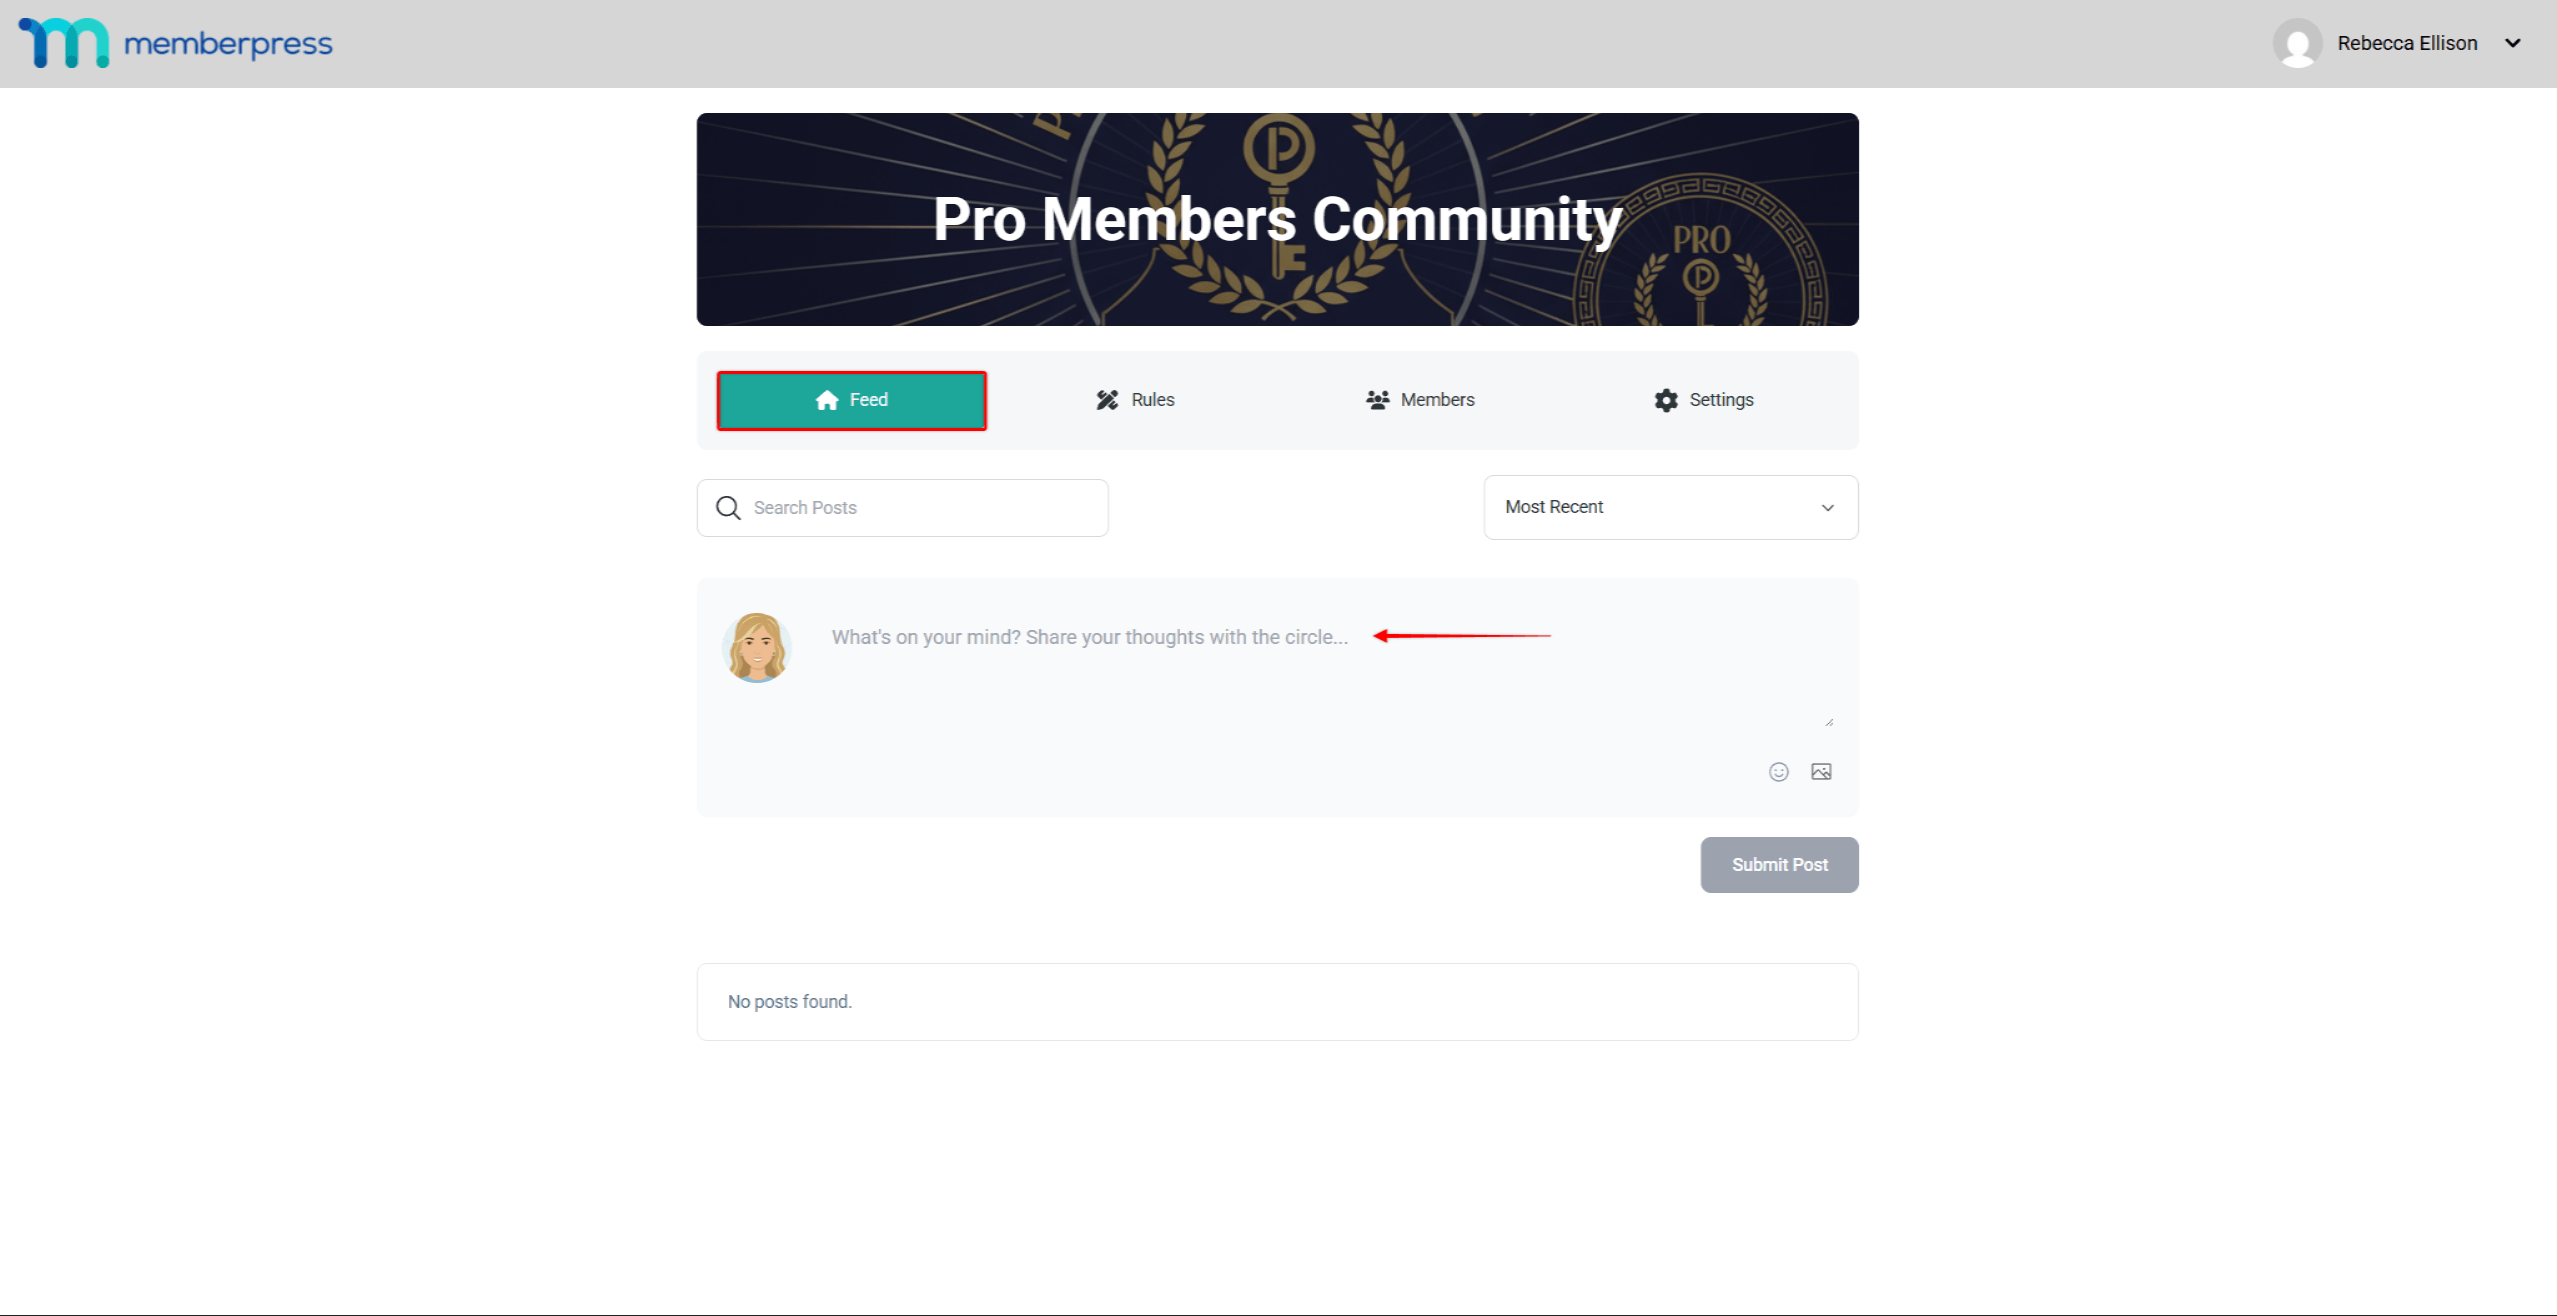
- Click in the “What's on your mind?” text box.
- Write the post text. Posts also support emojis, which can be added by clicking the smiley icon.
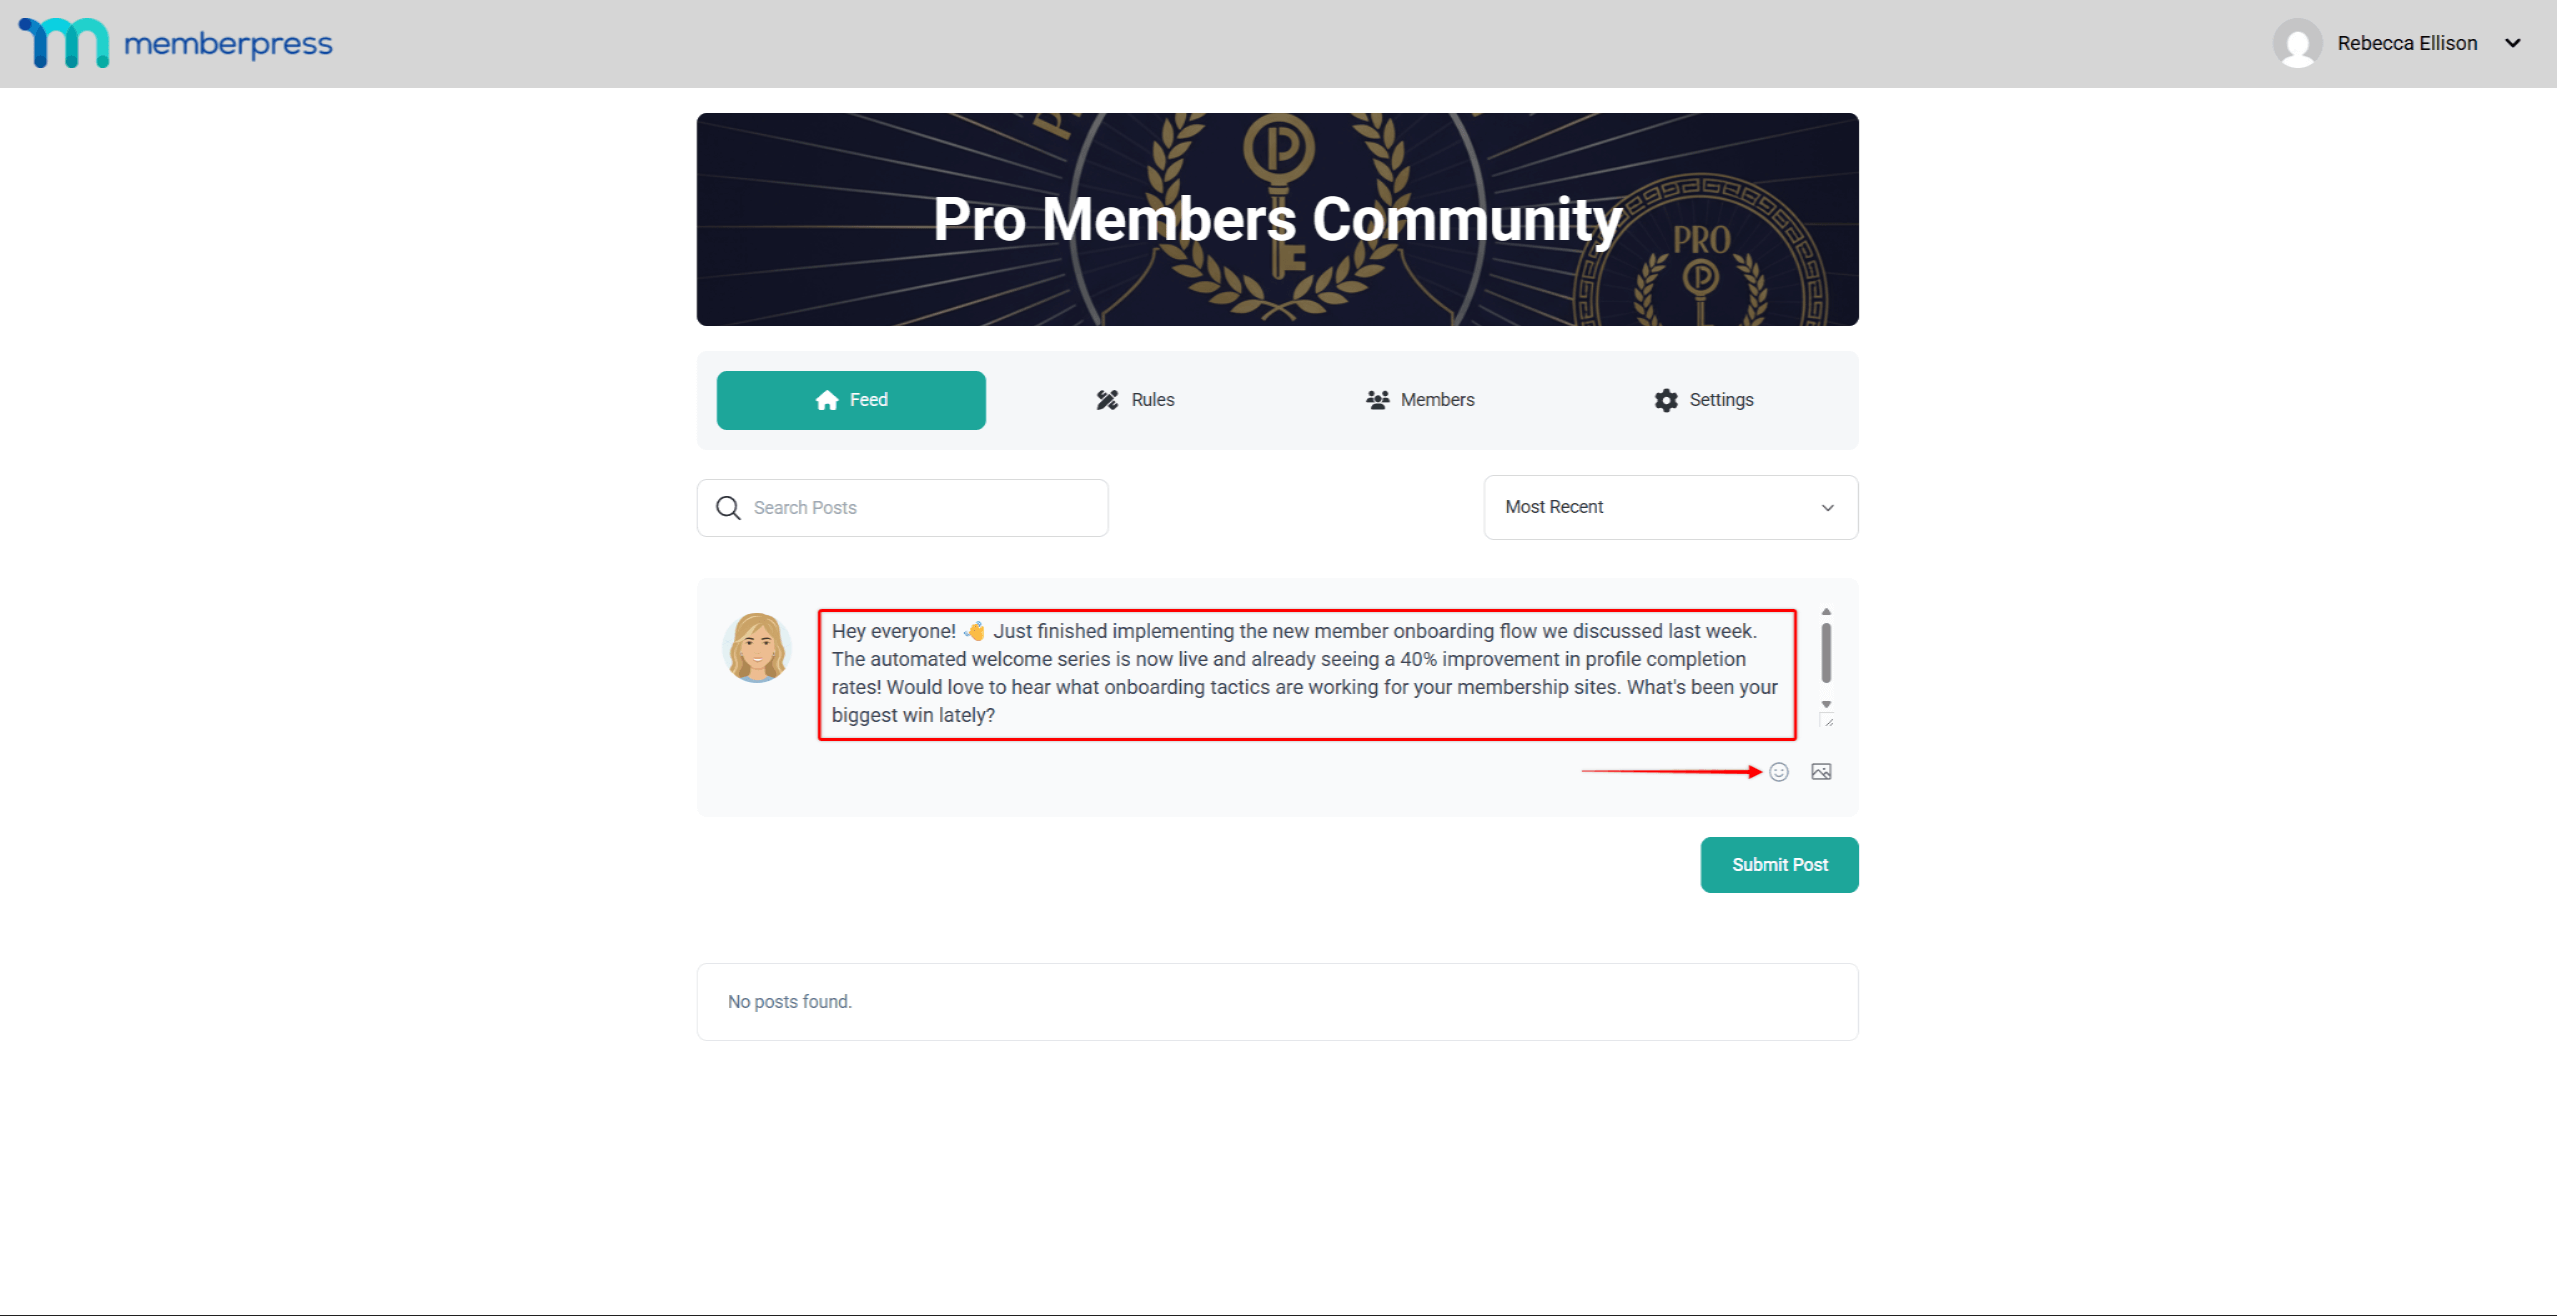
- Furthermore, to add images, click the image icon within the post box.
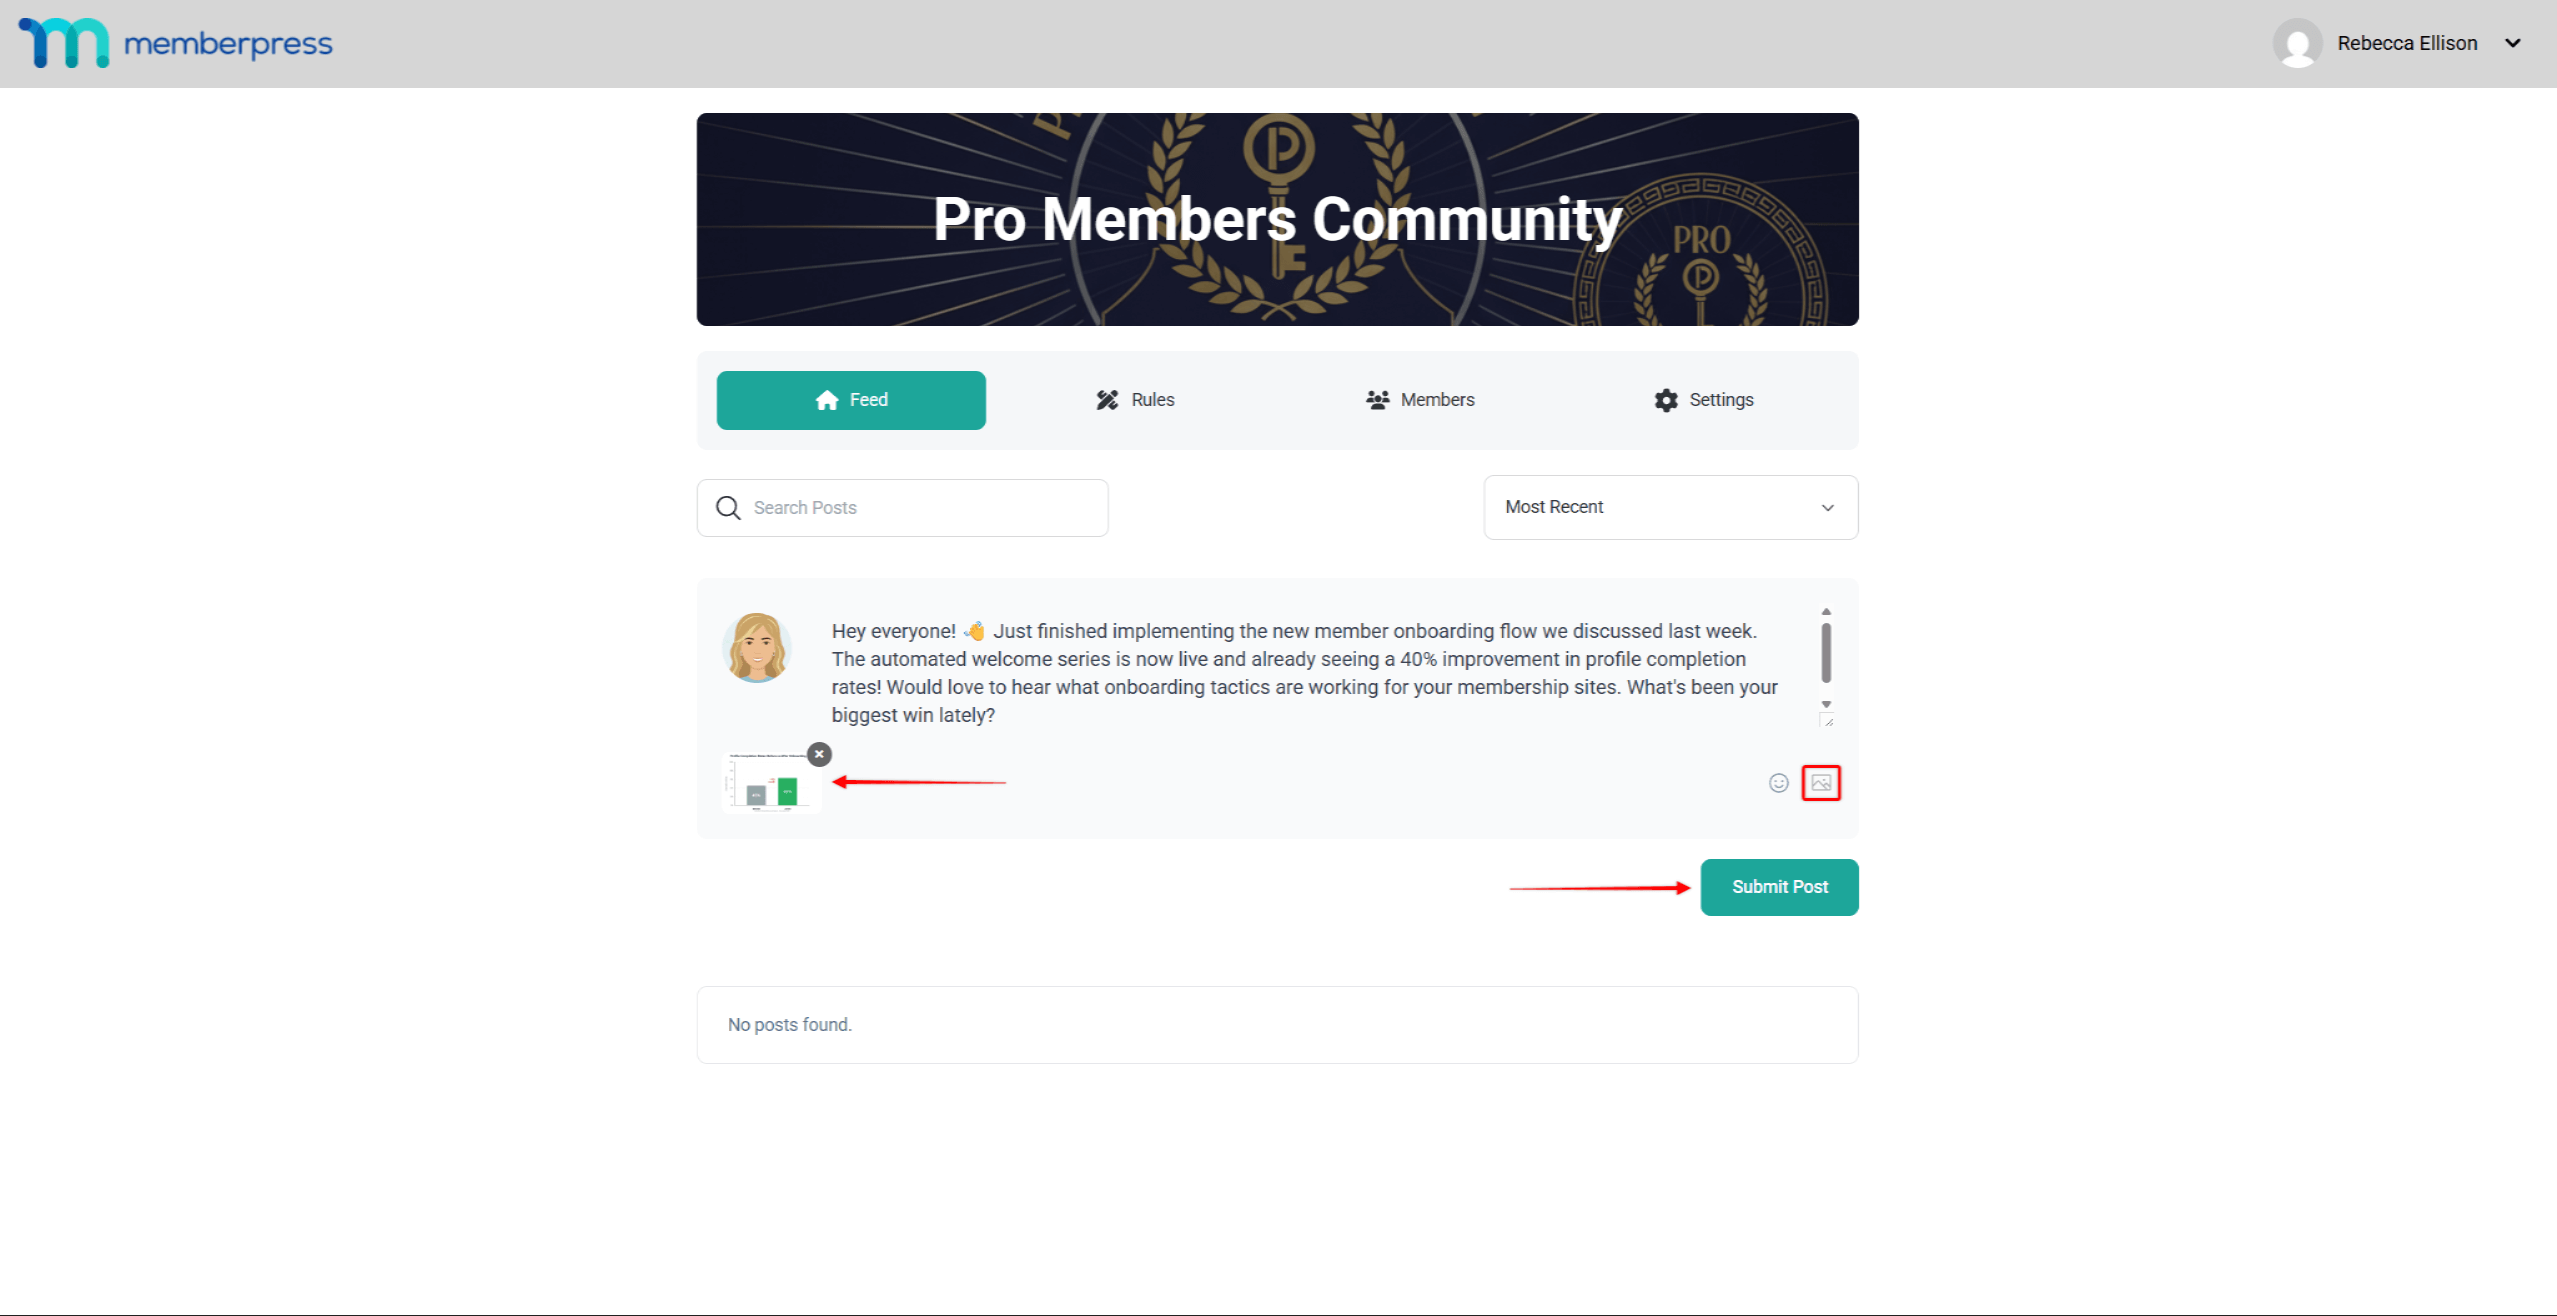
- Click Submit Post to publish to the feed.
Posts appear immediately unless moderation is active.
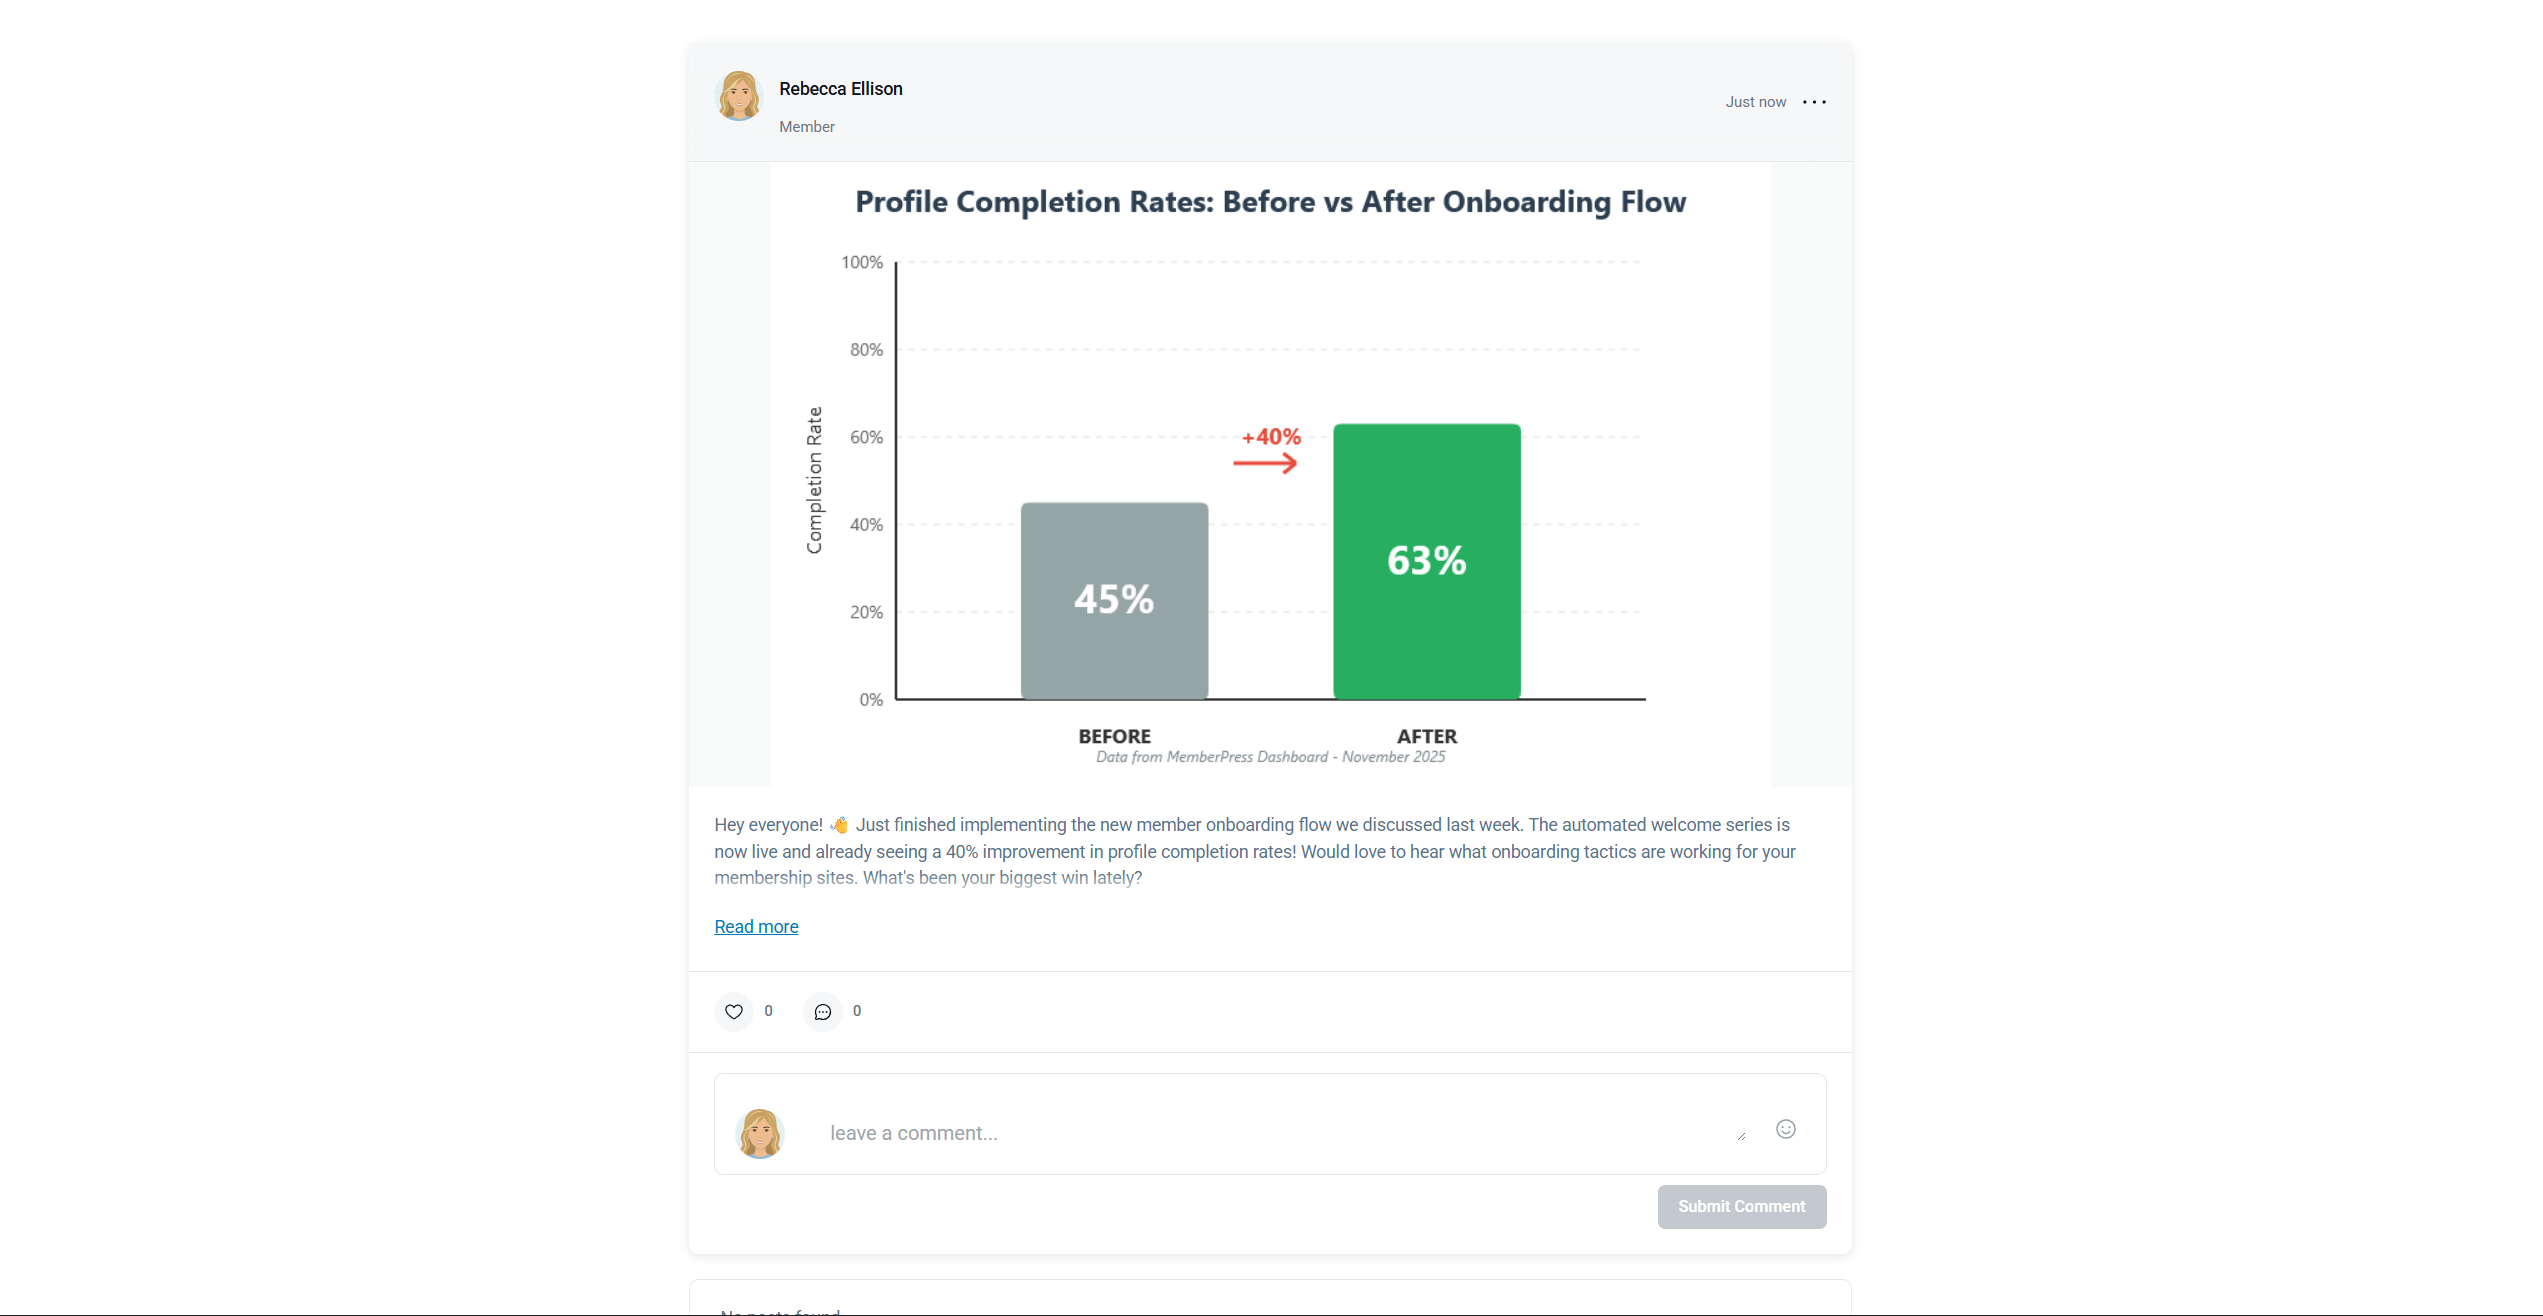
Now, other users can comment on your post or like it by clicking the heart icon.
