E-learning has significantly increased in popularity due to the 2020 pandemic. The demand for online lessons is rapidly growing, so helping your members find and purchase your courses should be a top priority.
However, organizing large volumes of content can be a challenge. Straightforward navigation is crucial for an optimal online student experience.
Using a plugin such as MemberPress Courses can help you control user access and transform your website into a full-fledged Learning Management System (LMS) so your subscribers have a clear overview of your offerings.
In this article we'll go over how you can help your members find and purchase your courses with MemberPress. Let’s dive in!
Introducing MemberPress Courses
MemberPress Courses is an add-on for our membership plugin that helps you transform your website into a fully functioning e-learning portal without the need for complex coding.
It lets you build your curriculum visually with a drag-and-drop interface and customize various elements to make your course page look professional on the front end.
MemberPress also comes with powerful access rules, enabling you to control the visibility of various areas of your website based on membership level and content type. Plus, you can easily automate your subscription fees and set up payment reminders.
To access these features, download our MemberPress plugin and activate the Courses add-on from your dashboard under MemberPress > Add-ons > Courses.
Once activated, an MP Courses menu will appear in your WordPress dashboard.
Navigate to MP Courses > Courses to get started.
How to Help Your Members Find & Purchase Your Courses (In 4 Steps)
Now that we’ve introduced MemberPress and the Courses add-on, let’s see how they can help you organize your content so that your members can find and purchase your classes.
Step 1: Make Sure ReadyLaunch™ is Enabled
Built-in ReadyLaunch™ by MemberPress lets you create pages (including courses, certificates, and quizzes) that are…
- Mobile-responsive
- Optimized to sell
- Branded
…and great looking! No coding required.
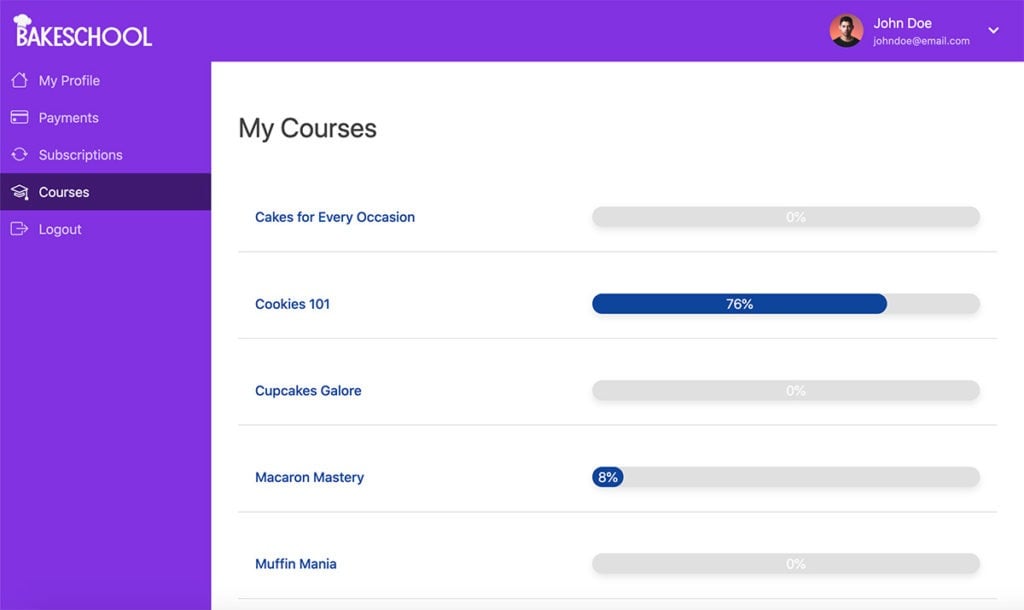
ReadyLaunch™ automatically styles all your MemberPress pages, and should be enabled by default when you install MemberPress.
To learn more about it, click the button below.
Step 2: Add Your Courses Page to Your Primary Navigation Menu
By default, MemberPress creates a Courses page at yourdomain.com/courses. This is where your classes will be listed once you add your curriculum. However, you still need to add the page to your navigation menu so that your members can find it.
To do so, navigate to Appearance > Menus, then select your main navigation menu (or create one). Next, check the box next to Courses in the list on the left under Add Menu Items and click on Add to Menu. Drag and drop it to where you want it to appear, and save your changes:
You can also control which menu items users can access by applying If Menu rules.
Step 3: Create Sales Pages for Your Courses
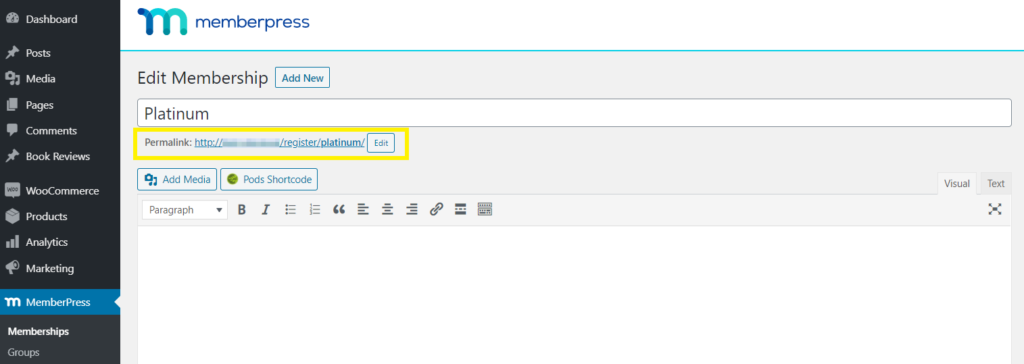
MemberPress enables you to set up registration pages quickly. As soon as you create a membership, the plugin will automatically generate a URL where visitors can register. You can access this link via Memberships > Edit Membership:
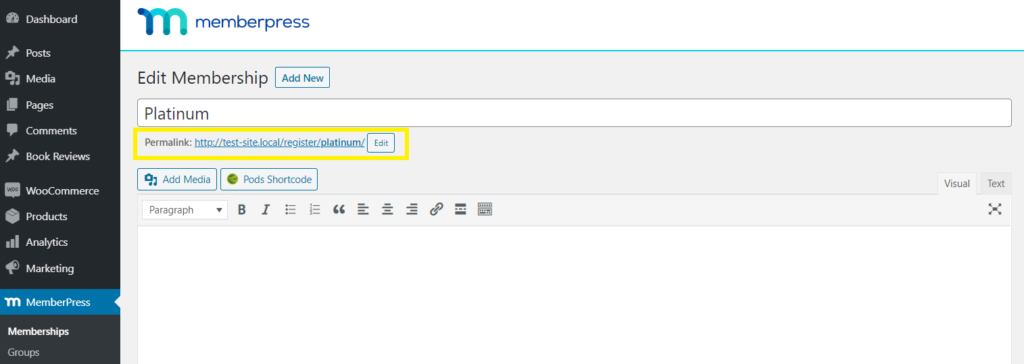
Next, go to your course page, navigate to Settings, and ensure that the Include in Course Listing toggle is in the on position.
Then, paste your registration link in the Sales Page field. This way, students will be redirected to the appropriate registration form to purchase the course:

Alternatively, you can manually embed the following shortcode anywhere on your website:
[mepr-membership-registration-form id="example"]Note that you should replace “example” with your membership ID.
Step 4: Determine the Best Way to Bundle and Sell Your Courses
Finally, it’s smart to consider your goals and whether listing your courses individually makes sense for your website. For instance, if you offer long-term courses aimed at several membership levels, selling them as a package might be a better option.
Depending on your needs, you can choose from the following strategies:
- List individual courses: This method is suitable for selling short-term courses or if you want your content to be accessible to the public.
- Offer course packages: As an incentive to subscribe, you can bundle several or all of your courses together and sell them as a package.
- Differentiate your content based on multiple memberships: You could also package your courses into several tiers, target different users, and create an upgrade path.
MemberPress gives you the flexibility to sell in various ways thanks to its powerful Rules feature. It enables you to restrict access to your courses so that only subscribed members can view your content. You can do so by navigating to MemberPress > Rules.
For instance, to sell your courses individually, you should create a membership for each class (under Memberships > Add New). Then, head to Rules > Add New.
Select A Single Course from the dropdown menu, then enter the name of the course you wish to restrict from public access. Under Access Conditions, select the membership that should have permission to view this class:
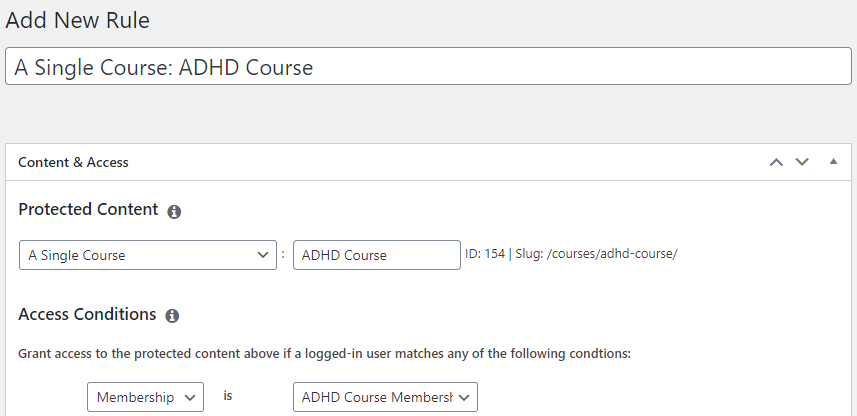
Don’t forget to add the registration page URL to the Sales Page field later under Settings in the course editor.
Similarly, to sell your courses in bulk, create a new membership (such as “Platinum” in the example below). This time, when you add a new rule, select All Courses from the dropdown menu, and repeat the steps above.
This way, your Platinum members will be able to purchase all your courses at once:
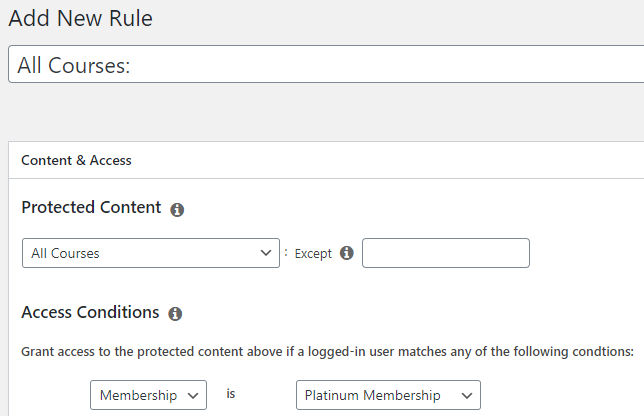
You can combine rules in other ways to accomplish various course package options depending on your needs.
An additional thing to consider when putting together your package options is whether or not you want to include quizzes as a means of learning. MemberPress Courses now has a built-in Quizzes feature to keep your students motivated and working hard.
Conclusion
Designing a clear customer journey is crucial if you want to increase conversions. With our MemberPress Courses plugin, you can create several membership levels, differentiate your content, and offer various e-learning packages.
In this article, we’ve discussed four steps you can take to help your members find and purchase your courses with MemberPress:
- Make sure ReadyLaunch™ is enabled, and your gateway is set up.
- Add your Courses page to your navigation menu so that visitors can quickly locate it.
- Create Sales Pages to help your members purchase your courses.
- Apply rules to restrict your content from public view, bundle courses together, or differentiate them by membership.

Get MemberPress Today!
Start getting paid for the content you create.
Do you have any questions about using MemberPress to help your users find and purchase courses? Let us know in the comments section below!


Great article, thanks for sharing your relevant idea. Keeping up with the latest trends , keywords, phrases ,and hashtags that are most relevant to your own company’s industryis imperative when developing an online marketing strategy and launching an official business blog.
Hi John,
Thanks for posting this. The videos and descriptions are very helpful.
How would I charge a paid-up member for each course, separate from their sign up fee.
Maureen
Hi Maureen 🙂
If you’d like to sell courses individually, you’ll want to create a “membership” for each of the courses you’re looking to sell. With the membership created, you can protect the course by using the “A Single Course” rule, then granting access to the membership that should receive access to it. For more in-dept info, go to our help doc, How to Sell Your Courses, and scroll to the section titled, “Selling Courses Individually”. Hope that helps! Thanks for reaching out.
~ Syble
I’m trying to figure out how the embed my newly created MemberPress course in my shop using html. This article got close to answering that question, but I still haven’t found the information I need. 🙁