MemberPress member Profiles transform basic member accounts into personalized showcases that bring your membership community to life. MemberPress Profiles come with premade, customizable layouts and dynamic content blocks.
This document shows you how to create MembePress Profiles and use them to build your communities.
ClubDirectory™ Video Tutorial
Understanding Member Profiles
MemberPress ClubSuite™ is a member networking and community pack that includes the ClubDirectory™ and ClubCircles™ add-ons.
Member Profiles are a feature within the ClubDirectory™ add-on, together with Member Directories. To use them on your website, you need to install the MemberPress ClubDirectory™ add-on and configure the global Profile settings.
Member Profiles serve as individual member showcases within your community ecosystem. Each profile provides a dedicated space where members share information, connect with others, and demonstrate their involvement. Profiles automatically generate unique URLs for each member, making them easy to share and discover.
The profile system respects your membership hierarchy and access controls. You can configure different visibility levels, ensuring that members only see the information relevant to their membership level. This granular control maintains privacy while encouraging engagement.
Well-designed profiles encourage members to complete their information and actively participate. You can use the premade MemberPress profile patterns or create your designs with profile-specific Gutenberg blocks.
Creating Profiles
Profiles serve as master templates that define how member profiles appear and function. They determine visual styling, available features, information fields, and interaction capabilities.
Thus, each profile includes layout design, available fields, display sections, and styling options.
You can create different Profiles for different membership levels, with premium members receiving enhanced features. When users qualify for multiple Profiles, MemberPress will display the Profile with the highest priority number. This setup enables you to add features to users’ profiles based on their membership level. For example, if a member upgrades to a higher membership level, their profile type automatically switches, instantly granting enhanced features.
MemberPress will automatically create the default Profile called “User Profile”, which will be applied to all users. You can use this default profile type as is, modify it to your needs, or add additional custom ones.
To create an additional custom Profile, follow these steps:
- Navigate to Dashboard > ClubSuite™ > Profiles.
- Click Add New.
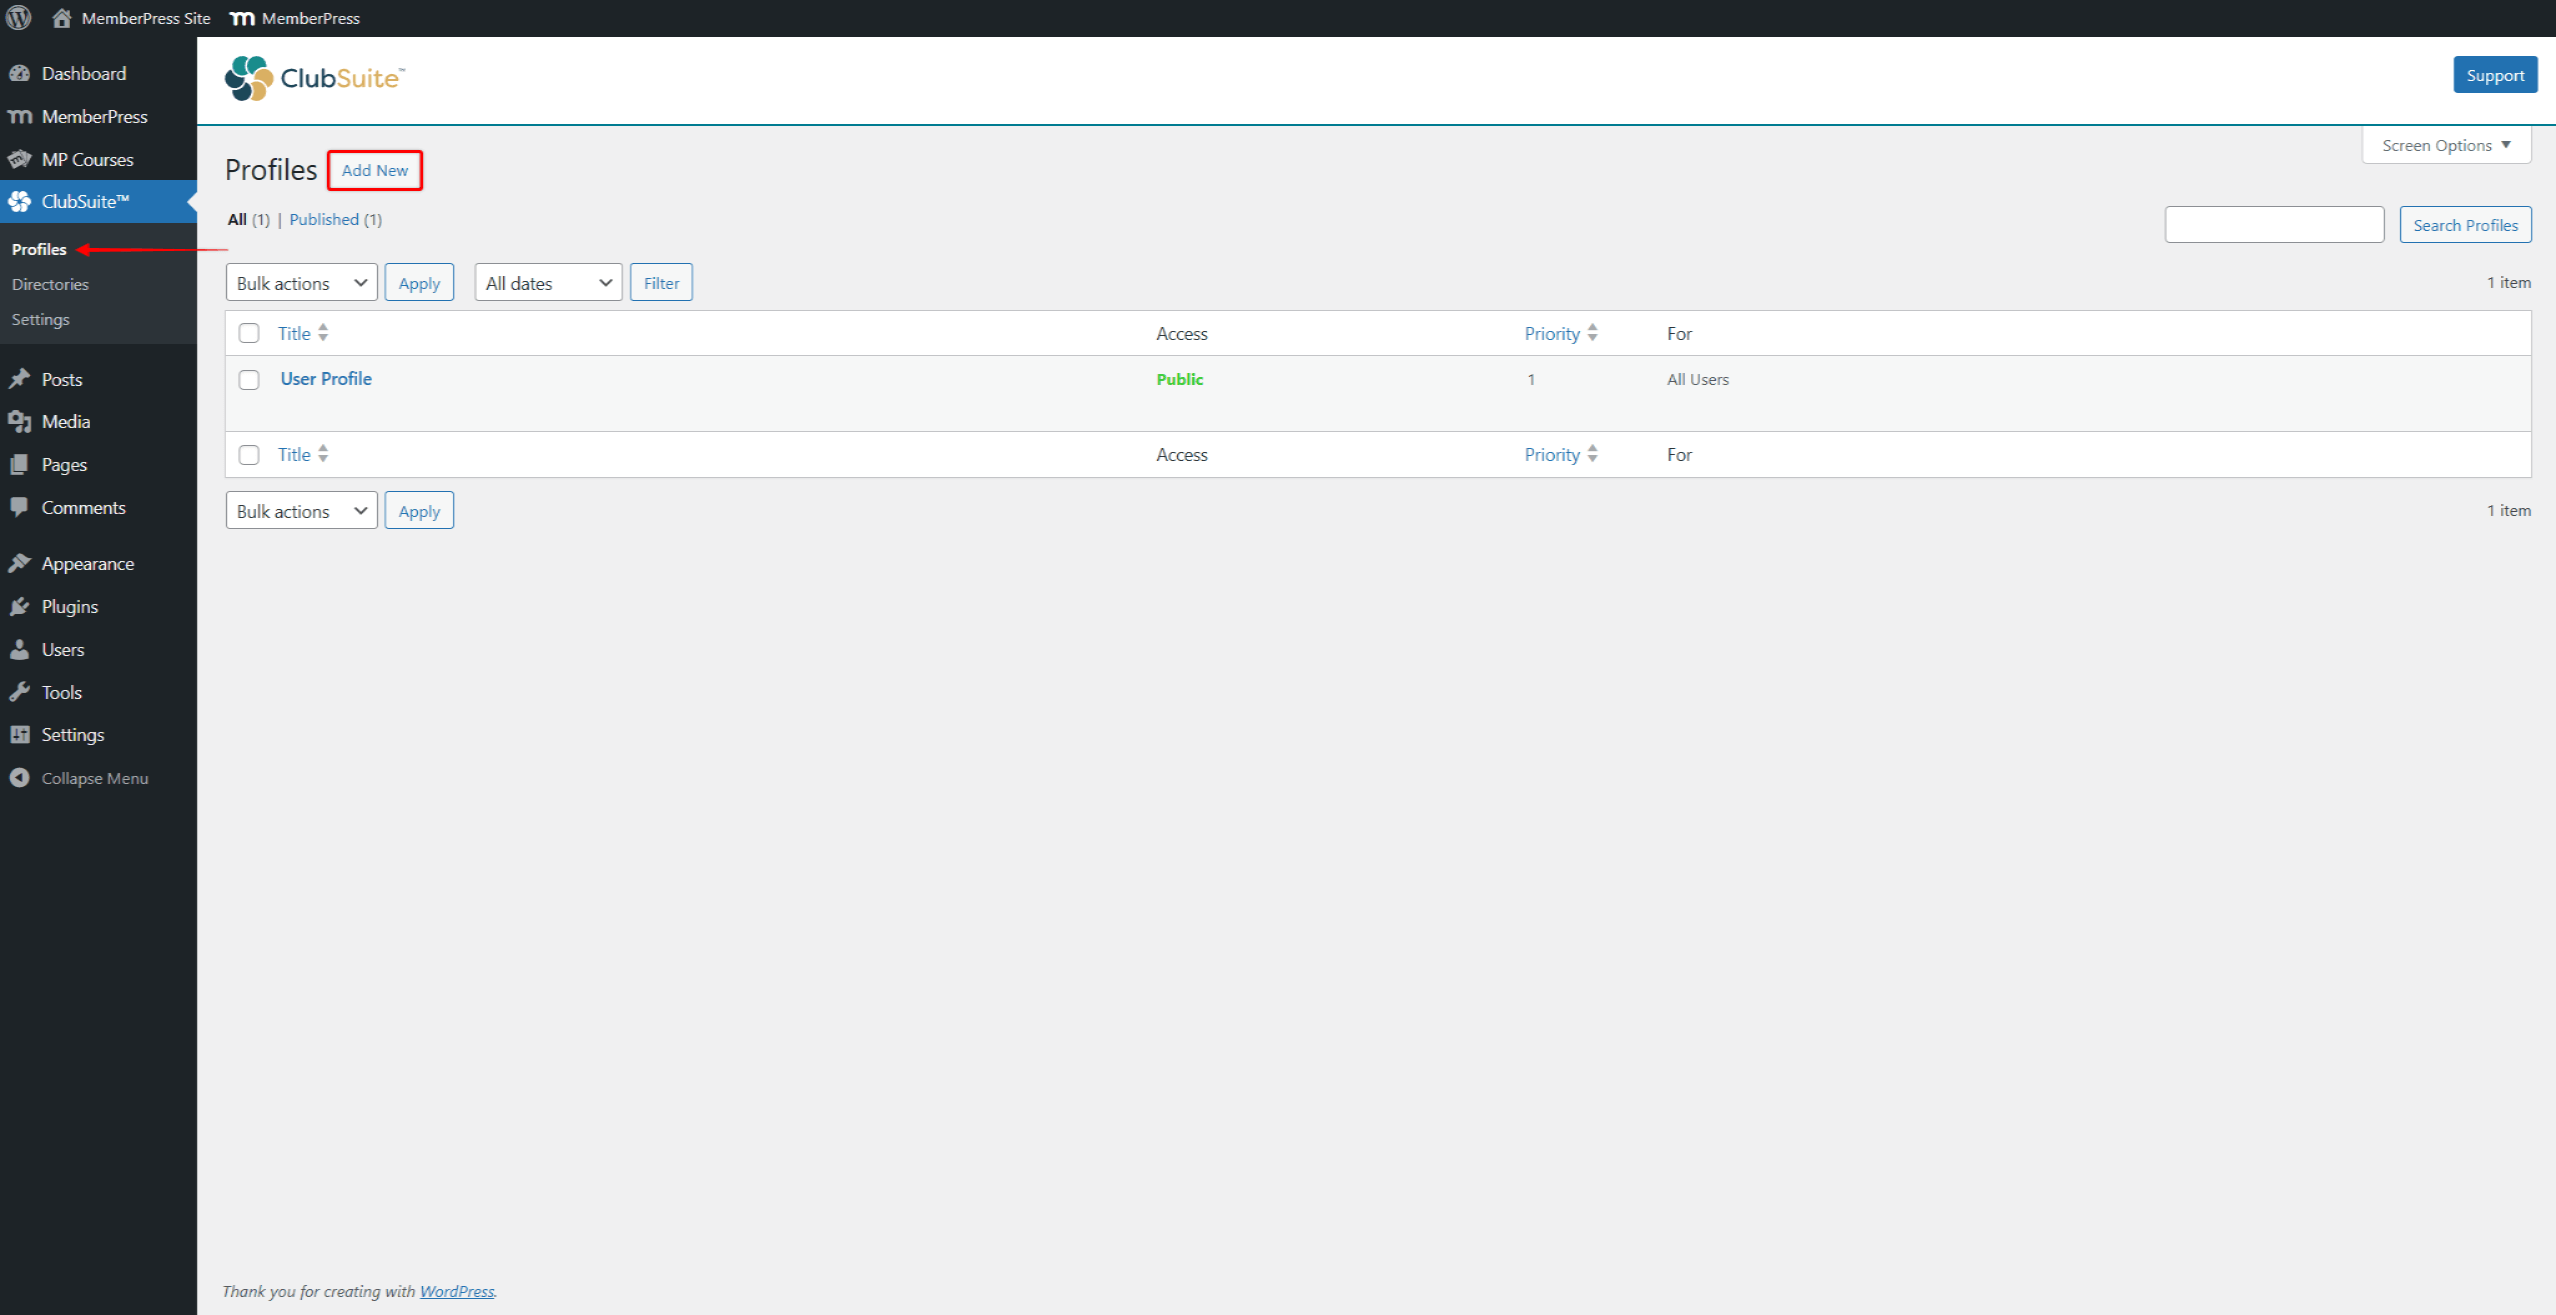
- Choose one of the available premade patterns (Starter Patterns), or close the pattern selection window (X icon) to create a custom design.
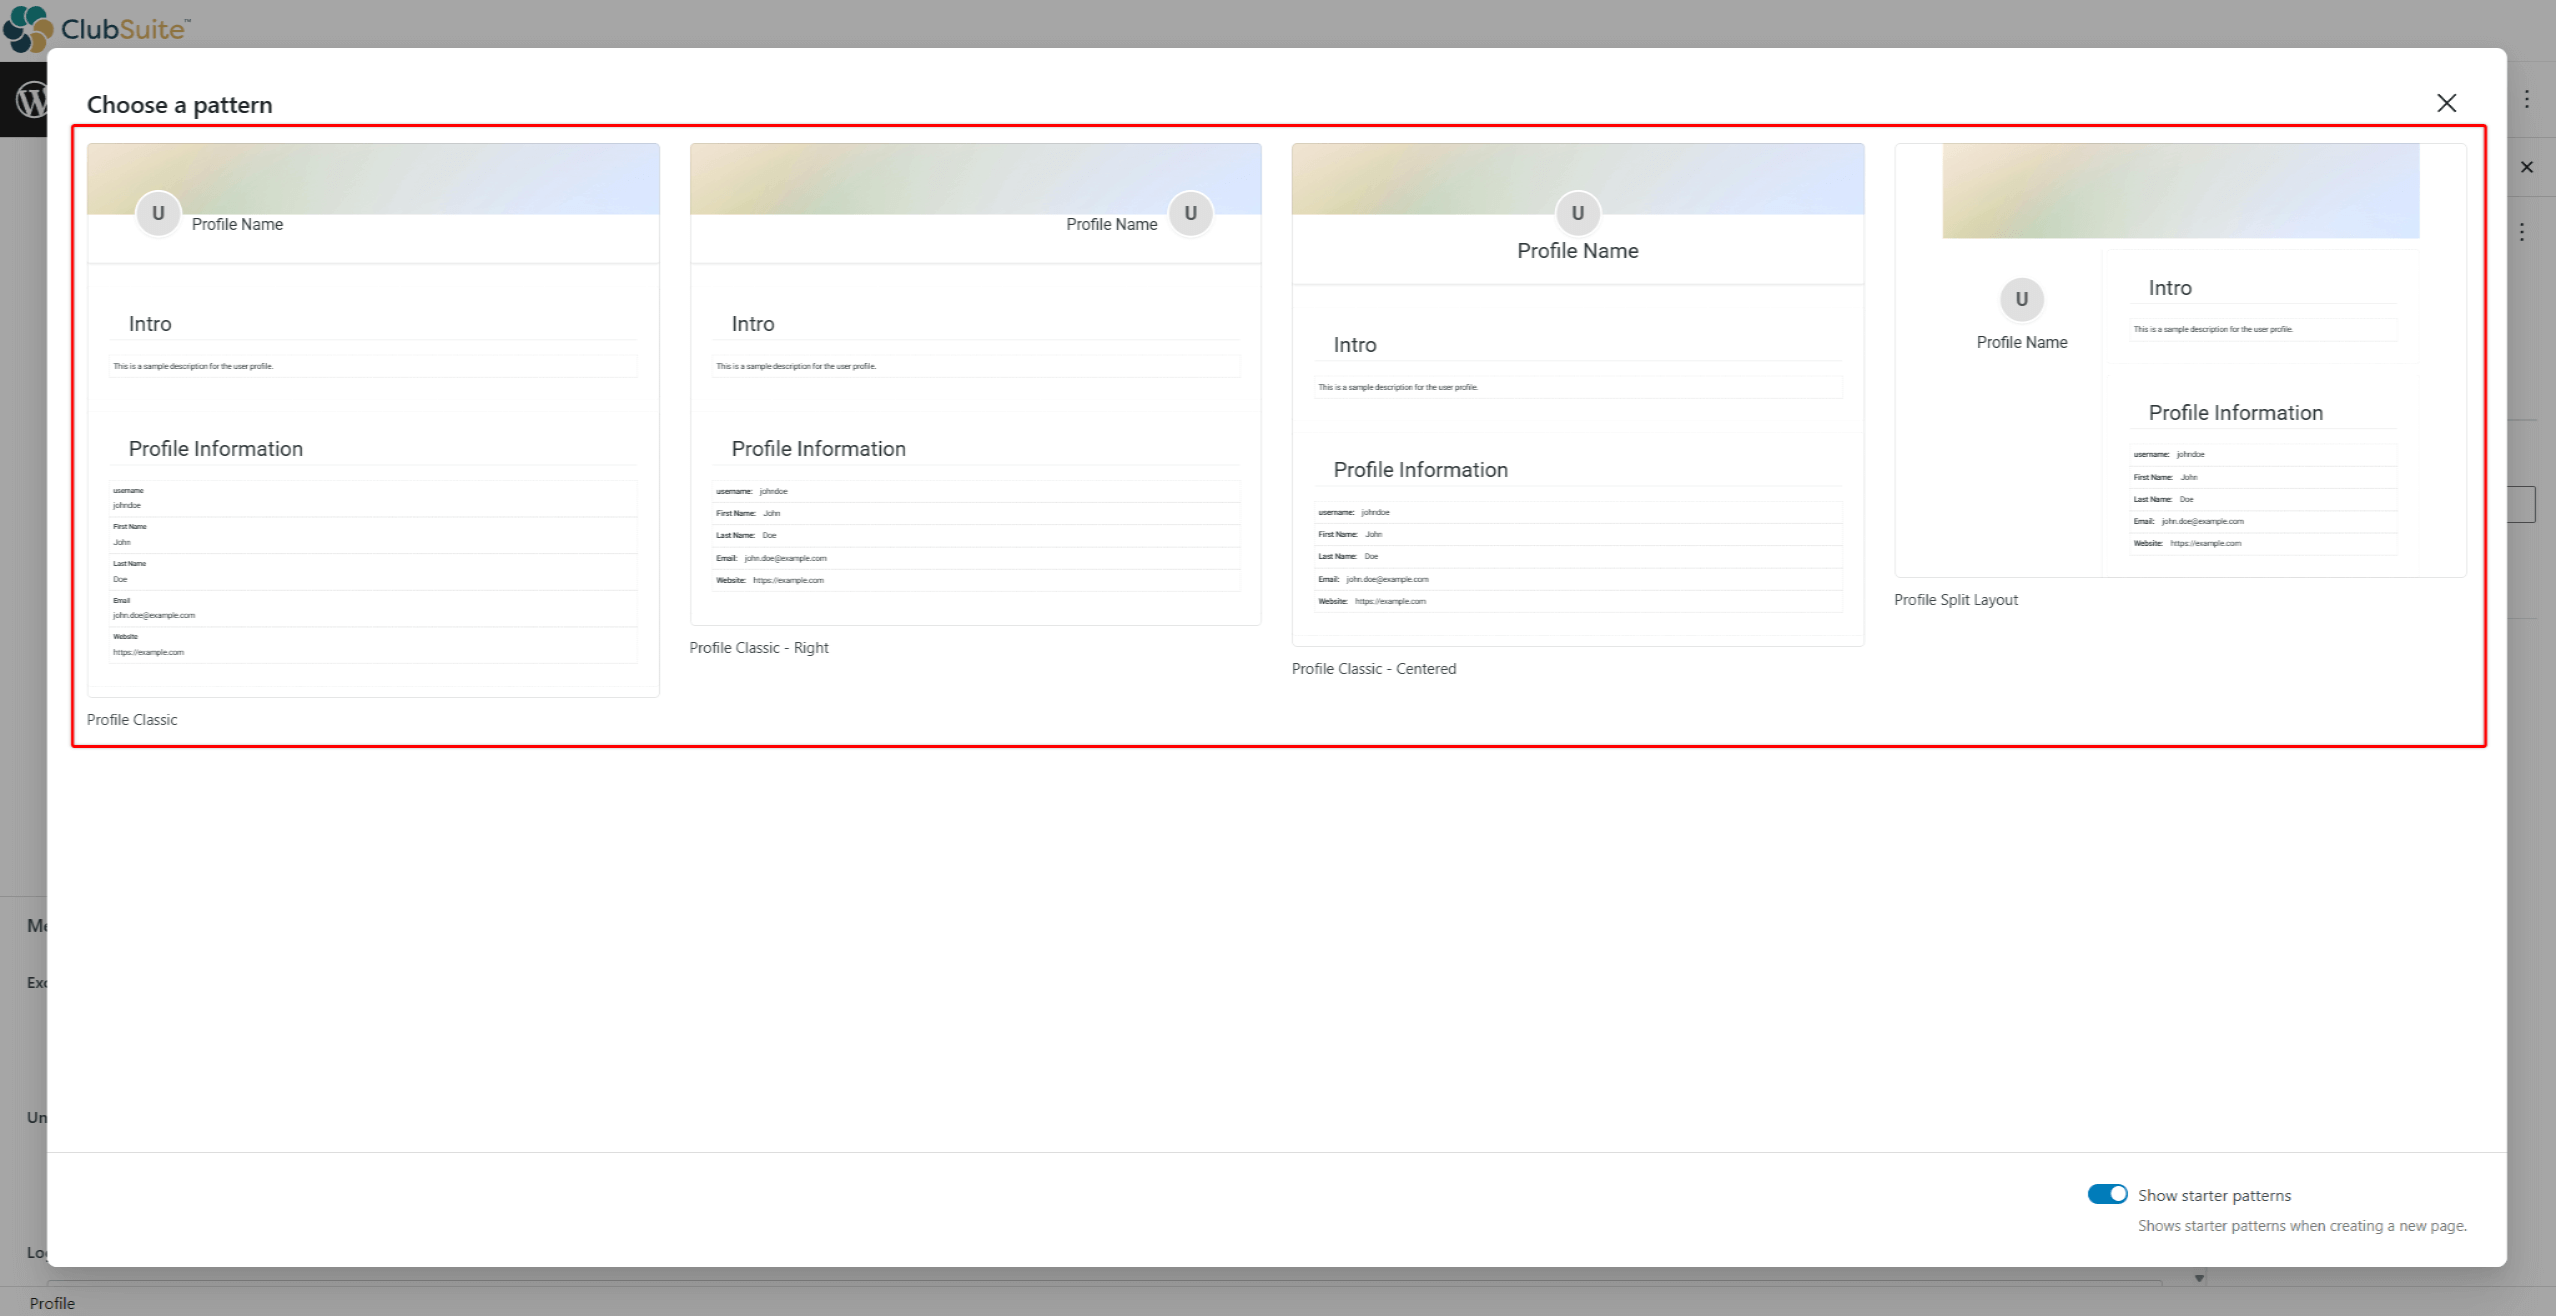
- Enter a title (name) that matches the use of the Profile you’re creating (e.g “Pro Member Profile”).
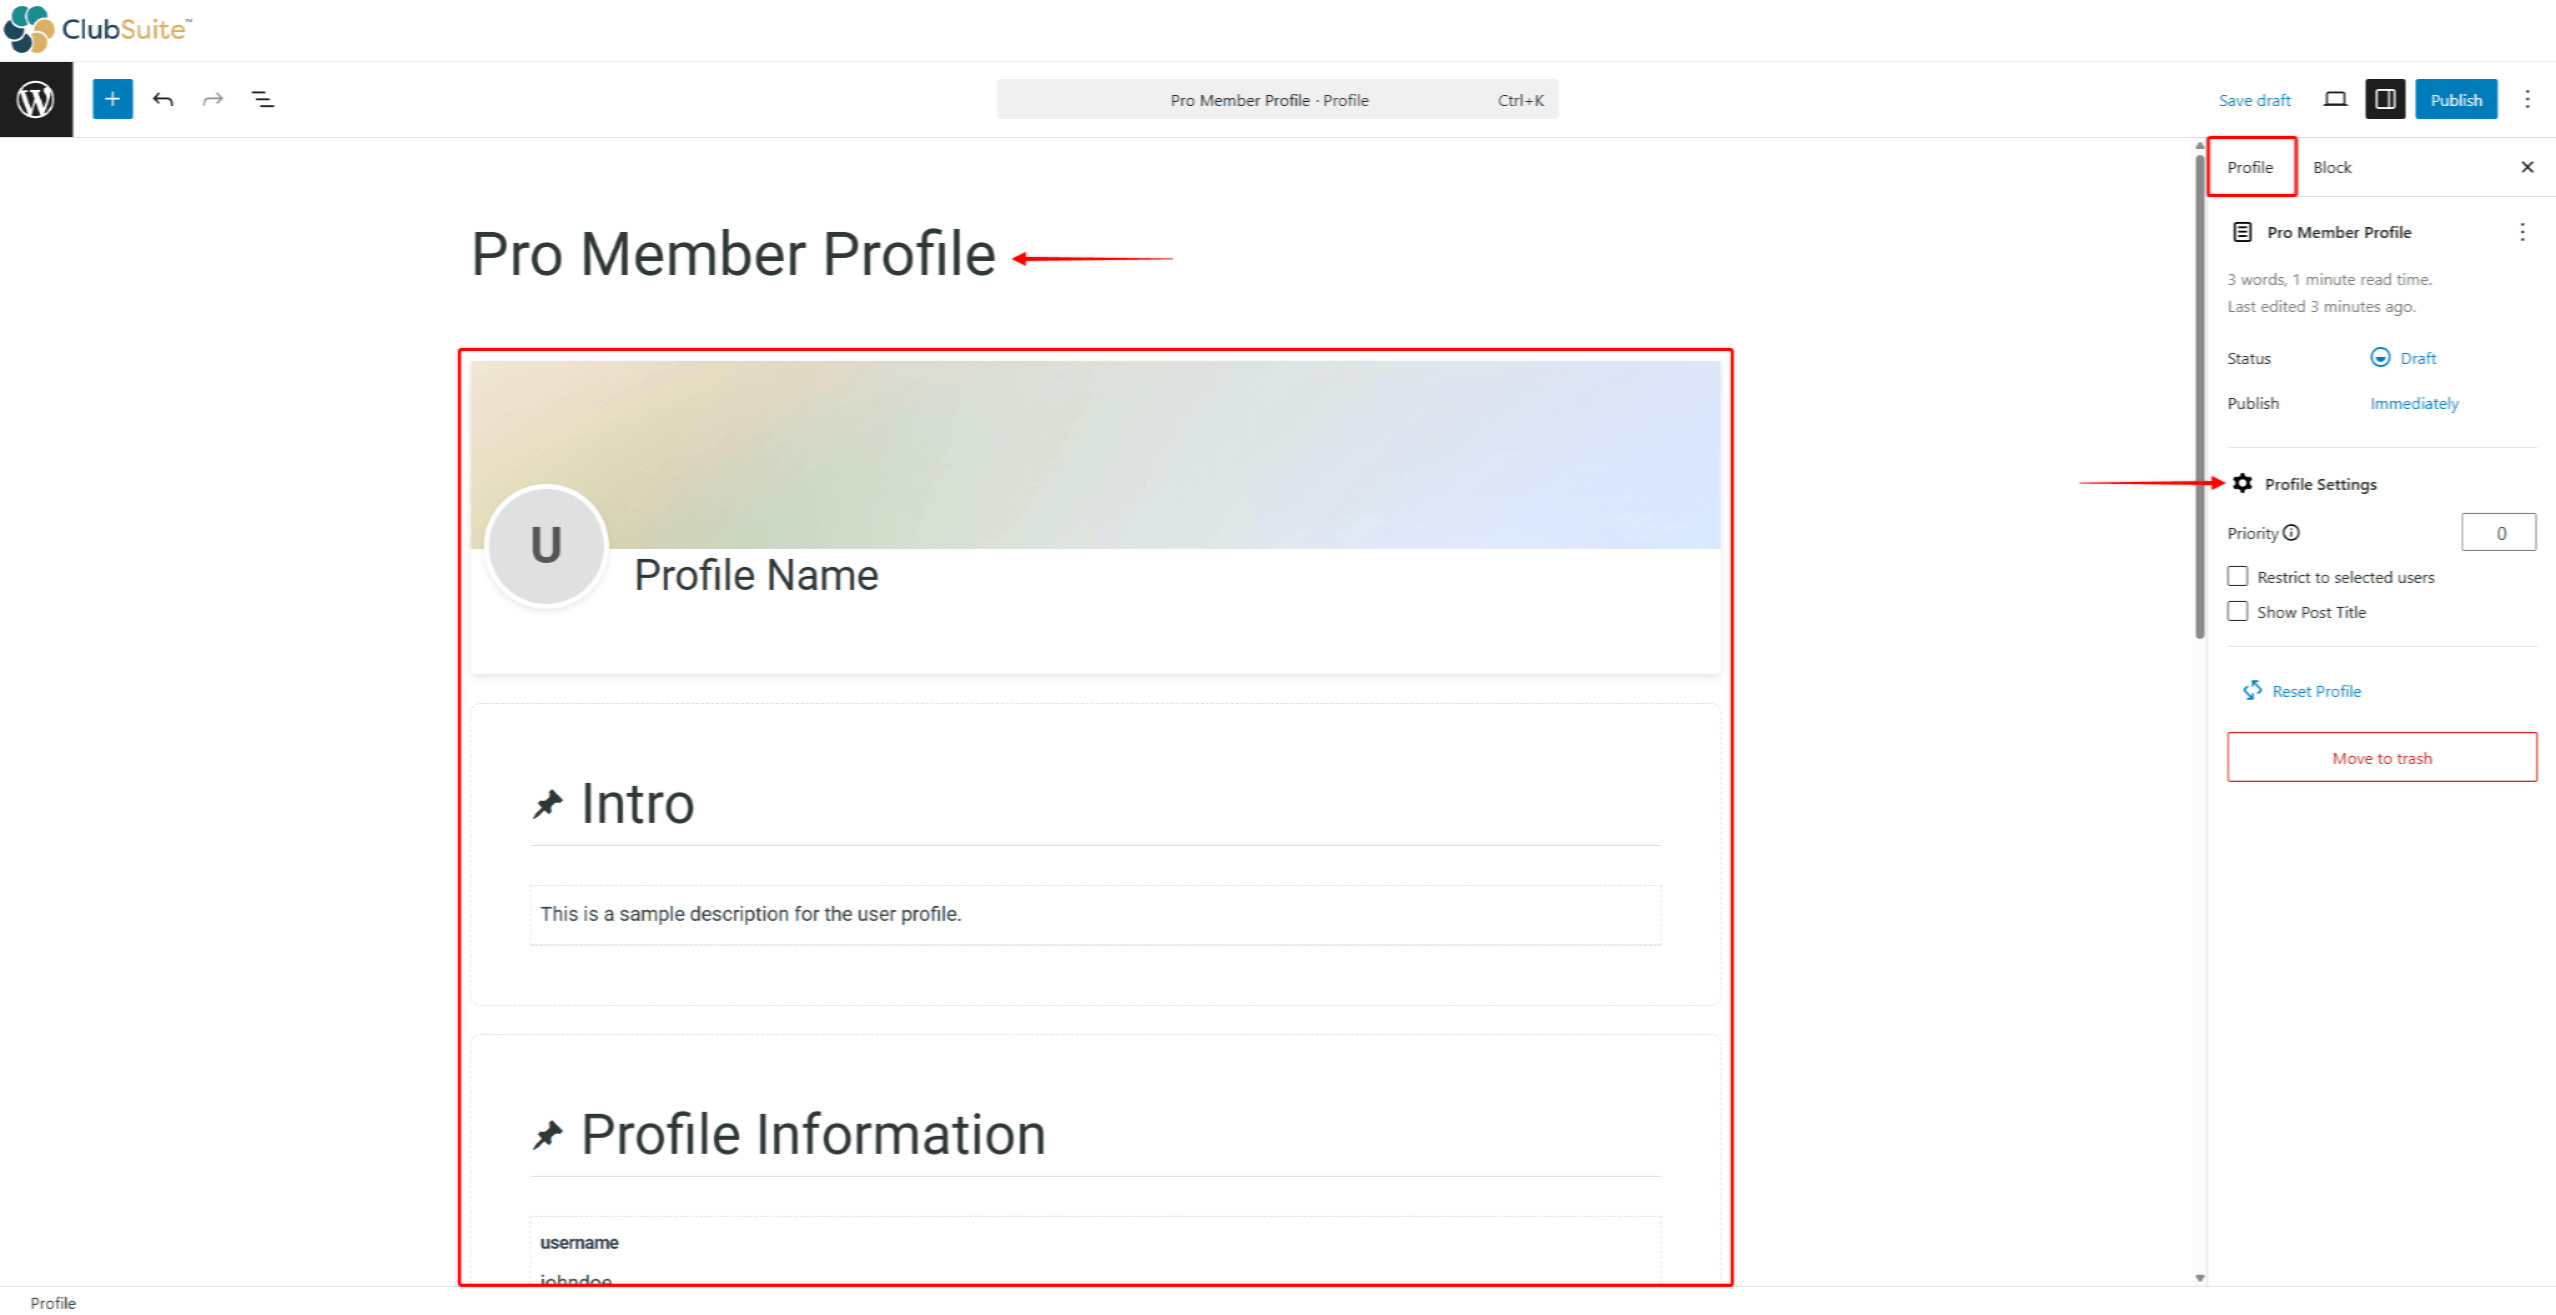
- Design the user Profile. You can use Profile blocks as well as any other Gutenberg block to design Profiles.
- In the right-side panel, configure the Profile Settings:
- Priority: Profiles use priorities when members match multiple Profiles. In this case, the system applies the Profile with the highest priority number, thereby preventing conflicts.
- Restrict to selected users: assign a profile to a specific group of users;
- Show Post Title: enabling this option will display the Profile title.
- Click the Publish button to save the profile.
You can create as many Profiles as needed.
Designing Member Profiles
Designing Profiles should be based on your business model and relevant to the specifics of communities on your website. Furthermore, you should create designs that maintain a good balance between information density and visual appeal.
Position the more critical information so it stands out and can be easily noticed by users. Use larger fonts for primary details and group related content within sections.
Maintain consistency with uniform fonts, consistent spacing, thoughtful brand colors, and uniform photo sizes. Test profiles on various screens to ensure profiles work well on all devices.
You can design MemberPress profiles using the Gutenberg editor and any Gutenberg blocks (profile-specific blocks and third-party blocks).
Furthermore, you can use premade profile starter patterns. These patterns are designs composed of multiple blocks that you can import with one click and customize to your needs.
Using Profile Starter Patterns
MemberPress includes four premade profile patterns as starting points:
- Profile Classic;
- Profile Classic – Right;
- Profile Classic – Centered;
- Profile Split Layout .
Patterns are groups of Profile blocks. You can add or remove Profile blocks, add any additional Gutenberg blocks, and customize each block to match your brand.
Working with Profile Blocks
The Profile blocks are individual components you can use to design your member profiles using the default (Gutenberg) editor.
Each MemberPress Profile block is used to display member-specific data on users’ Profile pages and comes with extensive customization options:
- Add and design a profile header with the Profile Header Block (contains Profile Photo and Profile Cover blocks);
- Group profile data into individual sections using Profile Section Blocks;
- Allow users to upload their profile image with the Profile Photo Block (used separately or within the Profile Header Block);
- Allow users to upload their cover image with the Profile Cover Block (use individually or within the Profile Header Block);
- Add the Profile Name Block to enable Members to add the name they want displayed on their profile;
- You can display individual data (e.g, email, phone number, custom fields, etc.) on users' profiles using Profile User Field Blocks;
- Add any icon to your profiles with Profile Icons Blocks.
Assigning Profiles To Memberships
By default, Profiles are not restricted and are therefore set to be used for all members. But when using multiple profile types, you should assign each Profile to a specific user role or membership
Profiles are assigned to :
- Navigate to a Profile you wish to design, and start the Editor.
- On the right-side panel, click on the Profile tab.
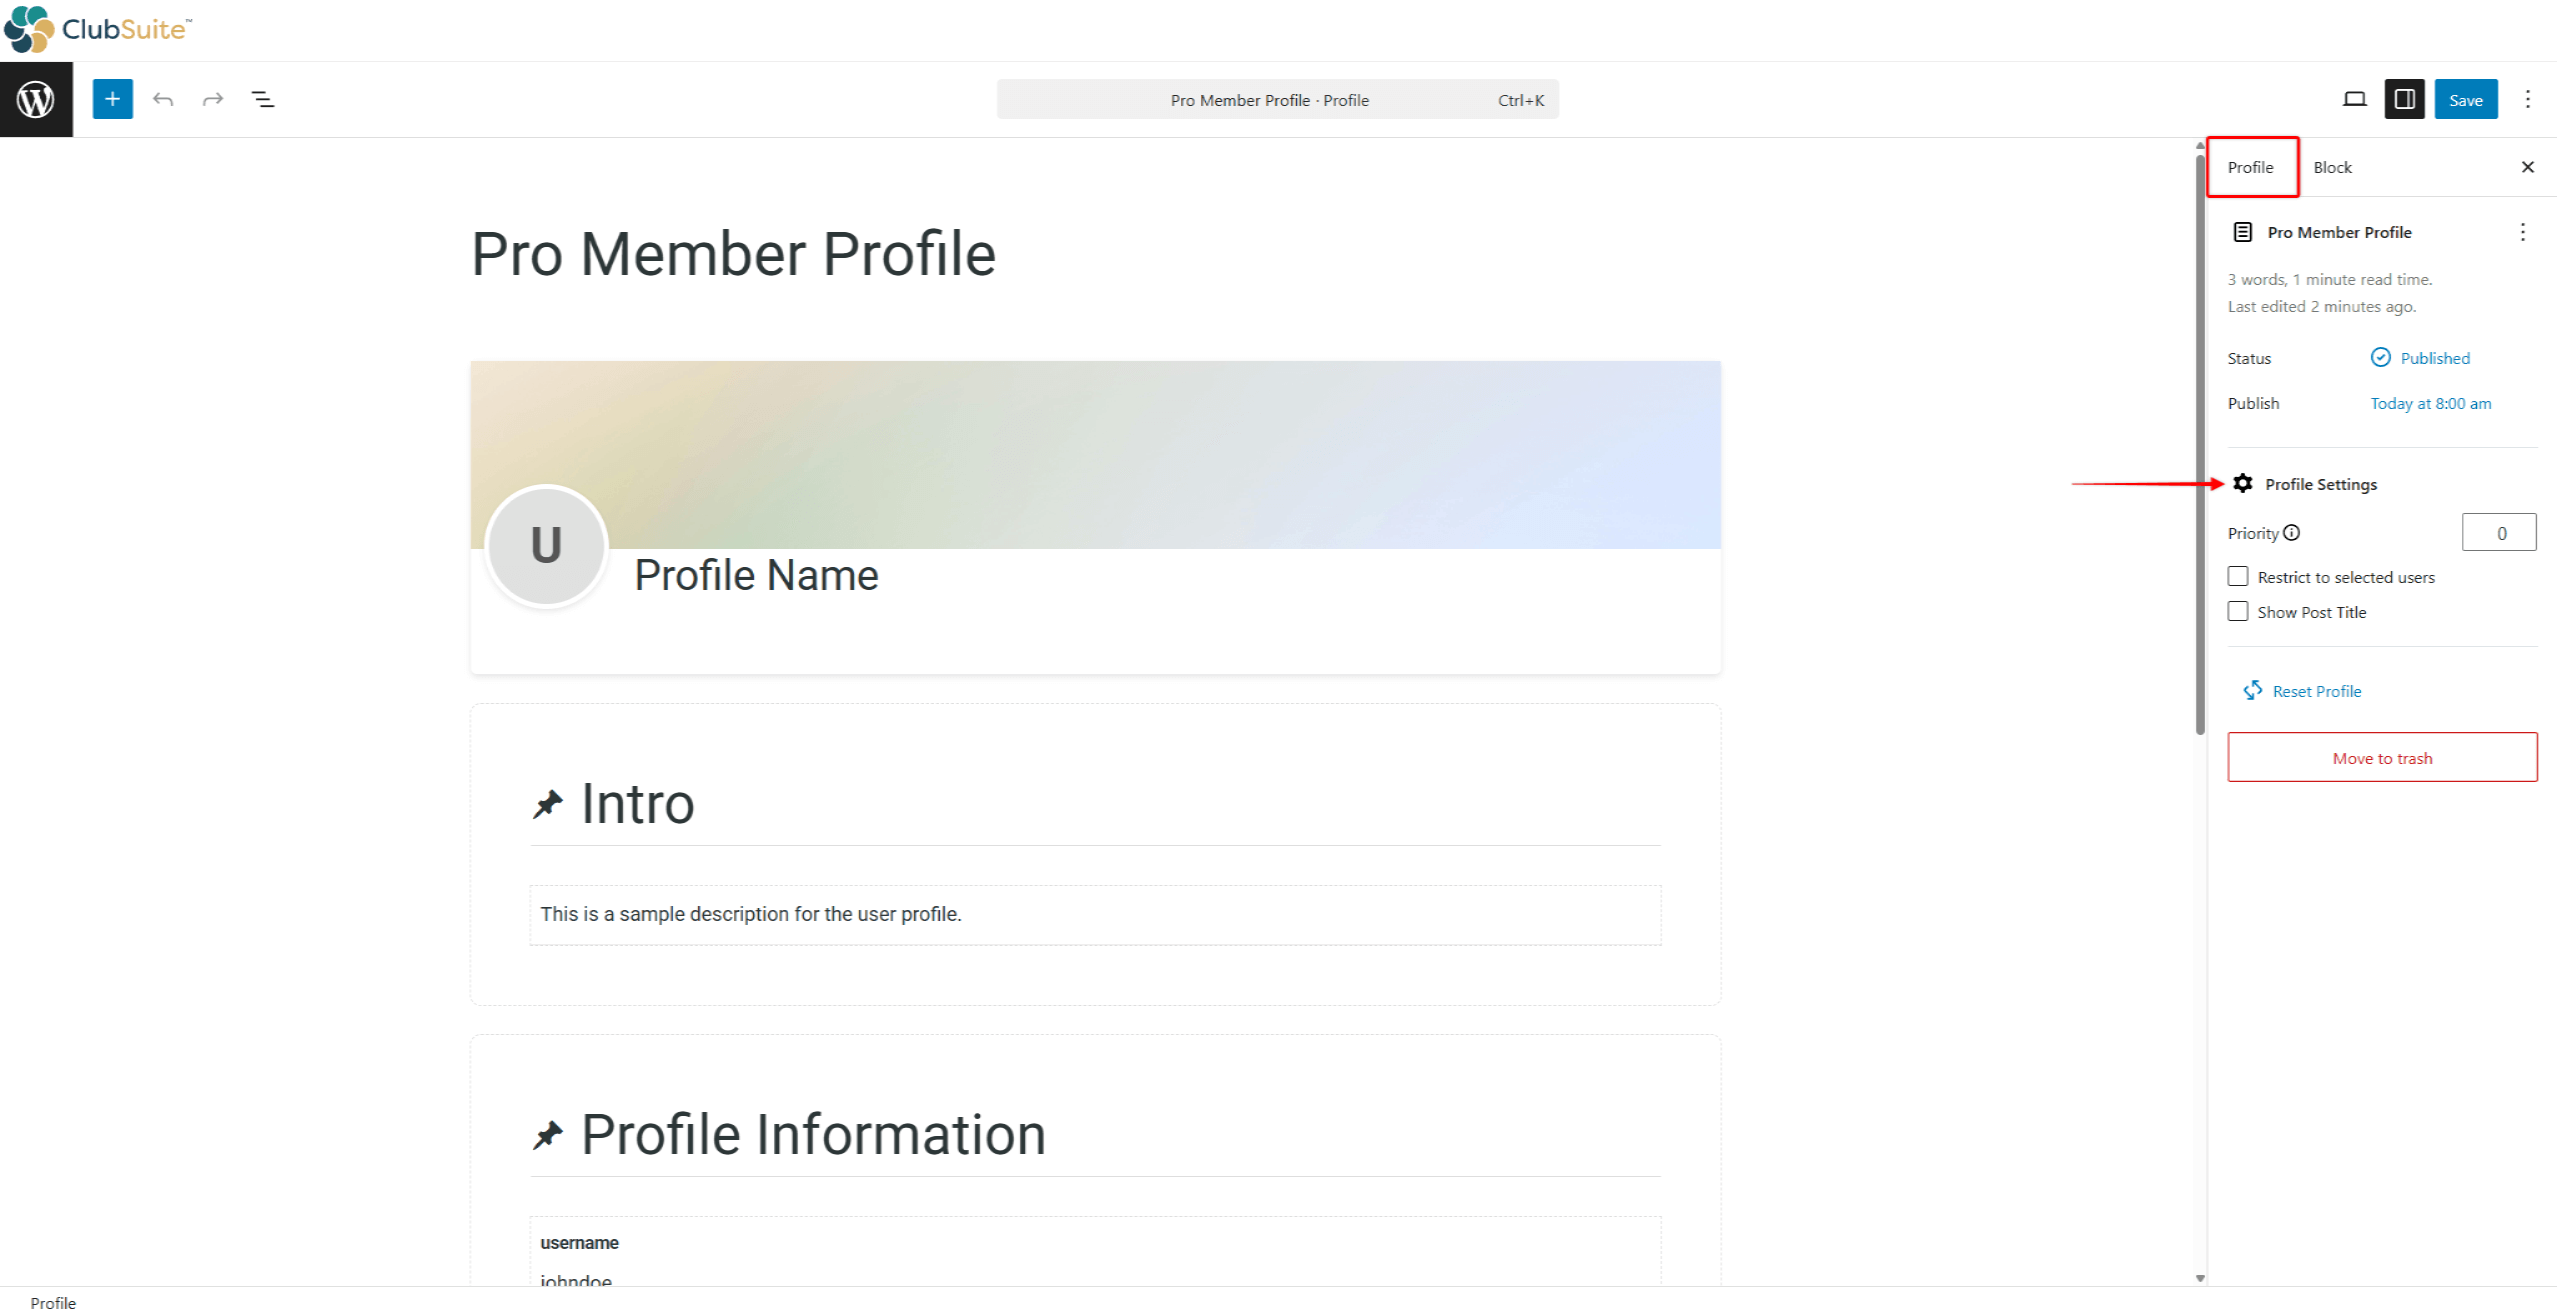
- Scroll down to Profile Settings and click the Restrict to selected users checkbox.
- Choose the restriction method:
- with the Role – users with specific WordPress user role (Subscriber, Author, Administrator, etc.);
- with a Membership – users with an active subscription to the particular MemberPress membership;
- with any Membership – users with an active subscription to any MemberPress membership;
- with no Membership – users with no active subscriptions.
- In case of with the Role restriction, also select the specific role. Similarly, for the with a Membership restriction, you need to select one of the memberships from the list.
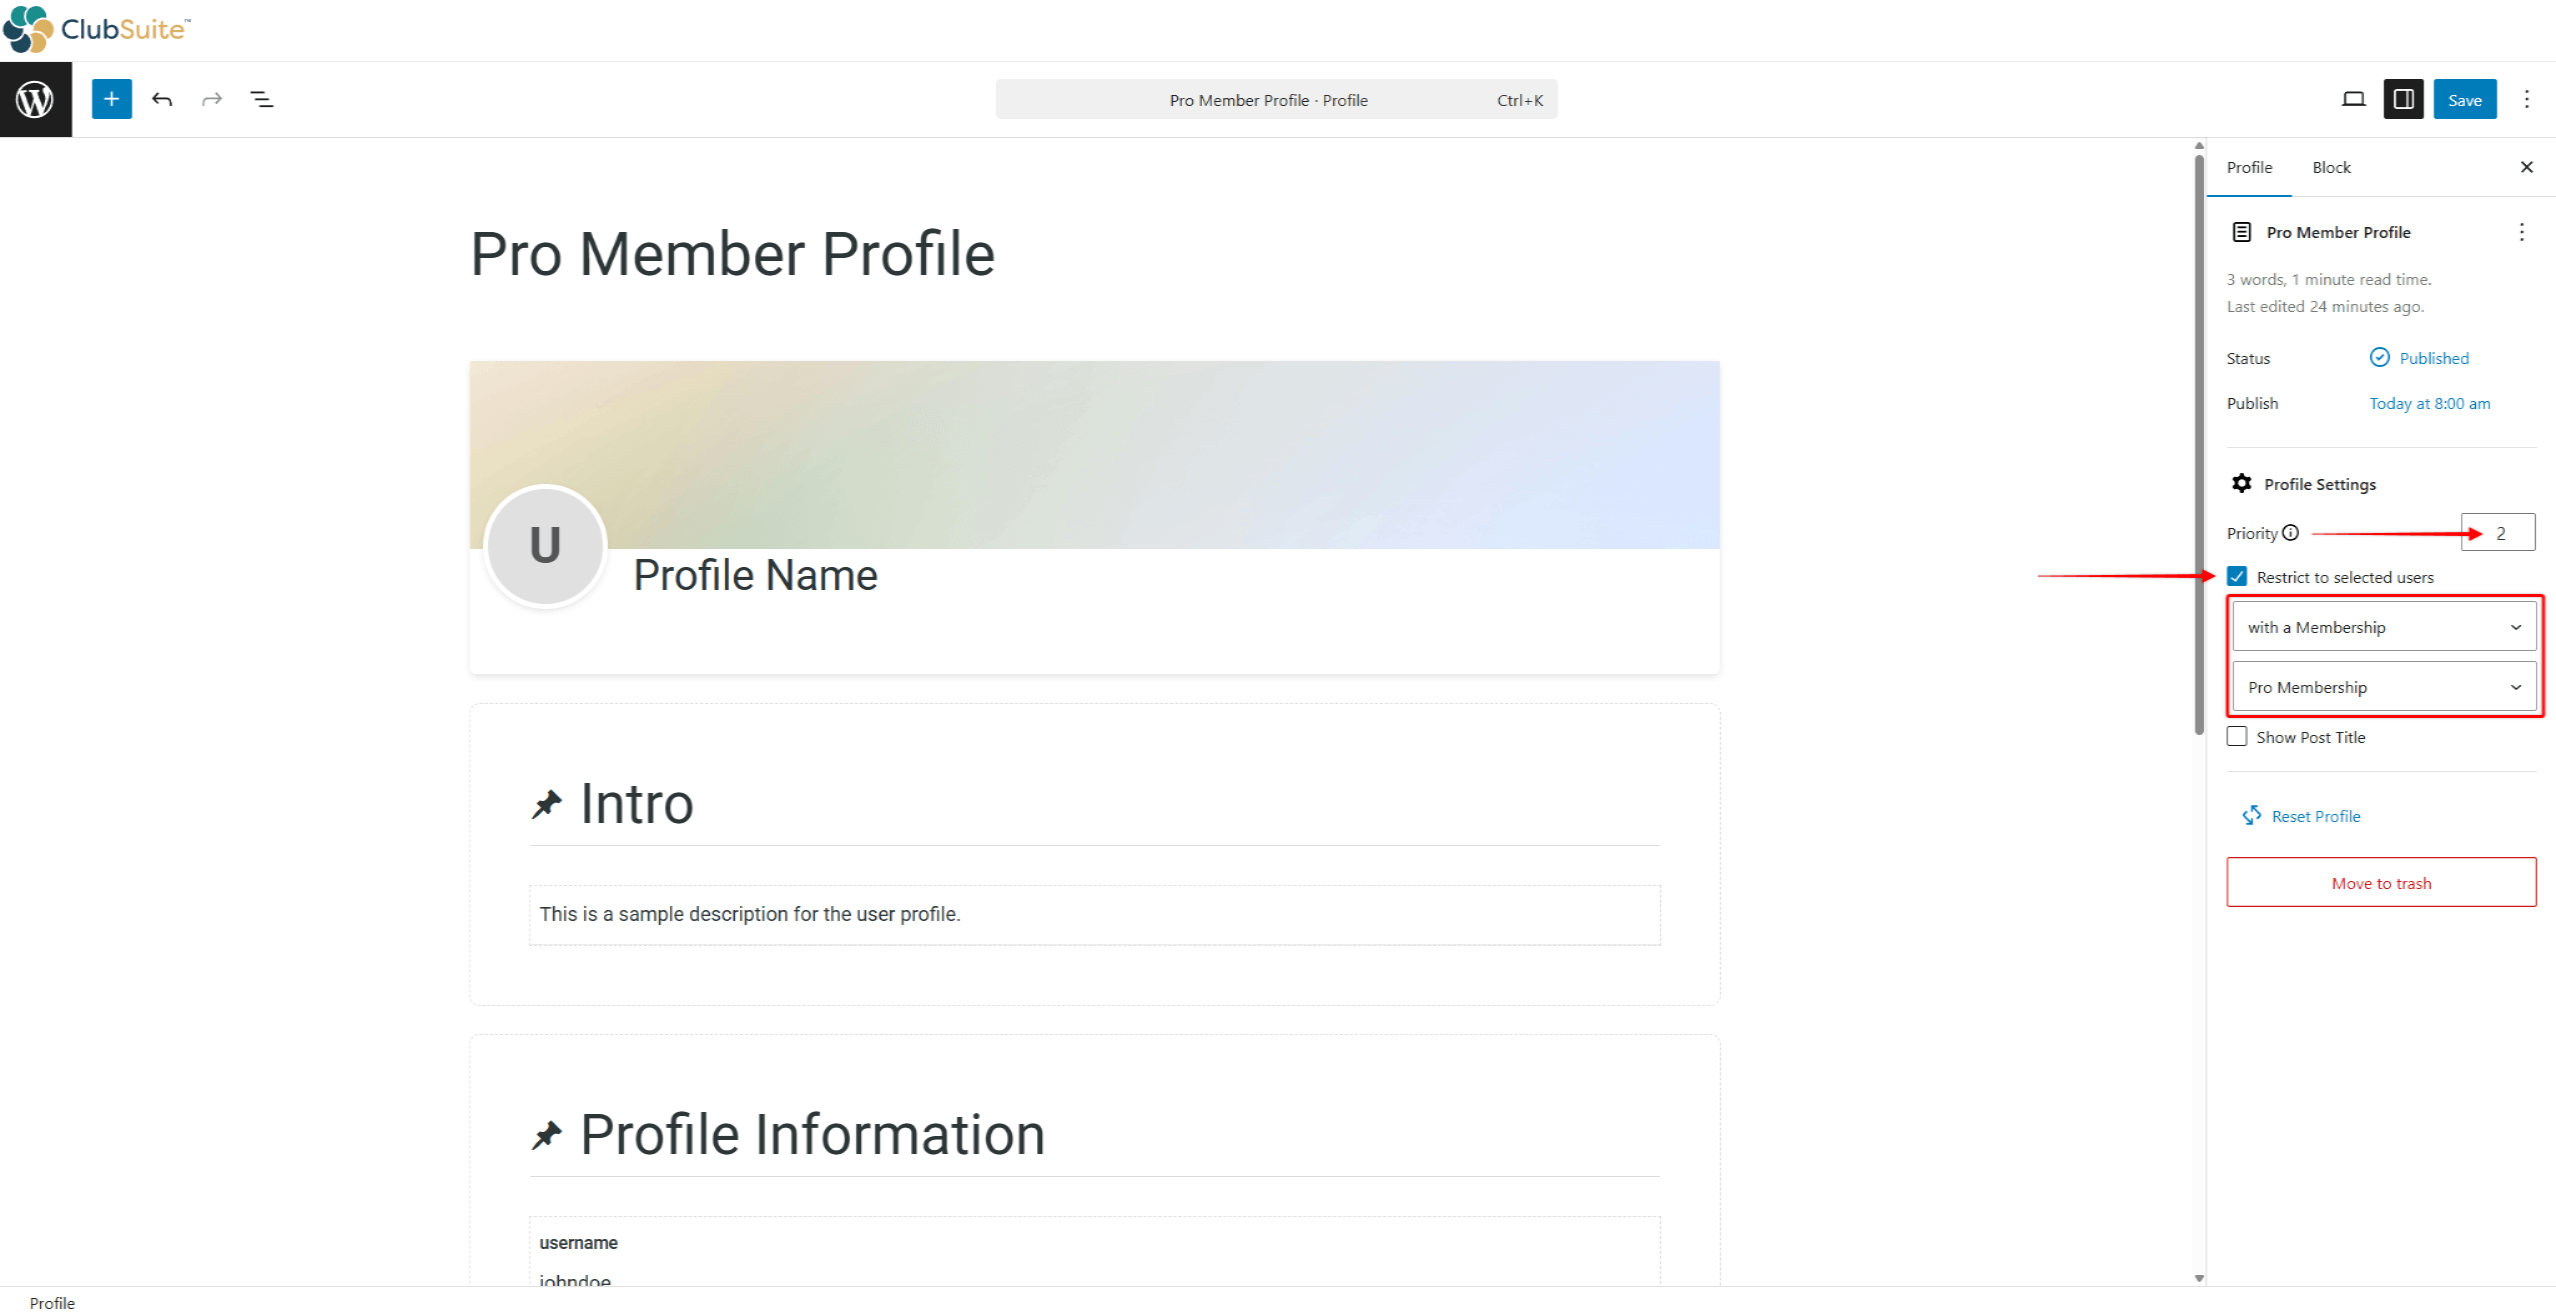
- Set the Priority number for this Profile if you use multiple Profiles on your website.
Moderating Profile Content
To help members create compelling profiles, provide guidelines and implement strategic defaults, including placeholder text, default images, and example content.
When profile moderation is enabled, review uploads promptly while maintaining consistent standards and providing constructive feedback:
- Navigate to the Profile settings page (Dashboard > ClubSuite™ > Settings > Profiles tab).
- Under the Reserved Pages & Moderation section, toggle on the Require admin approval of profile and cover images option.
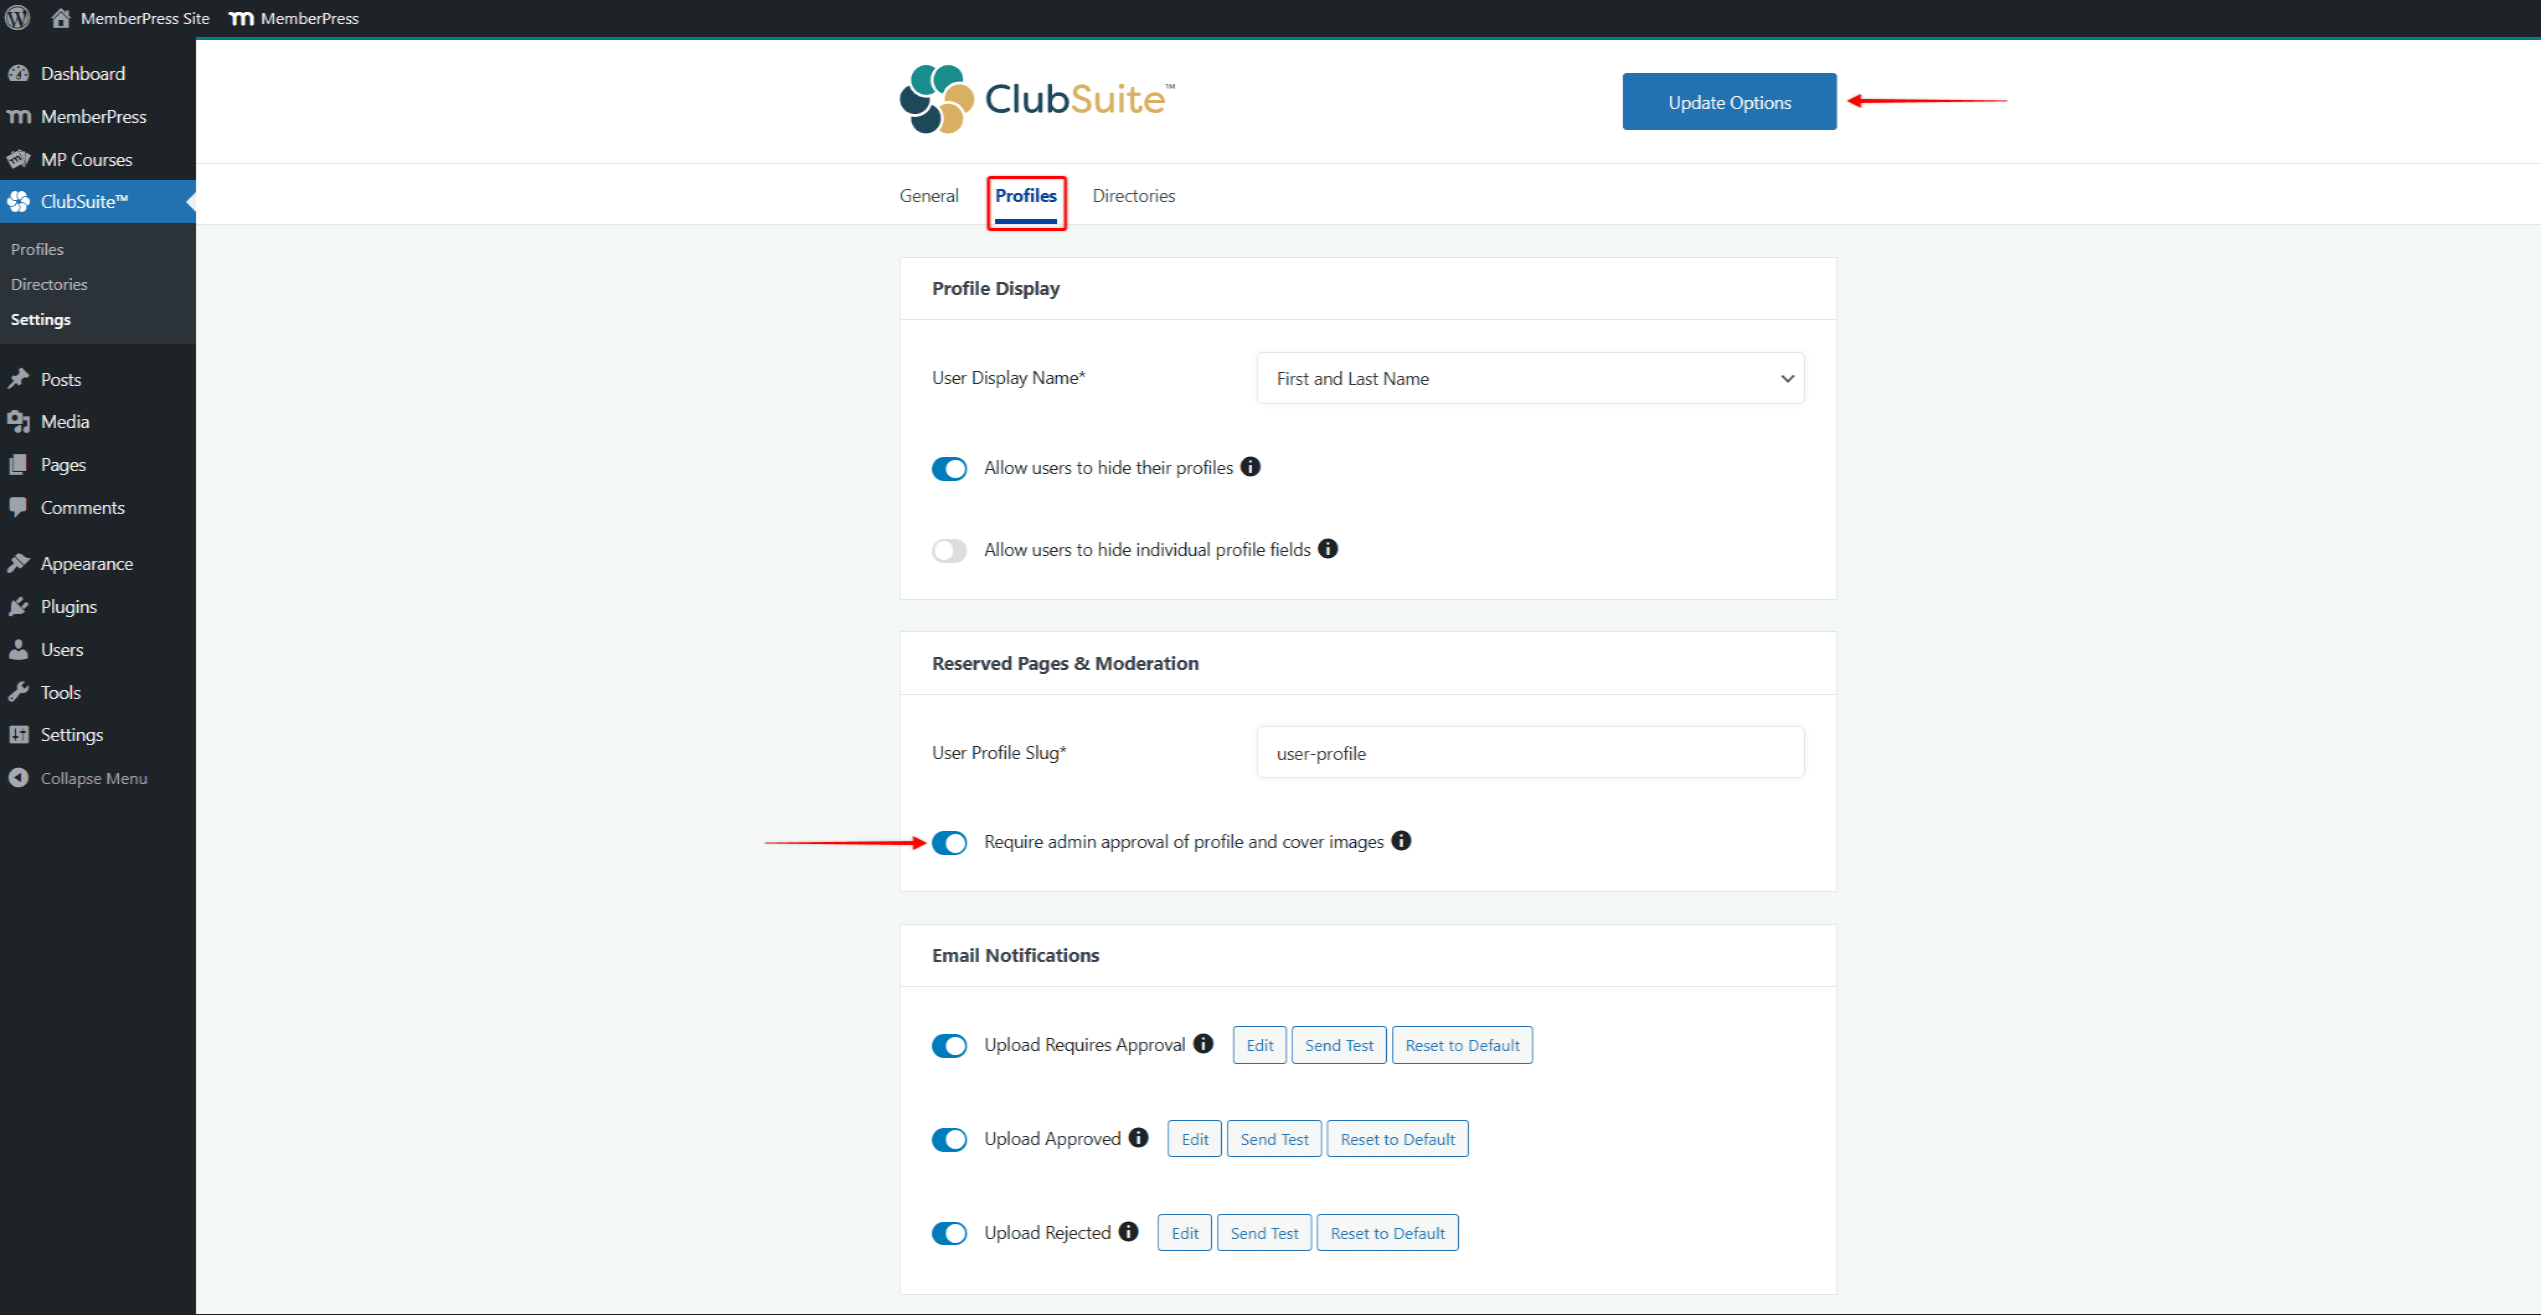
- Click Update Options.
Now, you’ll see a new Approve Uploads option under Dashboard > ClubSuite™.
Managing the Approval Queue
Enabling moderation allows you to maintain quality standards and remove inappropriate content:
- Navigate to Dashboard > ClubSuite™ > Approve Uploads.
- Review pending uploads showing:
- Thumbnail preview
- Member name
- Upload timestamp
- Image type
- For each upload:
- Click Approve to publish the image;
- Click Reject to decline and notify the member;
- Click View Full Size to examine details.
Approved images appear immediately on profiles.


