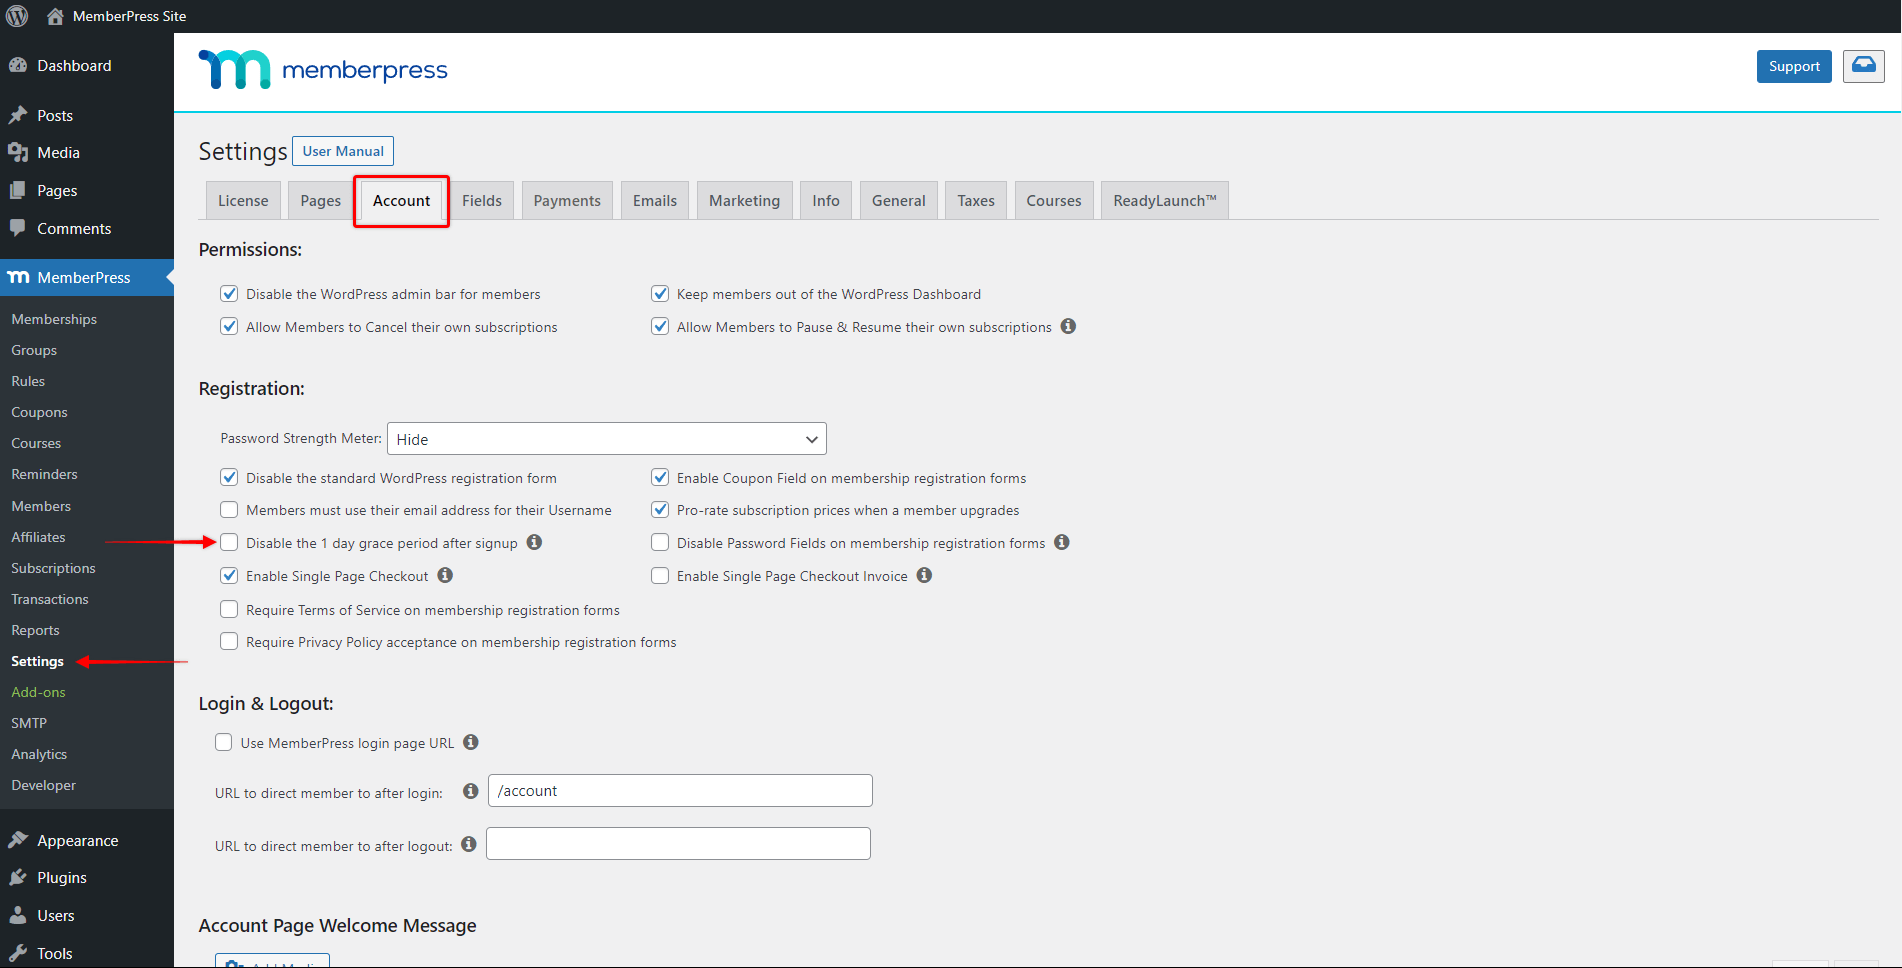
MemberPress will create all your subscriptions charged through payment processing platforms with a 1-day grace period. This option is enabled by default to compensate for possible delays related to payment processing.
In some cases, you would want or need to extend this grace period. This document will provide you with the code snippet that will allow you to change the duration of the grace period, and explain how to set this up.
MemberPress 1-day Grace Period
You enable users to pay for their subscriptions online by connecting payment gateways (Stripe, PayPal, Square, or Authorize.net) with MemberPress.
When users choose an online payment gateway and submit registration, MemberPress securely transfers their data to the payment processing platform. The platform then processes the payment and returns the related data to MemberPress.
Often, processing payments is not instantaneous. For this reason, MemberPress creates subscriptions with a 1-day (24-hour) grace period. The 24-hour grace period will provide temporary access for your users to compensate for when the processing is delayed.
By default, this option is enabled. Upon submitting the membership registration form, MemberPress will create a temporary transaction, and provide that user access to your protected content immediately. Here, if for any reason the payment doesn’t go through (or the successful payment data is not received), the user will lose access after the 24-hour grace period ends.
If needed you can disable this option. You might want to do this in case where you created your custom payment gateway, or you’re using payment methods that take longer time to process payments.
To turn off the automatic one-day grace period, kindly follow these steps:
1. Go to Dashboard > MemberPress > Settings;
2. Click on the Account tab;
3. Check the box next to Disable the 1 day grace period after signup option.

In this case, MemberPress will wait for the confirmation from your payment processor that the payment was successful, before providing access for the user.
On the other hand, you could extend the grace period to adjust it to your needs, instead of disabling it.
How Can I Extend The Grace Period?
As mentioned, in some cases, you would need to extend the 1-day grace period. For example, if you enabled SEPA or Sofort as payment methods for your Stripe connection, these methods take up to 14 days to confirm whether the payment was successful or not.
Here, by default, your users would get a grace period of 1 day. Since the successful payment data wouldn’t be received in that time (as SEPA or Sofort need more time), your user would lose access to your protected content. The user would regain access once the successful payment data is received, which means that this can last up to an additional 13 days in the case of the two mentioned payment methods.
In the case of some other payment methods (BECS, BACS, ACH), this period would be somewhat shorter (3-4 days), but there would still be a gap of one or more days where your user would be without access to your content.
Thus, depending on your payment setup, you could adjust the grace period to avoid your users experiencing this gap.
To do this, you would need to add the following code snippet to your site:
add_filter('mepr-grace-init-days', function() {
     return 14;
});
The example code will extend the default 1-day grace period to 14 days. The code needs to be adjusted to your needs by changing the duration of the grace period. You would have to specify the number of days for your grace period on the following line:
return 14;
Further, the same issue could be present with your renewals if the mentioned payment methods are used. Accordingly, you would need to add a second code snippet to extend the grace period on renewals:
add_filter('mepr-grace-expire-days',  function($days) {
     return 1;
});
You would adjust the grace period duration for this code, in the same way as you already adjusted the first code snippet.
Once you updated the grace period duration in both code snippets, you can add them to your website to the functions.php file of your child theme. As an alternative, you can use the WPCode plugin. Please check the following document for step-by-step instructions on how to add custom code snippets in WPCode.


