Facebook ads can be an excellent way to reach out to fans and attract new customers on a limited budget. However, it’s not enough to simply design a strong advertisement. Even a well-written campaign may fail if you don’t target the right people.
To avoid that problem, you'll need to learn how to identify your ideal market. Facebook ads enable you to speak to very specific groups, such as people who have visited your website, or anyone who has purchased a product from you in the past. You can even track your campaigns to see how well they’re doing, and use that information to better target your next ad.
In this post, we'll go in-depth about how to define and customize your target audience on Facebook. Let's get to work!
The Importance of Targeting Your Facebook Ads
Facebook serves a wide demographic, with over half of Americans using the platform multiple times a day. This means that ad targeting is extremely important if you want to get noticed by the right people. Targeting is a way of showing your ads only to individuals who meet specific criteria of your choosing, such as particular behaviors or demographics.
You might be wondering why it’s better to show ads based on those characteristics, instead of casting a wide net. The answer is that targeted ads are close to twice as effective as non-targeted ads, because there's a much higher chance that the people who see them will be interested enough to take the next step. Therefore, you can make the most of a limited budget by only displaying ads to individuals you know may be interested in your offerings.
This technique also enables you to create more effective advertisements. If you want to write an ad that speaks specifically to potential customers, you can avoid showing it to people who have interacted with your site or Facebook page before, to ensure that you’re reaching a new crowd. On the other hand, you can write an ad that assumes familiarity with your business, for those who have already ‘liked' your Facebook page.
Fortunately, Facebook has many powerful options for targeting your ads. Let's talk about how to take advantage of those built-in tools.
How to Customize Your Facebook Ad Audience (In 5 Easy Steps)
As we've mentioned, it’s surprisingly easy to create a customized audience for your Facebook ads. Over the following five steps, we'll show you how to get started with the platform's audience customizer tool.
Step 1: Define Your Target Audience
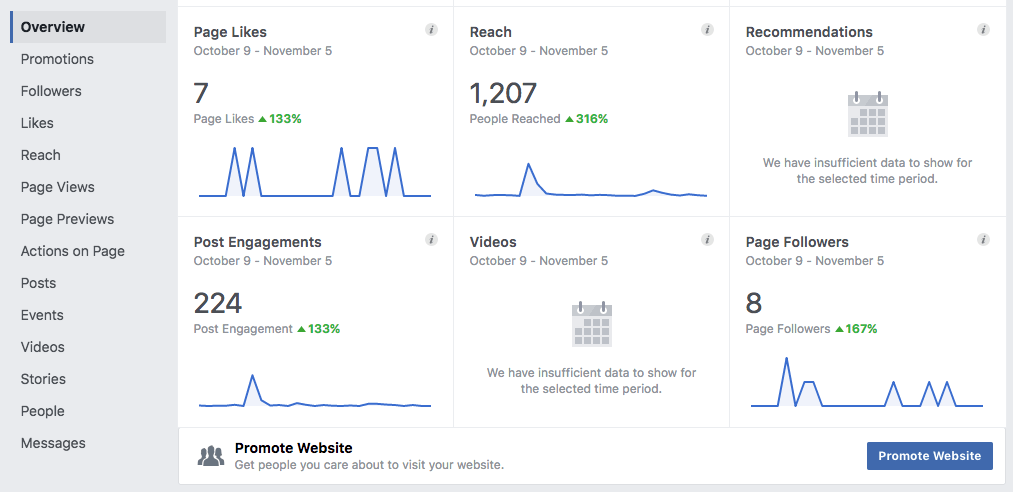
Before you can tell Facebook about your audience, you'll need to know who that audience includes. In other words, you'll need to define your target demographic. One way is to look at your current base of readers or customers. To help you do that, Facebook Page Insights can offer you a glimpse into what kinds of users are interacting with your page the most.
To access this tool from your Facebook page, click on the Insights tab. This will show you an overview of your page's metrics:
Then, click on People in the left-hand sidebar for a breakdown of your page followers by demographic:
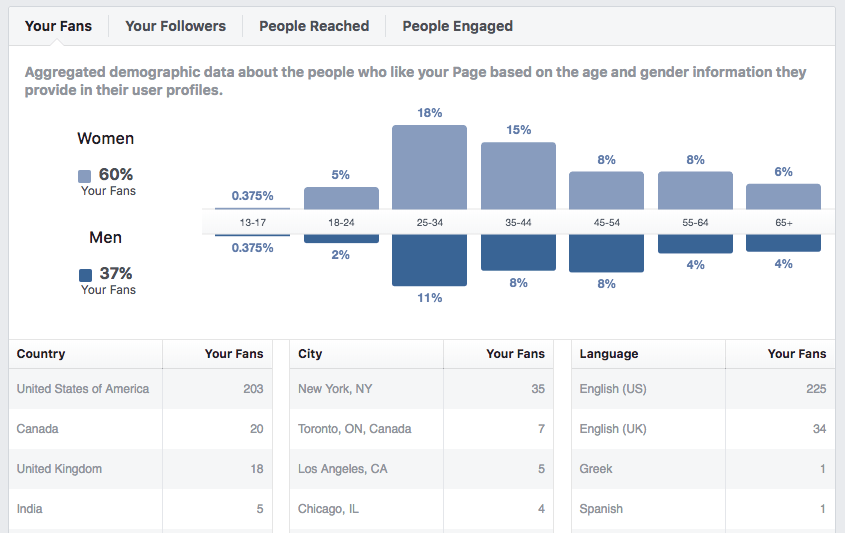
You can click on each of the four tabs to see a different demographic breakdown. This information will show you the characteristics of your user base – such as their most common gender, age range, location, and so on.
If you’re just starting out, and don't have much data to work with yet, you may want to instead begin by brainstorming who you would like to be in your ideal audience. For example, if you run a membership site on child-rearing advice, you might benefit from targeting men and women between the ages of 25 to 45.
If you don’t yet have a clear idea of who might be interested in your products or services, you can conduct audience research to get the ball rolling. It may also help you to create a detailed target audience persona. This can give you a base to start with when creating your first advertisement. Then, you can use Page Insights to see who actually engages with that ad. From there, you can narrow and define your target audience over time.
Step 2: Create an Ad in Facebook
To access Facebook's audience customizer, you'll first have to create an ad. To do this, choose Promote on your overview page:

Then you can set up your ad as desired, and select Promote again:
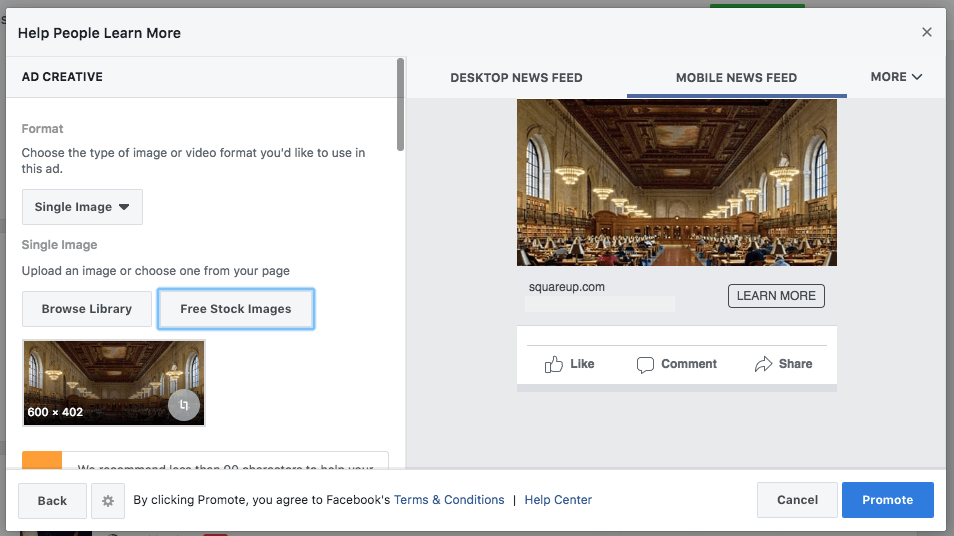
After that, you can define the audience that this ad will target.
Step 3: Customize Your Ad’s Audience
At this point, you'll want to scroll down to Audience in your ad’s sidebar, and choose Create new audience:
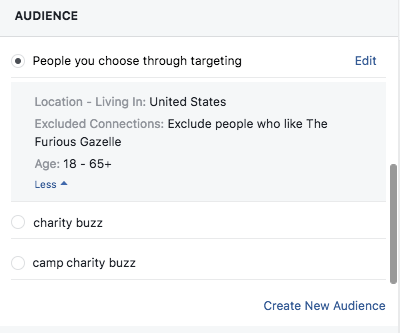
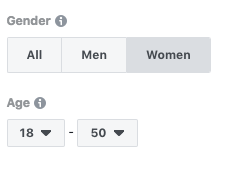
You can then define your target demographic, by selecting specific genders and age ranges:
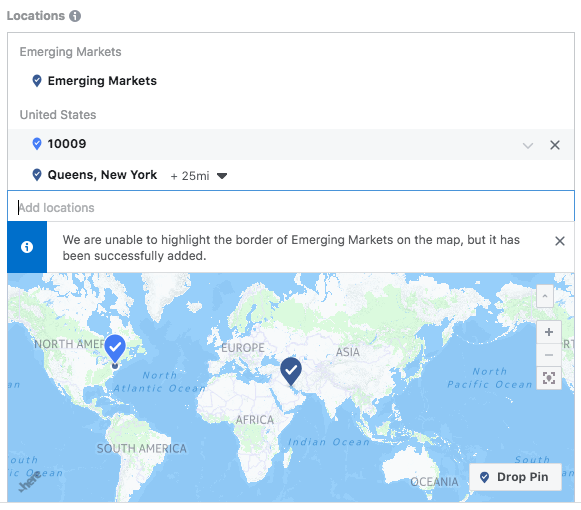
Facebook also enables you to target ads by location, with options as specific as zip codes and as broad as worldwide. You can choose a single location to focus on, or multiple options:
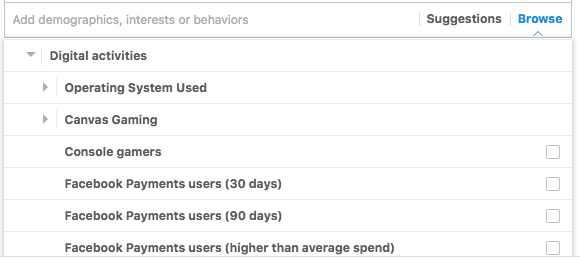
Scrolling down, you can also describe your target audience based on their interests, such as people who have ‘liked' a certain topic or page:
Make sure to save your changes when you're done, and your target audience is set up! In the next step, we'll go over how to create a different type of audience for your ad.
Step 4: Create a Custom or Lookalike Audience (Optional)
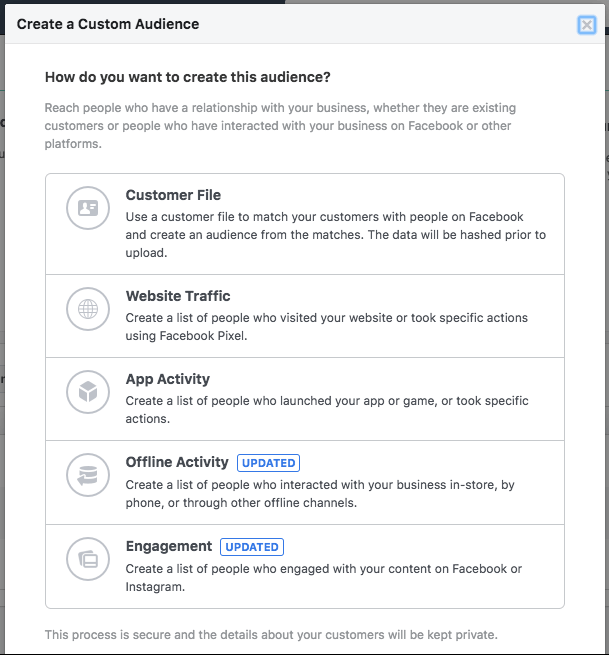
While the above process is sufficient for many ads, you can get even more specific with your target audience. By using the Custom Audience tool, you can target individuals based on their behaviors. For instance, you could display a specific ad to anyone who visits your website or ‘likes' your page. You can even exclude behaviors you don't want to target.
To find this option, open up the Facebook Ad Manager and visit Audiences in the top menu. Then, choose Custom Audience under the Create Audience menu. You'll be offered a number of options:
If your Custom Audience is very specific, you may also want to create a Lookalike Audience. This is an audience that's demographically similar to the people who already engage with your business. You can create a Lookalike Audience using your current Facebook page fans, or a saved Custom Audience:
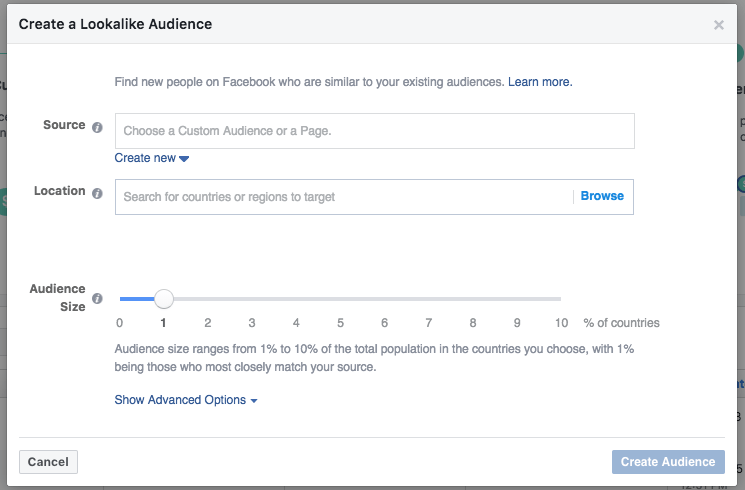
To do this, simply choose Lookalike Audience from the Create Audience button in the ads manager. Then you can pick a source and define your audience. This gives you even more options for how to target your advertisements.
Step 5: Place Your Ad
When you’re done customizing your audience, you’re ready to place your Facebook ad. Simply click on the Promote button in the bottom right-hand corner of your ad, and it will automatically be submitted for review.
After your ad runs, you can track who actually viewed and interacted with it using the Facebook Audience Insights tool. The next time you run an ad, therefore, you can adjust your targeting as needed based on the results you've seen so far.
Conclusion
Targeting your Facebook advertisements carefully is an excellent way to boost their engagement levels. By narrowing each ad’s audience to those who are most likely to be interested, you can see twice the results (or more).
As we've shown, you can easily create a targeted Facebook audience by following five simple steps:
- Define your target audience.
- Create an ad.
- Choose your target audience in the Audience Customizer.
- Optionally, create a Custom Audience or a Lookalike Audience.
- Place your ad.
Do you have any questions about how to customize your Facebook ads? Let us know in the comments section below!



Add a Comment