As you probably know, WordPress is currently the most popular website-publishing platform in existence. However, there are two flavors of WordPress out there: WordPress.com and WordPress.org.
On the one hand, you have WordPress.com, where you can sign up and create a new website almost instantly, for free. On the other, you have WordPress.org software, which takes a bit more time and effort when it comes to launching your website.
The former option and its low-barrier to entry is certainly tempting. However, going with the latter gives you significantly greater versatility for your website, including the ability to install your choice of WordPress membership plugin.
If you previously chose WordPress.com for your website instead of WordPress.org but are ready to move from WordPress.com to WordPress.org, this guide is for you.
Migrating to WordPress.org from WordPress.com
Before you move your website or blog from WordPress.com to WordPress.org, you’ll need a web-hosting account. Depending on your needs, this could cost from a few dollars per month to hundreds of dollars per year. Our guide on which web hosting works best with MemberPress can help you find a solution that matches your requirements and budget.
You may also need a domain name for your website if you don’t already have one. Your web host may provide one for you, but if not, you can register for a domain name through a site like Namecheap.com.
Once you’ve signed up with a web host, as well as registered a domain name and connected it to your hosting account, you’re ready to begin migrating your website from WordPress.com to WordPress.org.
Install the WordPress Software
Before you can move your website content, you need somewhere to move it to. Therefore, you must install WordPress on the web space provided by your web host.
Although it depends on which web host you’ve chosen, it usually takes just a few clicks. For example, with SiteGround, all you have to do is log in to your account area and navigate to the cPanel. From there, locate the Autoinstallers section and click on the WordPress icon.

From the WordPress installer page, click on Install Now. In the fields on the next page, you’ll enter details like the site name, your log-in credentials, and your email address.
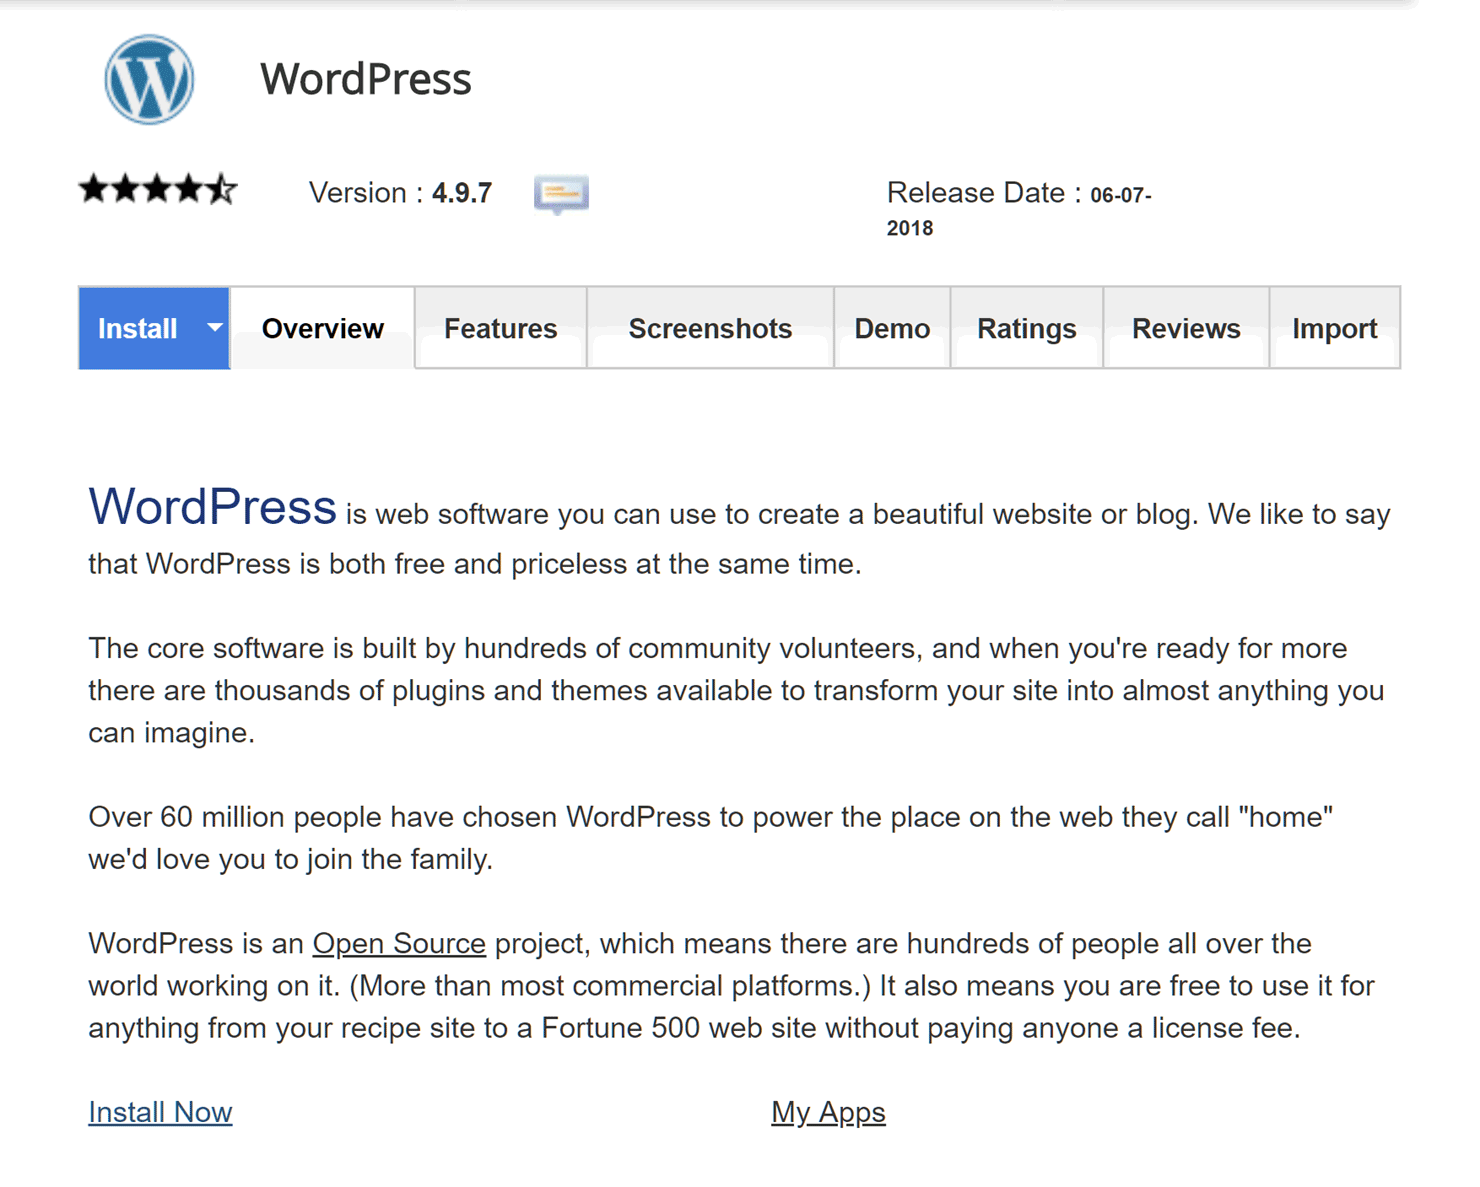
Once WordPress is installed, you’ll be able to log into your new website. The installation process should automatically send an email that includes your login details to the address you provided . If it doesn't, try adding wp-login.php to the domain name you are using for your site; for example: mydomain.com/wp-login.php.
Export Your Website Content from WordPress.com
Once you’ve verified that you can log in to your new WordPress.org website dashboard, switch to your WordPress.com website and log in to your dashboard. From that dashboard, click on the Settings item on the left-hand-side menu.
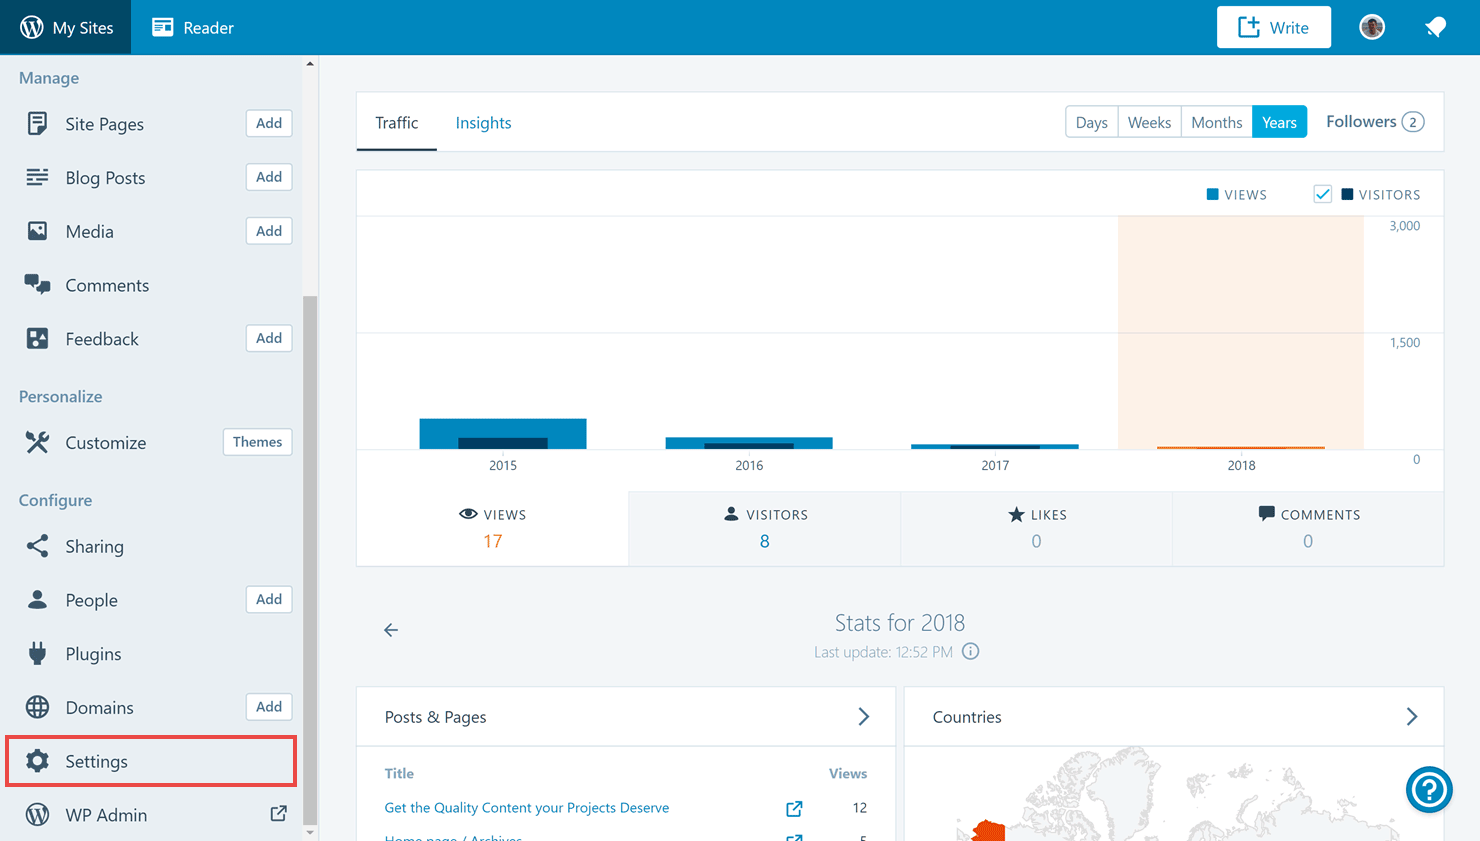
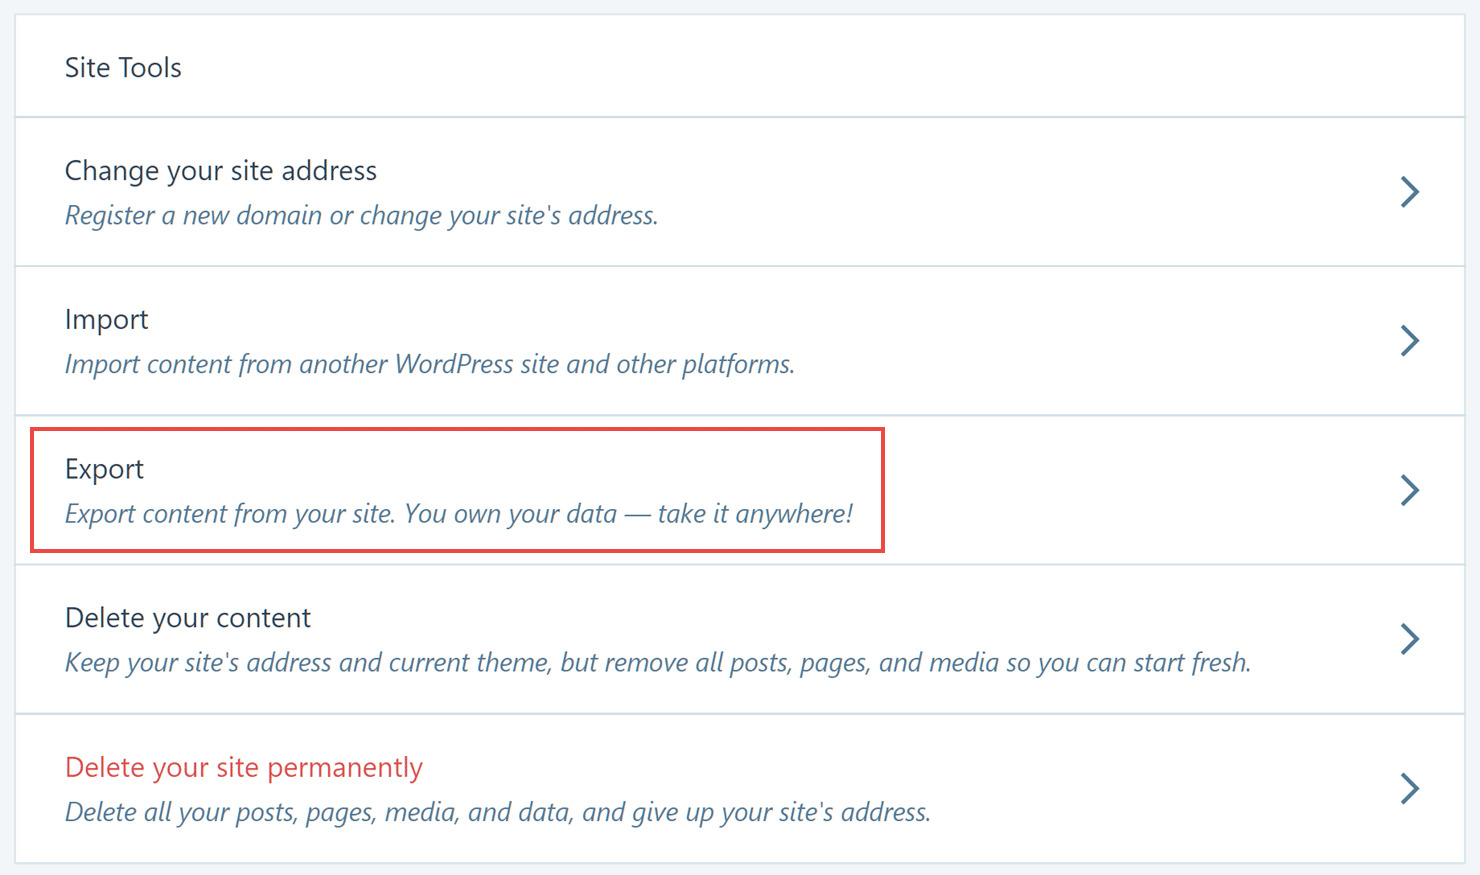
Next, find the Site Tools section, and click on Export.
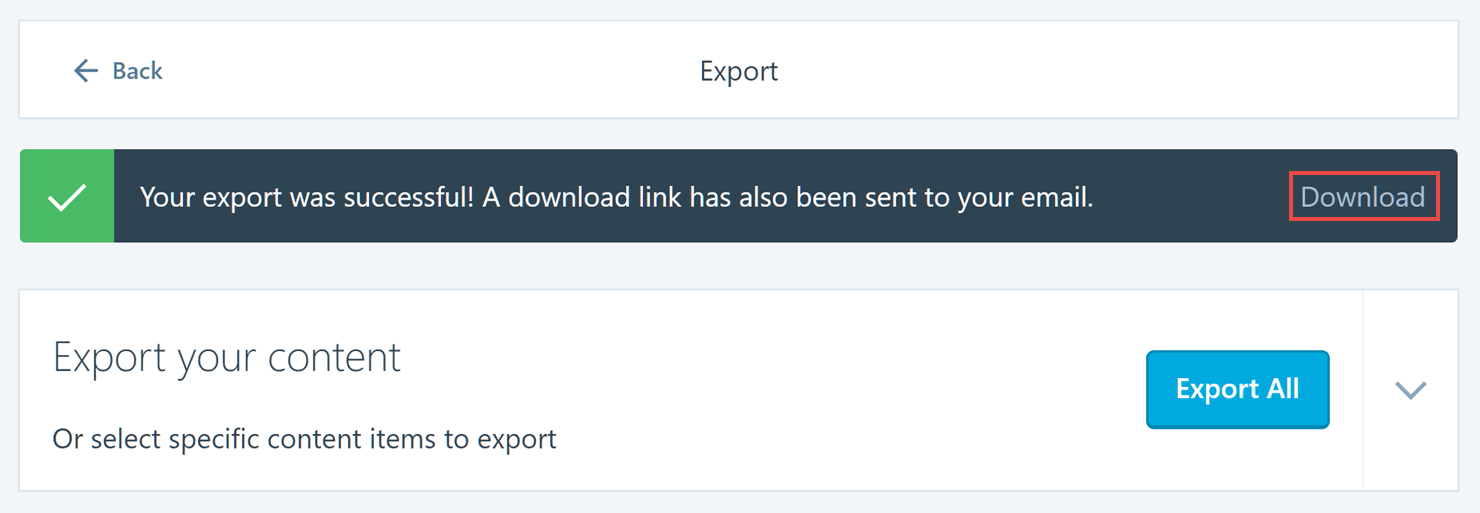
Although you can choose to export the individual elements of your site, choosing the Export All option is the recommended approach. Once the export job has finished, you can download the file by clicking on the download link. Be sure to save the file where you’ll remember it, such as on your computer’s desktop or in a personal folder.
Import Your WordPress.com Website Content
Now switch back to your WordPress.org website and log in to the dashboard area. Click on the Tools item on the left-hand sidebar menu and then click on Import.
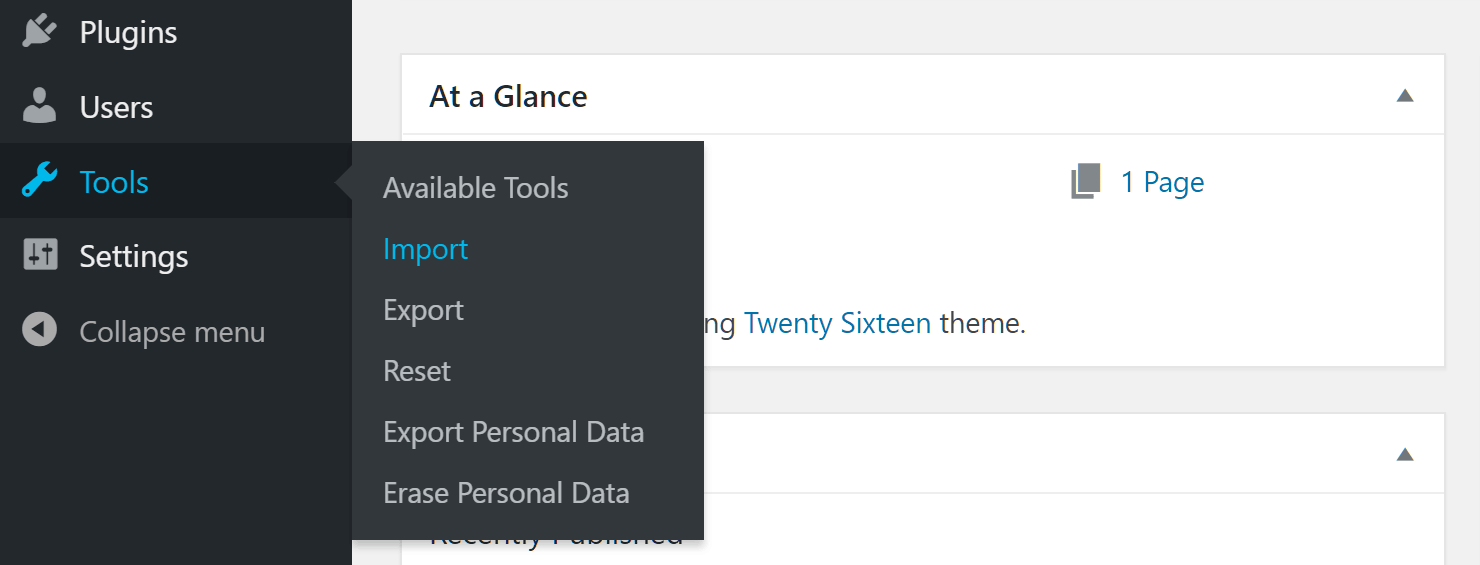
From this section of your dashboard, click on the Install Now link under the WordPress section.

Once you click on Install Now, the importer tool is activated on your website. You can then click on the Run Importer link displayed.
You will also need to extract the XML file from the ZIP file that was created as part of the export process on your WordPress.com website. Once you have extracted the XML file, upload it to the WordPress.org website importer.
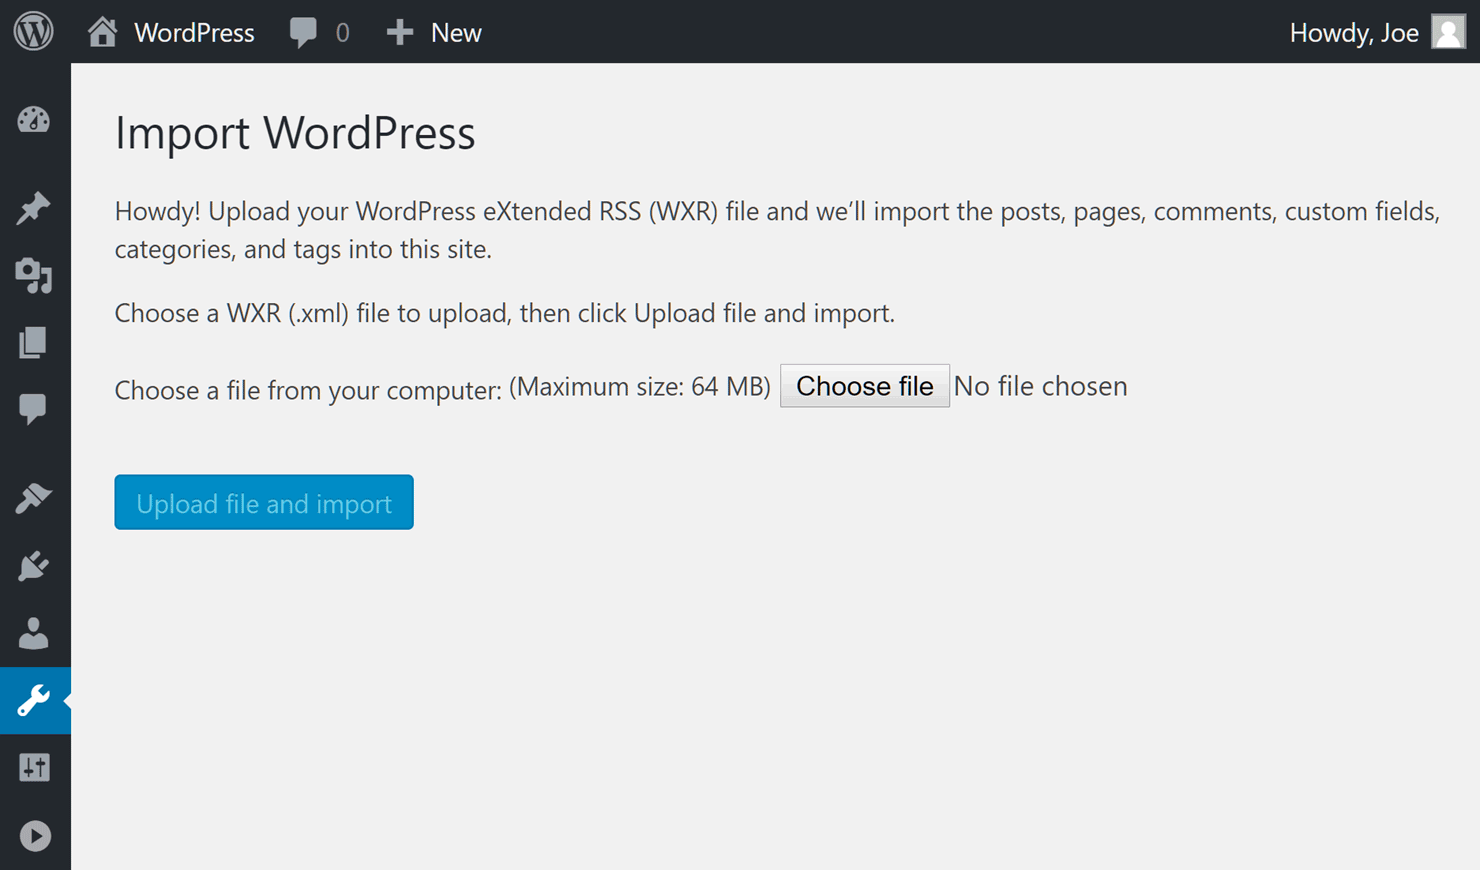
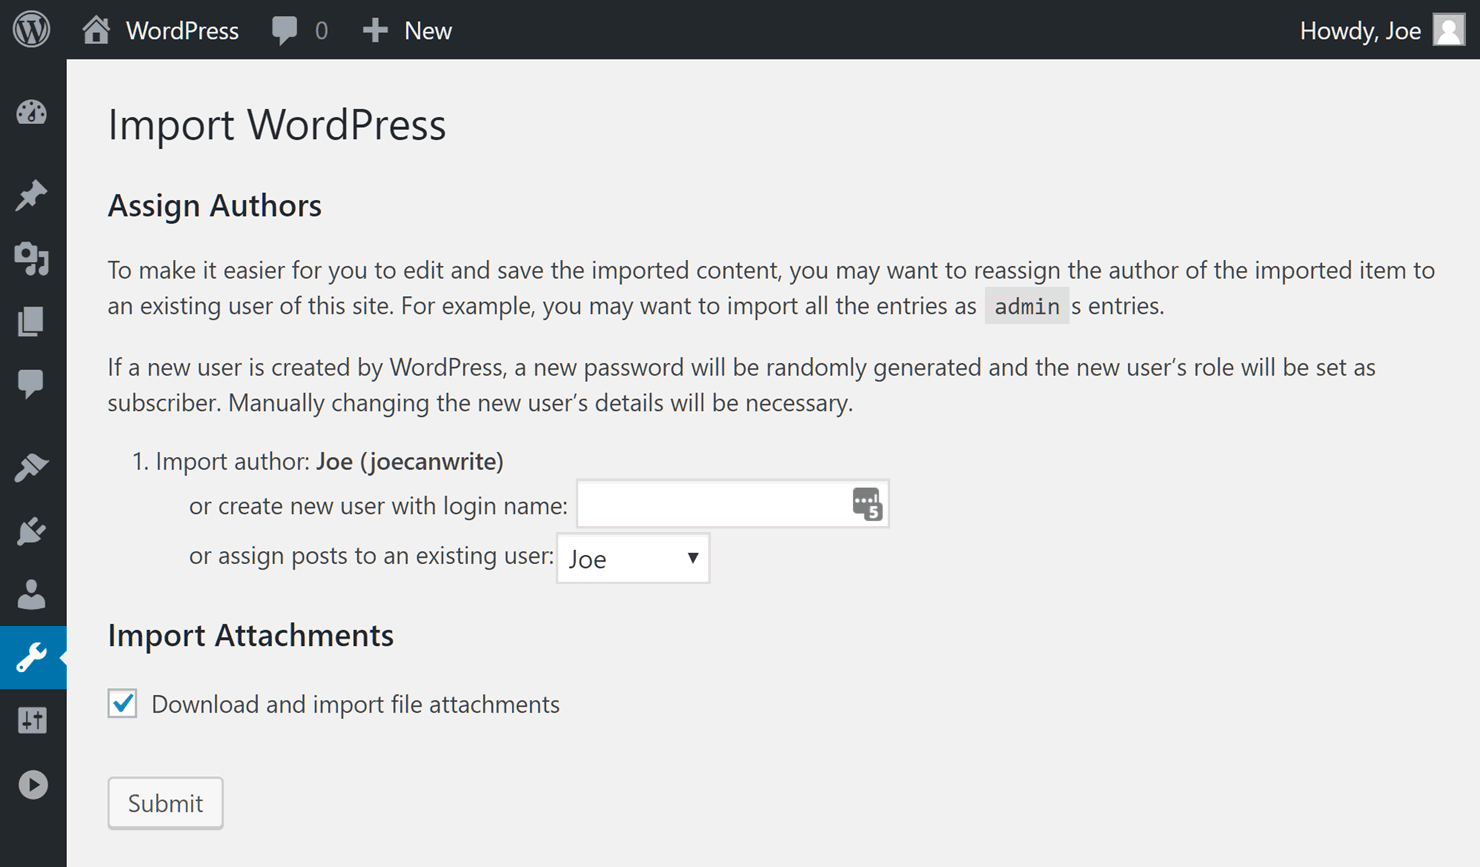
The next step requires you to choose where to assign the new content, which is probably your user profile. Importing the attachments, such as image files, is also recommended.
Once the import job has run, the content should have been migrated from your old WordPress.com website to your new WordPress.org site.
Now you can start designing your site to look and function the way you want it to, including choosing a suitable theme and installing some recommended plugins.
Final Tasks to Complete the Migration
One more task is changing your domain name so that it points to your new site.
If you were using the free WordPress.com subdomain service and your site had an address like mydomain.wordpress.com, you will have to use the paid Site Redirect service from WordPress.com to send traffic to your new domain. Although, if your site isn’t receiving much traffic, you may want to skip this step and save some money.
If you were already using your own domain for your WordPress.com site, you can update the details of that domain with the company you registered the domain through so it points to your new web host instead of the WordPress.com servers.
Now all that’s left to do is to choose a suitable WordPress membership plugin and start working on your new membership site.
Final Thoughts
If the fact that you created your website with WordPress.com has been holding you back from launching your membership site, you now have all the information you need to move from the restrictive WordPress.com service to the more versatile WordPress.org platform.
Although it doesn’t take long to migrate from WordPress.com to WordPress.org, you also have the option of paying to use the Guided Transfer service from WordPress.com and letting them handle the process for you.
If you have any questions about moving your website from WordPress.com to WordPress.org, please let us know in the comments below.


This article really helped me a lot. I managed to transfer my wordpress.com website to Bluehost web hosting with no glitches at all. Your guides are really awesome.
That’s great to know. Thanks for sharing.