Consulting is a booming industry. In 2020, it was worth approximately $132 billion in the United States. However, it can be challenging to find a consistent and well-paying position as a consultant.
Starting your own membership site for your consultancy business enables you to offer your expertise directly to companies and entrepreneurs. You can promote your tailored services, and use your reputation and knowledge to attract subscribers.
In this guide, we'll look at the benefits of having a members-only website that showcases your expertise. We'll also walk you through how to build a consulting website with the MemberPress plugin. Let's get started!
The Benefits of Having a Monetized Membership Site for Consulting Services
Monetized membership websites are sites with restricted content. Because it isn't available to the general public, users need to either pay a subscription fee or register their details to access the content.
Access to a much larger audience
With a consulting website, your marketplace is virtually unlimited. You can offer your professional expertise to help companies and individuals all over the world.
For example, College Transitions is a niche consulting site that helps students across America choose, apply to, and get into the right universities.

College Transitions uses MemberPress to manage its counseling and consulting services, offering two plans – hourly and unlimited. These plans also include access to premium resources.
If that's not enough inspiration, you should know the niche consulting sector is growing at a rate close to 18%, significantly higher than large-scale consulting firms.
If you have industry experience and a positive reputation, you can attract paying members to your site and boost your revenue.
Potential for recurring revenue
With a consulting website business, you can include online courses in your offerings.
Courses are an excellent way to package consulting services, and they naturally maximize recurring revenue. A bit of initial effort can lead to ongoing income for years to come.
The MemberPress Courses Add-on is included with all three MemberPress plans (Basic, Plus, and Pro). And it makes building and protecting courses super easy!
How to Build a Consulting Website (In 5 Steps)
Now, let's look at the simple steps you can take to create your membership site. For this tutorial, you'll first need a live WordPress site. If you don't already have one, no worries!
WordPress is incredibly easy to work with. Check out this article on how to get started with WordPress.
You'll also want to choose a theme for your consulting membership site. One of the best things about WordPress is that there are tons of great themes for just about every kind of business. For inspiration, take a look at the examples in this article 25 Best Consulting WordPress Themes.
Once you've got your site and your theme squared away, it's time to get set up!
Step 1: Brainstorm Your Content
First, you'll want to think about what kind of content you can offer your members. You should consider what your areas of expertise are, and how you can monetize them.
As mentioned, you can provide step-by-step courses with written material and instructional videos. With MemberPress, you can also…
- Upload resources such as business plans and budgeting documents
- Provide access to video seminars
- Run private consulting calls.. and more.
All of this is possible with MemberPress.
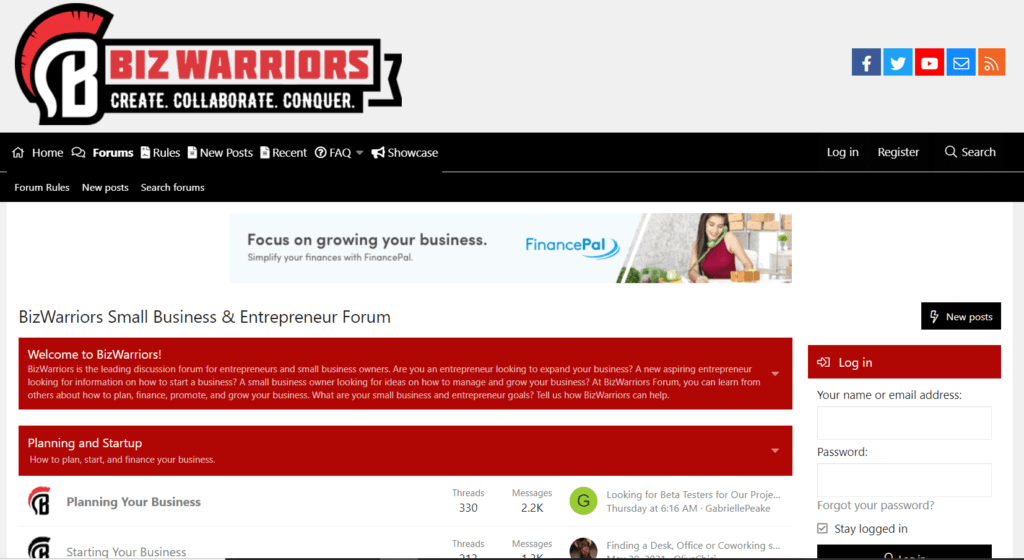
It could also be beneficial to set up members-only forums that facilitate discussions and networking. For example, Biz Warriors features small business and entrepreneurial advice forums:
PRO TIP: Your paid content should offer something unique and valuable that motivates a user to become a member. If they can find similar content for free elsewhere, they're unlikely to subscribe to your site.
Step 2: Install and Activate the MemberPress Plugin
In this tutorial, we'll show you how to start building your site with our MemberPress plugin. You can sign up for an account by choosing a pricing plan that suits your business' needs. Then just enter your personal details.
Once you complete the registration process, you'll be directed to your member account dashboard, which contains the plugin files and your subscription details (including your license key):
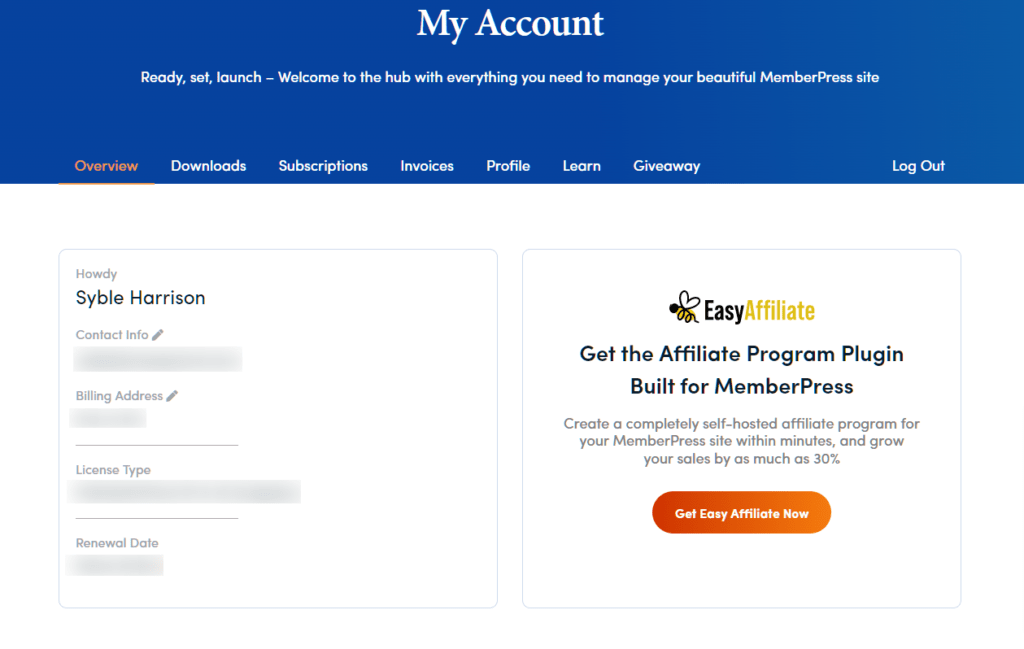
Download the files, then navigate to your WordPress dashboard. You can upload the downloaded files by going to Plugins > Add New > Choose File and selecting the MemberPress .zip folder:
Once the plugin is installed, you'll need to click Activate to complete the process. In the MemberPress dashboard, you'll also need to enter your license key to activate your subscription.
Step 3: Create Your Consulting Plans
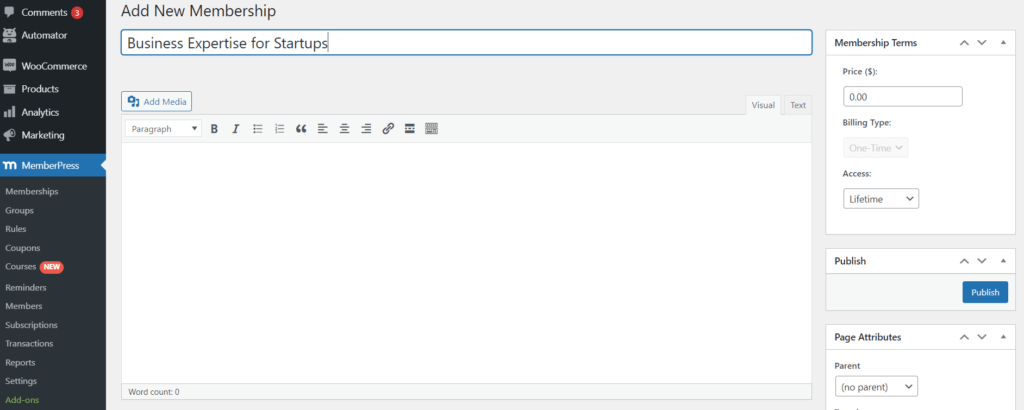
Now you can design the different memberships for your consulting services. To get started, click on MemberPress > MemberPress > Add New to bring up the design form. Here you can and name your first plan:
You can set the price of your membership and indicate whether it will be a one-time signup cost or have recurring billing. You can also set up a discounted or free trial period if you want to entice new members to try out your platform before committing.
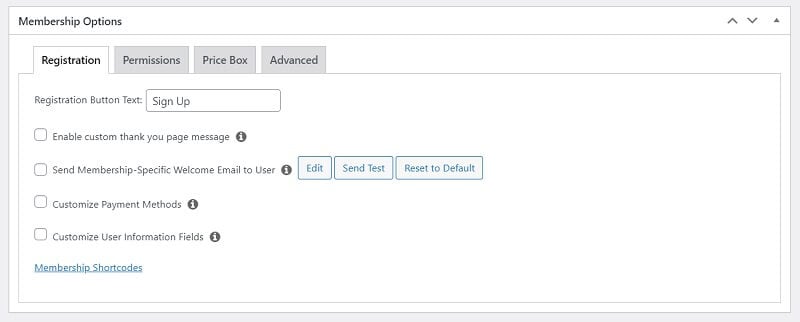
Then, scroll down to access the Membership Options section:
In this area, you can customize more advanced features such as payment methods and access URLs. You can also set permissions for this membership plan, and control how users can sign up for it.
Take your time and do your research when designing your plans. You want to make sure they're accessible and priced right. Consider checking out some similar consulting businesses to see what they're doing.
You may also want to create different memberships for various levels of consulting advice. For example, if you're creating a business consulting service, you might offer two plans:
- A less expensive plan for startups, including access to basic courses and one consulting session every six months
- A more expensive plan with a greater number of live consulting sessions and access to premium courses for larger-scale businesses
Step 4: Control Who Can Access Your Content
Next, you can set up rules that determine who can access your content. This step is essential because it enables you to keep some resources private and make others accessible to particular subscribers.
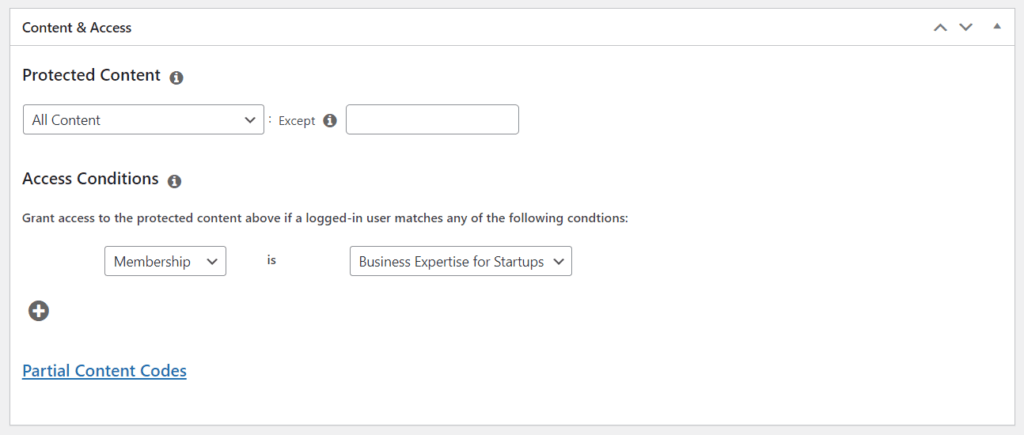
You can find these settings by navigating to MemberPress > Rules > Add New. You will then see a section titled Protected Content:
Here, you can use the drop-down menus to select the pages, tags, posts, or categories that you want to restrict. Then you can use Access Conditions to control how the restriction applies.
For example, you can create a rule that only members of your highest pricing plan can access pages with your most valuable resources.
Step 5: Set Up Registration and Login Pages for Your Members
Next, you need to create registration and login pages for your members. These pages enable users to sign up for your site and access their accounts once they are subscribers.
You'll need to add your registration page to your website's menu. You can do this by navigating to Appearance > Menus > Manage with Live Preview.
This will take you to a visual editor that enables you to add a menu by clicking on Menus > All Pages and scrolling down to + Add Items. Click on the drop-down menu next to Memberships, and select the name of your membership:
Once you select it, you can click Publish to save the changes and add it to your website's menu. This creates a link to the registration page for your membership plan. This page will contain your plan's overview, price, and the signup details that you request from users.
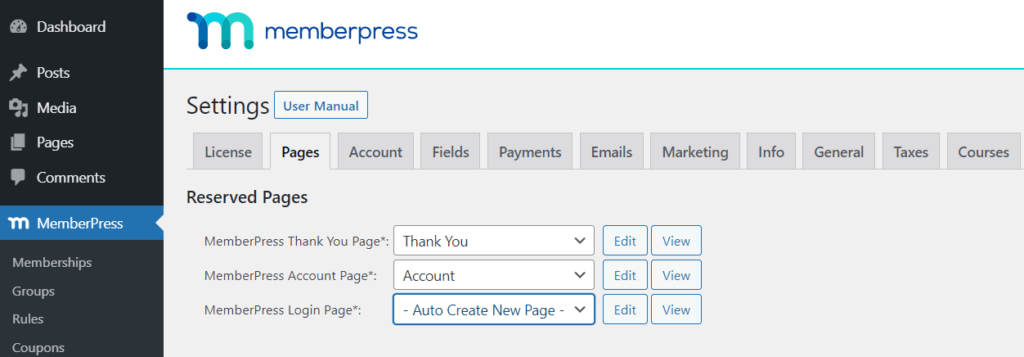
However, you also need a login page for your existing subscribers. You can set this up by going back to the WordPress dashboard and navigating to MemberPress > Settings > Pages. Then select Auto Create New Page from the MemberPress Login Page drop-down menu:
After that, scroll to the bottom of the page and click on Update Options. Now you've successfully created a membership site for your business consulting services!
Conclusion
Consulting is a booming industry, and many professionals make a living by offering their expertise to companies and individuals. You can take full control of this concept by building a consulting website that offers exclusive content to those who need it most.
Remember, you can build a consulting website business in just five steps:
- Brainstorm your content.
- Install and activate the MemberPress plugin.
- Create your business advice membership plans.
- Control who can access your content.
- Set up registration and login pages for your members.
Do you have any questions about how to build a consulting website with MemberPress? Let us know in the comments section below!
If you liked this article, be sure to subscribe to the MemberPress blog!






Add a Comment