MemberPress account and registration forms have a default set of fields. Under MemberPress settings, you can enable and disable some default MemberPress fields and add your custom fields.
This document explains how to manage MemberPress fields and create custom fields for registration and account forms.
Managing MemberPress Fields
MemberPress field options are available at Dashboard > MemberPress > Settings > Fields tab. Here, you will find several options for managing default fields.

The first option you can check is whether the field settings should be applied to purchases made by existing users. Disabling the Show The Fields Below For Logged-in Purchases option will only apply the field settings to new users.
Next, you can choose to show the Name and Address fields on the Account and Registration pages and forms.

Here, you can also set whether the Name and Address fields are required. Enabling the Required option will prevent users from submitting registration forms unless they fill them out.
Name Fields
The Name Fields will add the First Name and Last Name fields to both the user Account and Registration.
The Show option will be enabled by default for the Name Fields. To hide these fields on both the Account and Registration pages and forms, disable the Show option.

Address Fields
The Address Fields will add the Address, City, Country, State/Province, and Zip/Postal Code fields. You can choose to add Address Fields only to your Account page, or to both the Account and Registration pages.
By default, the Show in the Account option for Address Fields is enabled, while Show on Signup is disabled. This makes them visible on the Account page and hidden on Registration. This setup allows users to register more quickly with fewer fields to fill when purchasing subscriptions. They can then enter their address data on their Account page.
To enable Address Fields on your registration pages, follow these steps:
- Navigate to Dashboard > MemberPress > Settings > Fields tab.
- Scroll to Address Fields, and check the Show on Signup checkbox.

- Click the Update Options button to apply changes.
Furthermore, you can completely hide address fields by unchecking both the Show in the Account and Show on Signup options.
Creating Custom Fields
On the Fields page, under the Custom User Information Fields section, you can add your custom fields:
- Click on the + icon to add a new custom field. This will open the field form.

- Start by naming your field. This Name will be used as the label for this field in your forms.
- Next, you need to choose the Type of the field. Depending on the type you choose, additional options specific to that type will appear.
- The Default Value(s) field should contain the value that should be loaded as the default.
- As with the Address fields, you can specify where your custom field will be displayed. Enabling the Show at Signup option displays your custom field on registration forms. Also, selecting the Show in Account option displays the field on the account form.
- Selecting the Required option will prevent user registration unless this custom field is filled in.

- Click the Update Options button to save the field.
You can create unlimited custom MemberPress fields for your members to fill out.
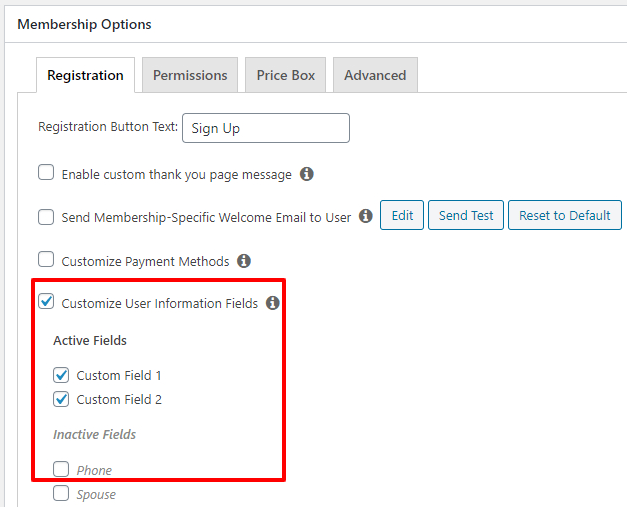
Further, under the settings of any Memberships, you can choose to show or hide specific fields. By default, all custom fields set to Show on Signup will be displayed on the registration forms of all Memberships.
This will allow you to show only the fields you need on the registration forms for every membership.
Custom fields set to Show in Account will be visible in users' accounts only after they register for a membership.
Creating a Default Blank Option for Drop-Down Custom Field
To add an “empty” option, add the following as your first option:
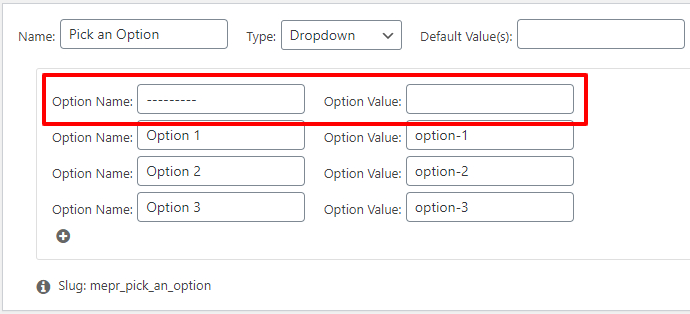
That way, when your users fail to select an option, MemberPress won't let them submit the form, and it will show this error:

Creating a Clickable Checkbox Option
To create a clickable checkbox custom field, you can simply add some basic html to the field name when creating it. Here is an example:
<a href='https://www.yoursite.com/special-policies' target='_blank'>Please agree to our Special Policies</a>

Which will show up on the registration page like this:

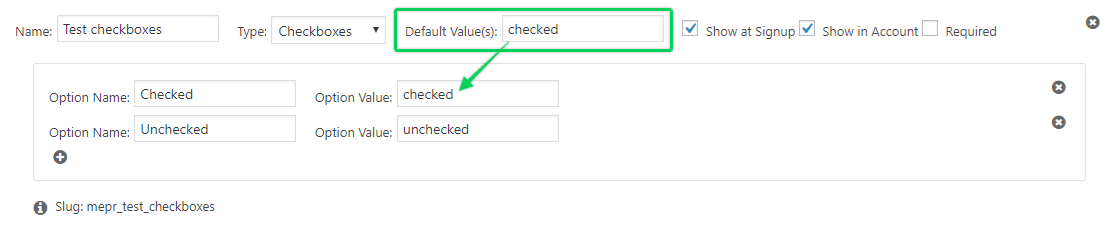
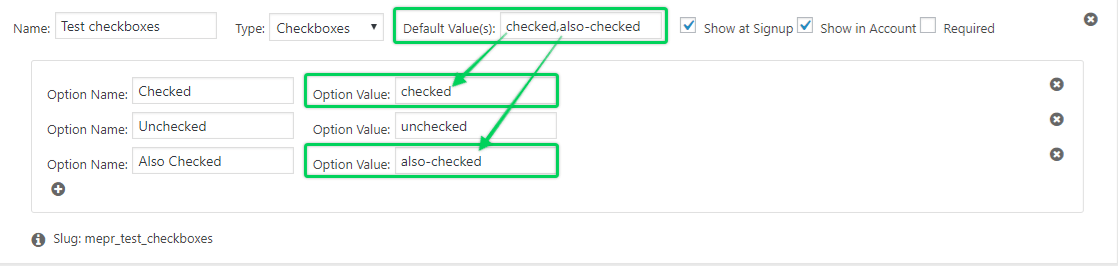
Enabling Multiple “Checked” Options for Multi-Select and Checkboxes Custom Fields
MemberPress allows you to enter a default option to be selected or checked for Multi-Select and Checkboxes Custom Field types using the
Default Value(s) option for the field and entering the option value as shown here:
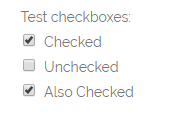
To have more than one option checked, simply separate the
Option Values entered in the Default Value(s) option as shown here (comma-separated, with no spaces between entries):
Here is what this would look like on your registration page: