MemberPress Courses come with the ReadyLaunch Courses/Lessons Template. This template was intended for distraction-free learning, and for this reason, it uses its dedicated header instead of the global site header.
The ReadyLaunch Courses/Lessons Template header comes with the Courses menu. This document will show you how you can modify this menu to match your needs.
Courses Menu Styling
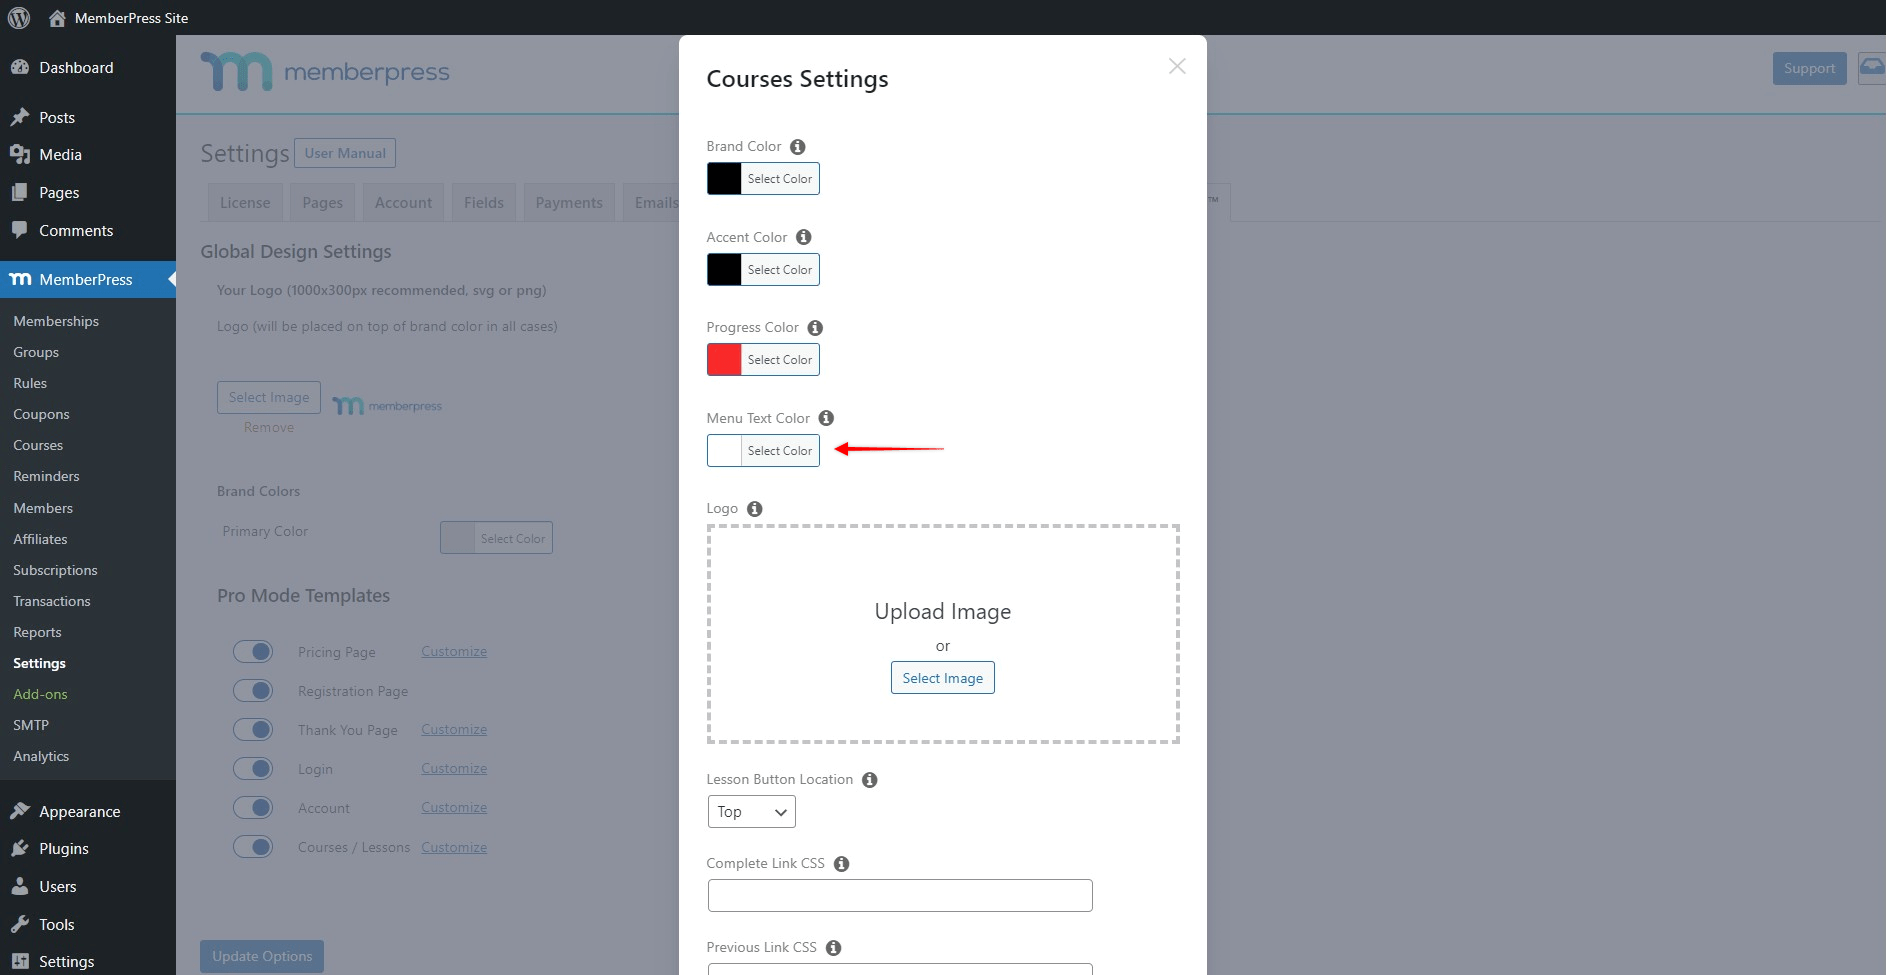
The ReadyLaunch Courses/Lessons Template comes with some default styling options. You can access these styling options by clicking the Customize link at Dashboard > MemberPress > Settings > ReadyLaunch tab.
Here, the Menu Text Color option will allow you to set the color of your course menu items.
If you would like to add any additional styling to the course menu items, you would need to do this by adding custom CSS to your Theme Customizer (Dashboard > Appearance > Customize > Additional CSS).
Add / Remove Menu Items
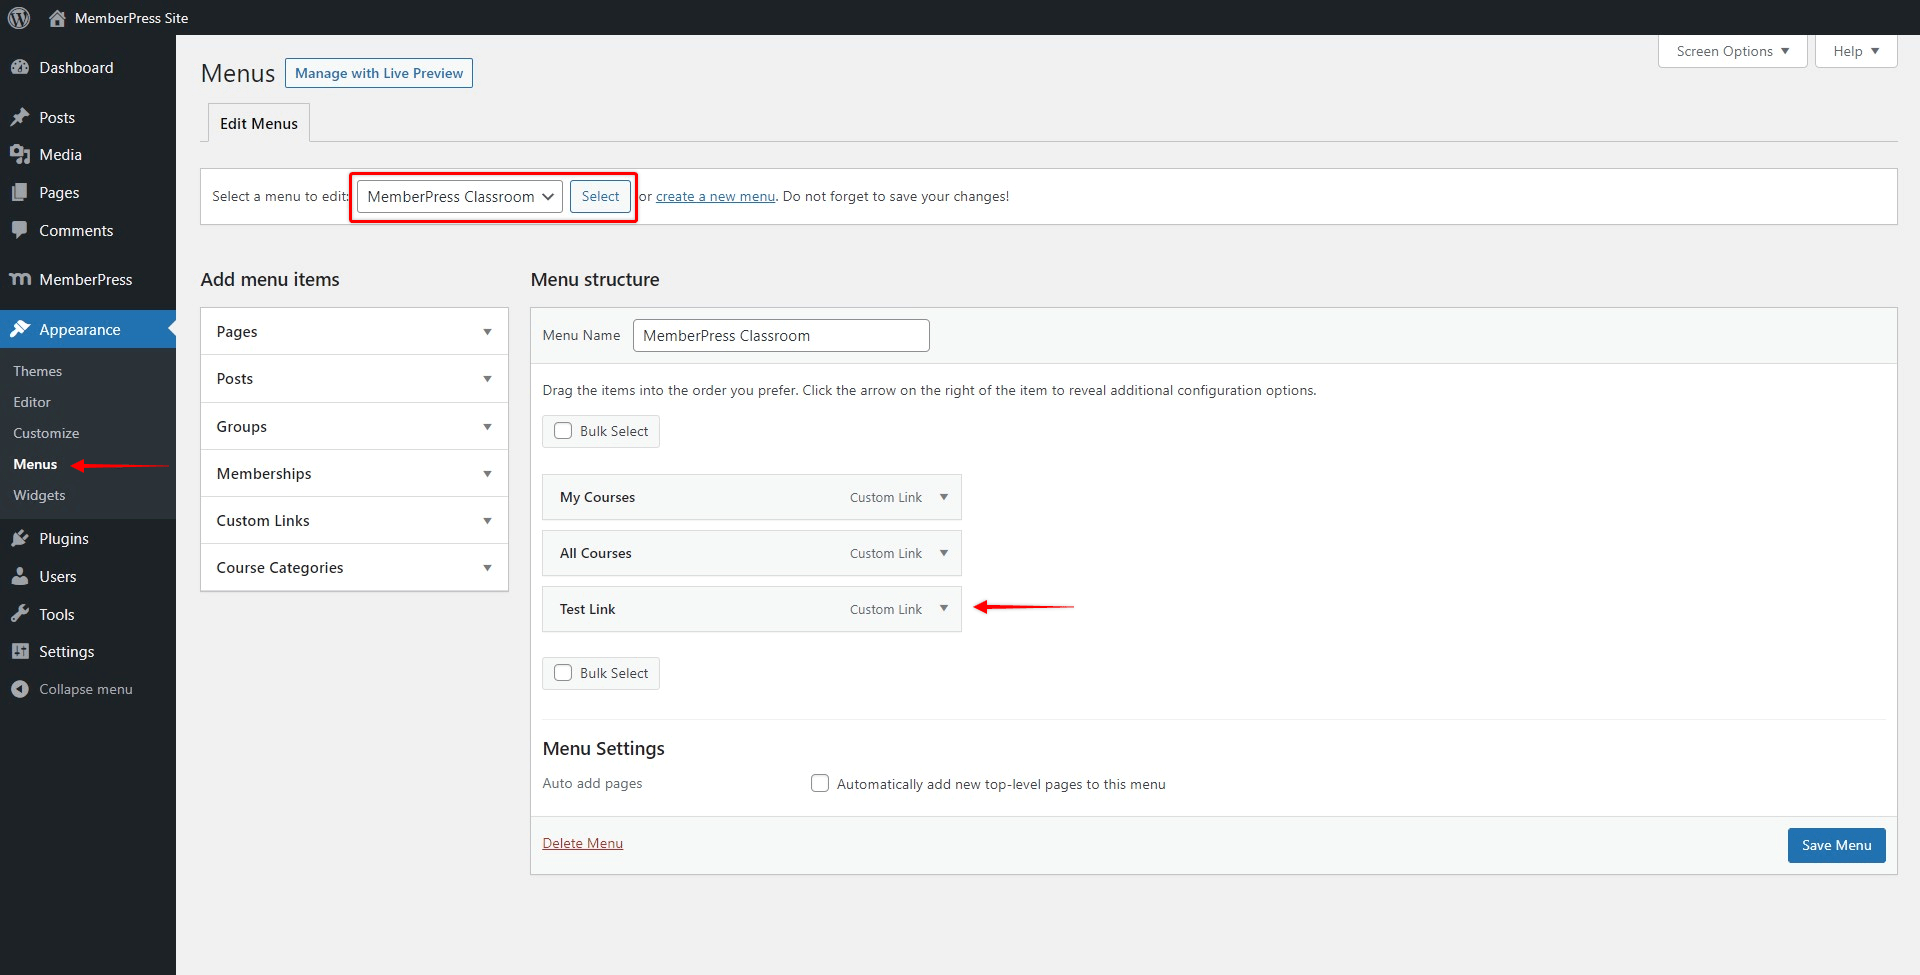
MemberPress Courses menu items can be edited the same as any menu location in WordPress. To manage the course menu items please follow these steps:
- Navigate to Dashboard > Appearance > Menus;
- In the menu selector dropdown at the top of the page, select the MemberPress Classroom and click the Select button;
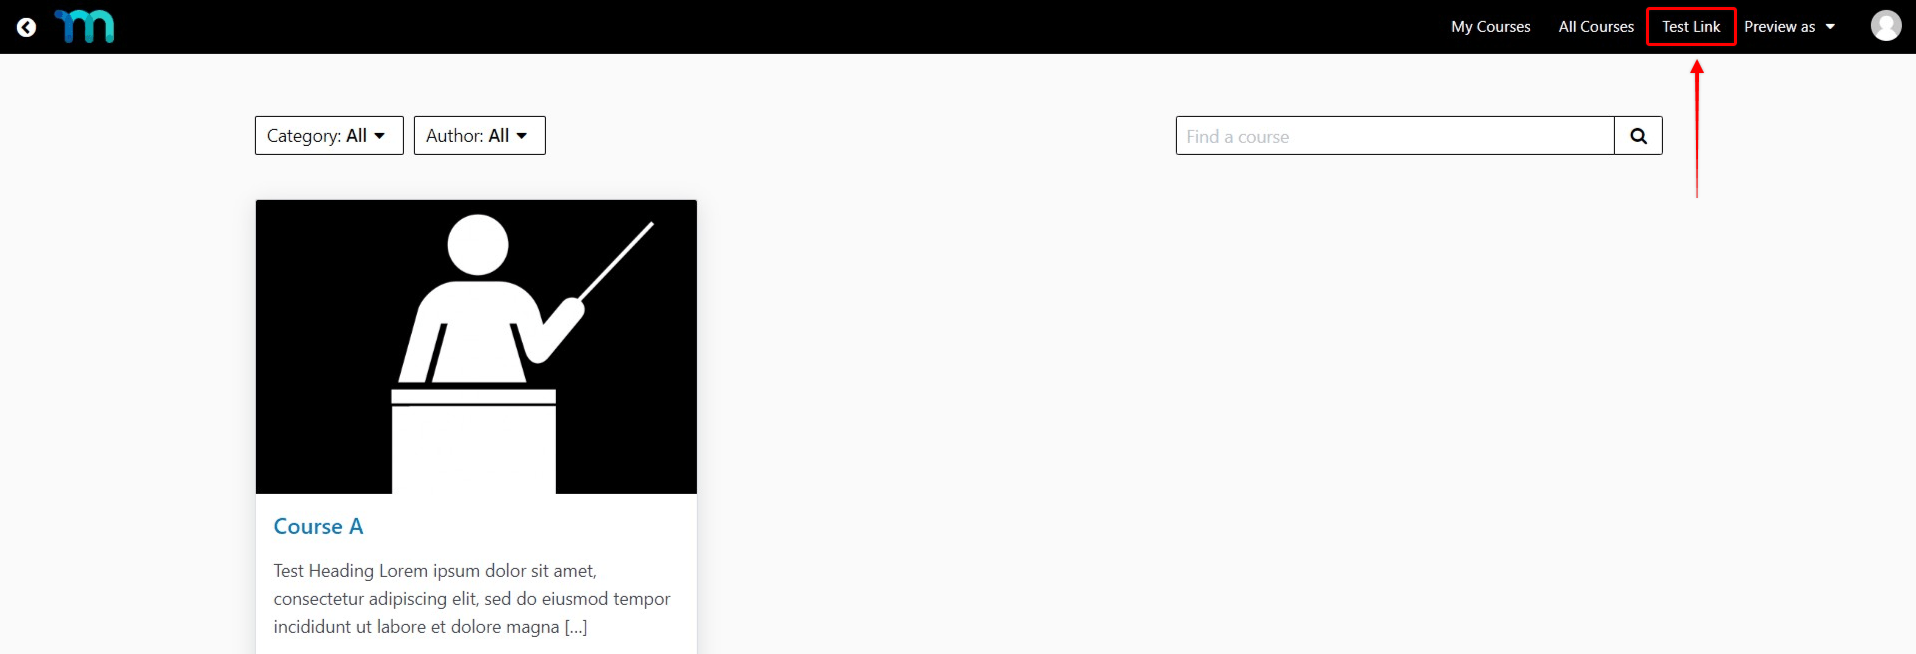
- Edit your menu options. As an example, we added the Test Link menu item;
- Click the Save Menu button to save your changes
The menu items you add here will be added to the course menu on the course archive and all course pages.
Help?
Is this not working how you think it should even after following the instructions in the video? Feel free to send us a
Support Ticket!


