Additional menu

Get MemberPress today! Start getting paid for the content you create! Get MemberPress Now

MemberPress Block Widgets

MemberPress has multiple Gutenberg blocks that you can use on your WordPress posts and pages. Also, you can use MemberPress blocks to add content to sidebars and other widget areas.

This document will provide more details on available MemberPress block widgets, and show you how to use them.

Widget Areas

Most commonly, the widget areas are your footer and sidebar. Depending on the theme and plugins you’re using on your site, you could have access to additional widget areas.

Accordingly, if you have the MemberPress Courses add-on active on your site with the Courses/Lessons ReadyLaunch template enabled, you will also have access to the following widget areas:

  • Classroom Sidebar – visible on all of your courses and lessons;
  • Lessons Header – visible on all of your lessons;
  • Lessons Footer – visible on all of your lessons.

To edit any of your widget areas and add a block to it, follow these steps:

  1. Navigate to Dashboard > Appearance > Widgets;
  2. Click on any widget area to expand it, and click on the “+” icon to add block widgets;

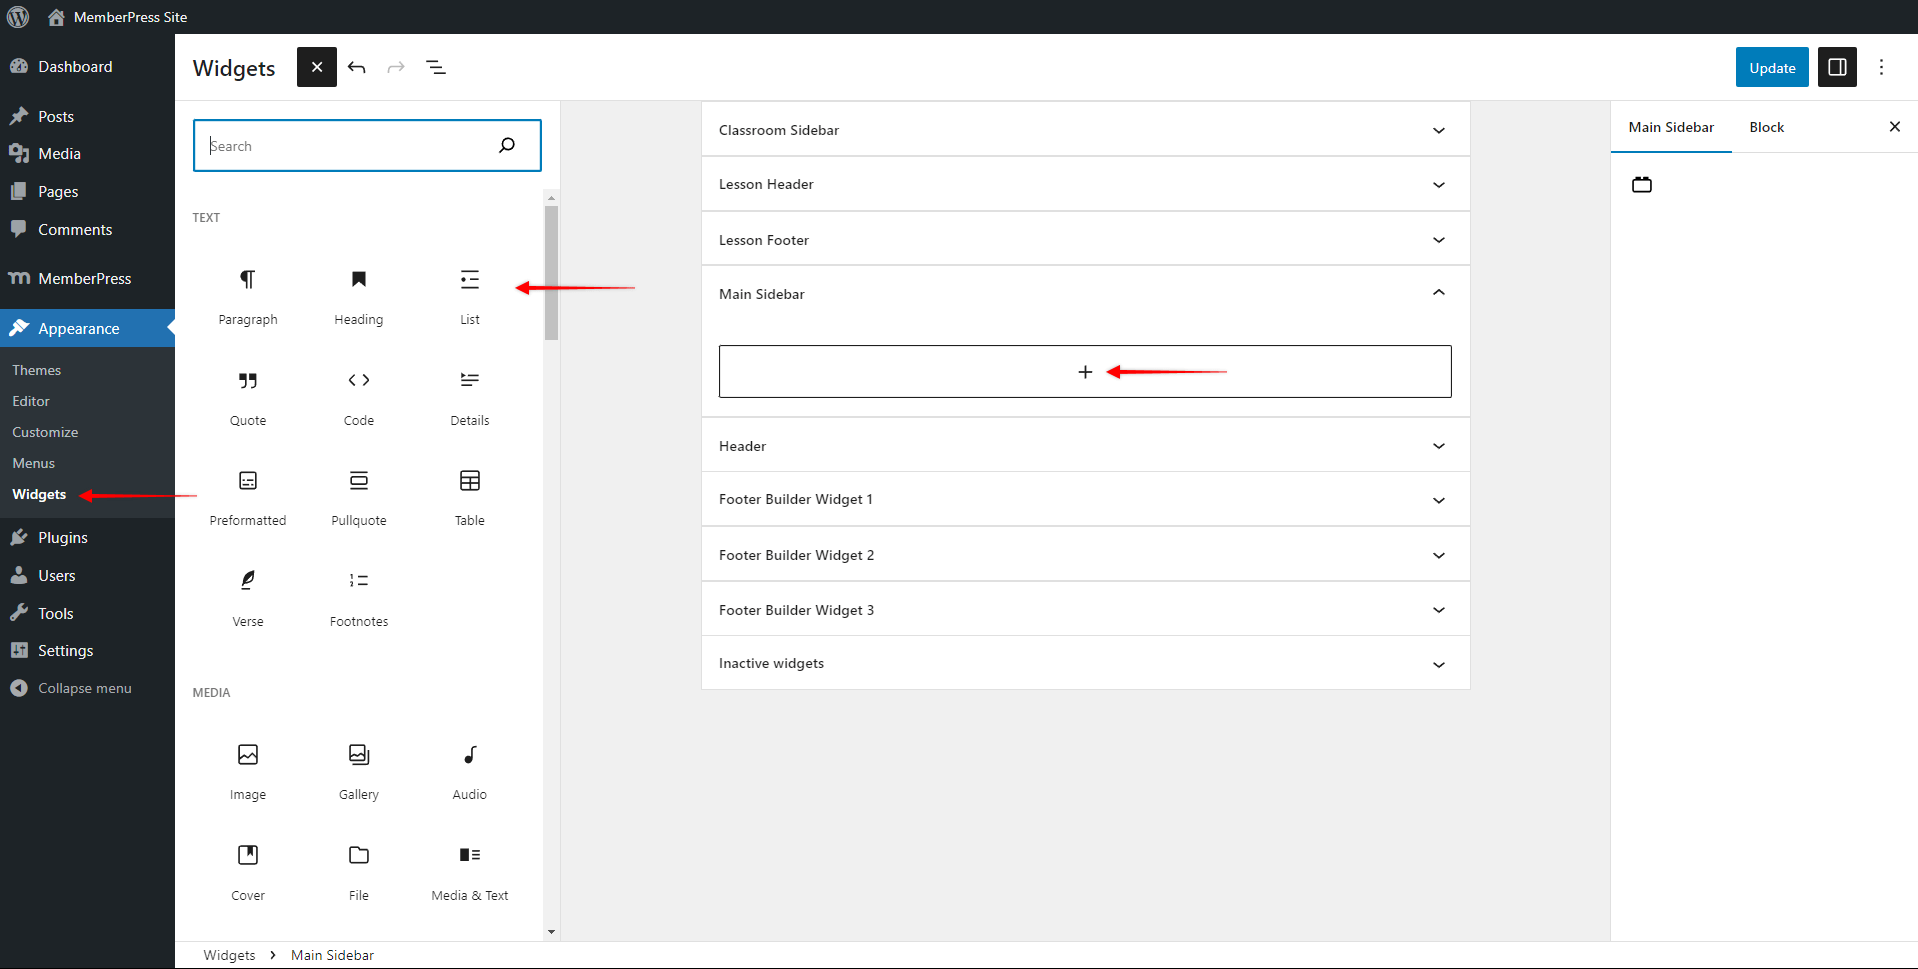
  1. Search or browse down the block list, and click on the block you need to add it to the widget area;
  2. Click on the “Update” button to save changes.

Note: If you don’t see the “Widgets” option at Dashboard > Appearance, please keep in mind that themes that support the Site Editor might not use widgets. In this case, you would use the Site Editor (Dashboard > Appearance > Editor) to edit your site and add MemberPress blocks to your templates and patterns.

Available MemberPress Block Widgets

MemberPress allows you to add classic forms, as well as ReadyLaunch forms to your widget areas. 

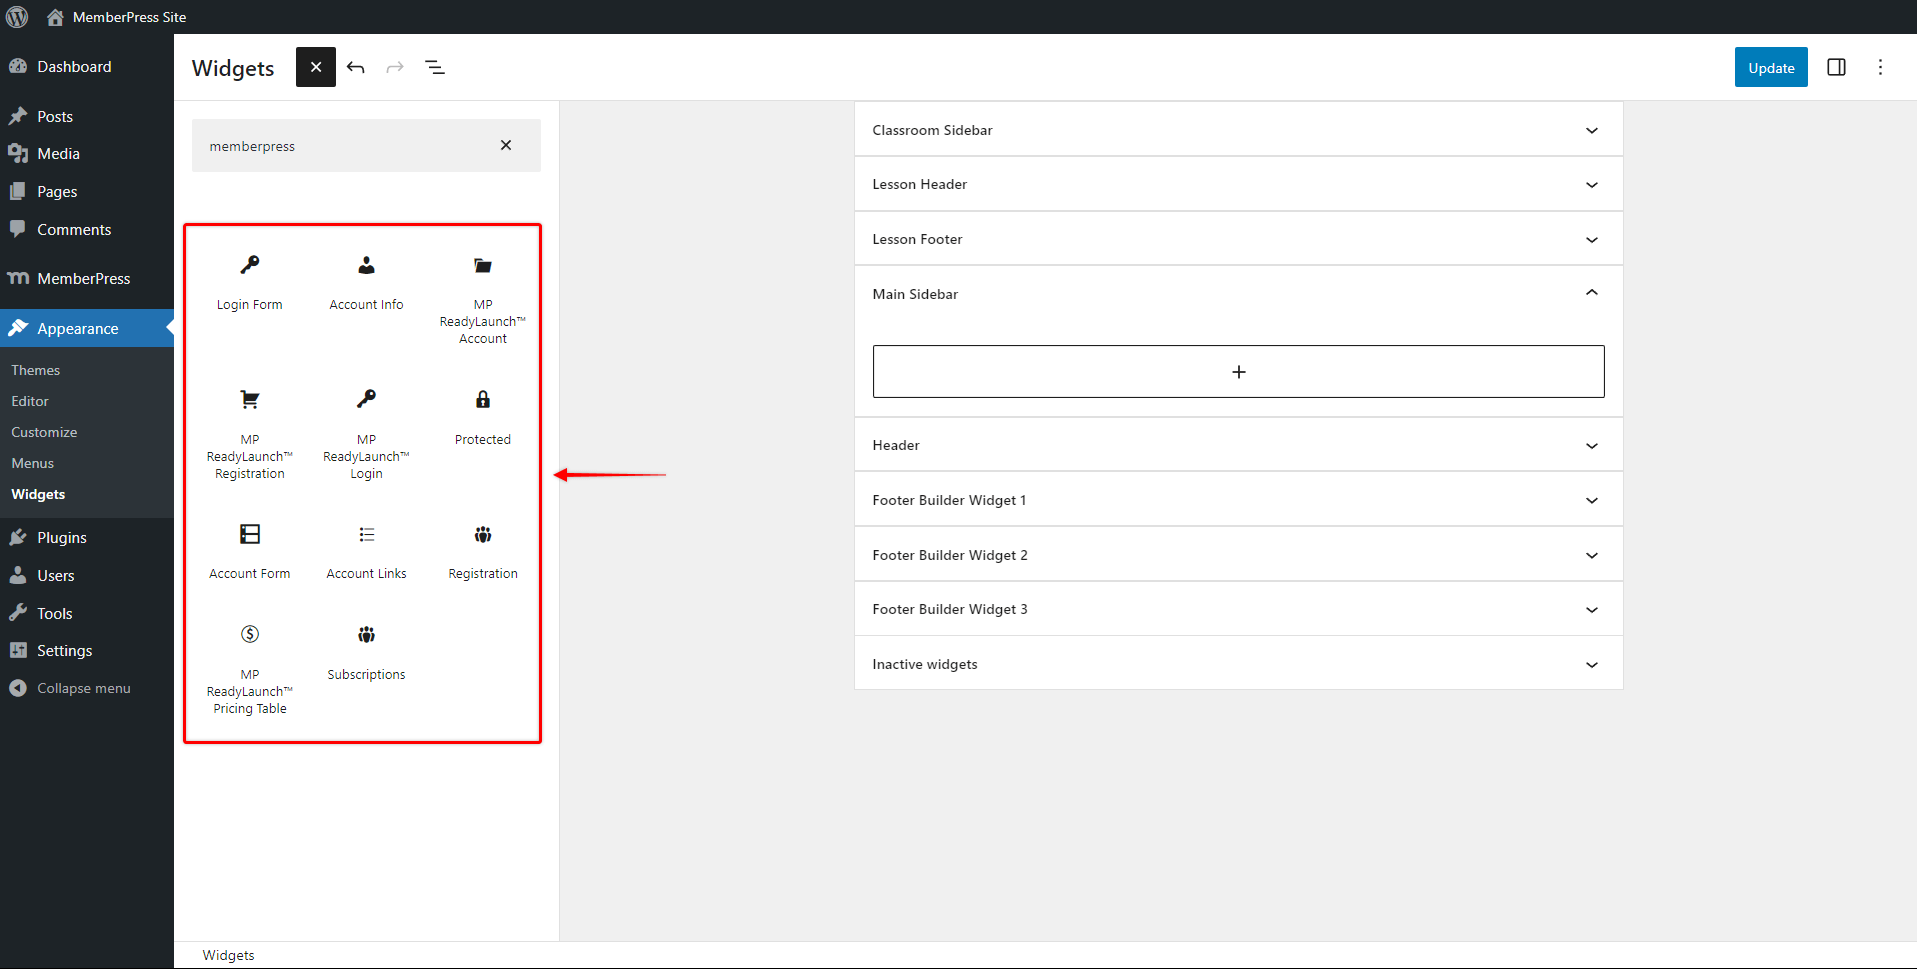
You can use the following block widgets to add MemberPress classic forms and other data:

  • Login Form Block 
  • Account Form Block
  • Account Links 
  • Account Info Block
  • Registration Block 
  • Subscriptions Block 
  • Protected Block

More details about each MemberPress block can be found in the “Available Gutenberg Blocks” document.

Also, you can use the ReadyLaunch blocks for Login, Account, Registration, and Pricing Table (Groups) forms. Please find more information about these blocks in the following related articles:

Note: Please keep in mind that the ReadyLaunch template design will be adjusted when added to a widget area using blocks. 

Example: Add a Personalized Greeting and a Login Form to Your Course Sidebar

To illustrate how MemberPress block widgets could be used, we created this example. Here, we’ll show you how you can create a personalized greeting for logged-in members, in the sidebar of all MemberPress courses (with ReadyLaunch template enabled). Also, we’ll add a login form for the users who are logged out.

To achieve this, we will use three MemberPress block widgets:

  • Protected Content block;
  • Account Info block;
  • Login block.

As mentioned above, the Classroom Sidebar is the widget area visible on all of your courses and lessons. Thus, this is the area to which we’ll add our blocks. 

Please follow these steps to create this setup:

  • Log in to your site admin dashboard and navigate to Dashboard > Appearance > Widgets;

  • Expand the “Classroom Sidebar” panel by clicking on the caret icon, and click the “+” icon to add the block widget;
  • Add the MemberPress Protected Content block. Select the rule you wish to apply and choose “Show” under the “If Allowed” option. This will show any content you add to this block only to your authorized logged-in members;

  • Next, add the default Column block, and set it to 2 columns. In the left column, add the default Paragraph block, and add your greeting text. In our example, we used “Hello,”;
  • In the right column, add the MemberPress Account Info block. Under the “Field Slug” dropdown, choose the “display_name” option – on the front end, this will show the display name set for the logged-in user. You can also use the first or last name slug if it fits your needs better;

  • Next, outside of the Protected Content block, add the MemberPress Login block. You don’t need to add the login form to the Protected Content block, as you want the login form to be shown to logged-out users. At the same time, by default, the Login block will show the “You’re already logged in.” message with the Logout link to your logged-in members;

  • Under the Login block settings, you should leave the “Login Redirect URL?” option disabled, as you don’t want a user to be redirected away from your course after logging in.
  • Click the “Update” button to save changes.

As a result, the logged-out users will see only the login form on your protected courses and lessons.

Once they log in, they will see the personalized greeting and the “You’re already logged in. Logout.” message.

Was this article helpful?

Related Articles

computer girl

Get MemberPress today!

Start getting paid for the content you create.