Blast Into a Massive Universe of Content Monetization Potential with the MemberPress Elementor Flexbox Integration!
Combine the power of MemberPress Rules and Elementor Flexbox containers, and you get near-infinite paywalling possibilities.
Step out of the confines of traditional sections and columns, and paywall virtually any content on your page!
Restrict access to containers based on membership levels to masterfully tease protected content, and shape the experience of members and non-members alike.
Maximize upselling and cross-selling and enhance user experience on your site by only displaying the most relevant content to your visitors.
In your online universe, you pull the strings.
You’ve never paywalled like this before!
Ready to step into the future of paywalling? Read on to find out more.

Elementor Flexbox Containers: What’s the Hype?
So you want a professional-looking website but don’t know how to code. I’ve got some great news: you don’t need to settle for a cookie-cutter template that’s awkward to customize.
With the total design flexibility of Elementor Flexbox Containers, you can build the website you want, no-coding required.
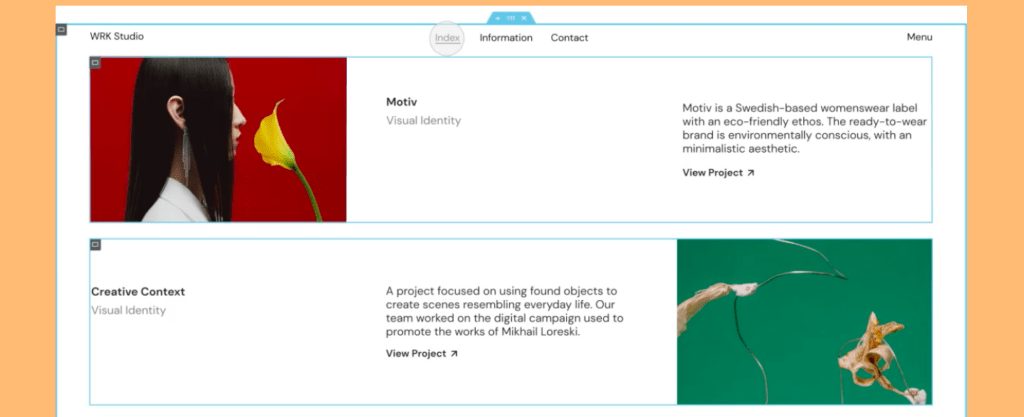
And with the MemberPress Elementor integration, this control extends to paywalling. Now, you can effortlessly tailor access to different content containers based on membership levels.
This kind of control opens up a whole ton of possibilities for your site. And that means there’s a lot to get your head around.
So first, let’s break down what containers are and why they’re key to design flexibility and access control.
What are Containers?
Traditionally, Elementor used sections and columns to organize web content on a page. Then containers entered the chat and it’s no exaggeration to say they changed the page-building game.
Here are some of the ways containers are better than sections and columns.
Faster Loading Speed
Containers are designed to optimize loading speed.
They reduce unnecessary code and offer a more streamlined design process. This ensures that your pages load at the speed of light, keeping visitors engaged and reducing bounce rates.
Greater Layout Control
Want pixel-perfect control over your page design? Containers give you added layout control.
Effortlessly align content, adjust spacing, and create visually stunning pages. They’re a designer’s dream come true!
Mobile Responsiveness
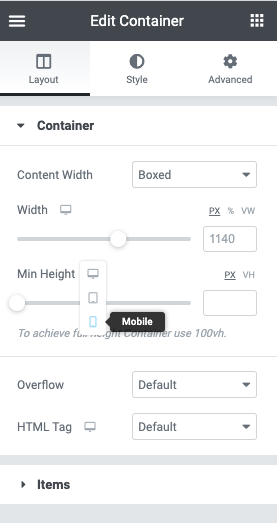
Responsive design is (and has been for a long time) non-negotiable.
Containers automatically adjust to different screen sizes, giving users an ideal viewing experience across devices.
No more tedious manual adjustments. With containers you get seamless mobile integration automatically.
Grouping Different Types of Content
With containers, you can group virtually any type of content together (images, videos, text, audio) in a harmonious layout.
This flexibility unlocks new creative possibilities. It also makes complex page structures a heck of a lot easier to manage.
So that’s some of the ways you can use containers to improve your customers’ online experience.
Now let’s get onto why the MemberPress Elementor Flexbox add-on is so revolutionary for your membership website.
Transform Your Membership Experience
If you’re running a membership site, you know creating an engaging and personalized experience is key to attracting and keeping members.
Well, with the integration of MemberPress and Elementor Flexbox containers, the way you shape that experience is totally dynamic and ultra customizable.
MemberPress allows you to protect the content inside containers, giving you full control over who sees what. This means, based on membership levels or rules, you can create experiences tailored to different audiences.
Here are a couple of the nuts and bolts behind those revenue-generating tailored experiences…
Ultra-Precise Paywalling
What does this mean for your membership site? Well, here are just some of the ways you can use this function:
- Entice Upgrades: Tease content to lower-tiered members, encouraging them to level up their memberships.
- Exclusive Promotions: Offer premium members exclusive promotions without ticking off anyone who’s recently signed up at full price.
- Cross-Sell Strategically: Offer high-converting, personalized content that’s relevant to specific members, such as exclusive tutorials for students enrolled in a particular course.
“Choose Your Own Adventure” Site Experiences
The possibilities don’t stop there. You can customize “unauthorized” messages that align with your brand and entice users to sign up or upgrade.
Alternatively, you can hide and show specific content to the extent that you’re able to offer entirely different experiences to different members.
How to Paywall Content With MemberPress + Elementor Flexbox Containers
Now let’s take a look at the content-preview use case so you can see MemberPress and Elementor Flexbox Containers in action.
In this step-by-step walkthrough, you’ll see how to create a paywall that enhances both the user’s experience and your monetization strategy.
Step 1: Tick-Tock, It’s Installation O’Clock
First things first, you’ve got to make sure you’ve got all the right tools installed and properly configured on your WordPress website.
Here’s the checklist:
✅ Install MemberPress
- Choose and purchase the right MemberPress plan for you, and click Get Started to set up your account.
- Then head to the MemberPress website and click Login to be directed to your Account page.
- Click the Downloads tab and follow the instructions to download the latest version of MemberPress in a .zip file.
- Next, head to your WordPress dashboard and go to Plugins > Add New > Upload Plugin.
- Choose the MemberPress .zip file from your computer and click Install Now > Activate Plugin.
- This will direct you to the MemberPress Wizard, which will guide you through activating your license and setting up your first membership level and rules.
✅ Install the Elementor Plugin

- Select the Elementor pricing plan that’s right for you and click Buy Now.
- Follow the steps to create an account and make your purchase.
- Navigate to your WordPress dashboard, and go to Plugins > Add New.
- Search for Elementor, and click Install Now next to the plugin.
- Activate the plugin after installation.
- Go to Elementor > License in your WordPress dashboard.
- Enter the license key you received when you purchased your plan.
- Click Activate License, and you’ll be ready to use Elementor’s premium features.
✅ Activate the MemberPress Elementor Add-On
Now it’s time to combine these powerful forces via the MemberPress Elementor add-on.
- From your WordPress Dashboard, go to MemberPress > Add-ons.
- Scroll down to Elementor and click Install Add-on.
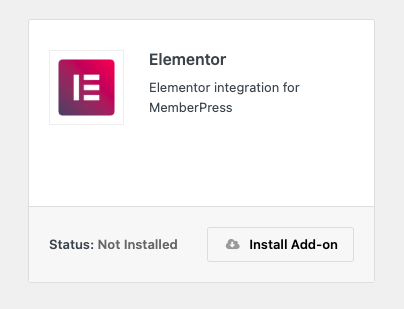
The Elementor add-on will kick start automatically.
✅ Activate Flexbox Containers
The final step in the installation and configuration process is to make the Flexbox Containers feature is turned on in your Elementor settings.
- From your WordPress dashboard go to Elementor > Settings and click on the Features tab.
- Under Ongoing Experiments click on the dropdown menu next to Flexbox Containers and select Active.
- Scroll down and click Save Changes, and you’re ready to roll!
Step 2: Create a MemberPress Rule
Here’s where the real beauty begins. Now it’s time to set up a rule in MemberPress that will allow only members to view your content.
- Go to MemberPress > Rules > Add New.
- Under Protected Content, select Partial from the dropdown menu.
- Under Access Conditions choose Membership, and select the membership level you want to be able to access the content.
- Rename your new rule in the field at the top for future reference.
- Hit Save Rule near the top-right of the screen.
And you’re done!
Step 3: Add Content to Containers
Next you’ll add content to your site using Elementor Flexbox Containers.
In this example, we’ll use Elementor to create a post with paywalled video content on our site.
- Click Post > Add New and create a title for your post.
- Click Edit with Elementor at the top of the screen.
- From the left panel, click and drag a Container onto your site.
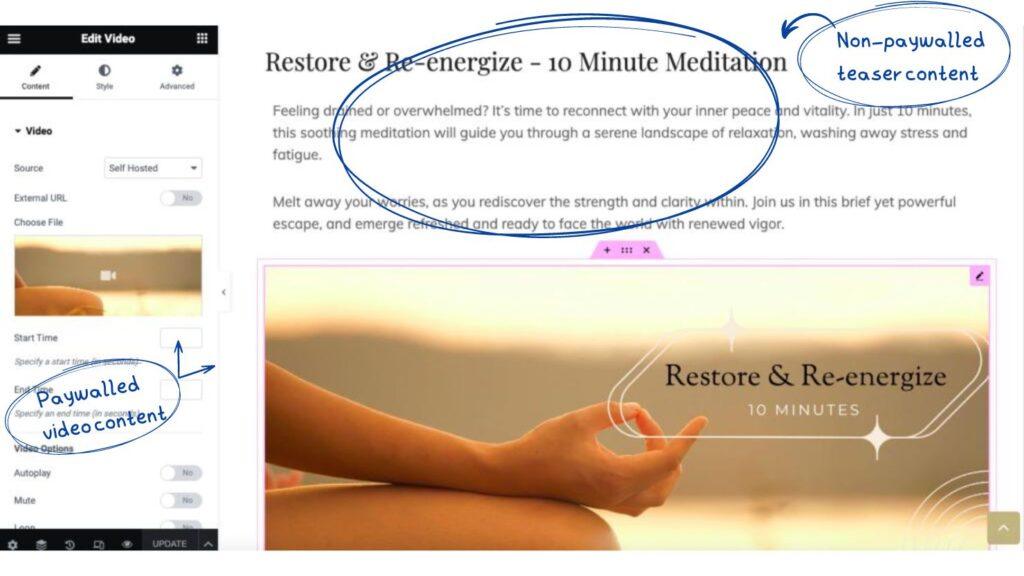
- Into this container, add the non-protected content that’ll be visible to everyone. Below, we’ve included a header and some text to tease our protected video.
- Click and drag a separate container below that and add the content you want to paywall. In this instance, we’ve added a video.
Step 4: Add MemberPress Rules to Protected Containers
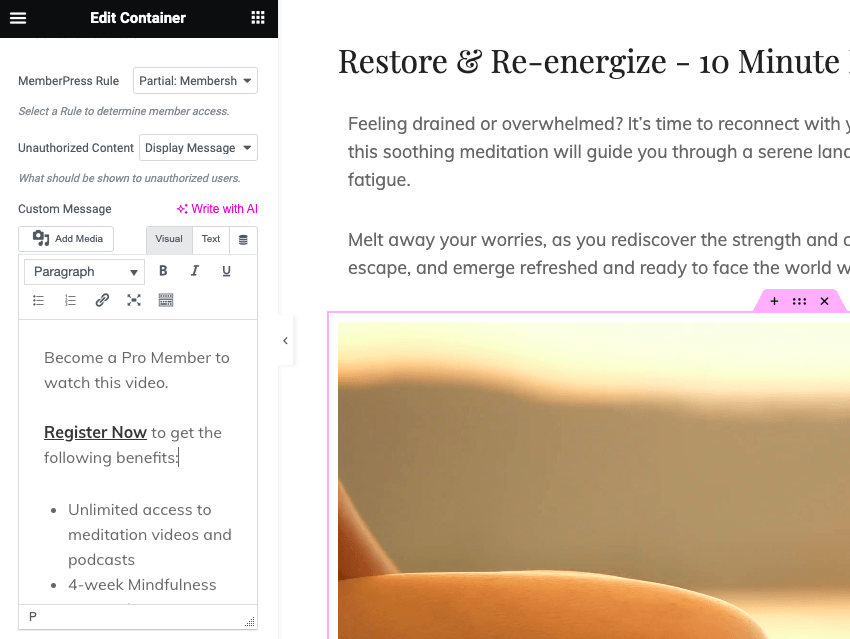
- Click on the container you want to protect. Make sure you have selected the container, and not the content inside it.
- At the top of the side panel, click on the MemberPress tab.
- Select the MemberPress Rule you created in step 2 from the dropdown menu.
- Choose whether you want to hide this content completely from unauthorized visitors, display the default message from your MemberPress settings, or create a custom message. In this instance, we’ll select Display Message and create a custom message.
- In your Custom Message, make sure to link to your sign-up page and give some compelling reasons for them to register.
- Hit Publish at the bottom-left of your screen.
Step 5: Give Your Content a Final Check
Your final step is to check your content from the front end. How will non-members view your site?
Open your newly created post in an Incognito Window in your browser and check that your paywalled content isn’t visible to the public.
And that’s it! You’re all done!
Get Started With MemberPress & Elementor Flexbox Containers Today
With this step-by-step guide, we’ve shown you just one of the ways you can use Flexbox Containers on your Membership site.
The MemberPress Elementor Flexbox Containers integration isn’t just a tool, it’s a new frontier in content monetization and user experience.
Here’s a recap of what you stand to gain from harnessing the combined power of these paywalling powerhouses on your site:
- Enhanced User Engagement: Target content specifically to different membership levels, keeping your members engaged and encouraging upgrades.
- Streamlined Content Management: Organize your content seamlessly with Flexbox Containers, making adjustments as easy as drag-and-drop, zero-coding required.
- Boosted Revenue Opportunities: From upselling to cross-selling, take your marketing strategies to the next level, offering tailored promotions and exclusive content.
- Future-Ready Design: Flexbox Containers ensure that your site is prepared for the evolving landscape of web design, providing an adaptable and responsive framework that will keep you ahead of the curve.
Whether you’re a seasoned membership site owner or just starting out, the MemberPress Elementor Flexbox integration offers an exciting leap forward in content control and monetization.
Don’t be left behind! The future of paywalling is here, and it’s time for you to be part of it.

Get MemberPress Today!
Start getting paid for the content you create.
Got any questions about using Elementor Flexbox Containers on your membership site? Let us know in the comments section below.


Add a Comment