Struggling to get clients for your tax prep business? Or just feel like you’ve hit a ceiling and need a way to grow?
It’s time to get online.
Creating a tax preparation website is the fastest and most efficient way to market your business and increase your customer base. You’ll just need a few simple ingredients to get started.
In this post, we’ll talk about why you should be doing business online as a tax professional.
And we’ll show you how to start a tax preparation business online with WordPress and MemberPress so you can get rolling.
But first, let’s talk about…
Why You Should Start an Online Tax Preparation Business (or Bring Yours Online)

Recurring Revenue
It all comes down to two simple words: Revenue Potential.
I can assure you that taxes aren’t going anywhere – at least here in the U.S. That means the tax preparation industry is guaranteed to grow.
There will always be customers.
And each one of those millions of customers is worth way more than a one-off tax prep opportunity.
With MemberPress, each person is a solid lead you can direct to your recurring revenue sales funnels (but more on that later!).
Simple Certification Process
If you’re new to the game, you’ll need to get certified.
While tax preparation training and certification isn’t easy, it is a super simple process. And it also happens to be FREE in the U.S.
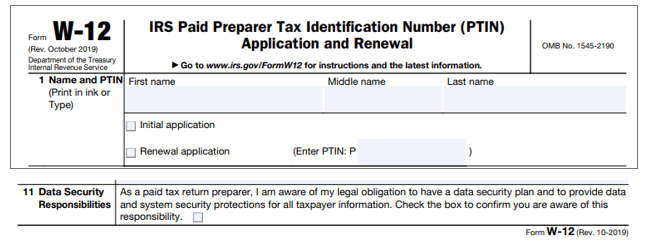
To sell professional tax services in the U.S. you’ll also need a Preparer Tax Identification Number (PTIN). But this is something that you can get easily from the IRS.
It’s a unique 9-digit number that lets the IRS identify which professional helped a taxpayer prepare and file their tax return.
In short, tax preparation really is a great career path that can make for a very lucrative online business.
NOTE: Each tax-collecting nation has its own licensing standards, which you can find easily with a quick Google search.
The Tools You’ll Need

Before you start your online tax preparation business, you’ll need a couple of tools.
WordPress and MemberPress have everything you need to create a website that’s fast, optimized to sell, and equipped to help you build up your client base:
As the most popular and powerful content management system (CMS) out there, WordPress is the best place to house your business site.
Need proof? Of the almost 2,000,000,000 websites on the internet, WordPress powers a full 40%. If that’s not social proof, I don’t know what is!
MemberPress is the world’s most widely used monetization and membership plugin for WordPress.
You can use MemberPress integrations, and functions like content paywalling, subscription and membership management, course creation, and content dripping, to set up virtually unlimited recurring revenue streams for your business.
Together, these two tools have everything you need to start a tax preparation business online.
Optional (But Highly Recommended)

Offering your customers one-on-one private consultations will really set your tax prep business apart. And it’s not hard to do with MemberPress.
You just need a video meeting platform like GoTo Meeting or Crowdcast. Pair it with a scheduling and booking plugin like Simply Schedule Appointments, and you’re all set.
Now that you know the what, we’ll move on to the how…
How to Start Your Own Tax Preparation Business with WordPress
With WordPress and MemberPress in hand, it’s time to create your website.
In this tutorial, we’ll boil down how to start a profitable online tax prep business into a simple step-by-step process.
1. Create a WordPress Site
Once you have all the necessary credentials, it’s time to build your website. As mentioned, you’ll want to start with WordPress.
To make things extra easy, consider going with WordPress’s top recommended provider Bluehost. There, you can purchase hosting and get your site set up in one fell swoop for as little as $2.95 a month.

Bluehost also gives you a free domain for the first year.
2. Install MemberPress
Next, it’s time to install MemberPress. Don’t worry – this is way easier than doing taxes! Just download and activate the plugin on your new WordPress site.
Once activated, MemberPress will show up on your dashboard:
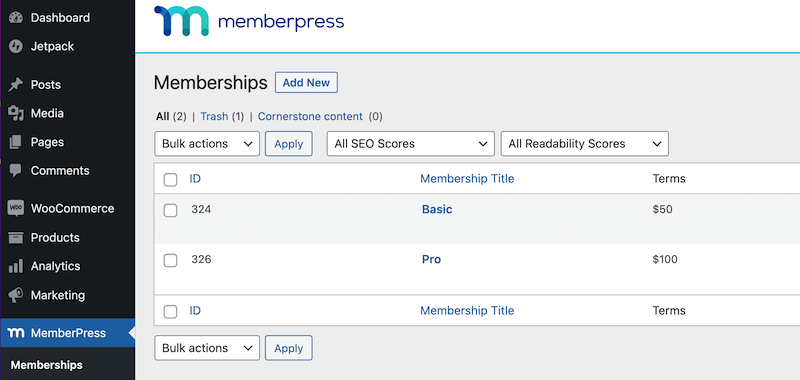
Now you’re ready to set up your membership and payment structure!
3. Set Up Your Memberships and Pricing Plans
Now that you have a website for your business, it’s time to create membership options for your clients.
The membership business model is scalable, meaning you can expand your offerings and increase your fees. So it’s perfect for online tax preparation.
With MemberPress you can create a dynamic pricing page for your services. You can set up tiered pricing depending on the tax services you want to offer.
This gives your customers flexibility and allows them to select the best plan for their needs.
For example, you might offer the following options:
- Federal Plan: Federal tax prep for one-time fee of $
- State Plan: State tax prep for one-time fee of $
- Bronze Plan: Federal + state tax prep for a one-time fee of $$
- Silver Plan: Annual federal + state tax prep + 2 consults/yr for $$$/mo
- Gold Plan: Annual federal + state tax prep + 5 consults/yr for $$$$/mo
To get started, go to your dashboard and navigate to MemberPress > Memberships:
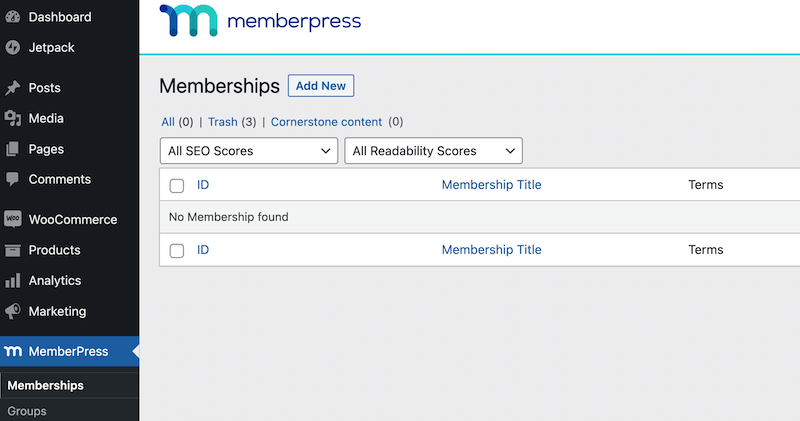
Then, click on Add New. This will take you to a page where you can create a new membership.
Here, you can customize different aspects of your membership, including the title, pricing, billing type, and access:
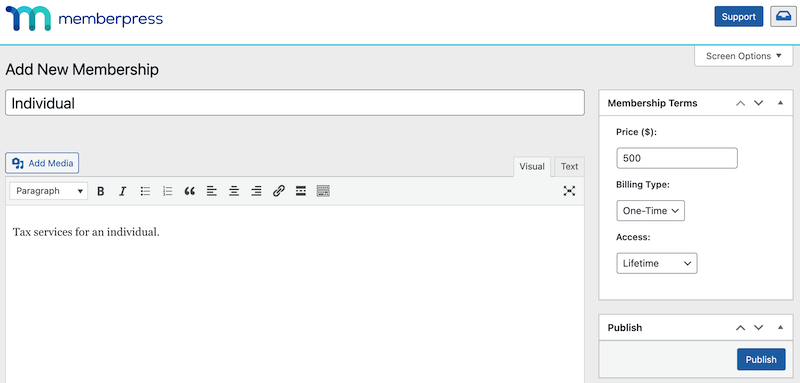
Once you’ve added all the details, hit Publish. You can create as many memberships as you want, depending on the services you’d like to offer.
Next, it’s time to create your pricing page. Go back to your dashboard and navigate to MemberPress > Groups:
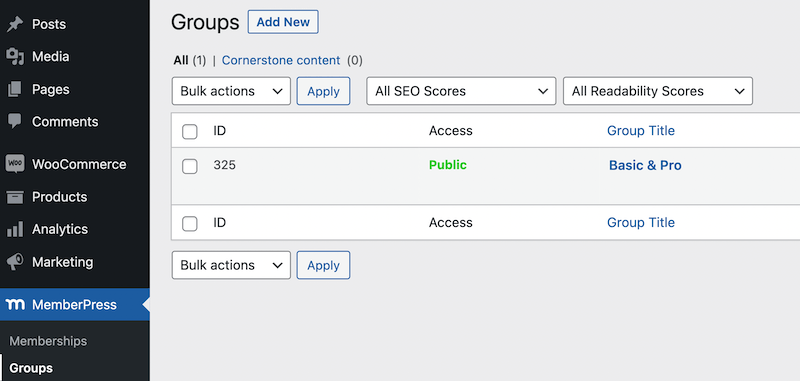
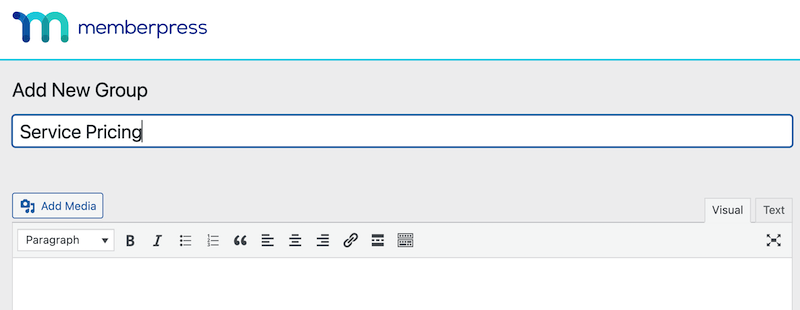
Then, click on Add New to create a new group. First, you’ll need to give your group a name:
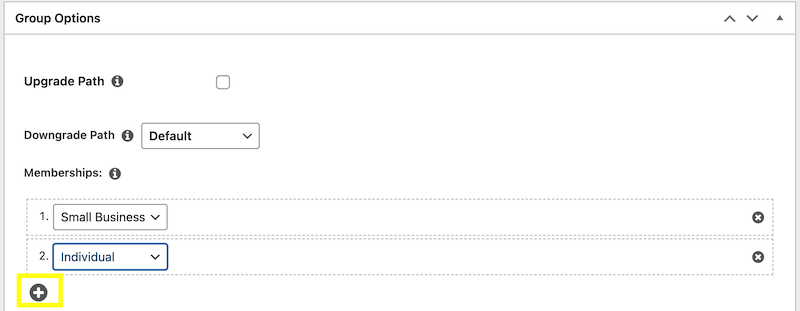
Next, scroll down to Group Options to customize your pricing page:
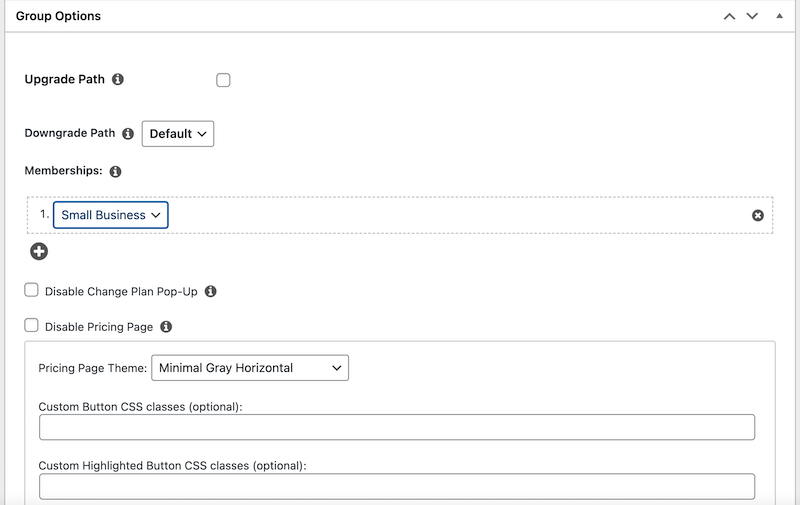
You can add all of the membership options you just created by clicking on the plus sign (+) and selecting the membership from the dropdown menu:
Next, select a pricing page theme. The dropdown menu gives you plenty of options to choose from:
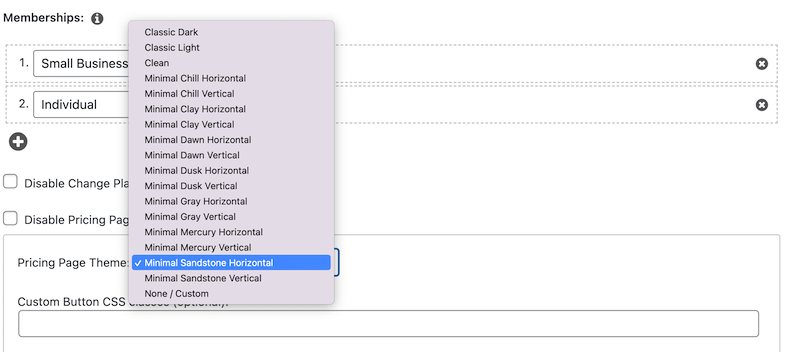
There are many other ways you can customize your pricing page, including adding custom button CSS classes. Once you’ve made all of your desired edits, scroll back up to the top of the page and hit Publish.
This will provide you with a permalink to preview your pricing page:
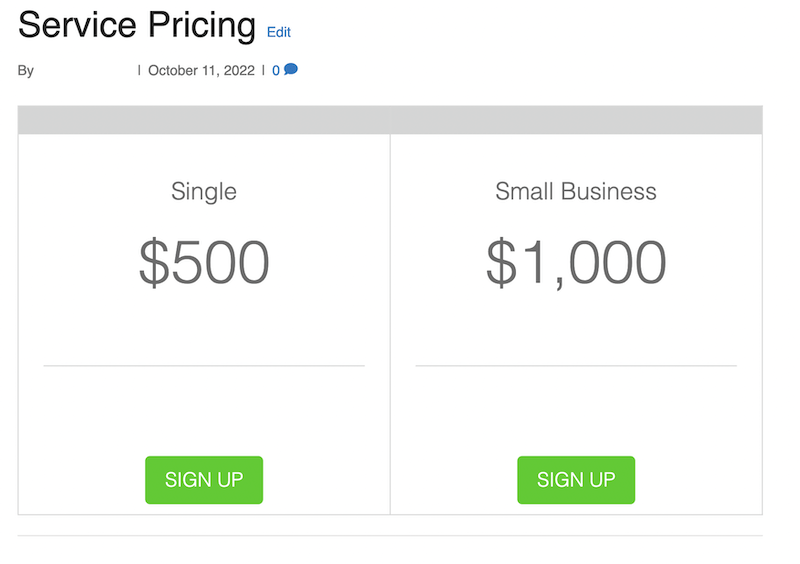
To learn more about how to create a customized pricing page, you can watch this tutorial:
Now, all that’s left to do is promote your website and start getting customers!
BONUS: Maximize Your Profits with More Recurring Revenue Streams
Tax Library

As a tax professional, you’ve probably got access to a lot of great info. You probably have a lot of knowledge floating around in that head of yours too.
You can turn these resources into additional profit through a paywalled online library.
With a paywall, you can charge users to access your premium content library while also protecting it from non-paying visitors.
Your library could include any type of content:
- Video and audio files
- Articles
- White papers
- PDFs
- Templates
You name it, you can paywall it.
Webinars
Online Courses
Then watch the revenue keep on rolling in.

Now that her course is built out, Christina’s got an additional recurring revenue stream she can rely on.
Passive and recurring revenue streams like this help protect service businesses from economic downturns.
How to Sell these Additional Options
Once you’ve set up these recurring revenue streams, simply adjust your pricing plans to reflect their availability.
For example, the pricing structure mentioned above might look something like this (new options in italics):
- Self-Service Plan: Unlimited tax library access for $/mo
- Self-Service+ Plan: Unlimited tax library access + 3 webinars/yr for $$/mo
- Federal Plan: Federal tax prep for one-time fee of $
- Federal+ Plan: Federal tax prep + unlimited tax library access for $$/mo
- State Plan: State tax prep for one-time fee of $
- State+ Plan: State tax prep + unlimited tax library access for $$/mo
- Bronze Plan: Federal + state tax prep for a one-time fee of $$
- Silver Plan: Annual federal + state tax prep + 2 consults/yr for $$$/mo
- Gold Plan: Annual federal + state tax prep + 5 consults/yr for $$$$/mo
- Platinum Plan: Annual federal + state tax prep + 5 consults/yr + unlimited tax library access + 5 webinars/yr for $$$$$/mo
Really, imagination is the only limitation when it comes to configuring your pricing plans with these additional offerings.
Conclusion
Launching a successful online tax preparation company has its hurdles. But it’s really the only way to grow.
Plus, WordPress and MemberPress are two tools that can make the the transition manageable – and profitable.
To recap, here are the basic steps for how to start a tax preparation business online:
- Get your preparer tax identification number (PTIN) from the IRS.
- Create a WordPress website with a hosting provider like Bluehost.
- Then install MemberPress.
- Consider enabling private consultations with a Crowdcast integration.
- Set up membership options and a pricing page.
- Consider adding additional recurring revenue streams to maximize your profits.

Get MemberPress Today!
Get your tax preparation business online, and watch it grow.



Add a Comment