Have you ever dreamed of opening up your own dance studio, but never had the funds to rent the space? What if we told you that you don’t need a loan to start your own dance business?
With WordPress and MemberPress, you can create your own virtual dance school. You’ll be able to make money by offering online classes and one-on-one coaching.
Sound too good to be true? We promise you, it’s not! Let’s take a look at how you can launch your dream dance business online.
The Tools You’ll Need
Before you start your virtual dance school, there are a couple of tools you’ll need to get. These will serve as the base of your business.
These tools are:
- WordPress: an open-source platform that enables you to create and manage your own personal website.
- MemberPress: an all-in-one membership plugin that will help you monetize your site with paywalled content.
That’s it! It’s way easier than doing a front flip.

Using these two tools, you’ll have the foundation you need to build your virtual dance school.
How to Start a Virtual Dance School (In 5 Easy Steps)
Now that you know what tools you’ll need to set up shop, let’s take a look at how to do so. We’ll be showing you how to create your online dance school in just a few steps.
Step 1: Install WordPress and MemberPress
The first step is to create a WordPress website. To do this, you’ll need to get web hosting and a domain name.
There are many hosting providers to choose from. HostGator offers a variety of plans, so you can select the one that works best for you:

Their plans come with 1-click WordPress installs and a free domain for your first year. This means you can get your site up and running without any hassle!
Need some help with WordPress? This WPBeginner Guide has everything you need.
Once you’ve created your WordPress site, it’s time to download and install MemberPress. This video will walk you through the process:
MemberPress provides you with all the features you need to start your virtual dance school. This includes subscription billing, online courses, access rules, and more.
Step 2: Create Your Dance Courses
Now that you have all the necessary tools in place, it’s time to create content for your dance students.
MemberPress enables you to create your own courses in WordPress. For example, you can build your own dance curriculum and sell it as online classes.
To do this, you’ll need to create paywalled content for your course. Since you’ll be teaching dance classes, you might consider using video content.
To get started, go to your WordPress dashboard and navigate to Courses. Then, click on Install & Activate MemberPress Courses Add-On:

This will take you to the Courses page. Click on Add New:

Now, you can create your new course. Start by adding a title and description:
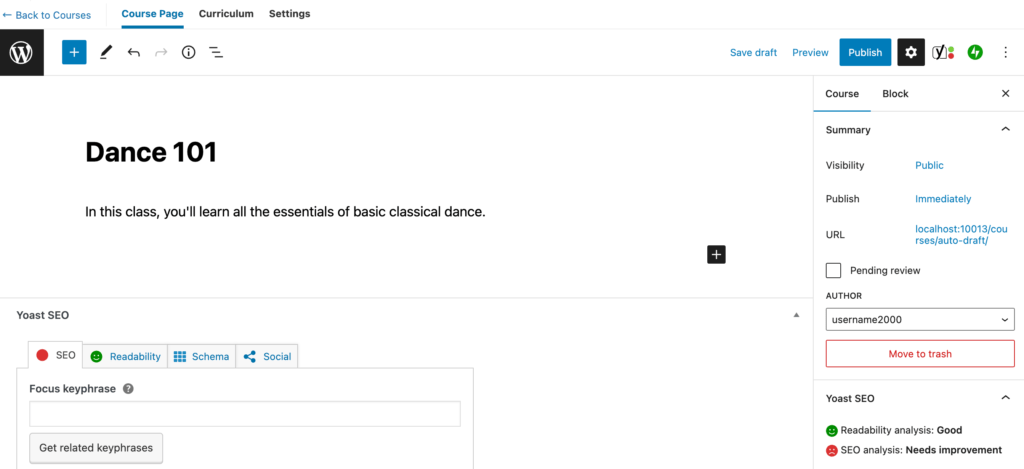
Then, click on the Curriculum tab at the top of the page:
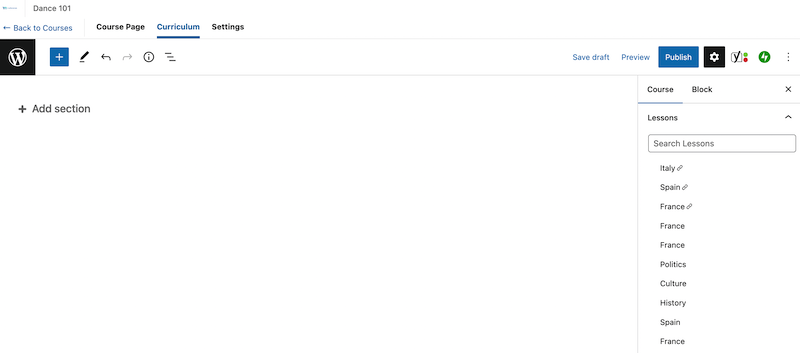
Here, you can add different sections and lessons to your website. Sections will serve as modules that will help you organize your lessons into groups.
To start, click on Add Section. In the popup box, enter a section name:
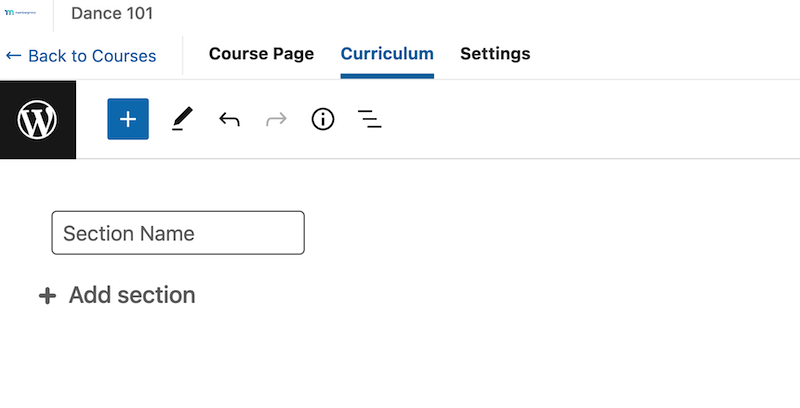
This will create a field where you can add a new lesson:
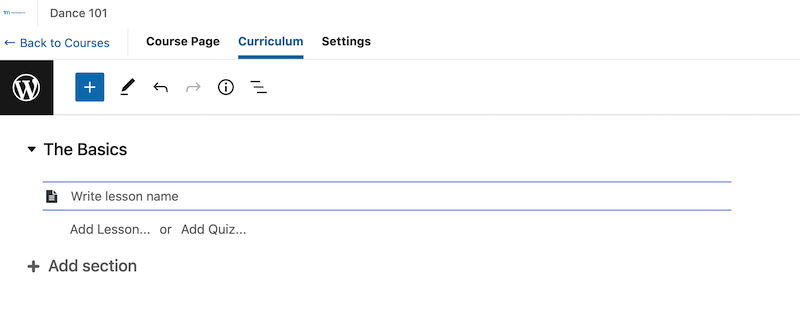
Here, you can name your lesson. Ideally, this should reflect the topic of the class:

Next, you’ll want to add content to your lesson. You can do so by clicking the small pencil icon when you hover over the lesson name:
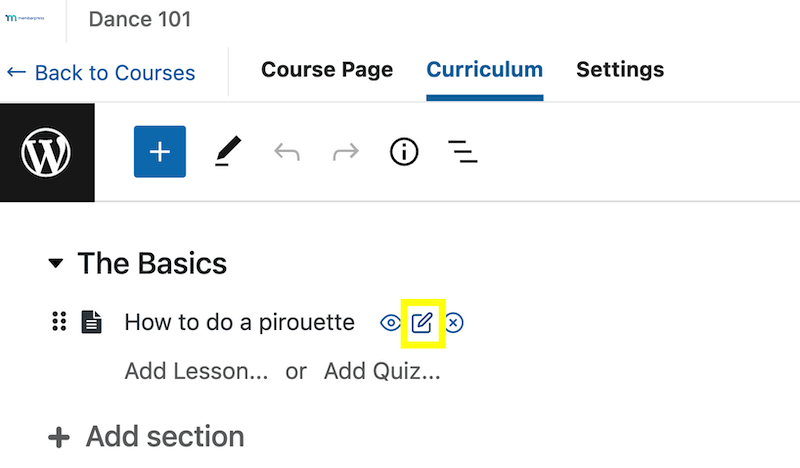
This will take you to a new page where you can add your dance content. For example, you might embed a video from your YouTube channel:
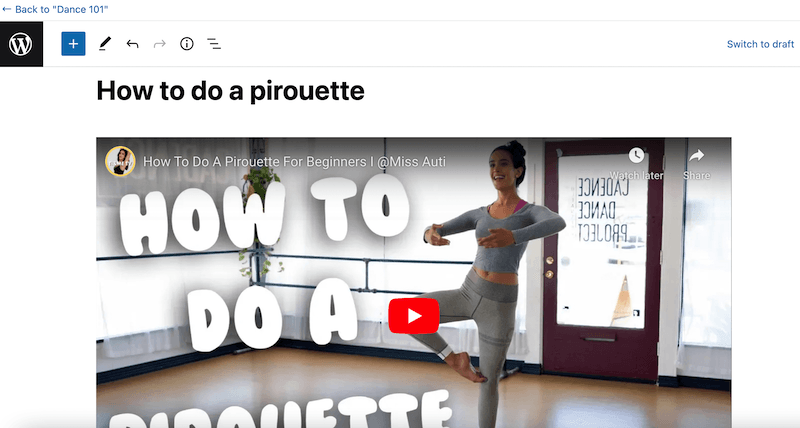
Once you’re done, hit Update at the top of the page.
You can watch our video to learn how to construct a full course on your WordPress site:
For example, you’ll also need to create tags for your course. This will make it easier to restrict access to your content.
Step 3: Set Up a Dance Membership
Once you’ve created your course material, you can set up one or more memberships on your site. This will enable users to subscribe to your dance content.
You can offer different membership levels and give access to various types of materials and services. For example, you might have…
- A full dance curriculum for beginners
- Separate skills classes for more advanced students
- A one-on-one coaching add-on
The possibilities are really endless!
To set up your first membership, go to your WordPress dashboard, navigate to Memberships and click on Add New:
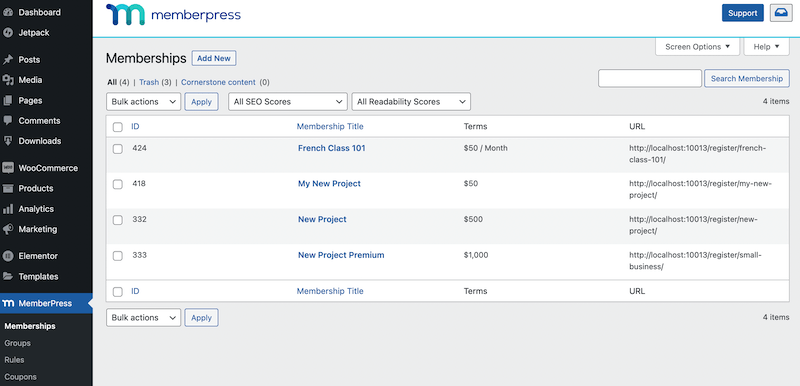
This will take you to a page where you can create your new membership. Start by adding a name and description:
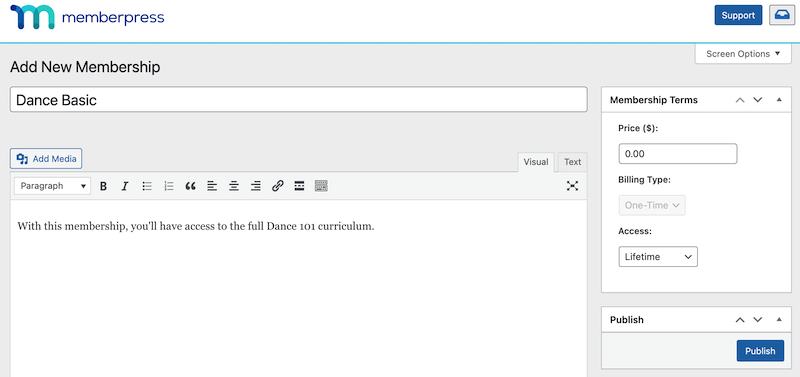
Next, navigate to the Membership Terms box to the right of the page. Here, you can add a price and choose a billing type:

You can also set up how often you want your members to pay. This can be monthly, yearly, or a custom schedule. You also have the option to offer a trial period to users.
Once you’re done, hit Publish:

This video gives you more details on how to fully set up your memberships:
As mentioned, MemberPress lets you create multiple memberships. That way, you can provide users with different options depending on their needs, level of experience, and budget.
Step 4: Create Access Rules for Your Course
Next, you’ll need to set up access rules for your course. This way, only users who have purchased your membership are able to view this content. This function is also referred to as “paywalling“.
Go to MemberPress > Rules > Add New. Under Protected Content, click on the dropdown menu and select an option:
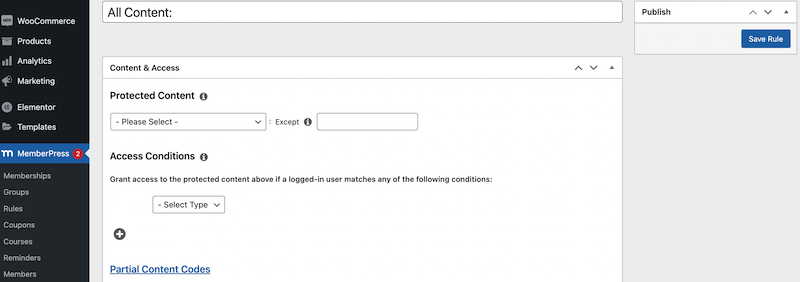
For example, you can protect all courses or a single course. You can also select courses with a specific category or tag.
Next, navigate to Access Conditions and click on the dropdown menu to select your membership. For example, users who have purchased your Ballet for Beginners course will only get access to content with the tag beginnerscourse.
When you’re ready, click on Save Rule.
Watch the tutorial video below for an in-depth look at using MemberPress Rules:
Step 5: Configure Your Login and Registration Pages
Finally, you’ll need to create login and registration pages. These will enable your new dance students to sign into your site and access your content.
Go to your WordPress dashboard and navigate to MemberPress > Settings > Pages:

Here, locate the MemberPress Login Page field and select Edit:

This video will further explain how to customize your login page:
Next, you’ll need to customize your registration page. Navigate to MemberPress > Settings > Fields on your dashboard:

Here, you can customize the fields on your registration form. Our video will give you more information on how to do so:
And you’re done! Congrats – you’ve just created an online dance school where you can teach classes and provide tutoring to students all over the world.
Step Up Your Online Dance School With CoachKit™
With the MemberPress CoachKit™ add-on, you can take your dance school to the next level with the following features:
- Create programs with courses, downloads, videos, and virtually any other online resources you can think of.
- Divide students into cohorts and assign them a coach to guide them through the program.
- Set up milestones and habits for goal-oriented learning and consistent engagement.
- Enable coach-student messaging and automated emails to keep students on track.
Create more opportunities for interaction and engagement with CoachKit™. It’s like taking your students by the hand and waltzing them through to success!
Conclusion
With WordPress and MemberPress, you can create a virtual dance school that enables you to reach people across the globe. That way, you can turn your passion into profit while making a positive impact on your students.
To summarize, here’s how to create a virtual dance school in five steps:
- Get WordPress and install MemberPress.
- Create your dance courses.
- Set up your memberships.
- Create access rules for your courses.
- Configure your login and registration pages.
MemberPress gives you an easy way to create your own courses. It lets you set up subscription billing, enables registered users to access your content, and more.

Get MemberPress Today!
Start your own virtual dance school, and make a living doing what you love.



Add a Comment