When using ReadyLaunch™ templates, there is a section in the sidebar for the Instructor. When clicked, something like the following appears:

How to Change Instructor on a Course
The Instructor of your course is set to whomever is the Author of the Course in the dashboard.
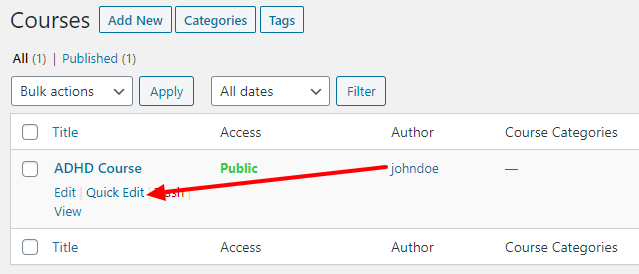
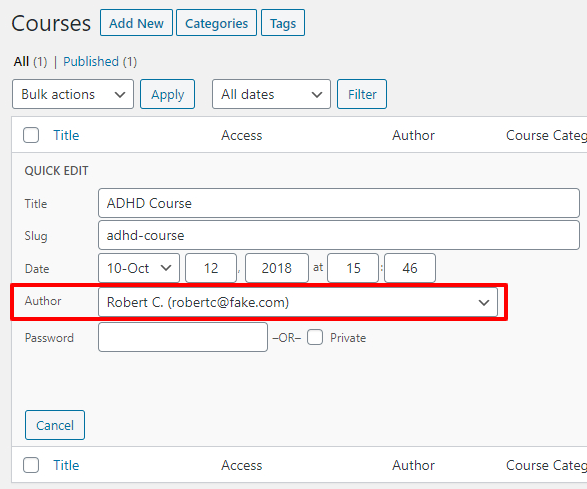
There's a couple of ways to edit an Author of a Course, but the easiest way is to click the “quick edit” link and adjust the Author as shown in the 2 images below:


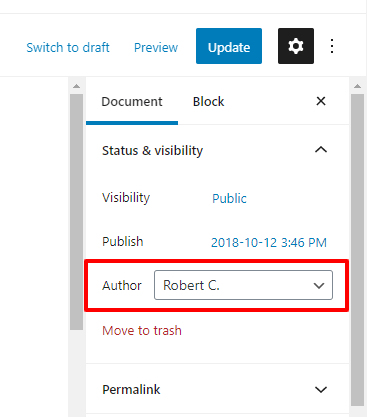
You can also change the Author when editing the Course as shown below:

Regardless of how you update it, be sure to click Update so your changes will take affect.
Change Bio Text
Go to your WordPress Dashboard > Users section and edit the User who is assigned as the Instructor of the course.
Under the About section, find the text input box for Biographical Info as shown below:

After you've updated the Bio, scroll to the bottom of the profile page and click save.
Change Social Links, Email Address, and Website
Social icons for Facebook, Twitter, Instagram, and YouTube can be shown under the Instructor's profile image. Under the Bio, a website and email address can also be listed.
To adjust these, head to your WordPress Dashboard > Users section and edit the User who is assigned as the Instructor of the course.
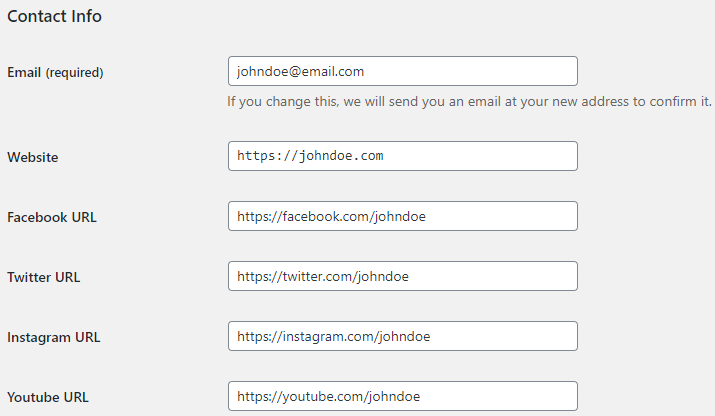
Find the Contact information section and update the following:

Leave them blank/empty to disable them. The email field is required and cannot be left blank.
Once you've adjusted these, scroll to the bottom of the profile page and click save.
Changing the Instructor's Profile Image
By default WordPress uses the Gravatar associated with the user's email address as their profile image.

You can edit your Gravatar by visiting https://gravatar.com/
However, if you'd like to upload your own image, and would prefer to not use Gravatar, we've found the following plugins work well for that.
https://wordpress.org/plugins/metronet-profile-picture/ (Lightweight, Simple, and Basic)
https://wordpress.org/plugins/wp-user-avatar/ (More Full-Featured)


