MemberPress core plugin comes with the set of default features necessary for building a membership-based website. On the other hand, you can extend the capabilities of MemberPress by enabling features with MemberPress add-ons and other integrations. This way, you can add features to MemberPress that match your specific needs.
This document explains MemberPress integrations, what add-ons are, and how to install and use them on your website.
MemberPress Integrations
All MemberPress integrations are listed on the Integrations page of the MemberPress.com website.
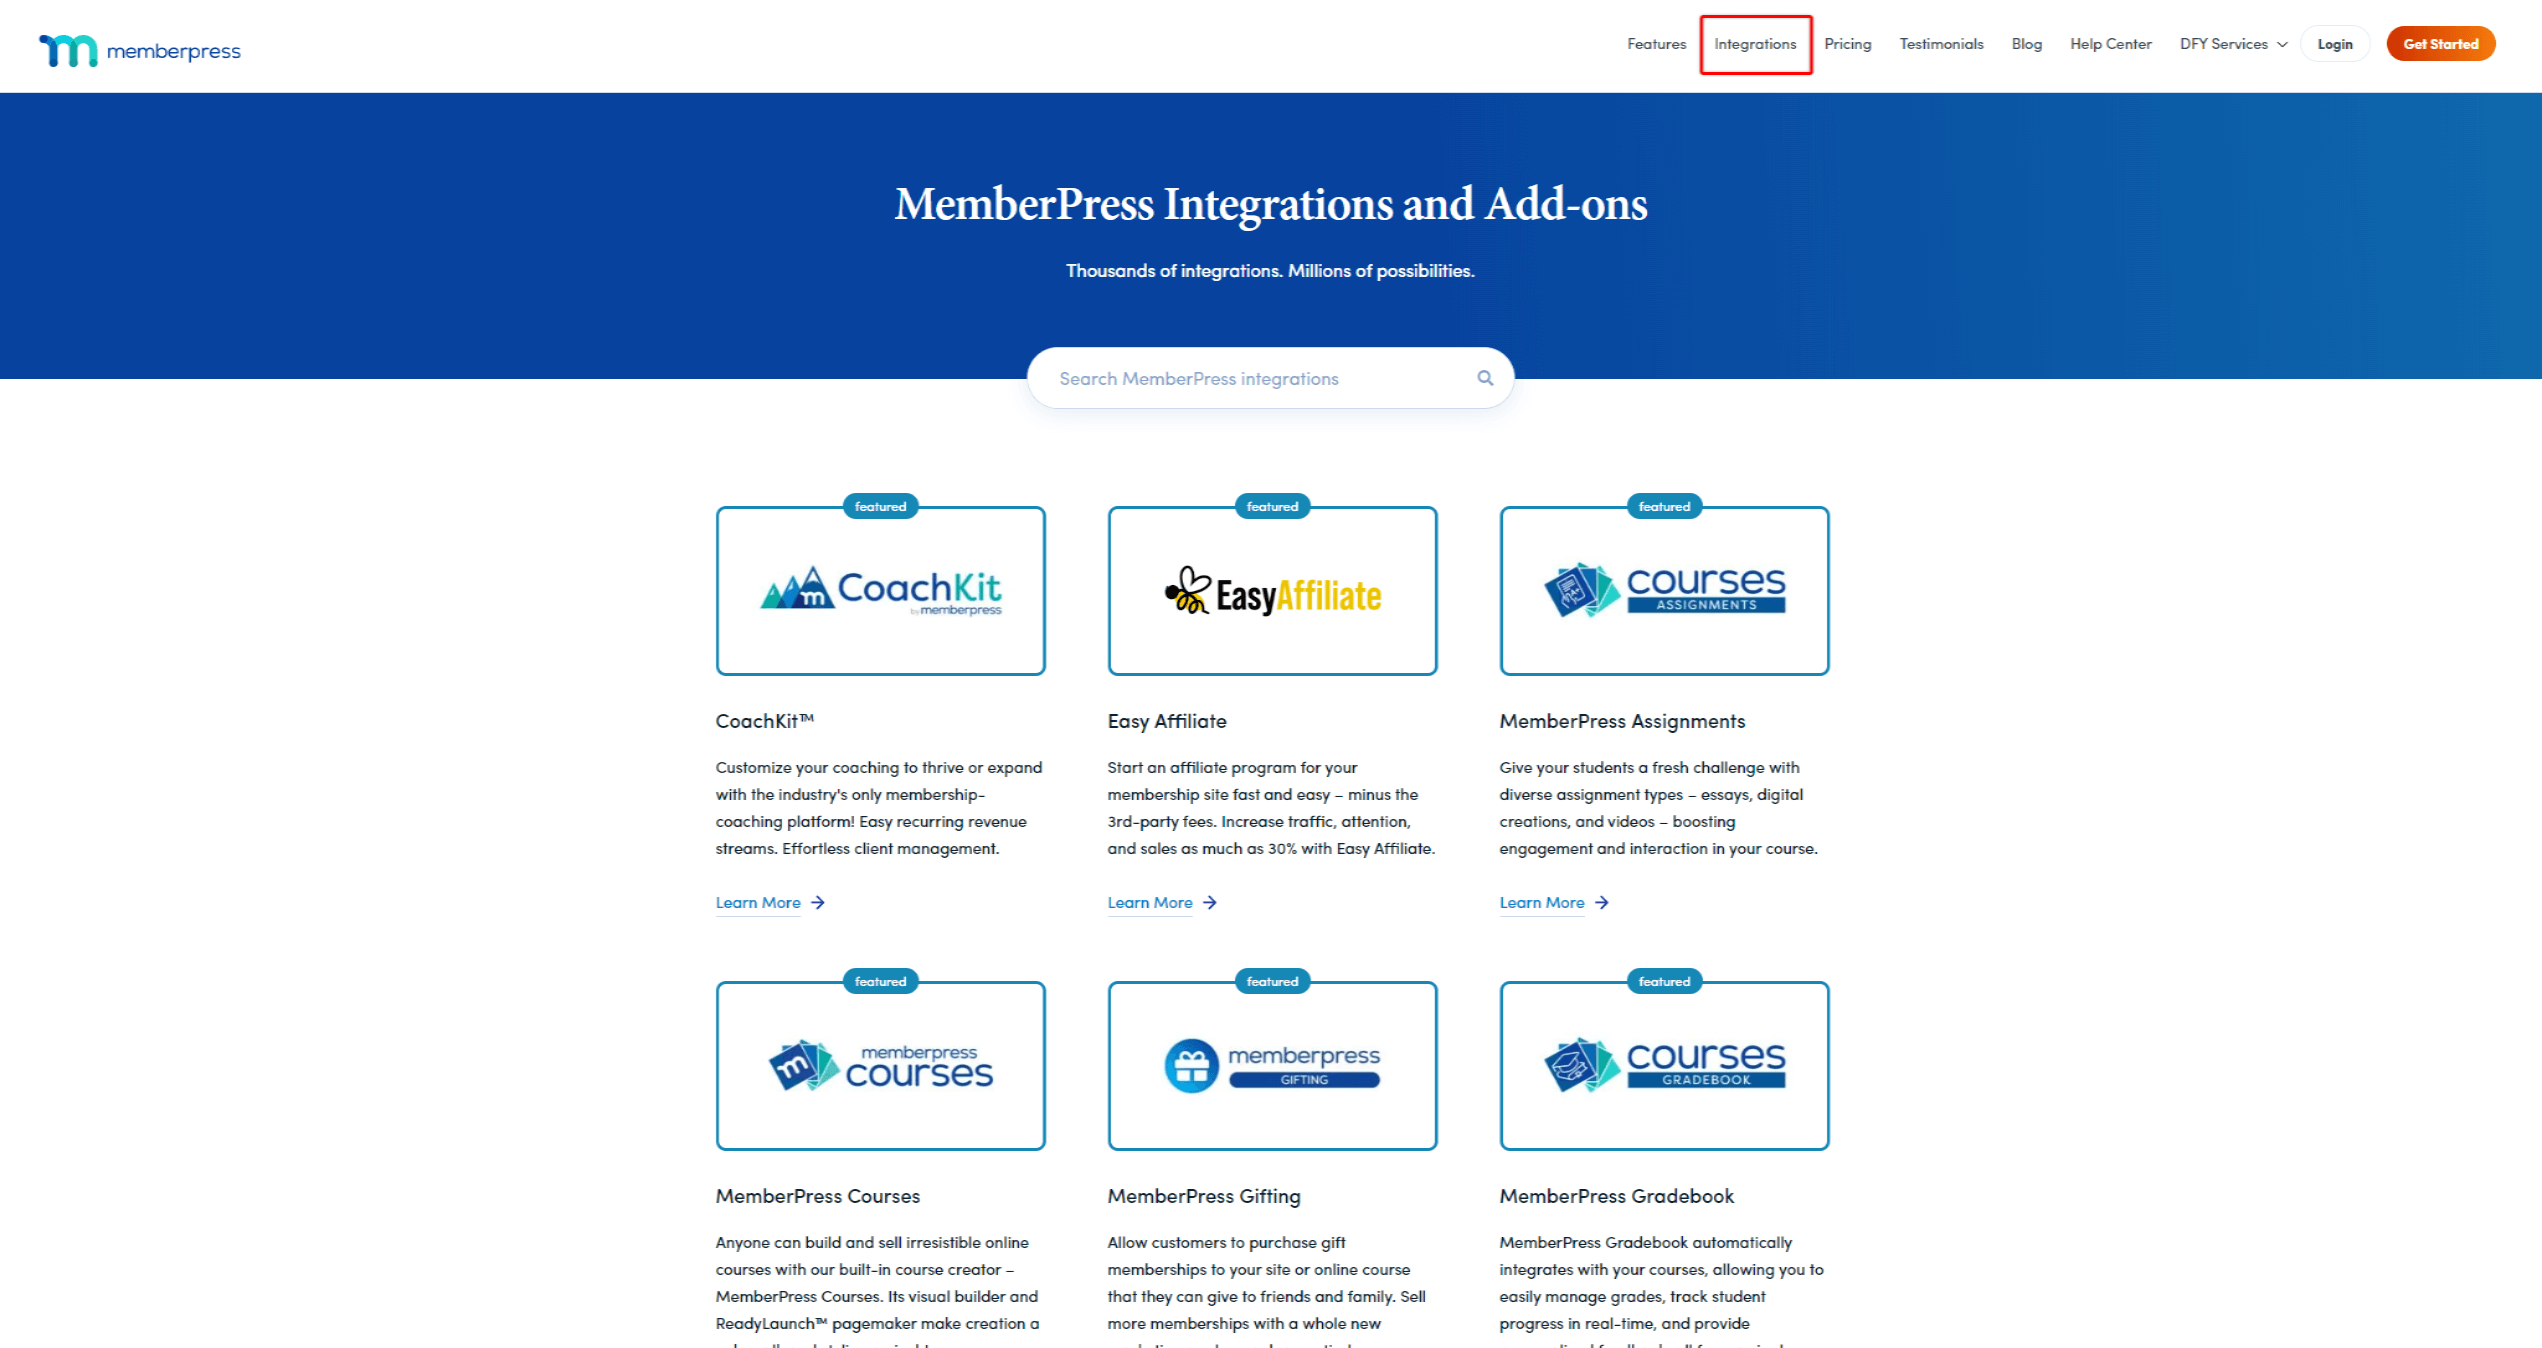
Here, you can search or browse integrations and find more details about each one on its individual page. The individual integration page also shows the type of specific integration.
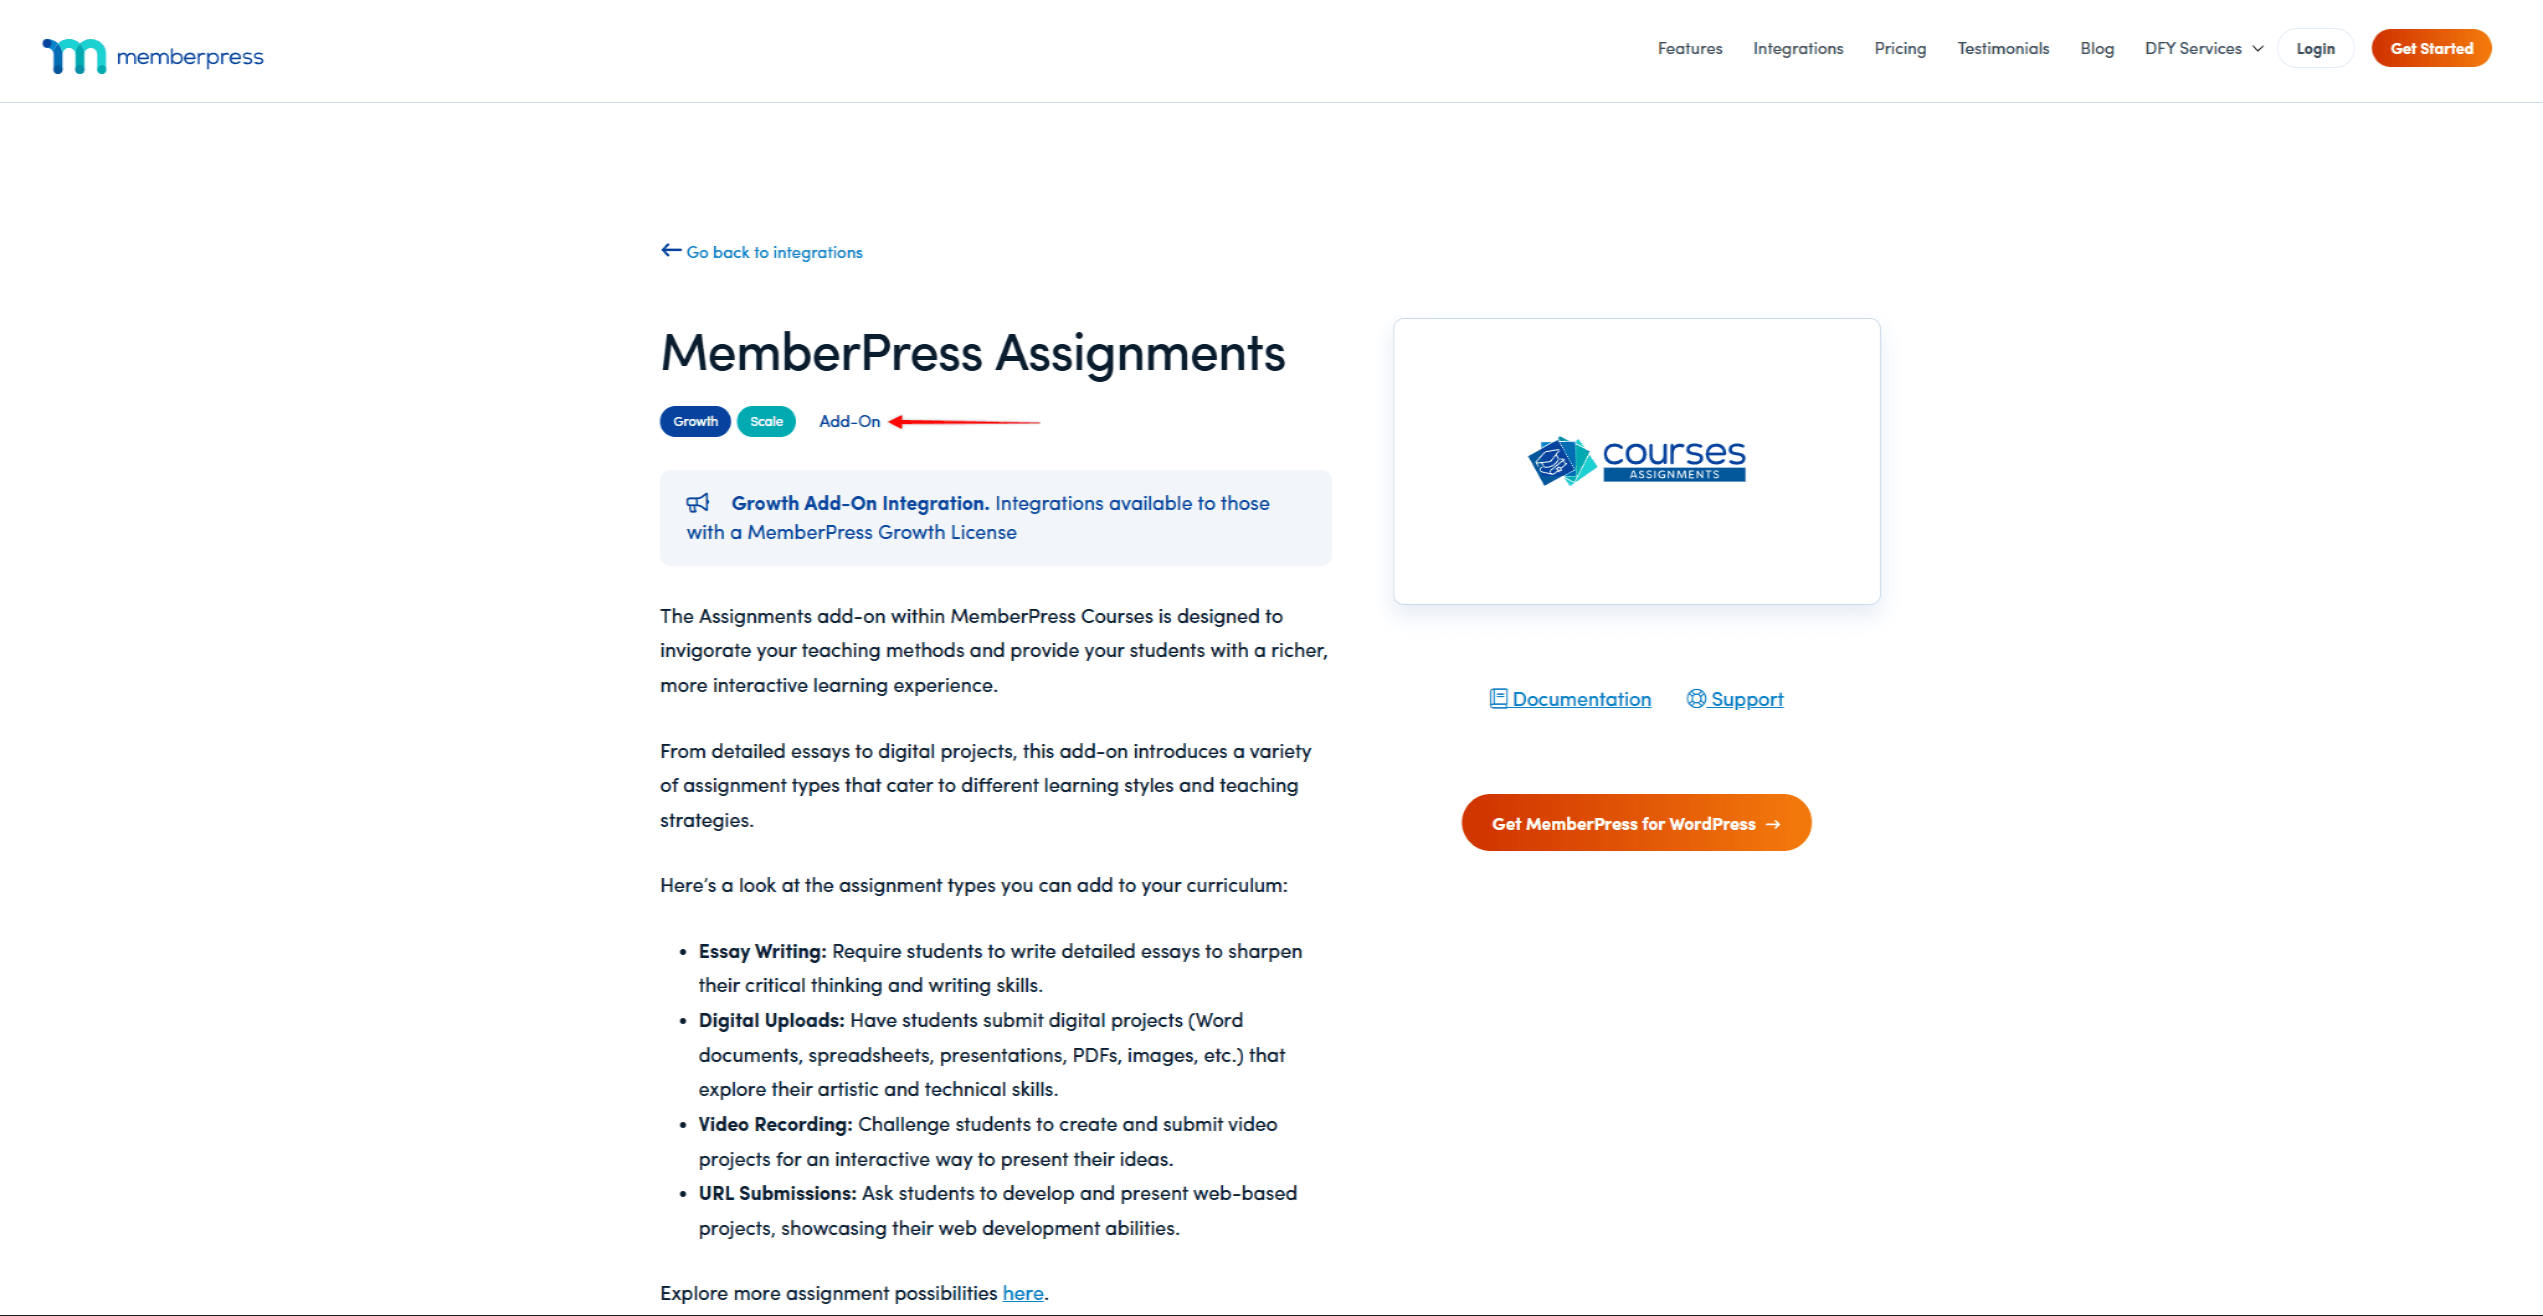
There are several types of integrations with MemberPress:
- Add-On: this type of integration marks add-ons developed and maintained by the MemberPress team. These are native add-ons that allow you to extend MemberPress capabilities.
- Built-in: this type of integration marks integrations built into the MemberPress core plugin. In this case, you don’t need any additional installations, as they will work out of the box.
- Zero Code: This type of integration refers to custom integrations you can create through third-party platforms or plugins. Here, you can choose between such providers as Zapier, Uncanny Automator, Integrately, and Make. You’ll need to open an account with any provider you choose. Furthermore, you don’t need any coding knowledge but will need to build these integrations yourself.
- 3rd-party: this type of integration marks add-ons developed and maintained by 3rd-party providers. These add-ons are compatible with MemberPress, but their compatibility depends on the 3rd-party provider. In addition, MemberPress teams don’t have access to these add-ons. Accordingly, you must contact the providers directly to help with any issues related to these add-ons.
MemberPress Add-ons
MemberPress add-ons are additional plugins that add features to your MemberPress setup. With add-ons, you can enable only the features you actually need instead of using all MemberPress features on your website.
Enabling Features With The Onboarding Wizard
When you install MemberPress for the first time on any website, the onboarding wizard will guide you through the basics. In the second step of the wizard (Enable Features), you can choose what add-ons (features) you wish to activate.
To activate any feature, mark the check box next to it and click the Continue button.
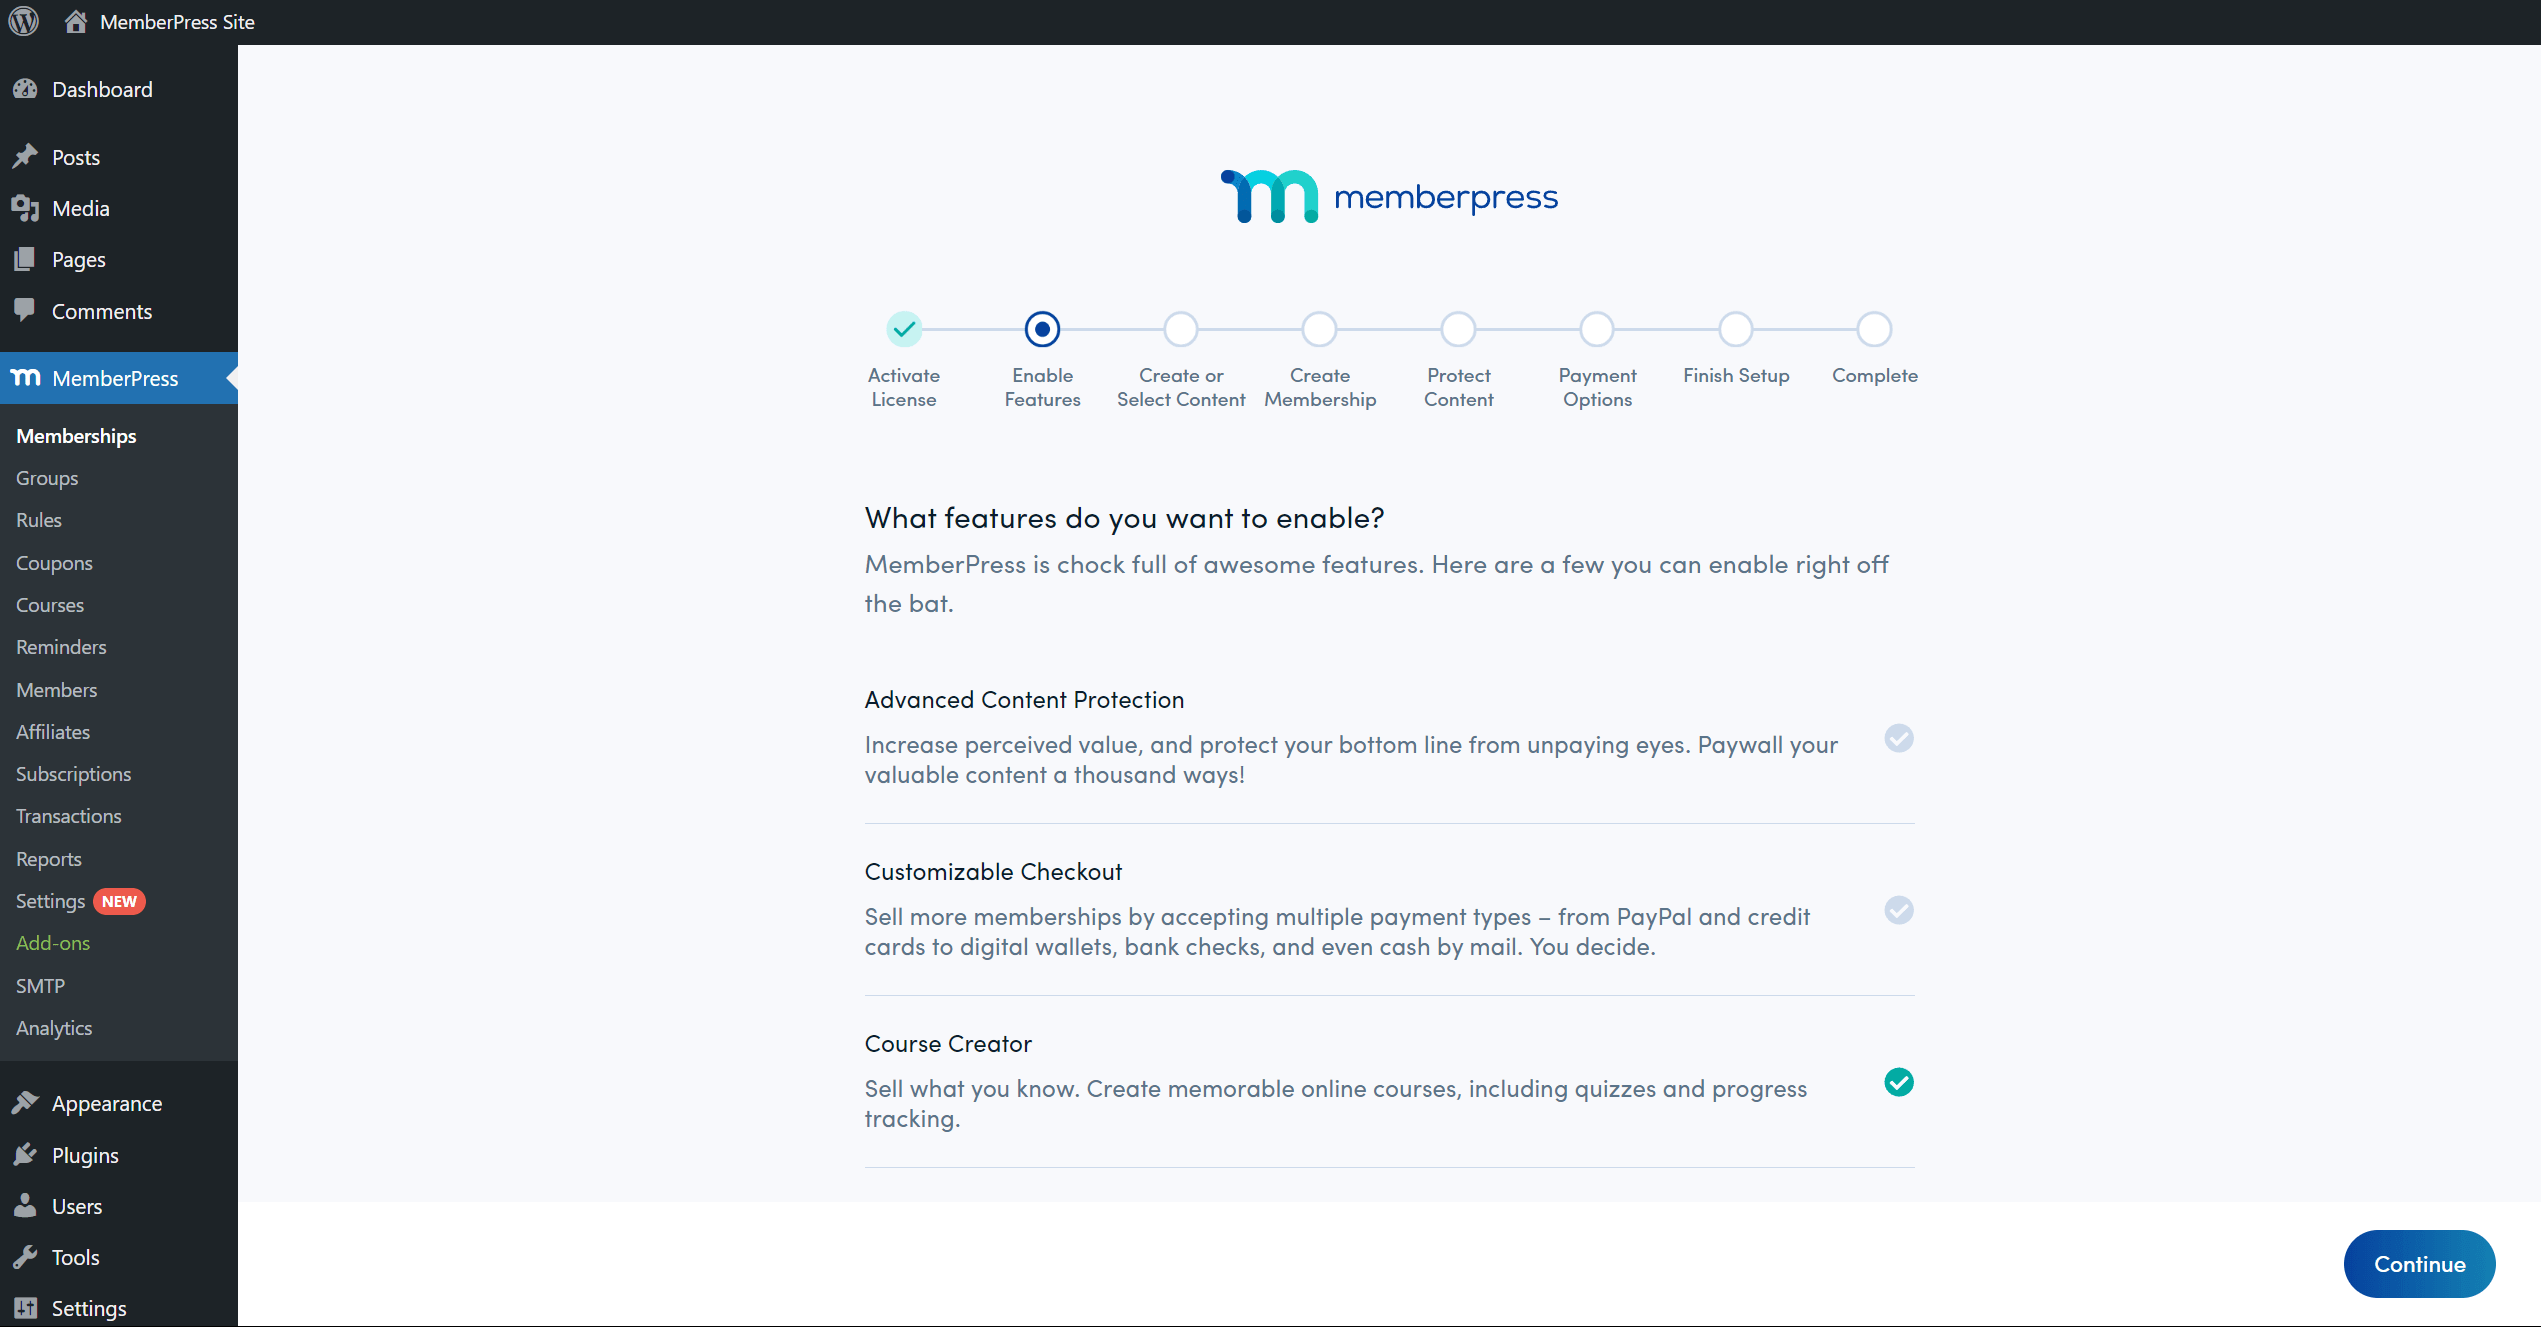
Later, you can deactivate these add-ons or install and activate any other available ones.
Add-on Availability
Depending on the MemberPress plan you subscribed to, you will have access to different add-ons.
On the Integrations page, you can click an individual integration to view more details. Here, you can see the MemberPress plans required to use the specific integration.
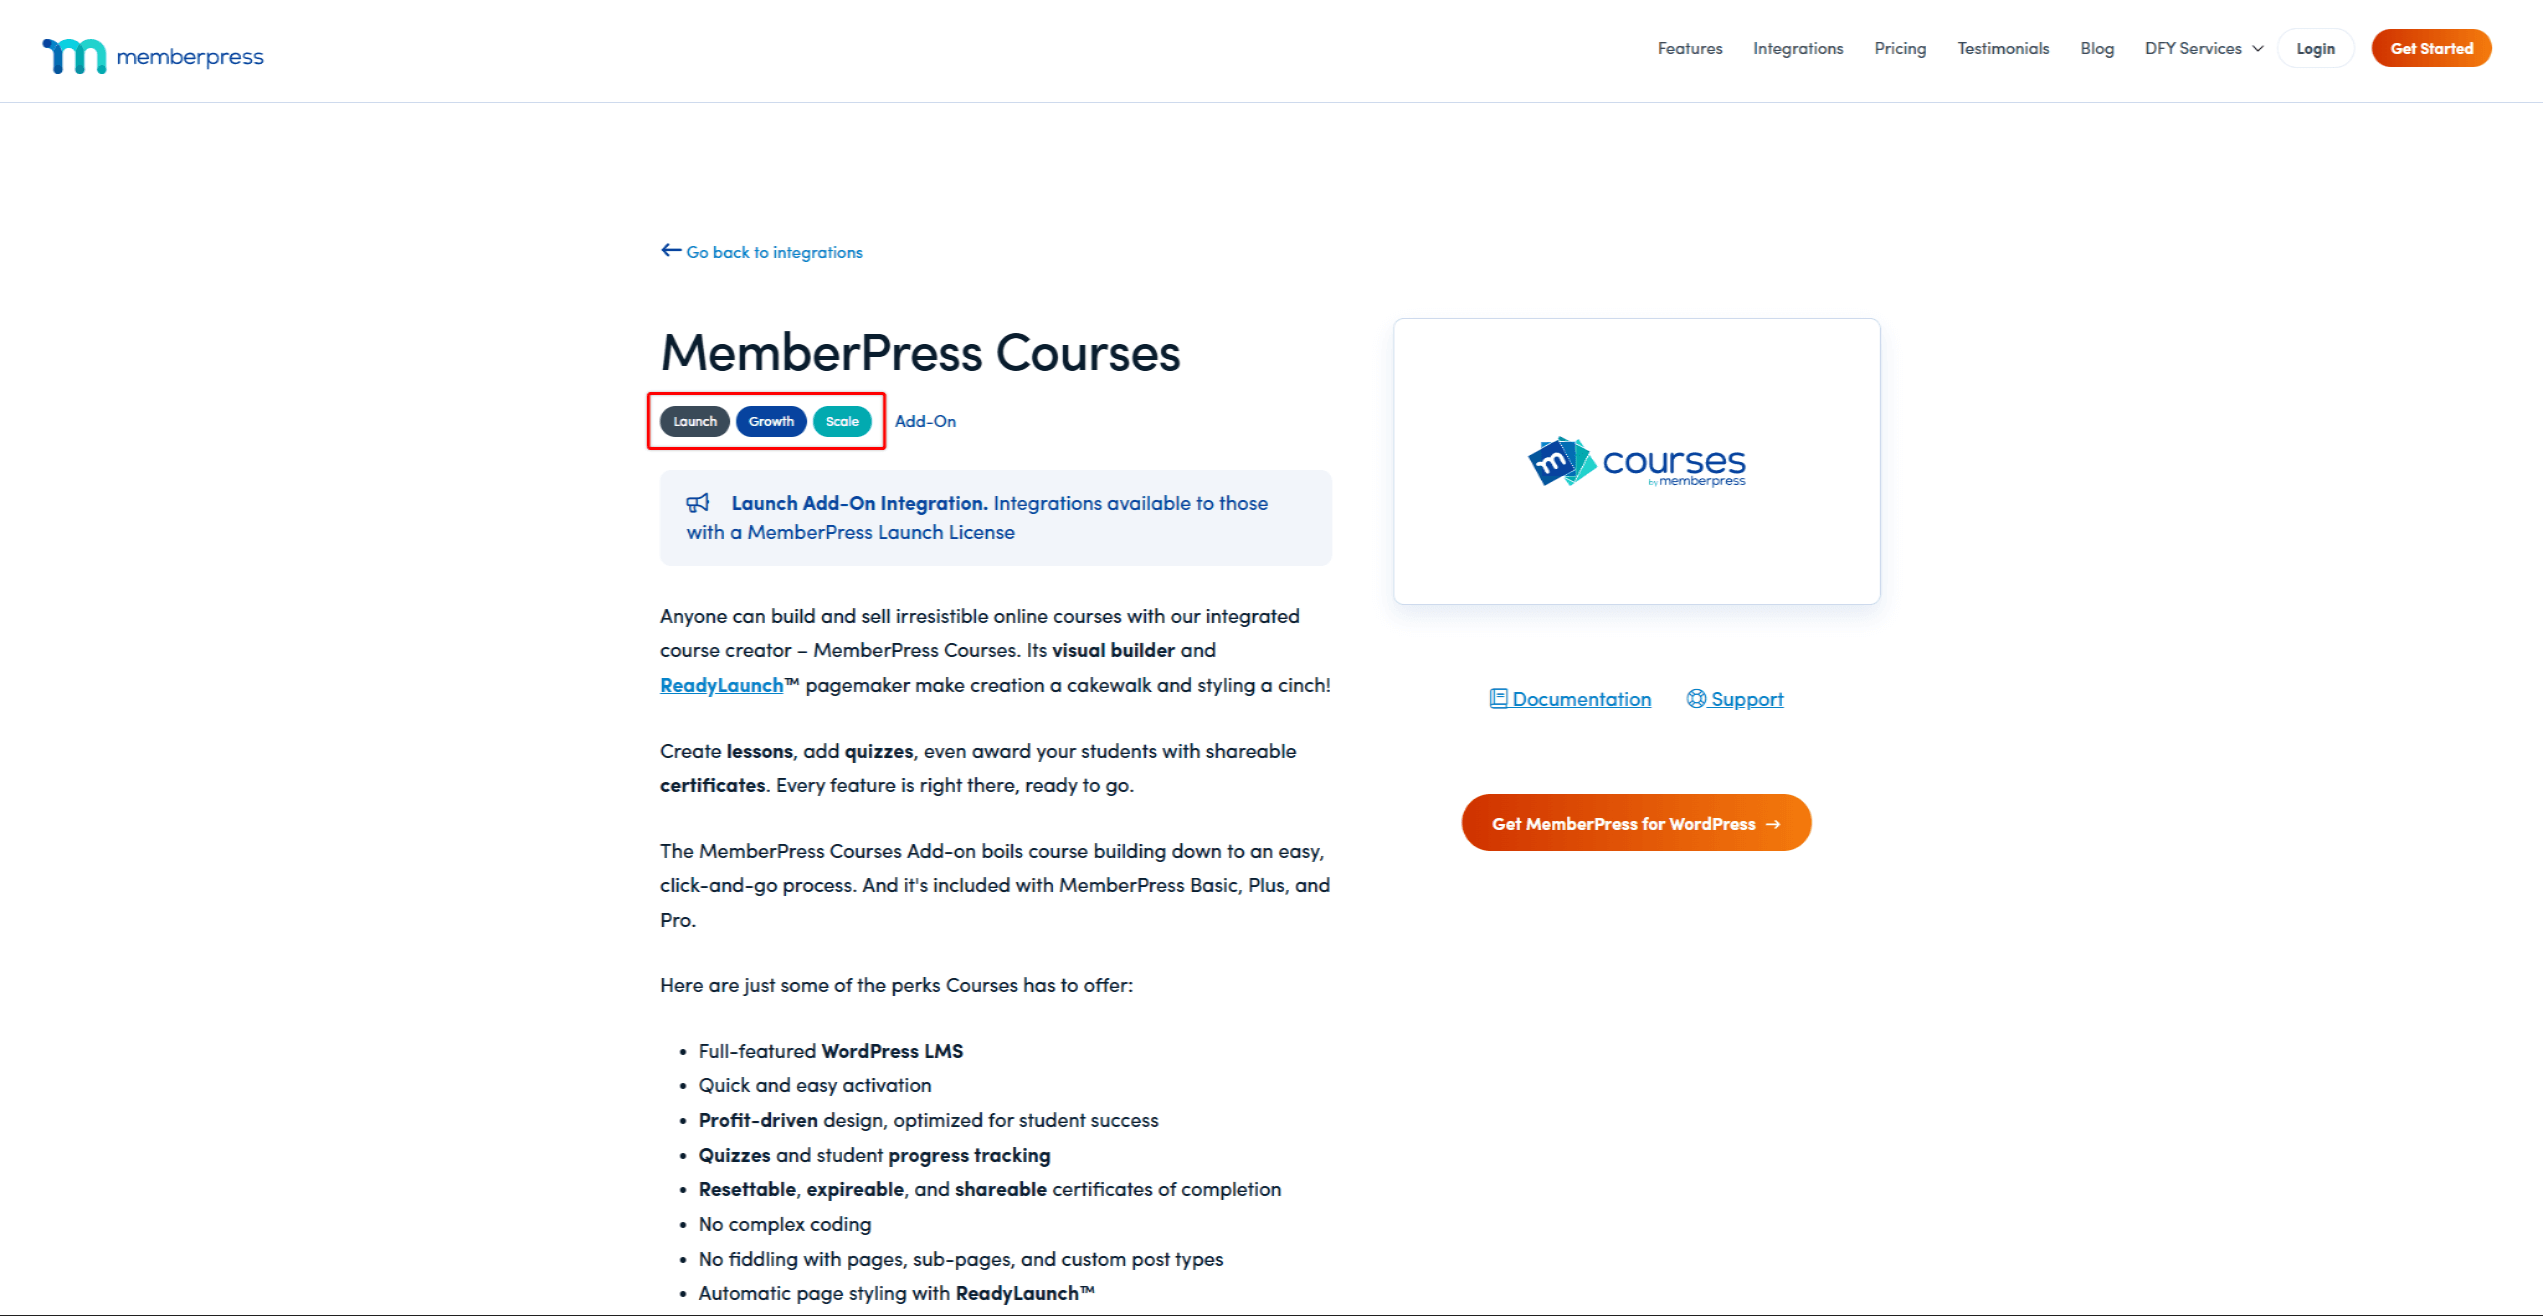
Furthermore, you can install any add-on available with your plan on the Add-ons page in your website’s backend (Dashboard > MemberPress > Add-ons).
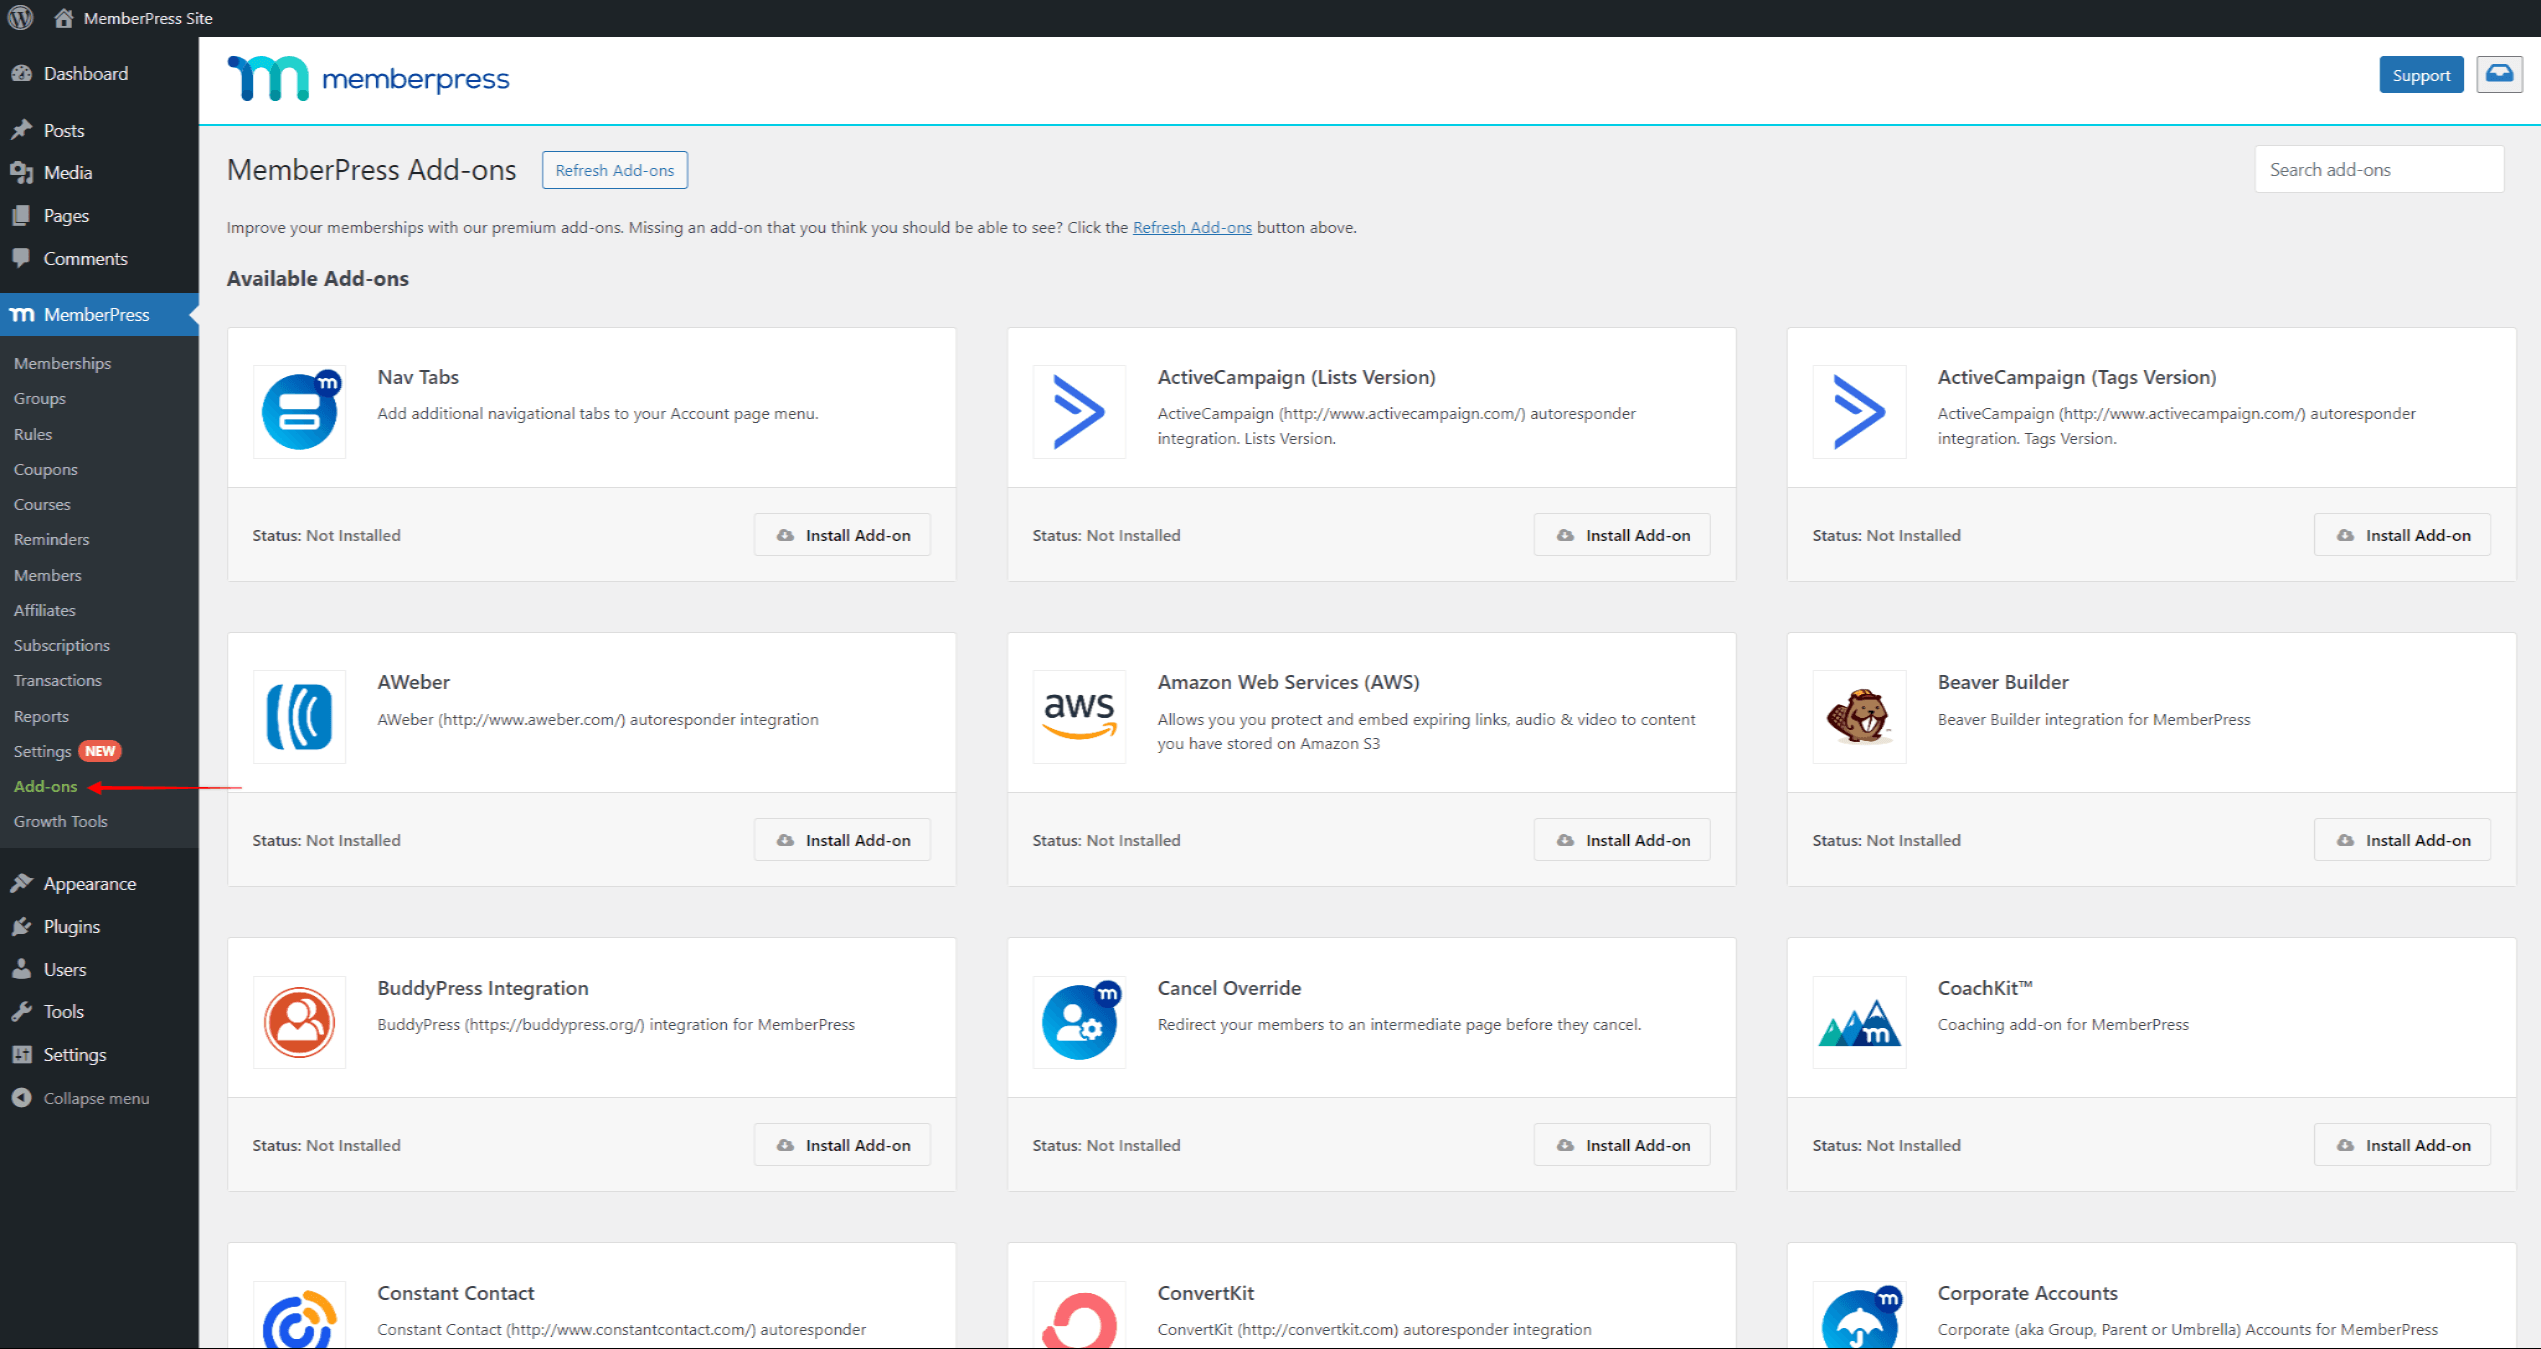
If you want to use an add-on not included with your plan, you must upgrade. Accordingly, you will see the Upgrade button on the add-on card (instead of the Install Add-on button) in this case. This button will take you to the MemberPress pricing page. Alternatively, you can do it on your account page by clicking the Change Plan link next to your subscription.
How To Find And Install MemberPress Add-ons?
All MemberPress add-ons can be found, installed, and automatically activated on the Add-ons page.
On this page, you can install any add-on available with the MemberPress plan you're subscribed to:
- Navigate to Dashboard > MemberPress > Add-ons.
- Browse add-ons or use the search tool to search for the name of the add-on you need. For example, if you wish to install the Social Login add-on, you would search for its name.
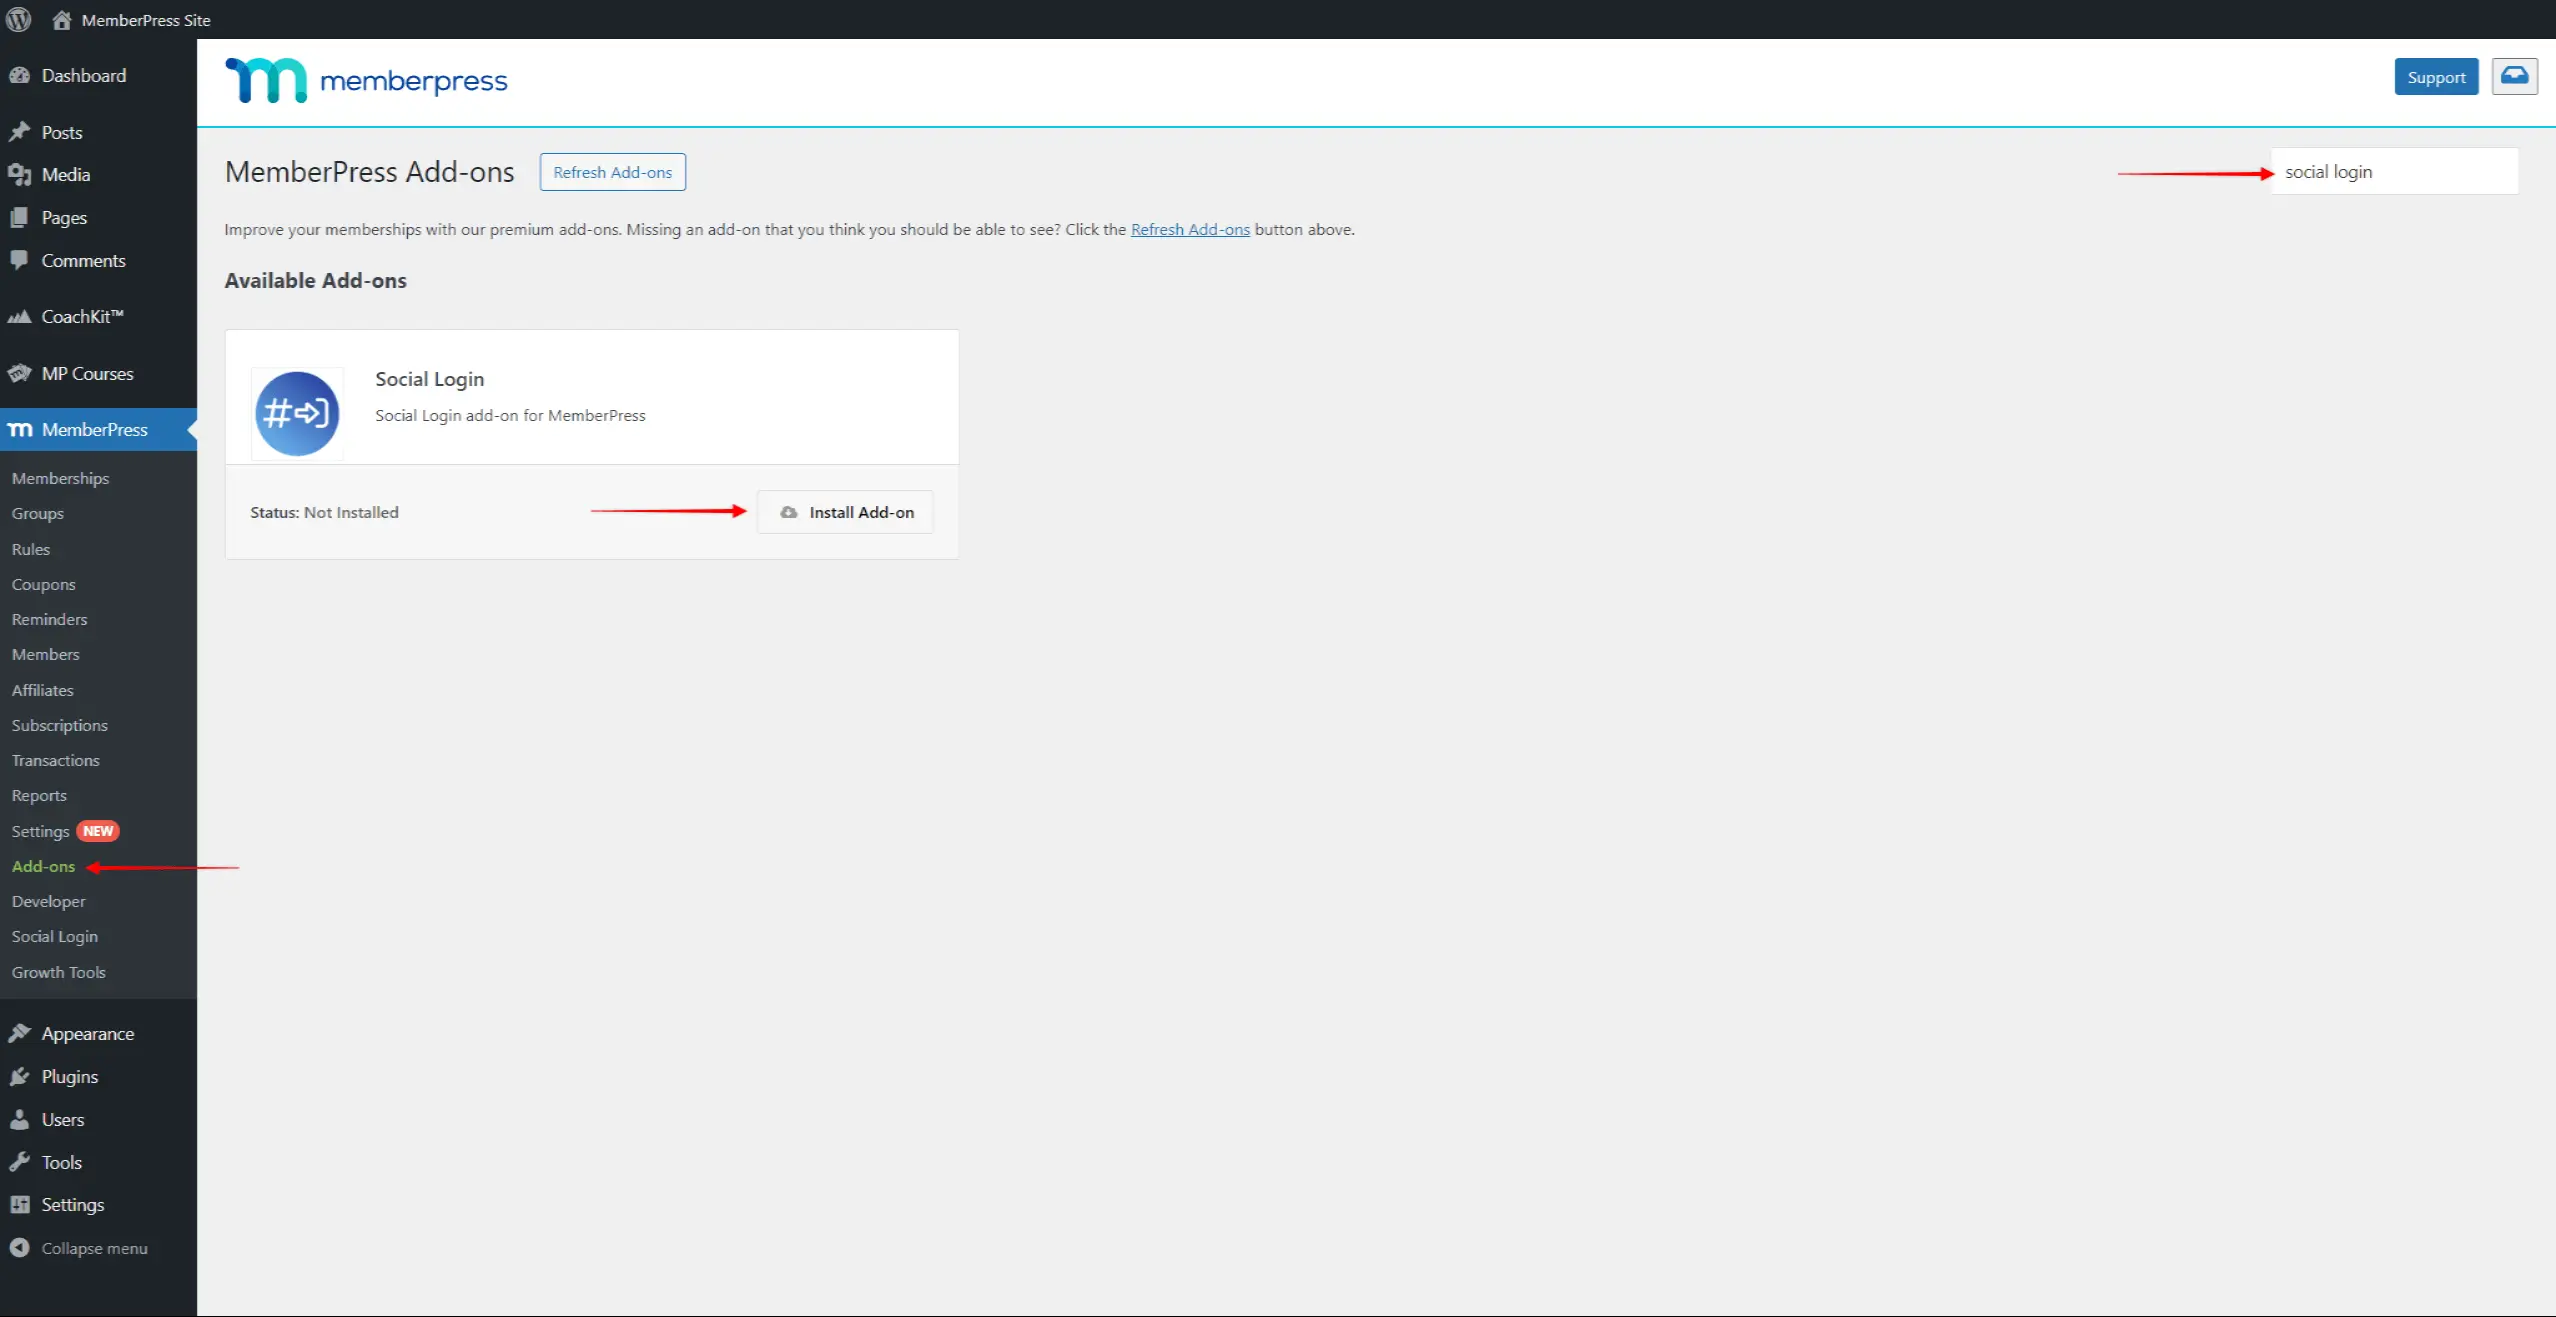
- Once you find the add-on, click the Install Add-on button. This will automatically install and activate the add-on.
Using MemberPress Add-ons
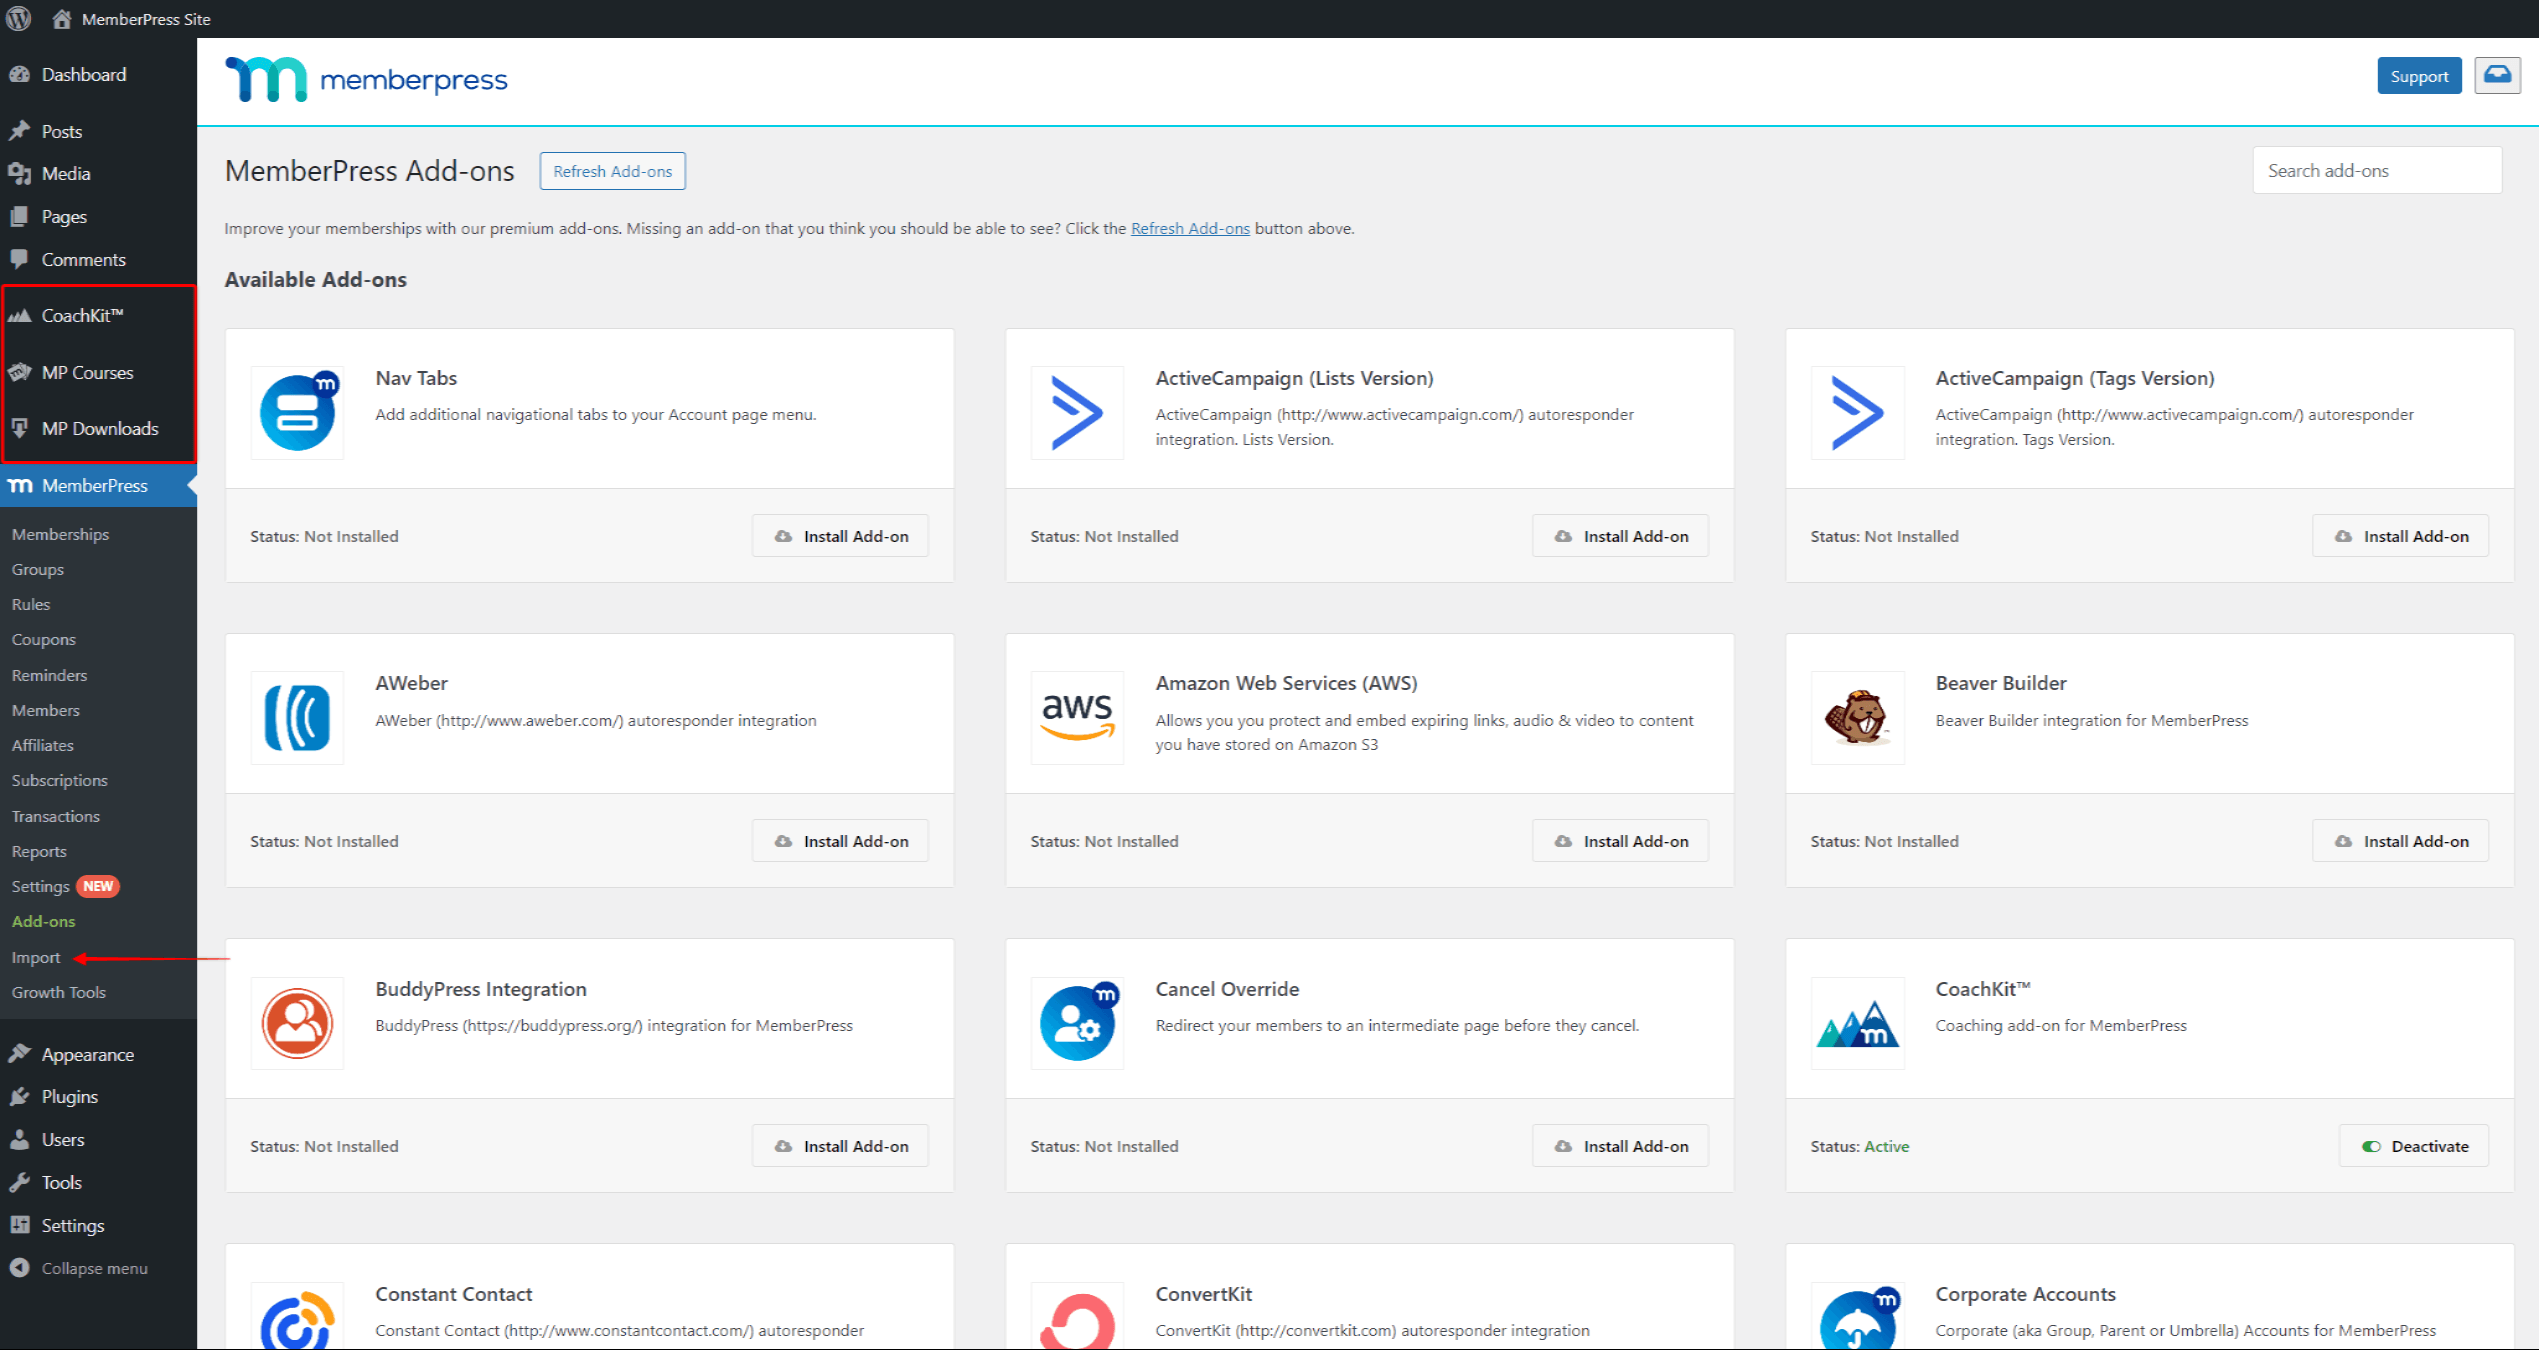
Once an add-on is installed, you’ll often see additional options for the enabled feature in your Dashboard main menu. Some add-ons might also add options under the MemberPress menu (Dashboard > MemberPress)
In addition, some add-ons will add tabs and options to the MemberPress settings page at Dashboard > MemberPress > Settings.
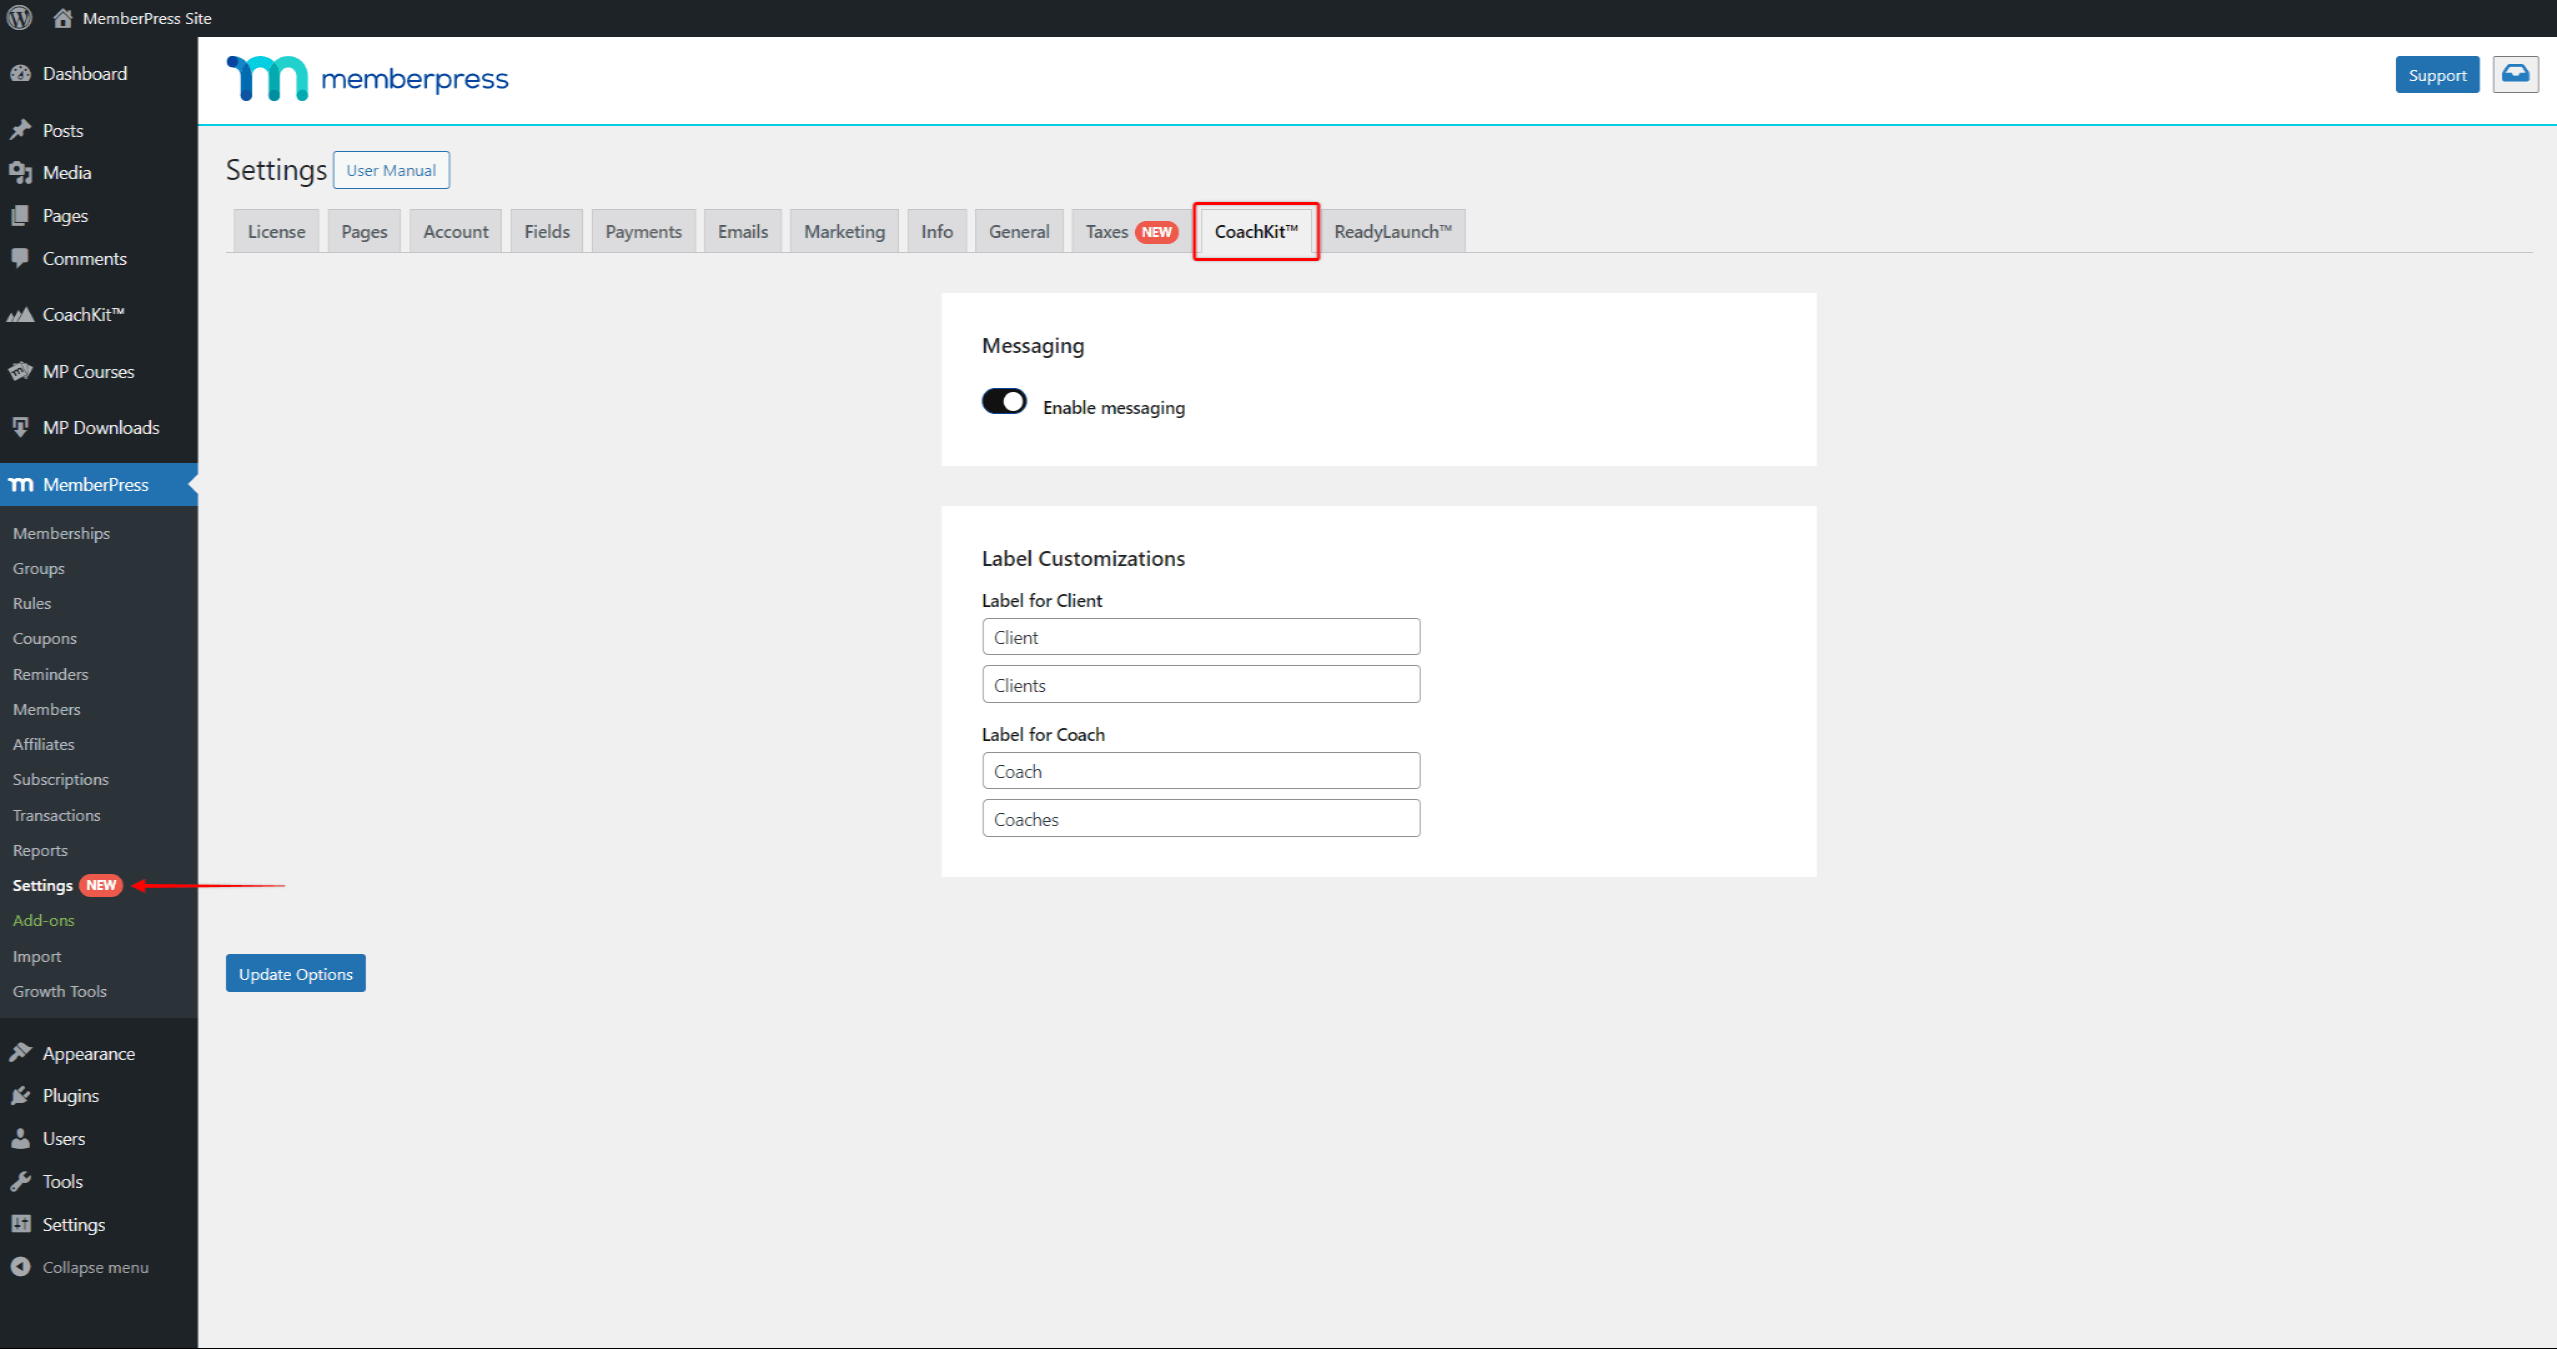
Most add-ons will come with their dedicated settings and will often require configuration. The MemberPress add-ons documentation contains details about each add-on and step-by-step instructions on configuring and using it.


