You can manually translate the MemberPress plugin into any other language using PoEdit. Alternatively, you can translate or change any text in MemberPress using the Loco Translate plugin.
This document will guide you through translating or modifying any default MemberPress text with Loco Translate.
Translate or Change Any Text in MemberPress
Loco Translate is a plugin that can translate plugin and theme language files. Activating the Loco Translate plugin will allow you to translate any plugin on your website, including MemberPress.
Install and Activate the Loco Translate Plugin
The Loco Translate plugin must be installed and activated on your website before you can use it:
- Navigate to Dashboard > Plugins > Add New.
- Search for “loco translate” in the search box.
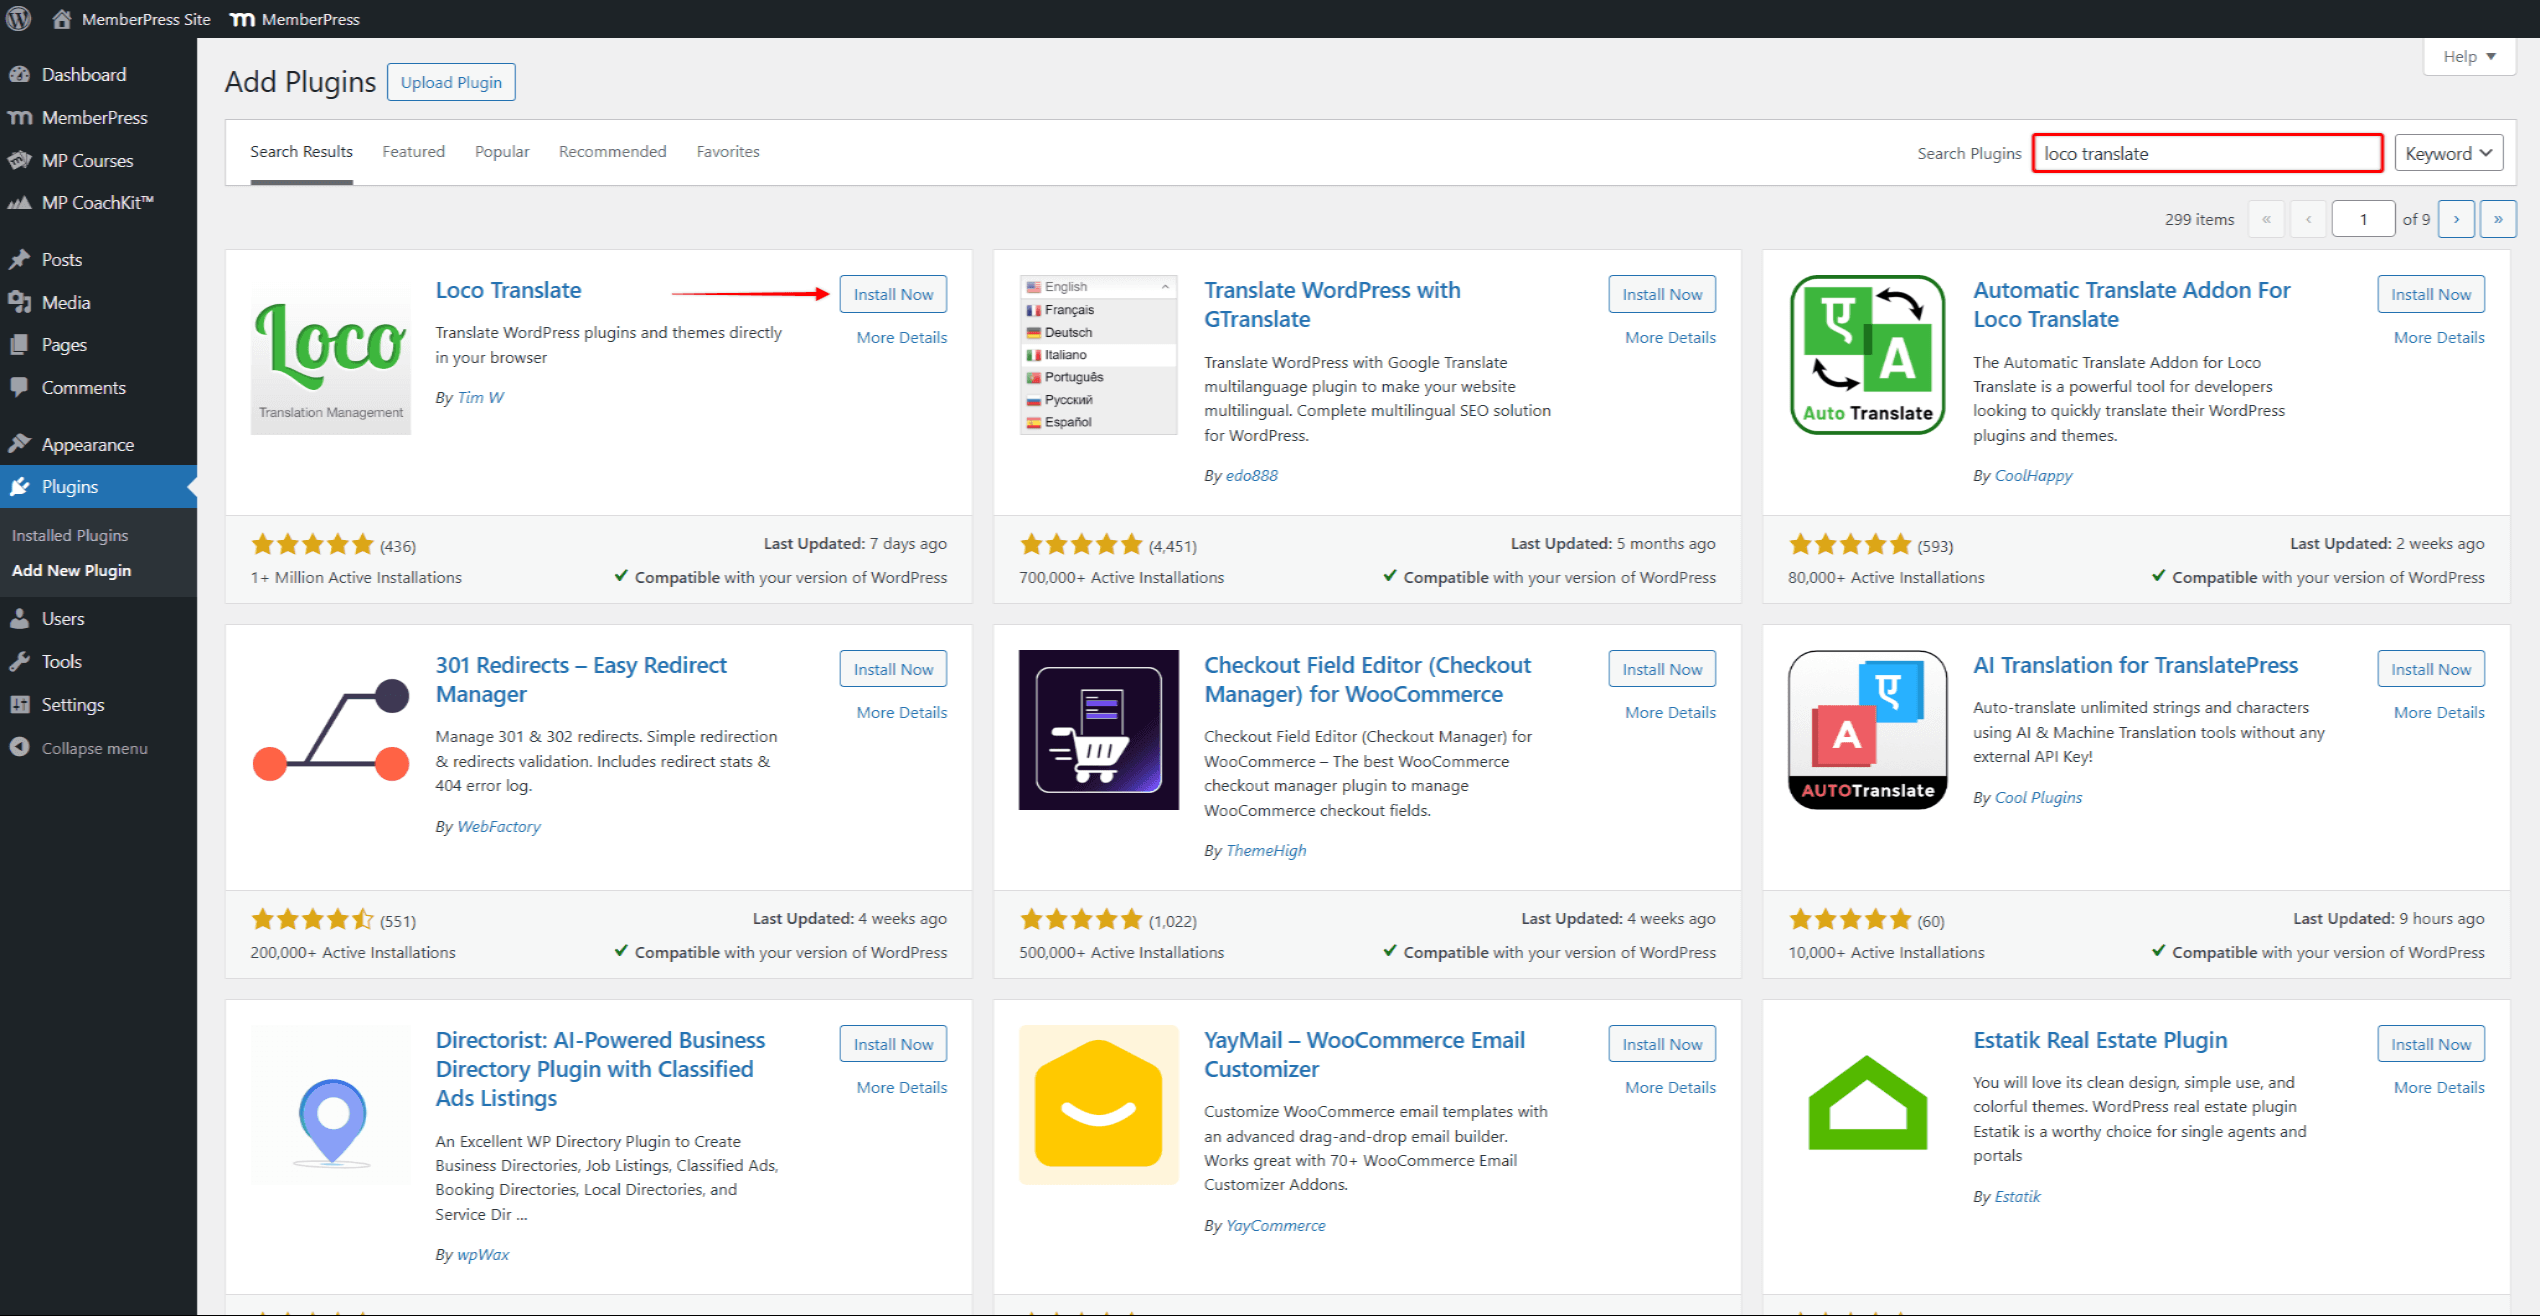
- Click the Install Now button to install Loco Translate, and then click Activate to activate the plugin.
Adding a New Language For MemberPress
To translate MemberPress, you must add a new language in Loco Translate.
- Navigate to Dashboard > Plugins > Installed Plugins and find the MemberPress plugin.
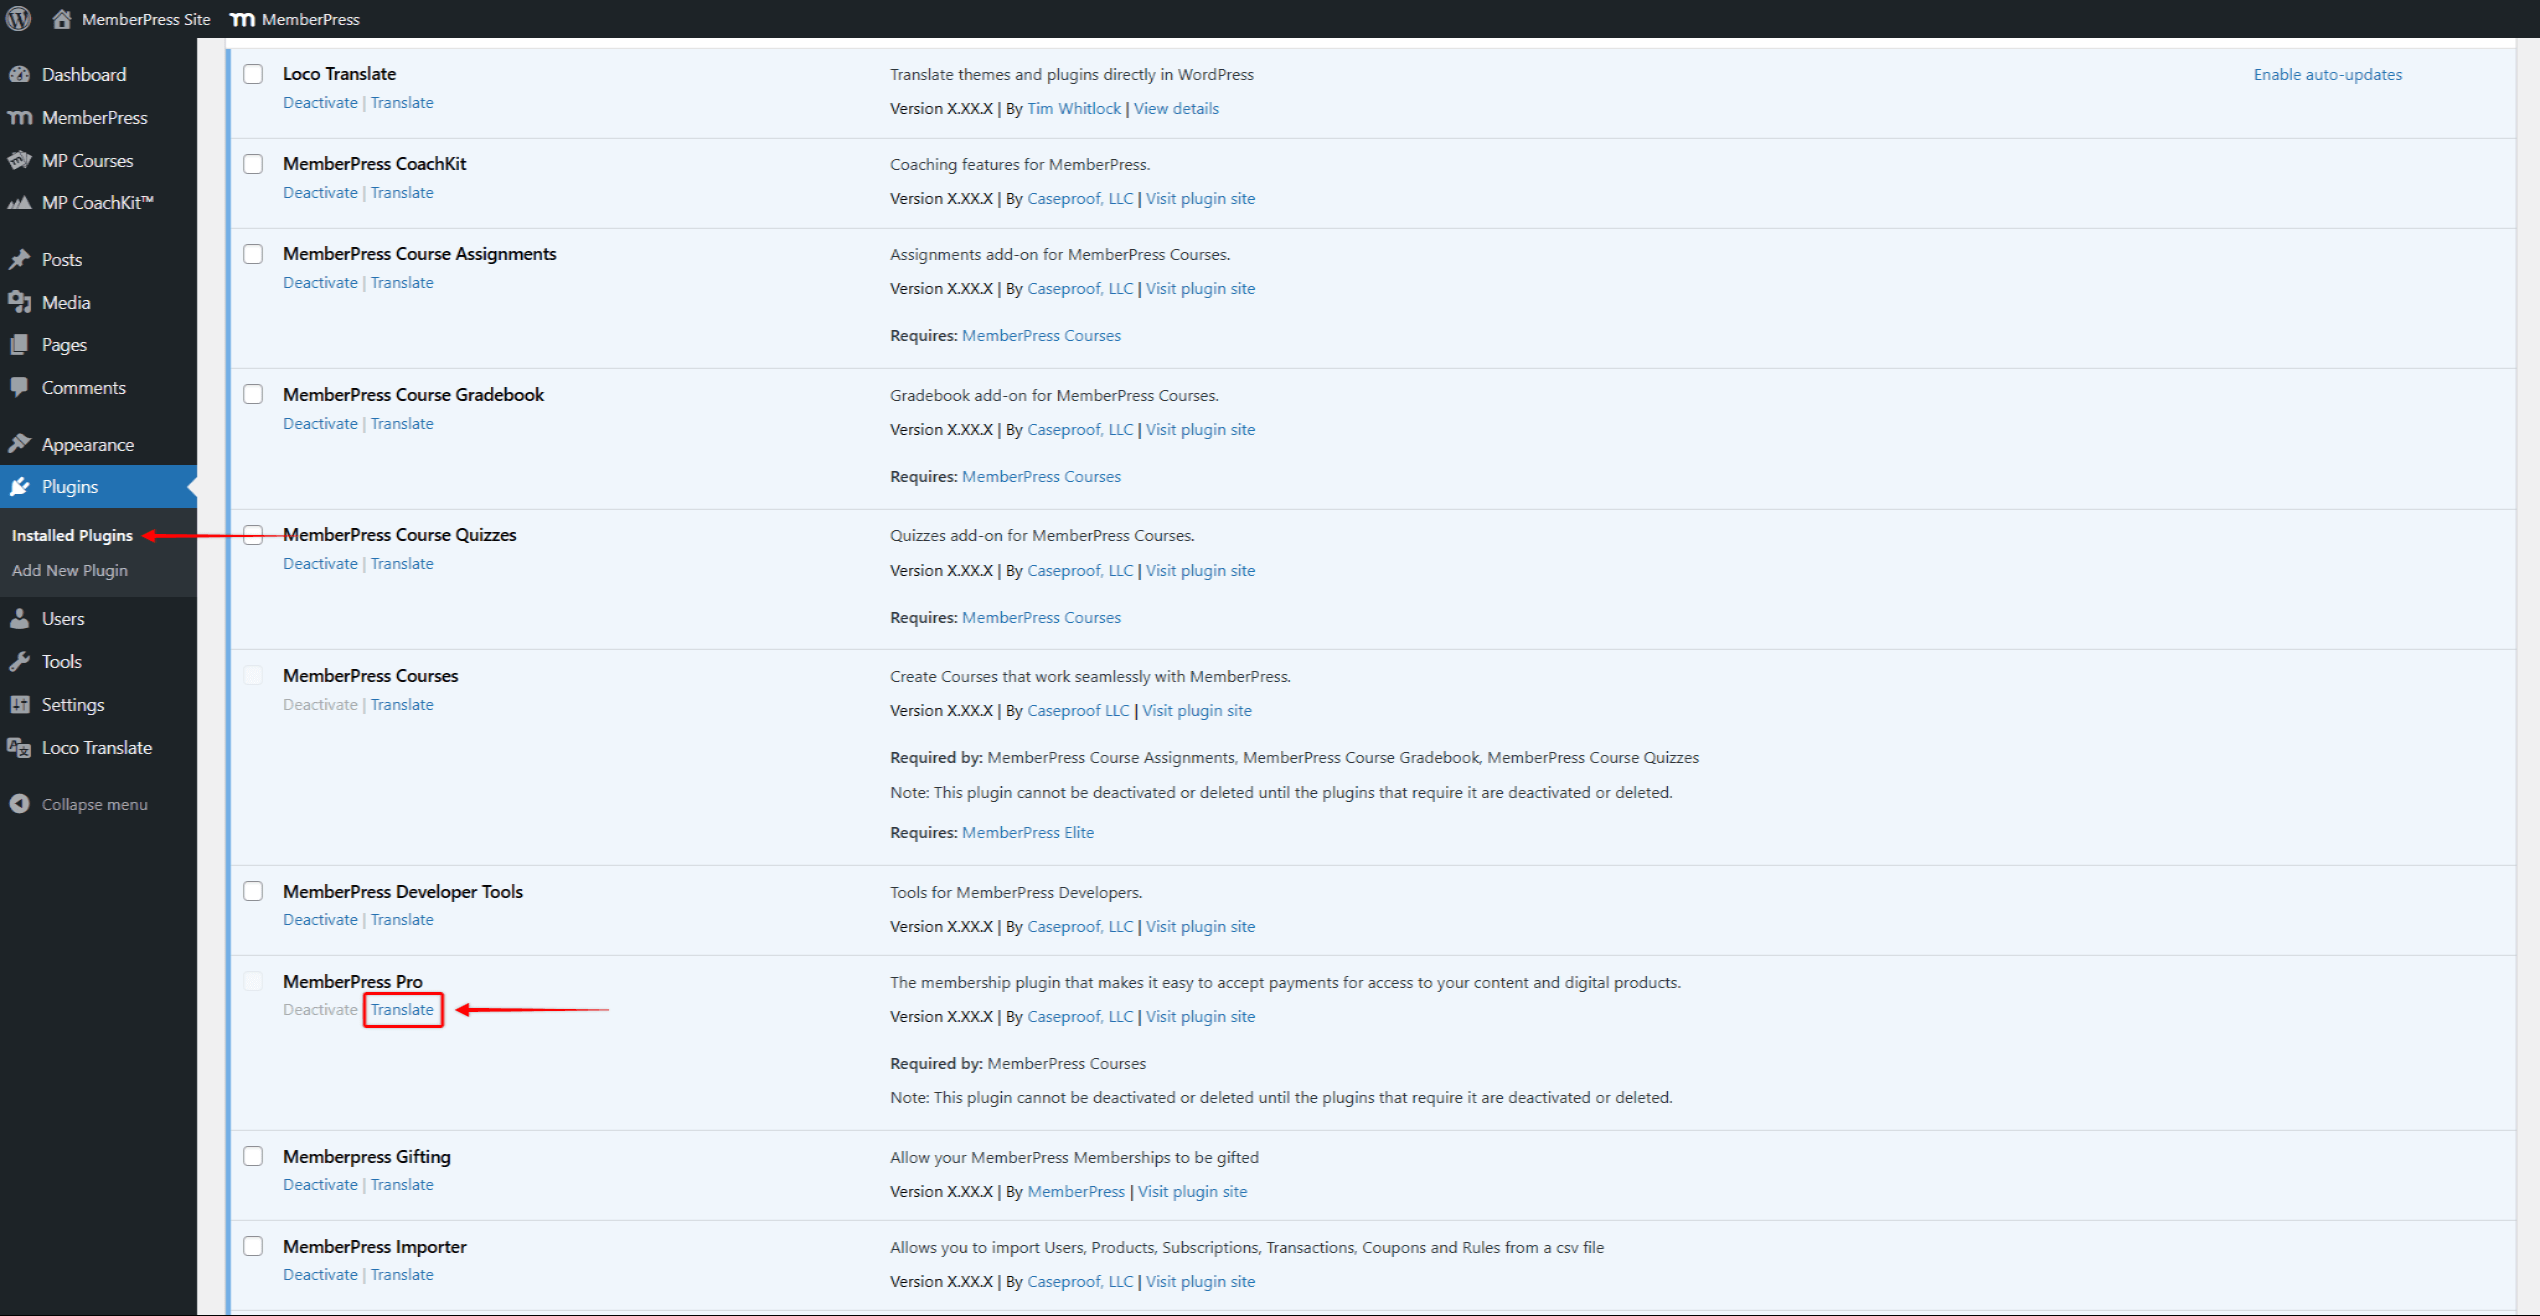
- Click the Translate option under the MemberPress plugin name. This will take you to the MemberPress translation page in Loco Translate.
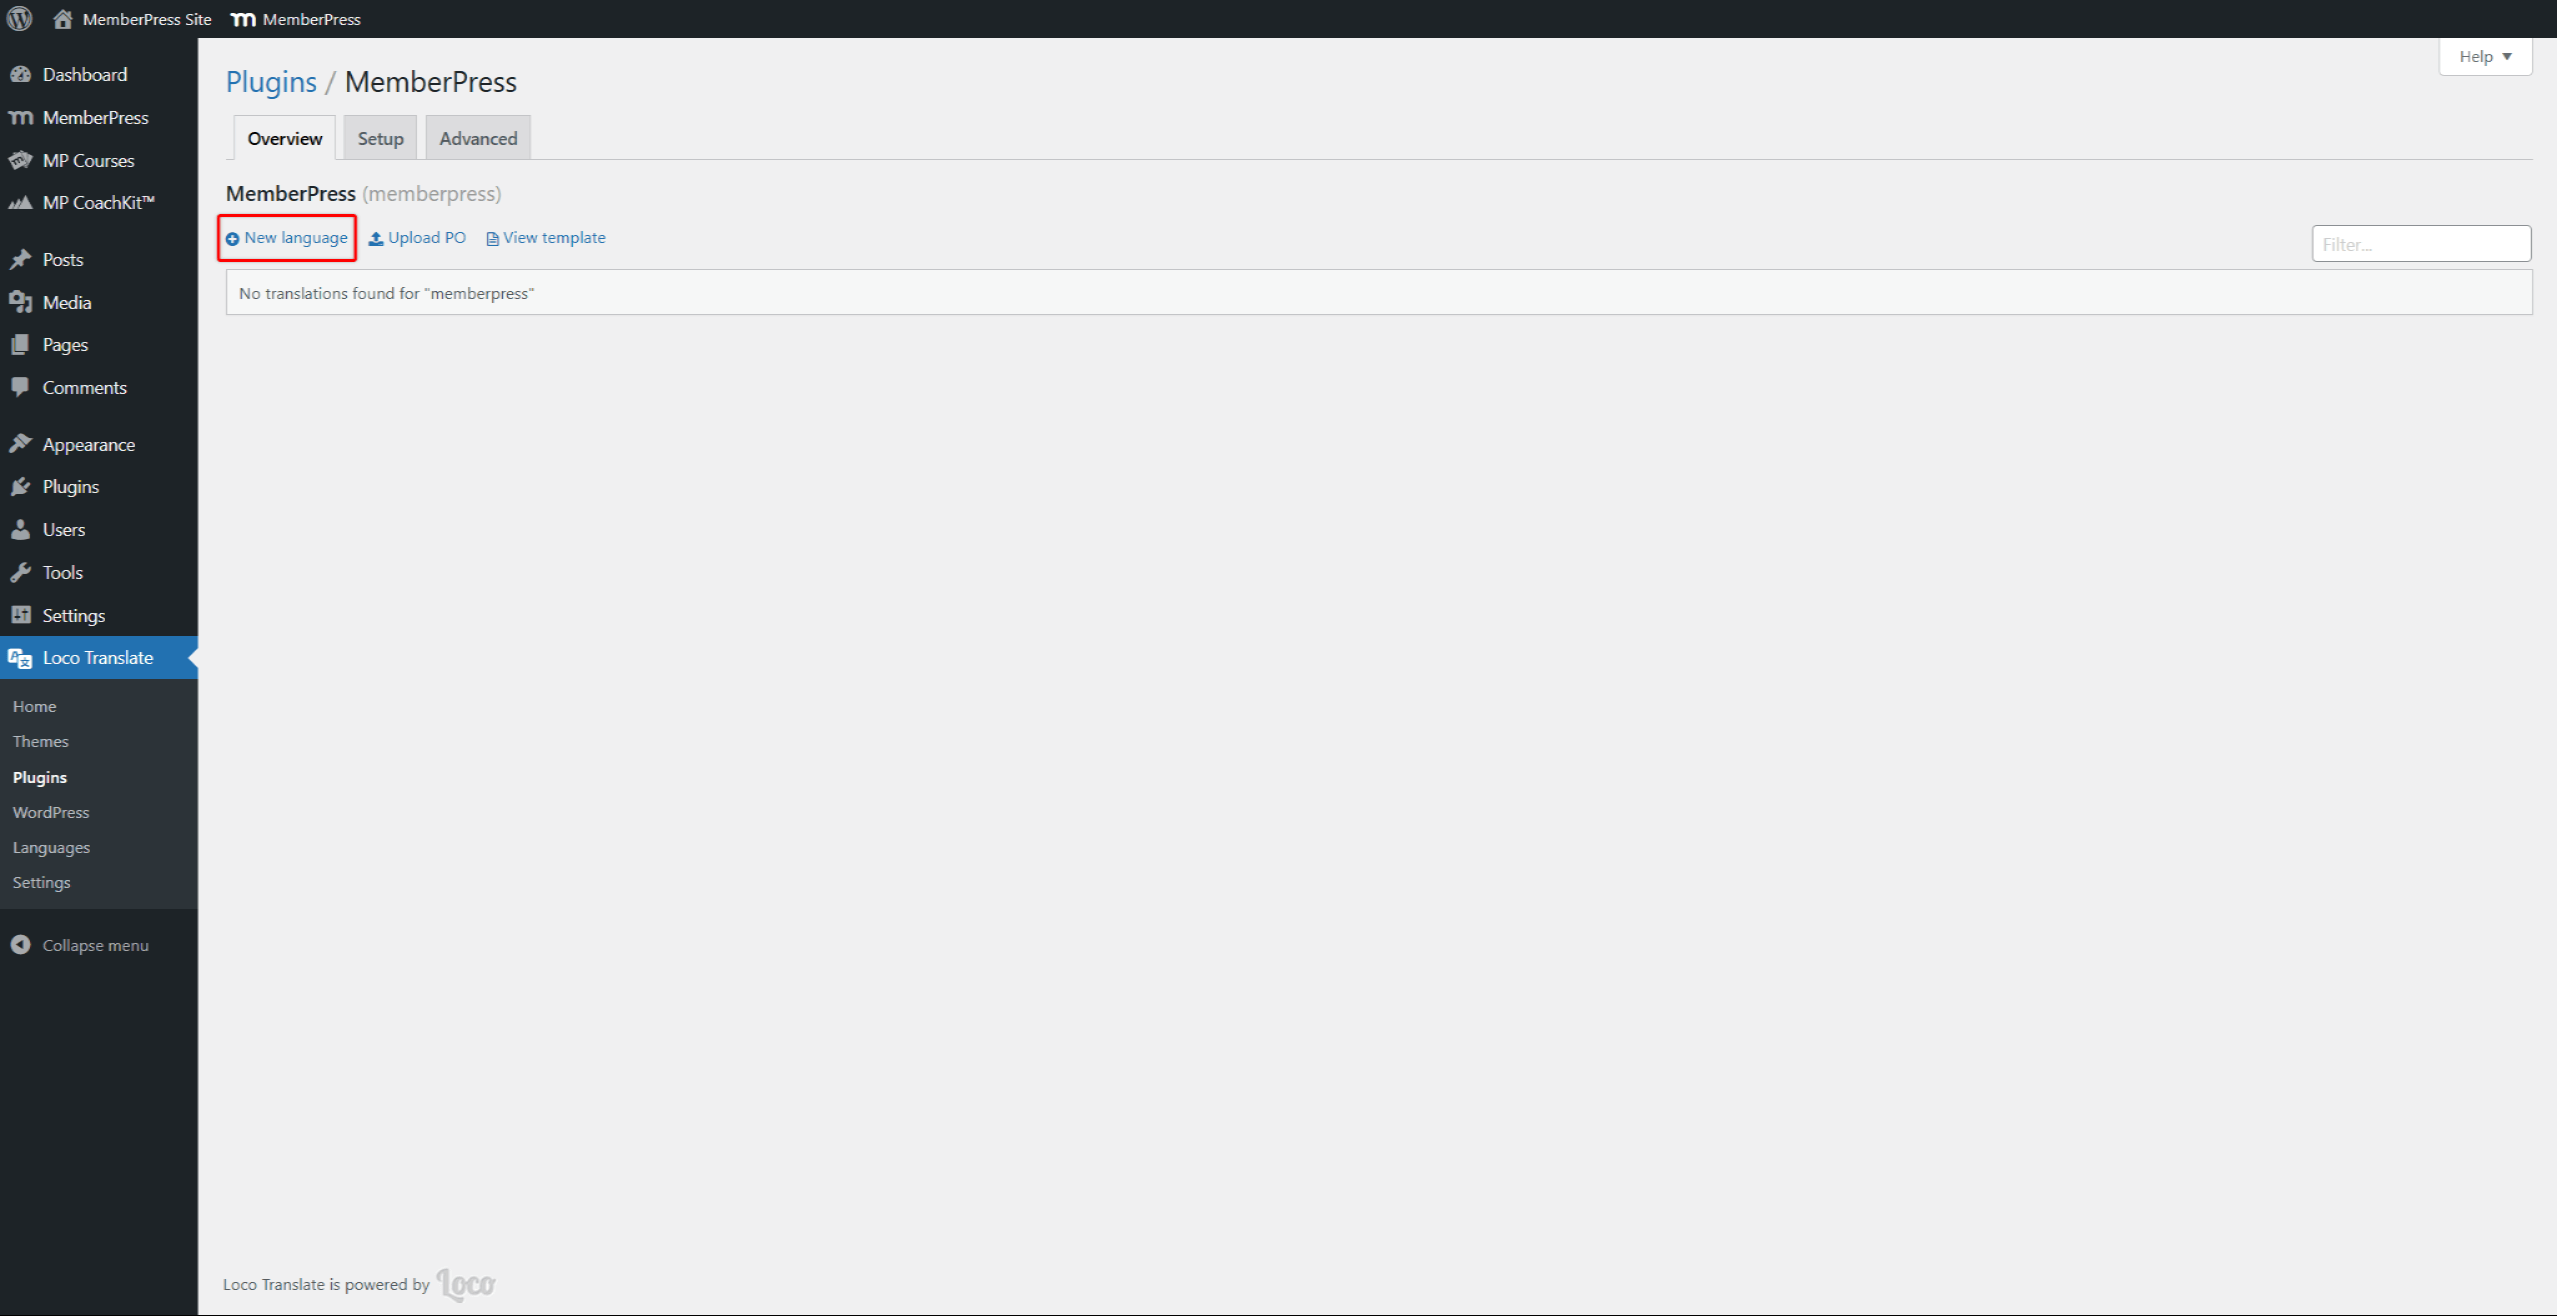
- Next, click the New language link.
- Select the language you want to add under the Choose a language dropdown.
- Under the Choose a location option, select System.
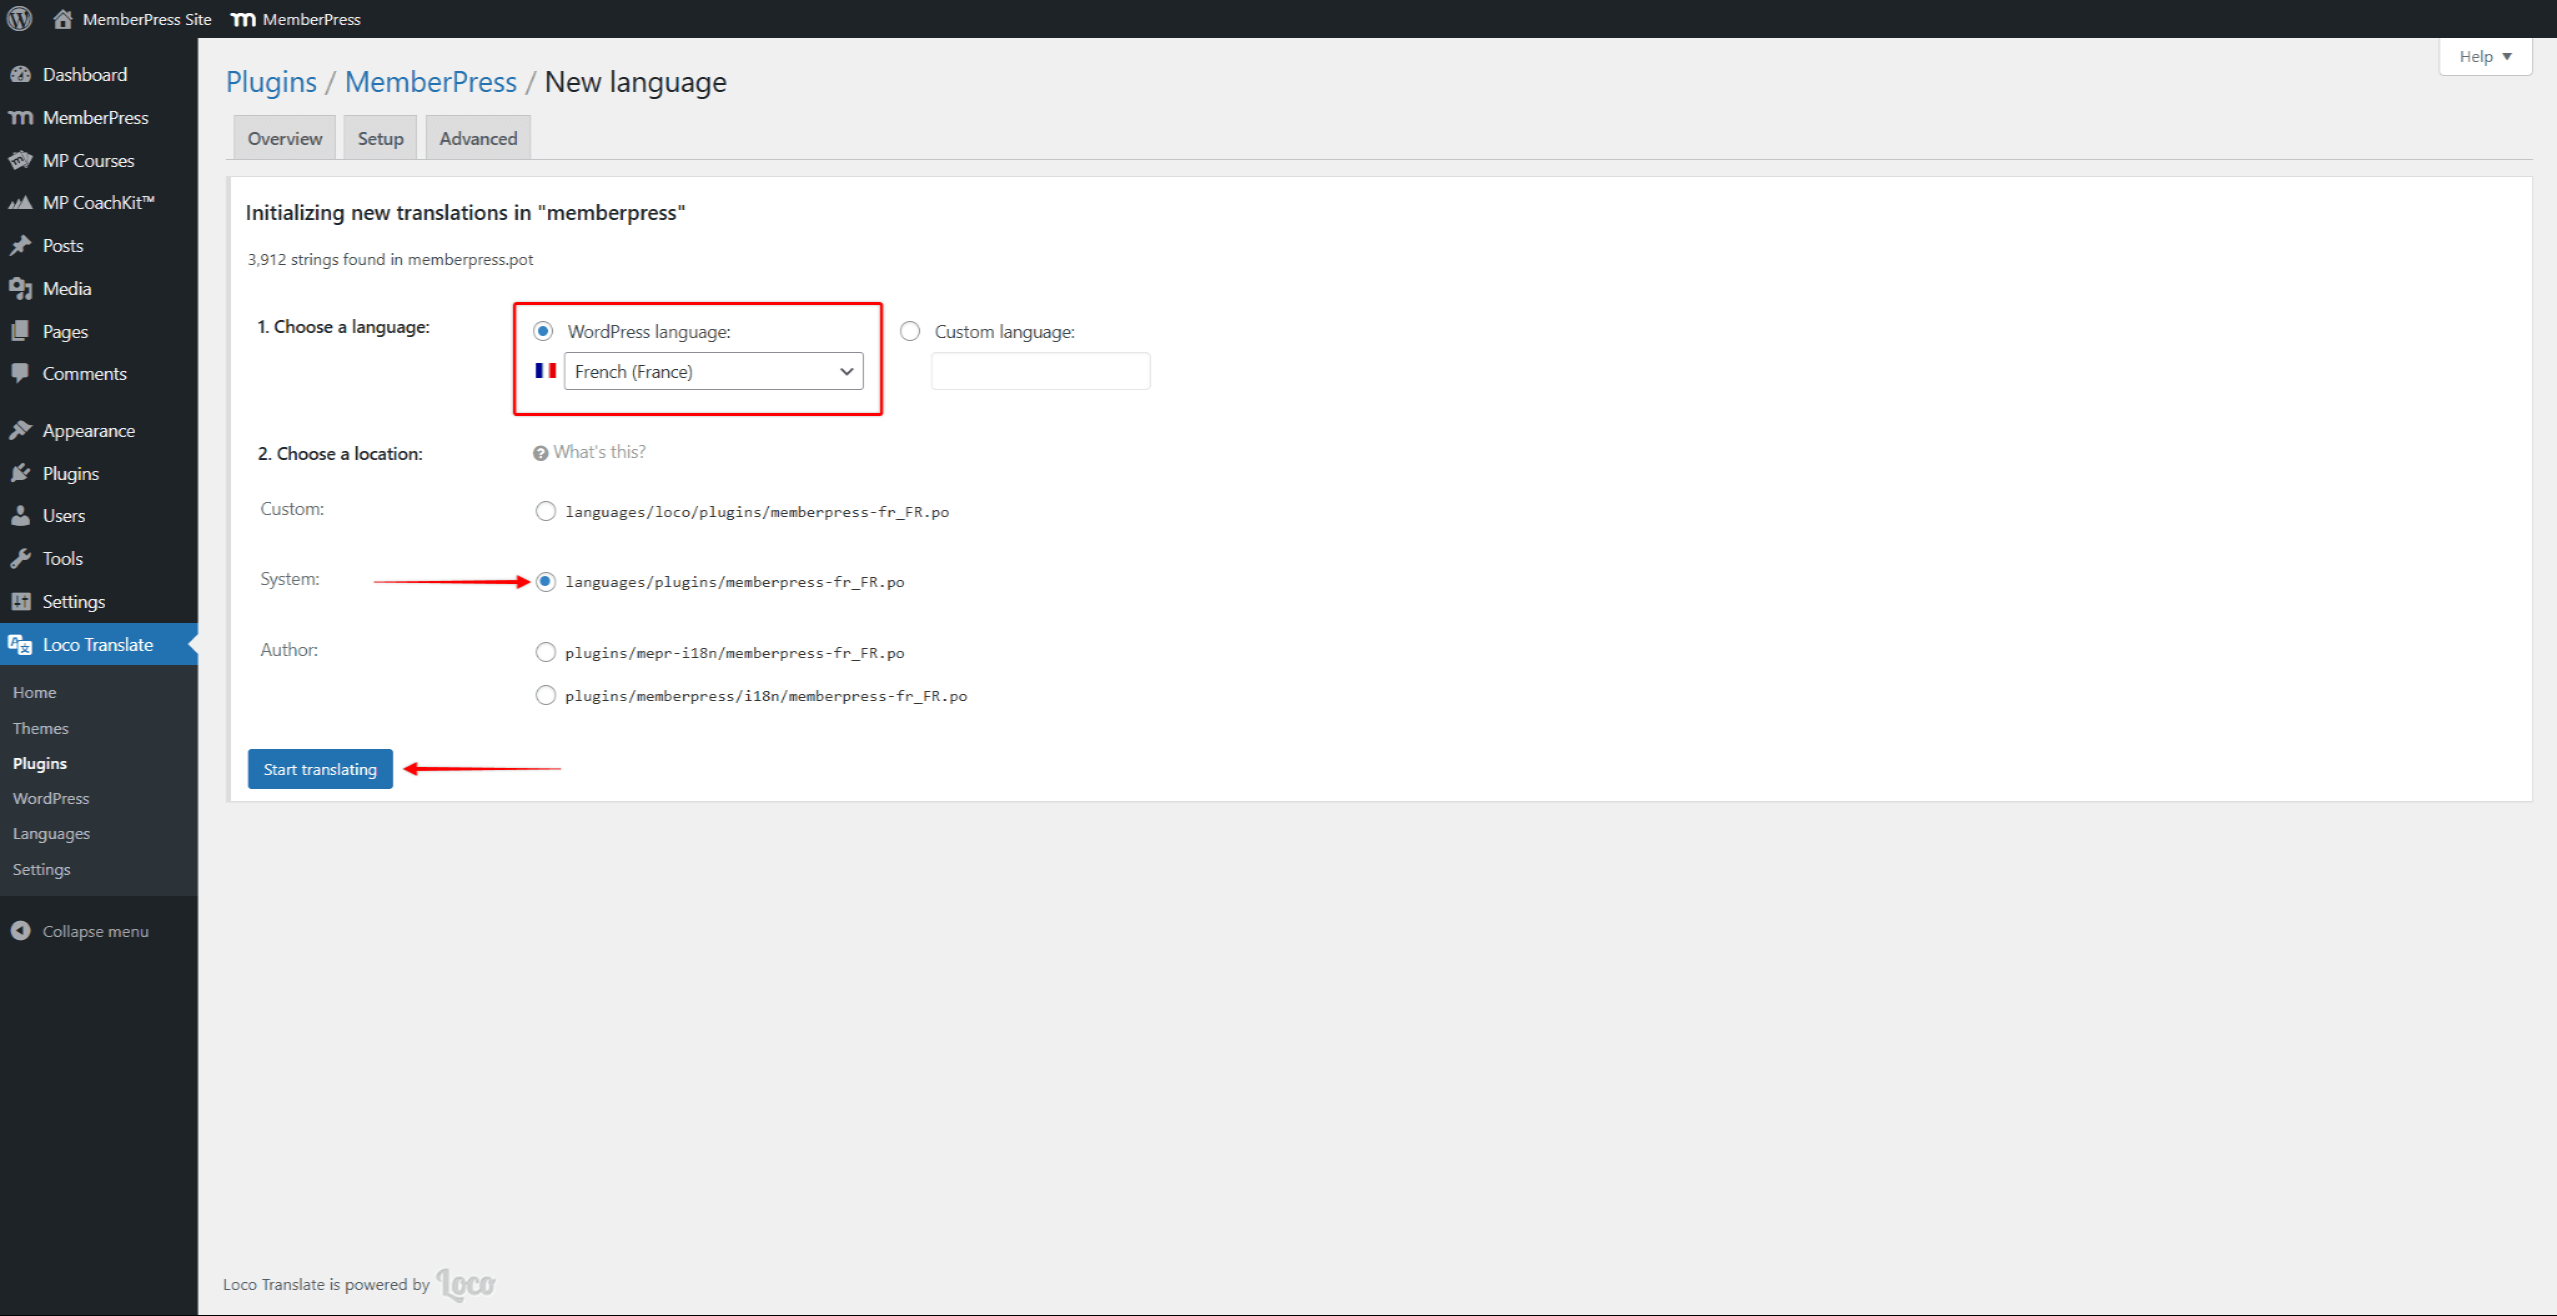
- Click the Start translating button.
Now you can start translating MemberPress to the newly added language.
Modifying the Default Text in English
The default MemberPress language is English (United States). You can also use Loco Translate to change any text in English, thus modifying the default MemberPress text or labels:
- Navigate to Dashboard > Plugins > Installed Plugins and click Translate under the MemberPress label. You can also access the MemberPress translation page directly.
- Next, click the New language link.
- Select the English (United States) language under the Choose a language dropdown and System under the Choose a location option.
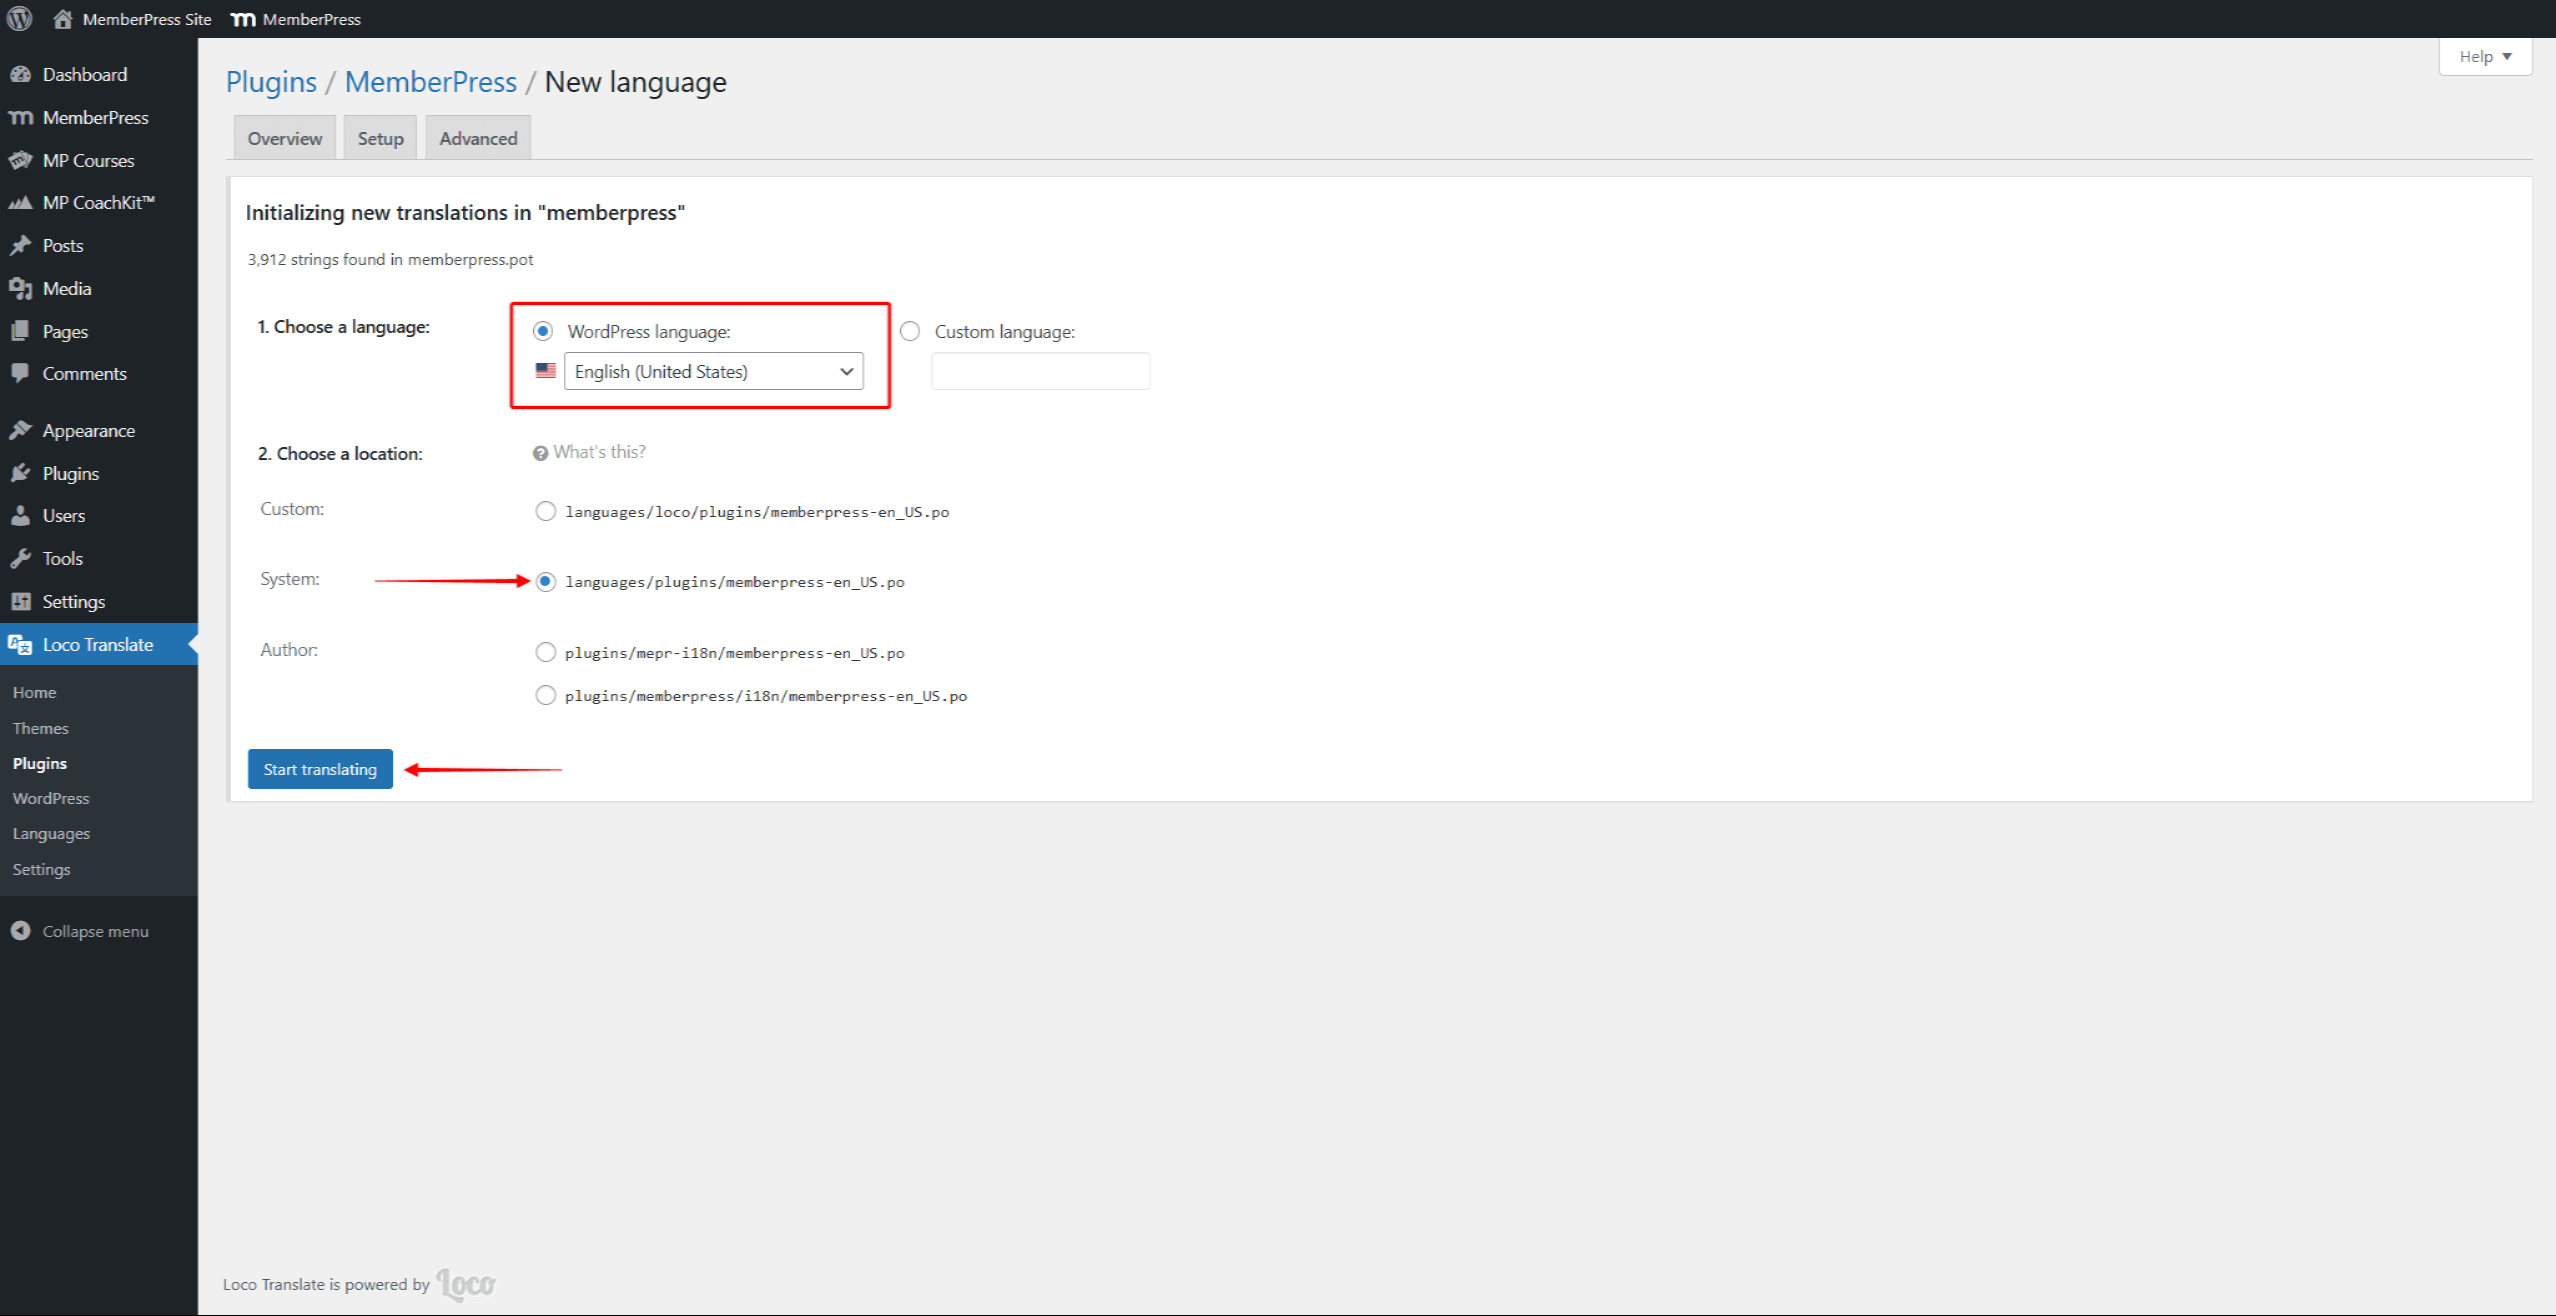
- Click the Start translating button.
This will allow you to replace each default text string with your custom text in English.
Adding MemberPress Translations and Modifications
Once the language is added and set in Loco Translate, you can start translating MemberPress.
As mentioned, Loco Translate supports translations string by string. Hence, each piece of text (string) must be translated individually.
If you want to translate the entire plugin, you can start at the first string in the list and work your way down.
Instead, if you want to translate or modify some specific strings, you can filter those out and translate them first:
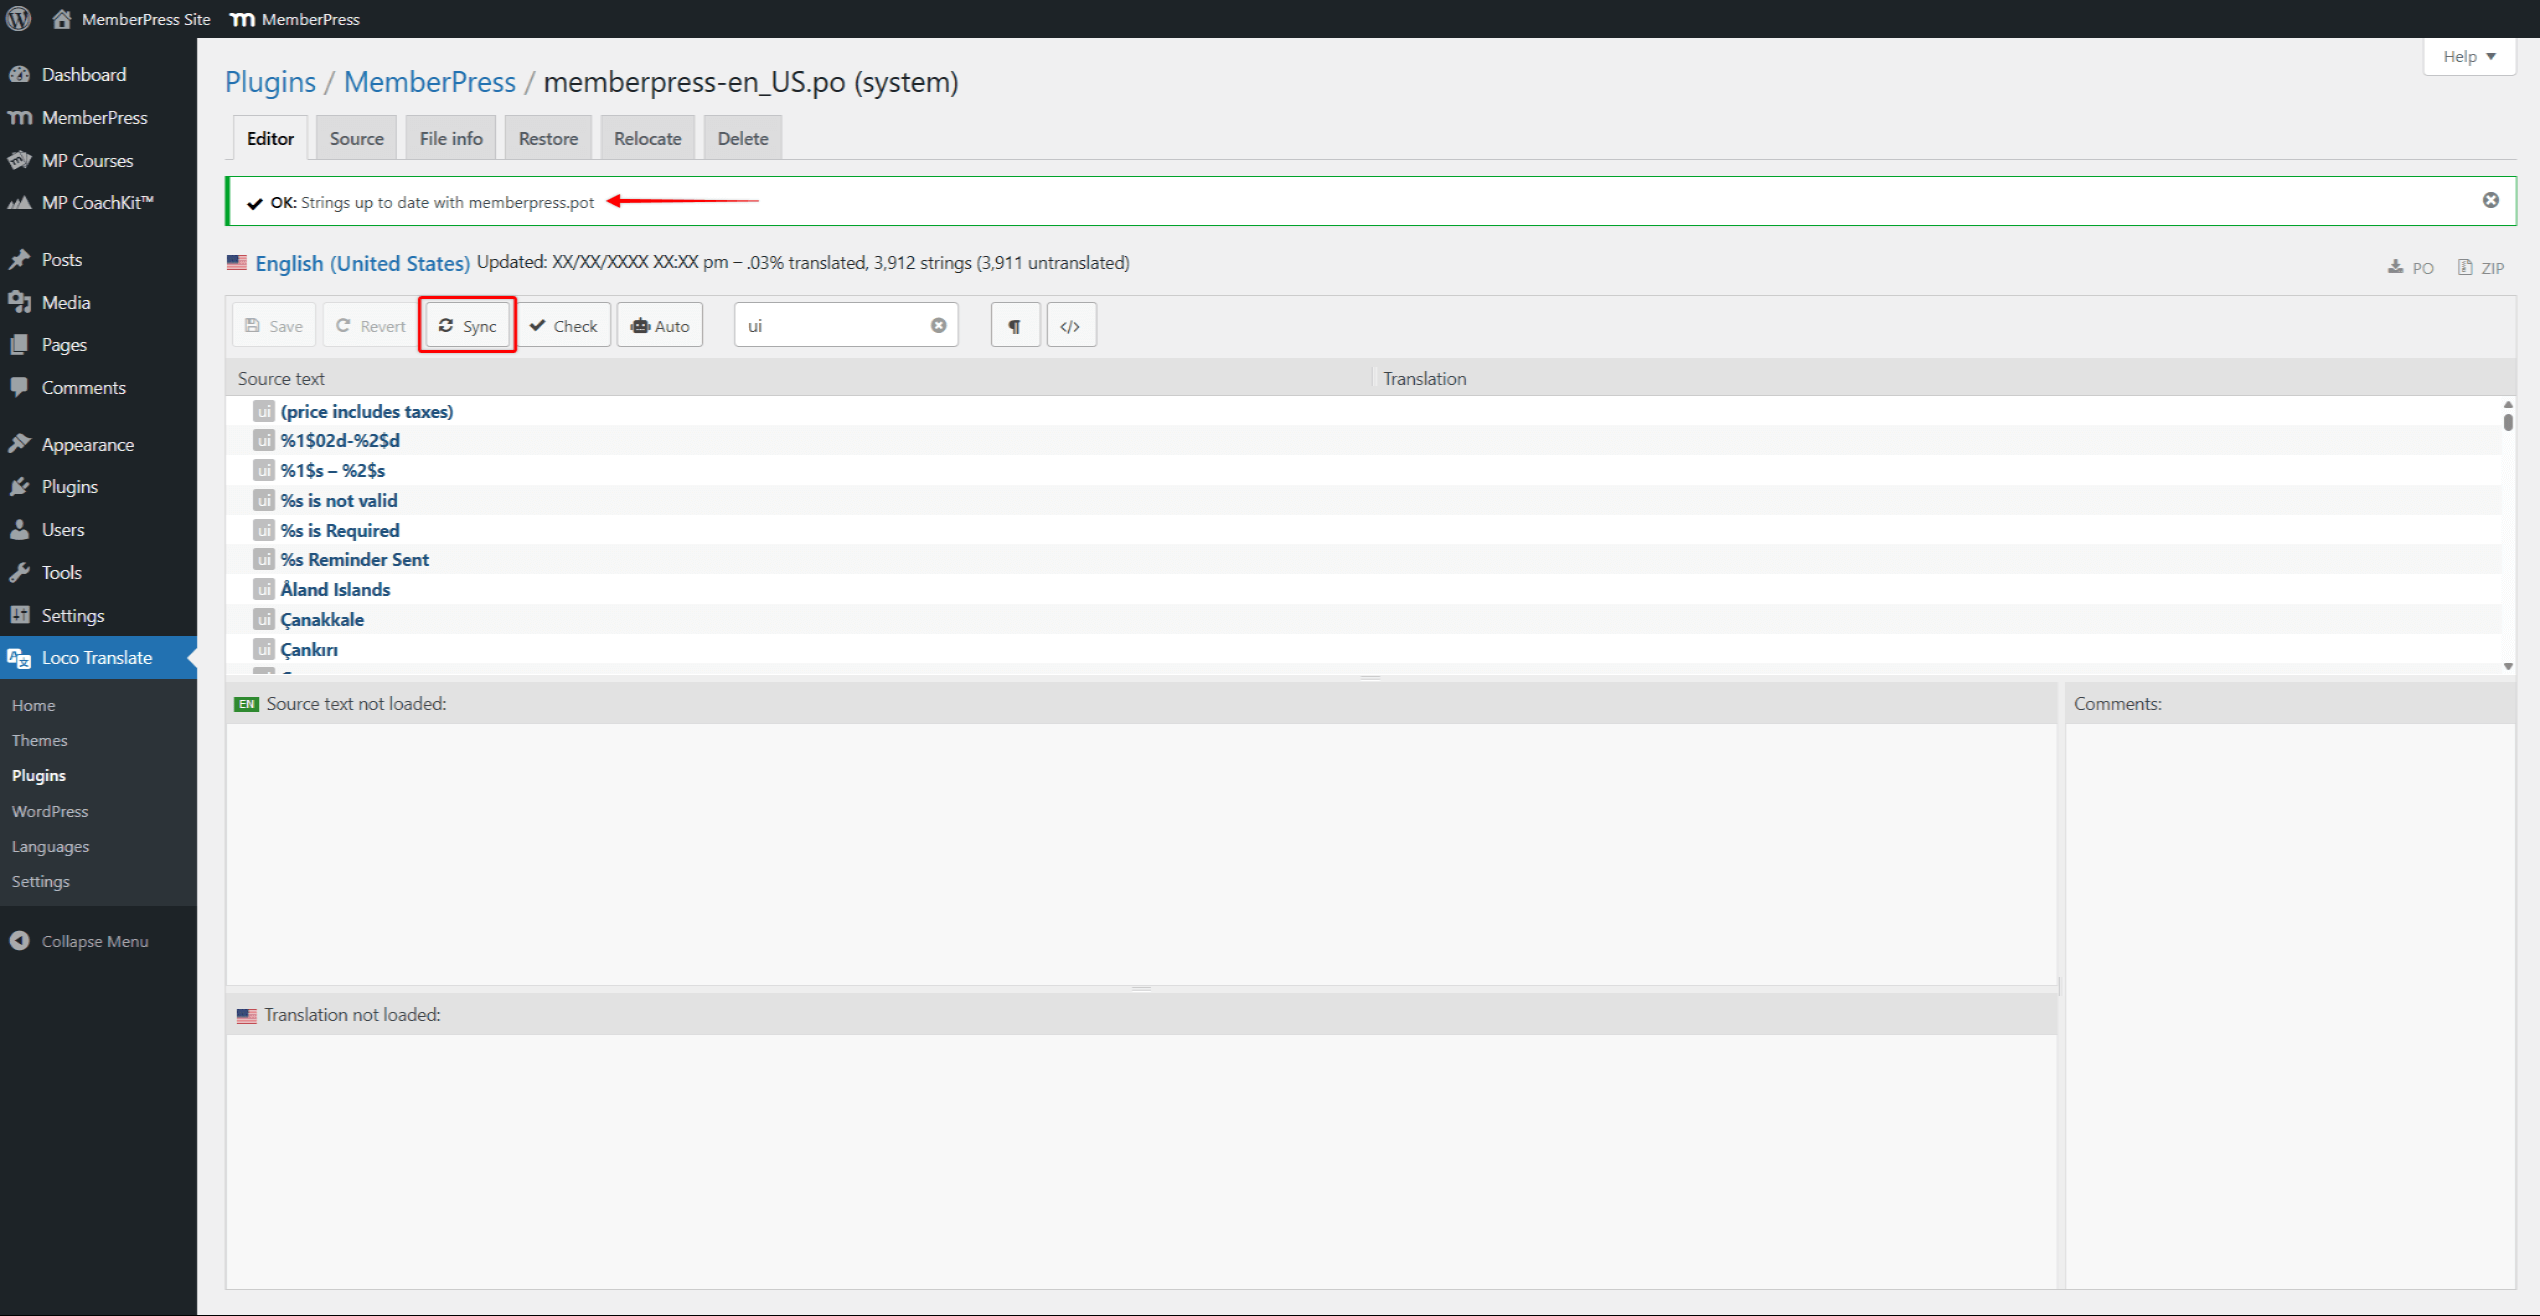
- Click the search field and type in the text you wish to translate or modify.
- The search results will show all strings that match or contain the term you searched for. Scroll through the string list and click on the string you want to translate or modify.
- The original string will be shown in the Source text field. You can add your translation or the modified text in the language translation field below. The star symbol will mark each translated/modified string.
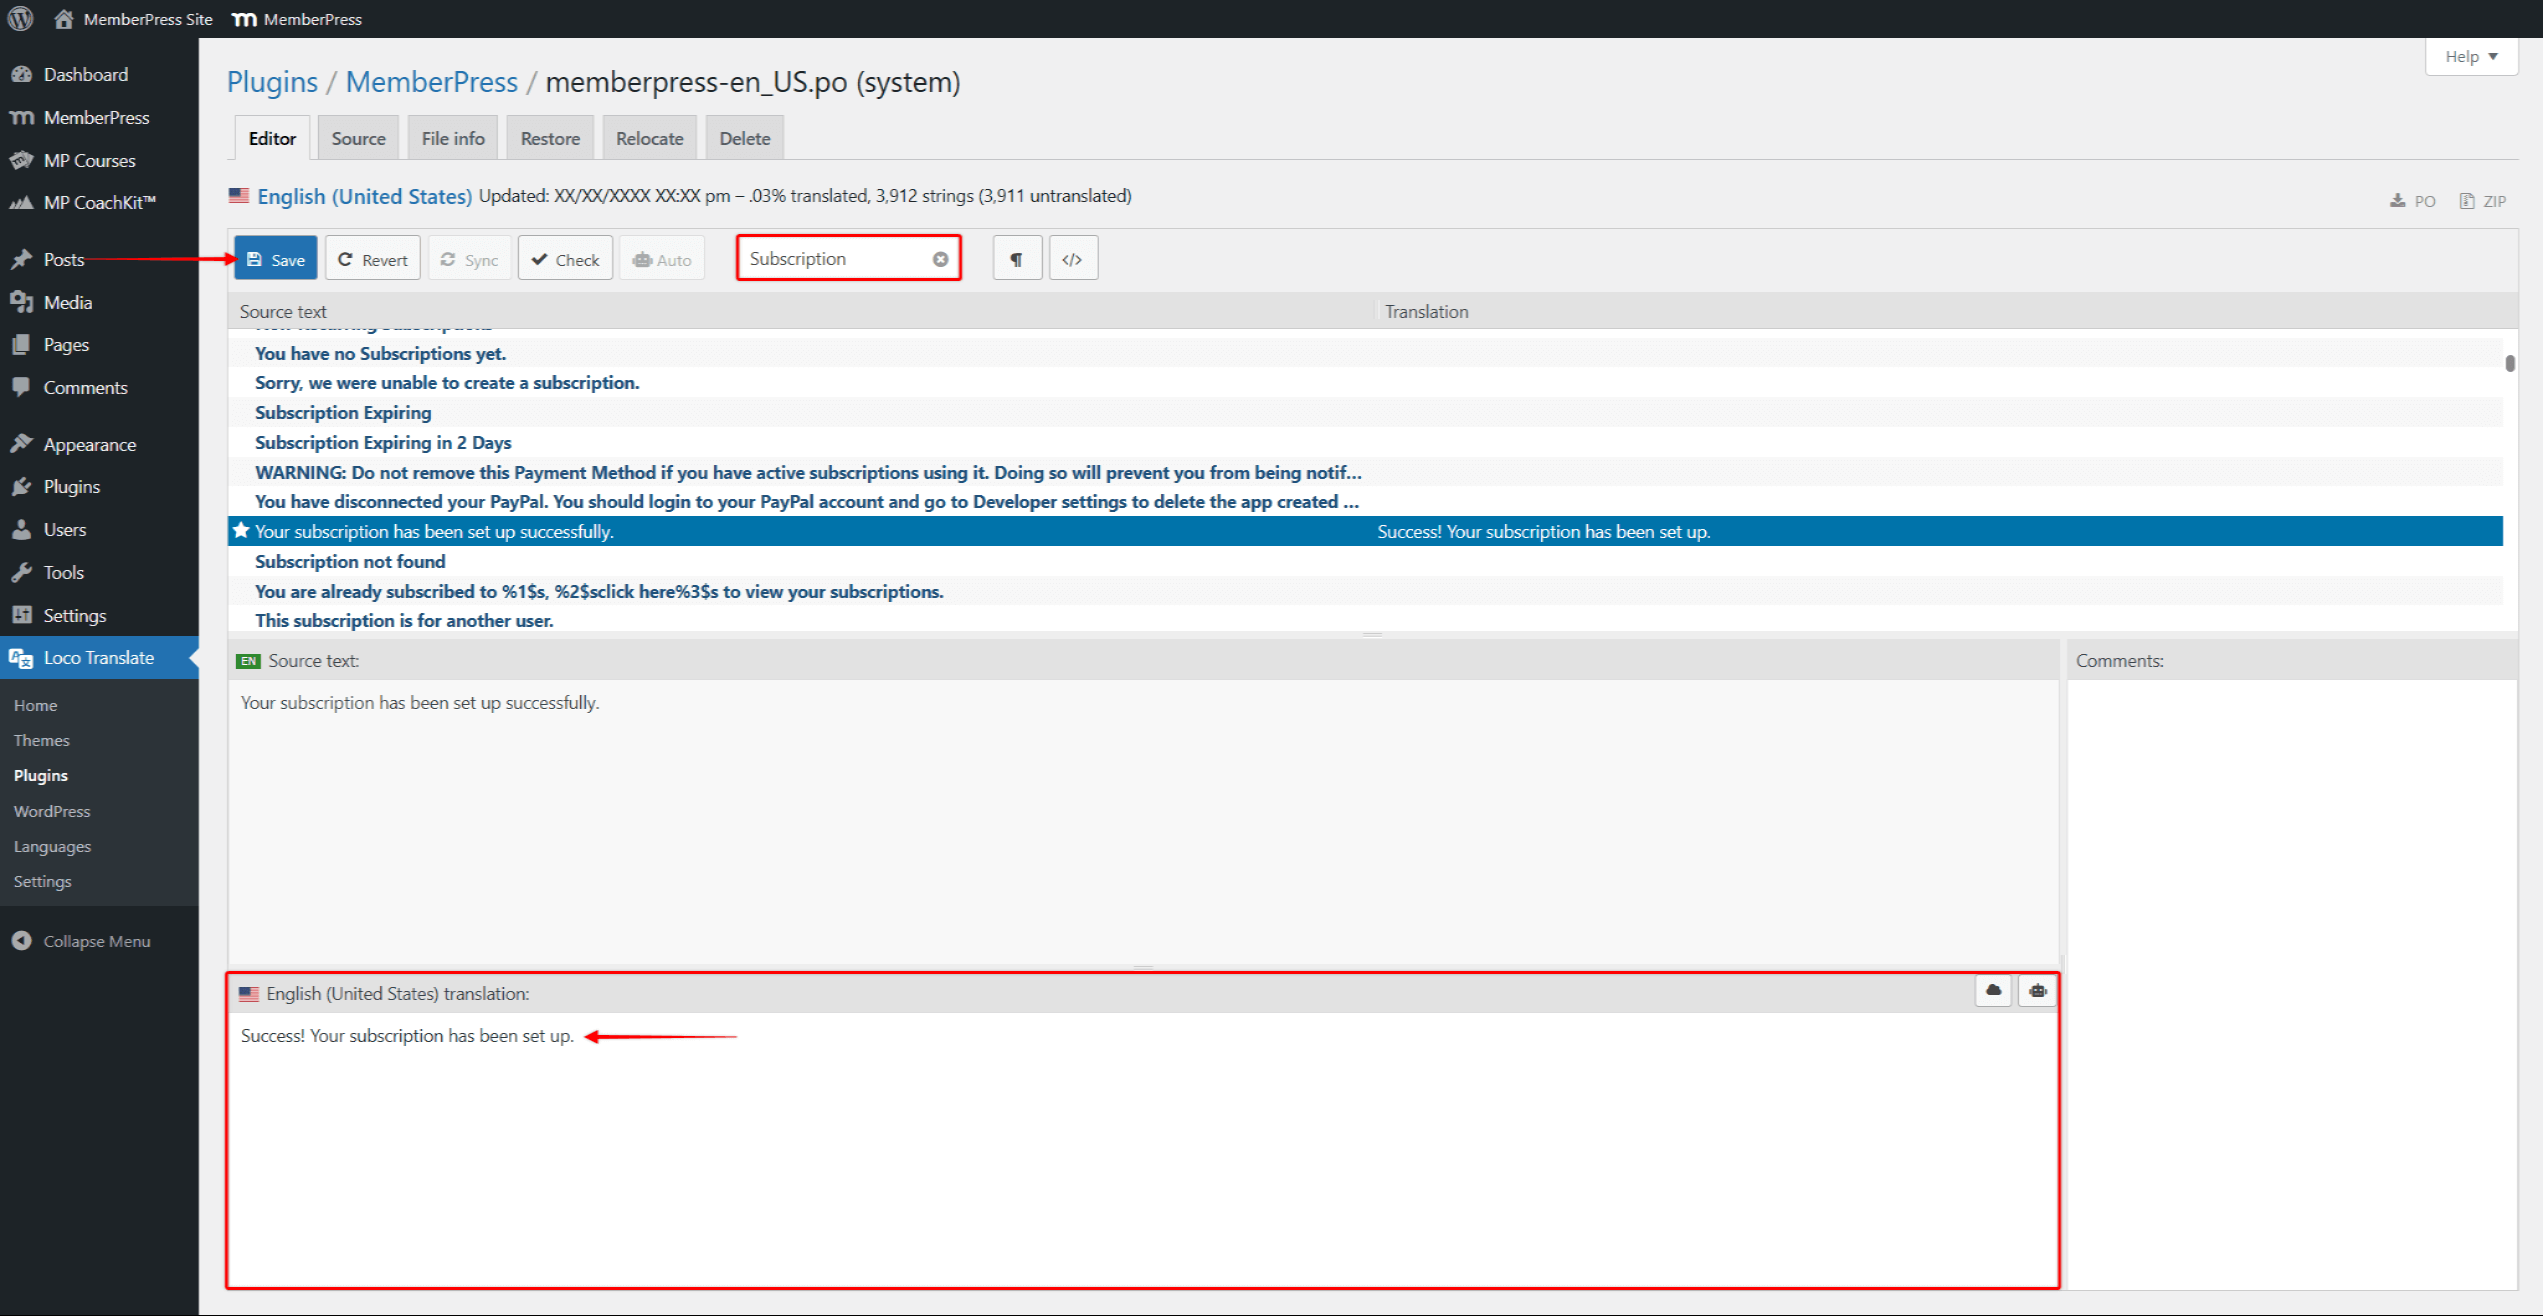
- Repeat steps 1 to 3 for all strings you wish to translate or modify.
- Once done, click the Save button.
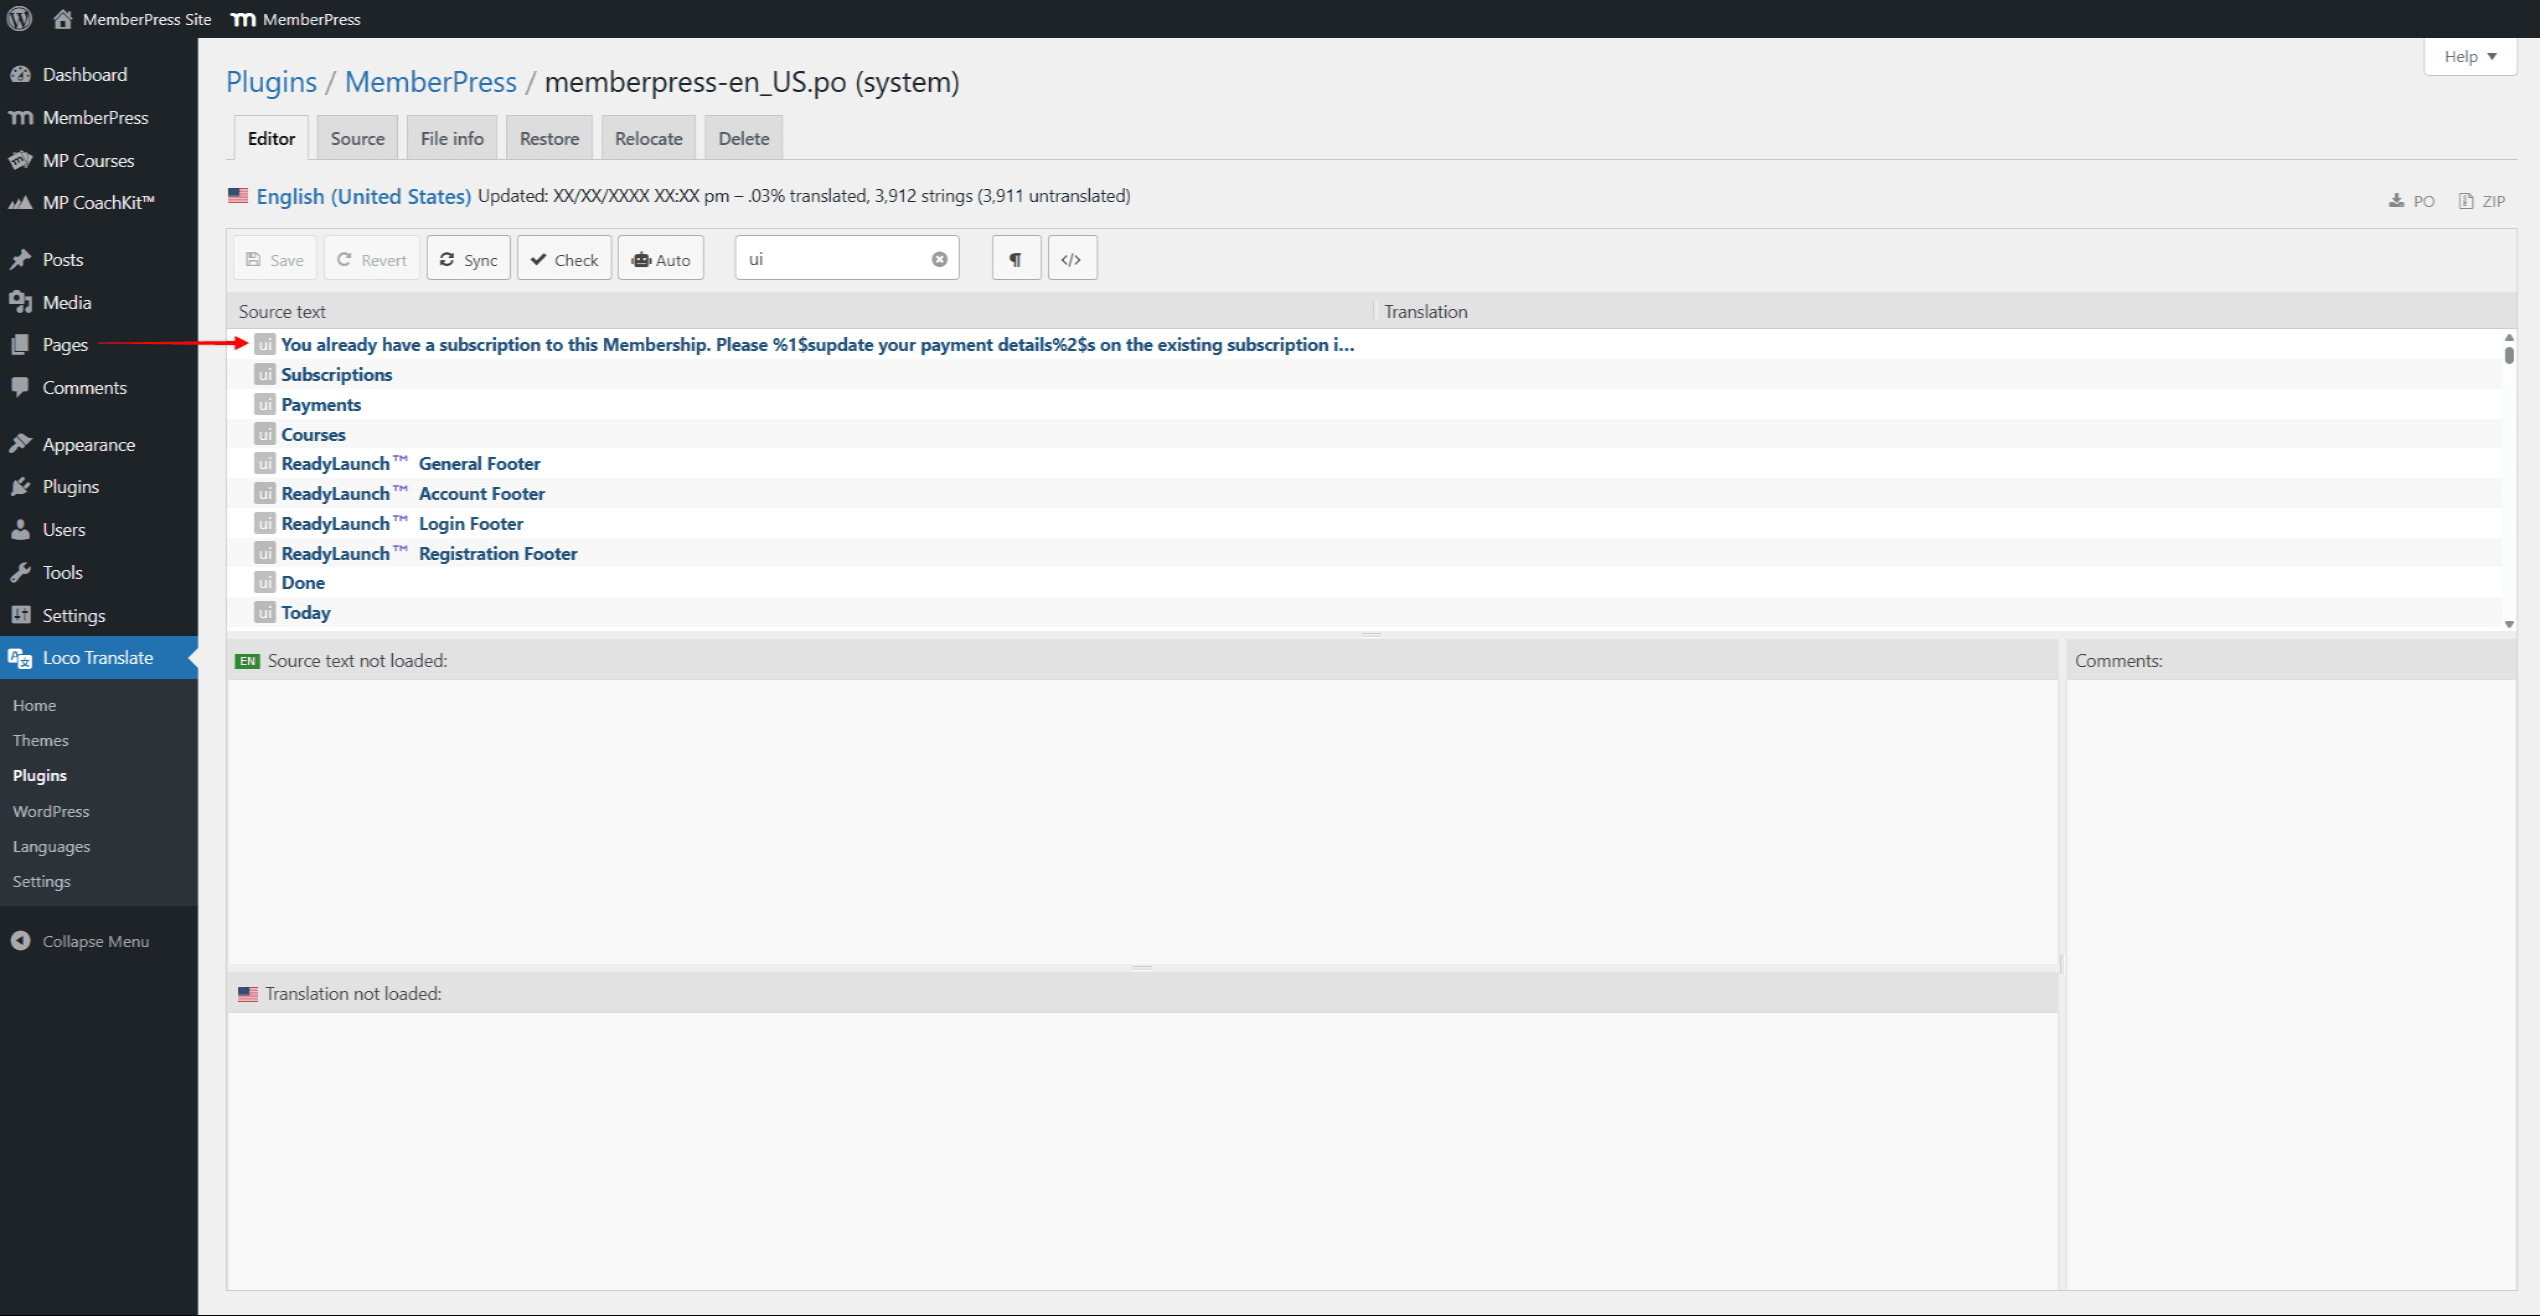
Loco Translate allows you to change any text on the front or back end, depending on where that string is located. Here, you can distinguish user interface strings by the ui icon before the string.
Syncing Translations After MemberPress Updates
Each MemberPress plugin update may bring changes, such as adding new strings or removing existing ones.
Thus, you should sync your translations with the updated MemberPress.pot file:
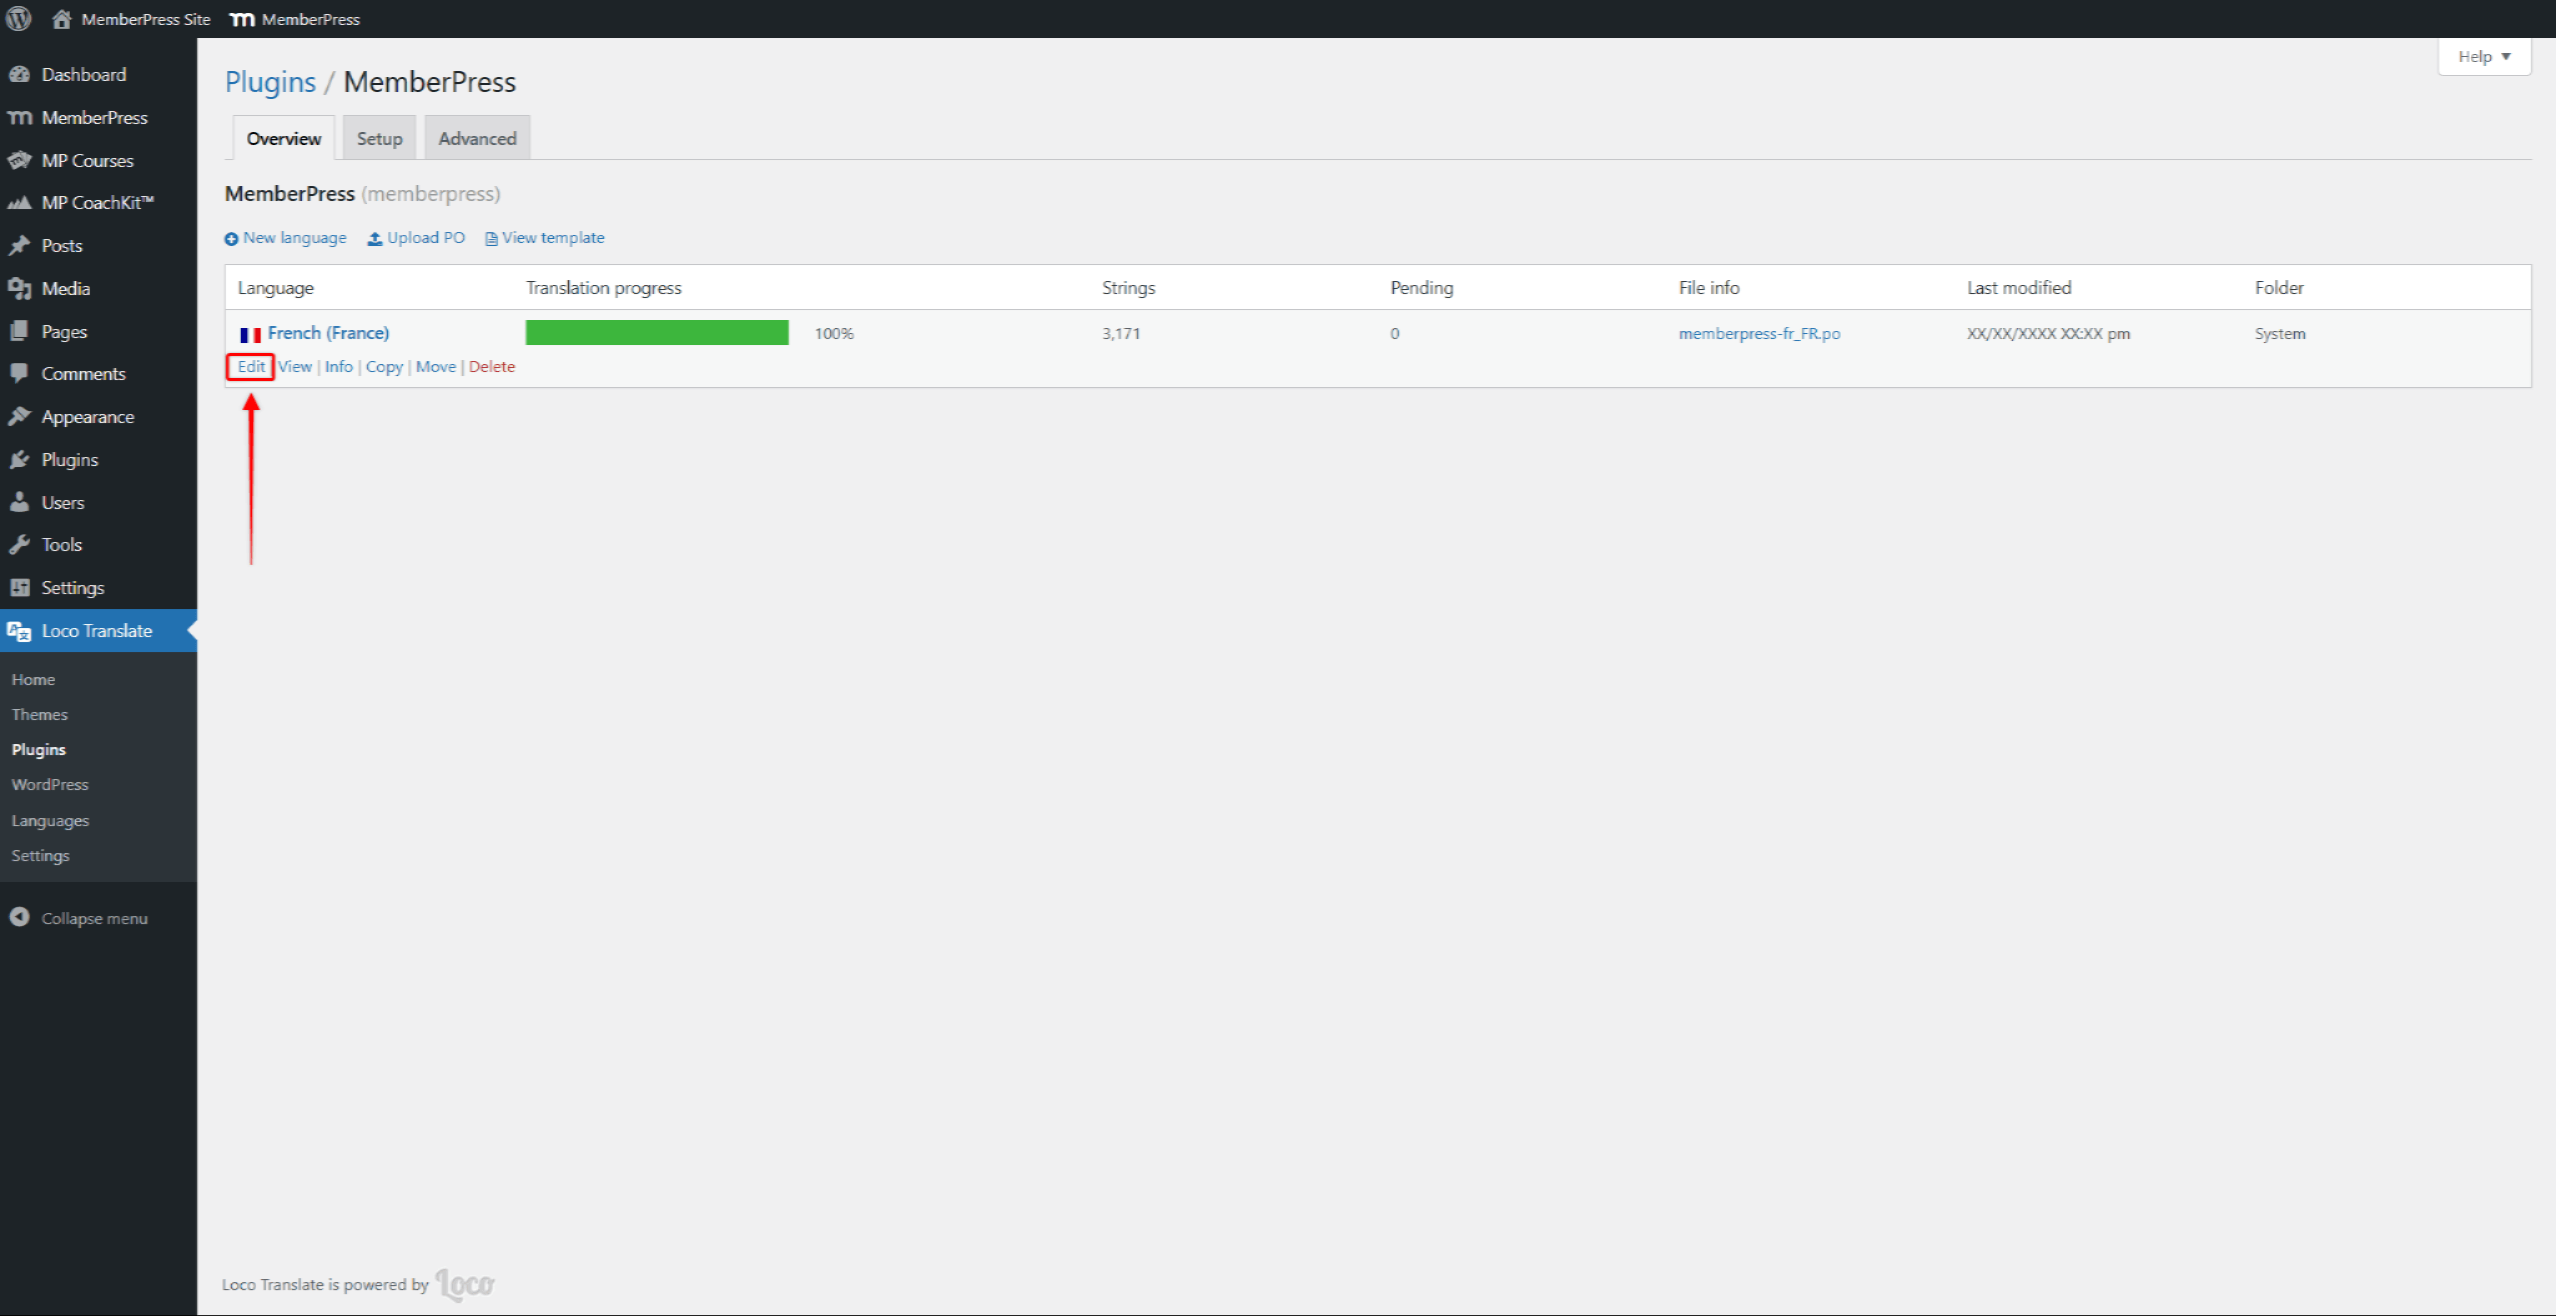
- Navigate to Dashboard > Loco Translate > Plugins, find MemberPress in the list, and click on it.
- Under the Overview tab, click on Edit under the language name.
- Click the Sync button. The message will be displayed once the translation is synced.
