To start creating your MemberPress-based website, install MemberPress and activate the plugin. There are two ways to install MemberPress on your site: automatically and manually.
This document will explain the steps for both automatic and manual installation of the MemberPress plugin.
Covered in this article:
Install MemberPress Automatically
After purchasing MemberPress, you can log in to your MemberPress.com account and download the plugin's zip file. Next, follow these simple steps to install and activate MemberPress.
- Login to your WordPress website as an administrator user.
- Head to Dashboard > Plugins > Add New and click the Upload button.
- Choose to upload the memberpress.zip file you downloaded earlier.
- Next, click Install Now.
- Finally, click the Activate Plugin button to activate MemberPress.

Install MemberPress Manually
If you encounter any issues installing MemberPress automatically, you should install it manually. In this case, also start by logging in to your MemberPress.com account and downloading the plugin's zip file. Then, follow these instructions to install it manually using FTP.
- Extract the memberpress.zip file you downloaded earlier somewhere on your computer.
- Connect to your website server using any FTP Client (e.g. FileZilla). If you are unsure how to do this, contact your web host for instructions.
- Copy the extracted “memberpress” directory from your computer to your server's /wp-content/plugins/ directory. Keep in mind that this can take some time to complete due to the folder volume.
- Once the upload finishes, log in to your WordPress website as an administrator user.
- Navigate to Dashboard > Plugins > Installed Plugins. Find the MemberPress plugin in the list, and click Activate below the plugin name.
Setting Up MemberPress After Installation
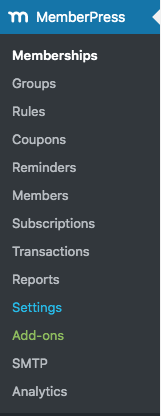
Once the MemberPress plugin is installed and activated, you should see a new menu item in the dashboard titled “MemberPress“. Navigate to that menu option (Dashboard > MemberPress) to find all MemberPress-related options.
Now, you can activate your MemberPress license and configure your membership site.
If you activate MemberPress on your website for the first time, navigate to Dashboard > MemberPress to encounter the Onboarding Wizard. The onboarding wizard will take you through the license activation and basic setup.


