MemberPress plugins and add-ons updates provide security updates, new features, and other enhancements. Updating MemberPress and add-ons ensures these plugins continue functioning well with WordPress, themes, and other plugins on your website.
This document explains how to update the MemberPress core plugin and add-ons. Furthermore, the document will guide you through both the automatic and manual updating process.
Automatic MemberPress Updates
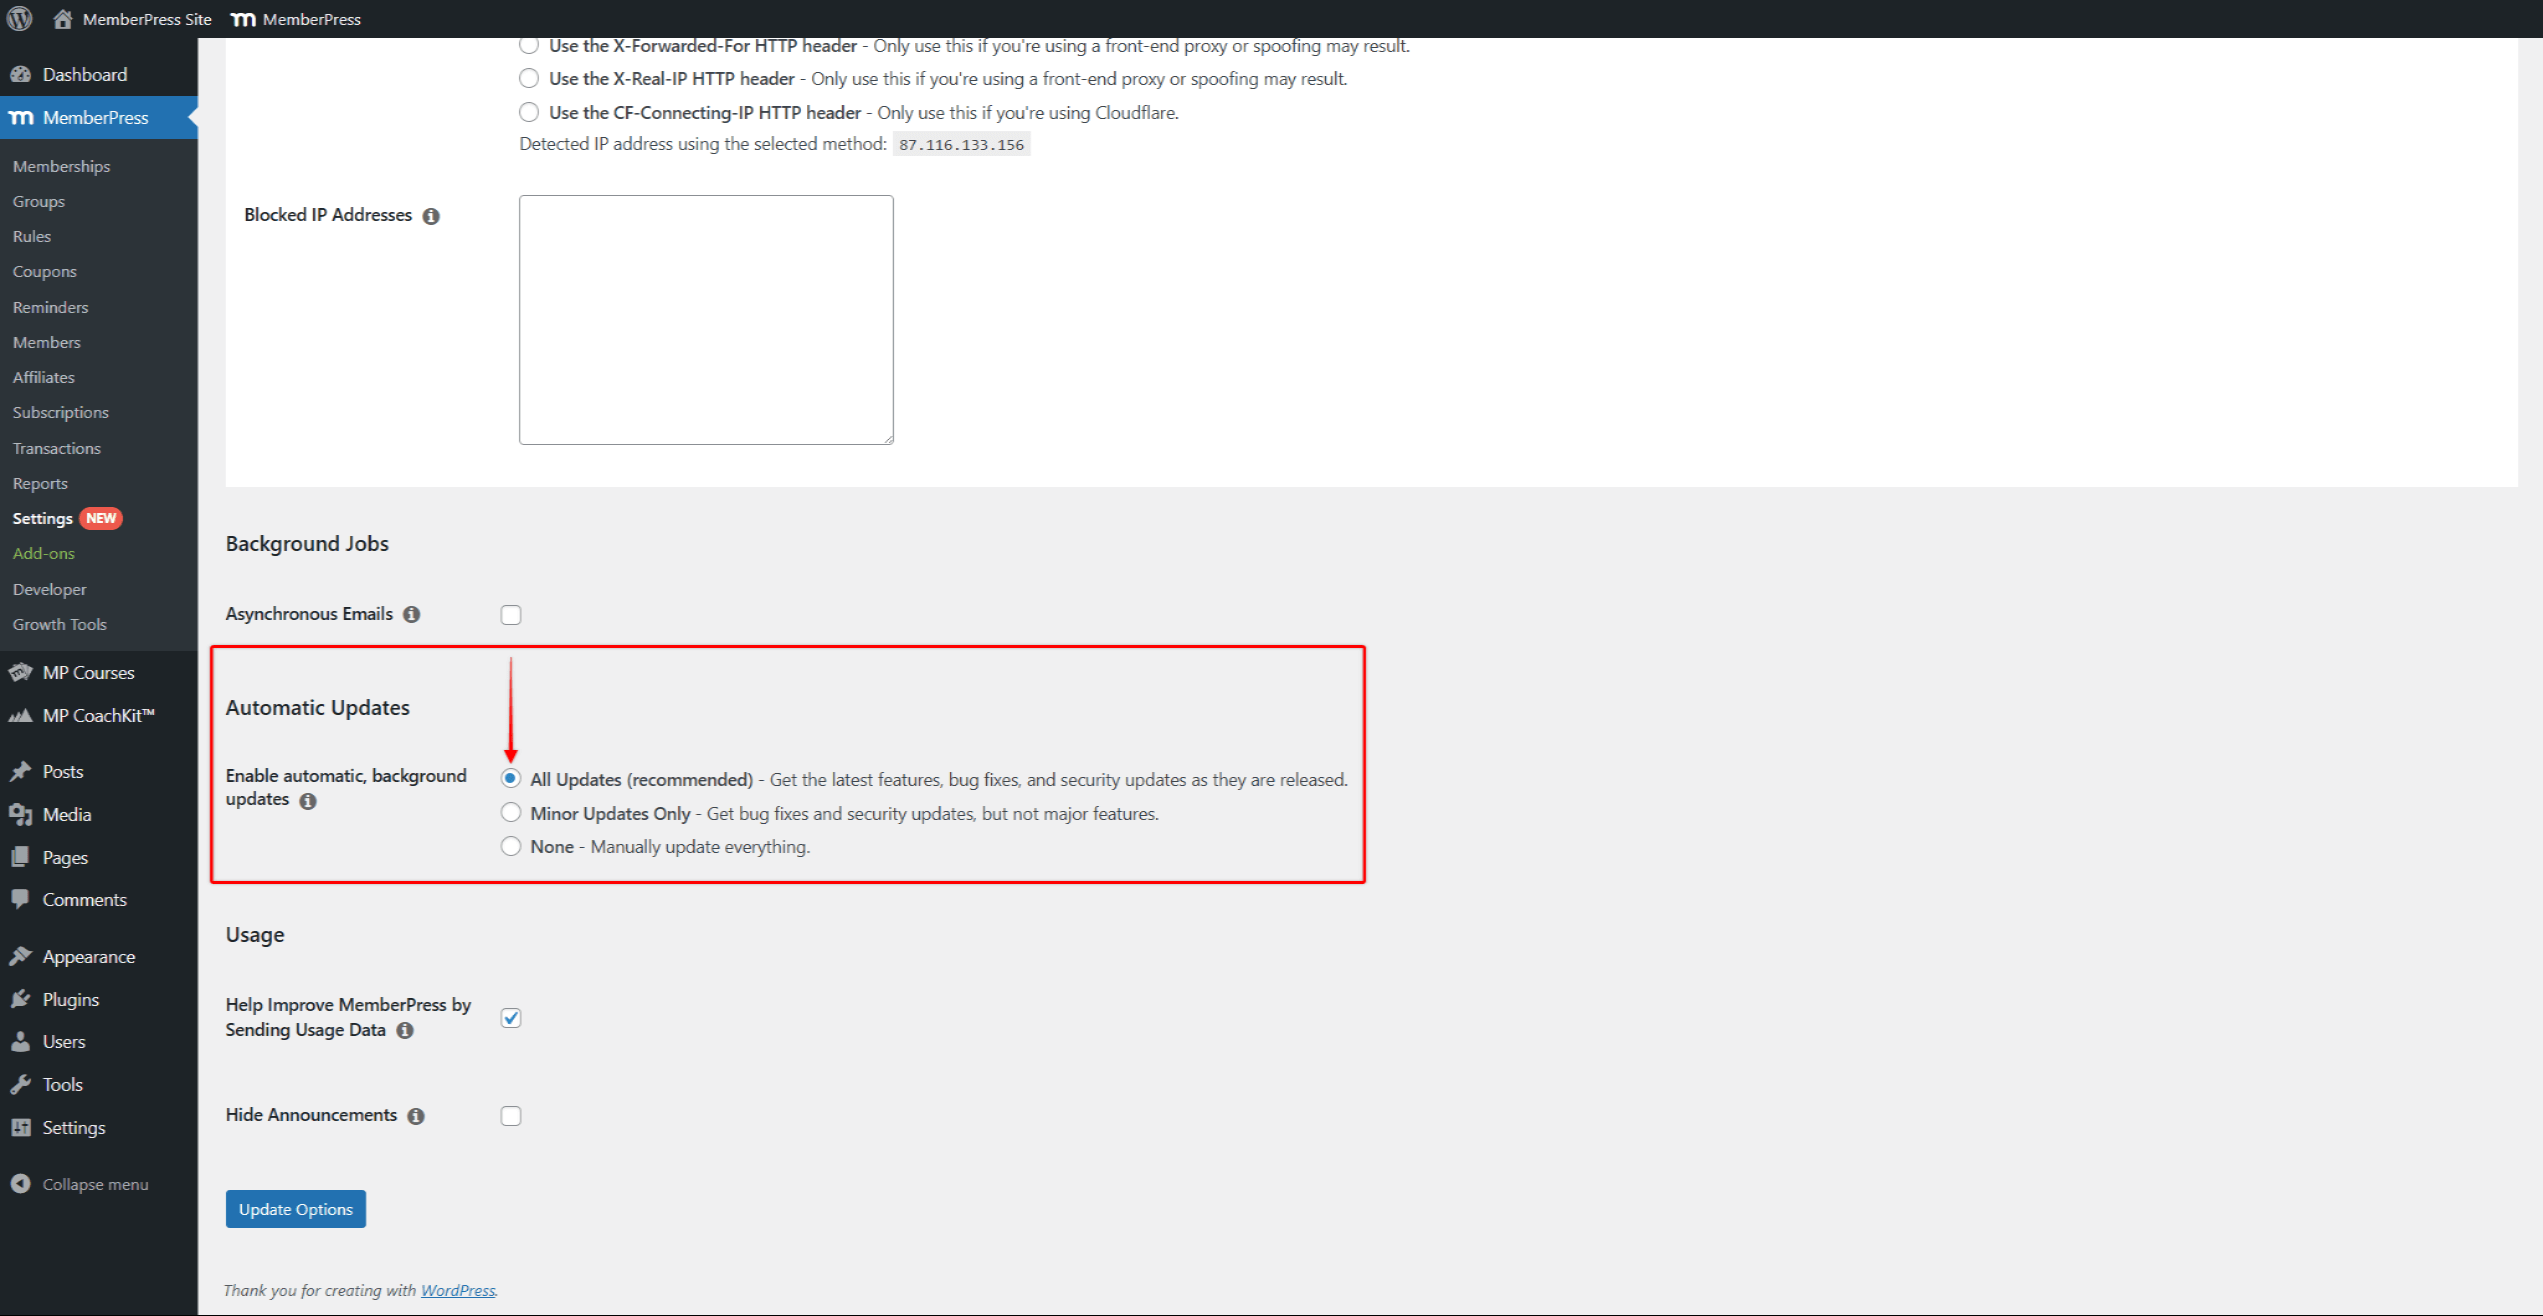
MemberPress settings (MemberPress > Settings > General tab > Automatic Updates section) enable automatic updates by default. Therefore, the default option set will be to apply All updates released. Furthermore, if necessary, you can change this to Minor Updates Only or None (disabled).

Here, if you disable automatic updates, you will still receive notifications about MemberPress core plugin or add-on updates. Therefore, you can decide whether to update the plugin and do the update at a time that fits your schedule.
Updating MemberPress Manually
If, for any reason, automatic updates are not possible or do not meet your needs, you can update plugins manually. To update MemberPress or add-ons manually, follow these steps:
- Download the latest stable MemberPress or add-on version (.zip file) from your account page.
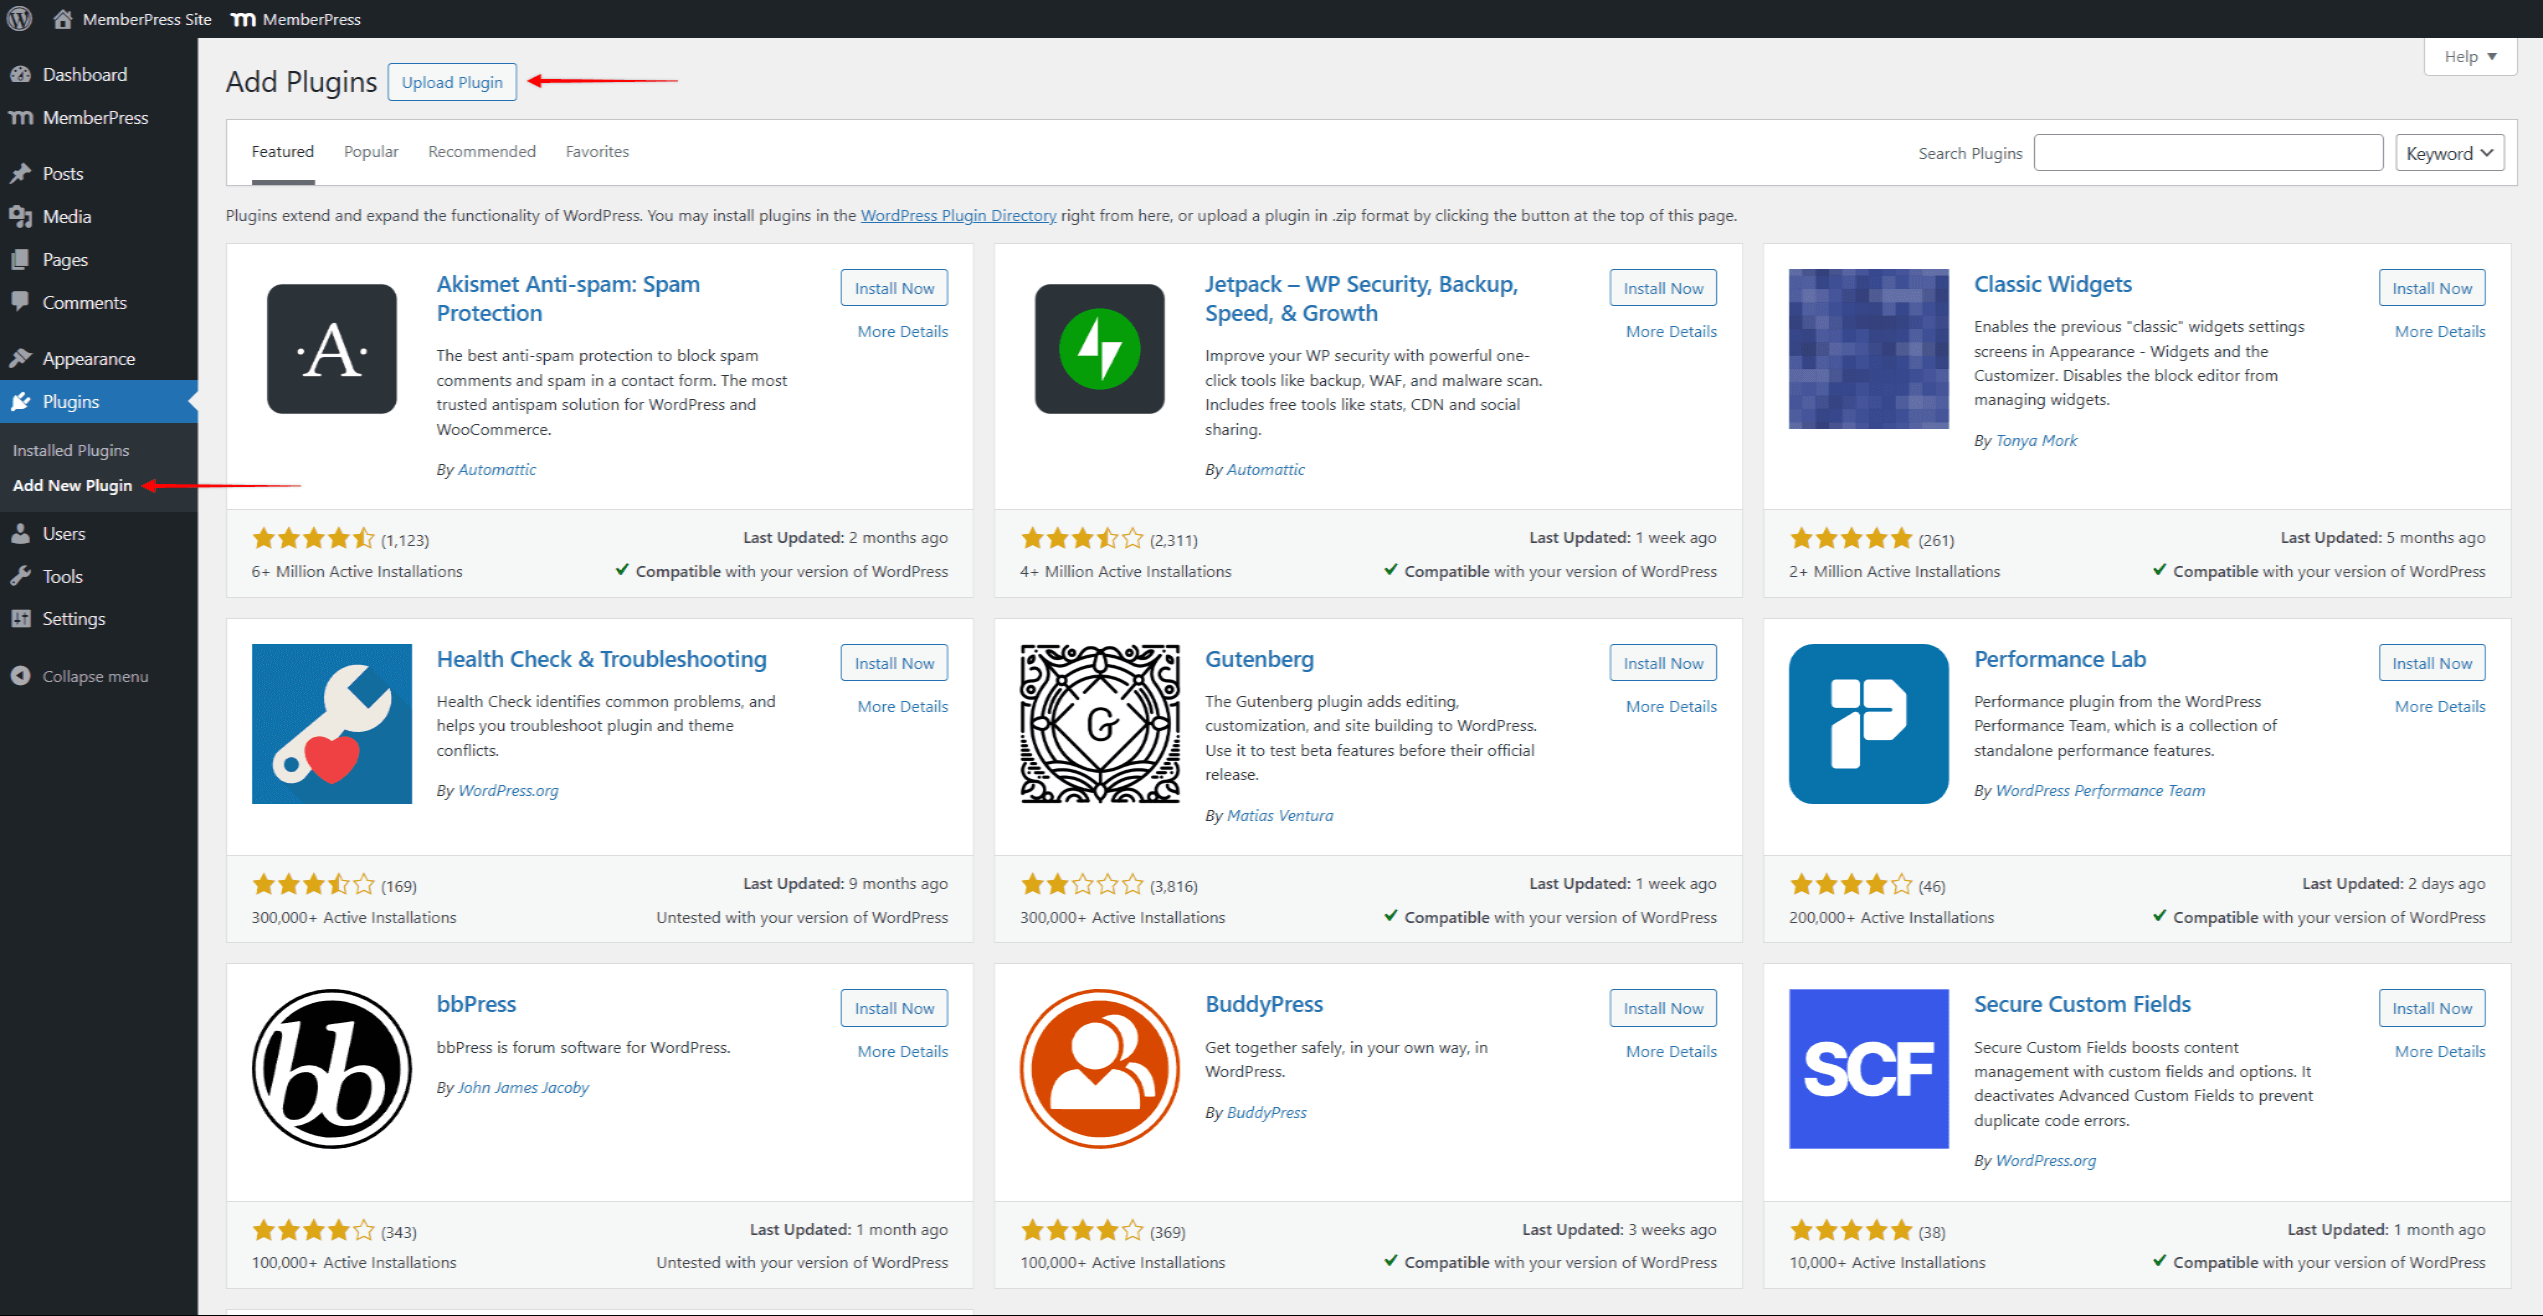
- Log in to your website and navigate to Dashboard > Plugins > Add New Plugin.

- Click the Upload Plugin button.
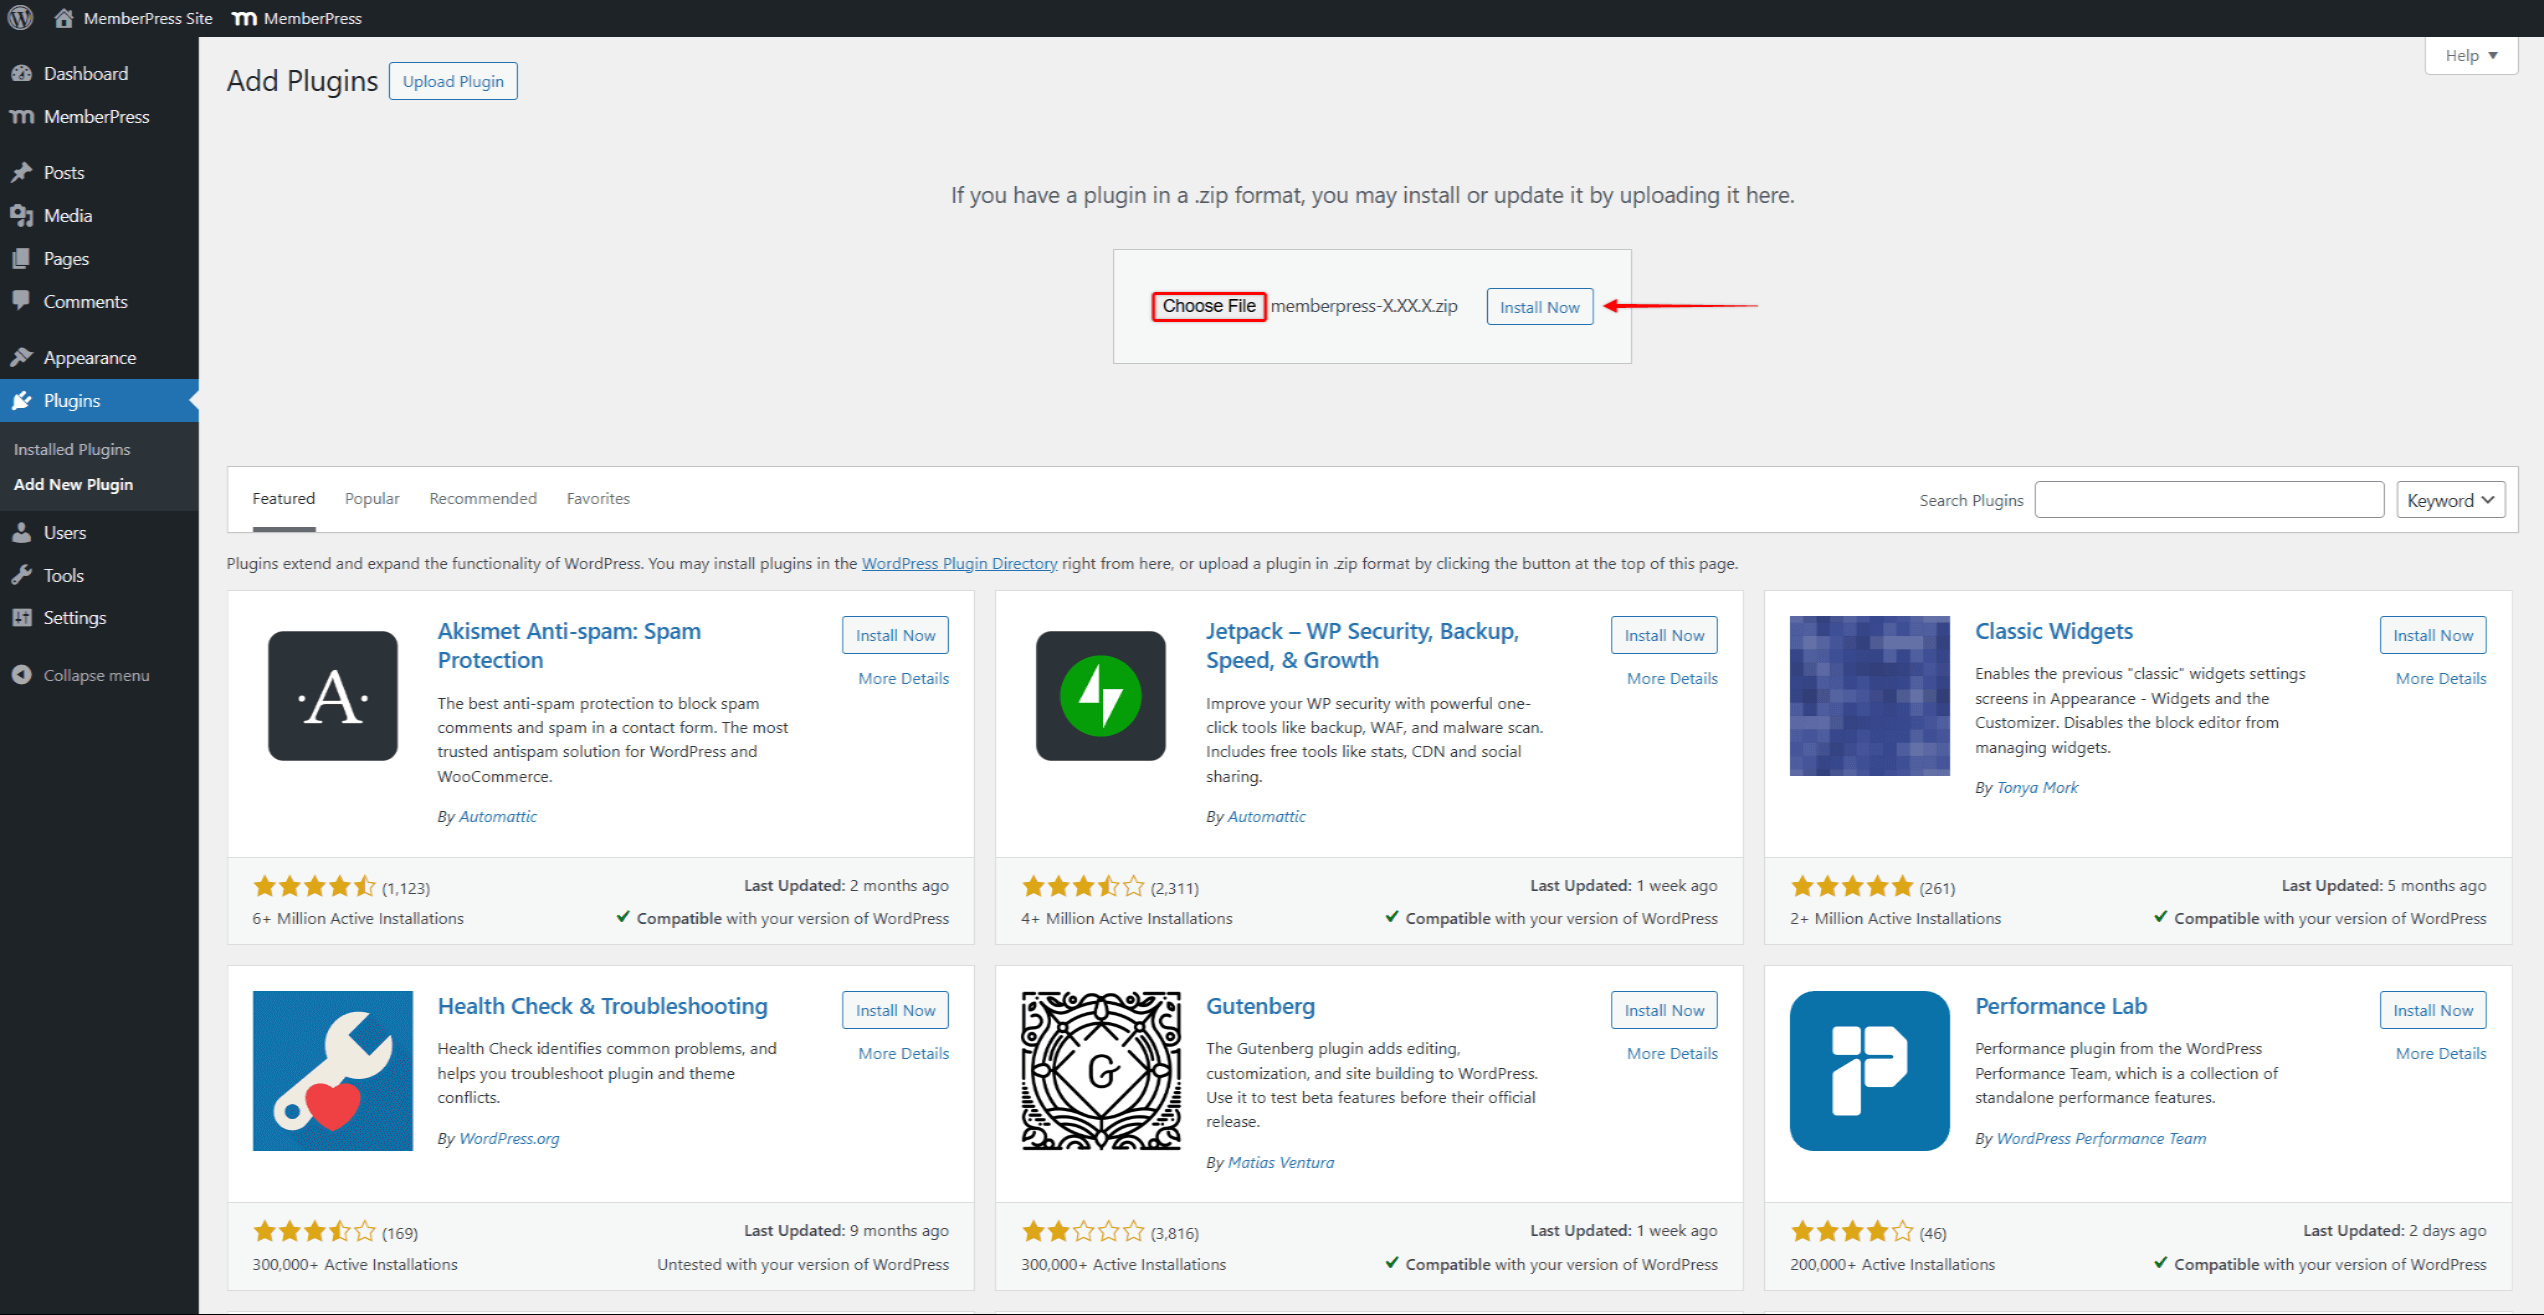
- Here, click Choose File and select the .zip file you previously downloaded to your computer.

- Click Install Now to upload and install the new version of the plugin.
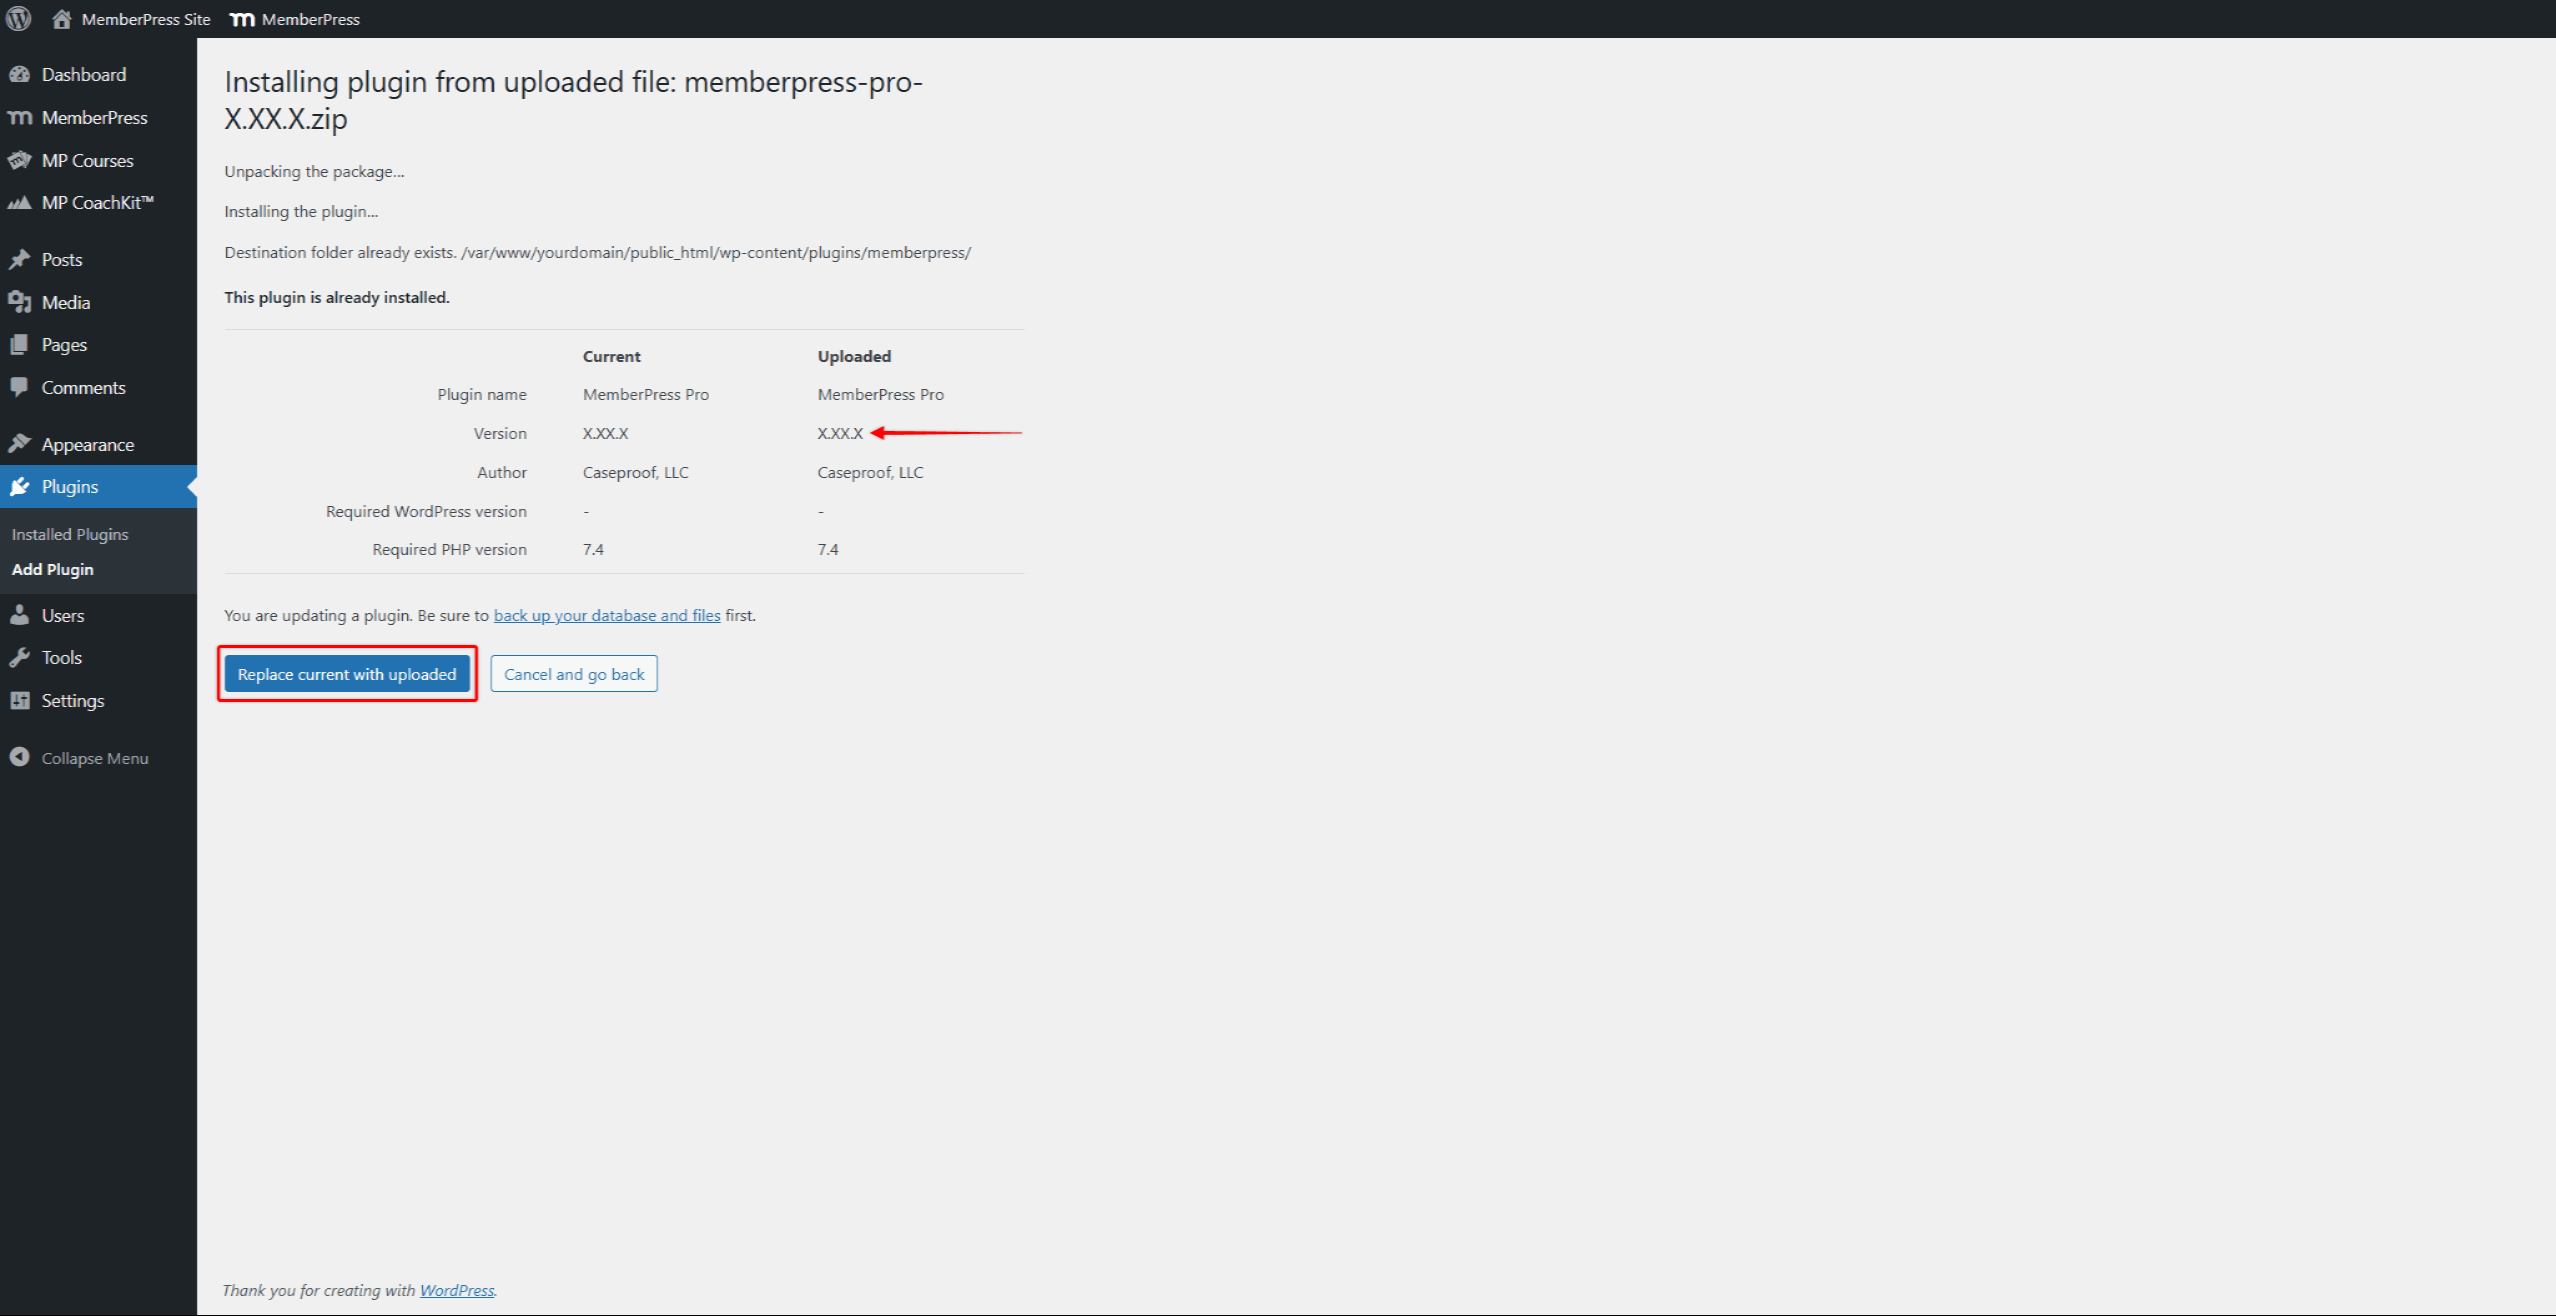
- On the next page, click the Replace current with uploaded button. This confirms that you wish to replace the existing plugin version on your website with the new one.

- Once the new version is installed, click Activate Plugin.


