In MemberPress, you sell your courses by having users register for the required membership. This means that enrollment in MemberPress Courses is based on the user's active subscription to a required membership.
When you create courses in MemberPress, they will be publicly available to any user, without Rules protecting each of them.
This document will show you how to protect MemberPress courses with rules, making them available only to authorized members. This way, only users who properly registered for your memberships will be able to enroll in your courses.
Protect MemberPress Courses – A Single Course
To protect a single Course, head to MemberPress > Rules > Add New page, and select the “Single Course” type from the drop-down. Then search for your Course by title and select it. Last, select which Membership(s) will provide access to this Course when purchased. Your Rule should then look something like this:
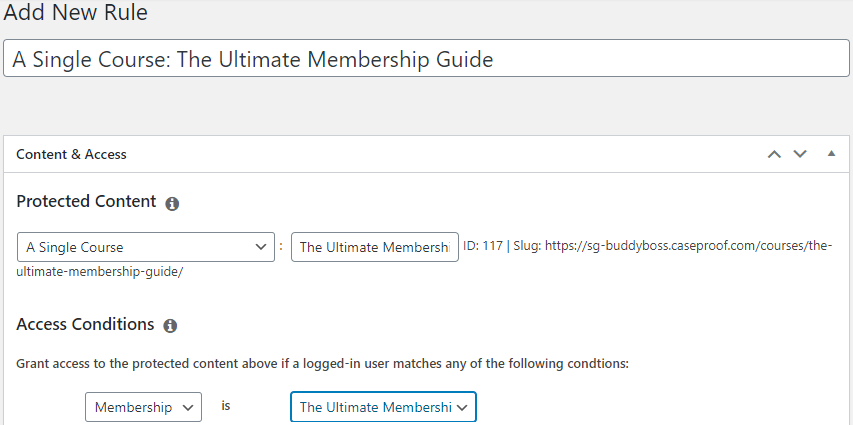
Your course is now protected from unauthorized views by guests or members who are not subscribed to one of the Membership(s) you selected in the Rule's Access Conditions.
Protect MemberPress Courses – All Courses
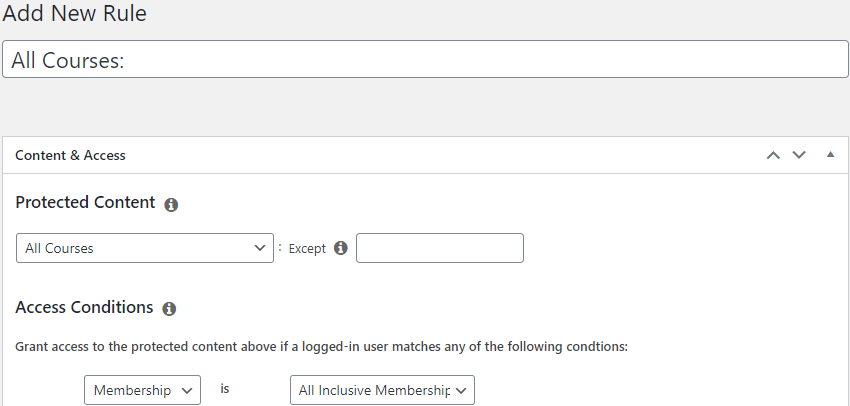
Protecting all Courses is very similar to protecting a single Course. Head to MemberPress > Rules > Add New and select the “All Courses” type from the drop-down. Then add your Membership(s) in the Access Conditions. This will make it so that a user must purchase that Membership if they'd like to gain access to all the Courses. For example, you might create a Platinum Membership that provides members access to all of your Courses.
Your Rule should look something like this:
Protect MemberPress Courses Based on Completed Course
Furthermore, you might want your members to complete courses in a specific order. You can achieve this by setting a MemberPress rule condition to Course Completed.
To illustrate, we'll use an example:
- A user is required to purchase a Pro Membership to access two courses: Course A and Course B;
- Users must first complete Course A before they can access Course B.
In this case, we would protect courses in the following way:
- Create a Rule 1 to protect Course A. In the Access Conditions, set the rule to require the Pro Membership.
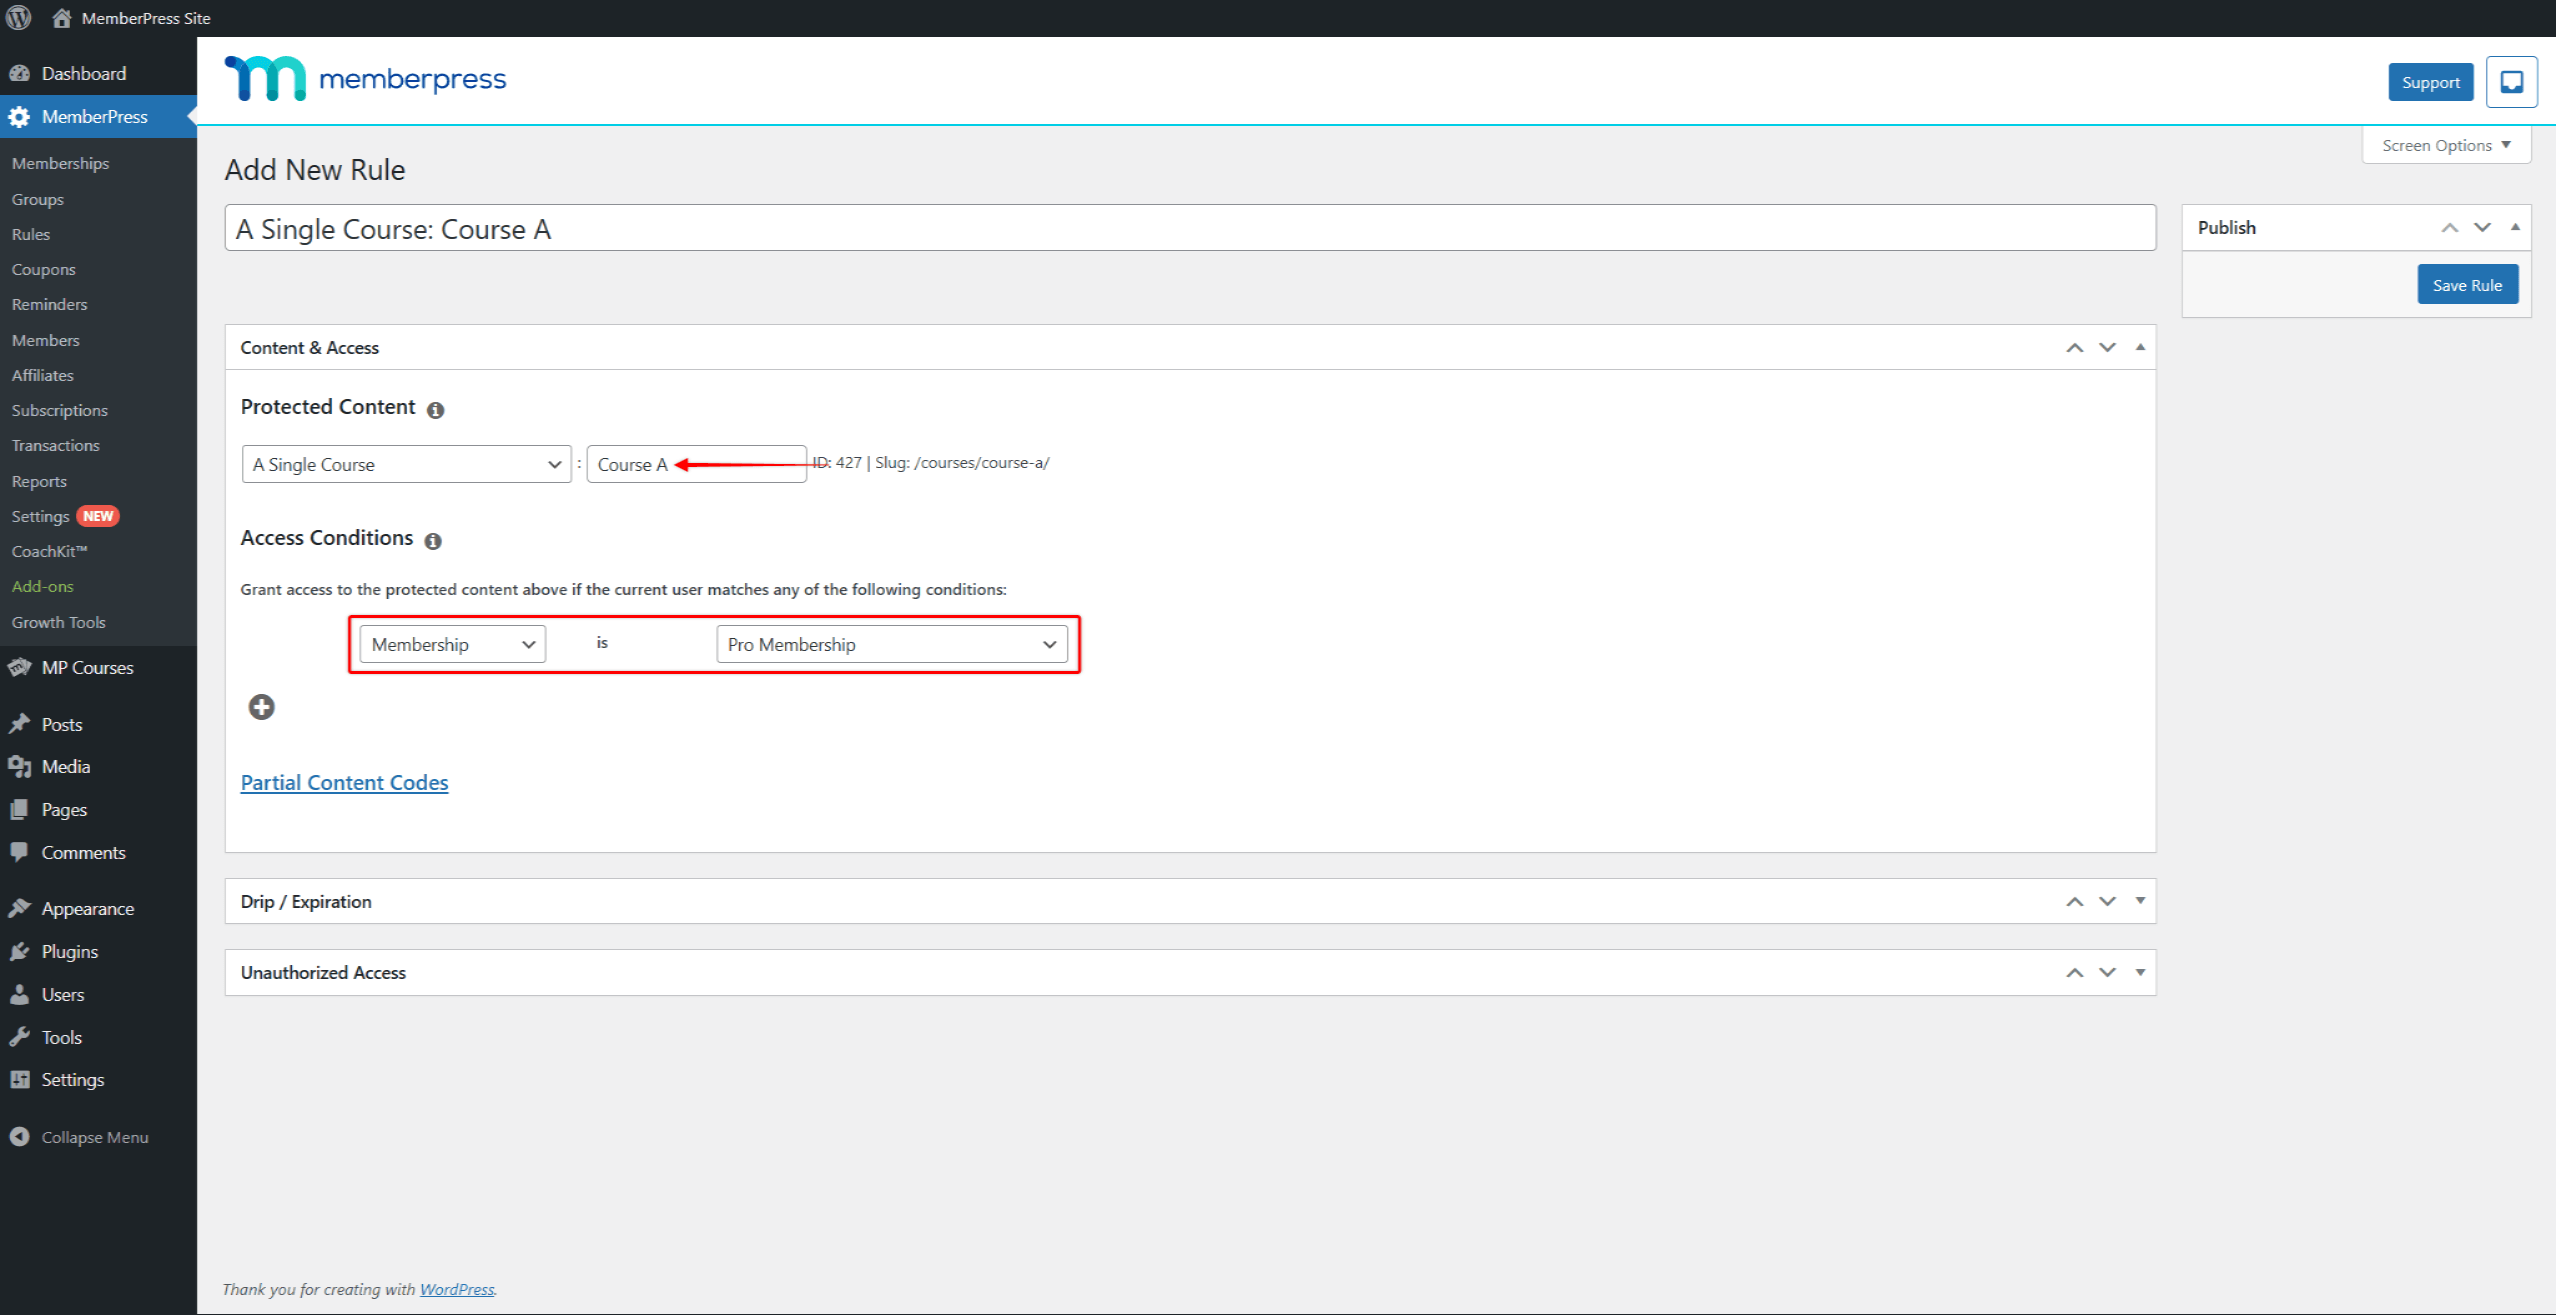
- Next, add Rule 2 to protect Course B. For this rule, set the condition to Course Completed and choose Course A.
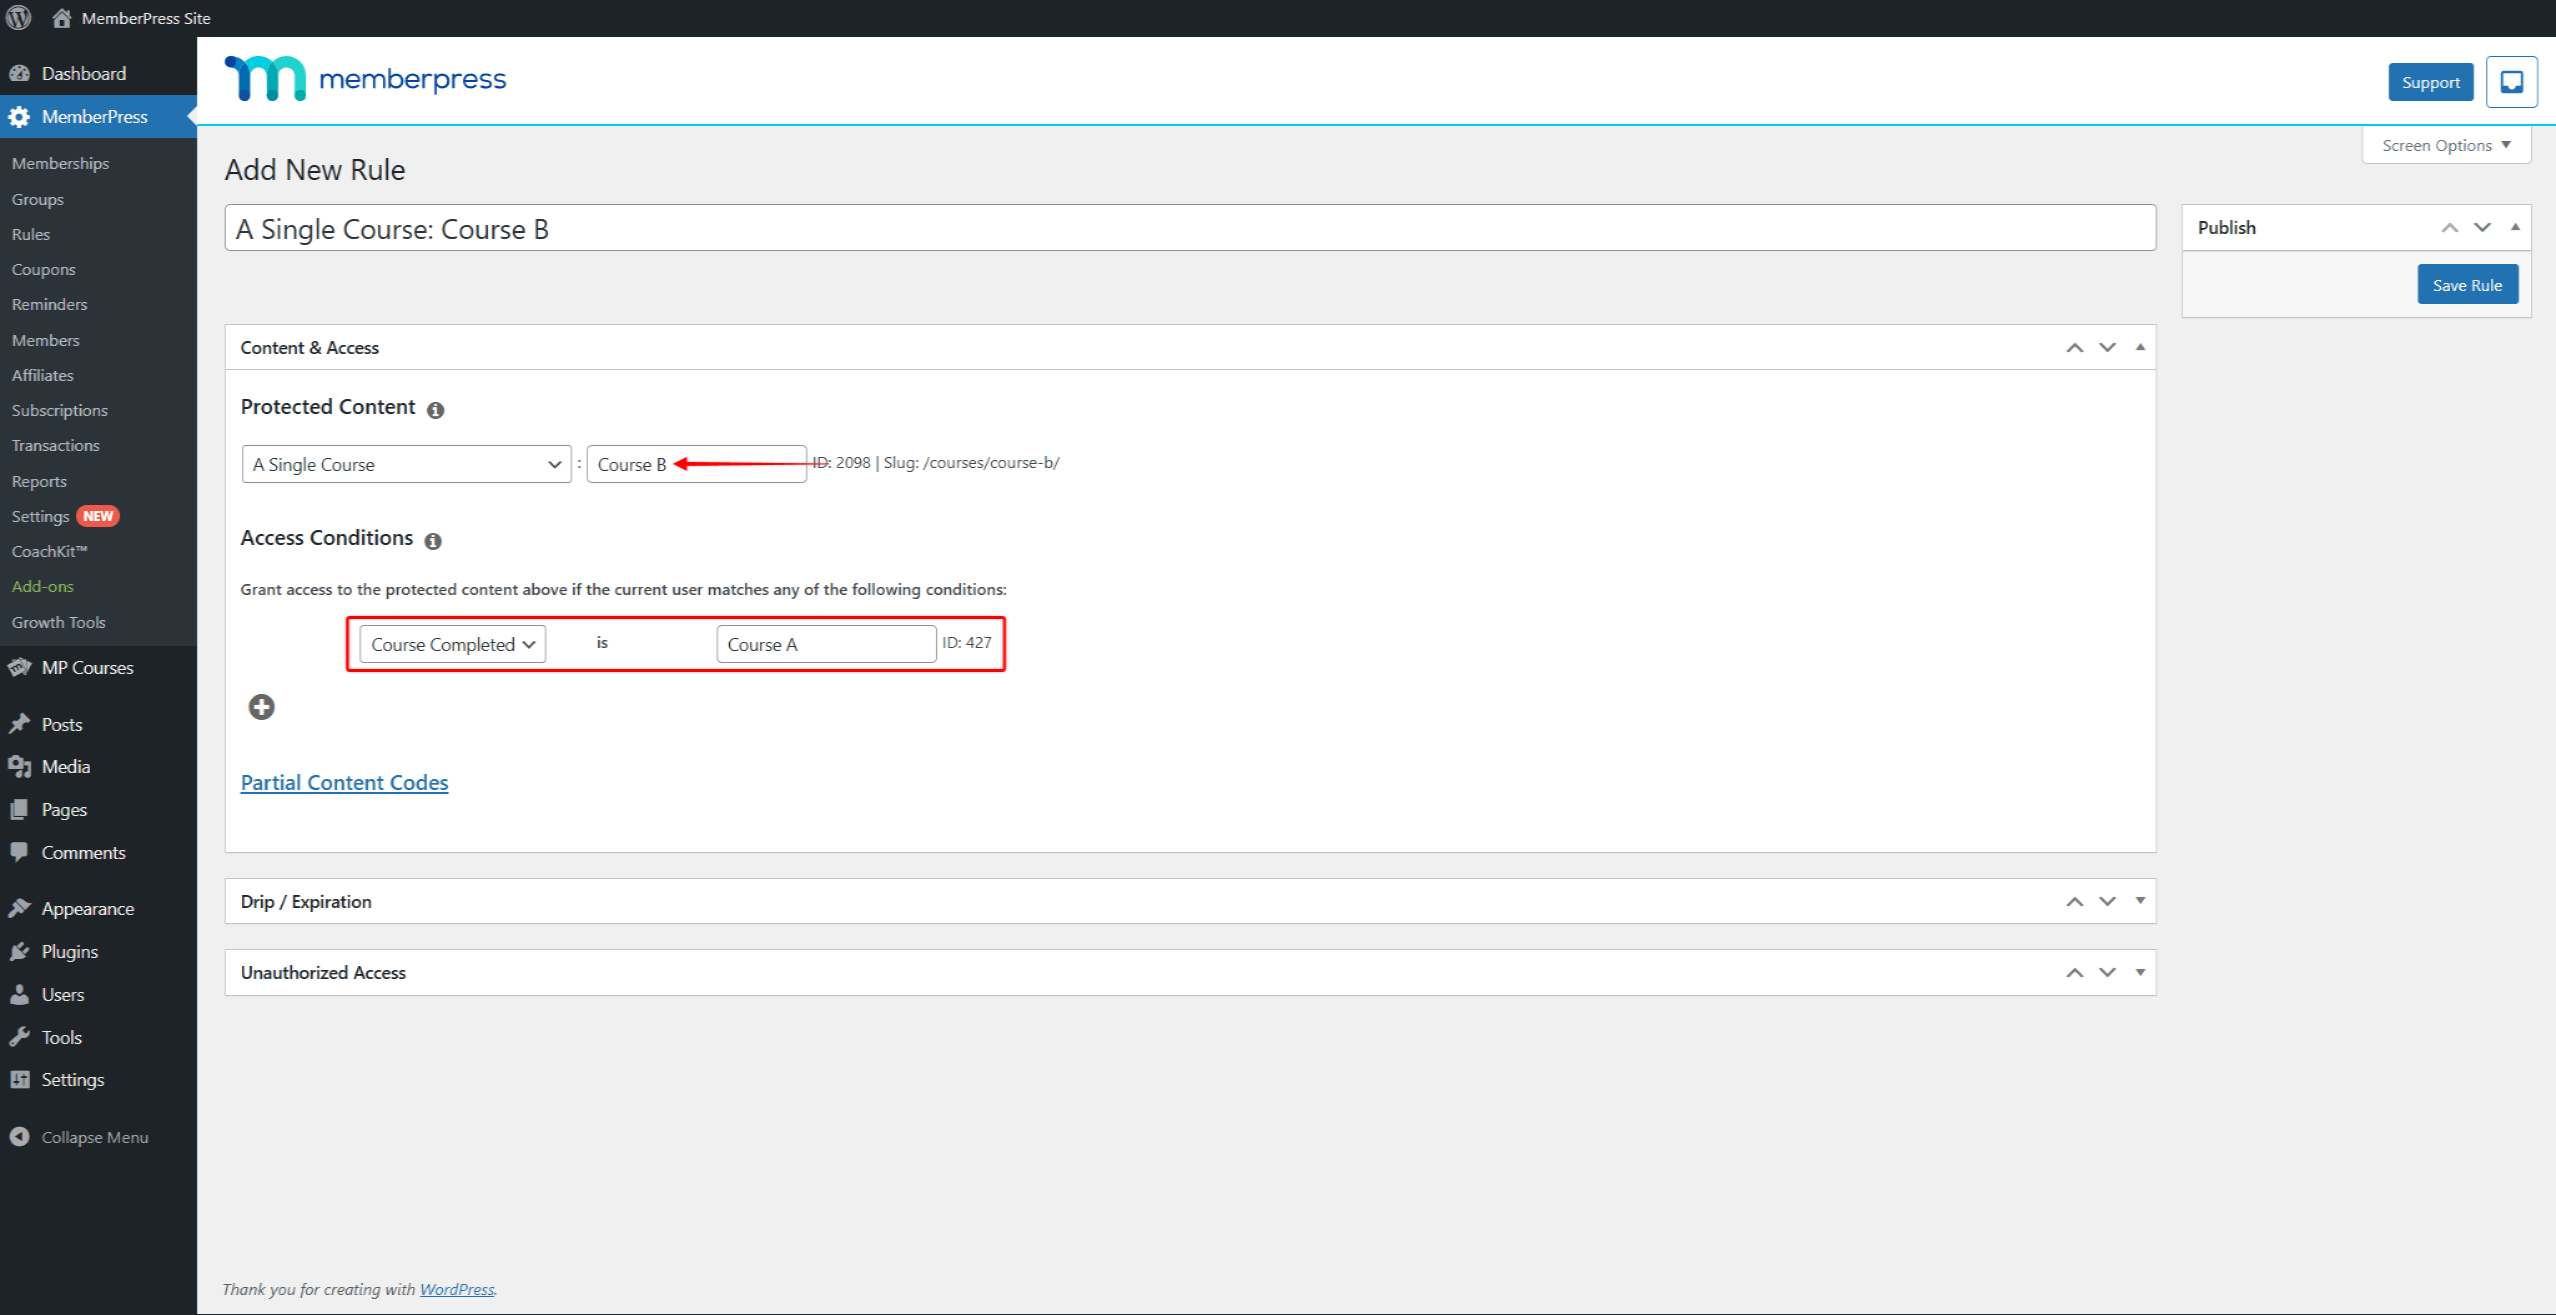
The second step should be repeated for each additional course in the group. Each new rule should be set to request completion of the previous course.
Protect MemberPress Courses Based on Tags or Categories
In some cases, you can provide access to courses, lessons, or quizzes in groups. For example, your courses might be grouped as Beginner, Advanced, and Professional. Here, purchasing a specific Membership should allow users to access all courses within only one of these groups. The best way to do this is to use Categories or Tags and create rules based on them.
Categorizing and Tagging Courses
Categorizing or tagging courses is beneficial if you need to provide access to groups of individual courses based on the membership purchased. This way, you can use a single rule based on a category or a tag to protect multiple courses.
To add or manage your Course categories or tags, follow these steps:
- Navigate to Dashboard > MP Courses > Courses page.
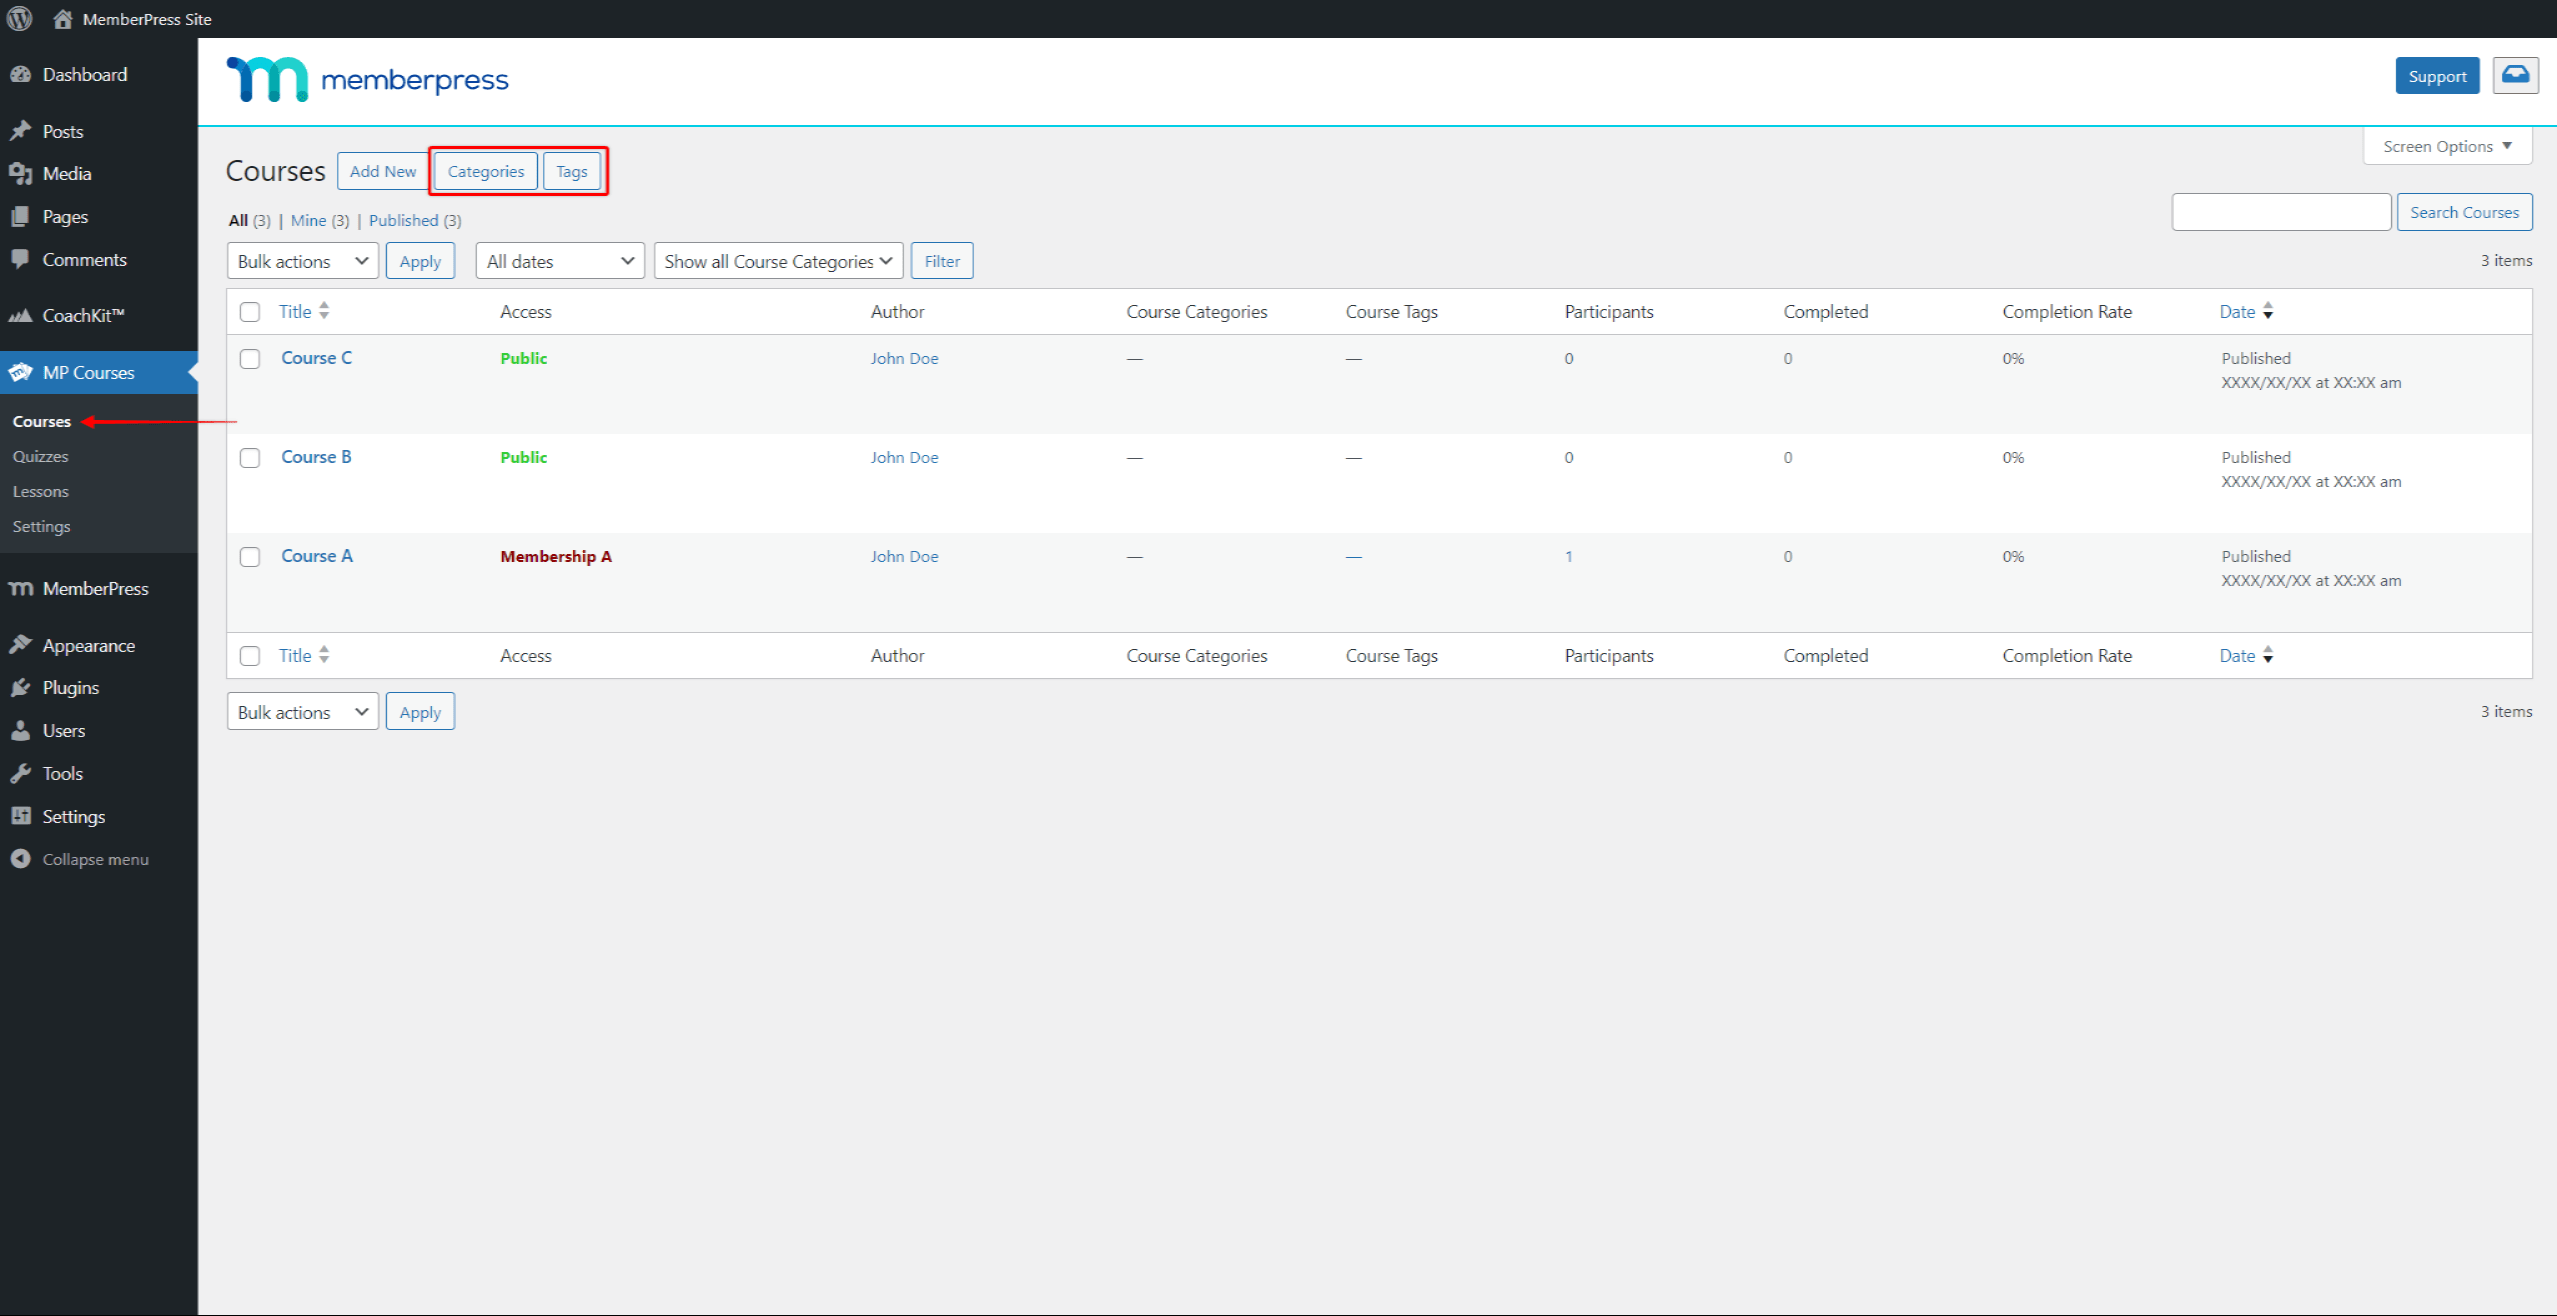
- Click the Categories or Tags button at the top of the page to add Course Categories or Course Tags.
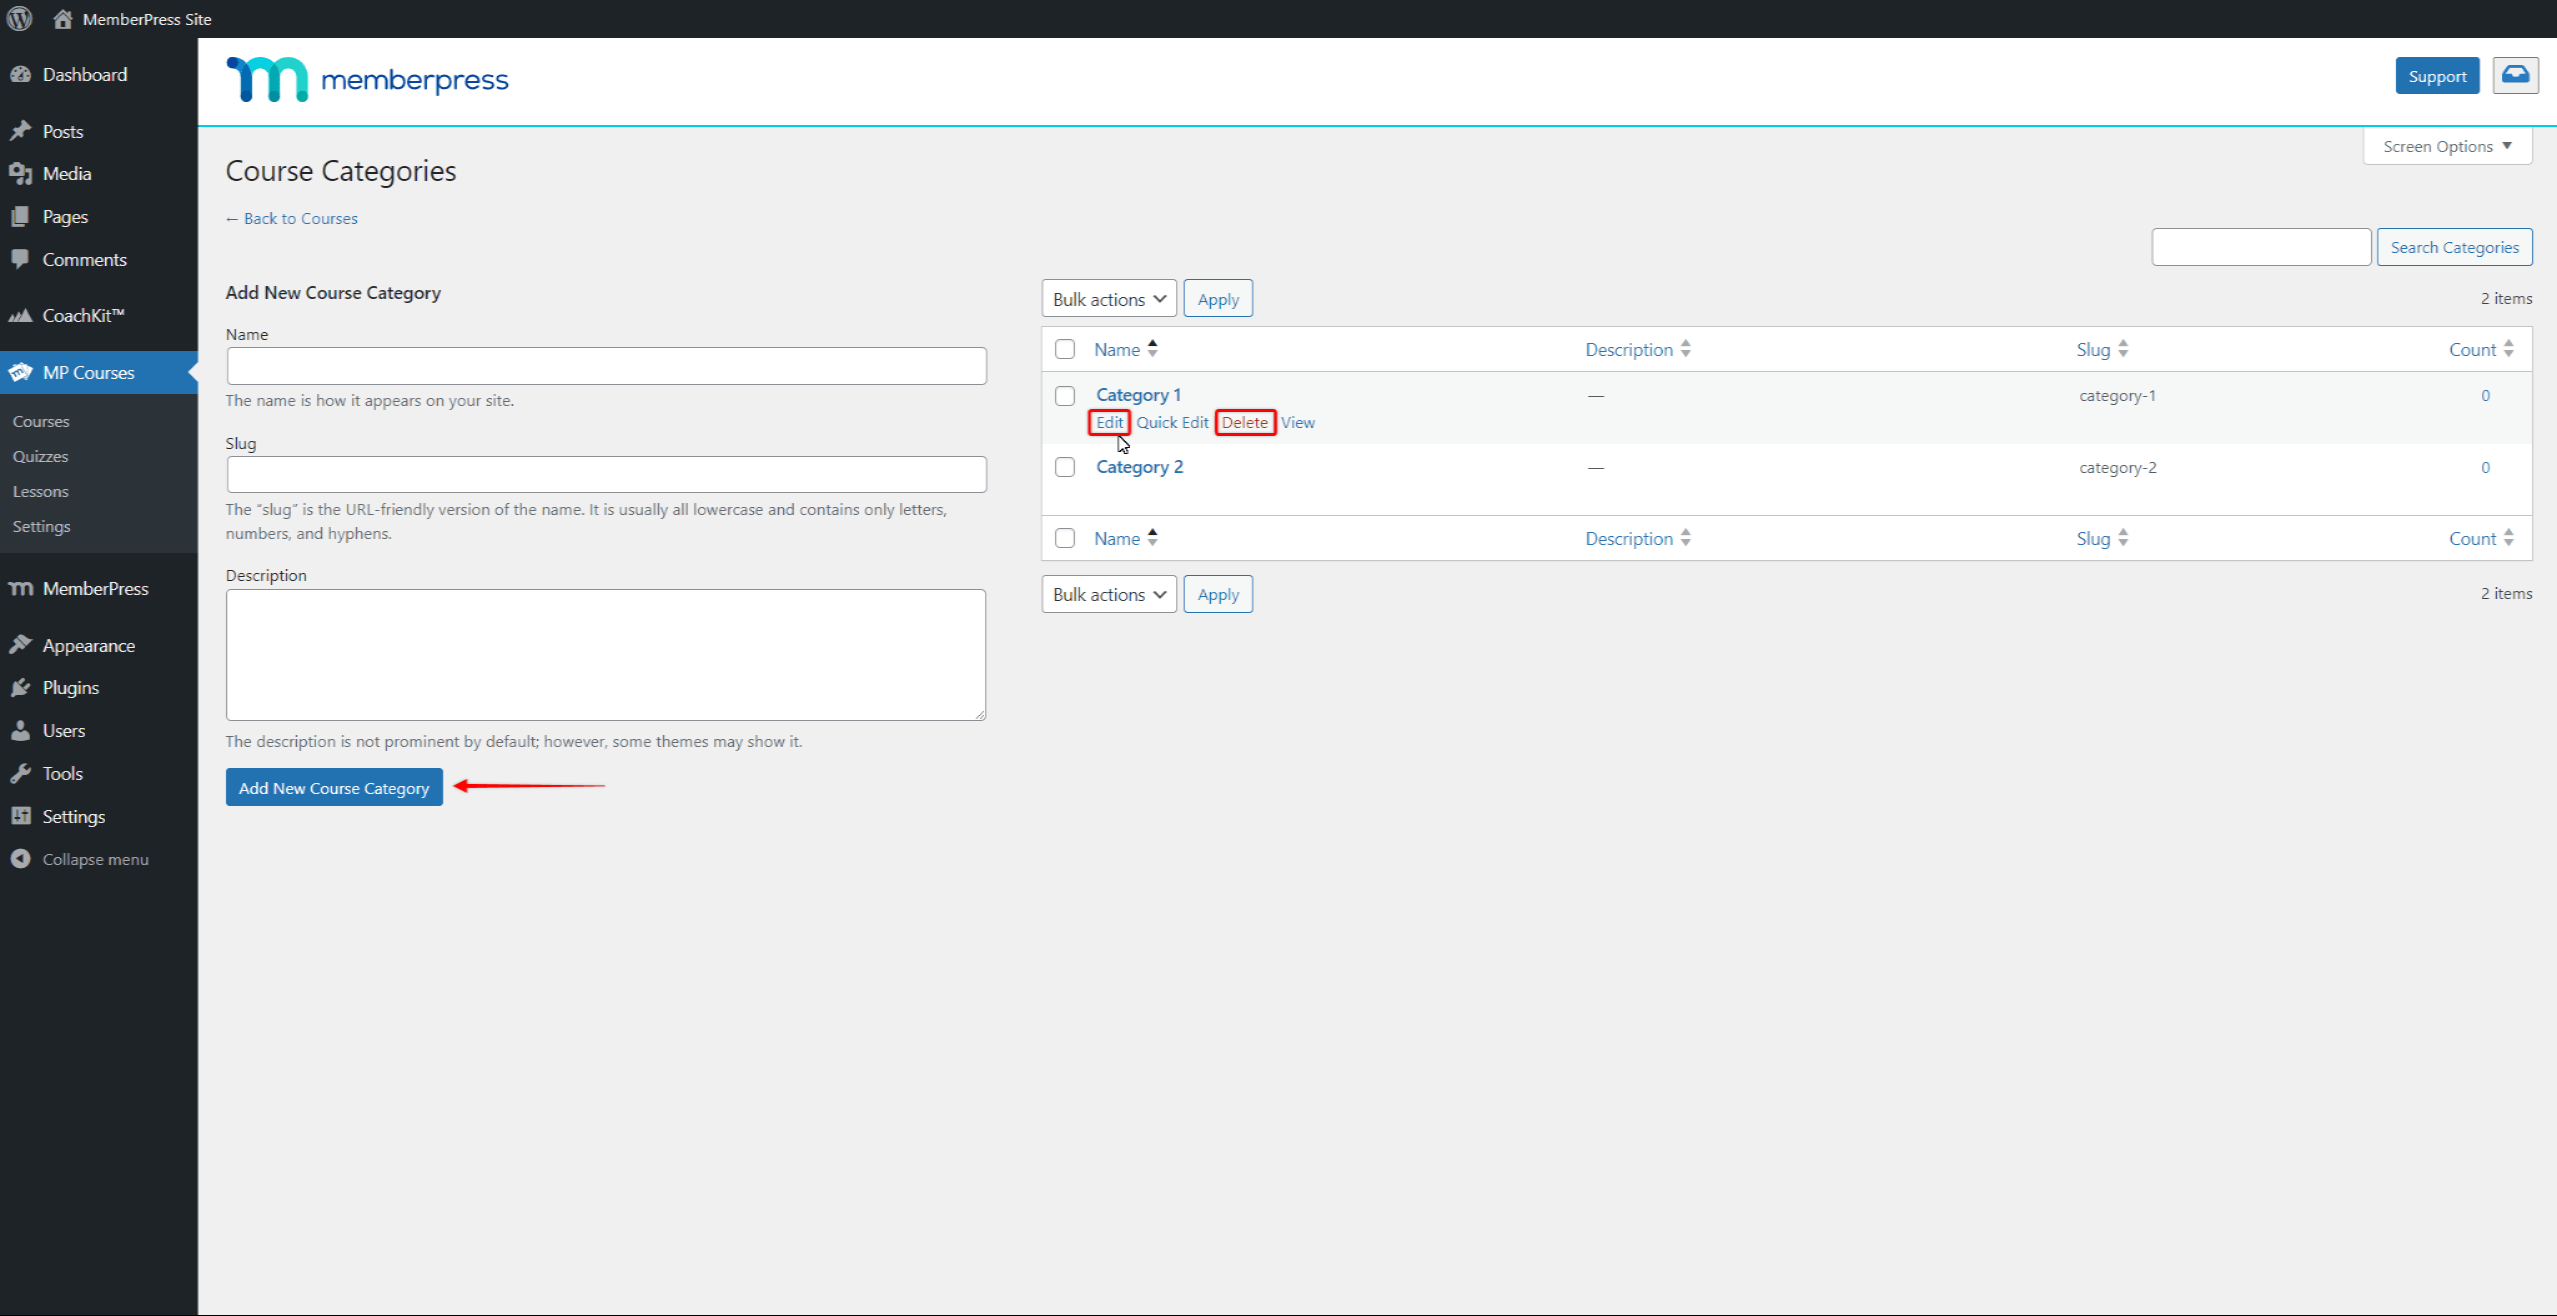
- Next, depending on the button you clicked, you’ll be transferred to the Course Categories or Course Tags page. You can create New categories or tags, and Edit or Delete existing ones on these pages.
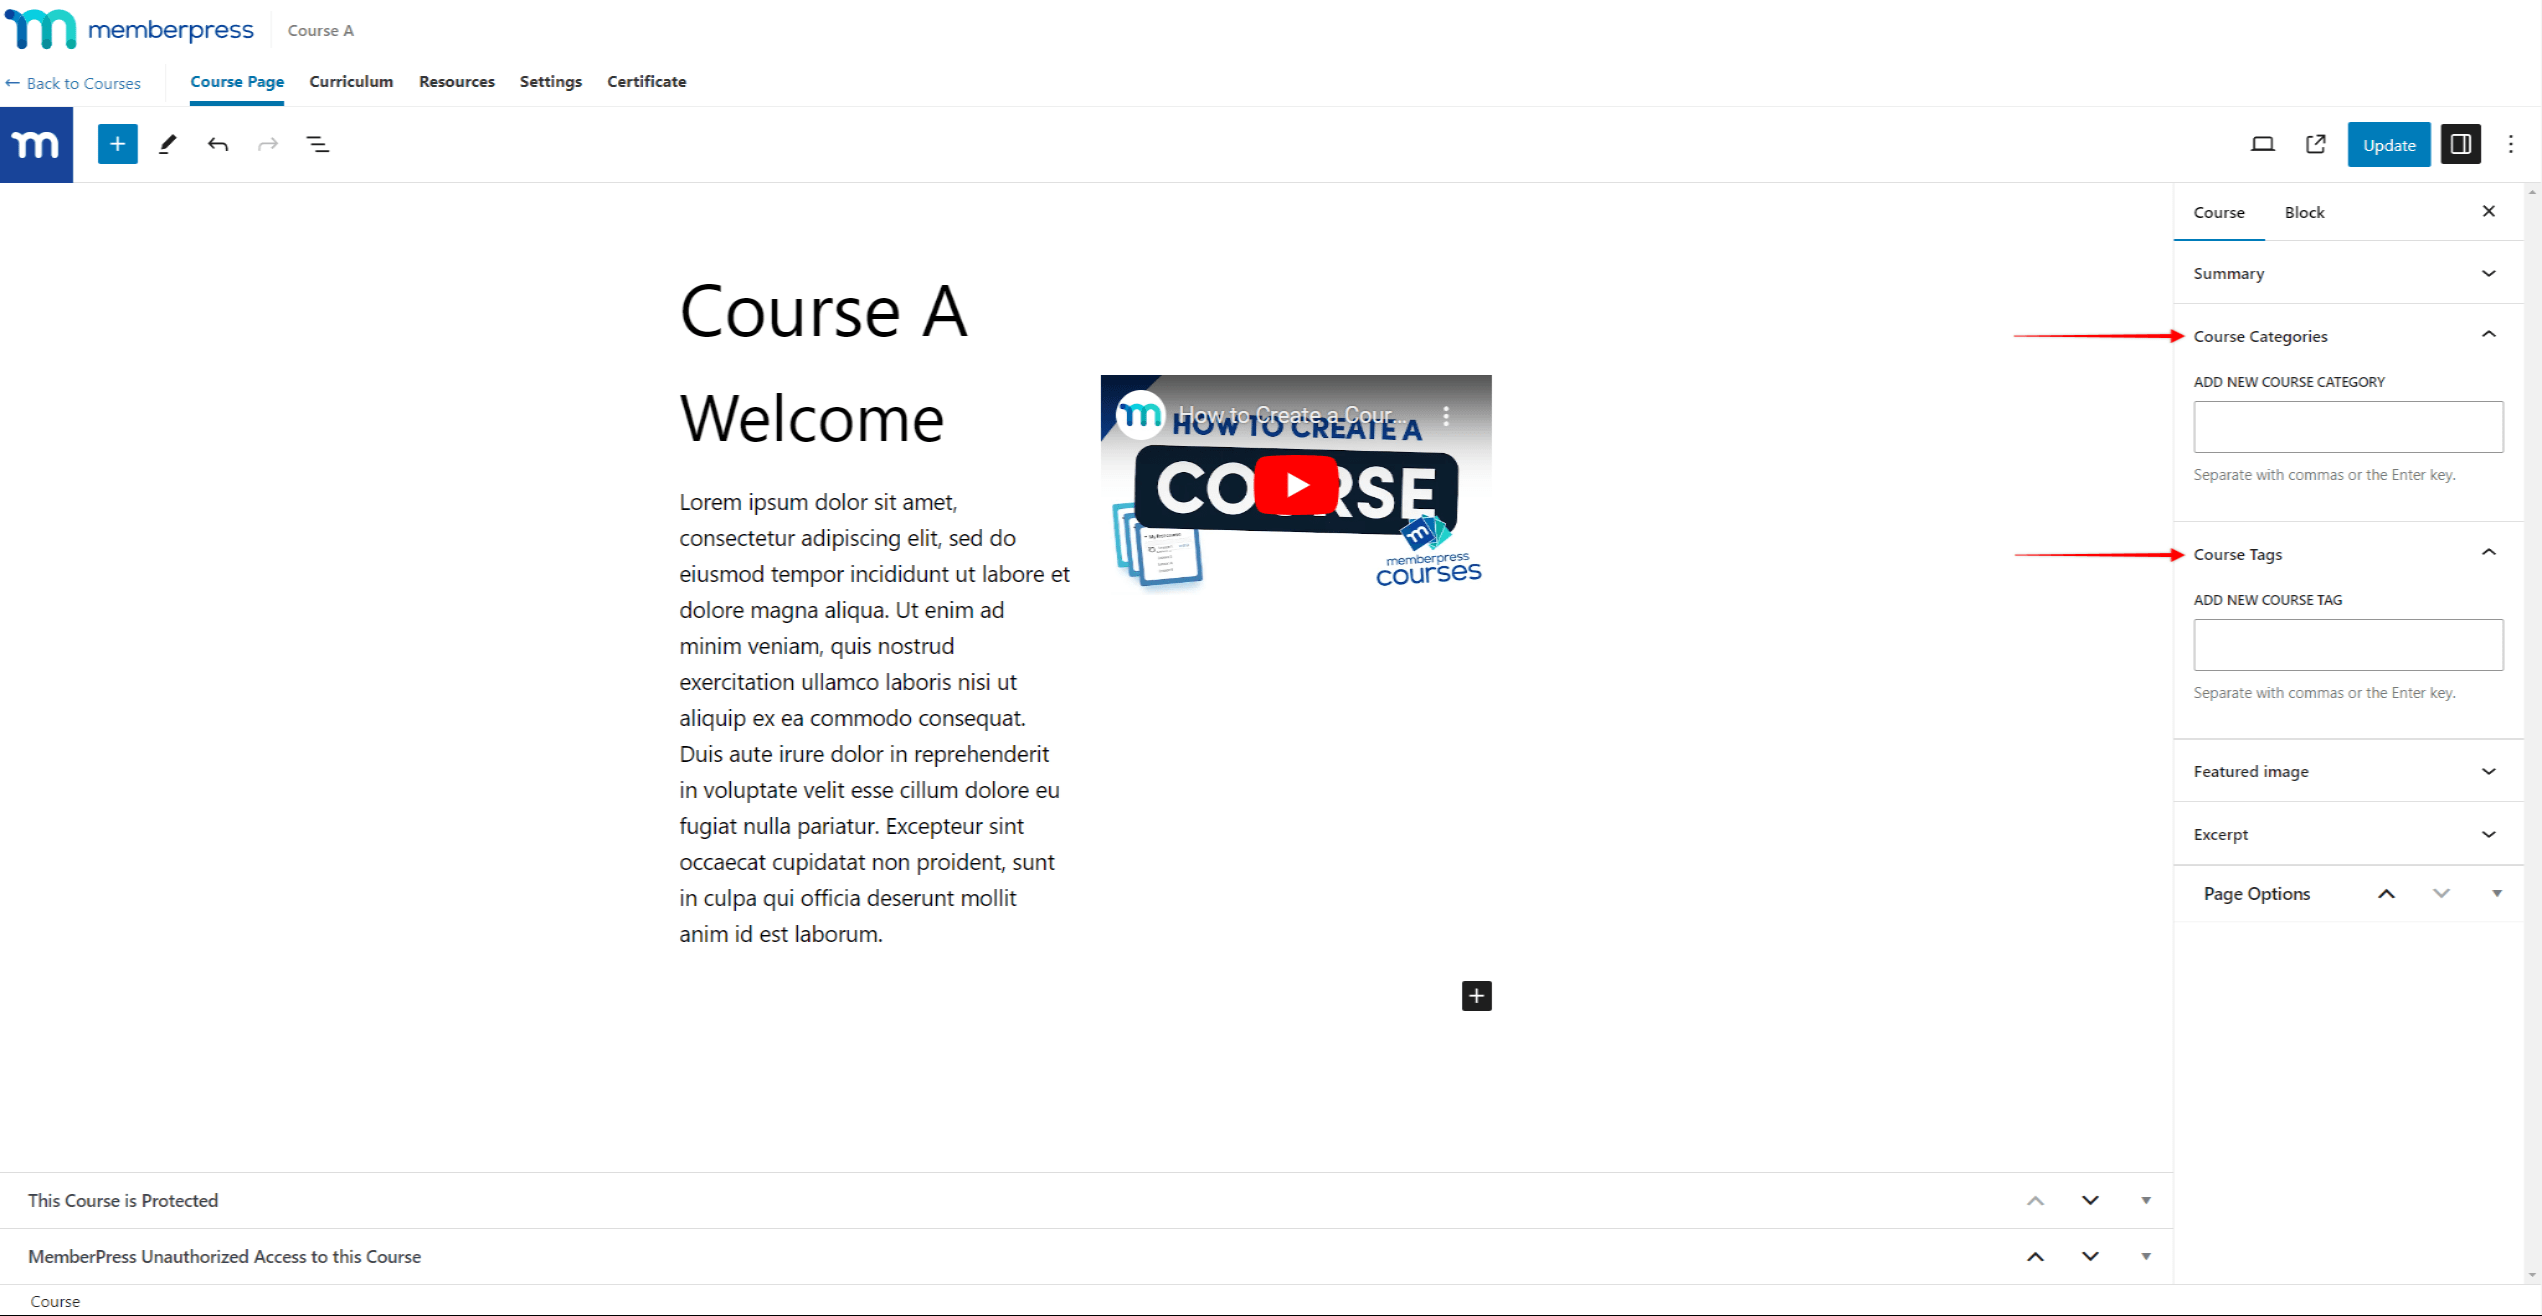
After you create Course categories and tags, you can add them to your courses through the Course editor. You will find the Course Categories and Course Tags panels on the right-hand menu of the Course editor.
Categorizing and Tagging Course Items
Similarly to Courses, you can use Curriculum Categories and Curriculum Tags to protect course items (Lessons, Quizzes, and Assignments).
Categories and tags could be used to create collections of lessons, quizzes, and assignments. For example, you could create a collection of all lessons, quizzes, and assignments that belong to one learning unit. Then, you can protect each of these collections with a single rule.
As with Courses, you can find Categories and Tabs buttons on the top of dedicated course item pages. To manage these categories and tags, access the Curriculum Categories or Curriculum Tags page by clicking the buttons above.
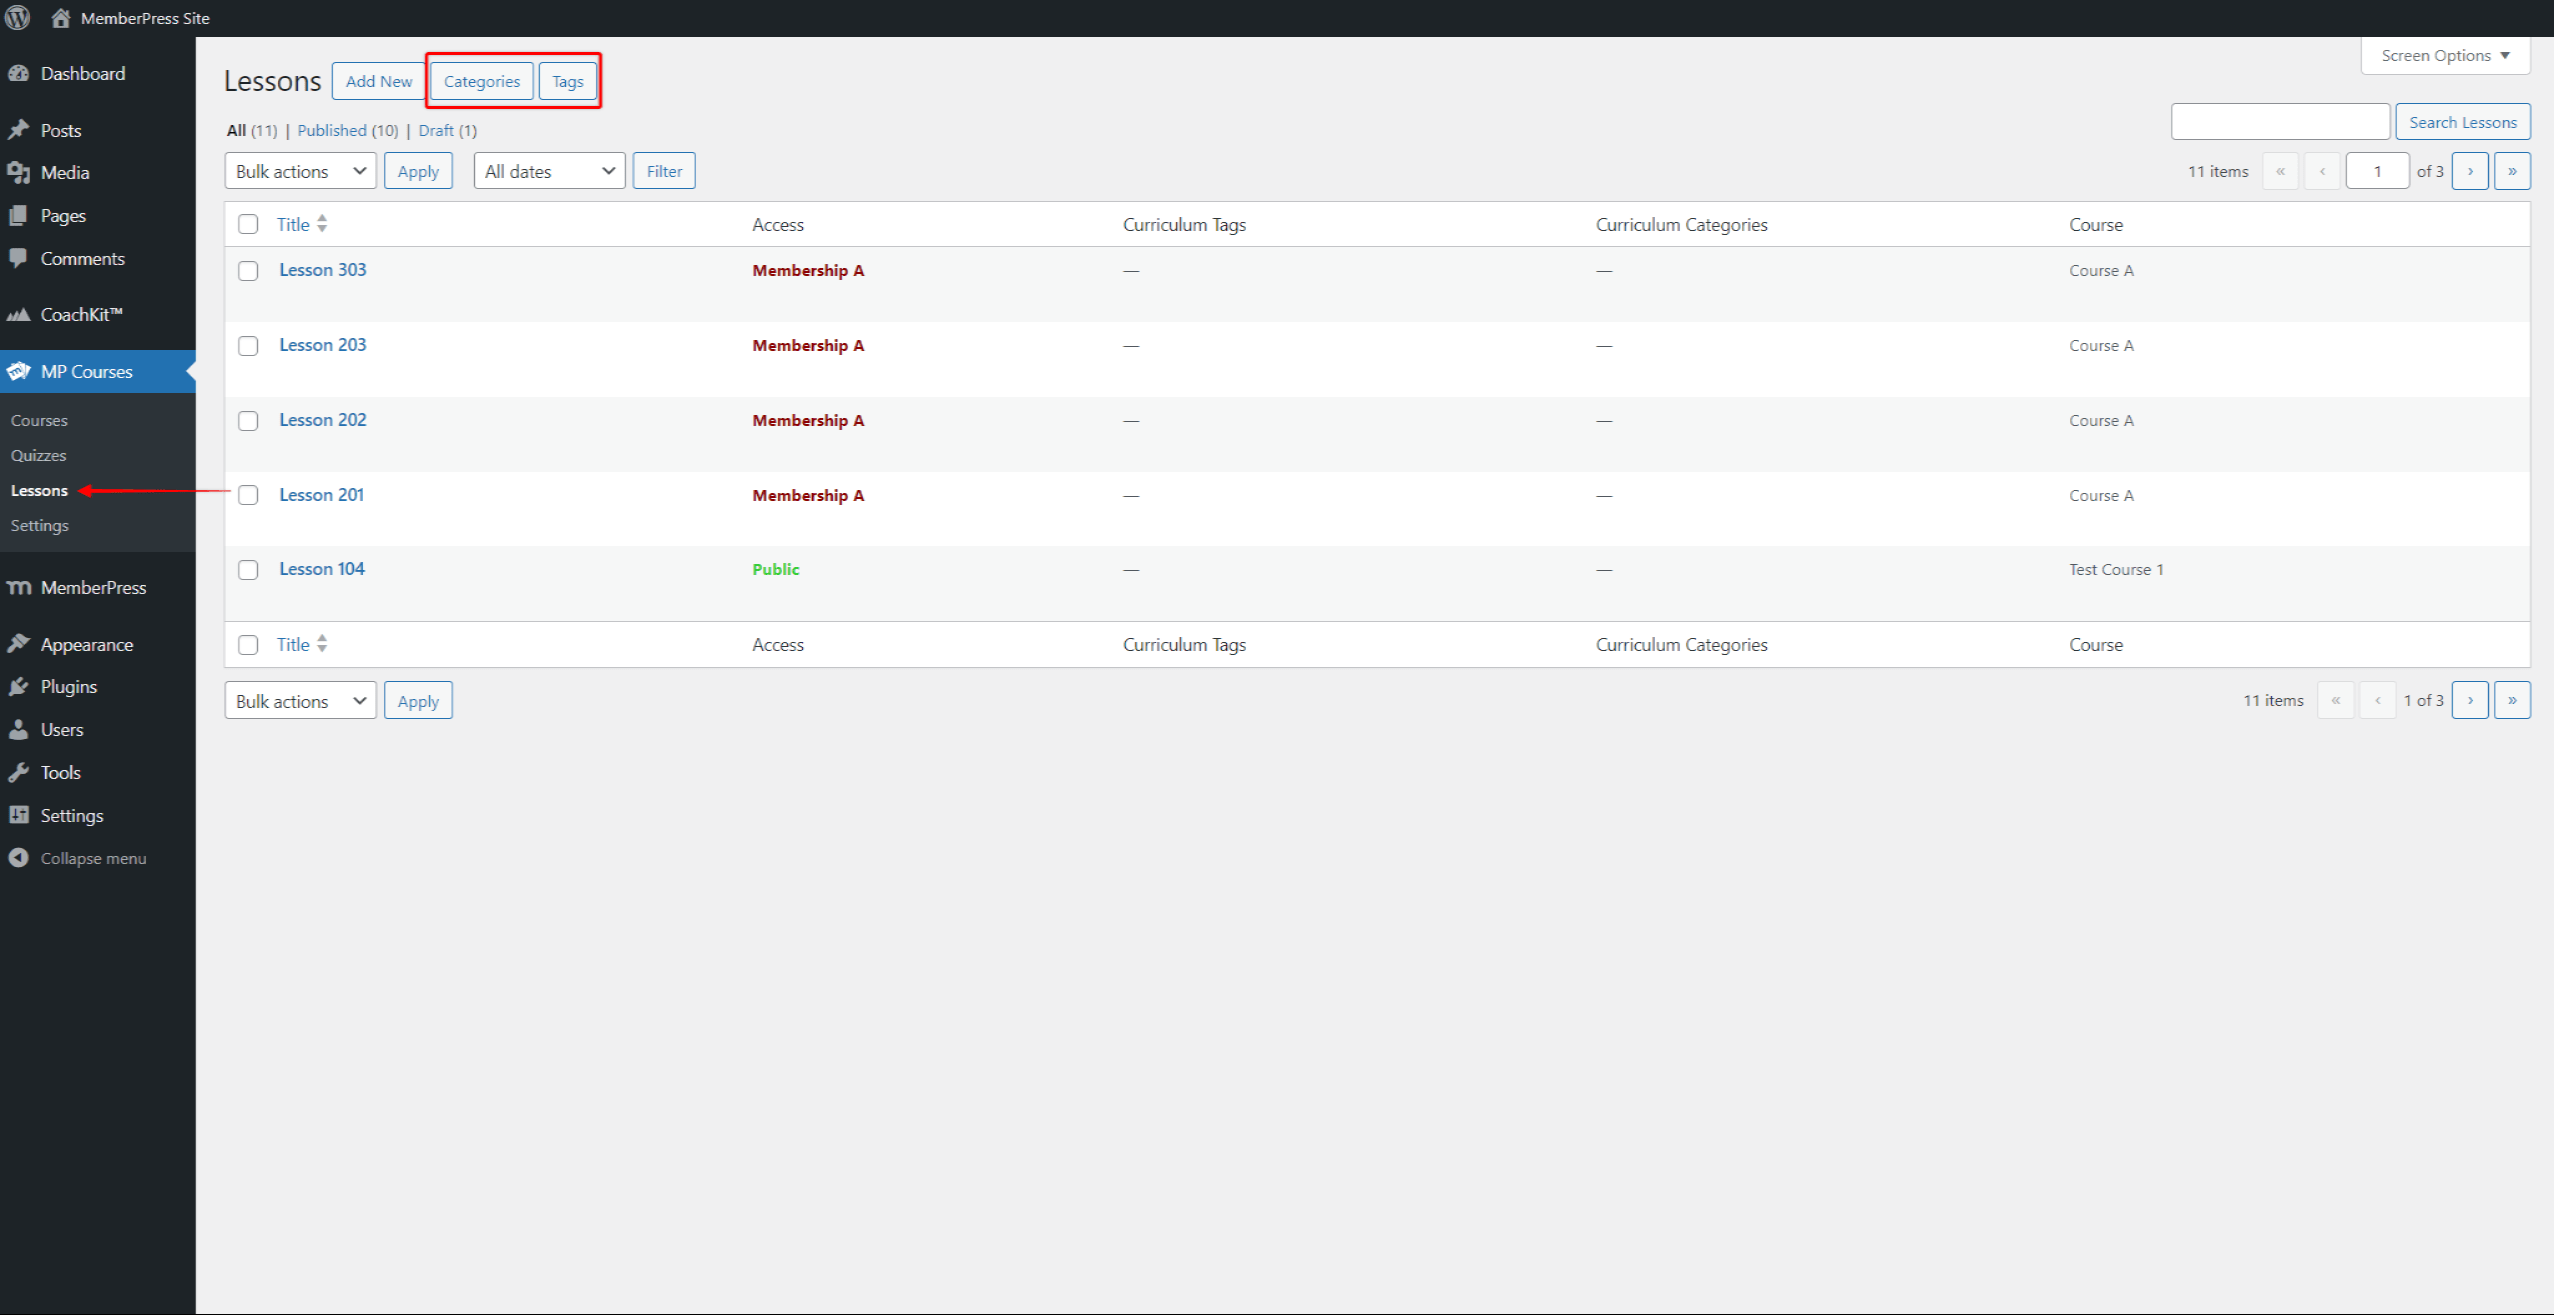
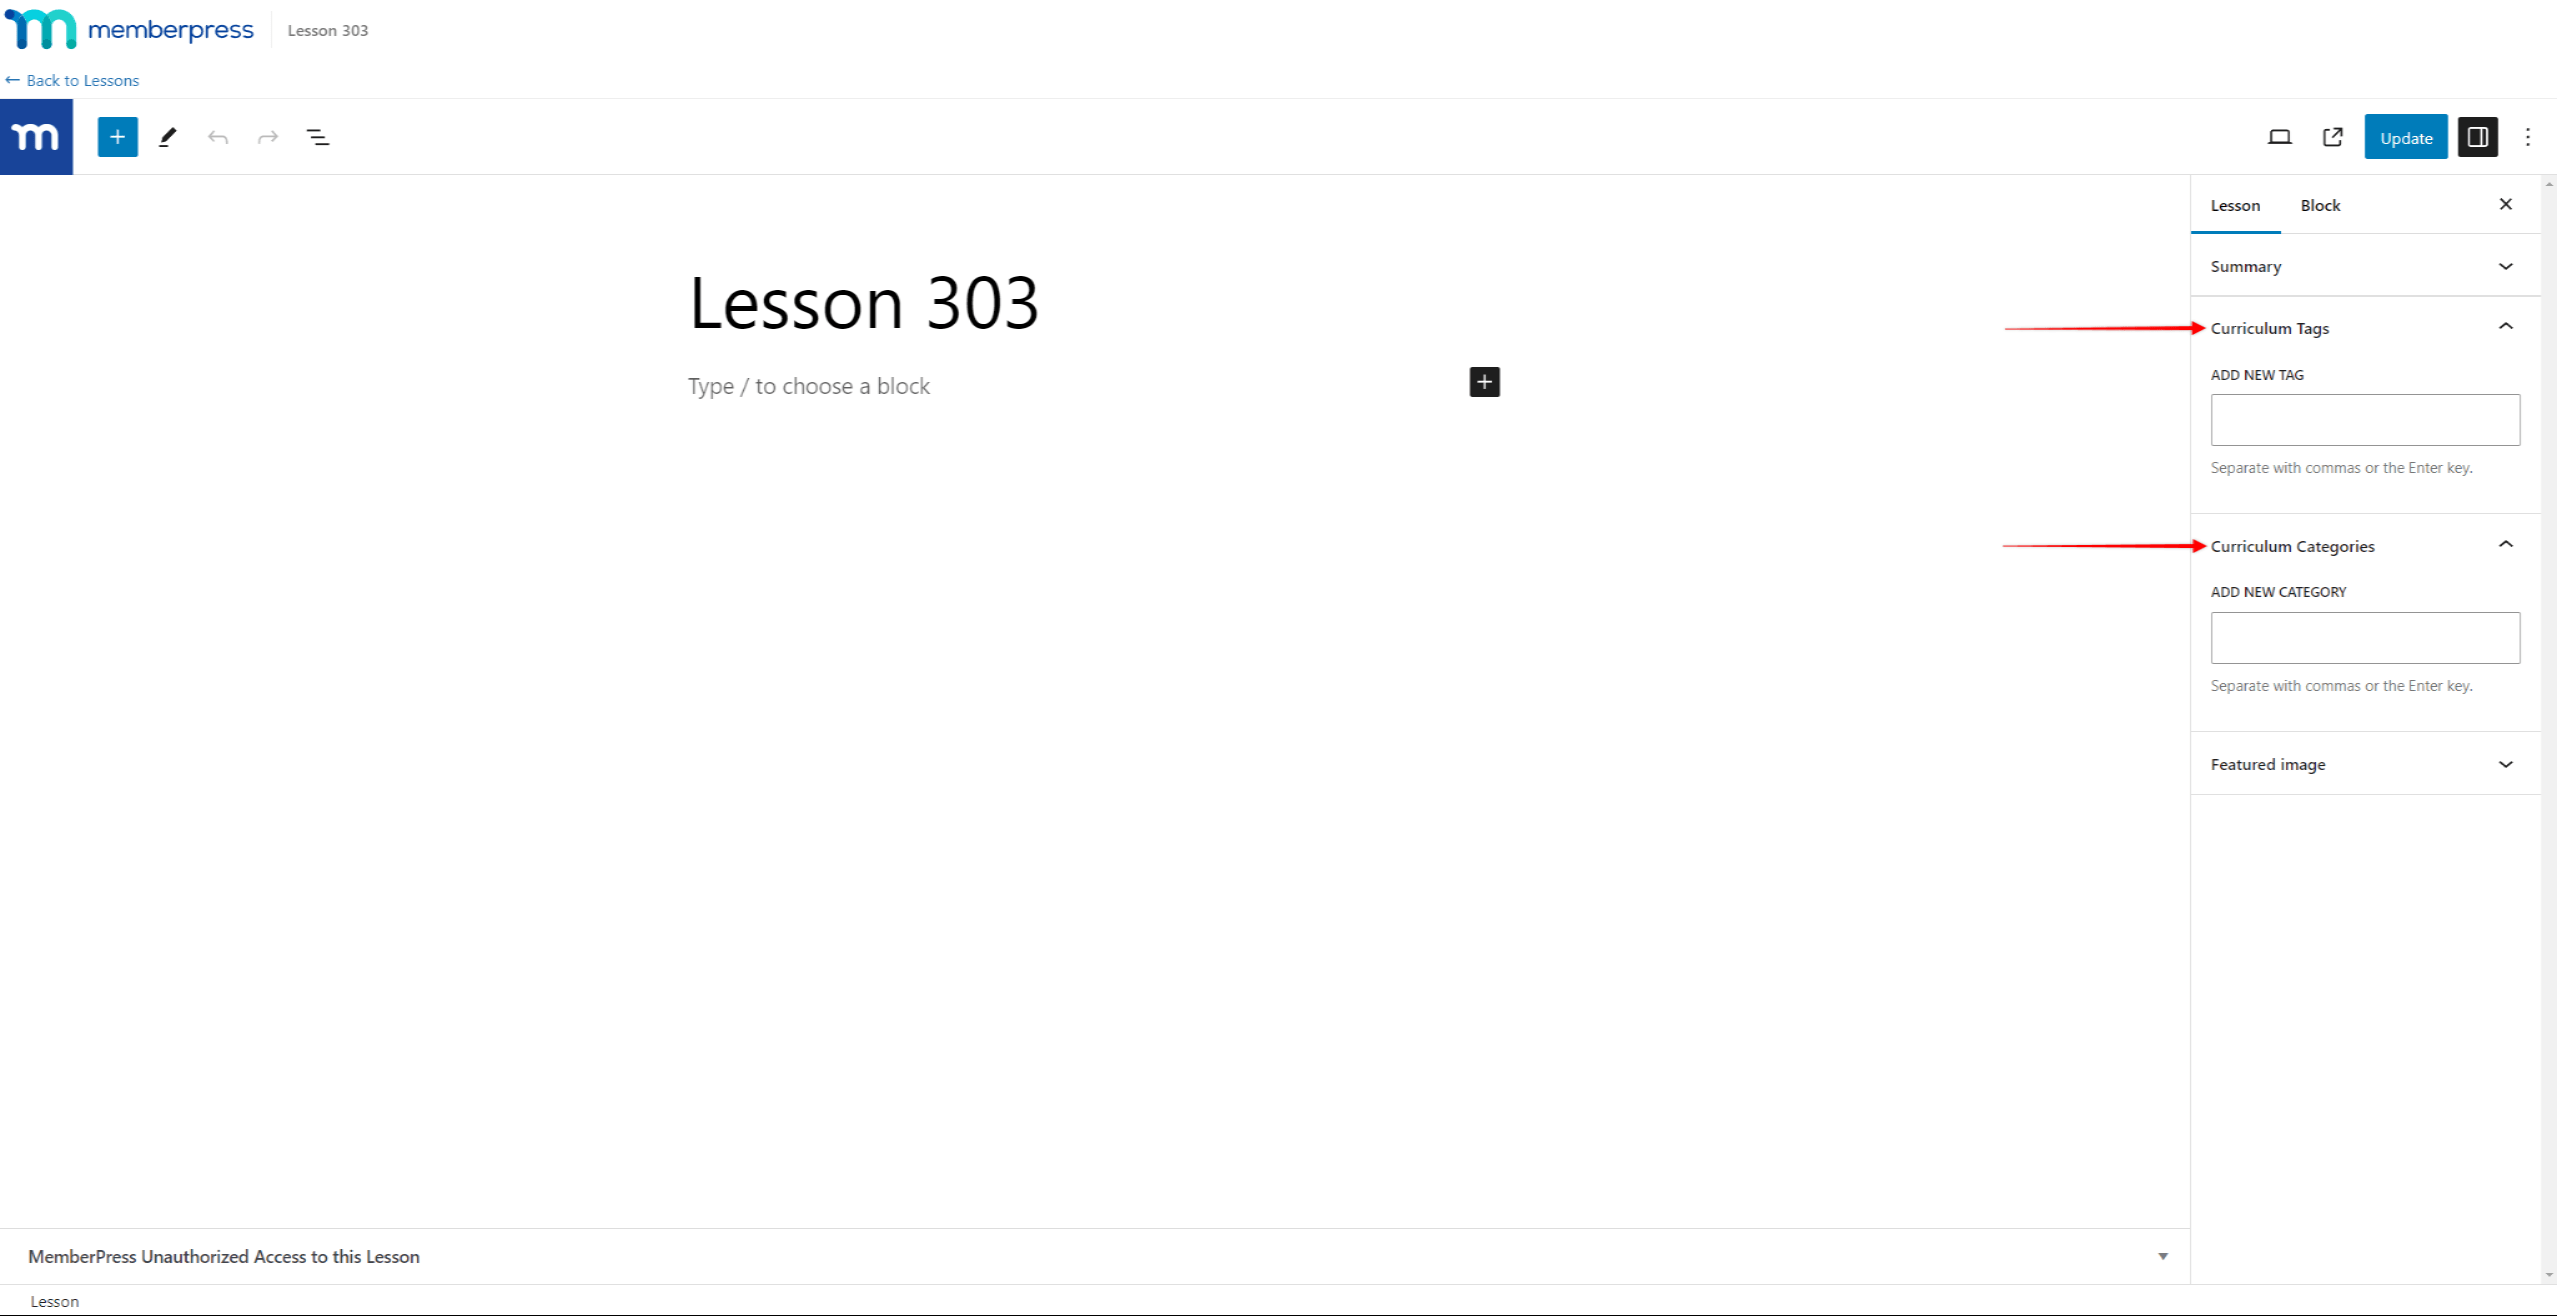
Also, you will find the Curriculum Categories and Curriculum Tags panels on the right-hand menu of Course item editors. Here, you can add Curriculum Categories and Curriculum Tags to your Lessons and Quizzes.
Creating Rules Based on Categories and Tags
Once you add categories and tags to your Courses, Lessons, and Quizzes, you can protect them by following these steps:
- Navigate to Dashboard > MemberPress > Rules > Add New.
- Select the appropriate rule type in the type drop-down:
- All Content: “All Content with Course Categories” / “All Content with Curriculum Categories” or “All Content with Course Tag” / “All Content with Curriculum Tag”
- Courses: “Courses with Course Categories” or “Courses with Course Tag”;
- Lessons: “Lessons with Curriculum Categories” or “Lessons with Course Curriculum Tag”;
- Quizzes: “Quizzes with Curriculum Categories” or “Quizzes with Course Curriculum Tag”;
- Assignments: “Assignments with Curriculum Categories” or “Assignments with Course Curriculum Tag”.
- Next, search for the category or tag you need and select it.
- Lastly, add memberships to the Access Conditions section of the rule. Here, you should add memberships required to access the Course or course items associated with this category or tag. Like with other rule types, you can add one or more memberships.
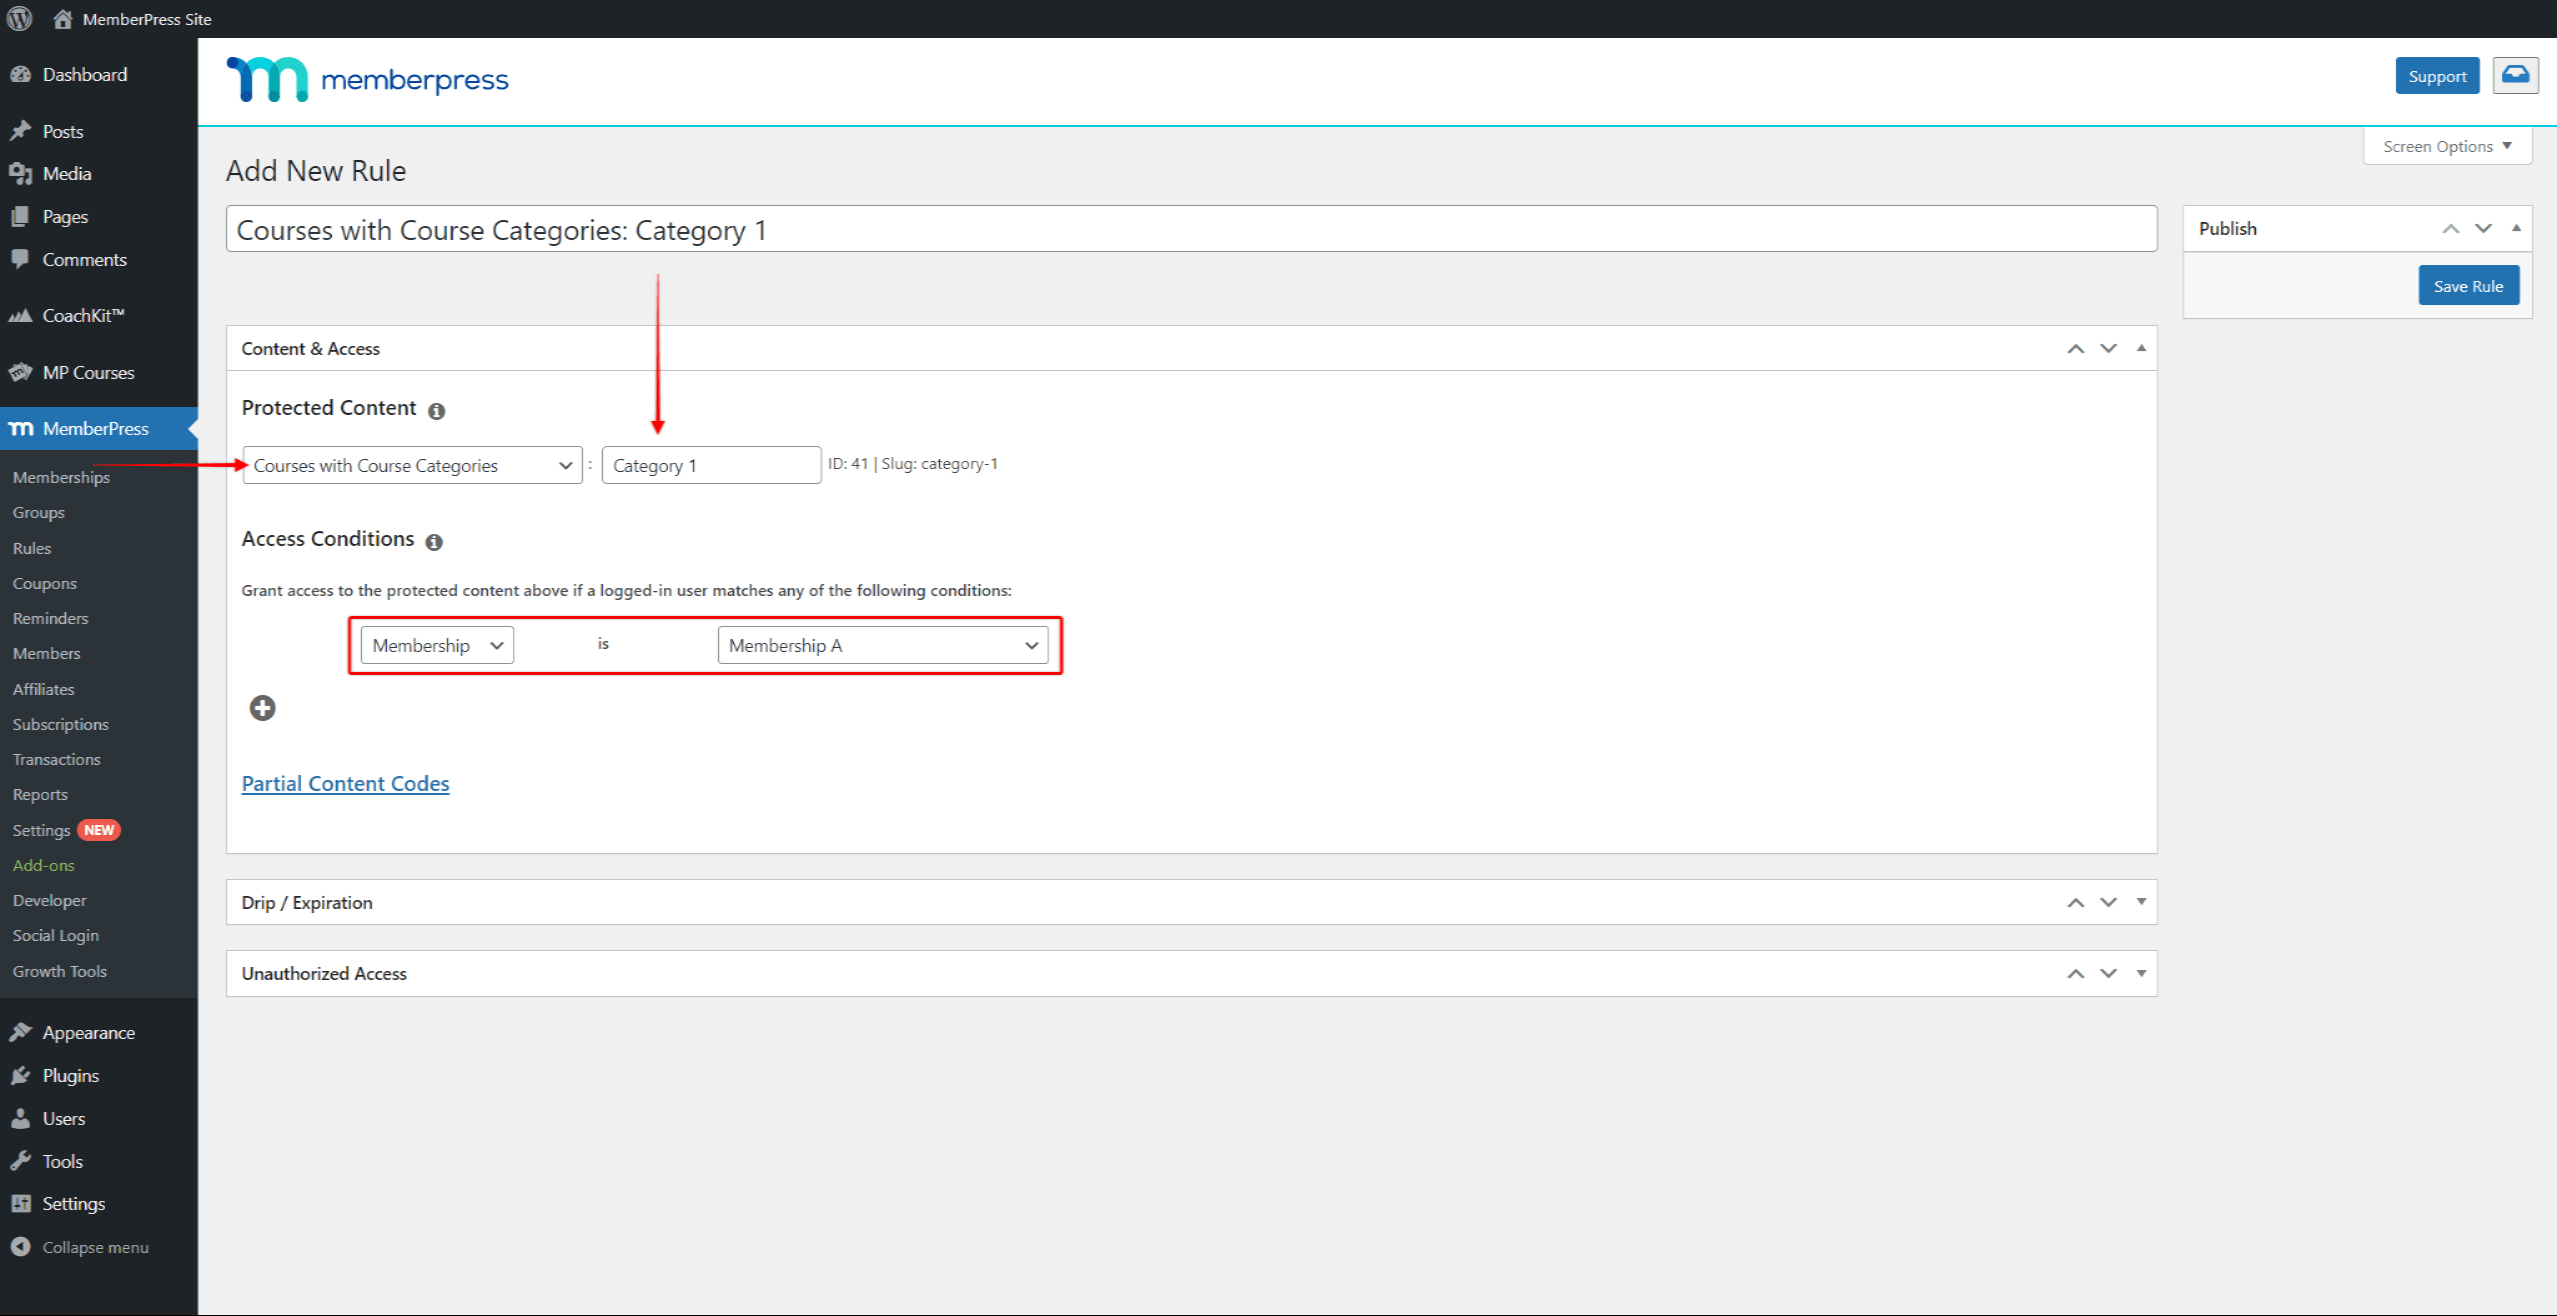
- Click the Save Rule button to save changes.
Protecting Sections
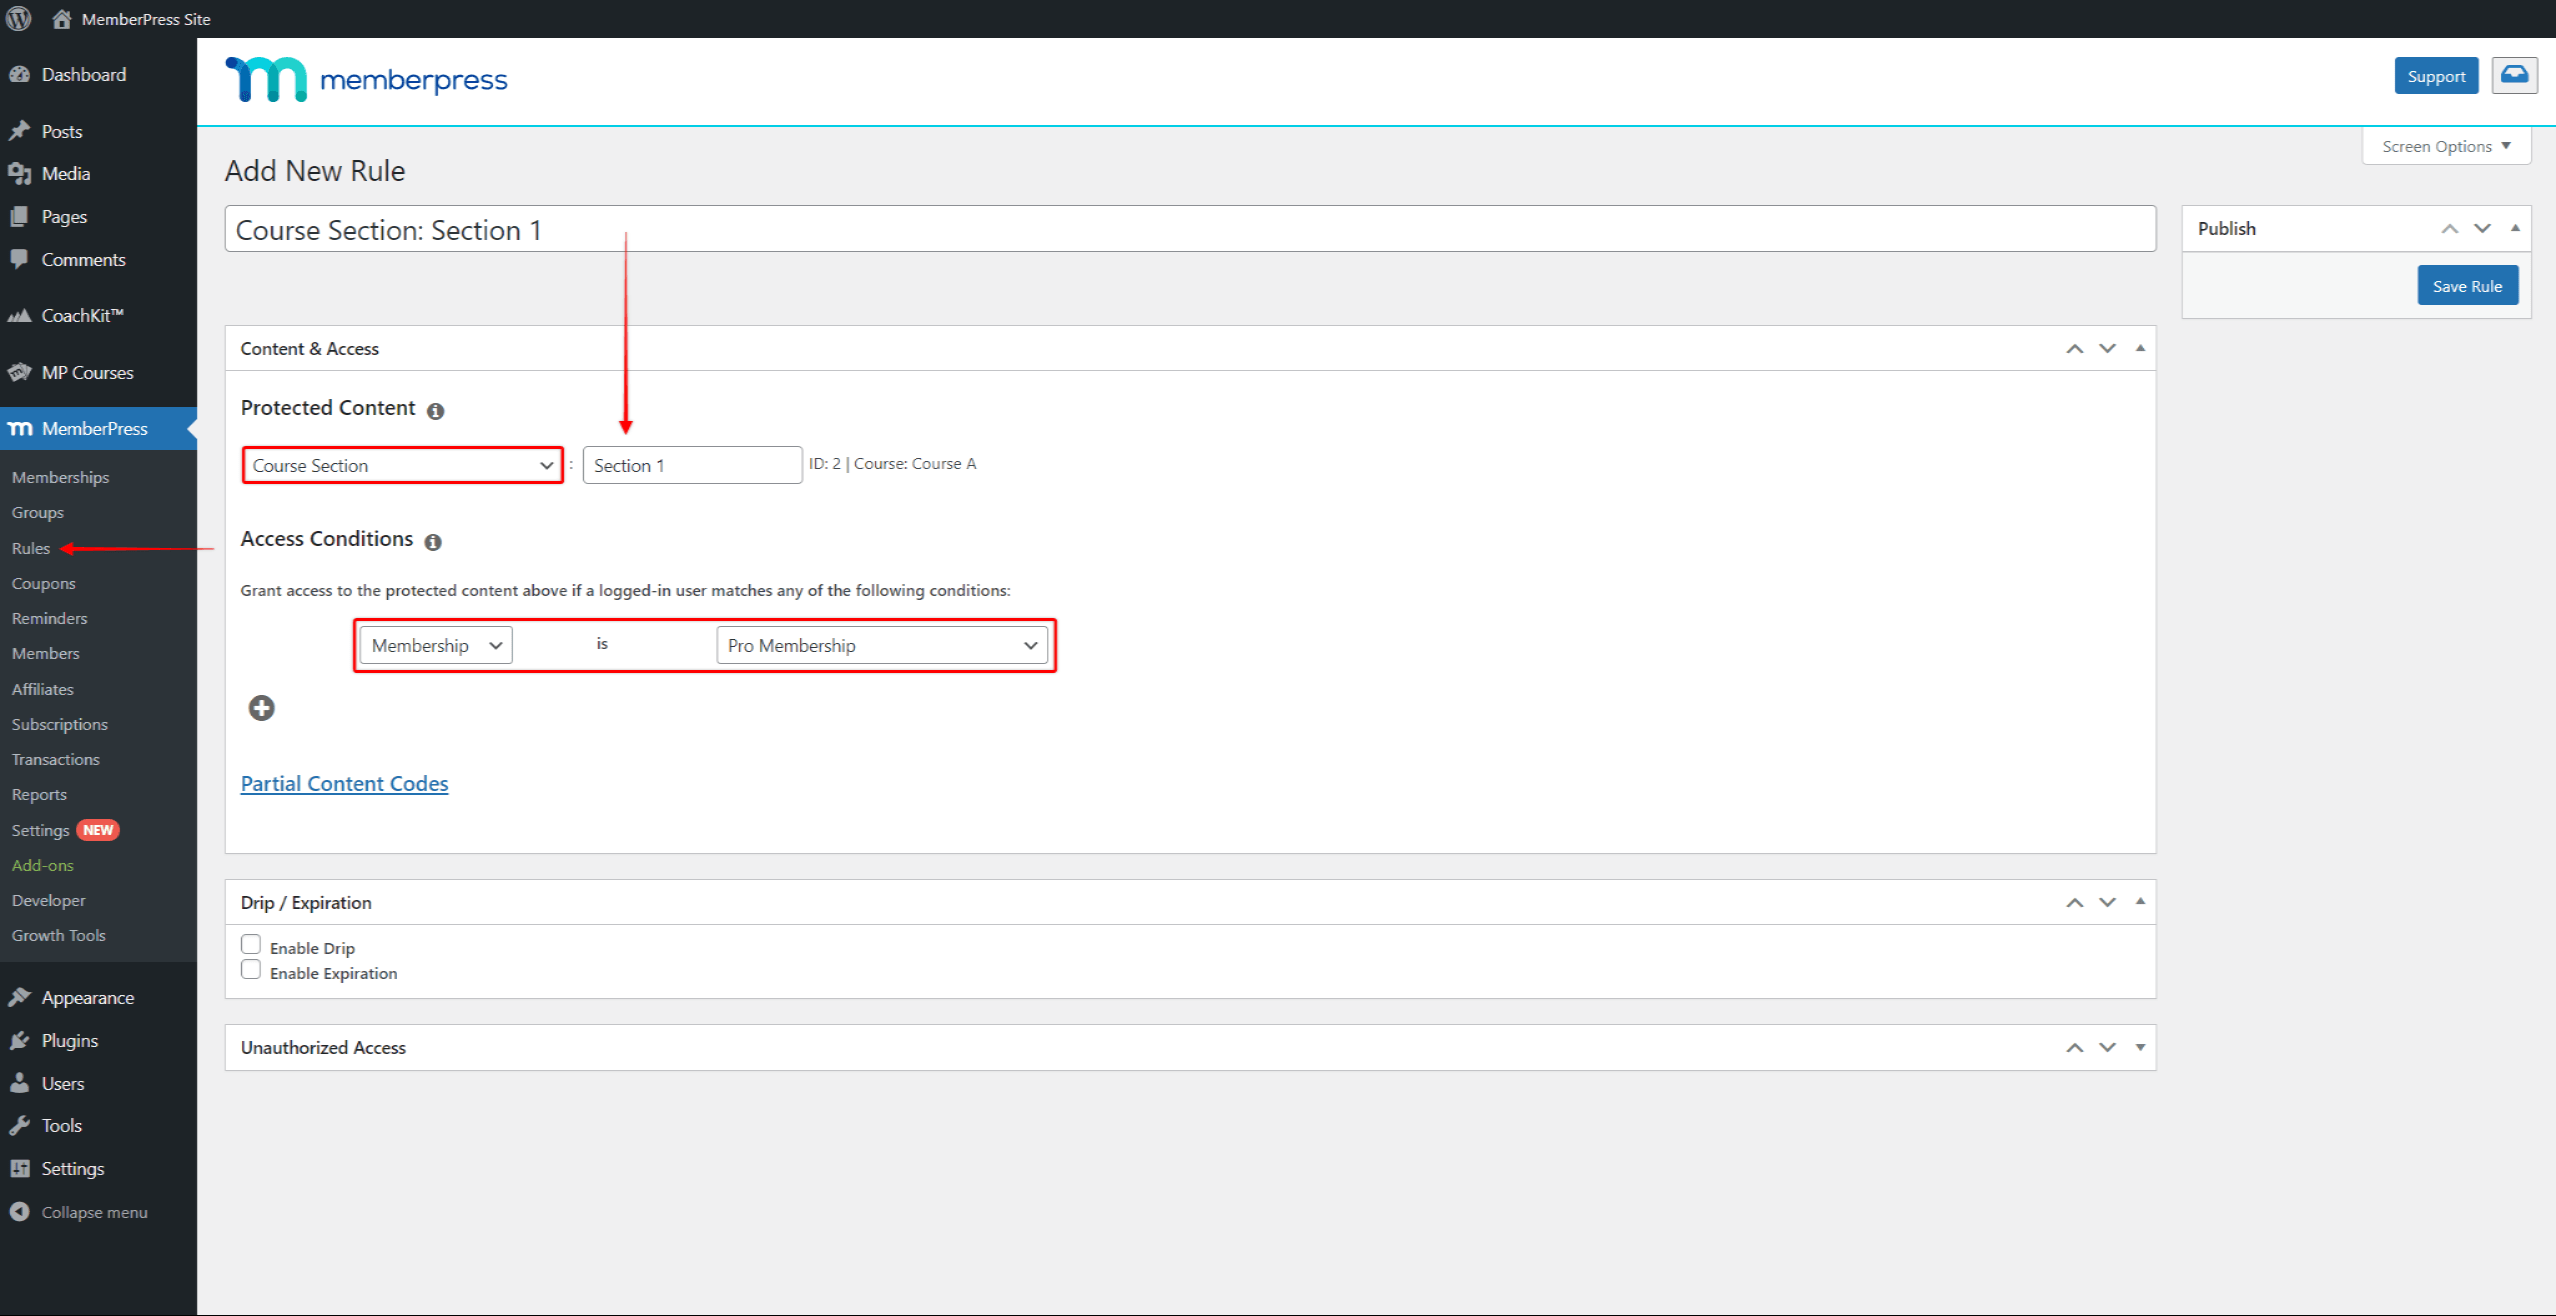
Each course section within a course can be protected with MemberPress rules using the Course Section rule type.
Protecting All Lessons in Section
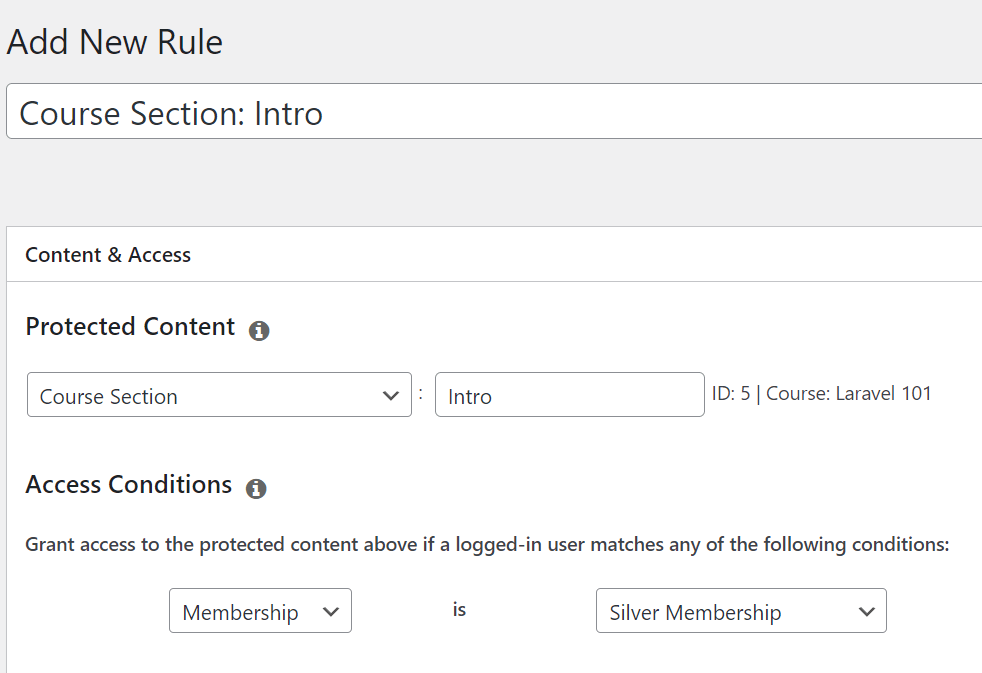
Sometimes you may want to protect all lessons in the specific section. For example, in the screenshot below there are 4 sections.
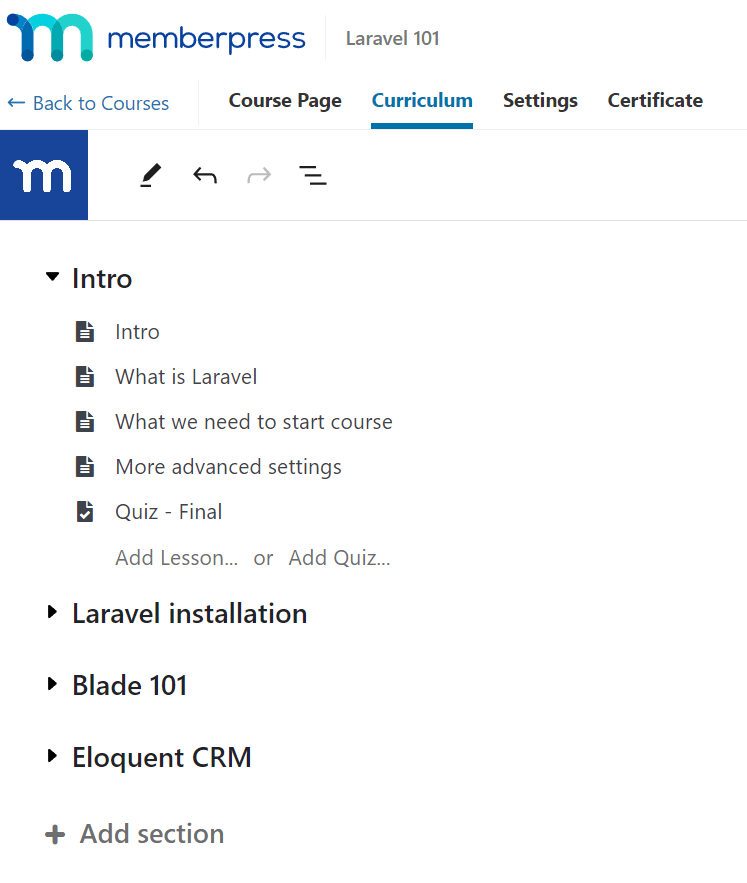
If you want to protect all lessons from the Intro section, you could create a Single Lesson rule for each lesson in the section. However, the easiest way is to use the Course Section rule.
Head to MemberPress > Rules > Add New, and select the “Course Section” type from the drop-down. Next, search for the section you want to protect and select it. Last, add the Membership(s) that should provide access to all lessons in this section by adding them to your Access Conditions.
Your Rule should look something like this:
