More and more people are choosing to cook most of their meals at home. In fact, cooking videos and downloadable recipes have become super popular in recent years.
If you’re a capable cook, you may be wondering how you can be a part of this growing market.
Starting a MemberPress site can be an excellent way to teach culinary skills and capitalize on your recipes. Fortunately, this process is super easy thanks to MemberPress.
In this post, we’ll look at the benefits of having a culinary membership site. We’ll then show you how to get a good setup to do cooking videos in just 5 steps. Let’s get started!
Why You Should Set Up a Culinary Membership Site
A membership site gives users access to exclusive content, typically through paid subscriptions.
If you’re a creator with excellent cooking techniques and unique recipes, you can create one of these monetized sites and offer your valuable content to subscribers.
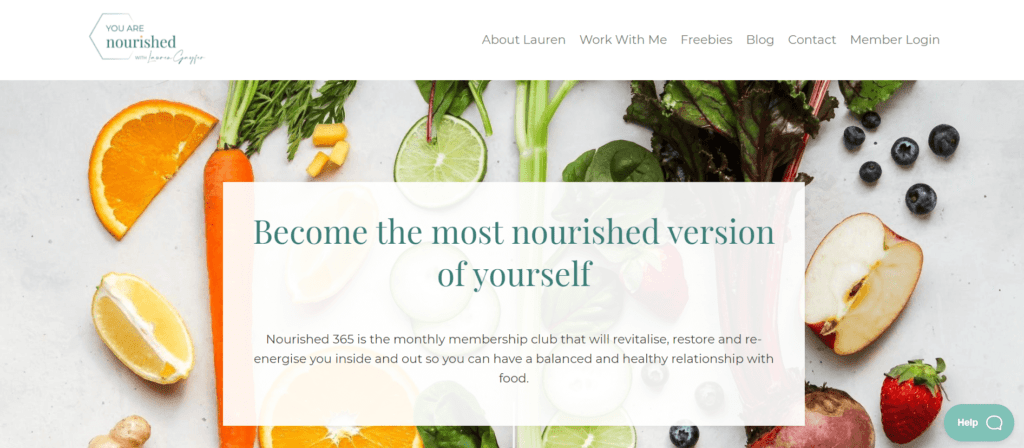
For example, qualified nutritionist Lauren Gayfer offers a diet-based monthly membership with her Nourished 365 club:
There’s a high potential for generating passive income with a food-based membership site. More than 70% of Americans prepare most of their meals at home.
Cooking Classes
Additionally, online cooking classes have increased in popularity since the start of the COVID-19 pandemic. That means more people are looking for new recipes to try.
Setting up live classes is easy with the MemberPress Crowdcast integration. It lets you host live shows, Q&A sessions, podcasts, and webinar classes.
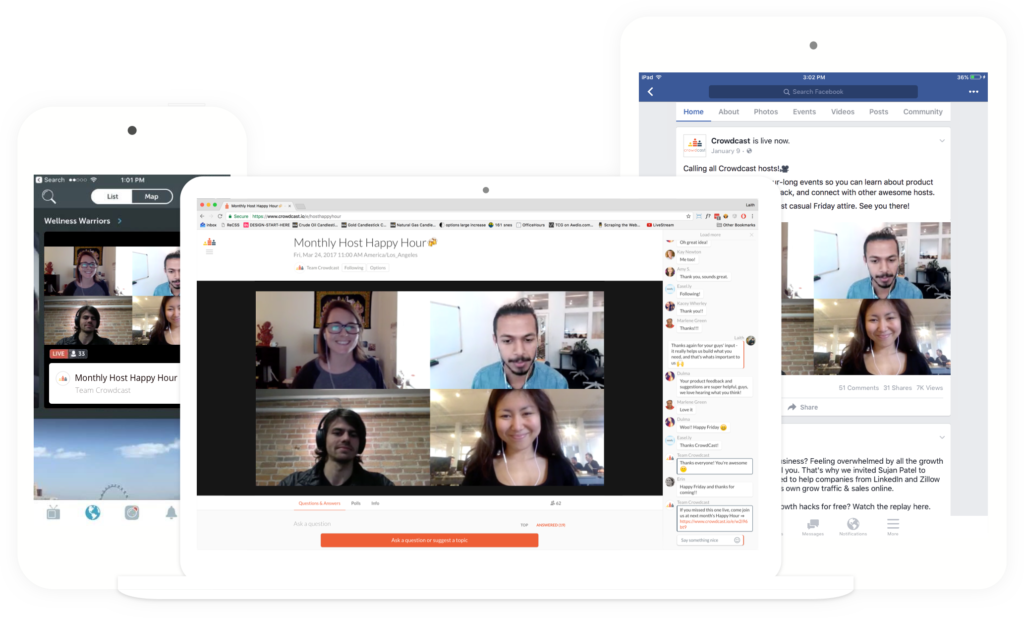
Once you add your content to your site, you can start earning profits from signup fees and ongoing subscriptions.
Alternatively, you could offer the content for free and generate income from ads or a self-hosted affiliate marketing program.
In these ways, a membership site presents new ways of monetizing and promoting your recipe and cooking online business.
MemberPress Recipe Site Example: 40 Aprons
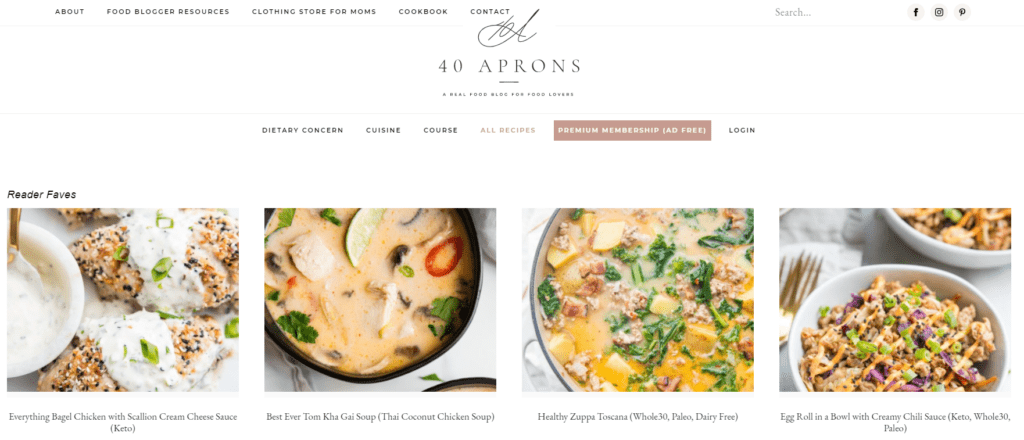
40 Aprons is a recipe collection site run by Cheryl Malik. The highly successful site has used MemberPress to offer an ad-free experience, including premium content, to members since 2015.
As a niche site, 40 Aprons accommodates to a variety of dietary considerations like Whole30, vegan paleo, keto, and more. The site’s recipes have been featured in Women’s Health magazine, Comopoliation, Pop Sugar, and more.
For more awesome MemberPress cooking site examples, check out the video below!
How to Start a MemberPress Site to Share Recipes and Cooking Videos (In 5 Steps)
Before you set up your MemberPress site, you’ll need a live WordPress website. If you don’t already have one, check out this link for easy setup.
You’ll also want to choose a theme for your WordPress site. Fortunately, there are all kinds of great options designed just for recipe sites. WPBeginner has an excellent article to get you started.
Now let’s look at how you can create a professional members-only area for your culinary content.
Step 1: Create Your Food-Based Content
Your first step will be planning and creating the content you’ll offer to your subscribers. This step is critical, so take your time and research your audience as part of the planning process.
Following are some great options for cooking sites (and MemberPress supports them all).
Videos
You’ll definitely want to record yourself cooking your recipes and embed those videos on your site. You do not need a fancy and expensive video setup! The article below will help you get rolling quickly and with minimal investment.
Cooking Lessons
Cooking lessons is another excellent way to monetize your culinary site. The MemberPress Courses Add-on makes creating courses super simple, and it’s included with all three MemberPress subscription levels (Basic, Plus, and Pro).
Consider putting together courses for users at different cooking skill levels, such as complete beginners, capable cooks, and aspiring chefs. That way you’re broadening your potential audience.
Members-Only Forum
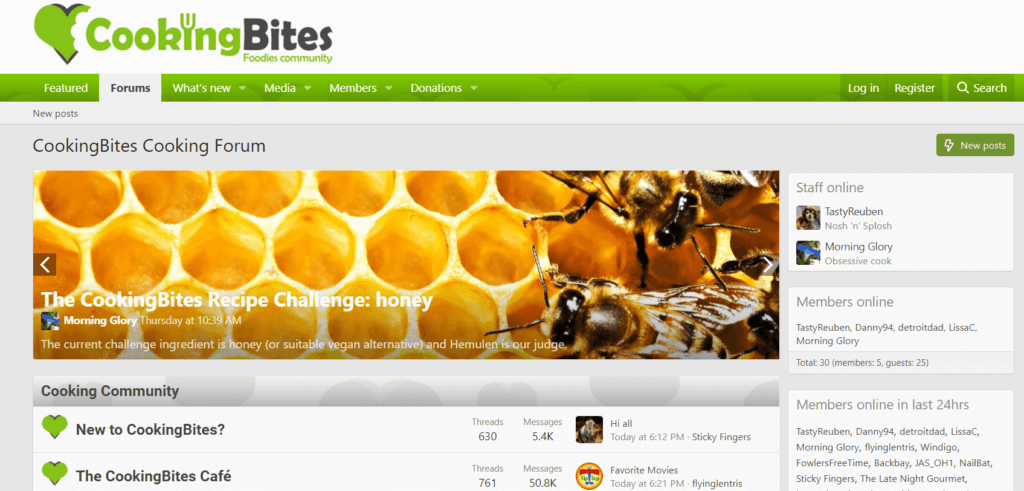
Foodies love sharing recipes and ideas. That’s why adding a members-only forum to your cooking membership site is a great idea. It enables members to share and keeps them coming back for more.
For a bit of inspiration, head over to CookingBites, and check out their dedicated forum.
Online Store
Adding an online store to your MemberPress cooking site is a great way to drive more revenue. For example, you could add a WooCommerce store to sell your physical recipe books and even swag.
Or you might upload your favorite recipes or nutrition-based advice and sell them as downloadable files.
Whatever content you decide to go with, make sure it adds value and will keep your subscribers coming back.
Step 2: Install and Activate the MemberPress Plugin
Once you’ve got your content squared away, it’s time to set up the MemberPress plugin.
This tool is straightforward to use and will enable you to create a membership area in just a few minutes.
First, you’ll need to choose your subscription level, and sign up for an account. Once that’s done, you’ll be directed to your user dashboard:
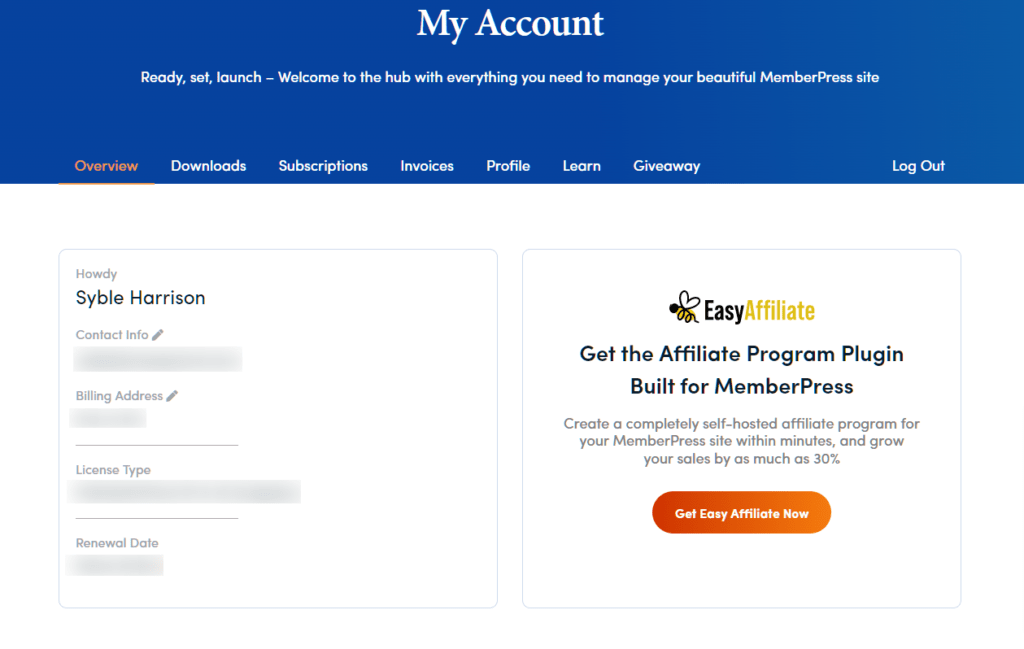
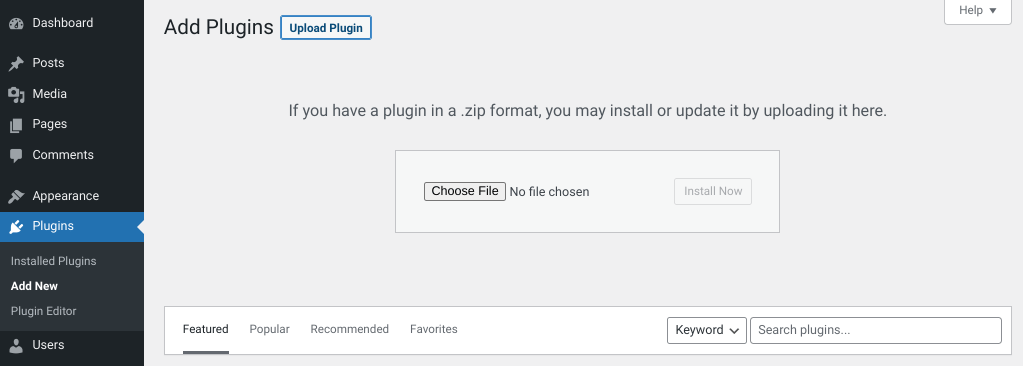
You can download the latest version of MemberPress from your account. Then, go to your WordPress dashboard and navigate to Plugins > Add New > Choose File:
Select the .zip file that you’ve just downloaded, then click on Activate Plugin. Finally, you’ll need to add your product license key, which you can copy from your MemberPress account.
This step will activate your subscription and give you access to all of the features you need for the following steps.
Step 3: Set Up Your Membership Plans
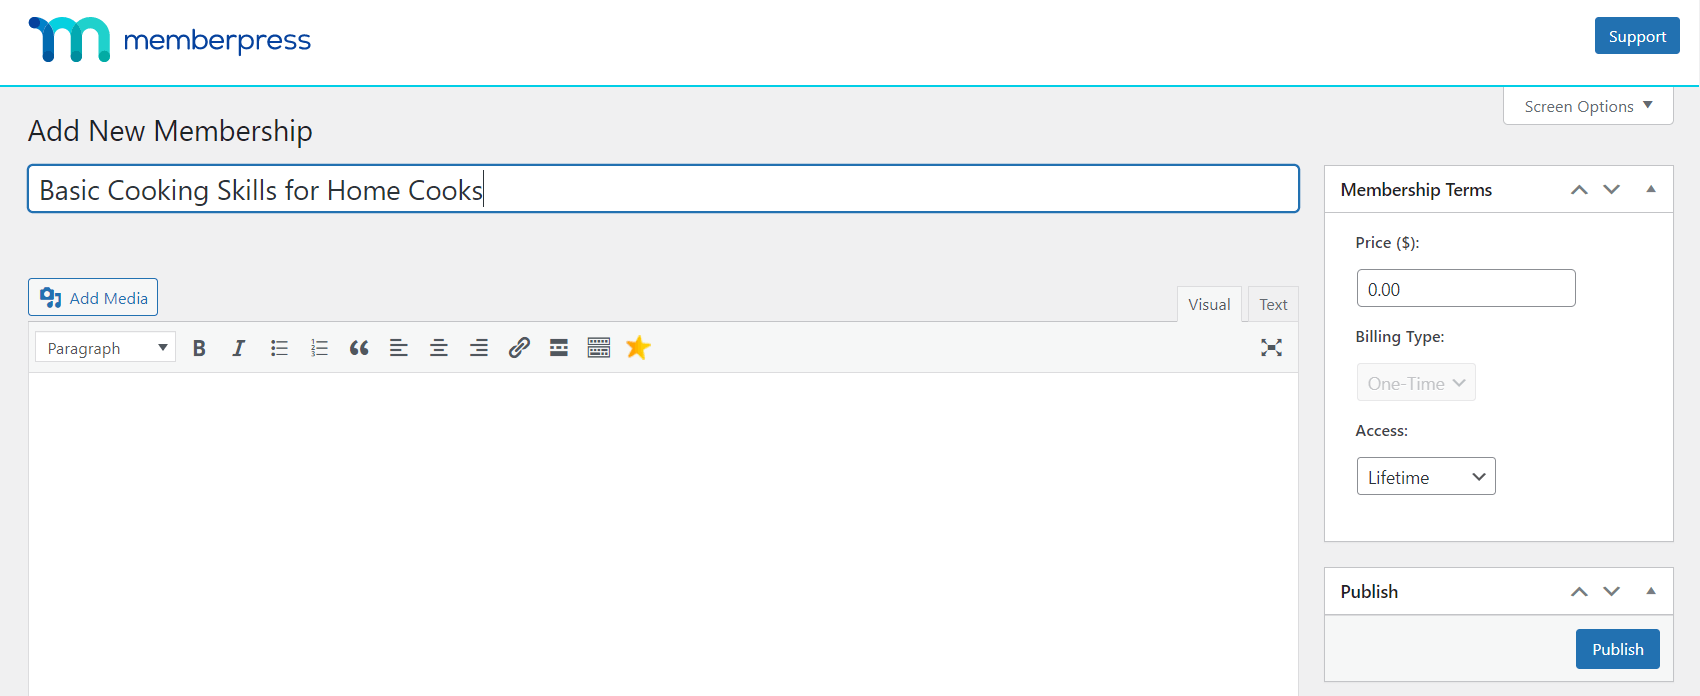
Next, we’ll create the membership plans for your subscribers. You can find this function by heading to MemberPress > Memberships > Add New:
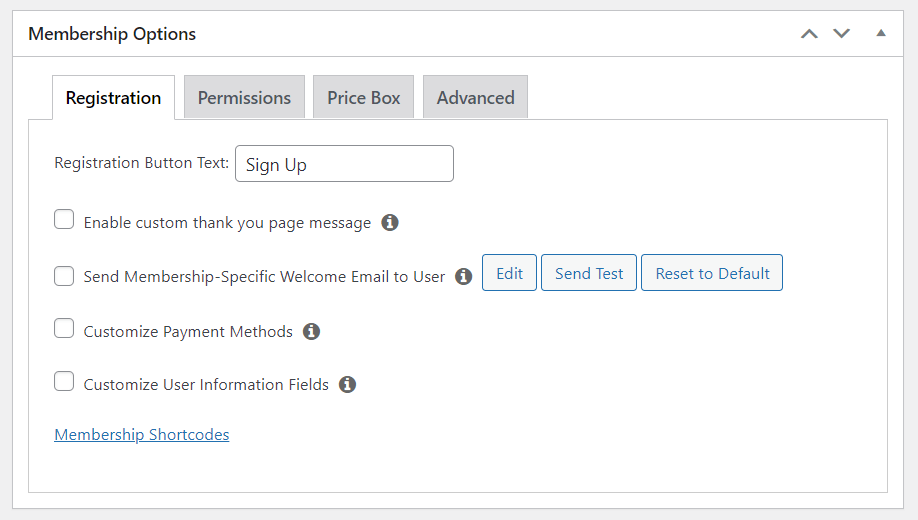
On this page, you’ll need to name your memberships and customize the settings for each.
For instance, you can set your prices, billing type, and period of access. You can also set up a trial period to enable users to try out your content before purchasing a membership.
You can also modify the registration process, set permissions, and configure advanced settings for your memberships:
We recommend taking your time with this process to make sure each plan has the right settings. Once you’re done, just click Publish.
You may want to set up multiple plans for different subscribers. For example, you could have affordable options for beginners and more expensive choices for experienced cooks.
Step 4: Manage Access to Your Content
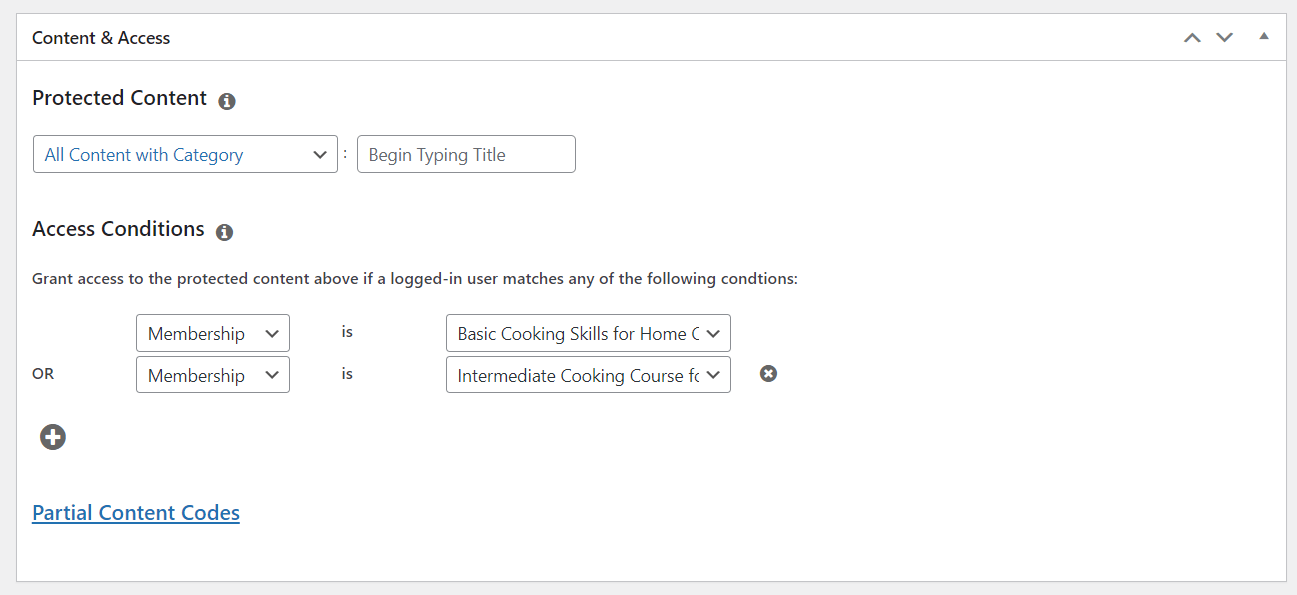
Once you have your membership plans set up, you can control which users can access what content. You can find these permission rules by navigating to MemberPress > Rules > Add New:
Here, you can select the content that you want to protect. Click on the drop-down menu and choose from the different options, which include categories, tags, page types, and post types.
Then, you can select the membership category or the particular members that will have permission to access that selected content. When you’re ready, click on Save Rule.
For example, you may restrict your higher-level content to members on more expensive subscription packages.
Whenever you want to adjust or add new rules, you can return to this page and make updates easily.
Step 5: Add Your Registration and Login Pages
Now, you’ll need to add your membership signup page to your website menu. This will enable users to register on your culinary site.
You can find the menu options by heading to Appearance > Menus > Manage with Live Preview in your WordPress dashboard. This will take you to the visual editor.
Next, navigate to All Pages > Add Items > Memberships. Here, you can click on the + next to your food and recipe member pages:
This will make your memberships visible to your users. Remember to save your changes when you’re done.
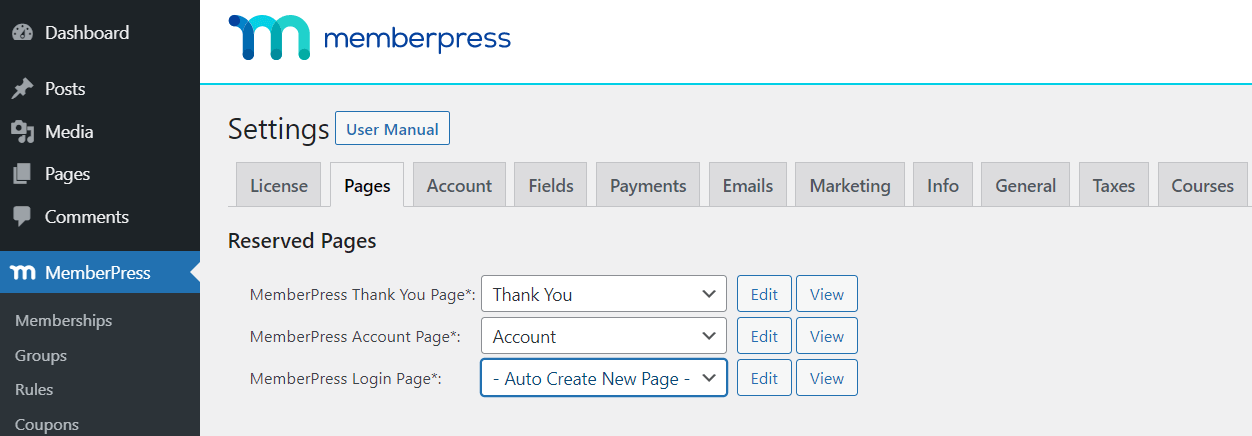
Finally, you can add a login page for your members. You’ll find this option by returning to the dashboard and selecting MemberPress> Settings > Pages:
Then, click on the drop-down menu next to MemberPress Login Page and choose Auto Create New Page. Scroll to the bottom of the page and click on Update Options.
Voila! You’ve just created a MemberPress site to sell your recipes, lessons, and cooking videos.
PRO TIP: Add a Recipe Plugin to the Mix
Most people visit food blogs to pick up recipes. So you really want to make sure it’s fast and easy to grab and print them from your site.
However, recipe printing is notoriously tricky. Between the fonts and formatting, it can be a frustrating experience for users. Fortunately, a recipe plugin is a quick and easy way to fix the problem.
For that we recommend WP Tasty. In addition to having a completely awesome recipe card function, this suite of food blogging tools can save you tons of time and money by automating the management, optimization, and marketing of your cooking site.
Think things like site-wide keyword autolinking, affiliate management, round-up post curation, and star ratings. And that’s just the tip of the round roast.
Conclusion
A members-only culinary site can be an excellent business investment. You can charge aspiring chefs to access your cooking videos and exclusive recipes.
Setting up a MemberPress site is a straightforward process, and you can quickly start earning a passive income from your content.
As we’ve shown, you can start your own membership site in just 5 steps:
- Create your food-based content.
- Install and activate the MemberPress plugin.
- Set up your membership plans.
- Manage access to your content.
- Add your registration and login pages.
And don’t forget to consider adding a recipe tool like WP Tasty!

Get MemberPress Today!
Start getting paid for your killer culinary creations
Do you have any questions about how to get a good setup to do cooking videos and recipes? Let us know in the comments section below!
If you liked this article, be sure to subscribe to the MemberPress blog!





Add a Comment