When it comes to email newsletters, the profit potential is huge. From subscription fees to paid advertisements, you can use all kinds of monetization strategies.
However, some creative writers may struggle to deal with the technical side of launching a newsletter.
Luckily, starting a subscription newsletter can be a breeze with the right tools – even for non-techies. With WordPress and MemberPress, you can create your own site and easily send your exclusive newsletter to specific members.
In this post, we’ll go over why you might want to create a WordPress membership site for your newsletter. Then, we’ll show you how to start a subscription newsletter in 4 simple steps! Let’s get to it!
Tools You’ll Need

Before you start any project, it’s best to know beforehand which tools the task requires. If you want to create an online newsletter quickly and efficiently, you’ll need the following software:
- WordPress
- The MemberPress plugin
- The MailPoet plugin
The good news is that these tools are highly user-friendly and very affordable. We’ll be diving into the details of each one later on. But first…
Why You Should Use a WordPress Membership Site for Your Newsletter
In recent years, the popularity of newsletter marketing has skyrocketed. Studies show that 86% of people believe newsletters play a major role in connecting brands with their audiences.
And that makes sense. A newsletter can share so much information – news, promotions, and any other essential communication – with your subscribers.

However, some newsletter or email marketing platforms may not include the right features for your needs.
For instance, solutions like Mailchimp don’t allow you to create a community around your newsletter.
Passive income potential
And popular third-party platforms like Substack take a big cut of your revenue from newsletter subscriptions.
That’s why offering your newsletter through a membership site is ideal. It allows you to create paid subscriptions for your newsletter, and you get to keep all your profits.
Plus, when you run your own show and don’t rely on a third-party platform you can use your content to create passive income streams…
- Turn your newsletter archive into paywalled content
- Repurpose your content into blog articles
- Set up forums where your members can discuss your newsletter
Now that you know the best way to go about starting a subscription newsletter, let’s get on to the nuts and bolts.
How to Start a Subscription Newsletter with WordPress (In 4 Easy Steps)
The following instructions will show you step by step how to start your paid newsletter and sell it through a WordPress membership site. Let’s get started!
Step 1: Build Your Site
First off, you’ll need to build your membership site. If you want to create any website, WordPress is one of the best tools for the job.
It’s free and open-source software that anyone can learn how to use:
You’ll need to purchase a web hosting plan and a domain name to get started. Often, the two come bundled into one.
After that, you’ll want to install WordPress. Sometimes your web host will take care of this for you or include a 1-click install option.
Once that’s done, you’ll need to navigate to your WordPress dashboard and install and activate MemberPress.
Then, you can create your website! For detailed instructions on how to build a membership site, check out our complete video tutorial:
You’ll need to create at least one membership before moving on:
This will be key to setting up your subscription newsletter later on.
Step 2: Install MailPoet and Activate Its MemberPress Add-On
Next up, you’ll want to set up the final tool, the MailPoet plugin. Fortunately, MemberPress integrates seamlessly with this popular email software.
You can install and activate the MailPoet plugin just as you did for MemberPress. After that, you’ll need to configure your MailPoet settings.
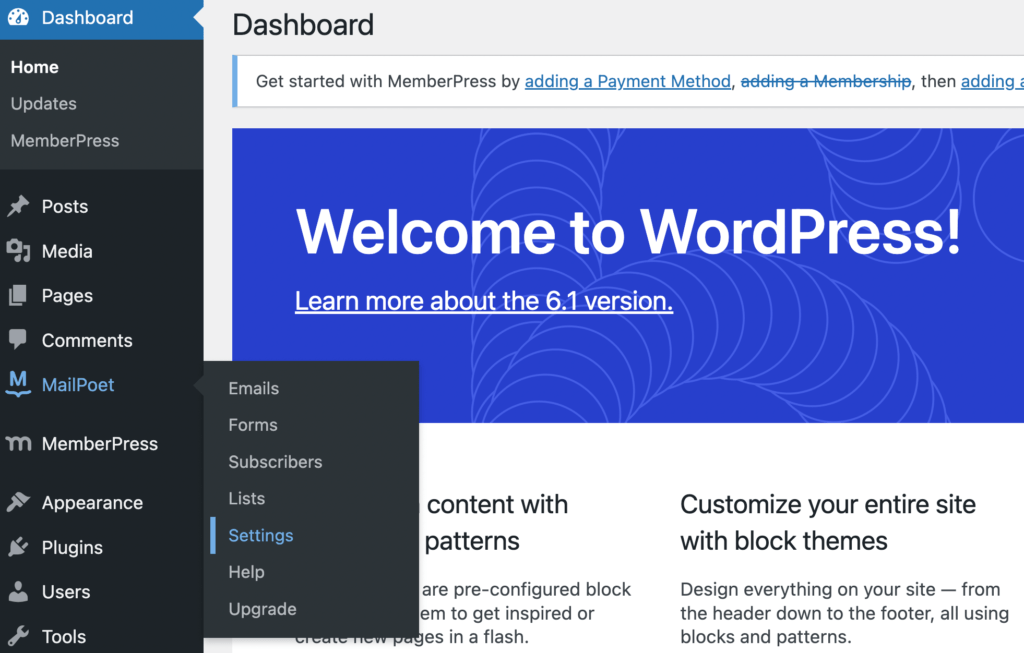
To do this, go to MailPoet > Settings in your WordPress dashboard:
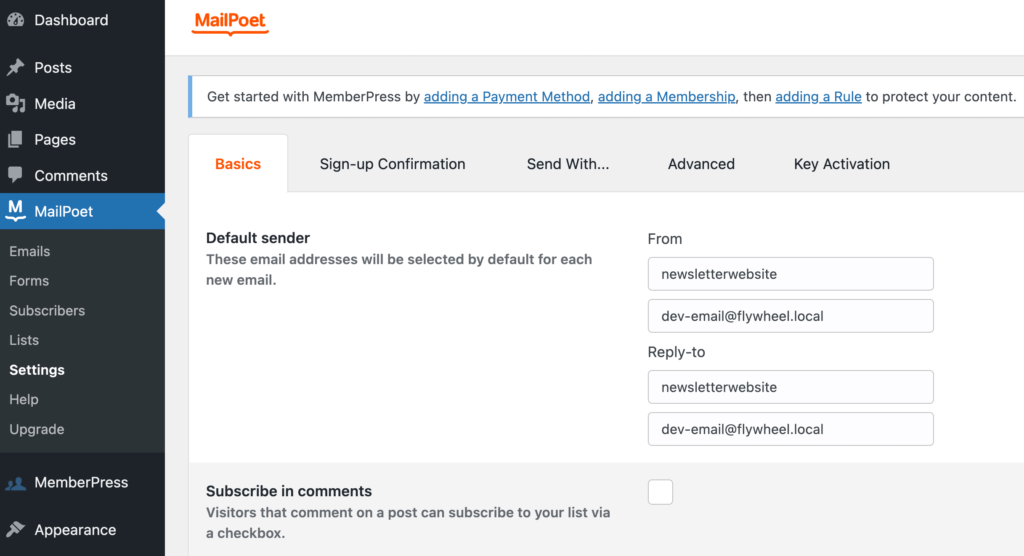
On this page, you’ll see tabs for Basics, Sign-Up Confirmation, Send With…, Advanced, and Key Activation:
We recommend exploring each page and filling in your information where necessary. Then, click on Save settings at the bottom of the screen.
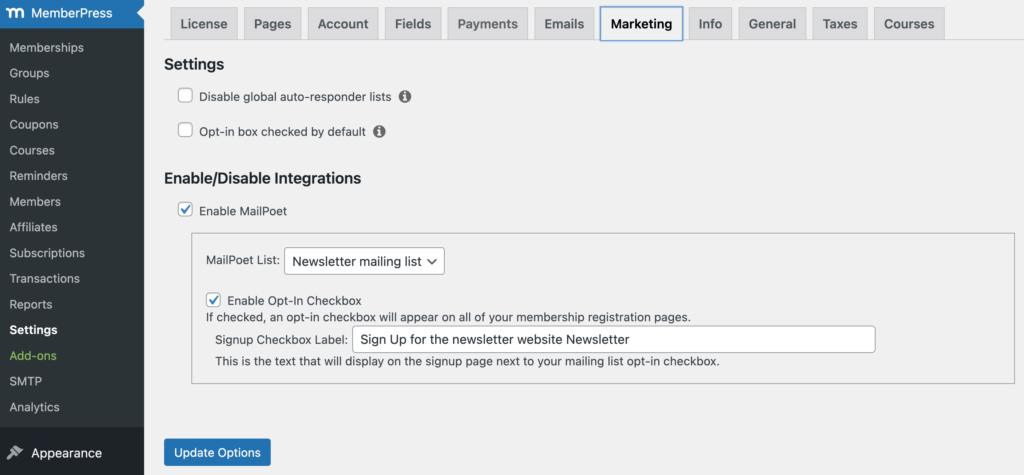
Next, head to MemberPress > Settings > Marketing:
Here, select Enable MailPoet. You’ll then be able to choose an email list.
You may see a default Newsletter mailing list as an option in your dropdown menu for MailPoet List. In that case, go ahead and select it.
You can also Enable Opt-In Checkbox if you like. When you’re done, hit Update Options.
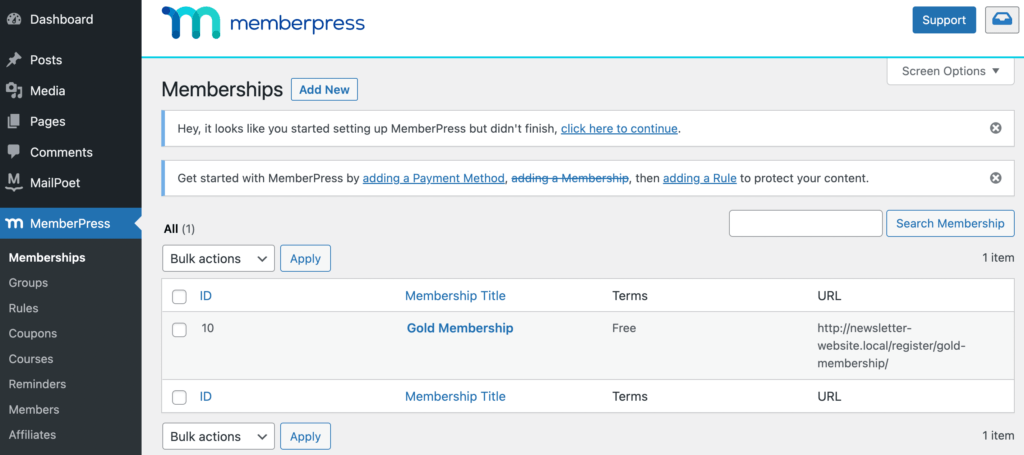
MailPoet should be linked to the membership you created in the previous step. To verify this, go to MemberPress > Memberships and click on Edit for the membership you made for your newsletter. We called ours ‘Gold Membership’:
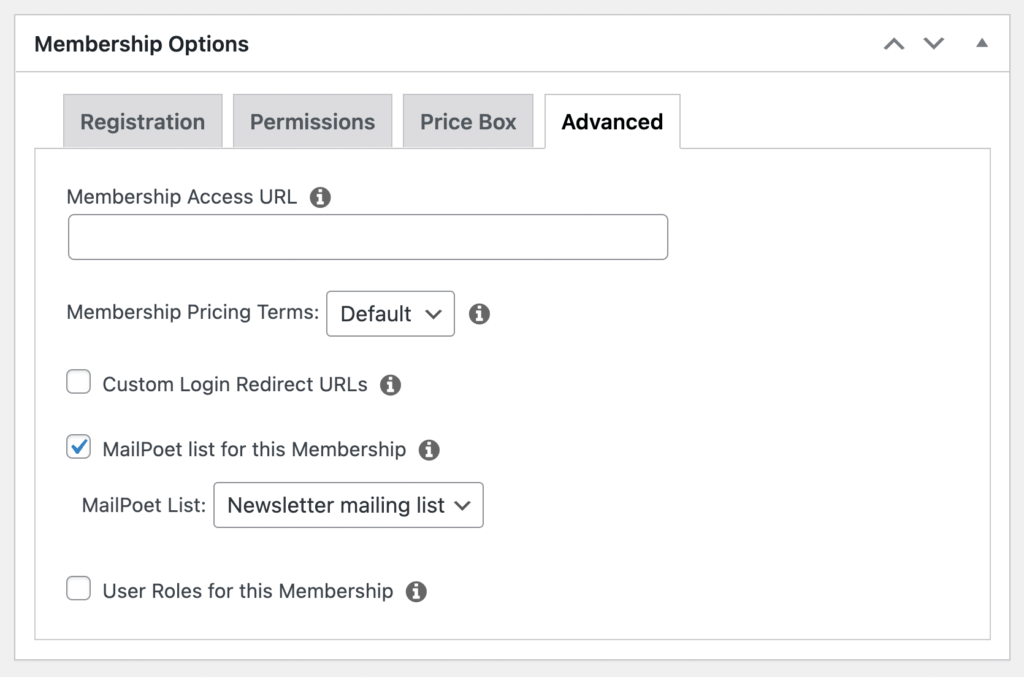
Then, scroll down to Membership Options > Advanced:
On this page, verify that MailPoet list for this Membership is selected and that the newsletter list matches the one you chose in your MemberPress settings.
Click on Update if you made any changes.
Remember, this list should differ from any global list you have set up. For more instructions on this step, visit our detailed help doc on configuring your MailPoet settings.
Step 3: Create Your Email Newsletter
Now you’re ready to create your subscription newsletter! Since MemberPress and MailPoet are both plugins, you’ll be able to do this directly from your WordPress dashboard.
Simply go to your MailPoet tab and click on + New email at the top of your screen:
Then, select Create in the Newsletter panel:
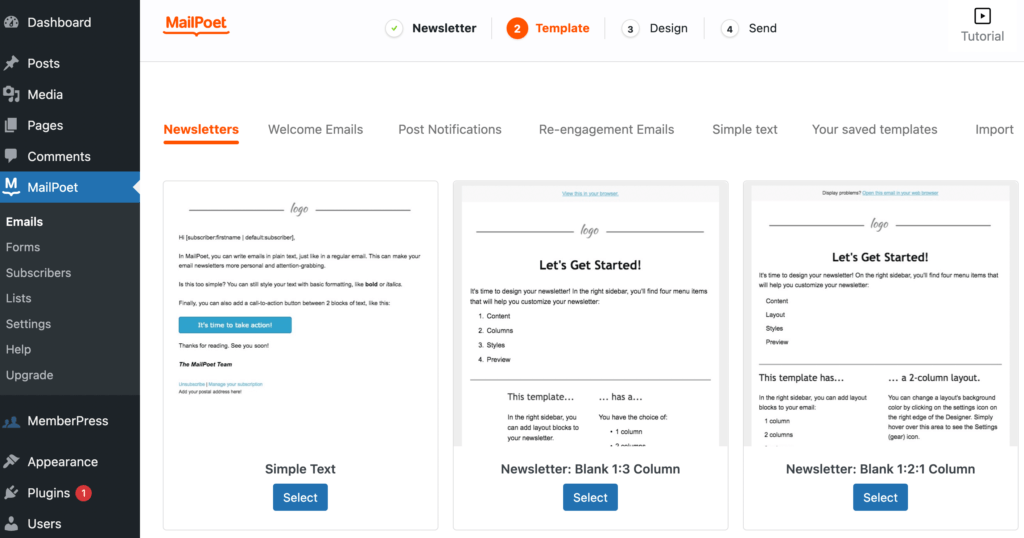
Once you do, you’ll find an extensive library of newsletter templates:
These templates feature sleek and professional-looking designs for different purposes.
For instance, there are templates for food bloggers, fashion influencers, and even musicians:
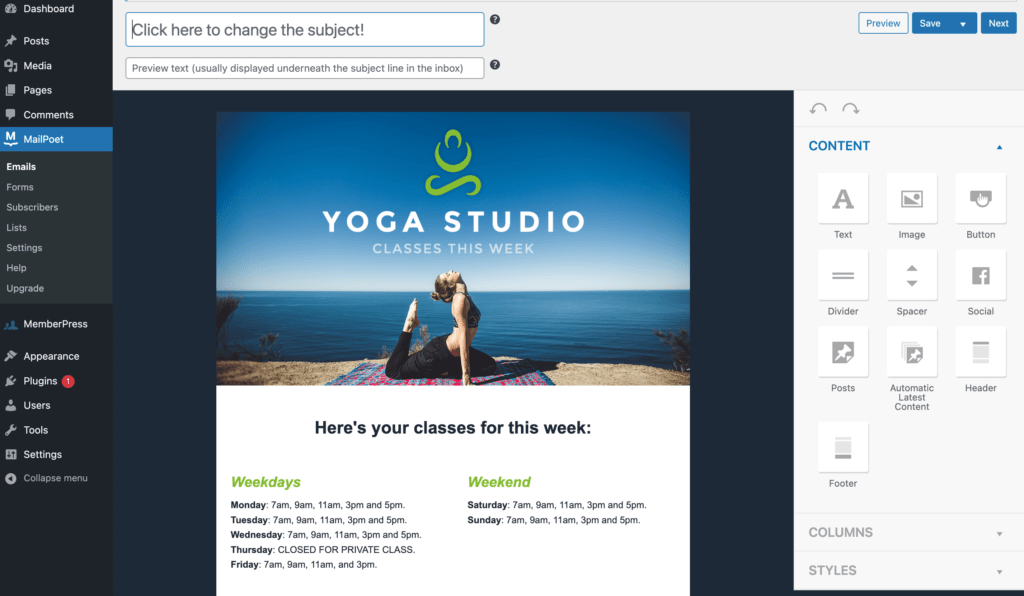
When you locate the template you want to use, click on Select. This will take you to the Design screen, where you can customize your template:
MailPoet uses a visual editor. That means you can click directly on the different elements of the template, then change them using the settings on the right.
You might modify content like text, images, buttons, and more. You can also add a subject and change structural elements such as columns.
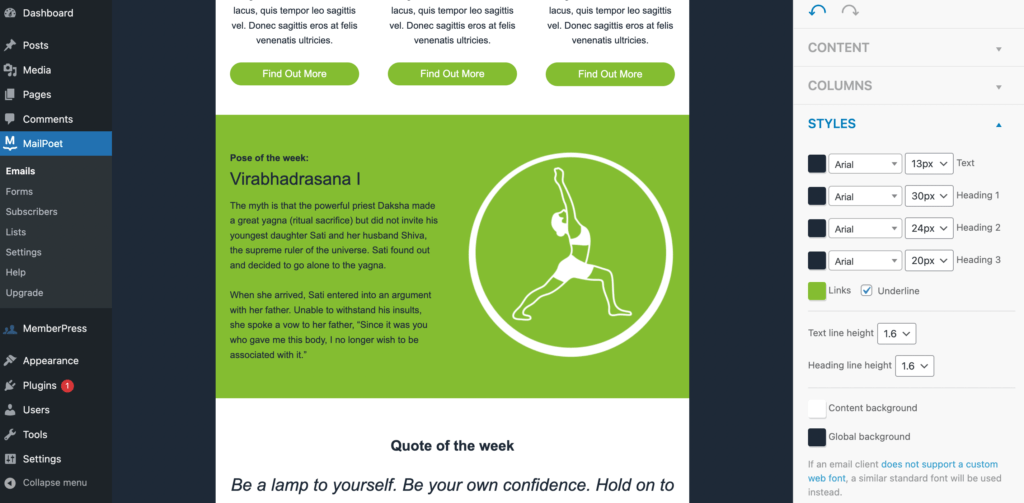
Then, if you scroll down to the Styles tab, you can alter the fonts, colors, and more:
When you’re happy with your design, click on Next!
Step 4: Schedule Your Newsletter
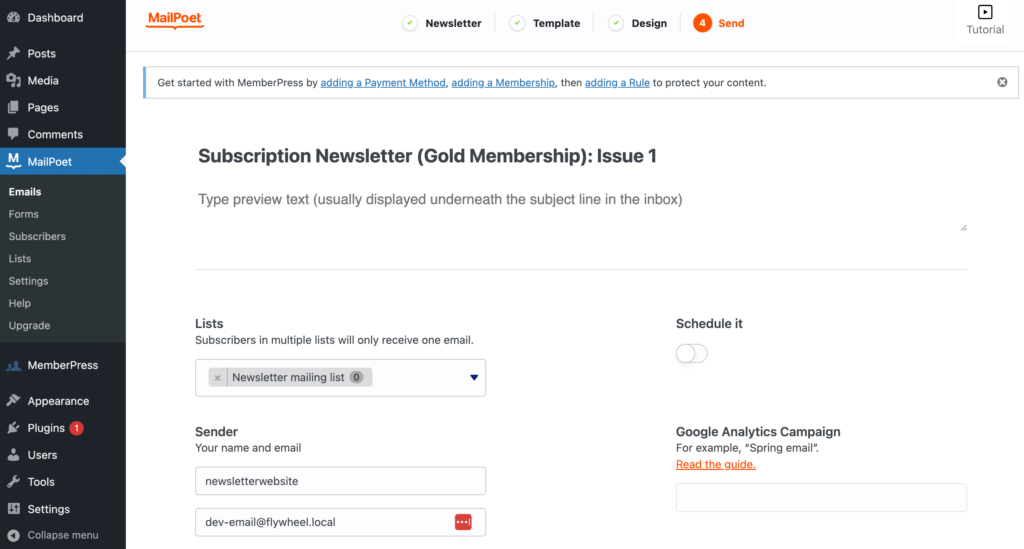
Finally, it’s time to send your newsletter to your members. Before that, though, you’ll need to select the appropriate member group in your Lists dropdown menu:
As you can see, ours matches the Gold Membership from the previous steps.
At this point, you can send your newsletter immediately. However, if you’re managing a subscription newsletter, chances are you’ll want to send it at a specific time, such as weekly or monthly.
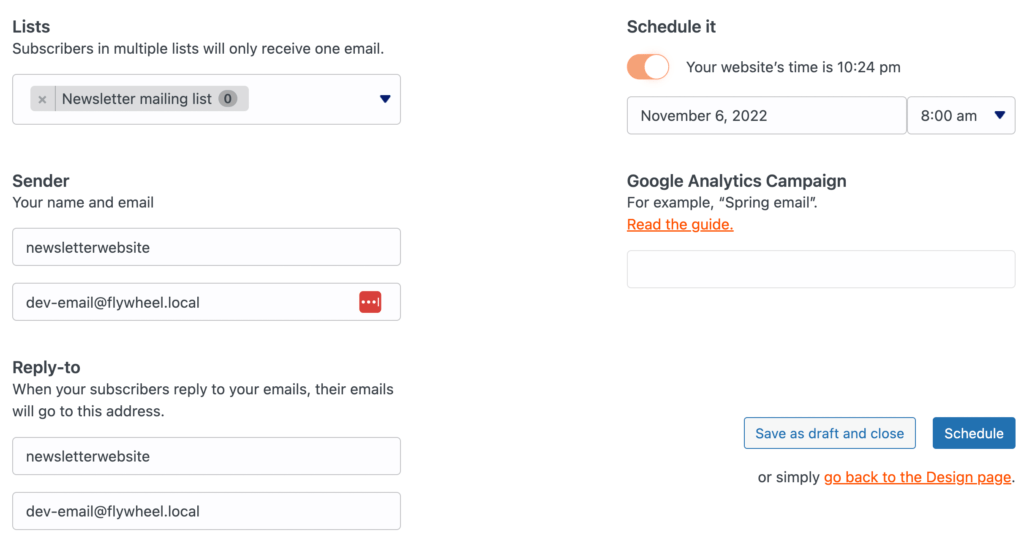
To do this, click on the toggle button for Schedule it:
Then, input the date and time you’d like to send your newsletter. Finally, click on Schedule. That’s it!
Conclusion
There are tons of benefits to launching an email newsletter. However, choosing the wrong newsletter software could limit your profit potential and your audience.
Fortunately, you can use WordPress and MemberPress to create a highly-customized newsletter with beginner-friendly tools.
To recap, here’s how you can start a subscription newsletter with MemberPress in four steps:
- Build a membership site.
- Install and activate the MailPoet plugin and add-on.
- Create your newsletter.
- Schedule your newsletter.

Get MemberPress Today!
Start getting paid for the content you create.







Add a Comment