As a tutor, you may sometimes feel limited by how many students you can see in person per week. You might also struggle to get new clients and grow your business.
However, thanks to the ever-growing world of virtual learning, offering educational sessions online has never been easier.
In this post, we’ll discuss why you should consider starting a membership site for your tutoring business. Then we’ll walk you through how you can do so in 5 simple steps with MemberPress. Let’s get started!
The Benefits of Starting a Tutoring Business Online with MemberPress
There are many benefits to starting a membership site. First, it can help you rapidly expand your client base.
When you’re not bound by geographical limitations, you can reach a wider audience. There are so many e-learning tools that enable teachers, students, and mentors to connect with ease.
With a website, you can promote your tutoring services in new and exciting ways. You can also leverage email and social channels to share promotions and content to help generate leads.
Another benefit of starting a membership site for tutoring is that it can help you increase your income. Of course, gaining a larger client base can help you earn more.
However, you can also create membership tiers and paid, premium content to sell in upgraded packages.
For example, you might provide high-quality downloadable resources in addition to tutoring sessions for premium plan members.
Finally, a membership website can also help you establish a professional online presence. Your members will be able to subscribe to your content, and you can create new coursework for them and track their progress as they go.
How to Start an Online Tutoring Business with MemberPress (In 5 Steps)
Now that you understand some of the benefits of starting an online tutoring business, let’s look at how to go about it.
To begin, you’ll need to have a WordPress site set up. You’ll also want to choose a theme. You can check out some of the best tutoring themes here for some quality options.
With that out of the way, we can get into how to create the site. We’ll be doing so using our own MemberPress plugin. It works on WordPress and enables you to control every aspect of your members-only site from a single dashboard.
Step 1: Purchase and Install the MemberPress Plugin
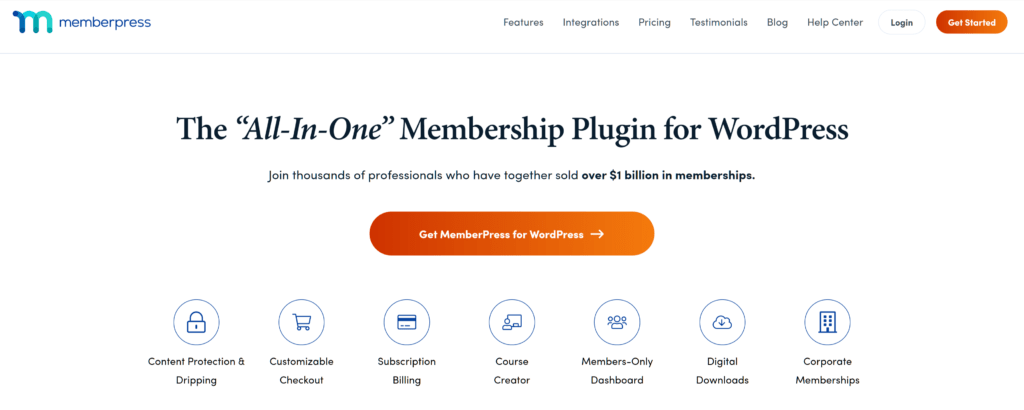
The first step is to head over to our website and select a pricing plan. The packages range from our entry level Launch plan to our advanced Scale plan, depending on your specific needs.
The Launch plan is an excellent option if you’re starting out. It comes with the course builder add-on, which makes it super easy for you to design educational content for your students (passive income opportunity alert!).
After selecting your plan and registering your account, the site will automatically bring you to the Downloads page to download the software as a .zip file.
Next, you can navigate to Plugins > Add New from your WordPress dashboard. Upload the MemberPress file and activate the plugin.
To finalize the installation process, you’ll need to input your license key. You can find it on your Downloads page.
Step 2: Select Your Payment Method
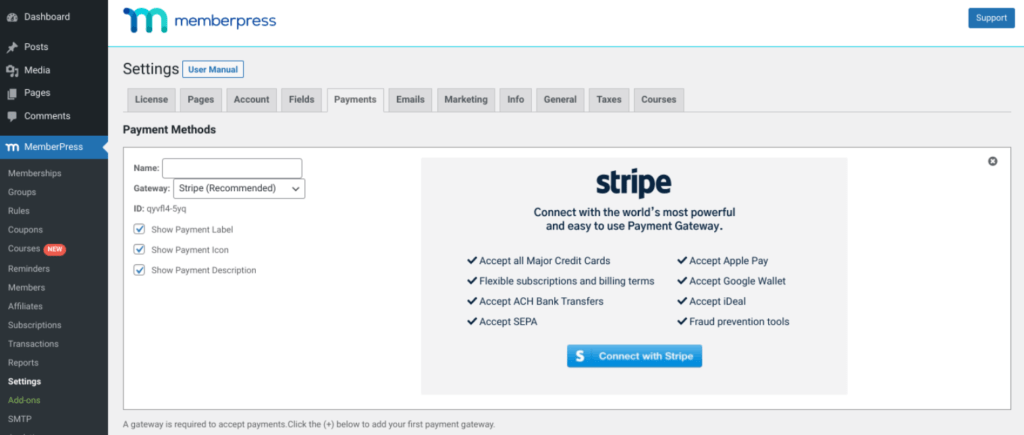
Before you start adding your membership options, you’ll need to add a payment method. To do so, you can navigate to MemberPress > Settings and select the Payments tab followed by the plus sign:
Here, you can enter the required information. You can choose from PayPal, Stripe, and Authorize.net. You can also opt for offline payments in cash, but this option may not be logical if you’re working remotely with your students.
Once you select the payment gateway(s) and enter your credentials, click on Update Options. You can come back to this page and add different methods in the future if needed.
Step 3: Create New Memberships
Once the payment gateways are configured, the next step is creating memberships.
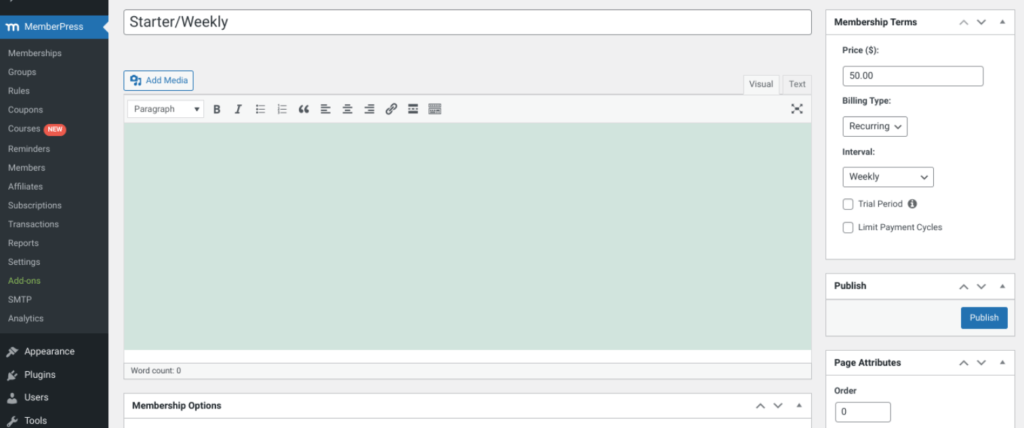
To get started, you can navigate to MemberPress > Memberships > Add New:
This is where you can start building plans for your tutoring packages. You can enter a title for the program, price, and billing type. For example, we created a “Starter/Weekly” plan with recurring, weekly billing.
You can add as many memberships as you’d like. When you’re done with each one, click on the Publish button to make it live.
If you have multiple plans, you may need to separate your content according to these tiers.
As mentioned, you might want to offer premium features, such as homework materials, to your highest-paying students. You can create content access rules to separate different posts and pages.
Step 4: Coordinate Tutoring Sessions with Your Students
There are many different forms your tutoring sessions can take. You can decide which methods to use depending on what’s best and most practical for both you and your students.
Perhaps you want to offer a variety of options. Some of the most popular include:
You may also want to enable your students to schedule tutoring appointments with you via your website. You can do this using a plugin like Simply Schedule Appointments.
With this add-on, you can customize your tutoring session lengths and design a calendar for students to make bookings.
Simply Schedule Appointments also enables you to set up different appointment types. For example, you could create modules for phone, video, or chat sessions with your students.
And the plugin integrates with Zoom for ultimate efficiency!
Step 5: Create and Share Your Membership Registration Link
Once you have your membership site set up and configured, you can create your membership registration page. To make the sign-up process as simple as possible, we recommend letting users register from your homepage.
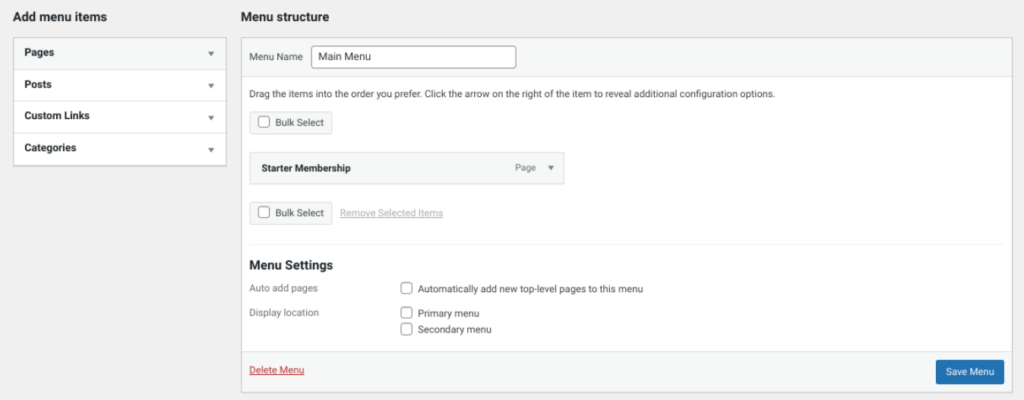
To do this, you can navigate to Appearance > Menus in your WordPress dashboard. Then you can select the name of the membership you want to add to the menu:
Once you have your menu item added, you can save your changes. When you visit your site on the front end, you’ll be able to see a registration link.
You can share this on other platforms with your students to make it easier for them to sign up for your tutoring sessions!
Conclusion
Thanks to virtual learning environments, offering tutoring lessons online has never been easier. And creating a membership website could be an excellent investment if you want to make the most of your business.
As we discussed in this article, you can start an online tutoring business in five easy steps:
- Purchase and install our MemberPress plugin.
- Select your payment method(s).
- Create your memberships.
- Choose and coordinate your tutoring sessions with students.
- Create and share your membership registration link.
Do you have any questions about how to start a tutoring business online using MemberPress? Let us know in the comments section below!
If you liked this article, be sure to subscribe to the MemberPress blog!





Can memberpress plugin be used to implement multiple tutor registrations as well as students registration? Please i would appreciate a feedback.
Thanks.
Can create a tutoring website for multiple tutors with memberpress? I want to be able to connect different tutors and students together on the site after they sign up.
This article on membership site tutoring is incredibly insightful and practical. The detailed strategies and actionable tips provided are a valuable resource for anyone looking to enhance their tutoring business. Kudos to MemberPress for such a comprehensive and helpful guide!