In MemberPress, the number of fields that you can have on the registration form range from as few as just Email, Password, and Password Confirmation, to having as many of our default and custom fields as you would like*.
How to Have the Least Amount of Registration Fields
Note: the description below assumes that you are not collecting taxes. If you are, please see our instructions below.
If you are wanting to have the fewest amount of registration fields possible, then the way to do that is to first uncheck every option available to you on the MemberPress > Settings > Fields tab.
With that, the only fields that your new users will see will be: Username, Email, Password, and Password Confirmation.
If you want to further limit it, then you can use the “Members must use their email address for their Username” and the “Disable Password Fields on membership registration forms” options discussed below so that all users have to enter will be their Email.
How to Have the Least Amount of Registration Fields When Collecting Taxes
If you are collecting taxes for your Membership sales, then unfortunately, all of the MemberPress default address fields must be enabled for your paid memberships. However, you can disable the address fields for any membership that is a free subscription.
This can be done per-membership by navigating to MemberPress > Memberships > Editing a membership > Membership Options > Registration tab > check the box for the, “Disable Address Fields” setting:
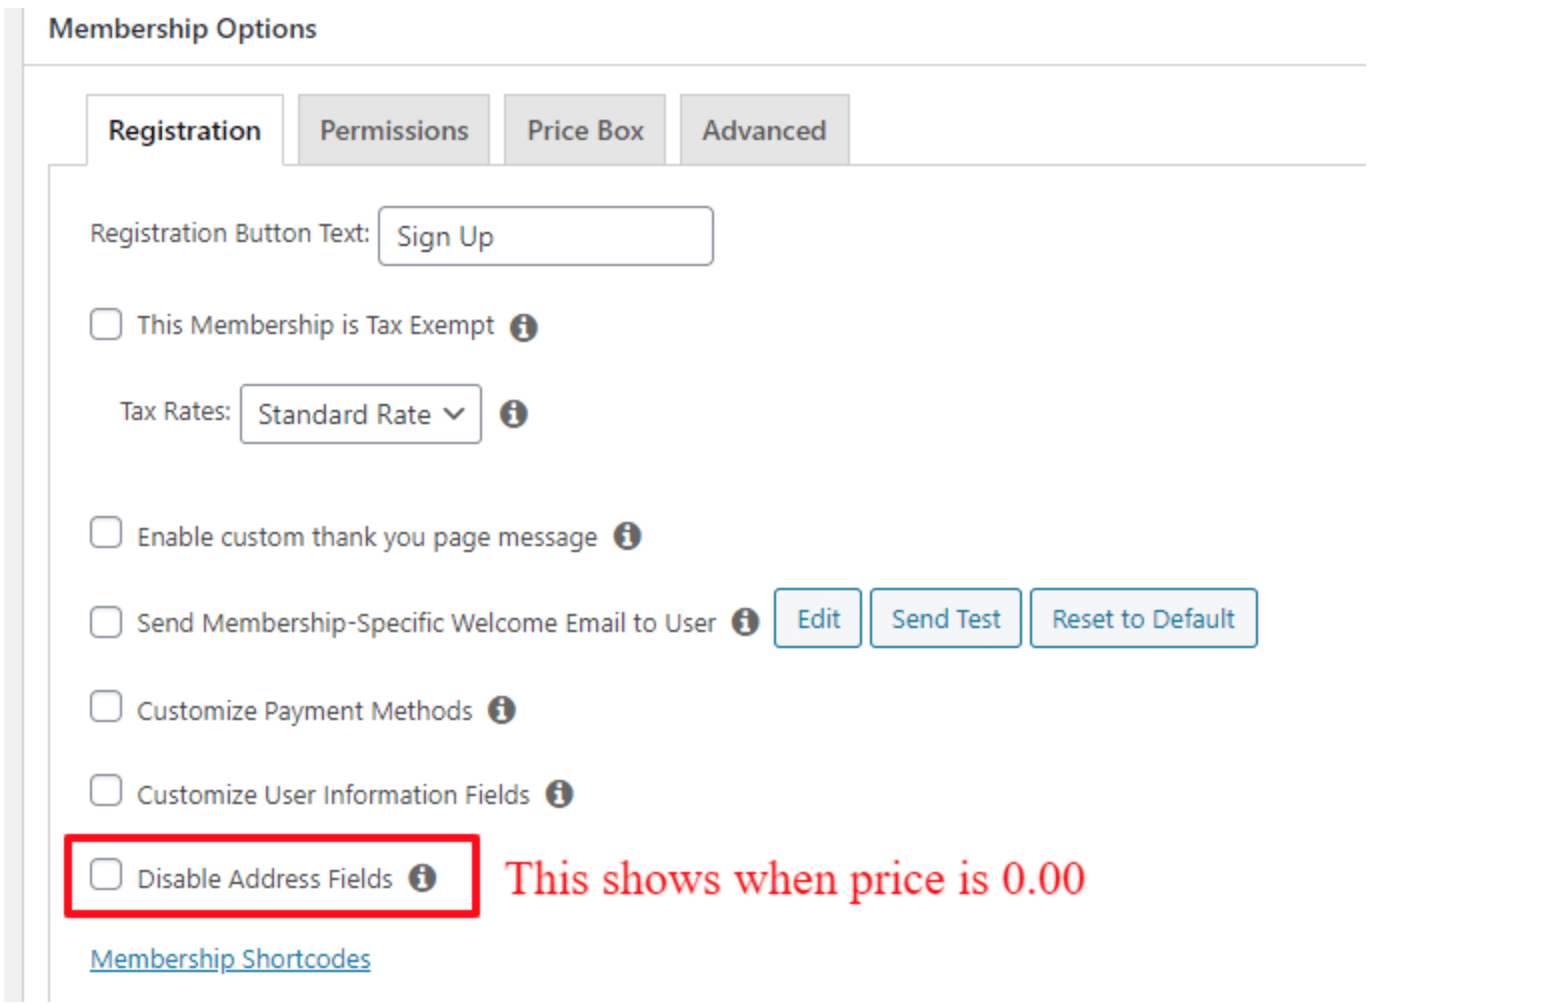
This will disable the default address fields upon registration for this membership. Be sure to click the “Update” button to save this setting.
Additionally, you can limit any of the other default or custom registration fields using the settings on the Settings > Fields tab or the “Customize User Information Fields” discussed below.
Other Important Features to Limit Select Registration Fields
If you don't need to have the shortest registration form known to man, then you can use these options to limit select registration fields:
Settings > Fields Tab Settings
In the MemberPress > Settings > Fields tab you will find the ability to show or hide any default or custom fields. To learn more about the settings shown there, please see this page.
Members must use their email address for their Username
If you don't have a need for users to create a username and are okay with them using their email in place of a username, then you can use this setting. Just remember that their emails will then be used to display publicly when posting a comment or otherwise interacting on your site.
To enable this option, go to your WordPress Dashboard > MemberPress > Settings > Account tab > Registration section > and check the box next to this option. Then click the “Update Options” at the bottom of the page.
Disable Password Fields on membership registration forms
This setting will remove the Password and Password Confirmation fields from the signup form. Making it quicker/easier for your members to register. They will instead receive an email in their inbox with a link to set their own password.
To enable this setting, navigate to the MemberPress > Settings > Account tab > Registration section and check the checkbox next to the Disable Password Fields on membership registration forms option.
Disable Address Fields (only for free memberships)
This option is one that will only be shown to if you have set the MemberPress default address fields to both show and be required in your Settings > Fields tab AND the membership is free (has no cost).
With those conditions met, you can find this option per-membership by navigating to MemberPress > Memberships > Editing a membership > Membership Options > Registration tab > near the bottom of the options list. Simply check the box next to it to enable this setting (thus disabling the default address fields upon registration for this membership) and then click the “Update” button to save this setting.
Customize User Information Fields
Any custom fields that you have created in the MemberPress > Settings > Fields tab can be enabled or disabled per-membership. To start, please note that to utilize the option here, you have to enable the “Show at Signup” option in the MemberPress > Settings > Fields tab for the custom fields you want to be able to show/hide per-membership.
With that done, you can use the Customize User Information Fields option that is found in the Membership Options (when editing your Membership) > Registration tab. Simply check the box next to this option to enable it, and then check or uncheck each custom field you would like, then click the “Update” button to save this setting.
Repeat per-membership.
*This is a figure of speech. While we do not have set limit on how many fields you can have or create, having too many can limit performance.


