If you run an online course, you might already have lots of ways to engage your users. However, the elearning market is becoming highly competitive. Coming up with creative ways to keep your audience engaged can be a challenge.
Fortunately, quizzes can help you keep your audience interested in your content. You can use them to offer value to your students and make your courses more interactive.
In this post, we’ll look at how quizzes can benefit your online course. Then, we’ll show you how to add a quiz to your courses with the MemberPress quiz creator. Let’s get started!
Why Quizzes are Beneficial to Your Online Course
If you offer online courses, it's important to provide engaging content for your audience. Quizzes are a tool that you can incorporate into the course material to keep your students interested and motivated:
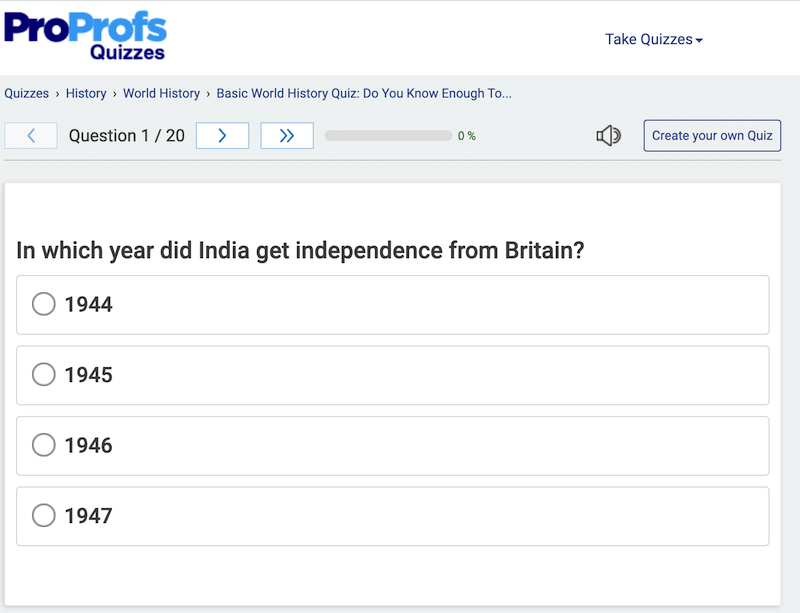
Quizzes provide many benefits for your students. For example, quizzes allow your users to test their skills and knowledge so they know what level they're at.
Additionally, you can use quizzes to monitor how your students are interacting with your courses. And you can use the information you collect from the results to improve your course content.
For example, if the majority of your students are getting low quiz scores, that indicates something needs to change. It could be your course content or something else. In any case, this knowledge is invaluable for keeping tabs on your program.
MemberPress Courses
MemberPress Courses is a powerful tool that allows you to deliver and sell online courses on your WordPress site. And it's included with every MemberPress plan level.

Our Courses add-on lets you easily create online courses with its visual builder that includes a drag-and-drop course editor, progress tracking and certificates.
The add-on also opens your courses up to a number of other incredible add-ons including assignments, gradebooks, and, as we'll explore in depth in this article, quizzes.
If your course content is on another LMS platform and you'd like to switch, check out our article How to Migrate to MemberPress. It's easier than you might think, and if you need help, our support team is second to none!
Ok, so let's get to it.
How to Add Quizzes to Your Courses with the MemberPress Quiz Creator (In 3 Steps)
In this tutorial, we'll show you how to use the quiz creator in MemberPress for your online course in WordPress. Note that you'll need to have MemberPress and the Courses add-on installed and activated on your site.
(If you're more of a visual learner, check out the full tutorial video at the top of this post)
Step 1: Download Quizzes Add-on
The Quizzes add-on is available to all MemberPress Plus and Pro plan members.
To enable it, head to your WordPress Dashboard > MemberPress > Add-ons.
Look for the Course Quizzes add-on or search for “quizzes“ using the search tool.
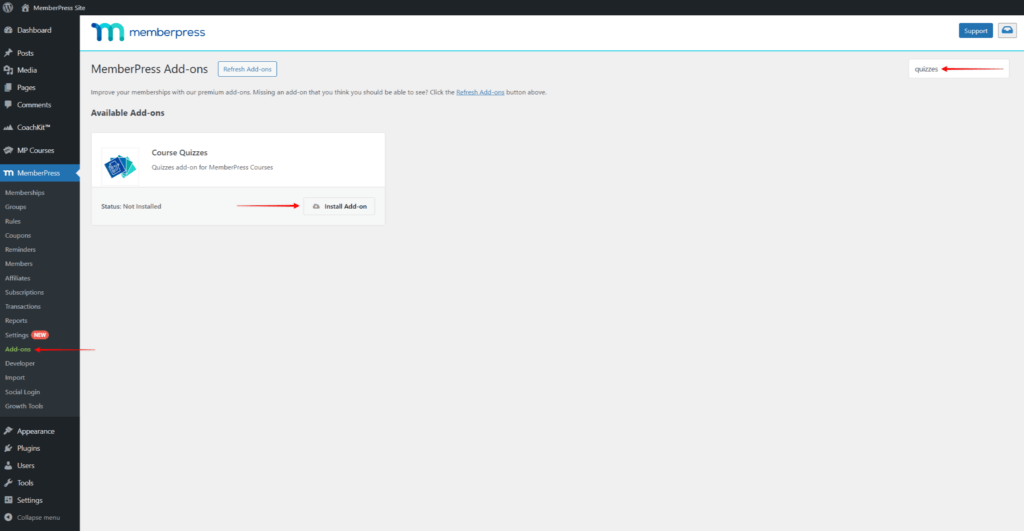
Simply click “Install Add-on” to install and activate the quizzes feature on your courses.
Step 2: Configure the Quiz Settings
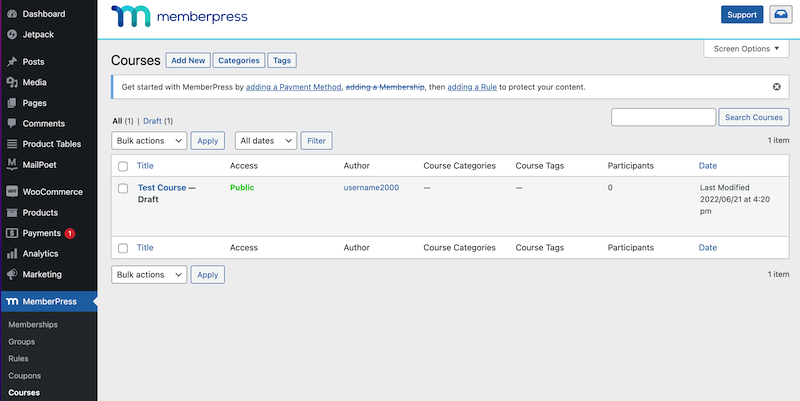
Next, from the WordPress dashboard and click on MemberPress > Courses. Then, choose a course that you want to add quizzes to and select the Edit option:
In the Block Editor, click on the Settings tab:

Here, you'll find three main settings for your quizzes. If you enable the Require Previous Lesson/Quiz option, users will need to complete the previous lesson or quiz before they can move to the next one:
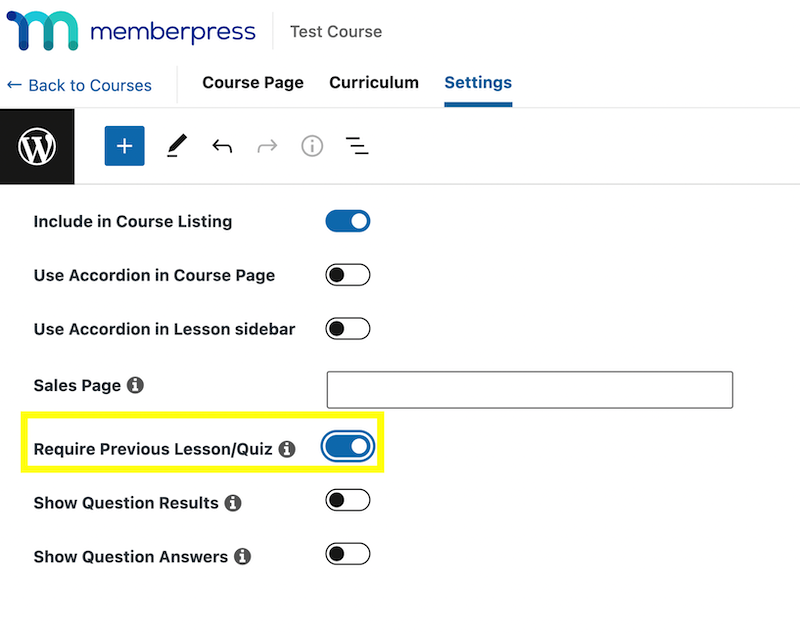
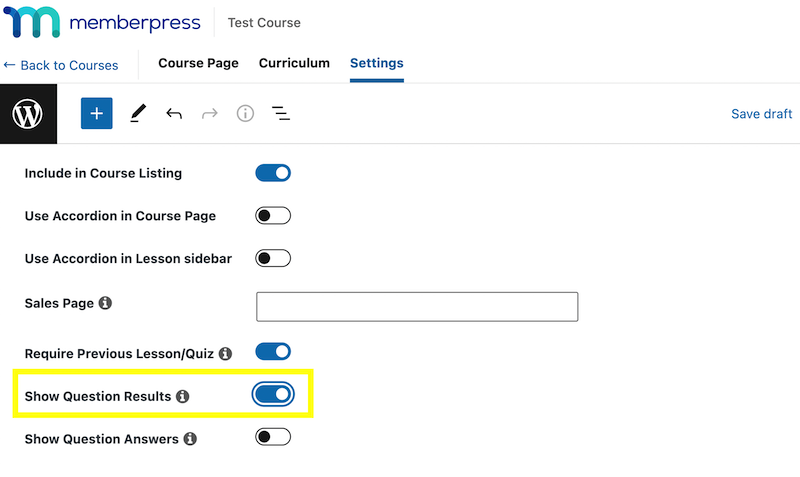
You'll also see the Show Question Results option. This enables you to share the results with your students:
The last option, Show Question Answers, lets you show users the correct answers after they complete the quiz:
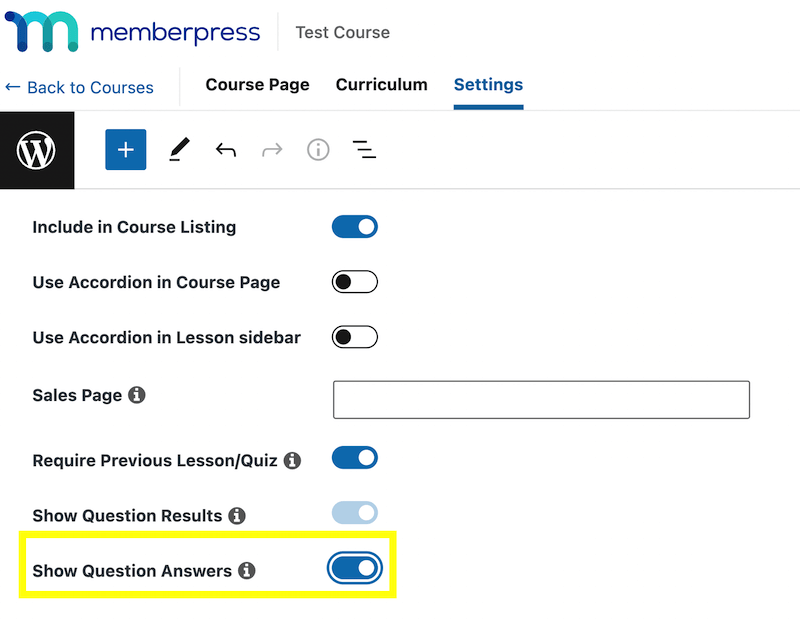
Note that you can show question results without showing the answers. When you're ready, click on Update or Save Draft to save your changes.
Step 2: Create Your Questions and Answers
Next, you can create your questions and answers. To get started, navigate to the Curriculum tab on the course page.
Here, you'll see the option to either add a lesson or a quiz. Click on Add Quiz and choose a name:
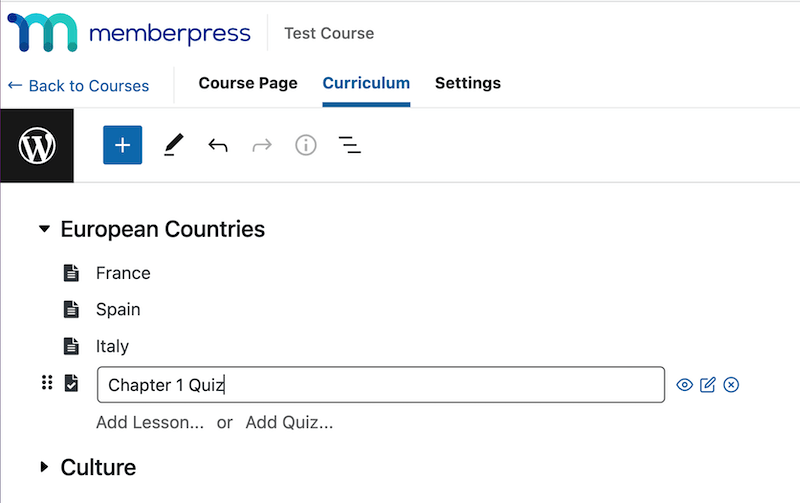
If you hover over the quiz and click on the edit button, a prompt will appear:
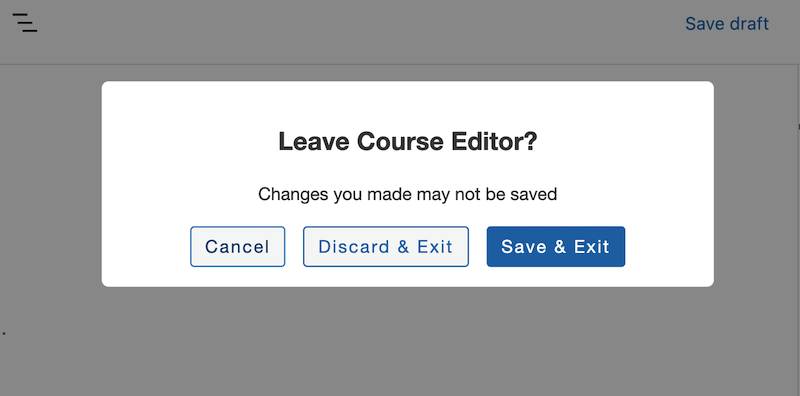
Make sure to select Save & Exit. This will redirect you to the Edit Quiz page:
Next, click on the plus sign (+) in the top left corner to display the available quiz blocks:
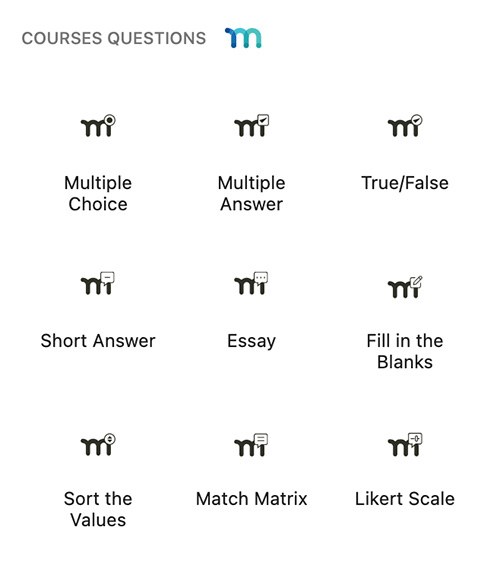
You can choose the following types of quiz questions:
- Multiple Choice – Students select one correct answer from a list of options.
- Multiple Answer – Students select all correct answers from a list (more than one may be correct).
- True/False – A simple statement where students choose whether it’s true or false.
- Short Answer – Students type in a brief response, typically a word or sentence.
- Essay – Open-ended responses that allow students to elaborate in paragraphs.
- Fill in the Blanks – Students complete missing words or phrases in a sentence.
- Sort the Values – Students drag and drop items into the correct order or sequence.
- Likert Scale – Students rate their level of agreement with a statement on a scale (e.g., 1–5).
- Match Matrix – Students match related items across two columns (like terms and definitions).
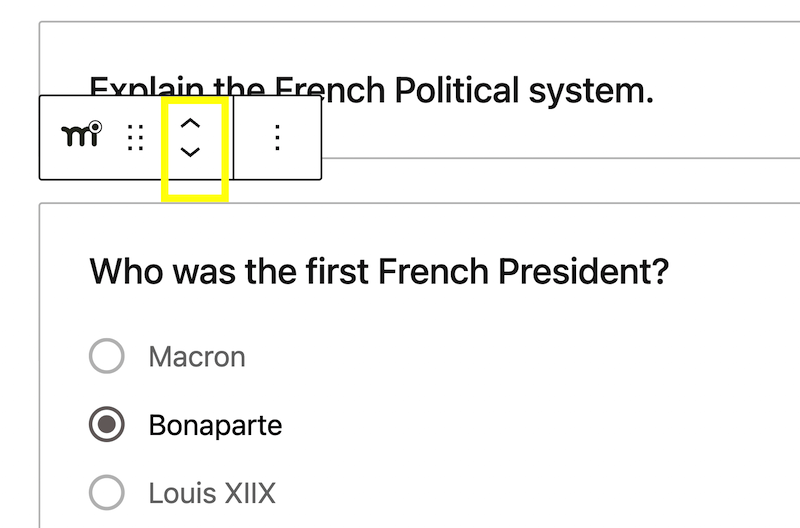
Additionally, you can use the arrows in the toolbar to rearrange the order of your questions:
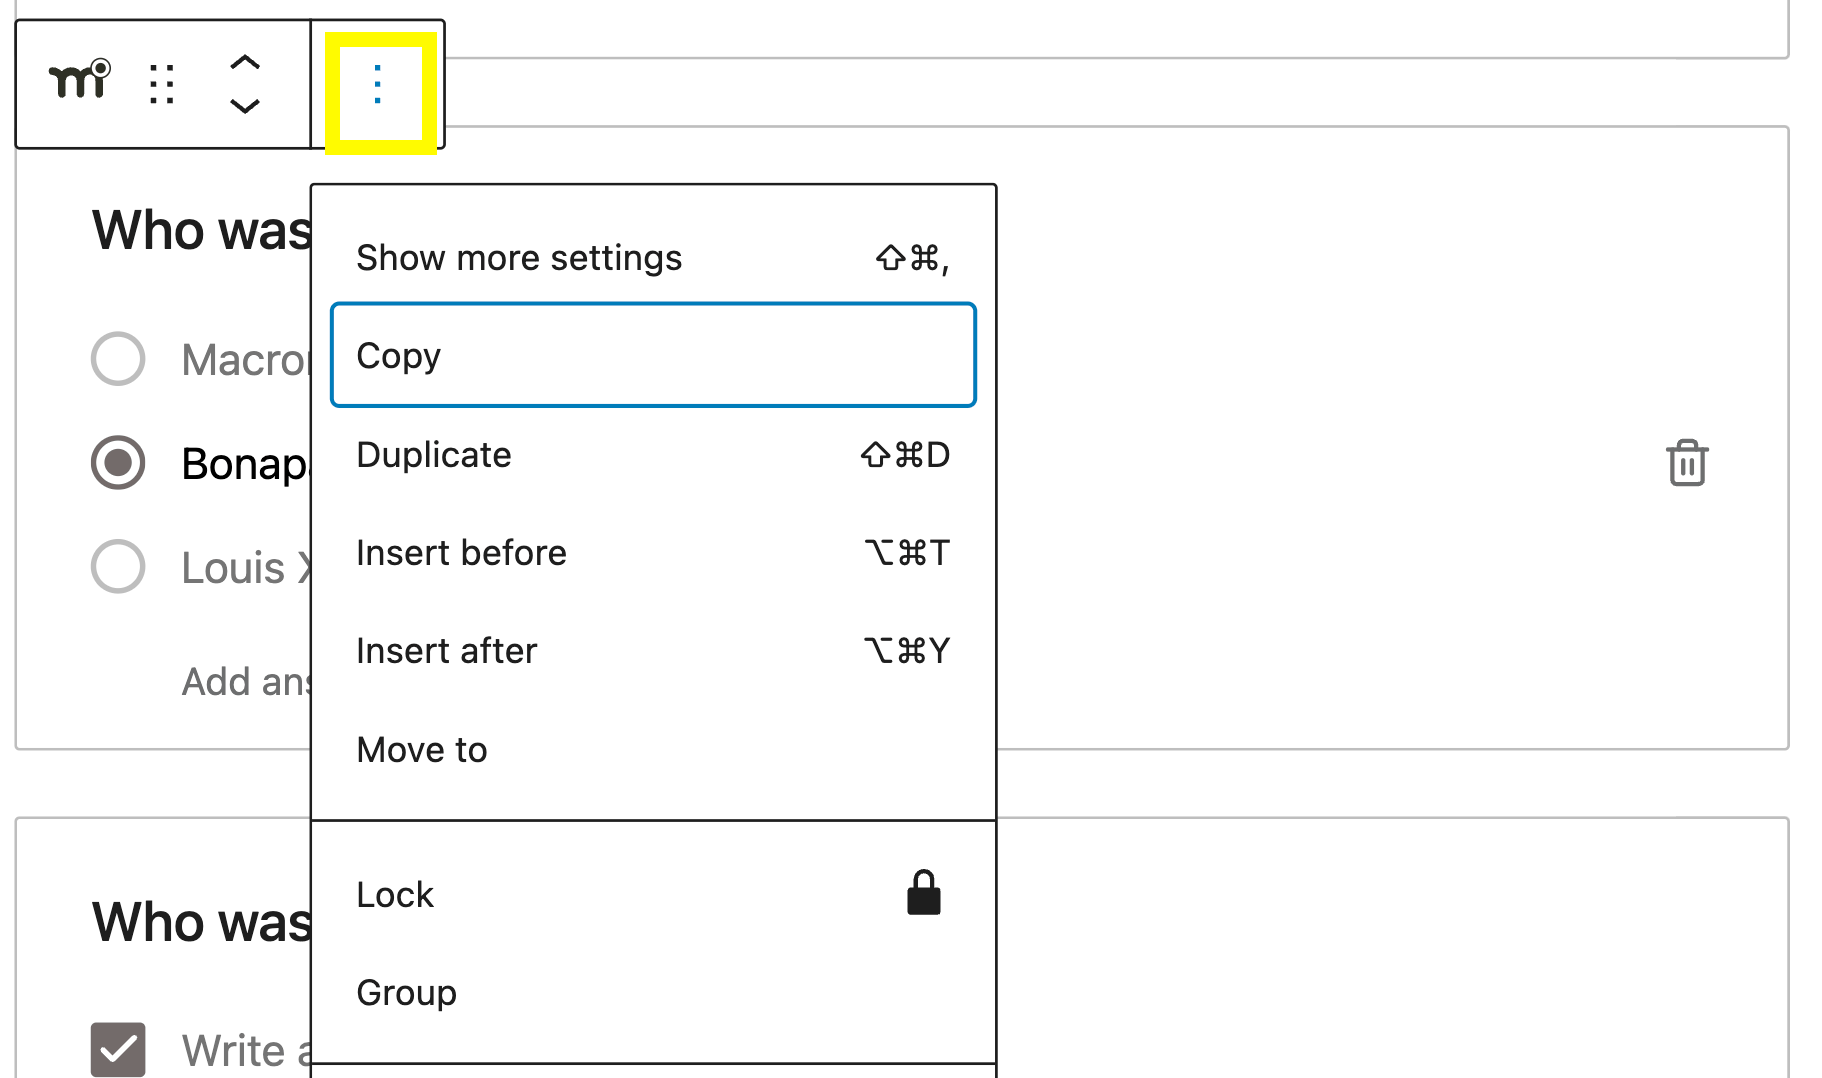
If you click on the three vertical dots, you'll see options to duplicate the block, remove it, or change the placement:
To create your question, simply enter your text in the appropriate field. If you're using the Multiple Choice block, you can also add your answers.
Choose the right answer by selecting its radio button:
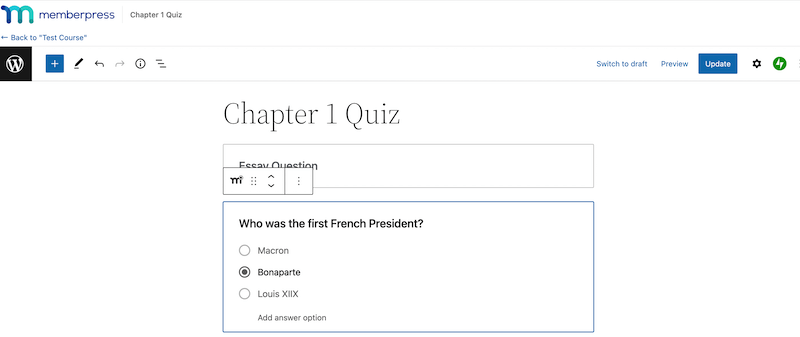
You can also do this with other question formats.
When you're ready, click on Update to save your work.
Step 3: Set the Rules for Your Quiz
On the right-hand side of your screen, you can configure the settings for each question. For instance, you can set points for it and provide feedback for wrong answers:
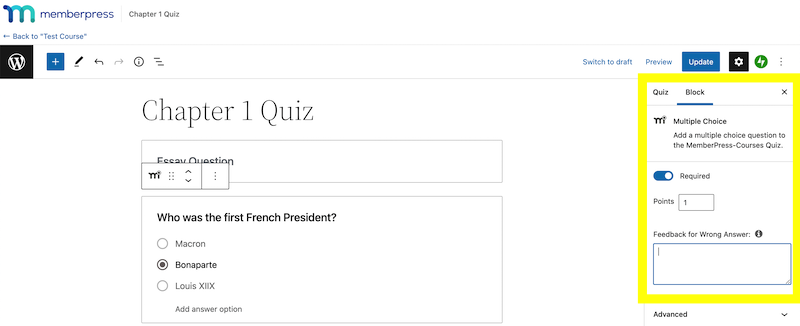
Note that if the Show Question Answers option is disabled, the text you write in the Feedback for Wrong Answers box won’t be displayed to your users.
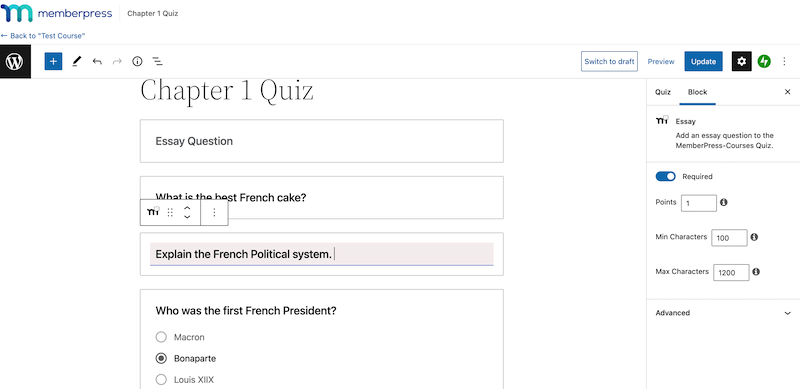
Most quiz blocks have the same settings. However, for Short Answer and Essay questions, users won’t be graded for correct or incorrect answers.
In the Essay block, you can set the minimum and maximum character count for the answer:
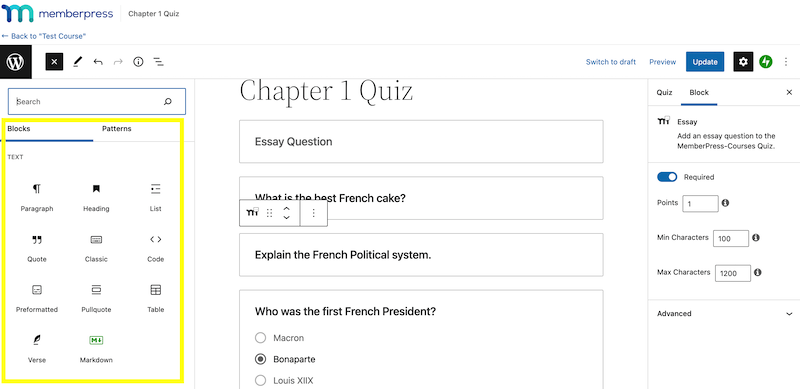
You can also add regular blocks to your quiz, such as Heading, Paragraph, and Quote:
When you save your changes, you'll get a prompt to preview your quiz. Click on the provided link to see what the quiz looks like on the front end:
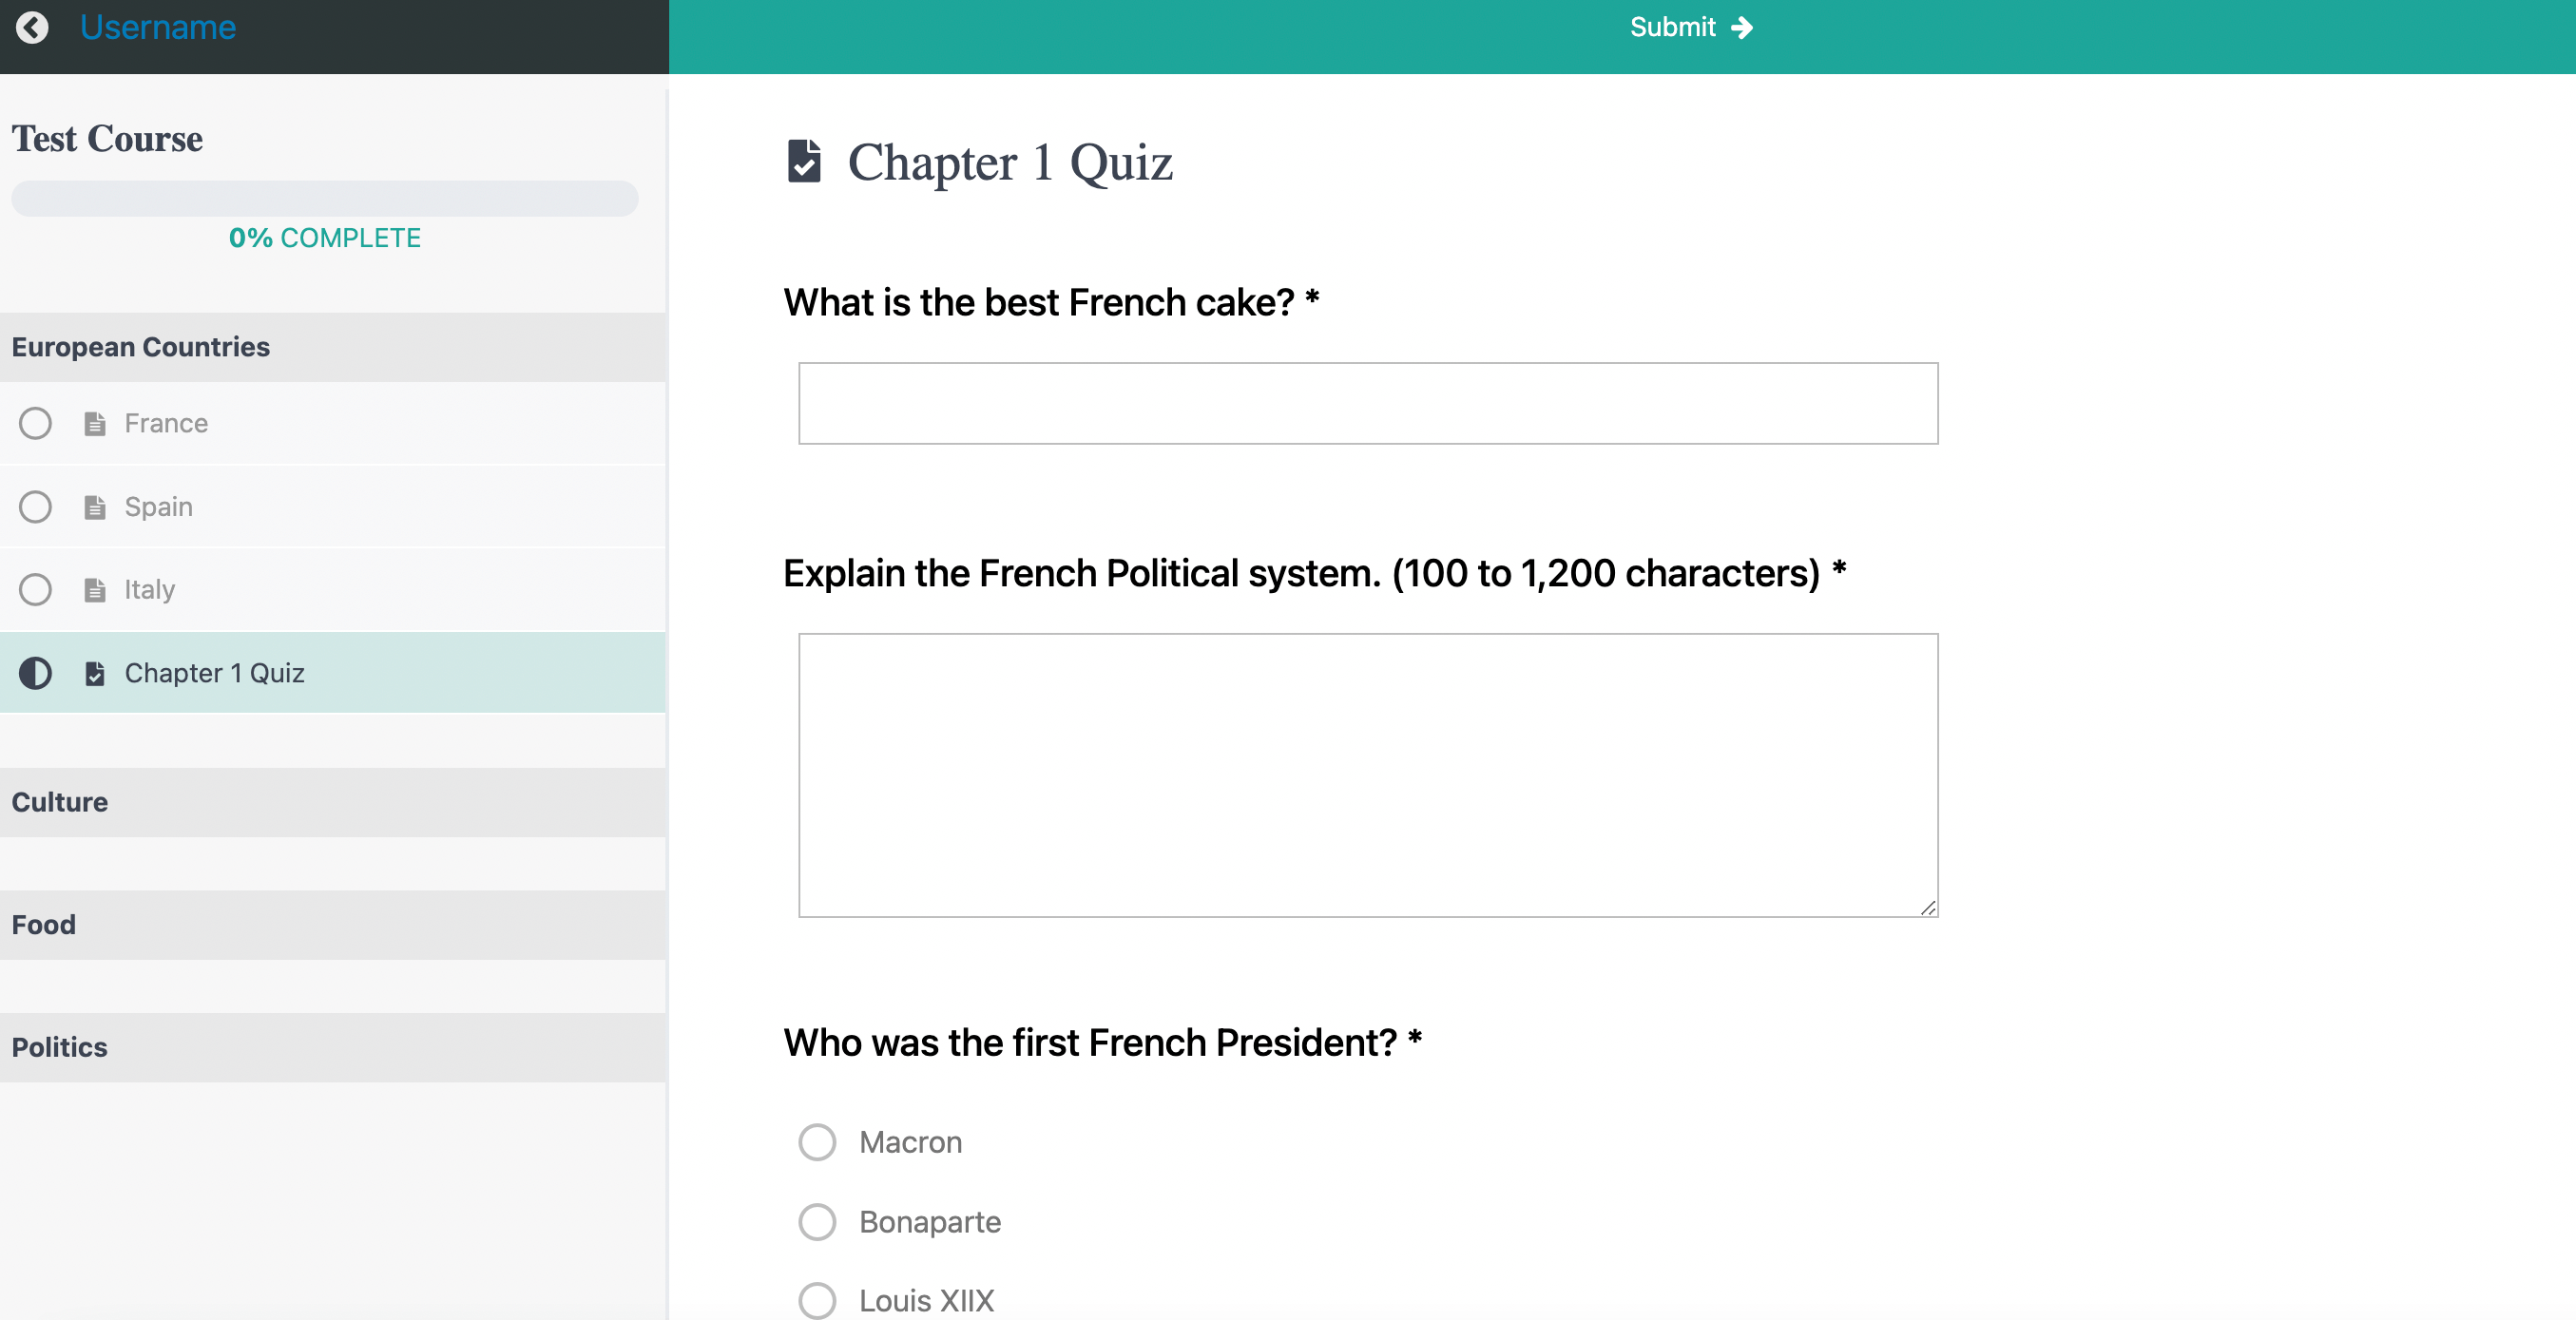
Here, you can play around with the answers to make sure that everything is working as it should:
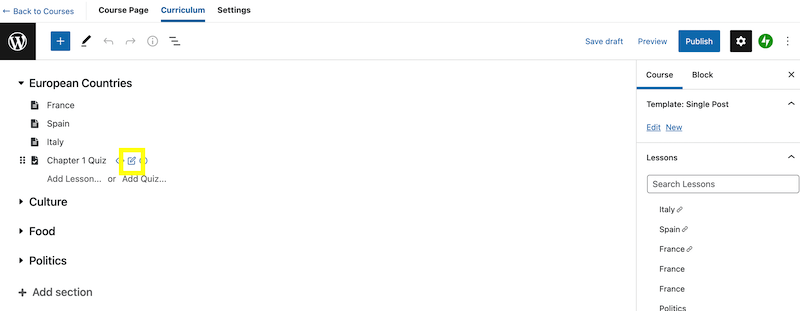
To edit your quiz, return to Courses on your dashboard. Then, select your course, go to the Curriculum tab, and hover over your quiz to find the edit button:
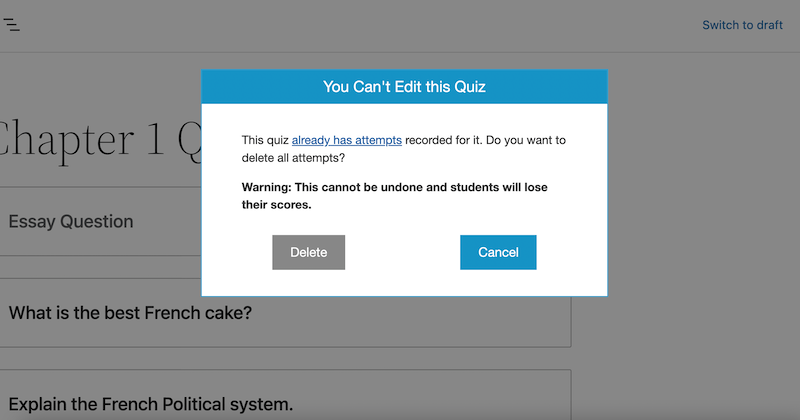
When you click on it, you'll get the following popup window:
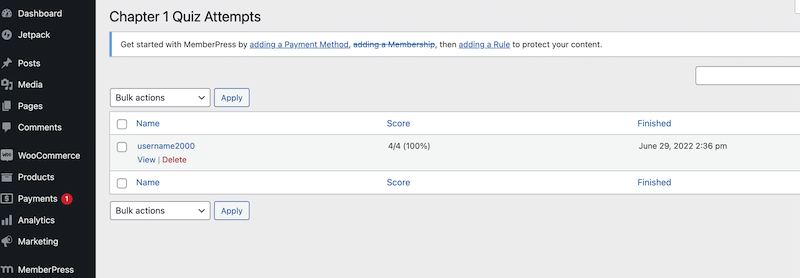
If you click on the anchor text in the window, you'll be taken to a page that shows the users that have taken the quiz:
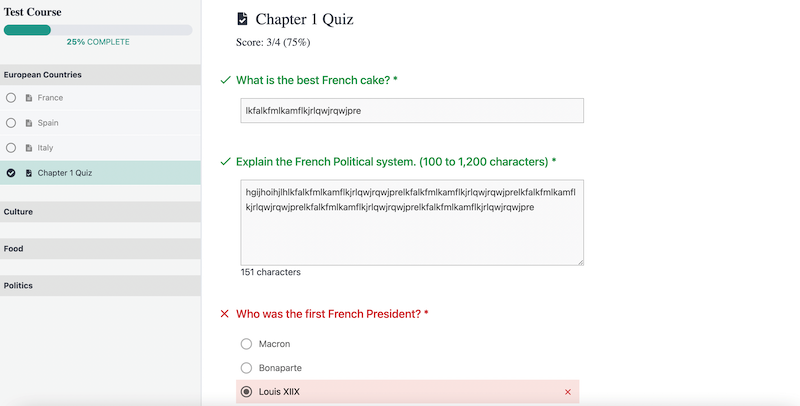
You can click on View to see a user’s results:

Now, go back to the popup window and click on Delete. Note that when you select this action, any students who have already taken the quiz will lose their results:
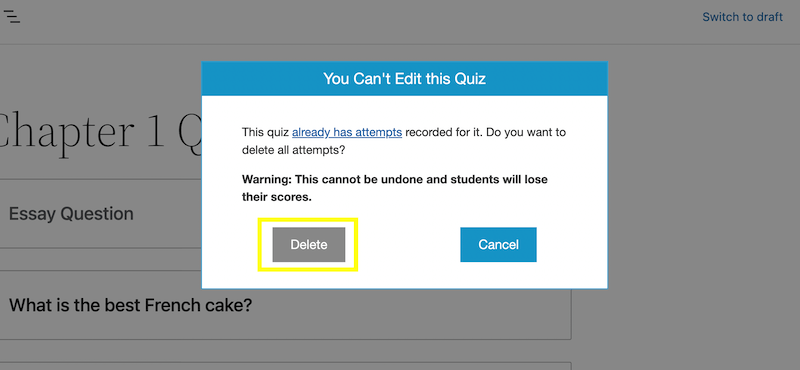
This will enable you to continue customizing your quiz in the Block Editor. You can add additional questions, change the answers, and more.
By clicking on the Quiz tab in the settings panel, you can edit the URL slug:
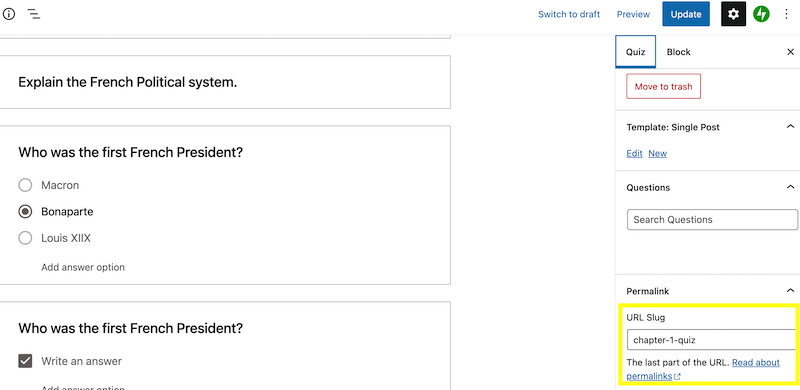
Here, you can also search for questions from your courses and drag and drop them into your quiz. Remember to save your changes when you're ready.
If you want to delete any attempts submitted by users, go back to the Curriculum tab and click on the edit icon for your quiz:
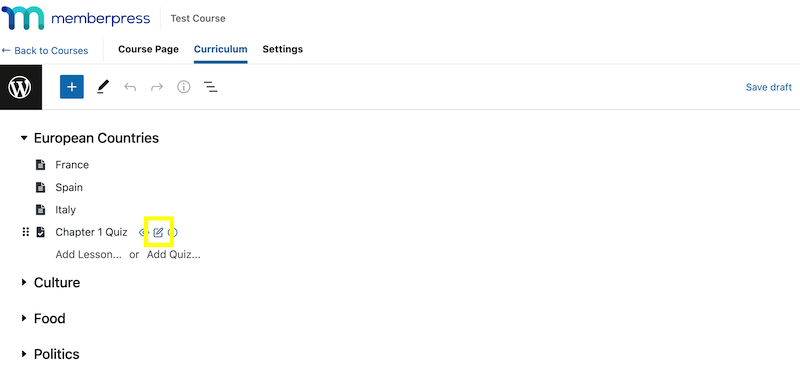
You'll see the You Can't Edit This Quiz popup again. Click on already has attempts to go to your user submissions. Then, hover over the user and select the Delete option:
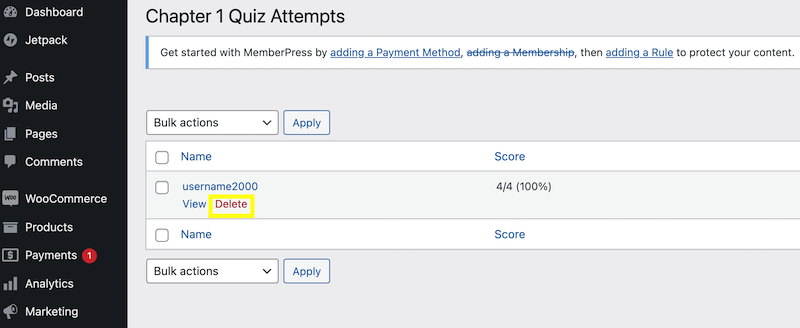
This will delete this attempt so that the user can retake the quiz. That's it – you now know how to create quizzes for your online course!
Conclusion
Creating interactive content for your customers can be challenging. Quizzes can help keep your users engaged and encourage interaction with your brand.
If you run online courses, quizzes can also help you track the progress of your students.
To recap, here’s how to add a quiz to your online course with the quiz creator in MemberPress:
- Enable the Courses Quizzes Add-on
- Configure the quiz settings on your course page.
- Create quiz questions and answers with blocks.
- Set rules and test your quiz.
Do you have any questions about how to create a quiz for your MemberPress course? Let us know in the comments section below!


Hi, is it possible to set a pass rate for each Quiz on memberpress? Is there no way to keep the user attempt if we have to edit the quiz?
We created four large quizzes via the wp-admin > MP Courses > Quizzes > Add New method. How do I add these already existing quizzes to a course? The course edit screen only seems to let me add a NEW quiz, as opposed to selecting one that already exists.