Are you looking for a way to improve your WordPress website’s search engine ranking and attract more visitors? One effective strategy is to use schema markup.
If you’ve looked into website schemas, you might be feeling daunted, especially if you’re not a coding whiz. But we’re here to demystify the whole thing.
Stick around as we explain what schemas are, how they work, and how to add schema to WordPress without any coding required.
What Is Schema Markup?
Most of the content we produce as humans is unstructured data. Whether it’s a video, a blog post, or a conversation on social media, search engines need to work hard to understand and process it.

Schema markup is a language of structured data that clearly explains to search engines what your content is about.
Back in 2011, top search engines, including Google, Yahoo, Bing, and Yandex (yep, that’s a thing) all collaborated to standardize schema markup to work across their sites.
Together they created Schema.org, a full library of different schema types and the schema markup language you need to use them.
Why is Schema Markup Important
Schema markup is a big deal for search engine optimization (SEO).
By making an effort to include schemas, you’re scratching search engines’ backs and giving them a tasty morsel of information they can easily process.
In return, they’ll prioritize your page on search engine results pages (SERPs) over your competitor pages that don’t include this data.
And if you’re really lucky, you might get rewarded with rich snippets.
Introducing Mr. Rich Snippets
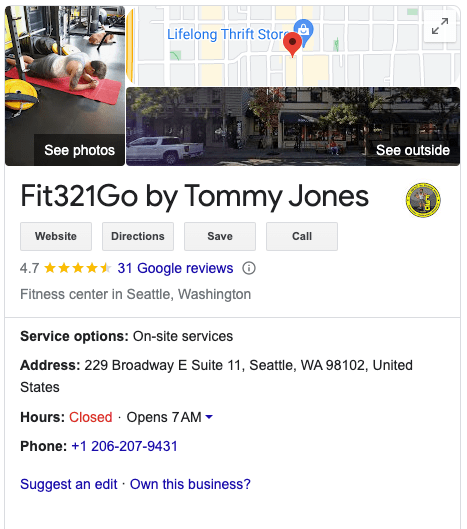
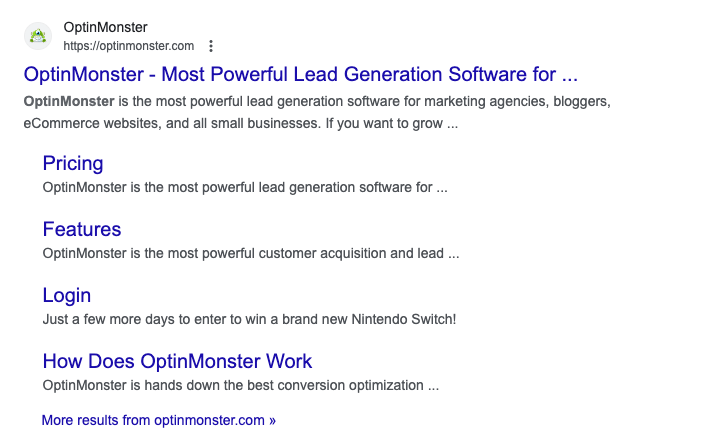
No, it’s not the name of a film noir detective. Rich snippets are actually nuggets of information shown in the SERPs that look super snazzy and help you stand out.
Like these:
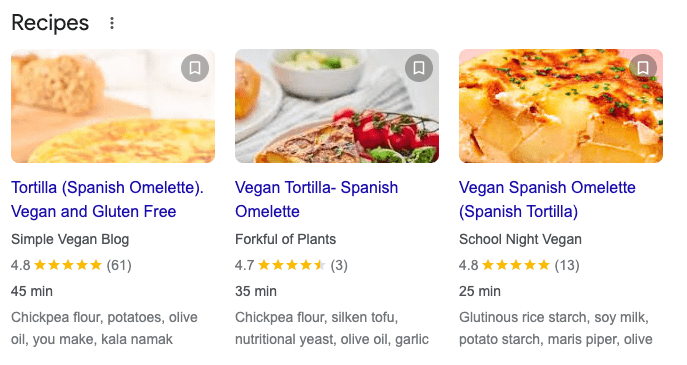
Look familiar?
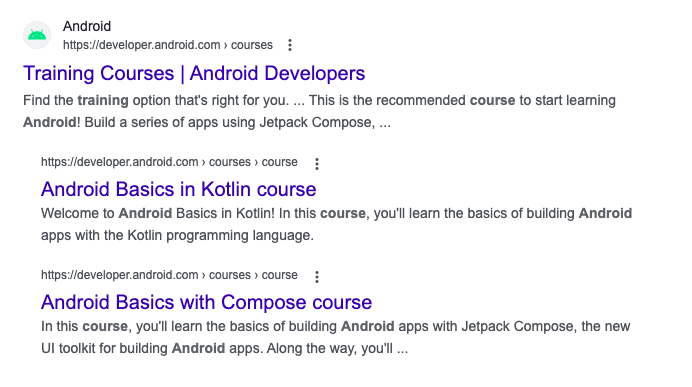
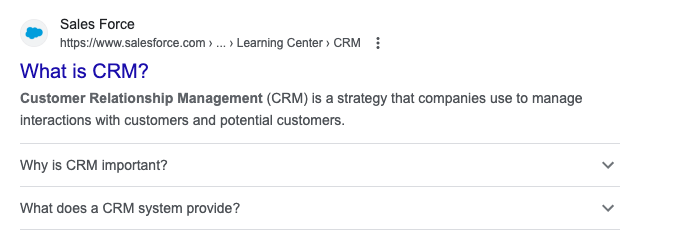
There are all kinds of examples of rich snippets. Google supports the following schema types to provide snippets on their search results:
- Articles
- Books
- Breadcrumbs
- Carousels
- Courses
- Datasets
- Education Q&As
- Employer aggregate ratings
- Estimated salaries
- Events
- Fact checks
- FAQs
- How-tos
- Image metadata
- Job postings
- Learning videos
- Local businesses
- Logos
- Math solvers
- Movies
- Practice problems
- Products
- Q&As
- Recipes
- Review snippets
- Sitelink search boxes
- Software apps
- Speakables
- Videos
Sidenote: Creating schema markups doesn’t guarantee your page will be displayed as a rich snippet, but it does give you a fighting chance.
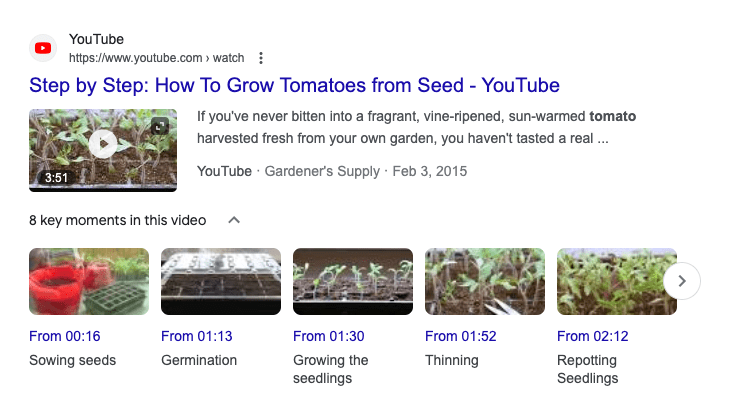
Rich snippets aren’t just great for businesses, they also improve the search experience for search engine browsers.
For example, with this video snippet, you can navigate directly to the part of the video that’s most relevant to you straight from the results page.
Snippets are also used in voice search results.
Considering almost half of the US population (around 142 million people) use voice assistants, optimizing your site for voice search is more important than ever!
Rich snippets on the backend
Rich snippets are quite lovely on the frontend, we’re sure you’ll agree. But schema markup is a different story.
Remember how we mentioned that you might be a bit intimidated by schemas? If you weren’t sure what we were talking about, have a look…
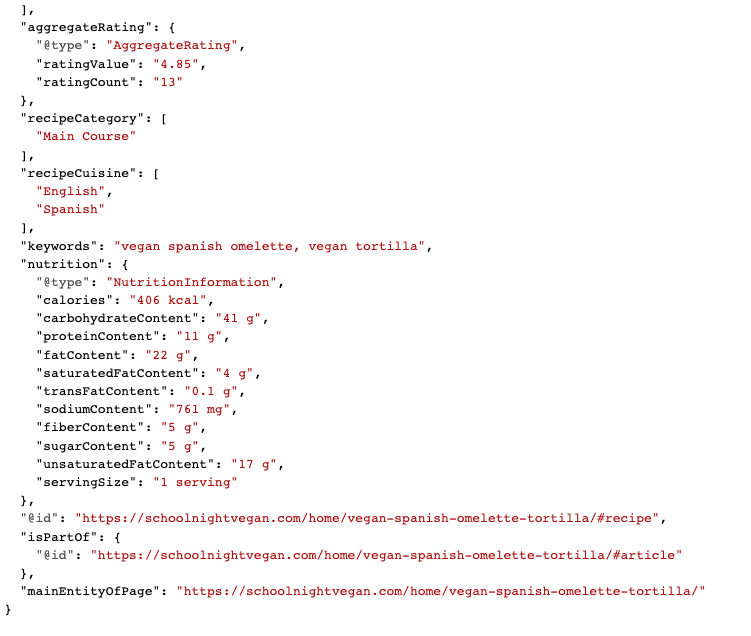
Yep. But don’t worry! Remember, we’re going to show you how to add schema to WordPress with zero coding.
Maybe you’re a solopreneur looking for a quick and easy way to add schema markup to new content. Perhaps you’re a developer who wants to simplify the process for their clients.
Whatever the case, read on to get the lowdown.
How to Add Schemas to WordPress
The excellent news is you created a website in WordPress! Gold star for you! ⭐

And since you’ve got a WordPress website, that means you have access to all sorts of plugins to help you avoid scary code altogether.
Our go-to plugin for schema markup (or for that matter, anything to do with improving search engine results) is All in One SEO (AIOSEO).

With AIOSEO, you can set your schema settings to auto-generate schemas, saving time and a lot of boring data entry.
Best of all, AIOSEO enables MemberPress users to quickly and easily create schemas for their courses and content.
We’ll show you how to set up AIOSEO to make it just as quick and easy to add schemas across your WordPress website too.
Step 1: Install AIOSEO
Before you can do anything else, you need to add the AIOSEO plugin.
- First, you’ll want to sign up to one of AIOSEO’s plans. All of their paid plans include smart schema markup. Their basic plan is just $124/year and covers tons of SEO essentials to improve your rankings on SERPs.
- Once you’ve signed up, copy your license key from your purchase receipt email.
- Next, add the AIOSEO plugin to your WordPress dashboard.
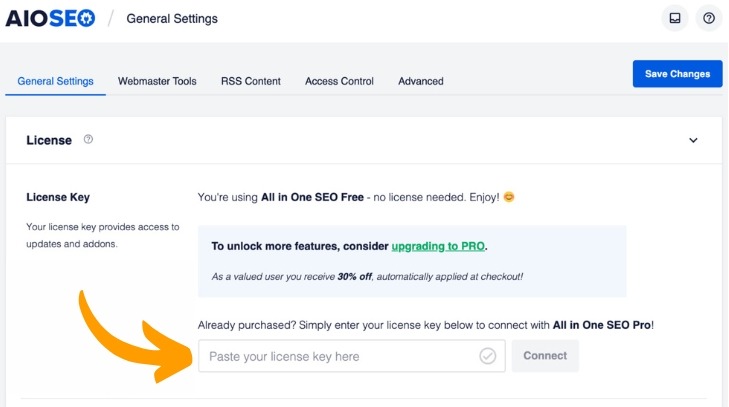
- Then head to All in One SEO > General Settings and paste your license key in the License Key field.
- Hit Connect to activate it, and you’re good to go!
Step 2: Enter Your Company’s Details
Now it’s time to enter your company’s details. This is so AIOSEO can automatically fill in your basic details when you generate schema.
- From your WordPress dashboard navigate to All in One SEO > Search Appearances. Under the Global Settings tab scroll down to Knowledge Graph.
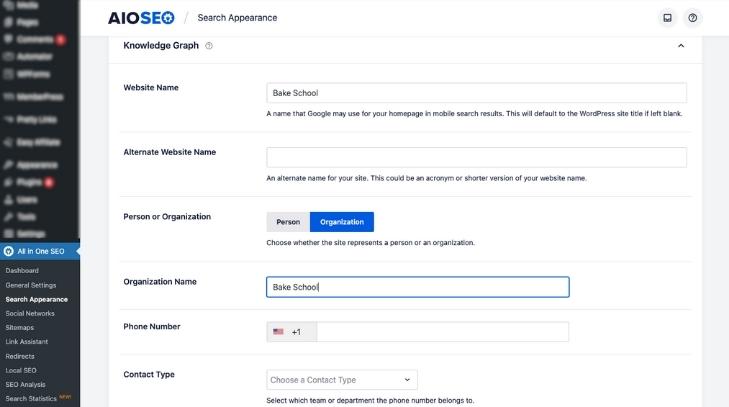
- Fill out all of the fields. In most cases, you’ll want to select Organization, unless, for example, you’re a solopreneur running a blog.
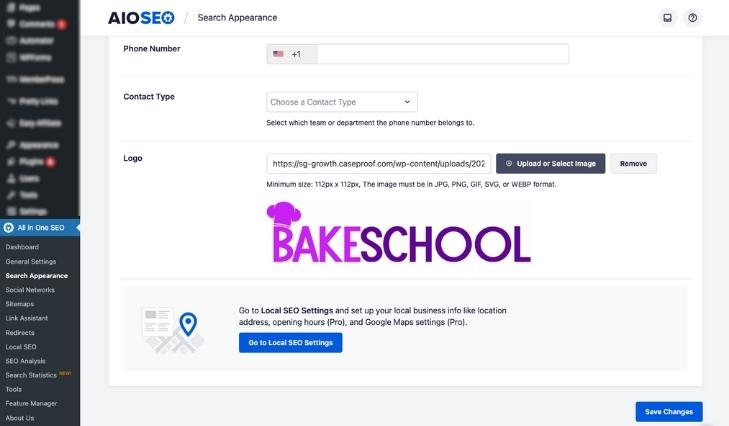
- Don’t forget to include your logo, and make sure to save changes.
Step 3: Configure your Schema Settings
Next, let’s configure your schema settings to create the default schema types for each part of your website.
- Scroll back up to the top of the page and click on the Content Types tab. You’ll see different sections for different post types on your website. If you’re a MemberPress user, you’ll see sections for Groups, Memberships, Quizzes, and Courses.
- Under Posts, select the Schema Markup tab.
- Select the appropriate default schema markup from the drop-down menu. For example, the posts on our baking website are recipes, so we’ll select recipes.
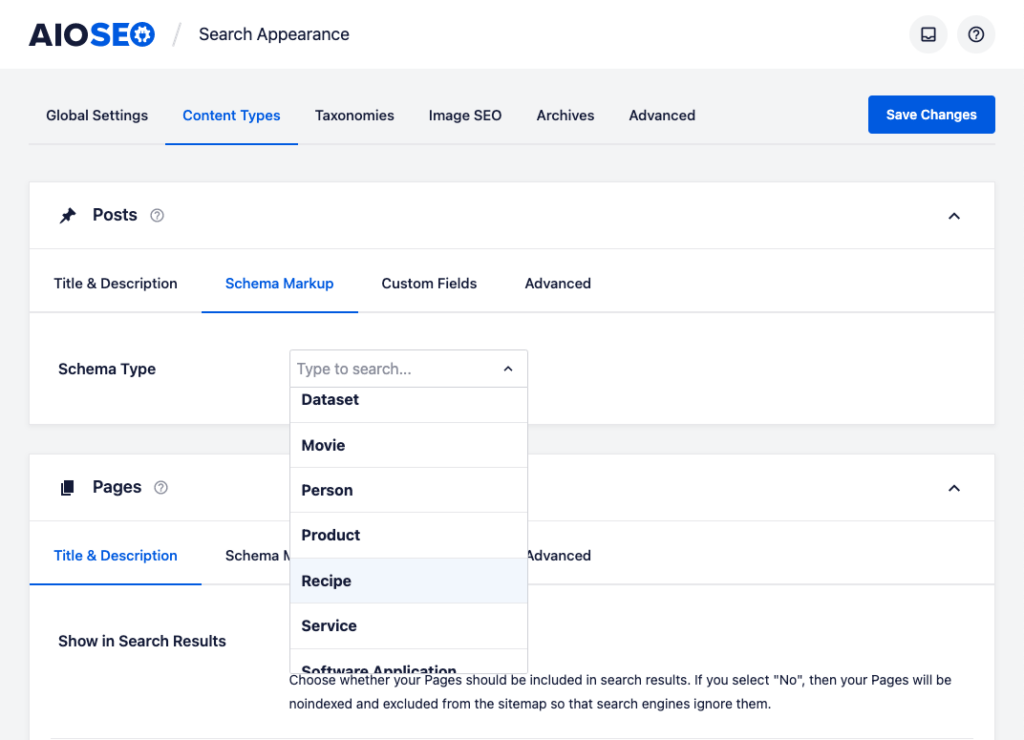
- If you run a blog, you’ll want to select Article from the dropdown menu. Then you’ll be presented with 3 options: Article, Blog Post, and News Article. Select the one that makes the most sense.
- Repeat with different post types on your website.
- Don’t forget to Save Changes!
Now you’re set up to auto-generate schema on your WordPress site!

You can manually change schema types on individual pages. So don’t worry if, for example, your posts are a mix of recipes and articles. You can also edit the schema to include extra information.
In fact, let’s look at how to do that now.
Step 4: Set and Edit Schema Information
Recipes
- Head to the page you want to edit in WordPress and scroll to the bottom of the page to see the AIOSEO Settings section and click on the Schema tab.
- Sometimes the default Schema In Use isn’t the one you want. If that’s the case, hit the trash can icon.

- Confirm you want to delete the schema.
- Then hit Generate Schema.
- This will bring up the Schema Generator.
- Select the schema you want by clicking the + icon. In this example, we’re adding the Recipe schema.
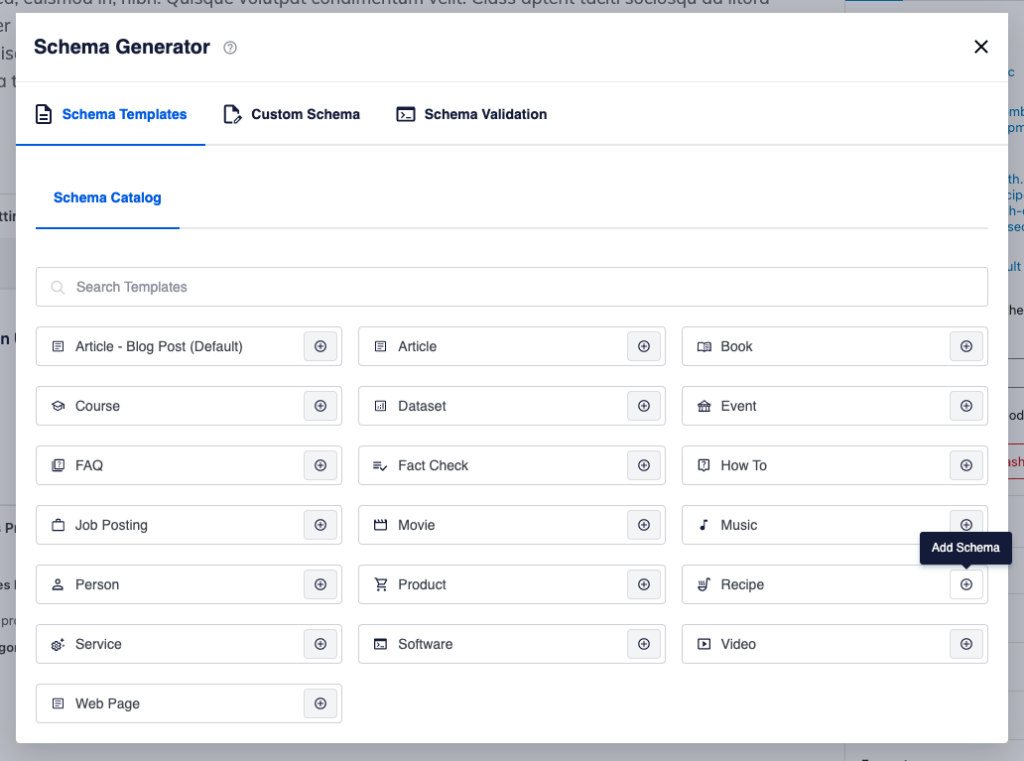
- Now it’s time to add and edit the schema details.
- The Name and Description fields will automatically be populated with your post title and a post excerpt, but you can edit them by simply deleting them and typing your own information.
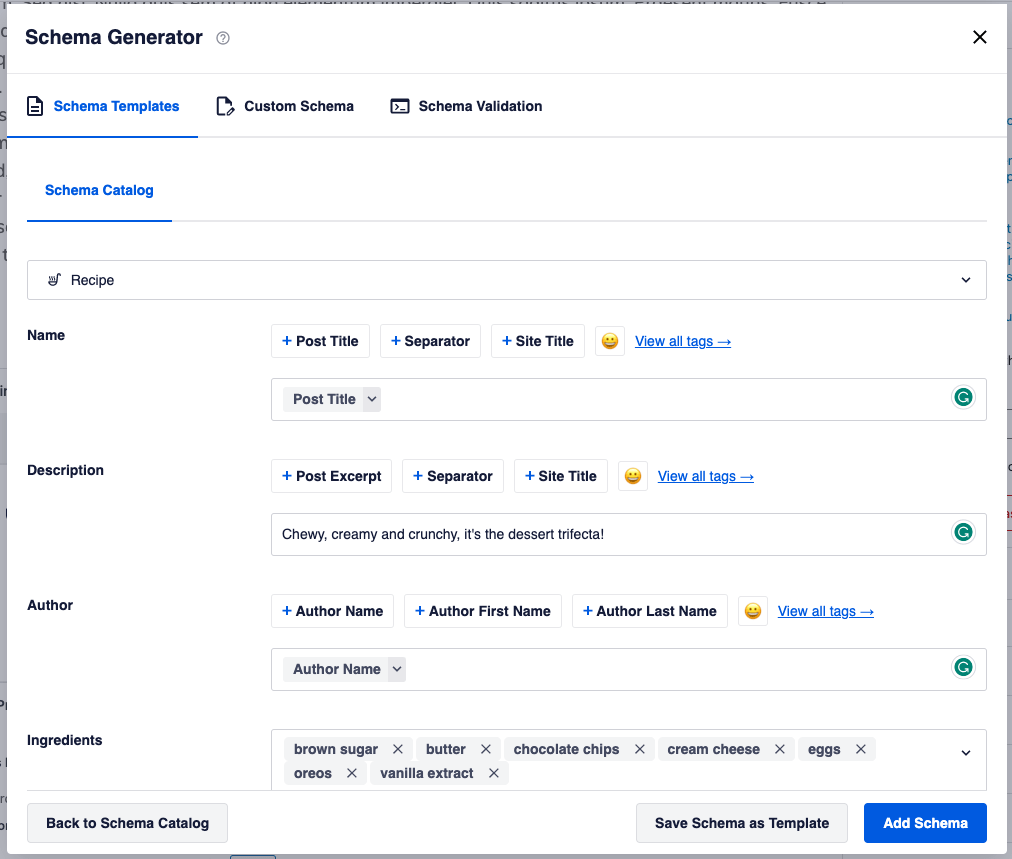
- Add Ingredients individually by hitting enter after each item. This will help people who are searching for recipes with specific ingredients.
- Fill out the Dish Type, Cuisine Type, and Keywords fields, as well as nutritional information, and preparation time.
- Upload an image. If the page is displayed as a rich snippet, this will be the image that’s used.
- Finally, you also have the option to include step-by-step instructions.
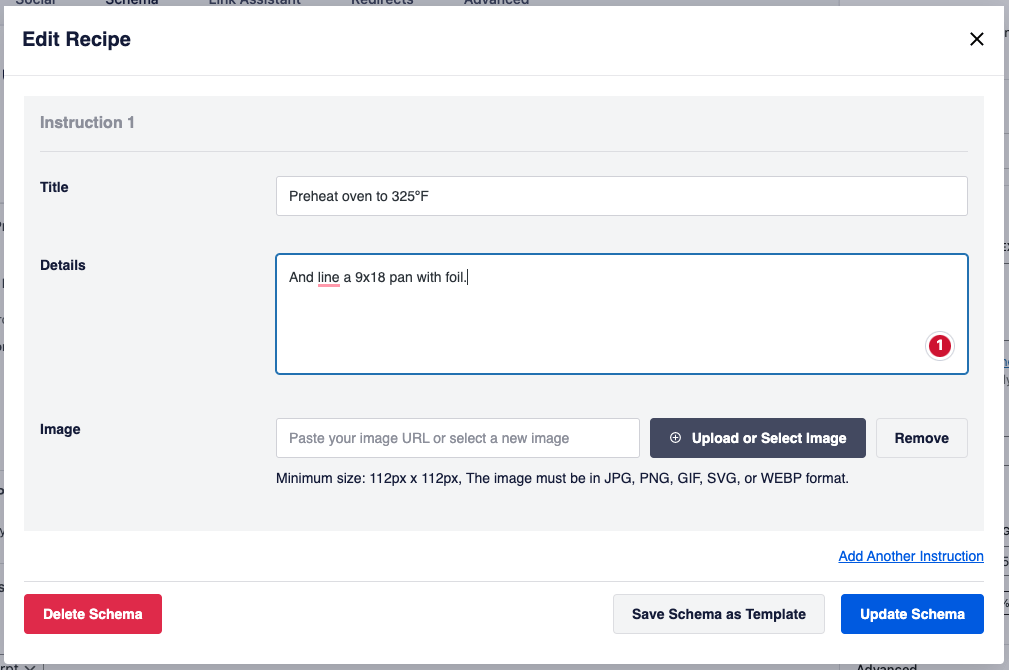
- Once you’re done, click Update Schema (if you’re editing) or Add Schema if you’re generating a new schema.
- Don’t forget to scroll to the top of your page and hit Update.
Ta-dah! You’re done! Zero coding, zero fuss.
Videos
Let’s look at another popular schema type… videos!
- This time, you want to click the + icon next to Video in the Schema Generator.
- The first two options are the same. You can either choose the automatically generated Name and Description from the Post Title and Post Excerpt or delete them and write your own.
- Add a link to the video as either a Content URL or an Embed URL. Search engines prefer content URLs. However, if you’re using a YouTube link, you’ll need to copy and paste it into the Embed URL.
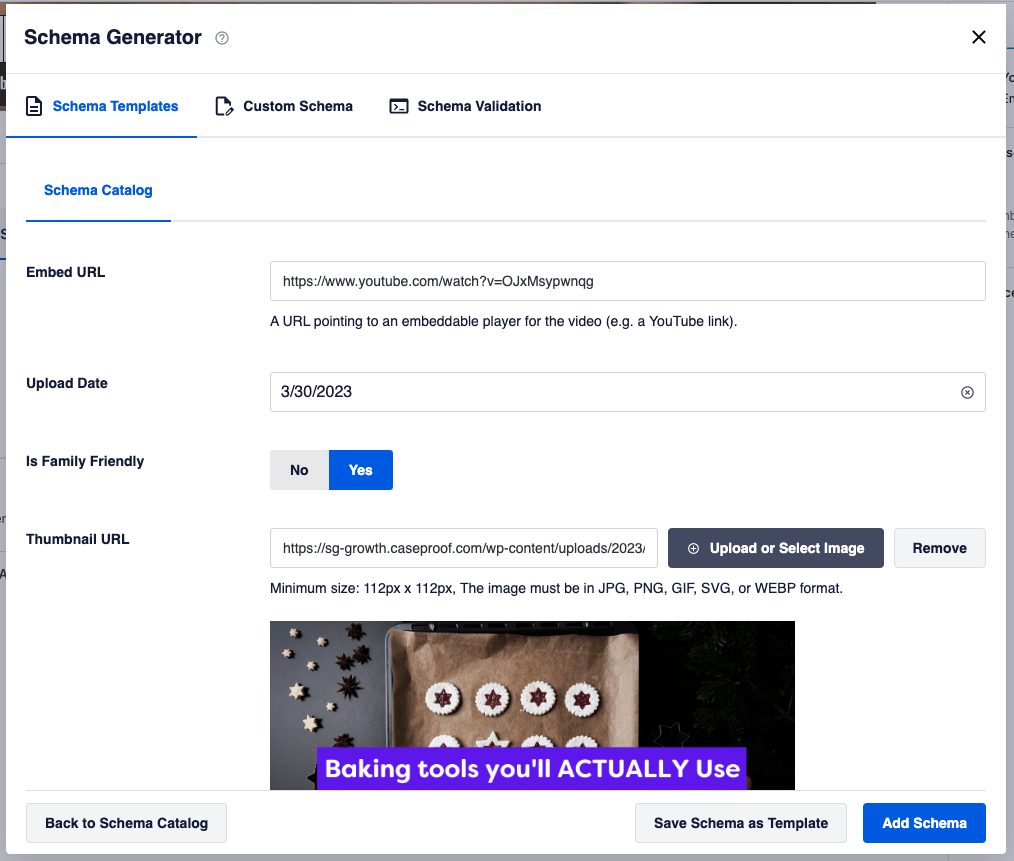
- Add the Upload Date.
- Specify whether or not the video is Family Friendly.
- Upload a Thumbnail URL.
- All that’s left is to hit Add Schema, Update your WordPress page, and you’re good to go!
Courses
Here’s one for you course creators out there – especially those using MemberPress Courses.
AIOSEO recently added courses to their list of available schema types!
- From your WordPress dashboard, head to MemberPress > Courses and click on the course you want to edit.
- Scroll to the AIOSEO Settings section at the bottom of the page, and click on the Schema tab.

- As you can see, we’ve already set up our default schema type to Course. You can do this by following step 3 and changing the Courses section under the Content Types tab.
- Or, as you know by now, you can click Generate Schema and click the + icon next to Course in the Schema Generator.
- Click on the pencil icon to edit your schema.
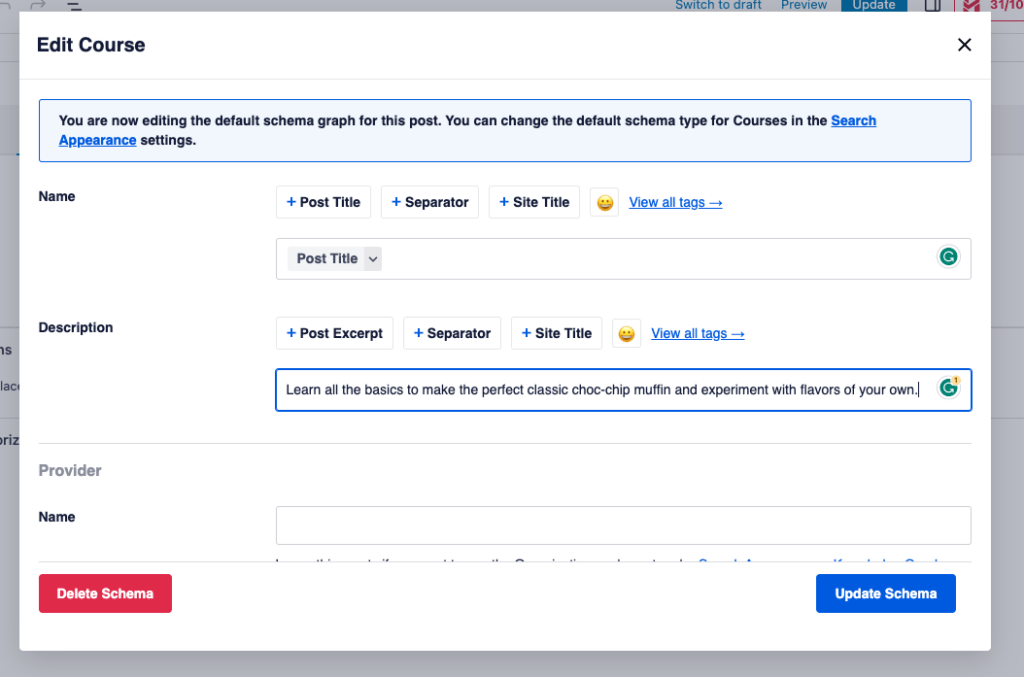
- As with other schema types, the Name and Description fields are automatically filled with your Post Title and Post Excerpt, but you can manually edit these.
- You can leave the Provider section blank if you are the course provider. This is for websites that offer courses from multiple organizations.
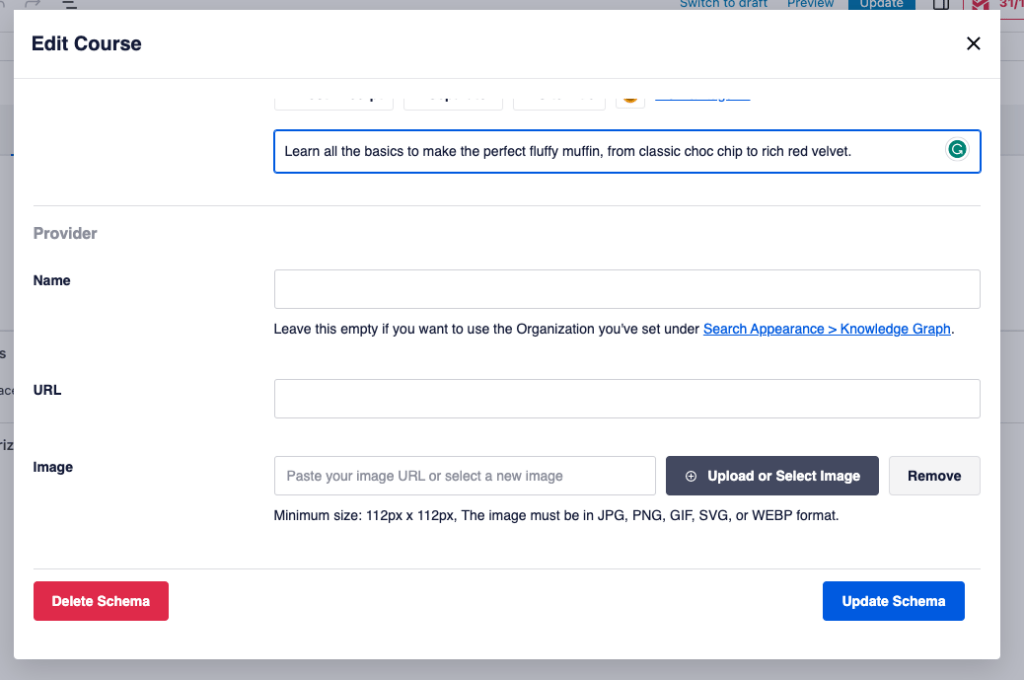
- If you leave this section empty, the course schema will contain the details and the logo you set up in step 2 of this blog. If you offer courses from multiple providers, then fill in the details of the provider for the course you’re editing.
- And that’s it! Hit the blue Update Schema button, and Update your WordPress page and your course schema is all set.
Conclusion
Adding schema markup to your WordPress website can help boost your search engine ranking and attract more visitors to your site.
With the help of the All in One SEO plugin, you can easily configure your schema settings and generate schema for each part of your website.
And if you ever need to manually edit schema information for individual pages, it’s easy with AIOSEO.
So don’t be intimidated by schema markup – follow our simple guide and start reaping the benefits of better SEO today!
Got any other tips on how to add schema to WordPress? Let us know in the comments section below.

Get MemberPress Today!
Start getting paid for the content you create.



Add a Comment