If you're looking for an easy way to start a photography business, you're in luck.
You can use WordPress plus MemberPress to launch almost any kind of business you want, including an online photography business.
MemberPress makes this business model easy to manage. It lets you sell memberships, create paywalls to limit access to your photos, and start earning recurring revenue several other ways.
In this article, we'll show you how easy it is to do. So if you're ready to get rolling, let's get to it!
The Tools You'll Need

You'll only need a few tools to set up an online photography business. These are:
- WordPress. This content management system (CMS) is the core of the entire business. The software is free – you'll just need to purchase web hosting and a domain name.
- MemberPress. This membership and WordPress monetization plugin enables you to set up memberships, create paywalled content, process payments, and a bunch more.
- MemberPress Downloads Add-on. With this add-on, you can sell digital downloads through your WordPress site.
These tools make it simple to sell photographs and photography services online. However, you'll also need to design a website that can help attract new members.
ReadyLaunch™ can help you with that process. This built-in pagemaker enables you to style all the core pages for your online photography business, including registration and login forms, download pages, and protected content.
Your pages are mobile responsive, optimized to sell, and beautiful – with just a few clicks. No coding or design experience required.
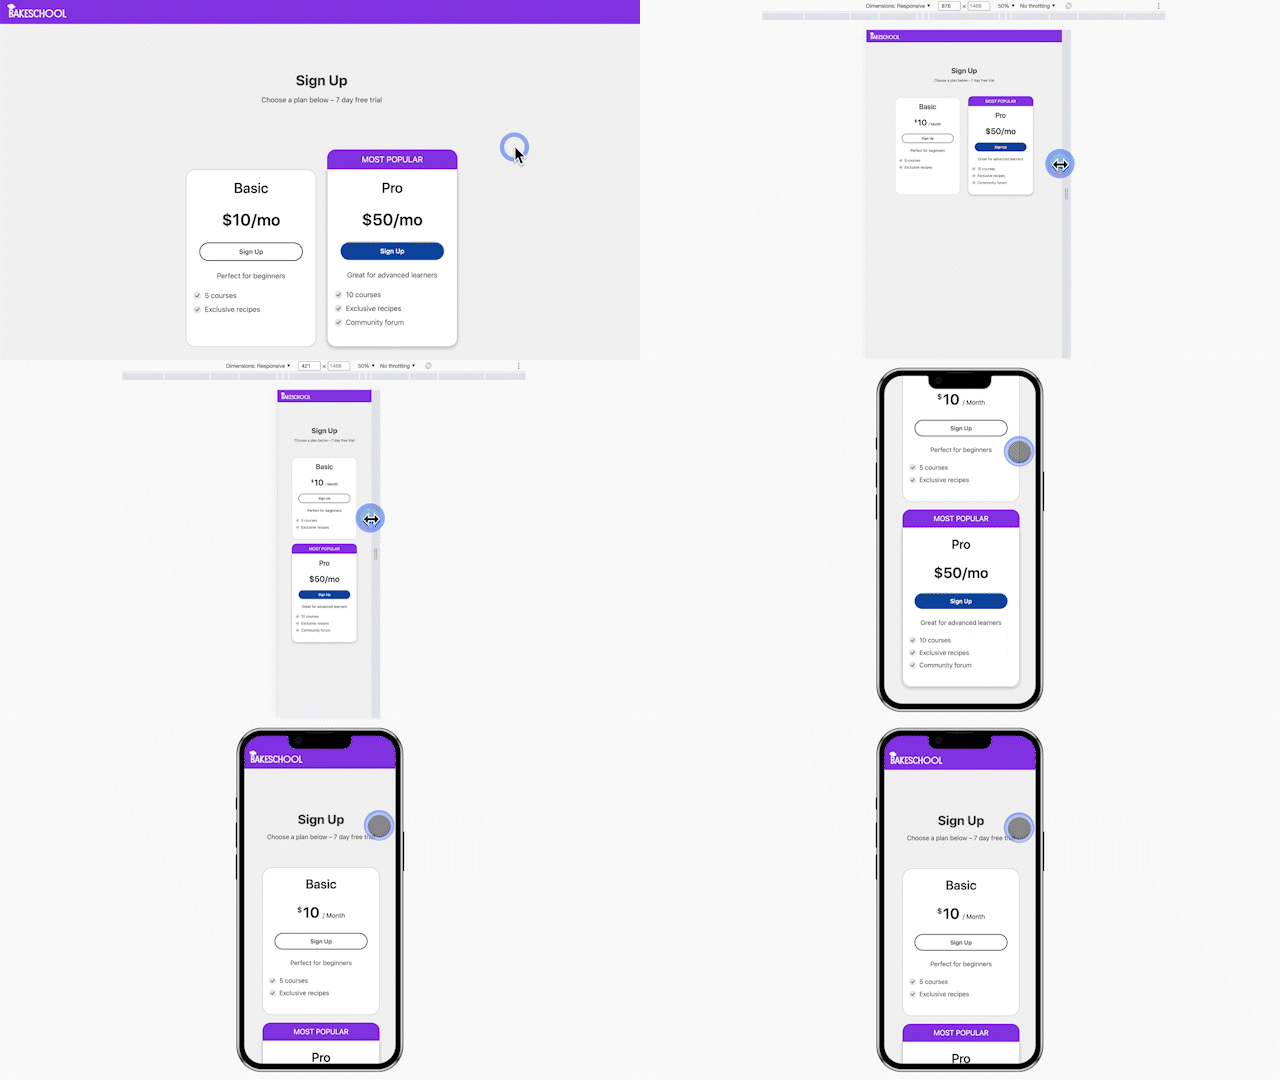
The best thing? ReadyLaunch™ is built into MemberPress, so you don't need to install it separately.
How to Start a Photography Business Online With WordPress (4 Steps)

Now that you know what tools you need, let's look at how to start a photography business online with WordPress.
Step 1: Choose a Business Model for Your Photography Website
WordPress and MemberPress enable you to set up any type of business. As a professional photographer, there are three main ways to make money online:
- Charge for memberships. If you want to understand how this business model works, you can look at stock photography websites like Shutterstock. Typically, a membership to one of these sites gives you access to a specific number of photographs. If it's a recurring membership, you can download new images every month.
- Sell downloads. Selling digital downloads is a great way to set up a passive income stream. You won't generate recurring revenue via memberships this way, but once you create an image, your work is pretty much done. Customers can download it on into infinity, and you don't have to lift a finger.
- Offer photoshoots. You can always go the traditional route, and use your website to promote in-person services, like photoshoots. This can help you attract new customers. Plus, you can manage bookings online with a tool like Simply Schedule Appointments.
- Sell courses. If you want to share your knowledge and help people take better photos, you can offer online courses on your website. The MemberPress Courses add-on lets you to create engaging course material, manage enrollments, and even award certificates.
With MemberPress, you can set up membership tiers that give users access to photographs and courses, and also enable individual sales (with the Downloads add-on):

You can also use your website to promote photography services. That means you can showcase your work and find new clients while making money from an online business running almost on autopilot.
It's a pretty great deal.
Step 2: Get WordPress and Install MemberPress
Installing WordPress is easy. Your web host might even set up the CMS for you or offer a one-click installation process. Bluehost is an excellent option if you'd like to go this route.
After installing WordPress, you'll need to set up MemberPress. This process involves getting a license key and using it to activate the plugin.
This video will give you step-by-step instructions on installing MemberPress:
In the following steps, we'll show you how to use MemberPress to upload the photographs you want to sell and create memberships. This way, you'll be able to generate both one-time sales and recurring revenue.
Step 3: Upload the Photographs You Want to Sell
For this step, you'll need to install the MemberPress Downloads add-on. To do this, go to MemberPress > Add-ons in the dashboard.
Look for the Downloads option and click on Install Add-on or Activate:
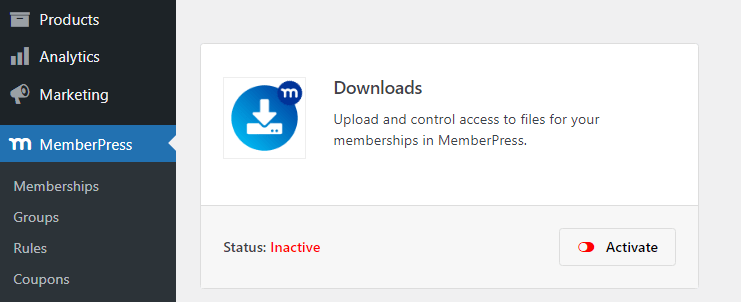
After activating the add-on, go to MP Downloads > Add New. This will open an editor where you can select your image and set a title for it:
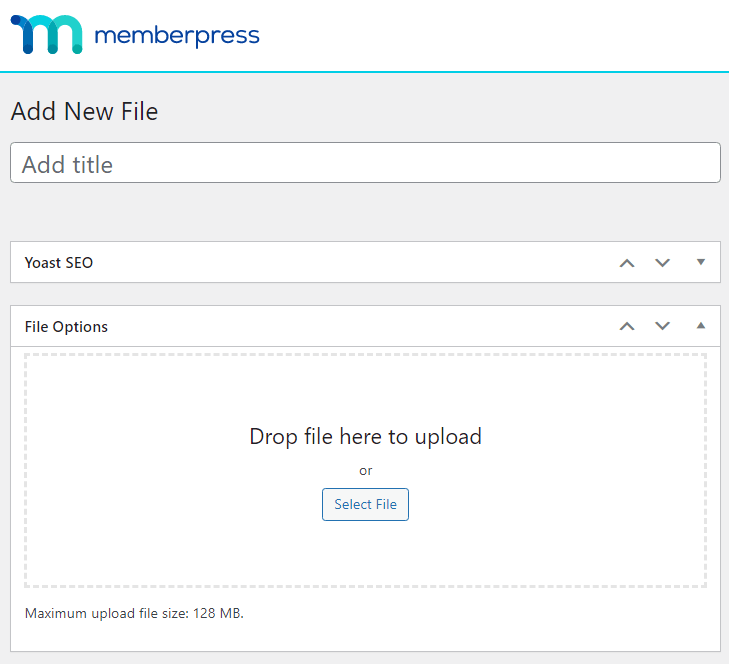
After uploading a file, you can use the Enable Download Limit option to set the number of times a file can be downloaded in general or by single users.
However, you'll want to ignore this option if you're planning to offer memberships. That way, users will be able to re-download images they have access to:
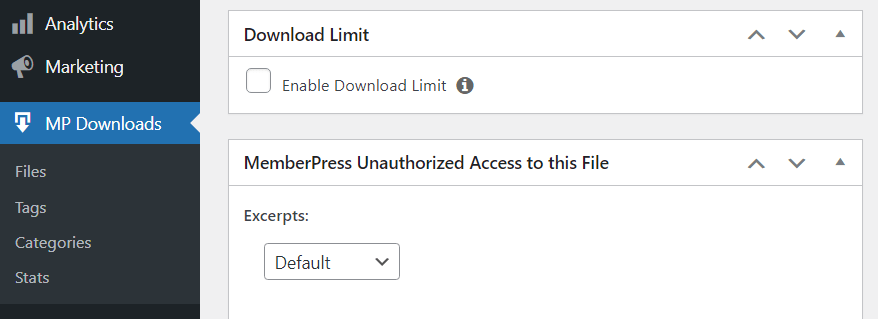
After configuring download limits, look for the File Tags and Categories widgets. These settings are important because they'll let you set up rules governing which members have access to which types of photographs.
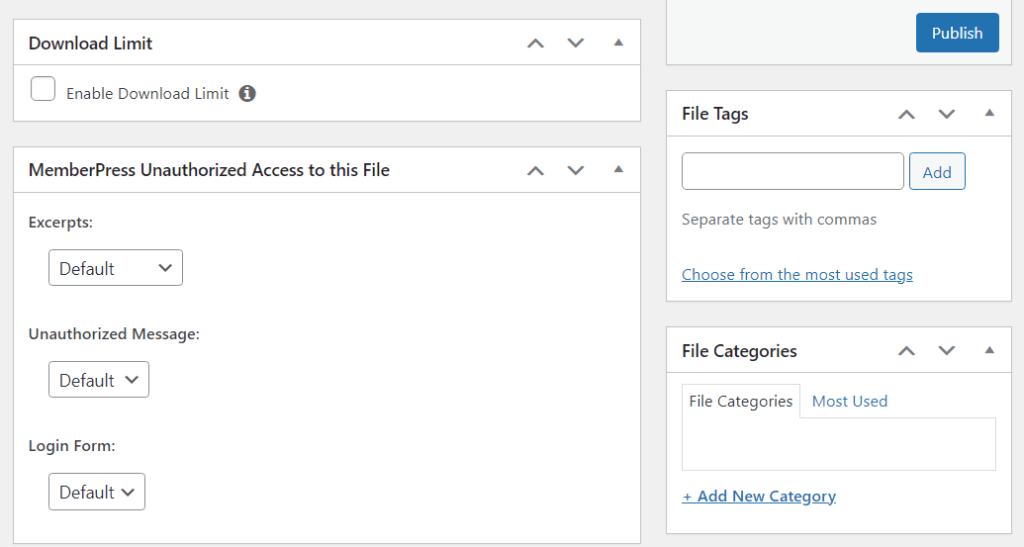
Every image you upload should have a category. This is especially important if you intend to offer more than one membership tier. Remember to save your changes when you're done.
At this stage, you're ready to start selling photographs as one-time purchases. If you want to go opt for a membership business model, you can move on to the next step.
Step 4: Set Up Membership Tiers and Access Rules
Selling subscriptions that give users access to a specific number of photographs per month is a fantastic way to generate recurring income and grow your business.
To get started, you'll need to set up at least one membership tier.
With MemberPress you can create memberships that offer different levels of benefits. This video guides you through the entire process:
If you decide to set up multiple tiers, you'll also need to configure membership rules:
These rules will let you determine which tiers get access to which photographs. This way, every membership offers different perks and you can give customers more options.
What Your Online Photography Business Should Look Like
If you want to see an example of what a successful online photography business looks like, you can check out Christina Jones Photography:

Using MemberPress, this photography website combines multiple business models.
Of course, it offers in-person services. But Christina Jones Photography also sells one-off branding packages:

In addition to that, the business offers online courses and coaching sessions:

Not every photography website needs to offer such a variety of services – it all depends on what business model you want to implement.
However, Christina Jones Photography offers some great ideas on how to brand your business and promote different types of services to maximize revenue with passive income streams.
Conclusion
Learning how to start a photography business online can be easier than you might think.
When you combine WordPress with MemberPress, you'll get all the features you need to launch a profitable site.
To recap, here's how to set up an online photography business:
- Choose a business model for your photography website.
- Get WordPress and install MemberPress.
- Upload the photographs you want to sell.
- Set up membership tiers and access rules.

Ready to Start Your Photography Business?
Start getting paid! Get your site set up and ready to sell in under a day with MemberPress.
Do you have any questions about how to start a photography business online? Let us know in the comments section below!



Add a Comment