The online greeting card industry is lucrative, to say the least. In 2021 alone, 147 million cards were sold online.

These figures might be motivating, but if you don’t know the first thing about how to start an online greeting card business, you’re sunk.
Fortunately, it’s actually a pretty simple endeavor thanks to WordPress and MemberPress.
With these two tools, you can get set up instantly. They don’t require any coding experience, and they’re completely beginner-friendly.
In this post, we’ll show you how to start an online greeting card business, and we’ll go over how the business model can work.
But first, we’ll take a quick look at the tools you need to get rolling. So let’s jump right in!
The Tools You’ll Need

Here are the main tools you’ll need to start your online greeting card business:
- WordPress. WordPress is an open-source platform, ideal for creating and managing content. The software is totally free – you’ll just need to purchase web hosting and a domain name.
- MemberPress. MemberPress is the world’s #1 monetization plugin for WordPress. It adds membership, paywalling, and other revenue-generating functions to your site.
- MemberPress Downloads Add-on. Designed to work with MemberPress, our Downloads add-on is the simplest way to store and sell digital files.
With the MemberPress setup wizard and built-in ReadyLaunch™ pagemaker, you can get your online business up and running in under a day – no coding or web design experience required.
Online Greeting Card Business Model – How it Works

One of the best things about starting an online business with WordPress and MemberPress is recurring revenue streams.
By adding MemberPress to your site, you unlock the potential to create multiple passive income streams for your business through things like…
Selling digital downloads

Say you combine 3 product groups in your online greeting card business:
- Printable card downloads
- Digital e-cards
- Custom printable and/or e-card designs
For the first two product groups, you simply purchase premade designs, then sell them to your customers at a markup. For the second, you create made-to-order designs (or hire a designer to create them for you).
In any case, all your assets are digital. And once an asset exists, it can be sent or downloaded indefinitely. The labor to revenue ratio is awesome!
Selling memberships and subscriptions
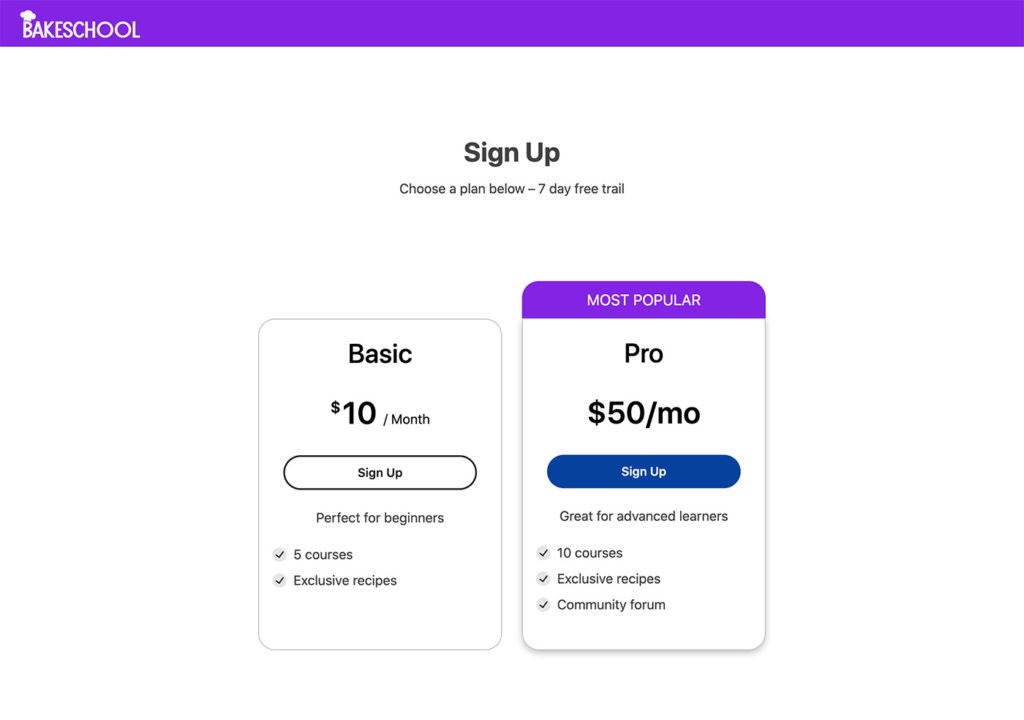
Once you’ve got your products put together, you can sell them individually as one-offs and offer tiered subscription packages.
For example, in addition to a pay-per-download or pay-per-design option, you might have 3 subscription plans:
- Bronze: 5 downloads/sends per year for $X/annually
- Silver: 10 downloads/sends per year for $X/annually
- Gold: 10 downloads/sends per year + 2 customer designs per year for $X/annually
These are just examples. With MemberPress, you can structure your subscription timing and pricing any way you like. Autobill annually, monthly, every 10 days… whatever works for you.
You can even set up free-trials and coupons.
Doing affiliate marketing

There are a couple of ways to approach affiliate marketing for your business, and you can do one or both at the same time:
- Monetize your blog with affiliate marketing
- Run your own affiliate marketing program
Monetize your blog with affiliate marketing
These days, every online business has a blog. And for good reason. A solid business blog can help you rank higher in the SERPs, attract visitors to your site, and increase your sales.
It also gives you an amazing way to generate recurring revenue through affiliate marketing.
All you do is write high quality, useful content, plug in a few affiliate links, and watch the revenue roll in.
Run your own affiliate marketing program
You can also operate on the other side.
Set up an affiliate marketing program around your products, and recruit affiliates to share your links.
By doing this you’re essentially creating a non-salaried sales team to market your business for you.
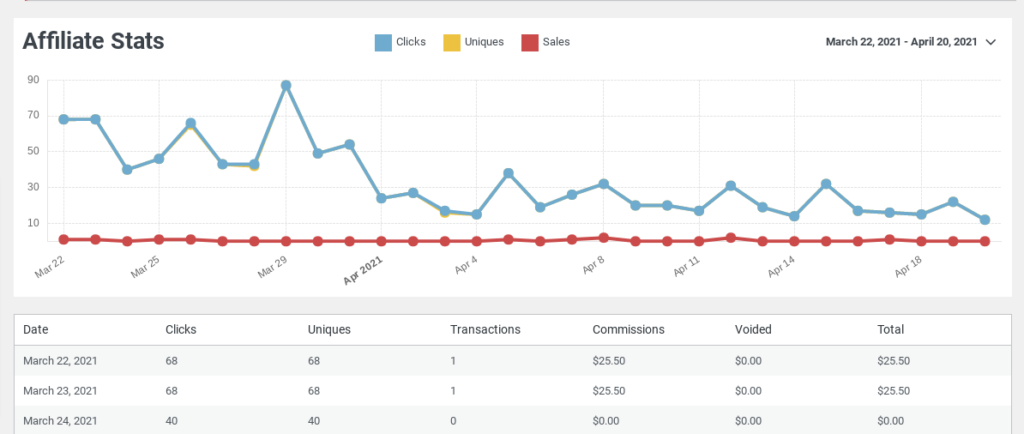
The Easy Affiliate plugin (developed by the MemberPress team) makes setting up this passive income stream super simple for businesses built on MemberPress.
How to Start an Online Greeting Card Business with WordPress (In 5 Steps)
Now that you know which tools you need and how the business model can work, we’ll take a look at 5 simple steps you can take to create an online greeting card business of your own.
Step 1: Set Up WordPress and Install MemberPress
To get started with WordPress, you can download the software directly from the website.
We recommend choosing a web host that can handle the process for you. For example, Bluehost and SiteGround offer automatic WordPress installs:

Plus, they include other features with their plans, like a free domain name and SSL certificate.
Next, you’re ready to install MemberPress. The video below gives you step-by-step instructions:
Once install is done, you can activate the Downloads add-on from your dashboard. Just go to MemberPress > Add-ons, look for Downloads, and click on Install Add-on.
Step 2: Design Your Online Greeting Cards
As mentioned, you might consider hiring a professional artist to design your greeting cards. Alternatively, you can purchase existing graphics and resell them on your site.
However, you can also create simple greeting cards with an online tool – you don’t need to be a professional artist to produce beautiful designs!
If you already have some technical ability, you could use Adobe Creative Cloud to design your products. If you’re looking for an easy-to-use tool, Canva is a great option:
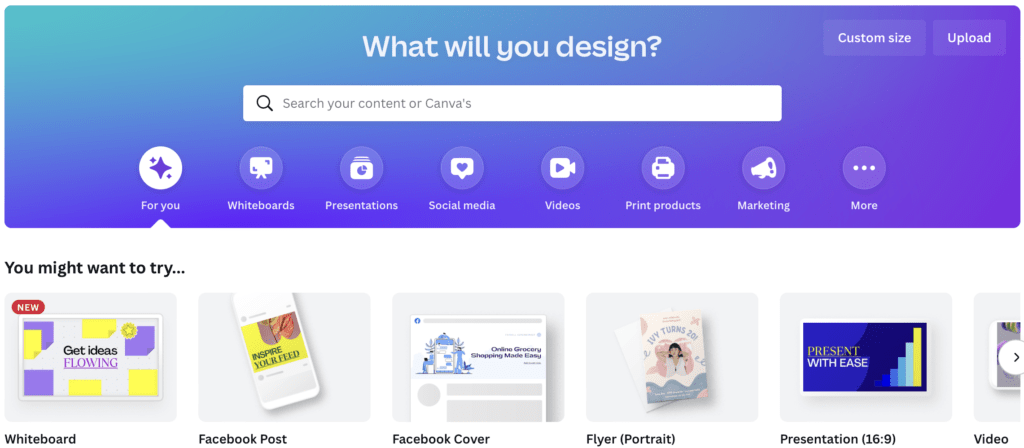
To get started with Canva, type “Greeting cards” into the search bar and choose a template:
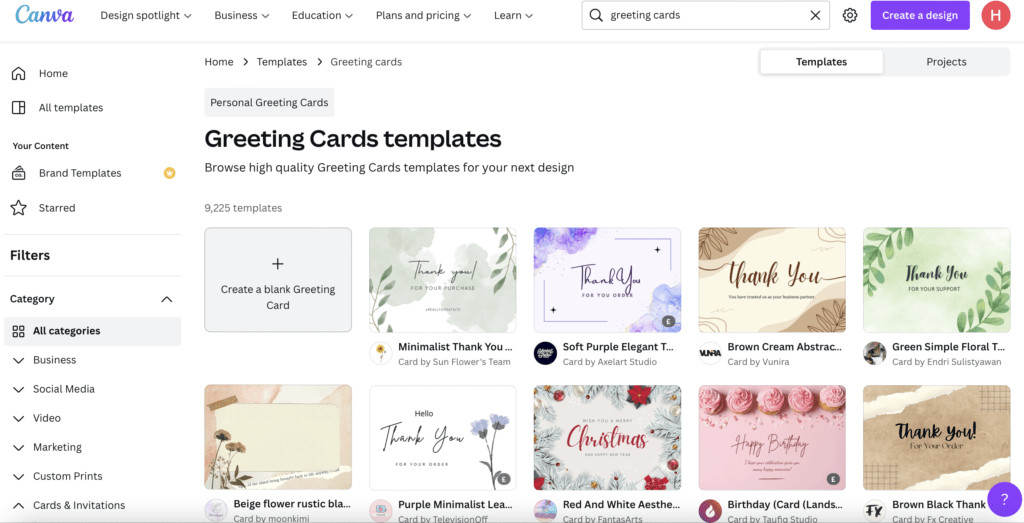
Select the design you’d like to use and click on Customize this template. A new window will open where you can edit your greeting card:
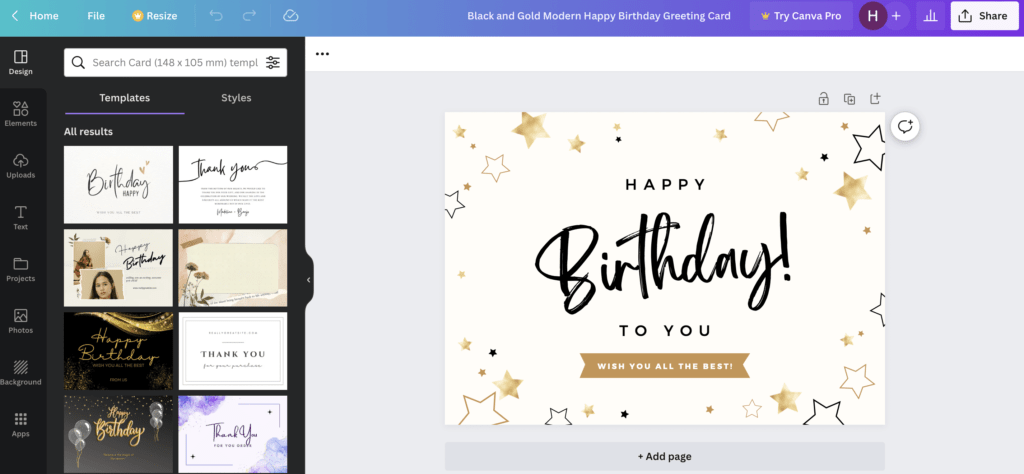
To the left of the screen, you can choose different styles and elements. Simply drag your favorite elements onto your design and arrange them into your preferred layout.
Under Styles, you can adjust the color palette, change the font sets, and overhaul the entire combination:
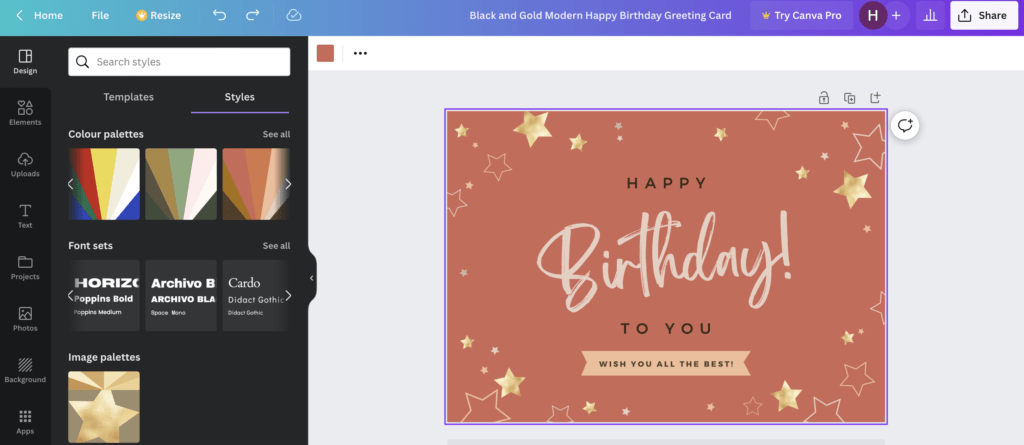
If you switch to the Elements tab, you can add shapes, graphics, stickers, and photos to your card. Add custom text to your card by visiting the Text tab.
To incorporate your own files, go to Uploads and choose your image. For instance, you might want to include your own photos or upload graphics from a royalty-free platform like Shutterstock.
When you’re happy with your design, click on Share > Download:
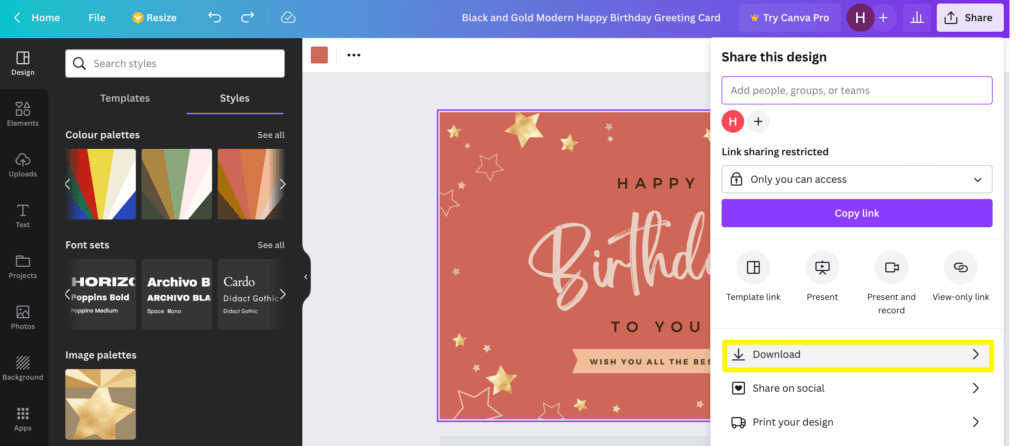
Choose your file format and hit Download again.
Step 3: Upload Your Greeting Cards to Your Website
Once you’ve designed a batch of greeting cards, you’re ready to upload them to WordPress. You can do this by heading to MP Downloads > Files > Add New.
Here, give your greeting card a name and either drop or upload your file:
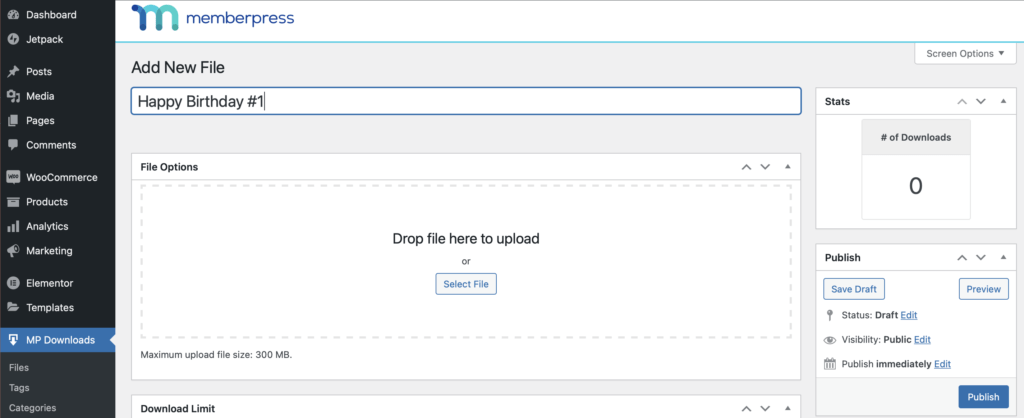
Further down, you can enable a download limit and assign your card to a specific category:
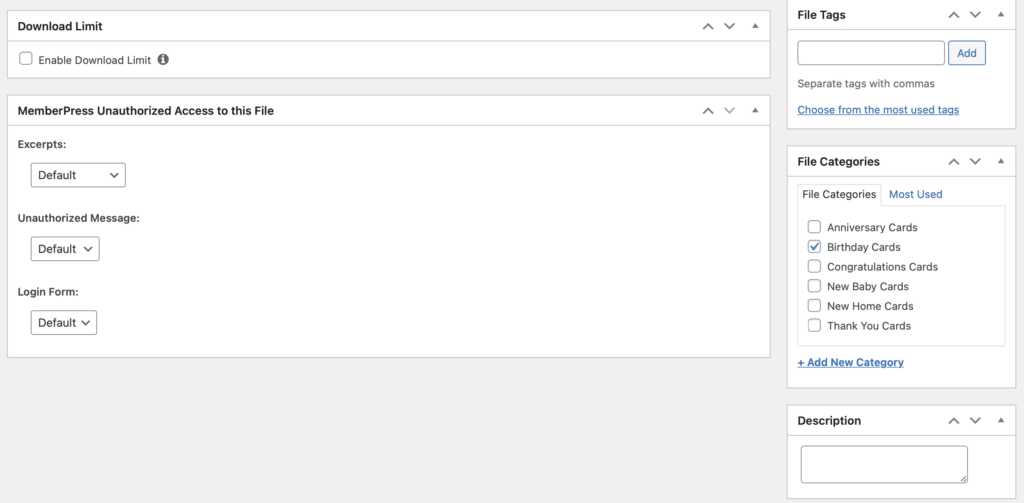
Categories are a neat way to organize your greeting cards. For example, you might order your cards by occasion, such as birthdays and anniversaries. When you’re ready, click on Publish.
At this point, you’re all set to accept one-time digital purchases from customers. However, if you want to set up subscriptions on your site, move on to the next step.
Step 4: Create Your Subscription Tiers
As mentioned above, selling subscription plans is an awesome way to generate recurring revenue.
For example, with a basic membership, customers might be able to access five free greeting cards a month. With a more advanced subscription, members can get a bundle of fifteen cards, plus two custom cards a month.
By accepting requests for custom cards, you can appeal to even more customers. Plus, this can be an attractive perk for your pricier plans.
You can set it all up MemberPress. The video tutorial below shows you how:
Remember, you can also enable a free trial period for your memberships to increase conversions.
Step 5: Protect Your Greeting Cards with Membership Rules
Membership rules protect your files so that only those with the right permissions can access them. For instance, the option to request custom cards might only be accessible to users who purchased an advanced membership.
You might also provide more niche offerings with some plans, such as graduation or housewarming cards. Then, you can protect these files from being accessed by general users or those with only a basic subscription.
To configure these settings, head to MemberPress > Rules > Add New:
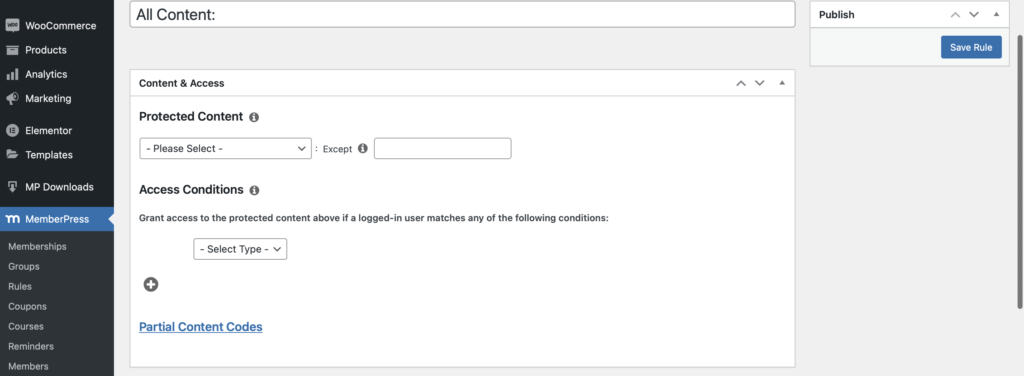
Under Protected Content, you can select All Files or A Single File. You’re also able to choose files that belong to a particular tag or category. For instance, you could protect all Thank You cards:
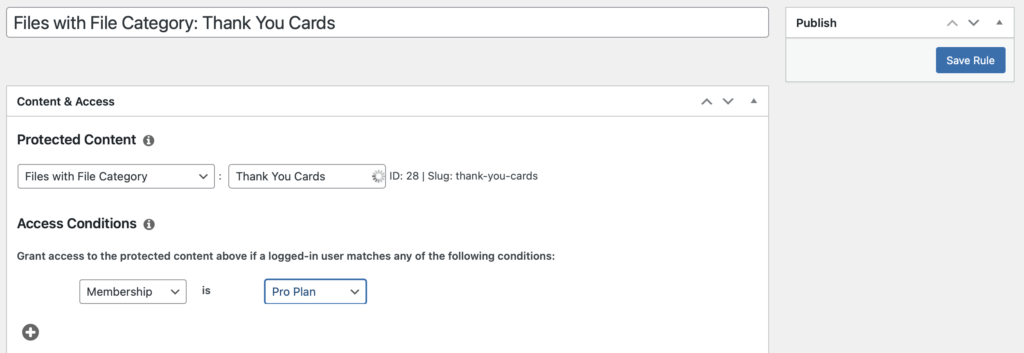
Then, under Access Conditions, select Membership and use the dropdown menu to choose the relevant option. When you’re ready, click on Save Rule.
Conclusion
Online greeting cards are becoming increasingly popular, so you might be interested in capitalizing on this trend.
Fortunately, WordPress and MemberPress make it easy. To recap, here are 5 steps to start an online greeting card business of your own:
- Set up WordPress and install MemberPress.
- Design your online greeting cards with Canva.
- Upload your greeting cards to your website.
- Create your memberships.
- Protect your cards with membership rules.

Get MemberPress Today!
Start getting paid for the content you create.
Do you have any questions about starting an online greeting card business with WordPress? Let us know in the comments section below!


everything is good, how can i add a custom feature, where visitors can edit the texts in cards or may be colors, and finally able to preview and download them in pdf file or in a high quality image ?