If you're looking to have a user profile image tab on the Account page where users can easily add their profile image and use it through your website, look no further than the
One User Avatar plugin.
To add a user profile image tab, please follow the steps below:
- Navigate to your WordPress Dashboard > Plugins > Add New, and search for “One User Avatar”. It is the one developed by One Designs.
- Install and activate this plugin.
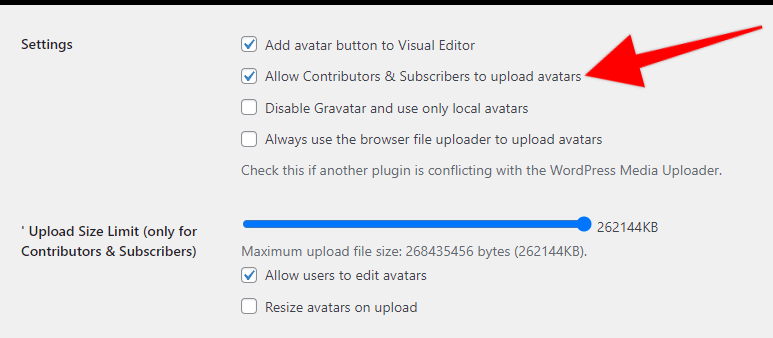
- Activate Allow Contributors & Subscribers to upload avatars option to allow users to upload their own avatars.

Optionally change the default avatar size in Avatars > Settings page:

- Create a special Profile Image tab on the Account page. There are two ways to do this that are listed below.
- Activate Allow Contributors & Subscribers to upload avatars option to allow users to upload their own avatars.
Use Custom Functions
If you are familiar with PHP, you can add the code below at the bottom of your active theme's function or use the WPCode plugin (please check this article for details: How to add custom code snippets in WPCode).
<?php
function mepr_add_image_tab($user) {
    ?>
    <span class="mepr-nav-item custom-image">
      <a href="/index.php/account/?action=profile-image">Profile Image</a>
    </span>
    <?php
}
add_action('mepr_account_nav', 'mepr_add_image_tab');

function mepr_add_image_tab_content($action) {
    if($action == 'profile-image') {
        echo do_shortcode('[avatar_upload]');
    }
}
add_action('mepr_account_nav_content', 'mepr_add_image_tab_content');
?>
Displaying profile image
Adding a user profile image like this will change the user picture called avatar in all places where the user picture is displayed. It will also replace the user image from the Gravatar site assigned to the user's email. The most popular place where the user picture is displayed is the post comments, but you can display it anywhere using the following shortcode:
[avatar user="current"]


